Welcome for another Tutorial by toffer In this tutorial i wanna teach how to make Animated Gif using Adobe After Effects CS4.
Procedure:
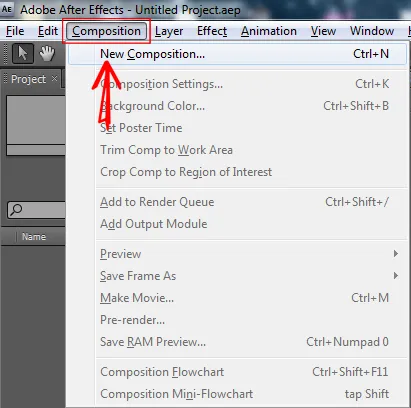
Create New Composition
Step 1. To create a new composition, choose (Compositon > New Composition) or by clicking (CTRL + N) on your keyboard. If the
Composition Settengs menu is open you can change the Compostion Name what ever you want the name. You can also set the Preset
I choose (HDV/HDTV 720 25), Width is (1280px) and Height is (720px) If you are done click OK.
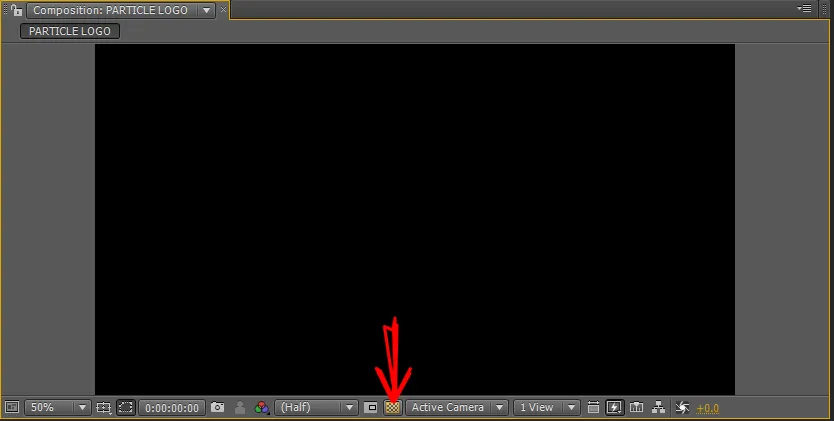
Change Composition to Transparent
Step 2. If you want the composition change to transparent click the Toggle Tranparency Grid.
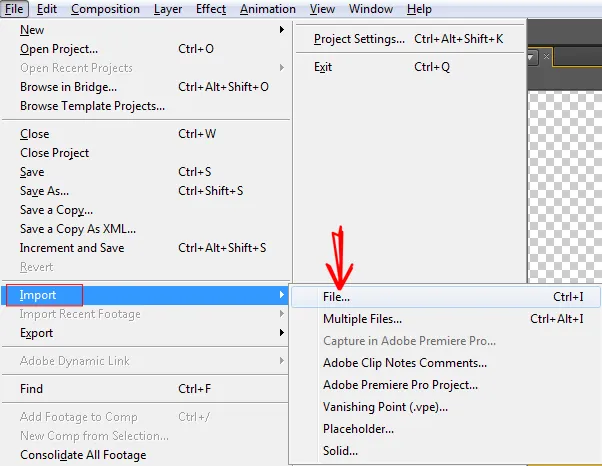
Import Files
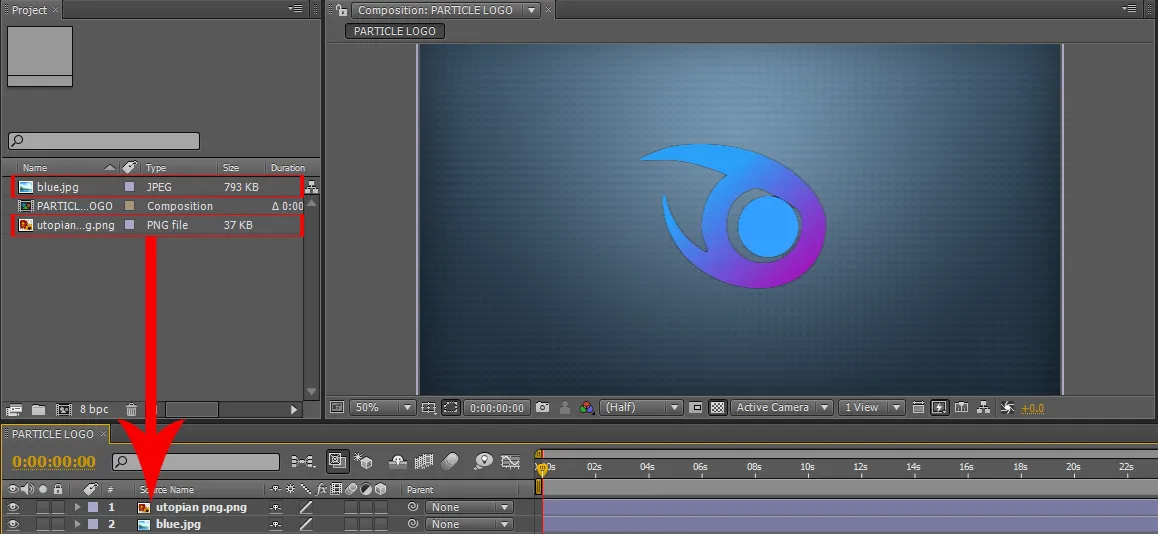
Step 3. To Import Files, choose (File > Import > File) and choose the files into your Gallery.
Drag the Files into Composition Timeline
Step 4. To drag the files into Composition Timeline hold CTRL and click Left Mouse Key choose the files and hold Left Mouse Key then
drag into Composition Timeline. If the Logo is going under the Backgound just click the Logo and drag up to Background.
Create A Pre - Compose
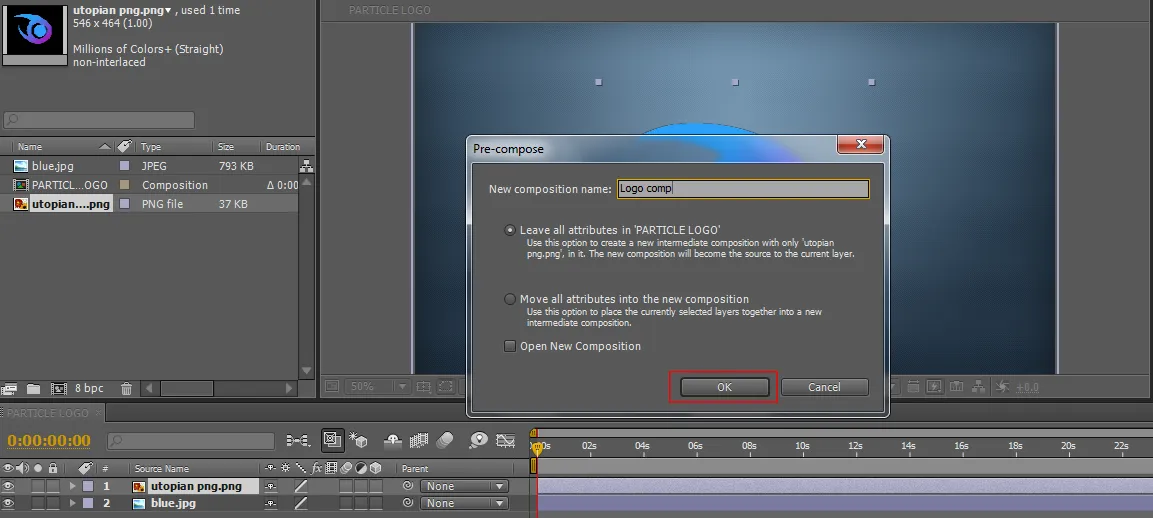
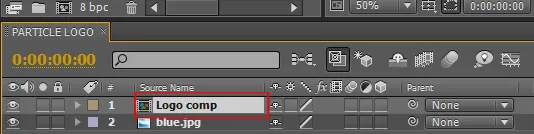
Step 5. To create a Pre - Compose first is click the Logo file in composition timeline and choose (Layer > Pre - Compose)

•If the Pre - Compose menu is open create a New composition Name I put "Logo comp" and click OK. After creating a Pre - Compose, create again of Pre - Compose this time I Name it "Logo comp 1" and click OK.
Create Mask
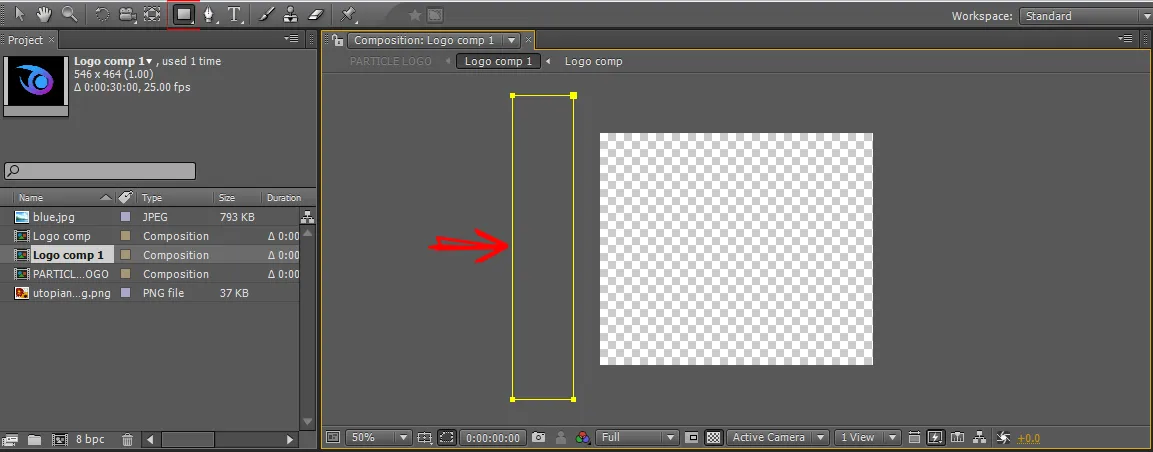
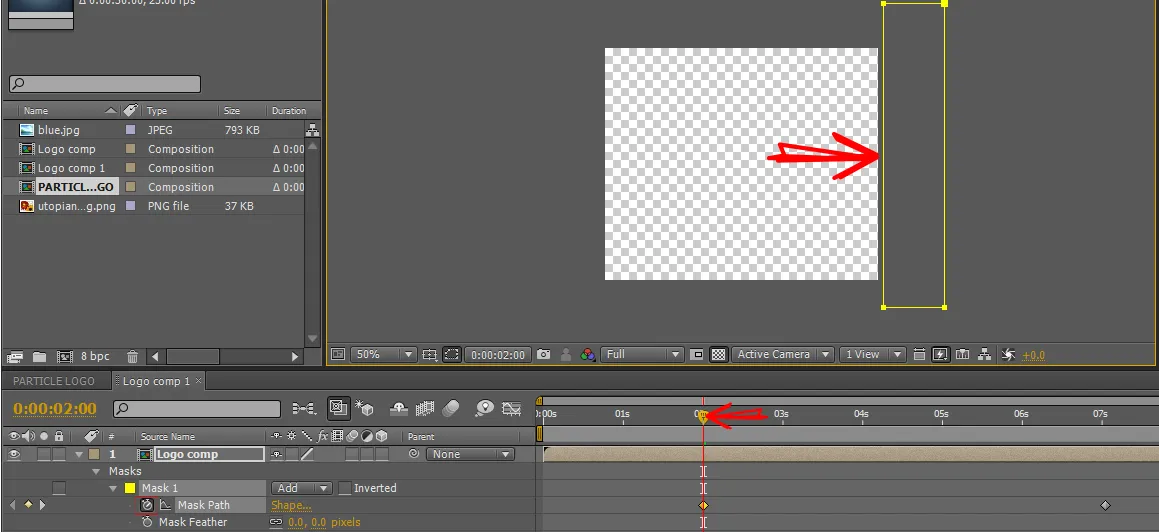
Step 6. To create a Rectagular Mask first double click the Logo comp into the timeline.
•Click Logo comp into timeline and choose Rectagular Tool drag a Rectagular Tool into composition and draw a Rectagular. To
reposition the Rectagular use the Selection Tool.
Set Time Navigator
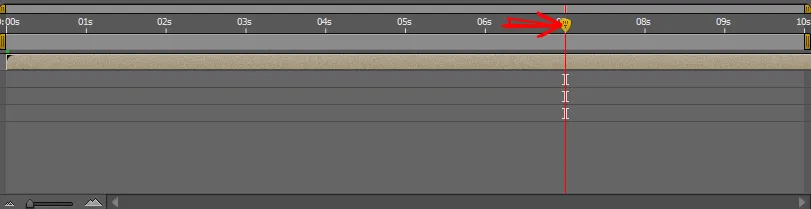
Step 7. To set a time navigator drag the Time Indicator into the seconds you want I set mine to "7s"
Set Mask
Step 8. To set a Mask, choose the Mask 1 and click the arrow if the arrow pointed down you can see the settings of a Mask 1.
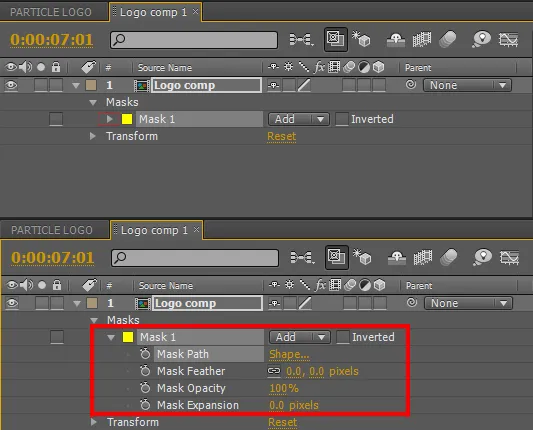
•Click the timer of a Mask Path and move the Time Indicator to "2s" and move the Rectagular Mask to the right.
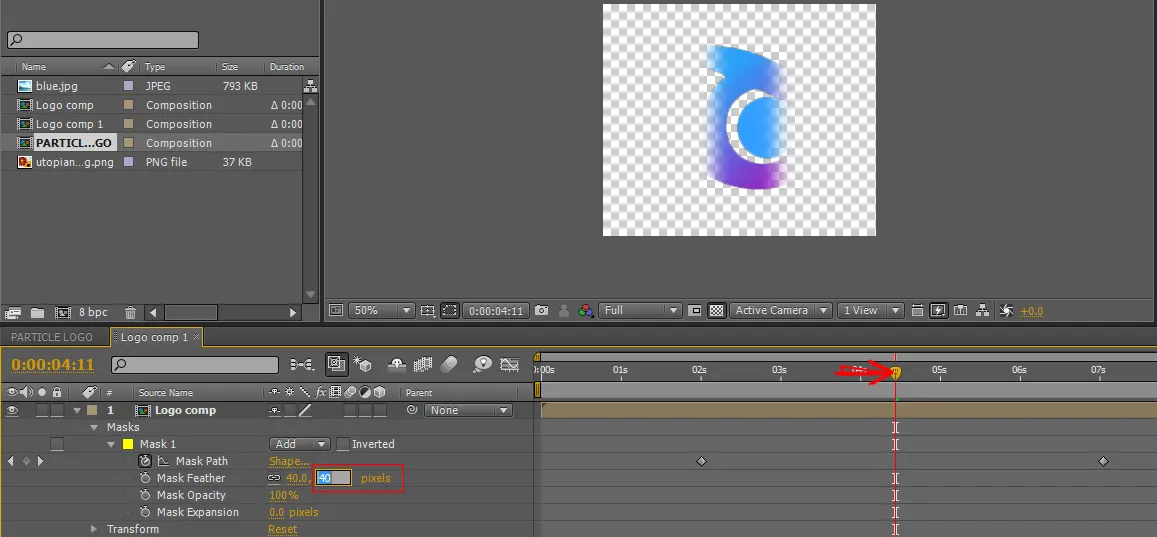
•Move the Time Indicator to "4.5s" and set the Mask Feather to 40.0 pixels
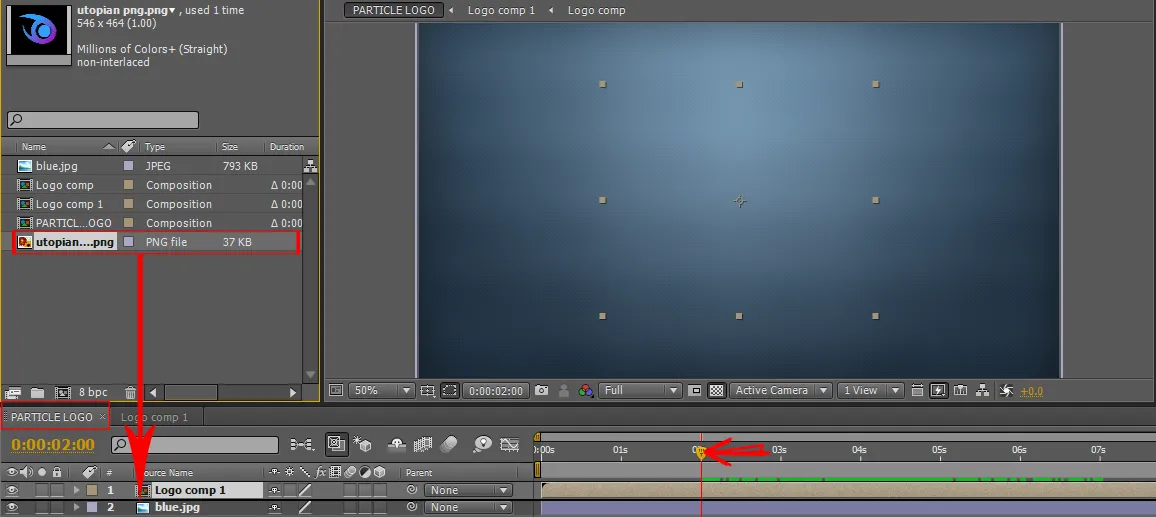
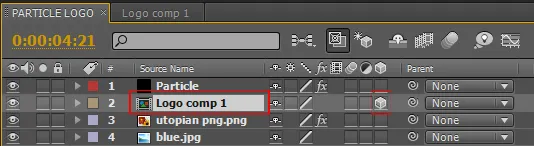
Particle Logo
Step 9. Choose the Particle Logo composition timeline move the time indicator to "2s". Click the Logo comp 1 and drag the file logo
between Logo comp 1 and Background file.
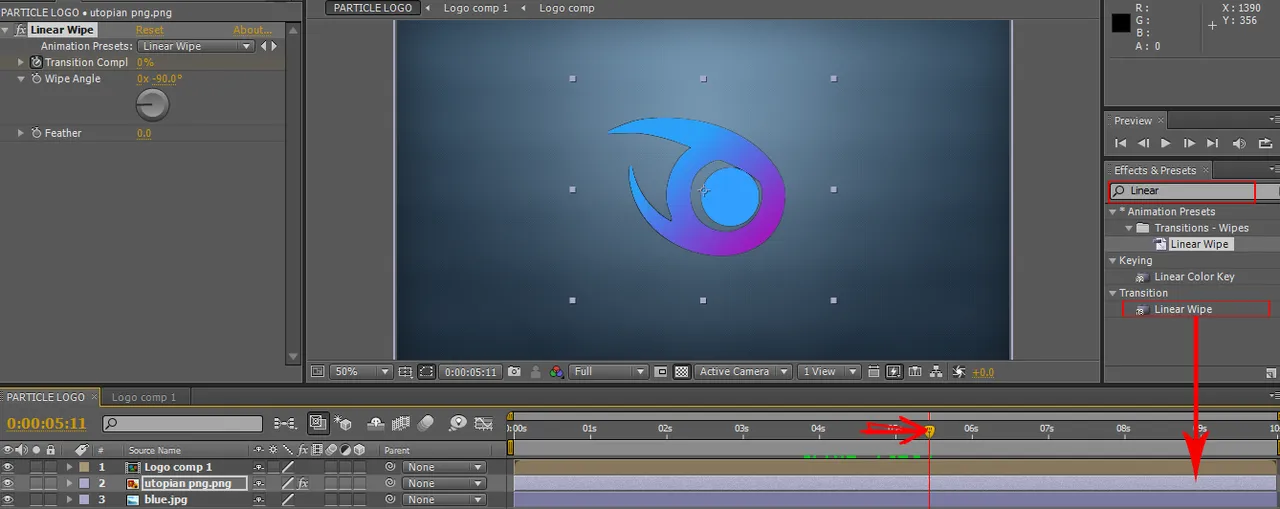
Search The Effects And Presets
Step 10. Go to search box of Effects and Presets and search Linear Wipe. If the Linear Wipe is appear drag the Linear Wipe to Work
Area of Logo File and move the Time Indicator to "5.5s".
Linear Wipe
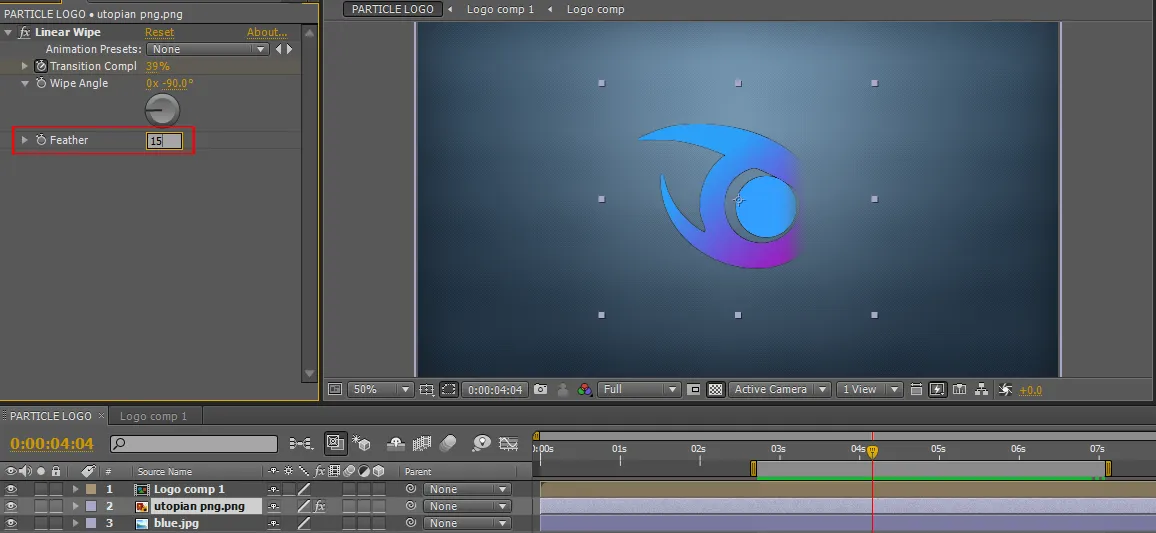
Step 11. Set the Transition Completion to "100%" move the Time Indicator to "6.5s".
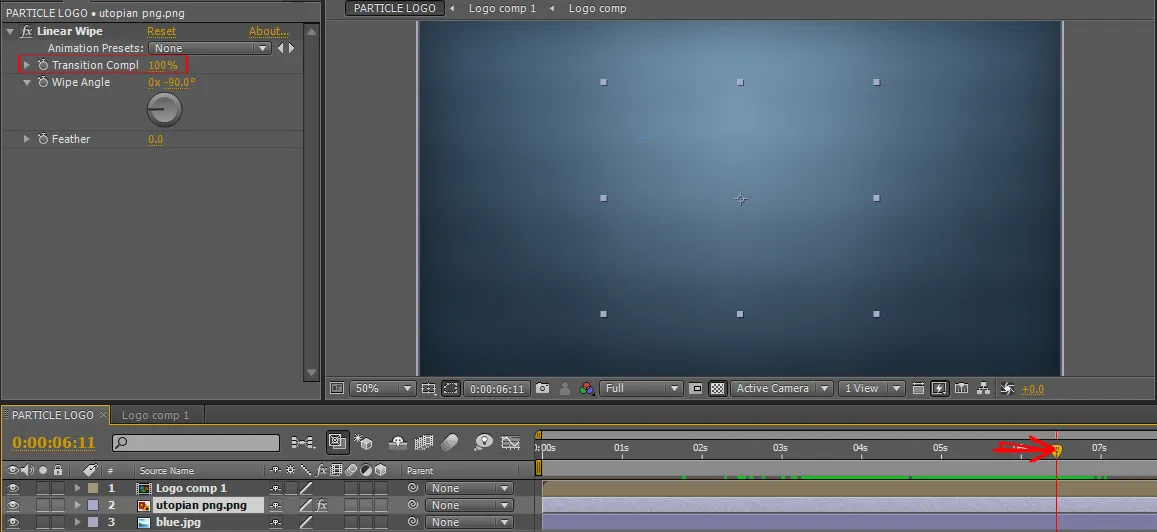
•Click the time of Transition Completion and move the Time Indicator to "2.8s" and set the Transition Completion to "0%". Move the Work Area Start to "2.8s and Move the Work Area End to "7s".
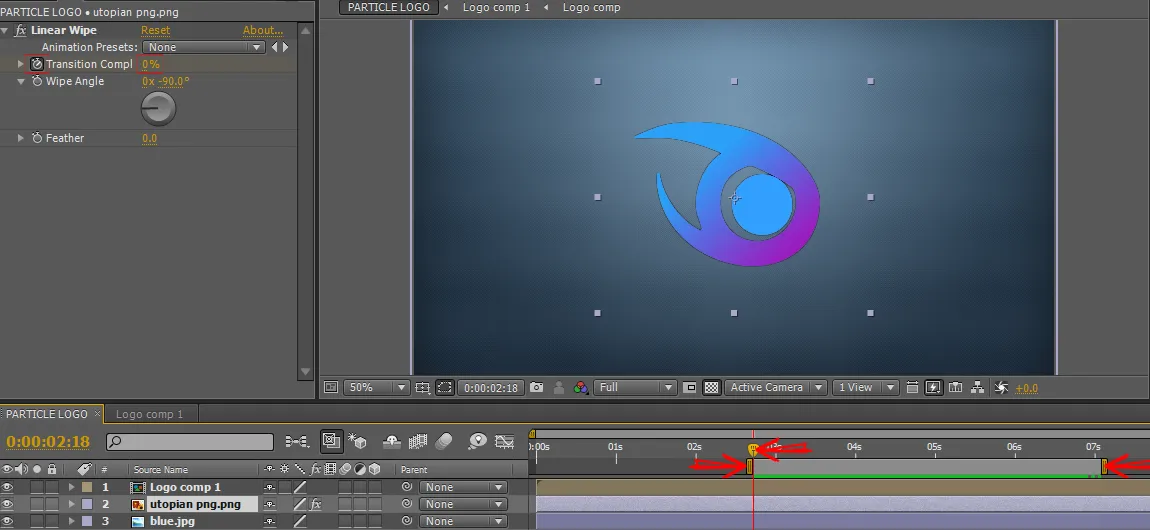
•Set the Feather to "15.0"
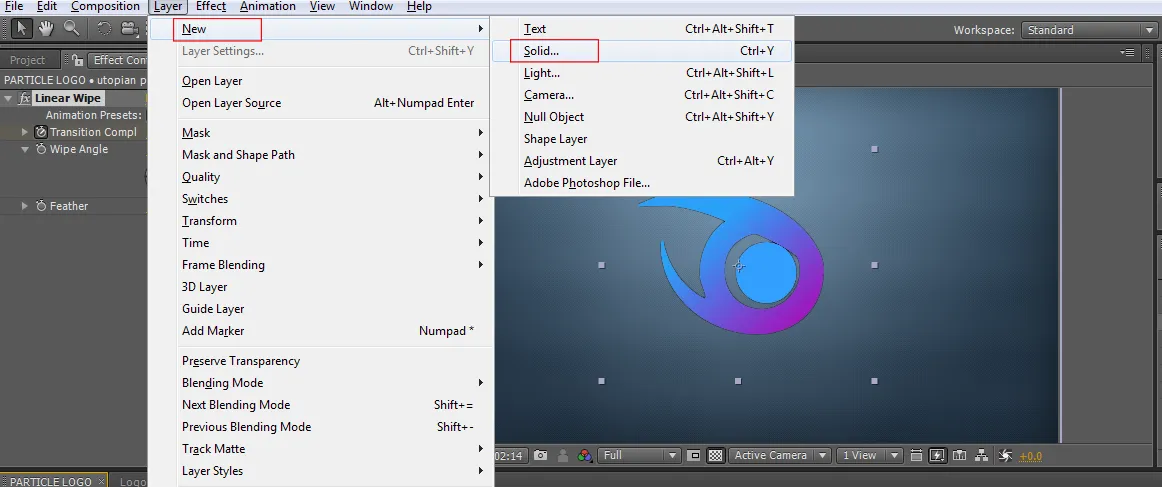
Add New Layer Solid
Step 12. To add New Layer Solid, choose (Layer > New > Solid).
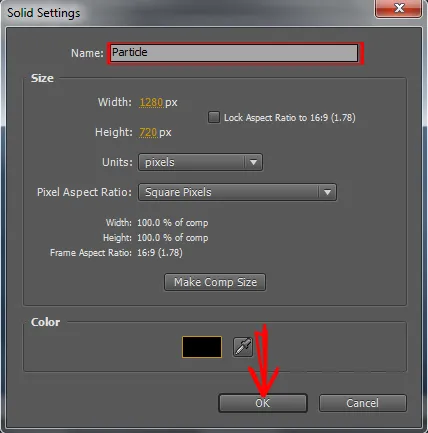
•If the Solid Settings is open change the Name i put "Particle" and if you are done click OK.
•Go to search box of Effects and Presets and search "Particular". Drag the Particular to to Work Area of Particle.
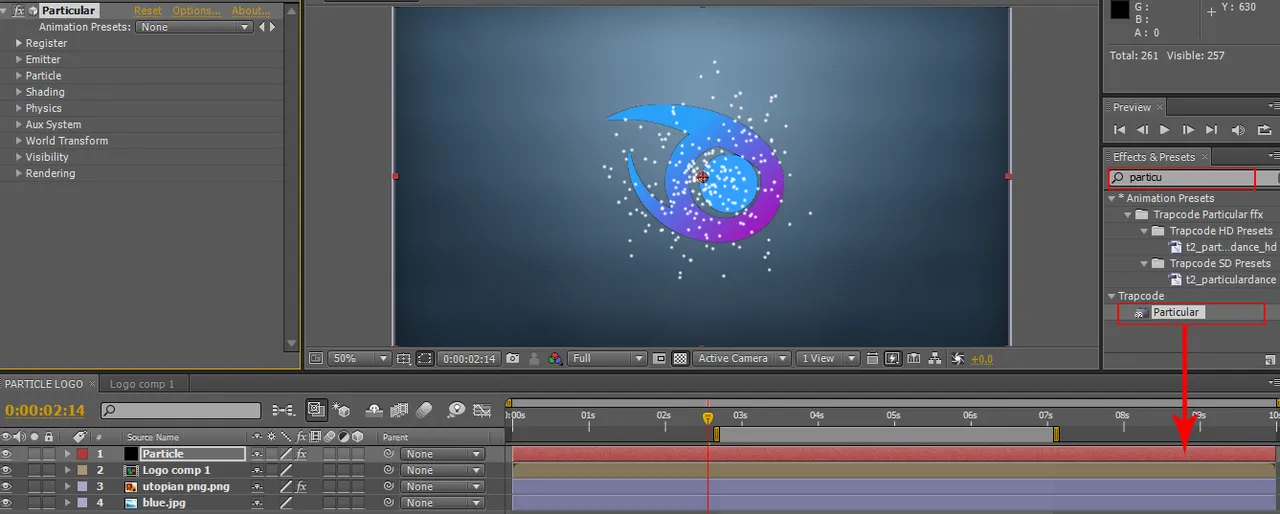
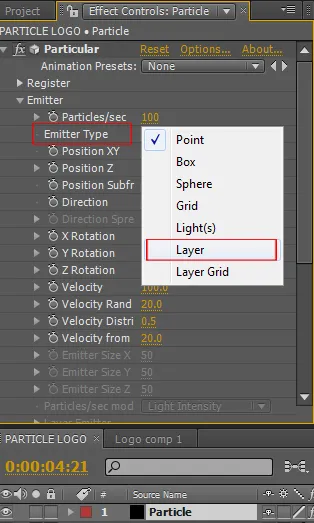
Set Of Emitter
Step 13. Click the "Logo comp 1" in composition timeline and click the 3D Layer box.
•Click the "Particle" and click the arrow of "Emitter" to open the settings of emitter, click the "Emitter Type" and choose "Layer".
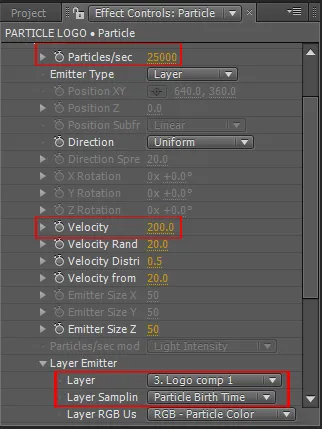
•Click the arrow of "Layer Emitter" and click the "Layer" and choose "Logo comp 1", click also the "Layer Samplin" and choose "Partile Birth Time" and set the "Particles/sec" to "25000" adn change the velocity to "200.0".
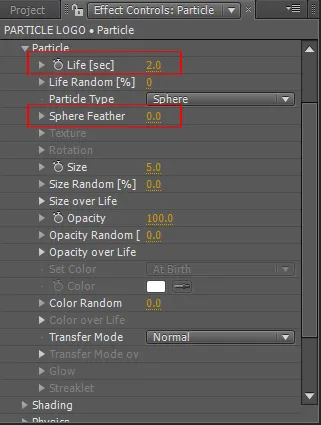
Set of Particle
Step 14. Go to Particle and click the arrow to open the settings of the Particle. If the settings is open change the value of "Life [sec] to
"2" and change the value of "Sphere Feather" to "0".
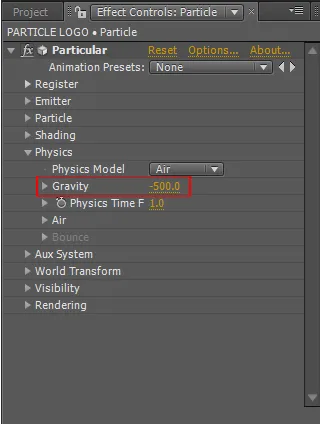
Set of Physics
Step 15. Go to Physics and click the arrow to open the settings of the Physics. If the settings is open change the value of "Gravity" to
"-500".
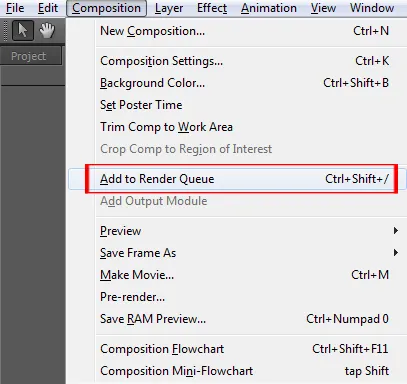
Save Project As GIF
Step 16. To save your project as GIF File, choose (Composition > Add To Render Queue).
•If the Render Queue composition timeline is open, choose "Output Module and click the "Lossless"
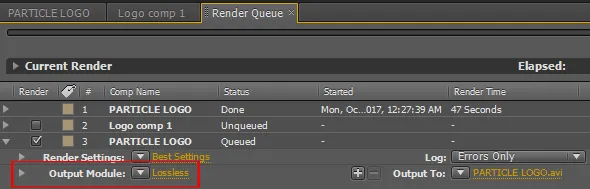
•If the settings of "Lossless" is open you can see the Output Module Settings, choose the "Forma" click the arrow down and choose "Animated GIF" and click OK.

•In the compostion timeline of Render Queue click the "Render" and wait until is done.

••Note: You can change the value of Emitter, Particle and Physics to the value of what ever you want to make a look great..