Welcome to my first post on electronics and hardware, if you are ever interested in embedded systems, Arduino is the best place to start.
In this post, we'll be building a classes beginner's project on Arduino which is equivalent to "Hello world" program. Blinking a LED. It's Simple and satisfying to watch and also lays foundation for everything you'll create in future from interfacing sensor's to building complex robots!!
WHAT YOU'LL BE NEEDING
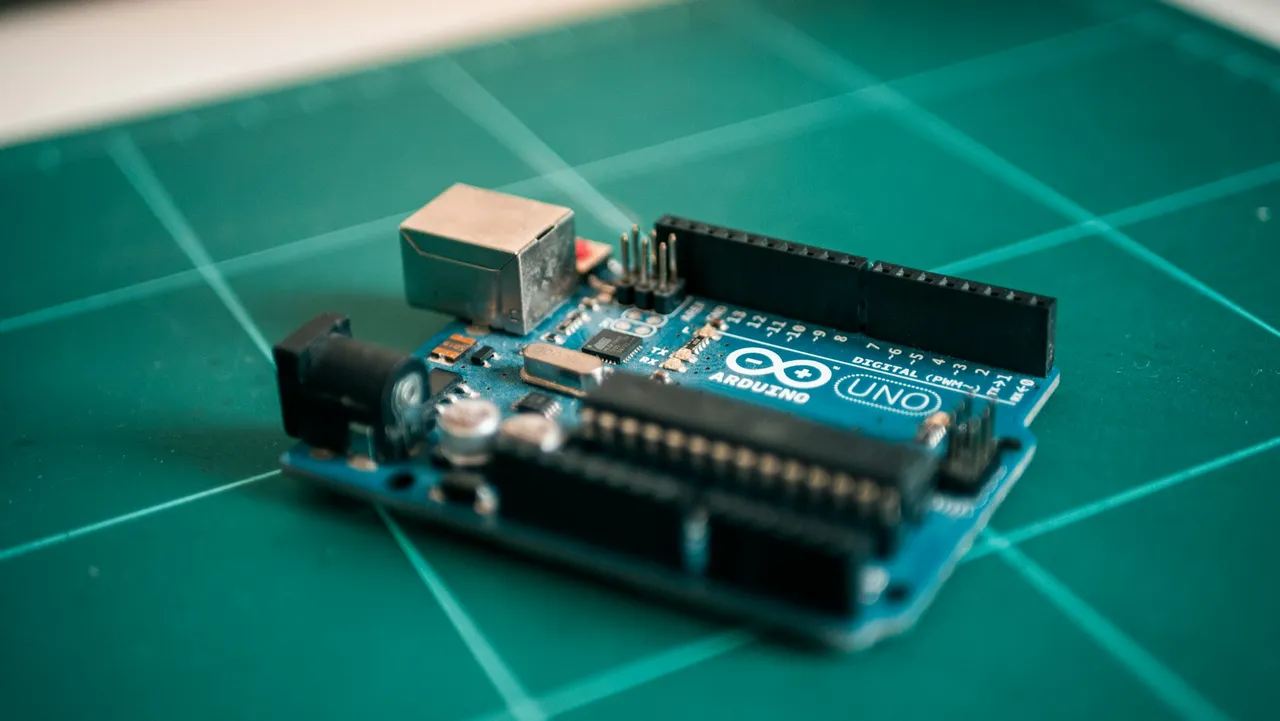
- Arduino UNO
- LED
- 220 ohm or 330 ohm resistor
- Breadboard
- Jumper Wires
- USB Cable for uploading the code
- Arduino IDE (download it from https://www.arduino.cc/en/software/ )
Tip: If you're waiting for your hardware to arrive, sites like Tinkercad lets you simulate the arduino circuit online!
Step 1: Wiring the LED to Arduino
Follow these simple steps to build your circuit:
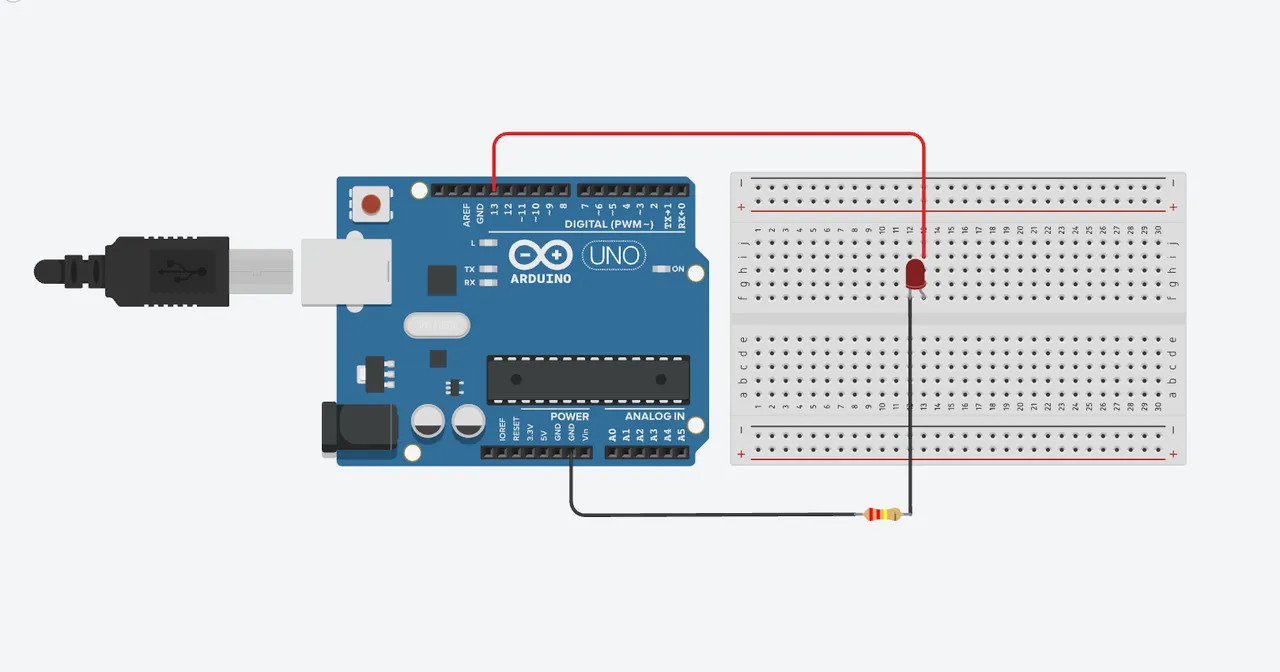
Place the LED on the breadboard.
Connect the longer leg (anode) of the LED to digital pin 13 using a jumper wire.
Connect the shorter leg (cathode) through a 220Ω resistor to the GND pin on the Arduino.
Double-check the connections!
Tip: The longer leg of the LED is always the positive side.
Step 2: Writing the Code
Now that the hardware is ready, it’s time to write our first Arduino program, also called a sketch. Open the downloaded Arduino that will probably look like this:
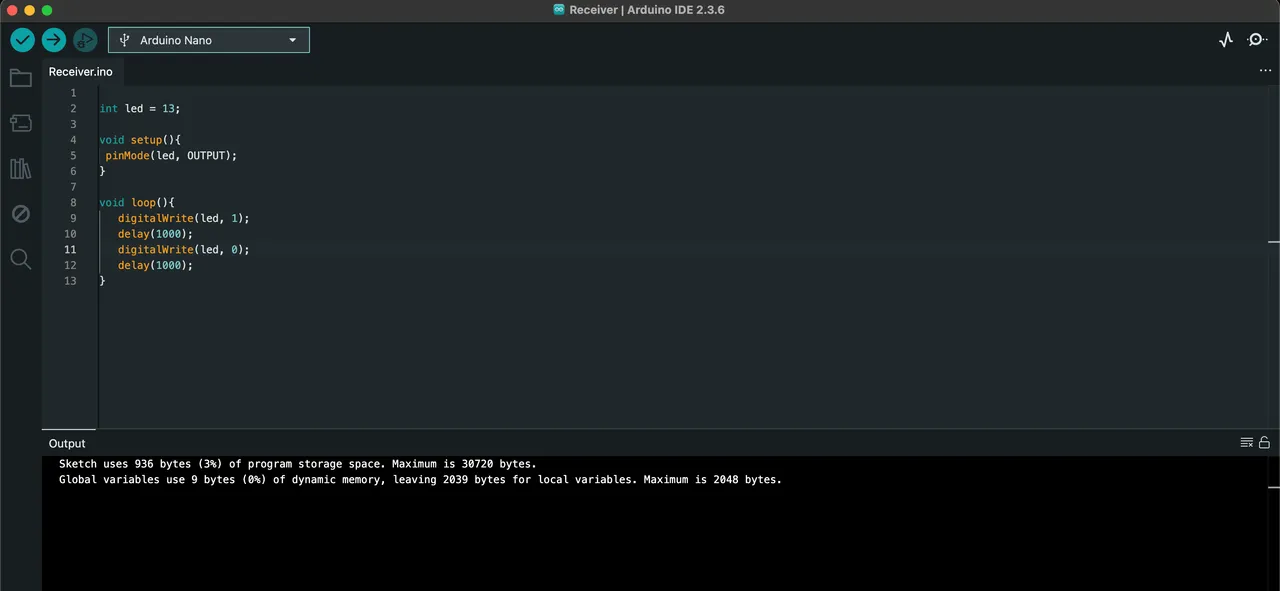
This is what is called Arduino IDE (Integrated Development Environment), it's what allow you to interface your code with your arduino board.
Write the following code on it:
int led = 13;
void setup(){
pinMode(led, OUTPUT);
}
void loop(){ digitalWrite(led, 1);
delay(1000);
digitalWrite(led, low);
delay(1000);
}
Code explanation:
we start by saying that "Hey the pin 13 of Arduino is to be called led, and herein after led means pin 13 and vice versa.".
The functions void setup and void loop are special function in Arduino world they are absolutely necessary in an Arduino program. they setup function only runs once and is thier for setting up and specify pins purpose in this case its to assign pin number 13 as output pin.
In void loop function, we turn on the led by providing high voltage state to pin 13 {digitalWrite(led, 1);} we then use delay function to turn it on for exactly one second. note that delay is in millisecond and 1000 millisecond is equivalent to one second.
We do something similar for next state. we turn led off for one second. the loop function is then started again. and it repeats as long as their is power to the Arduino board.
Conclusion:
That's it you just now need to connect the board with your computer using USB cable and upload the sketch.
That's it folks, this was my first blog post on the network. I wish to improve and create content for future too, any suggestions and criticism are welcome. thank you for giving it your time and reading it!! 😊