A lot of people think that drawing requires a lot of talent. It might be true to a certain degree but I think if you truly want to learn, you can pick up that skill. If you want to learn and don't want to spend money to attend classes, there are plenty of free video tutorials around the Internet you can watch. I have been drawing portraits as a hobby for many years but didn't have the courage to take any commission jobs until earlier this year. I am by no means an expert on portrait sketching. I have so many areas to improve on. But that doesn't mean I am not qualified to give you some simple and basic tutorials on pencil portrait sketching. This is going to be a very long series of tutorials, therefore, I have to break it down into several posts.
Edit: This tutorial was originally requested by @thetruthbomb who wanted to learn how to sketch portrait and requested I make one. I haven't seen her around here on Steemit the past one week, but I hope she will participate when she returns :)
NOTE: I have thought long and hard about this. To encourage people to learn, I would like to offer some reward in the form of SBD to 3 people who could sketch the best portraits by the end of this tutorial series. I haven't decided on how much the reward will be though. I am thinking of giving SBD3 to the best portrait, SBD2 to the second one and SBD1 to the third. I know it's not much but I am just a lowly minnow who doesn't earn much yet, unless we have some sponsors or the response is encouraging.
So here are the rules:
- The challenge is for complete beginners in portrait drawing. They could be anyone, including artists who never attempted portrait sketching/drawing.
- Upvote and resteem this post
- Draw a portrait exactly the way I taught it in this tutorial series (there will be several posts covering different facial features. This post is the first in the series)
- Make a post for your entry (add pencilportraitnoob in the tags). Make sure you spell it correctly.
- At the end of this tutorial series, please link to your post in the comments so that I could find your entry
This is optional but feel free to share your progress photos in the comments.
Is this too complicated? If you are not clear, maybe you can leave me a comment.
I am not sure if anyone is interested to participate but let just give it a try first. If no takers, that's okay too ;)
So let's start shall we? On this first tutorial, I am going to talk about the basic things you need to prepare before you can start sketching.
Step 1: materials
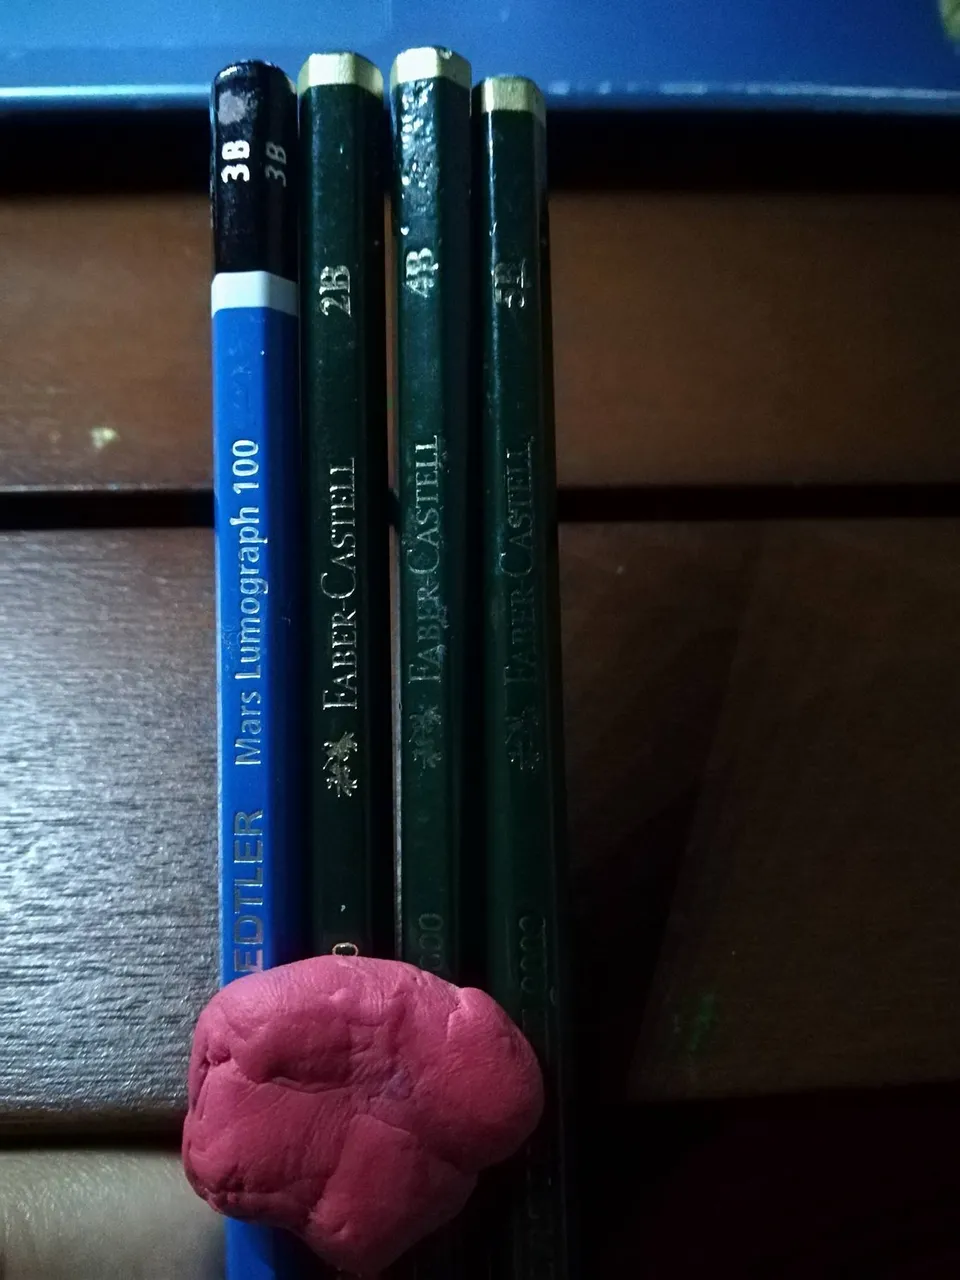
You don't need fancy pencils or papers for practice. However, you would need a printer to print the reference image mentioned in Step 2 below. For pencils, I recommend four different grades: 2B, 3B, 4B, 5B. If you can't get all of them, 2B and 4B would suffice. You are just practicing so don't stress out too much about this. Also you would need a plain old vinyl eraser and an art (or putty) eraser.
As for papers, you can use a piece of printer paper but I highly recommend papers with 100gsm or more. A thinner paper would tear easily when you erase it frequently. Use A4 paper or if you don't have it, a letter size paper would do too. And don't forget a ruler for you to draw the grid lines.
Step 2: reference image
Second, you need a suitable reference image. An appropriate image would have to be clear, not blurry, and preferably has high resolution. The reference image I am going to use for this tutorial is taken from pixabay.com. This image has high resolution, therefore, I could crop it off without reducing the quality significantly. You would need to convert a color image to black and white before you print it out. I have made it easier for you and saved it as a PDF file which you could download from this link here. Download the file and print it out on a piece of A4 or letter size paper.
Step 3: draw the grid lines and the outline of the face
Some people might look down on the use of grid lines because they view them as amateurish. To this people I would say - just keep quiet and let us learn. Just go away and disappear.
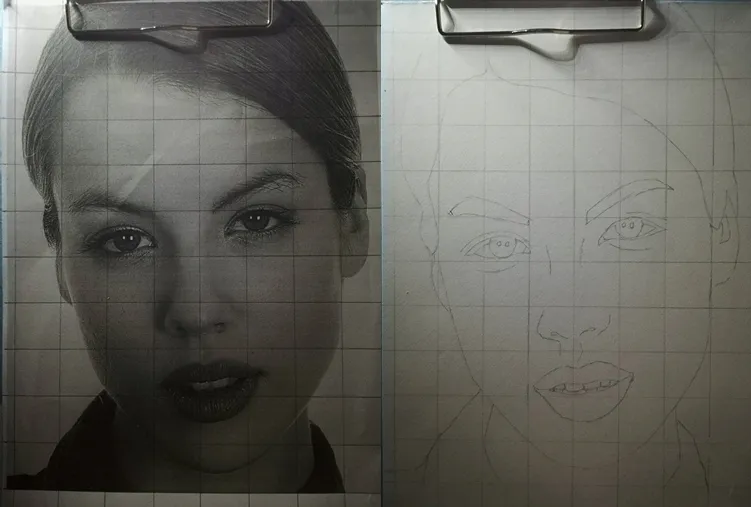
Now after you printed the reference image in Step 2, get a ruler and your 2B pencil and get ready to draw the grid lines. You would need to draw them on the printed reference image AND the paper you would sketch on. Make sure the papers are of the same size. The grid should consist of 1 inch squares. Make sure the placement of the grid is exactly similar on both papers. When you draw the grid on your paper, draw it lightly. You would need to erase them later on and you don't want to leave some undesirable grid marks on your portrait.
Next, you would draw the outline of the face. Now this is going to be a bit tricky but try your best to draw as accurately as possible. Draw exactly the outline of the feature you see on every square. When you finished drawing, they should look like this:
Struggle to draw the face outline? The second tutorial will guide you through this:
So that's it for the first tutorial!
What do you think of this tutorial? Please leave your comments below. Thank you!
Some of my pencil portrait posts on Steemit:
Jerry and Barbie - A Tribute to Meteor Garden On 16th Anniversary
Pencil Portrait of My Mother - Madam Veronica G. Bedindang
Pencil Portrait of My Husband and Son
Pencil Portrait: Luciana Zogbi - A Brazilian Lebanese Beauty
Pencil Portrait: Sabina Altynbekova - The Living Anime-Girl
My Previous Posts
Upvote and resteem if you think they are worthy. Thank you!
Jerry and Barbie - A Tribute to Meteor Garden On 16th Anniversary
Tiny Audrey Hepburn's Portrait
Satan Patrolling the Earth - A Painting
The Tiniest Portrait I Ever Drew