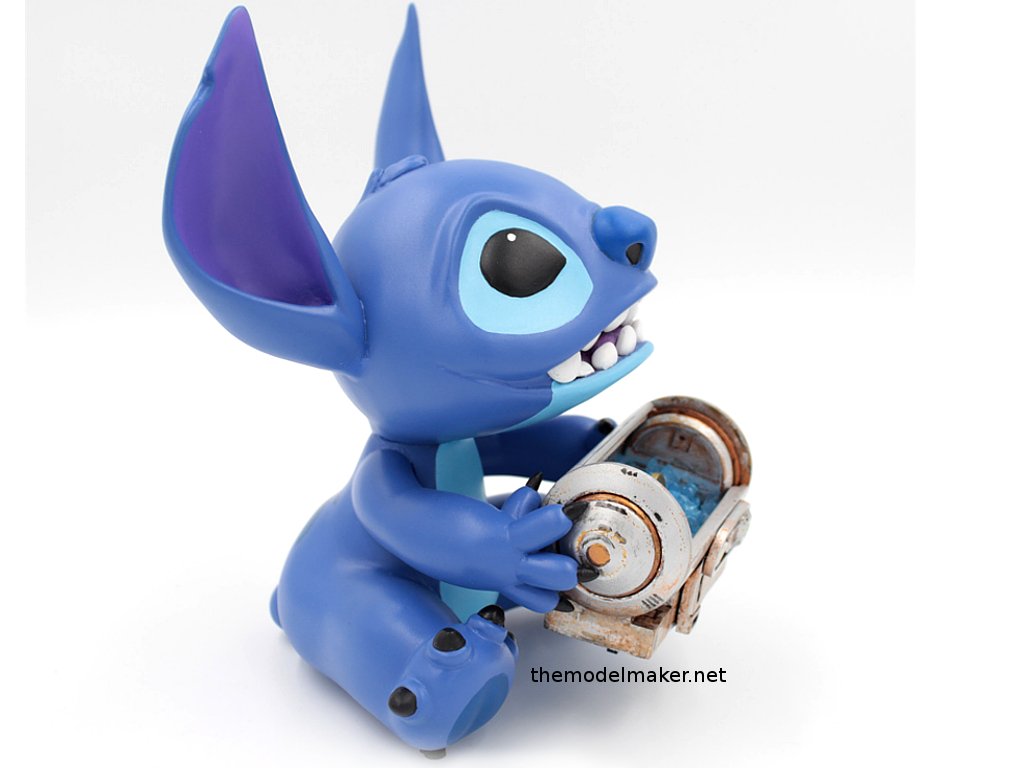
I was very silent for last few weeks. I was busy moving to new place and making it my home. It involved lots of packing, unpacking and weeks of DIY. I did floors and painted walls, for the first time, so learned a lot of new things in the process. I was exhausted in the evenings with limited energy to post on social media. I am finally going back to my routines and building models, so you will see new posts and new projects. Here is one, I worked on a while ago and showed you one photo of progress. I can finally share it with the world because it was gifted to its new owner. It is not just figurine, it is engagement ring box based on Disney character Stitch. I built him from scratch based on my client's requirements and his girlfriend's favorite things.
photo credit: Me (http://themodelmaker.net)
I was approached by Mike from Santa Monica with the idea of creating Stitch figurine. We started bouncing ideas, started with Stitch holding the ring on his tongue and his mouth openable with small hinge on the back of his head but it evolved to him holding the crate from Sarah's favorite game, Destiny 2. Mike sent me a video showing this object and I liked its design and few interesting challenges it would create. I like solving problems so I agreed to build it.
photo credit: Me (Sculptris)
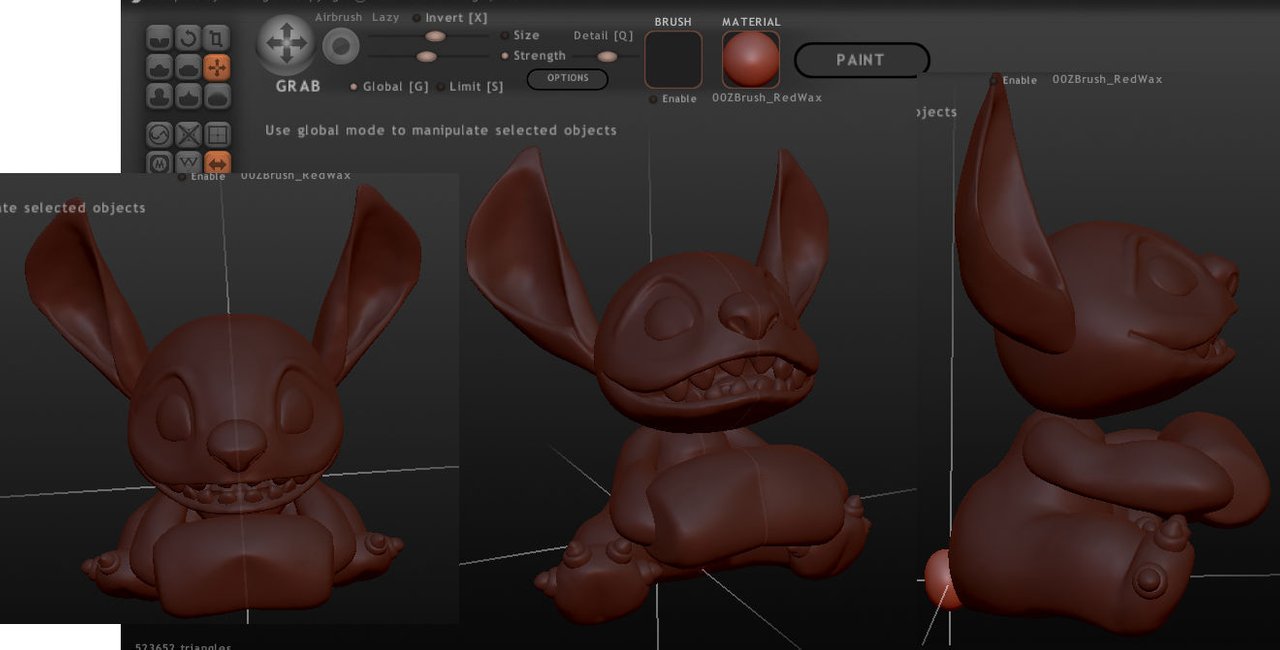
I was going for holidays to visit my parents then, so decided to sculpt him digitally on the laptop. I spent few evenings doing it in Sculptris. It is free program, very basic, but does the job. My plan for this year is to learn sculpting in Zbrush which is industry standard software with more tools and more complicated at first glance.
It is created with multiple spheres modified to create shapes like nose, ears legs and arms. I can shape each independent element and quickly move it, rotate or scale to suit my needs. It greatly speeds my process. I later combine the meshes in Meshmixer and cut them to easy to print pieces which fit in my 3d printer. This model turned to be bigger than I expected, but its size was dictated by engagement ring size. You can see in the picture above, he holds the crate placeholder, I designed it later in the different program and scaled figure based on that.
photo credit: Me (Sketchup)
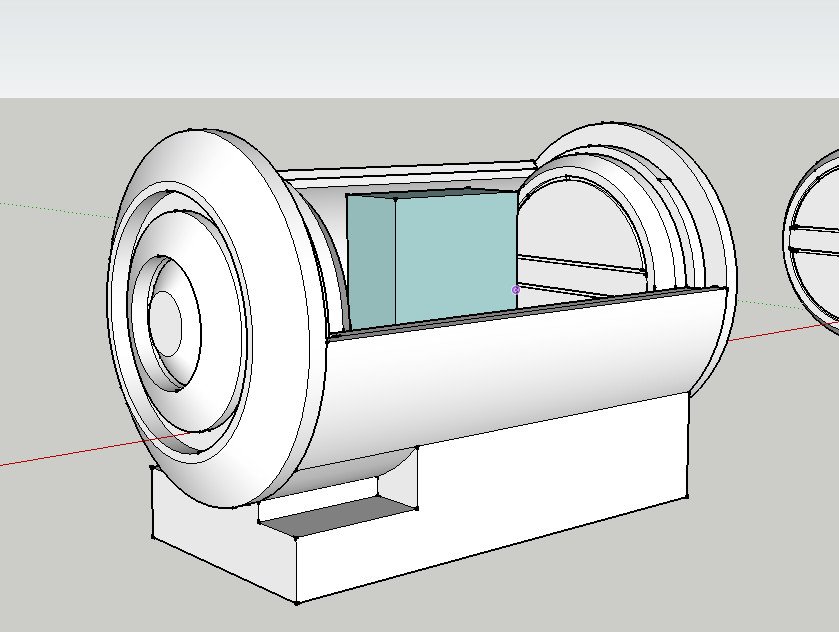
The ring was of certain size and design. It would need to fit inside the crate. The diameter of a compartment inside of the crate was slightly bigger than a ring with the diamond. I drew this tubes in Sketch-up and started from there. I designed the mechanism so the lid slides like in the game. I had to give enough thickness to the elements so they are strong but look right. I quickly came with an elegant solution which worked. It was easier than I estimated so we added the lights :) I figured the way to switch the LEDs ON when the lid slides. I placed tiny potentiometer hidden in the side panel, attached at the axis. This dims the light when it is closing. Clever, isn't it? :)
photo credit: Me (http://themodelmaker.net)

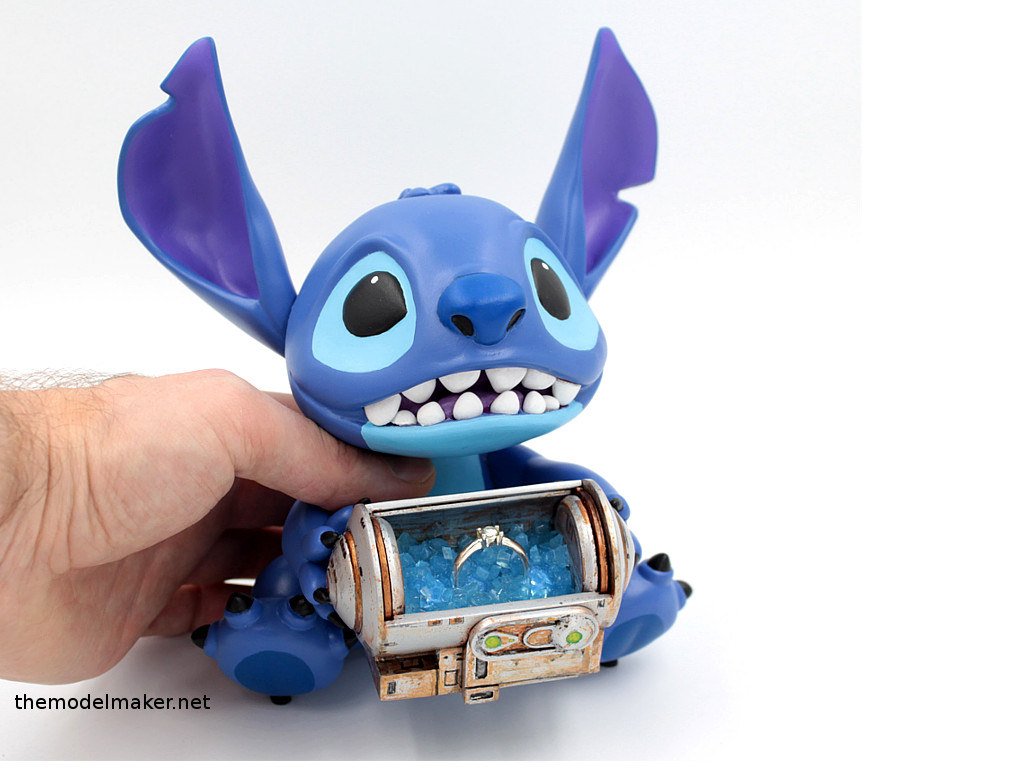
I am holding here bare bones of the crate to test how it works. I later added more details to look more like in the game. I also added a layer of translucent silicone as a ring holder. I tinted it with acrylic paint and poured a thin layer on glass. When it set, I diced it with the knife. I then mixed tiny pieces with a fresh batch of silicone and placed it inside the painted box. I used a coin to create a void for the ring. It produced a nice effect in real life, but hard to photograph.
photo credit: Mike (Destiny 2)

I used ABS plastic to print all the pieces, so it was easy to weld them with acetone, creating strong bond. Using this smelly filament also speeds the sanding process, because it is softer and less brittle. I can also use acetone to smooth some hard to reach places like inside his mouth. Fortunately, I guessed this area will be a pain so I removed teeth and printed them separately.
photo credit: Me
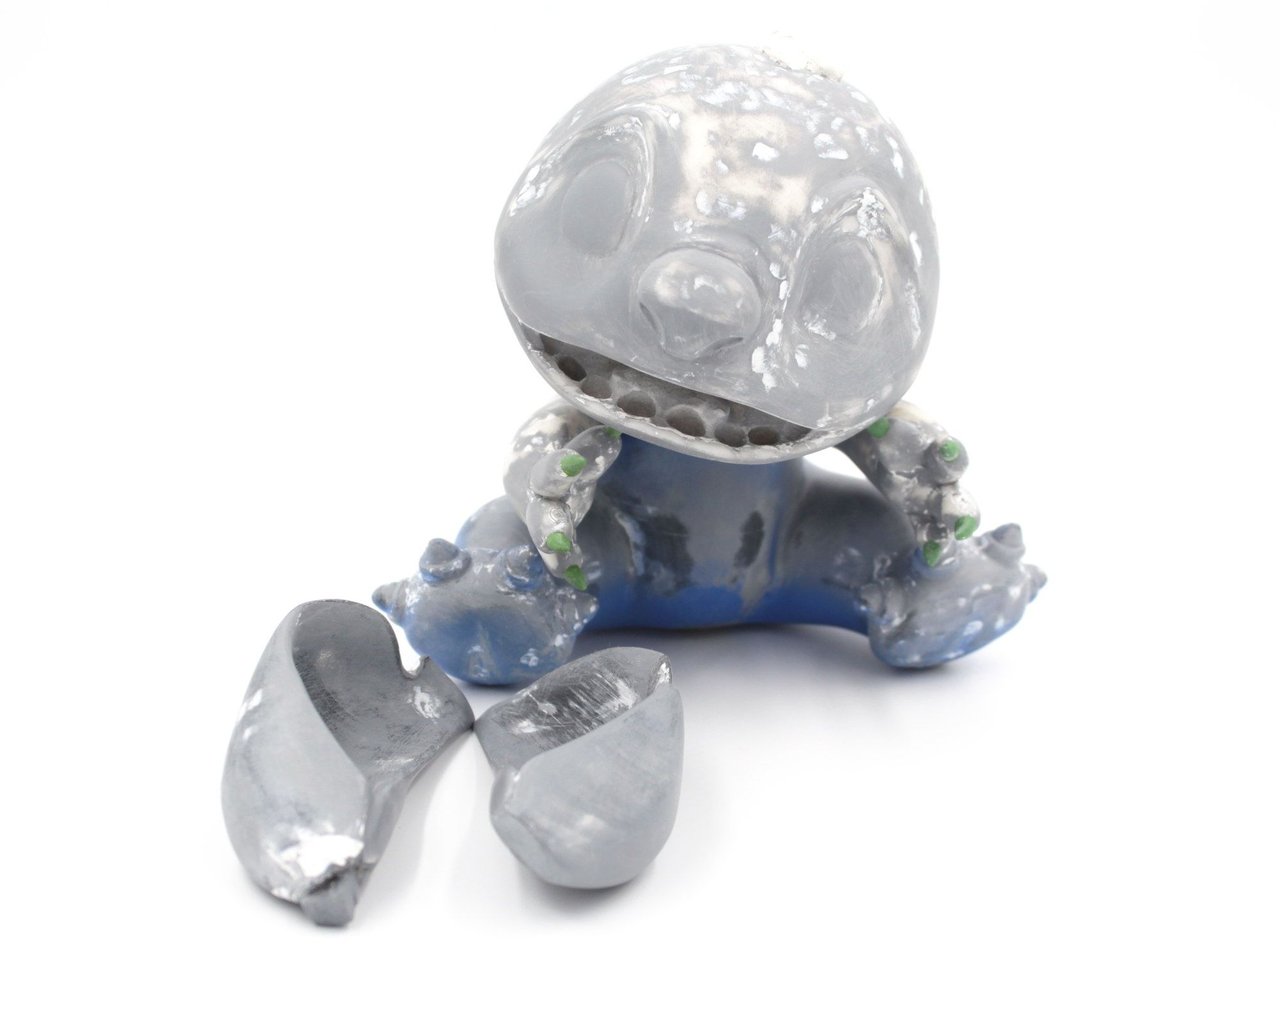
I hate sanding and filling 3d printed pieces. It takes so much time and patience. I start with rough paper on all surfaces to get rid of the layers. Then I paint all with grey primer. Then I can see all the holes and imperfections. I fill them with Tamiya filler which smells bad or water-based liquid green stuff. I recently discovered another option, wood filler by Ronseal which sticks to print well and is very smooth when sanded. It is also much cheaper than my other options. I used it on my whole BB9E model, this will be a real test for durability.
photo credit: Me
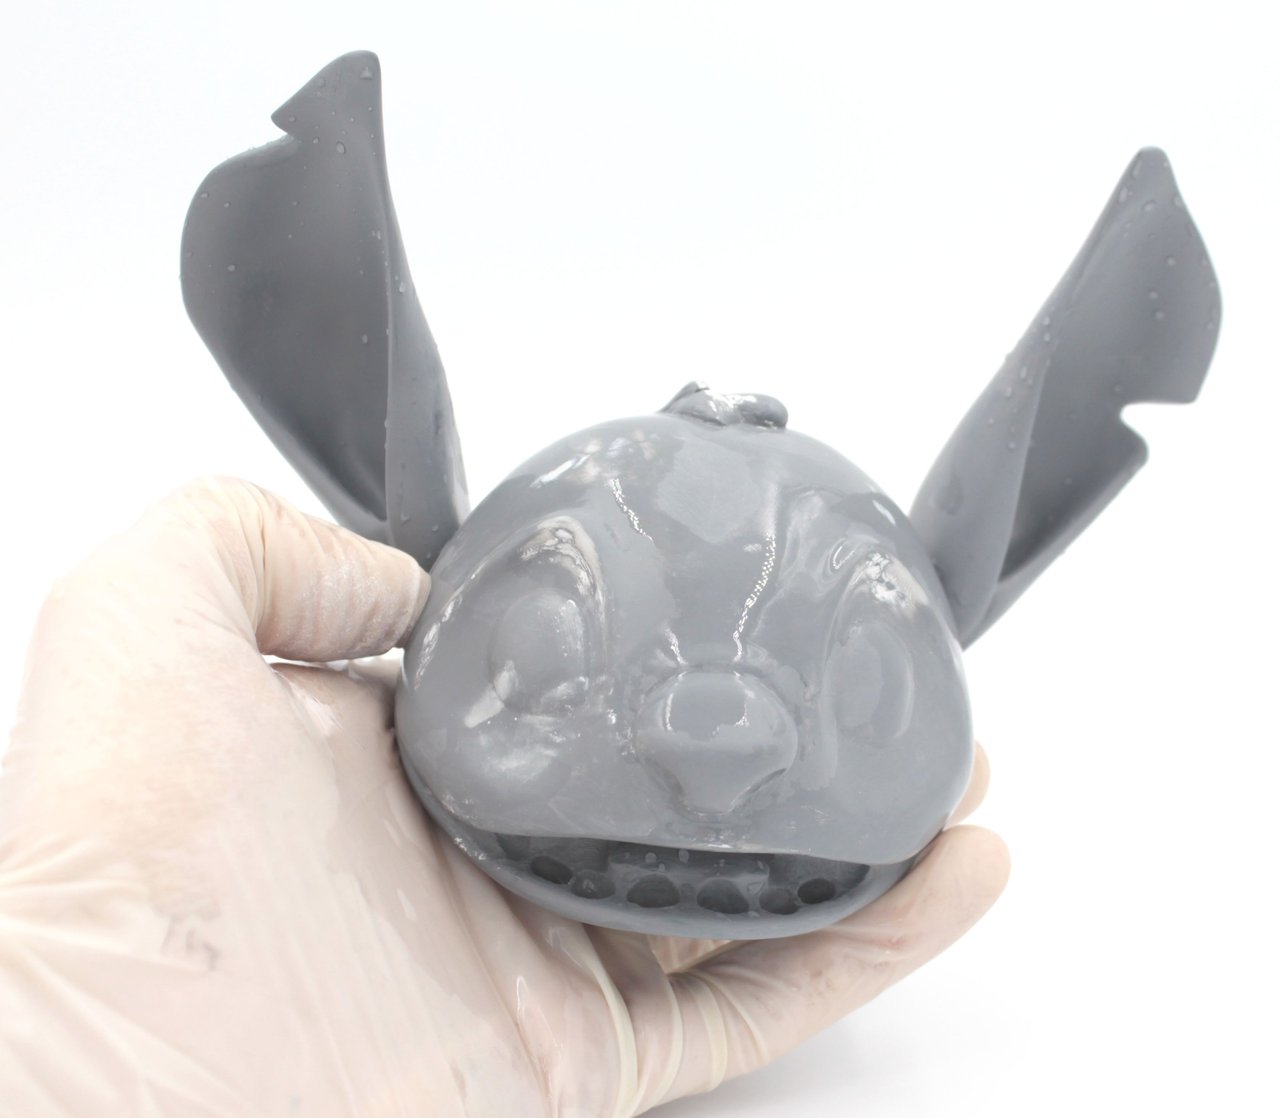
The sanding and filling process is repeated 4-5 times and finished with wet sanding with very fine sandpaper. It should only remove and polish top layer for primer and produce the very smooth surface. I can of course always find places which require more attention so end with few more passes of this stage :)
photo credit: Me
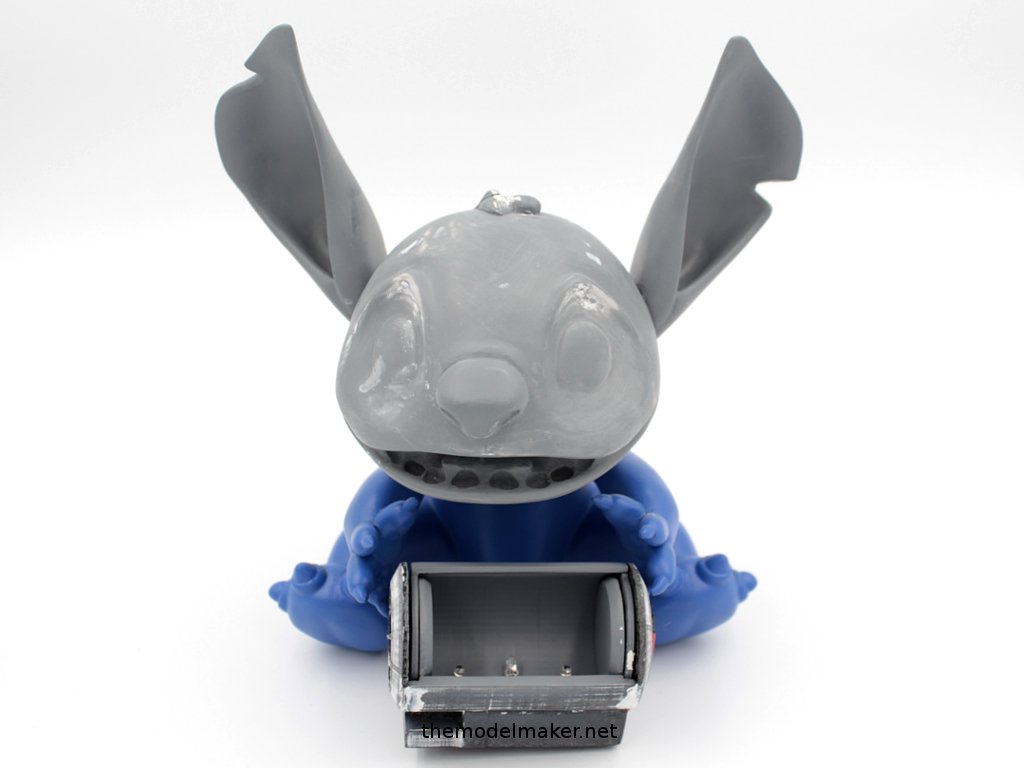
I was fortunate that this character was the same color as Ultramarine Blue primer from Army Painter series of color primers. This gave me great solid base color for later detail work with acrylic paints applied with brushes.
photo credit: Me (http://themodelmaker.net)
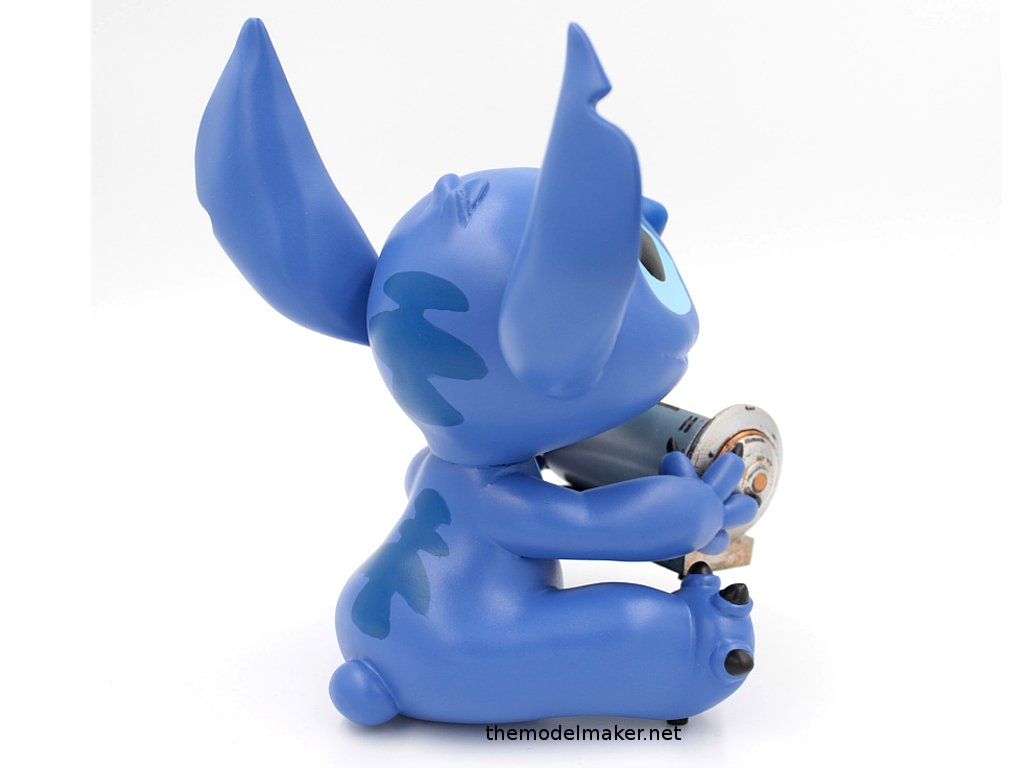
After weeks of hard work, I ended with a clean and solid toy, similar could be found in many stores for much less :) It is often the case with my models. I spend a lot of time and attention to bring them to the look of finished and mass-produced toy or statue. The only difference, it is one of the kind prototypes what makes them expensive to make. I often underestimate the time needed and charge too little so you can help me recoup the costs with your upvotes. I hope you enjoyed reading about the process and learned something new. I am now going back to sanding my BB9E, so I can write about it if you are interested. The post dedicated to this Stitch engagement ring box project is here : https://themodelmaker.net/stitch-custom-engagement-ring-box/
Thanks for your support!
photo credit: Me (http://themodelmaker.net)