Hello, friends!
The second part of my story about materials and tools for Chinese painting will be devoted to the design of works. This must be done if you want to hang the picture on the wall.
Rice paper is very thin and crumples during the dyeing process. This paper is necessary to glue the second layer of paper to the picture became dense. In the process of this design, the paper is smoothed, the colors become brighter.
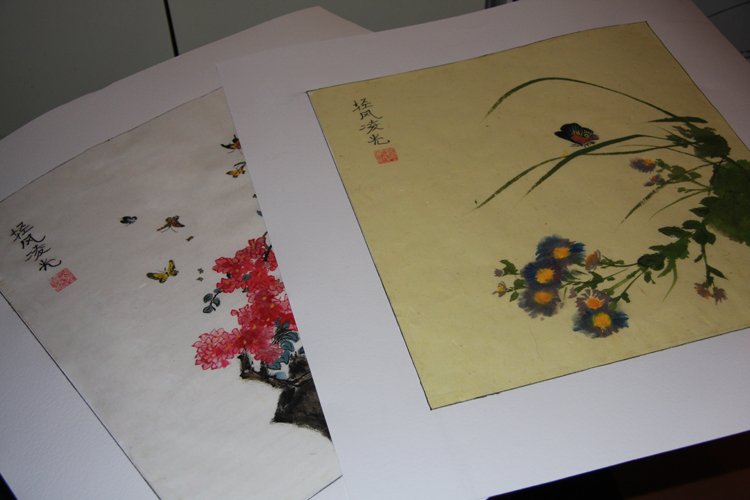
For several years of my training in Chinese painting, I designed the work in the traditional way, using glue and special brushes. I will show you this method on the example of my students ' works, which I prepared for the exhibition. I also want to say that this whole process does not forgive haste, and requires maximum accuracy and concentration, well, experience.
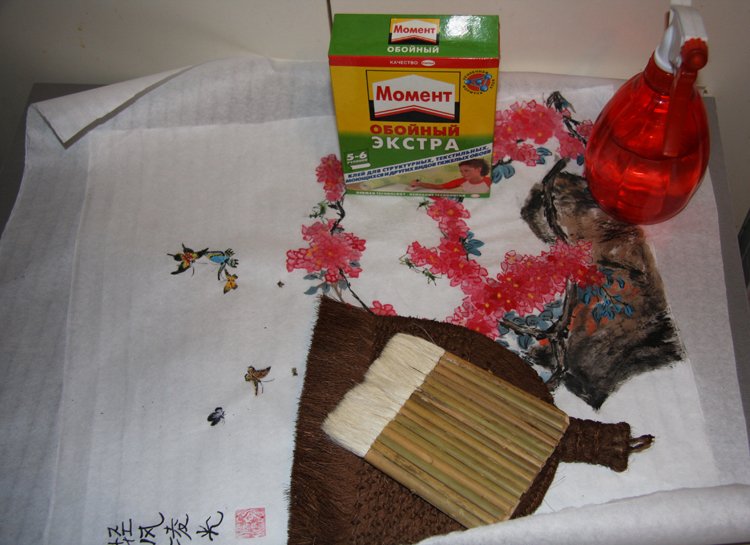
Materials:
The finished picture.
The picture should not only be drawn. It should dry out for a few days. My Chinese teacher advised to wait a week, and then proceed to the design work.A sheet of rice paper.
it should be wider your drawing on 5-10 centimeters on each side. Rice paper is better to use the same as for the pattern, or cheaper. I use roll paper.
- Two special brushes.
One brush (white) for applying glue, the other (bamboo) for smoothing the picture.
- Glue for Wallpaper.
Chinese artists make their own glue with water and starch. But my teacher advised to use Wallpaper glue as it protects the painting from mold.
Spray with water.
Large size Board.
You can use the surface of the table, if you do not plan to use it during the day. I use the furniture Board I bought at the hardware store.
Step by step process
Step 1
First, I prepare the glue. I dissolve in a plastic container dessert spoon of glue and water. I don't have an exact recipe. I'm just looking at the consistency. If necessary, I add more water or glue. It will take about 10 minutes for the glue to swell.
Step 2
Take a picture and put it face down on the Board. After that, spray with water from the sprayer. You need to act carefully, because rice paper is very hygroscopic and you can easily make puddles.
At this stage, you need to make sure that the wet paper does not crumple.
Step 3
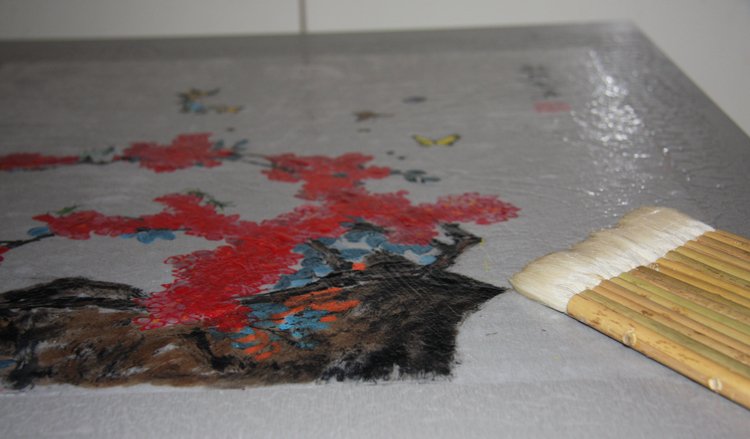
Now take a soft white brush and begin to apply the glue to the picture. I start from the bottom and move to the center. From the center I turn to the sides. Do not apply too much force, because the soaked paper may break. If air bubbles appear, they should be carefully removed with a brush to the sides

Glue can go beyond the picture, on the Board
Step 4
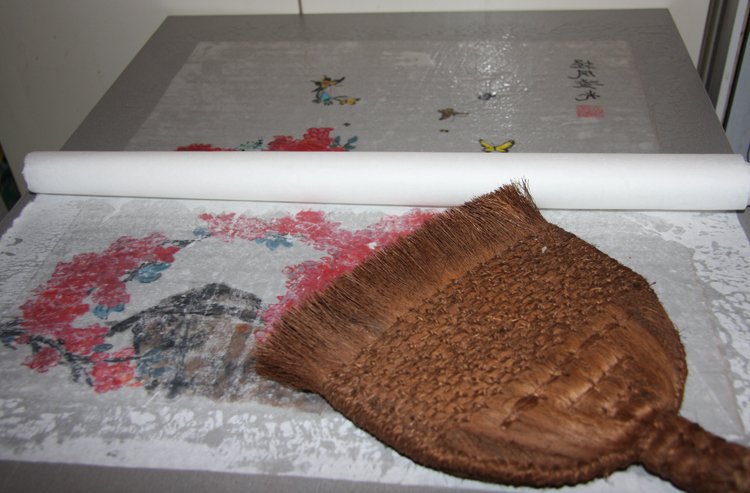
I take a blank sheet of rice paper and roll it up. I glue one of the sides of the roll to the picture and start to roll this roll. Brown bamboo brush level the surface of the paper. Roll out the roll should be carefully, slowly, 1-2 centimeters
If air bubbles get between two sheets of paper, they should be removed from the center to the edges.
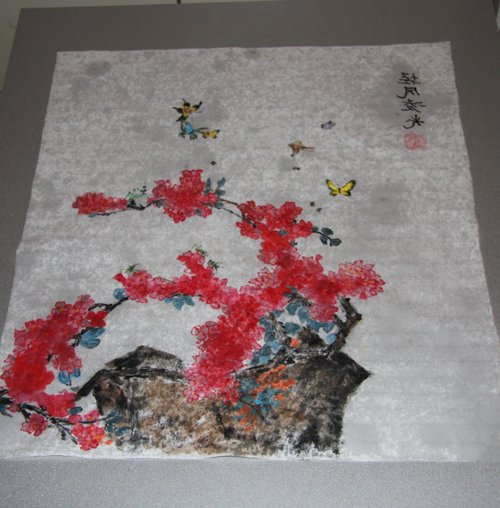
Step 5
In this step, I step back from the traditional technology. I'm doing what's best for me. But I will write how to do it right - you need to take glued sheets of paper, turn and glue the wrong side on the Board. That's right, when the front side of the drawing dries out.
I don't know how to do it without spoiling the drawing, so I leave the drawing to dry in this position, face to face the Board.
The perimeter of the paper, I coat with glue and glued to the Board
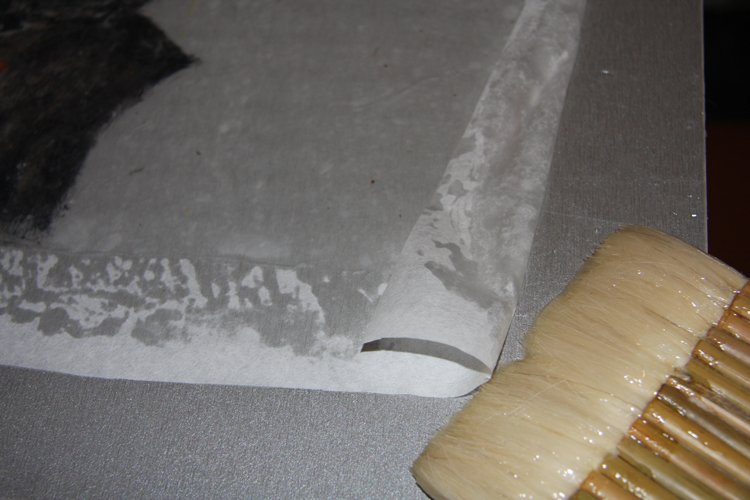
This will ensure uniform tension of the sheet during drying.
Step 6
The picture dries about a day.
Step 7
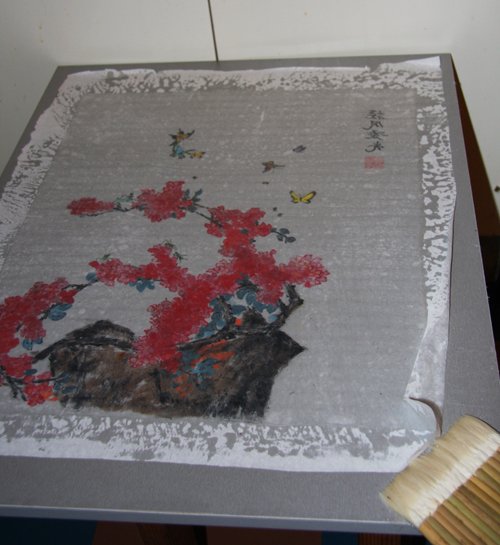
The next day the picture dried up. I carefully remove it from the Board.
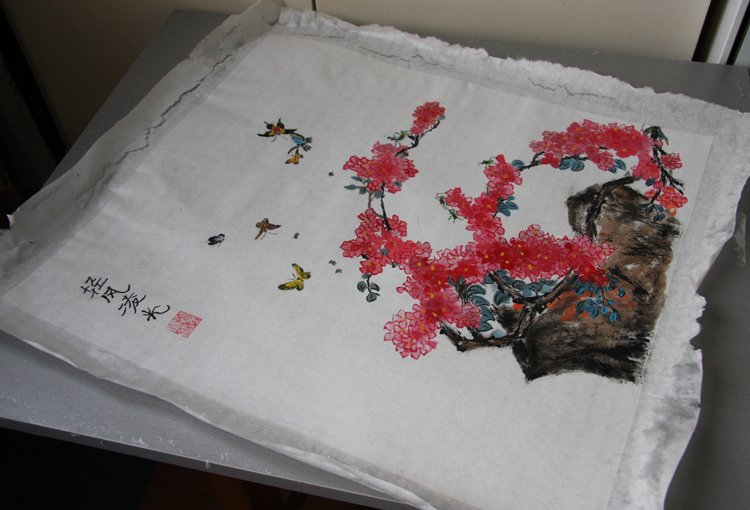
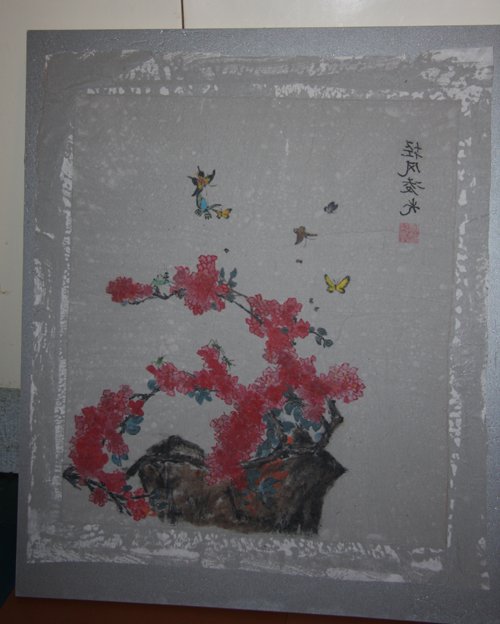
Cutting the jagged edges. Result
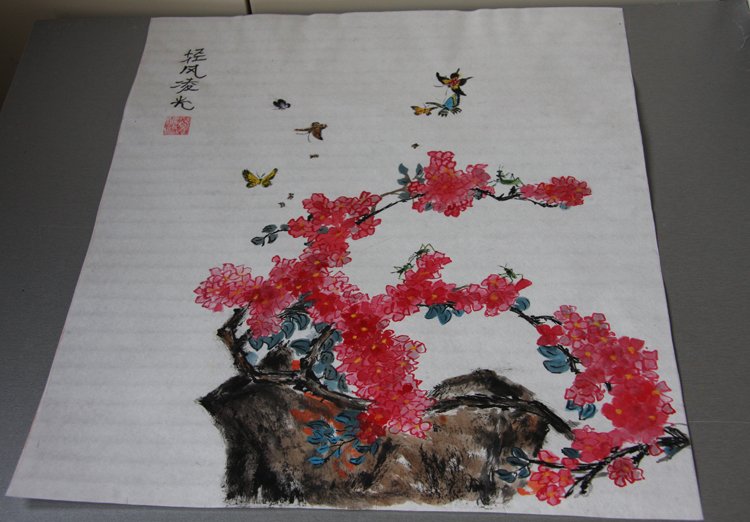
The finished picture can be glued to a sheet of cardboard (as in the title photo) and inserted into the frame. I like the minimalist IKEA plastic frames.
Chinese artists give their paintings, thus prepared in specialized workshops. There these paintings are decorated in silk and scrolls.
Recently, there was a special paper with a silicone layer, which will replace the traditional process of registration. About how to make out the work with the help of this paper I told in the post Flowering plum branch in traditional Chinese technique. Step by step: painting + process of compacting rice paper
Thanks for your support and comments!