Hi There.....Have you ever done beadwork?
I have done quite a lot..... And I still have to do a lot..... You may be thinking..... Why? Simple because I have a closet full of beads..... Those little buggers are so very addictive 🙃
But I thought to myself..... Why on earth should I go through this alone..... Why not rub it off on a few others here..... That's an evil plan, I know..... But I just can't help it..... I blame my mom and dad..... They are the ones that made me..... I had no say in it 😈
So if you are a bit like me..... Evil..... Come and join me in spreading this addiction..... And start by trying out this pattern to make this Magical Triangle 😋
Here is an example of what we will be making
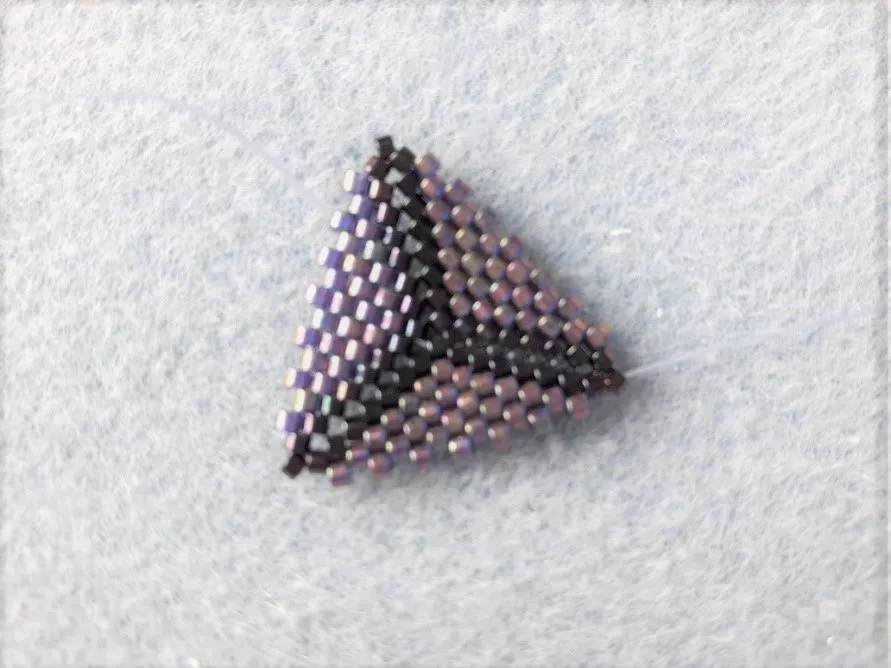
Pattern Peyote Triangle
I always use Toho or Miyuki Delica beads because, in my opinion, they get the best results..... To make it easy it is best to work with 2 different colors of beads..... We will call them A and B
Step 1 - On a comfortable length of thread pick up 3 beads A and go through them again to make a ring as shown on the drawing below
Step 2 - Pick up 2 beads A and go through the next A bead. I have made the beads from the previous drawing light grey and the newly added beads black.
Step 3 - Pick up 2 beads A and go through the next A bead.
Step 4 - Pick up 2 beads A and go through the next A bead.
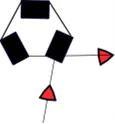
Step 5 - Now we need to step up to the next round by going through the first A bead added in step 2.
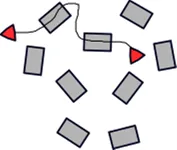
Step 6 - Pick up 2 beads A and go through the next A bead.
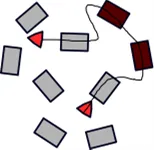
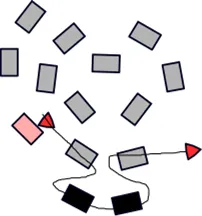
Step 7 - Pick up one bead B and go through the next A bead. From here on the newly added B beads will be red and the ones from previous rounds will be pink.
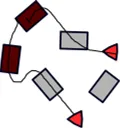
Step 8 - Pick up 2 beads A and go through the next A bead.
Step 9 - Pick up one bead B and go through the next A bead.
Step 10 - Pick up 2 beads A and go through the next A bead.
Step 11 - Pick up one bead B and go through the next A bead.
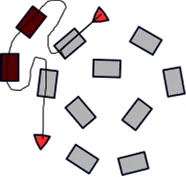
Step 12 - Step up to the next round as you did in step 5
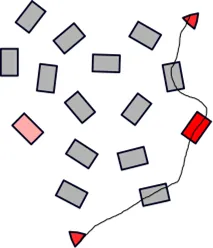
Step 13 - Pick up 2 beads A and go through the next A bead.
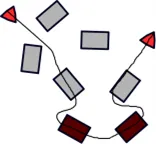
Step 14 - We will add 2 beads B instead of one now.

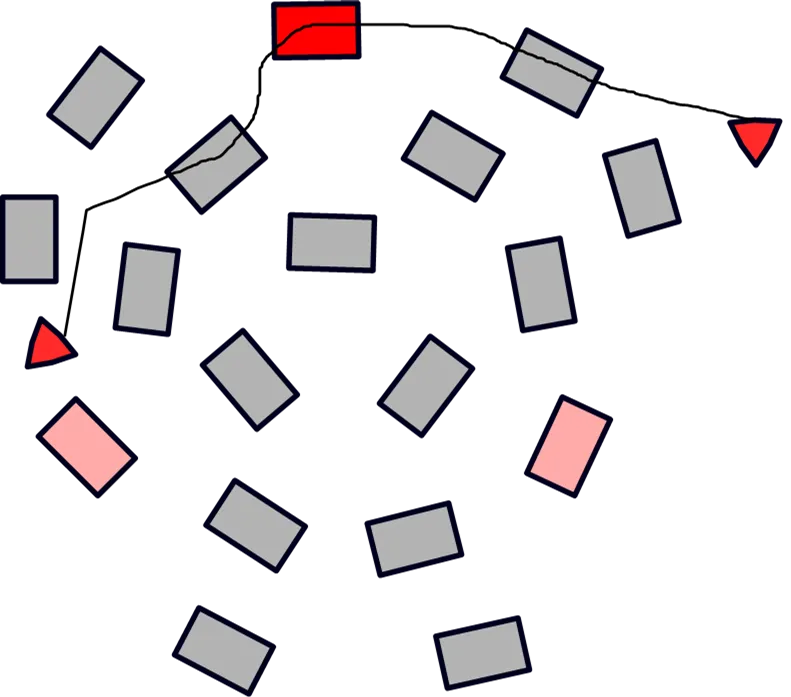
Step 15 - Repeat this for the rest of this round and step up to the next round as you did before
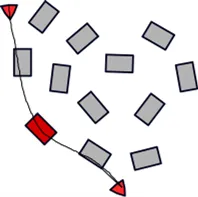
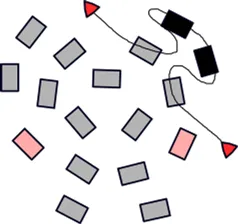
Step 16 - In the next round we will add 3 beads B instead of 2 and so on
Step 17 - You can make it as big as you want - to end it you make a round with just adding one bead A on the 3 corners.
There is a lot you can do with these..... You can make them into earrings or make several triangles and put them together to make a bracelet 😃
But was is most important is that you have fun making them..... Show me yours when you finished it..... Your triangle of course 😁
One more thing..... Don't come crying to me if you get addicted..... I did warn you 🤣🤣
Oh yes, I almost forgot..... I made this especially to enter the contest from the Build-it community - /trending/hive-129017 - of which I am a member of..... Tx @build-it for hosting this great contest
@build-it/build-it-weekly-contest-20-hive-2250-build-and-100-upvote-from-build-it-in-rewards-q8u49h
Hope you like my blog post.....Until next time.....Have a great day
Renata (Seadbeady)
Want to be on my blog next time ?? Want me to review your product?? Just send me a message 😊
Ps: something seems to have gone wrong with my drawing in step 11..... It turned out a bit bigger..... Not sure why 😳
Proud moderator of the Amazing Nature Community /trending/hive-127788

Banner by @barbara-orenya