Portraits have been the dreaded arch-nemesis of artists since the beginning of time. When it comes to the list of 'artist's kryptonite,' I'd say its usually a solid second, with self doubt just inching into first.
Portraits are particularly difficult to do well, much less master. Being able to replicate a person's likeness on a 2D surface is no easy feat and often takes years of practice and countless hours to get them done even remotely 'right.'
As someone who had no formal training in the arts past the standard high school and university course electives, I've had to pick up art tricks along the way. I was however very fortunate to be born into a fairly 'artistic' family, with some of my earliest memories being of my father tattooing clients at our dining room table.
With that in mind, today I present to you my step by step approach to drawing portraits that is based on what I learn't during my own tattoo apprenticeship coupled with years of observation and research.

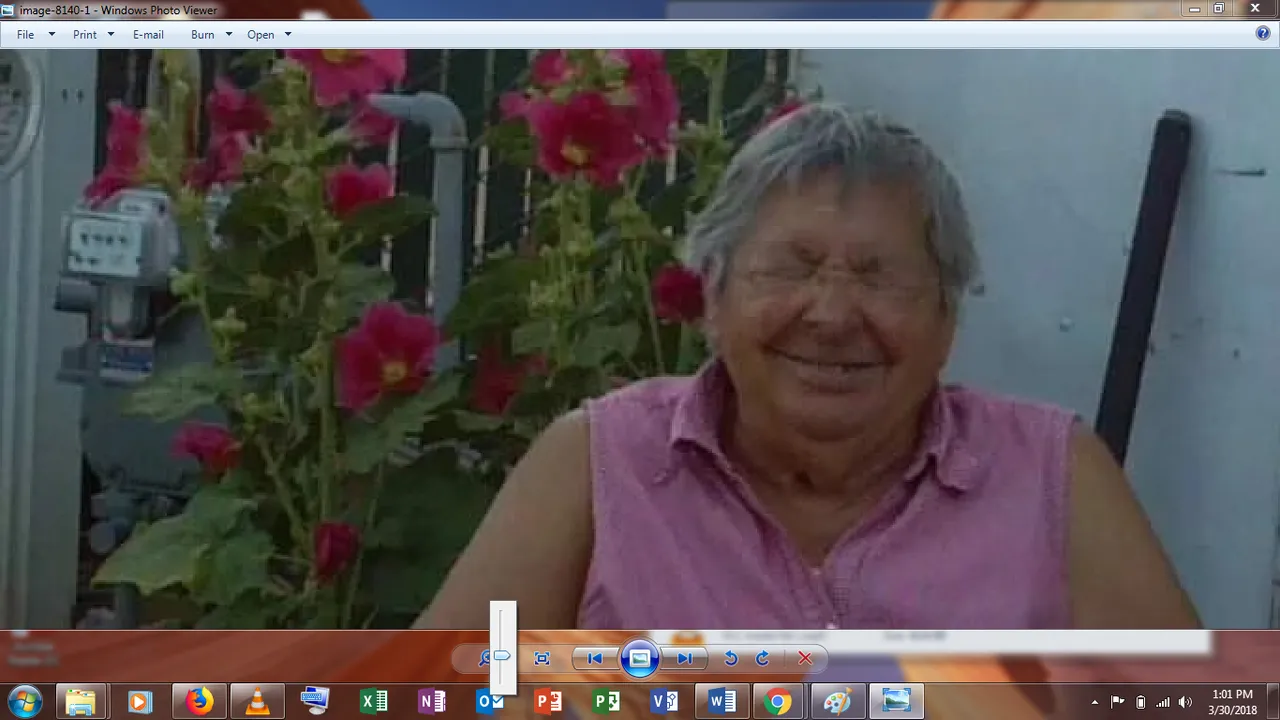
This is the first portrait that I've ever done from reference, and it was done using this method.
For the full story behind this piece see here - https://steemit.com/love/@ascendedmonkey/how-to-win-a-guy-for-life-the-story-and-process-behind-the-portrait

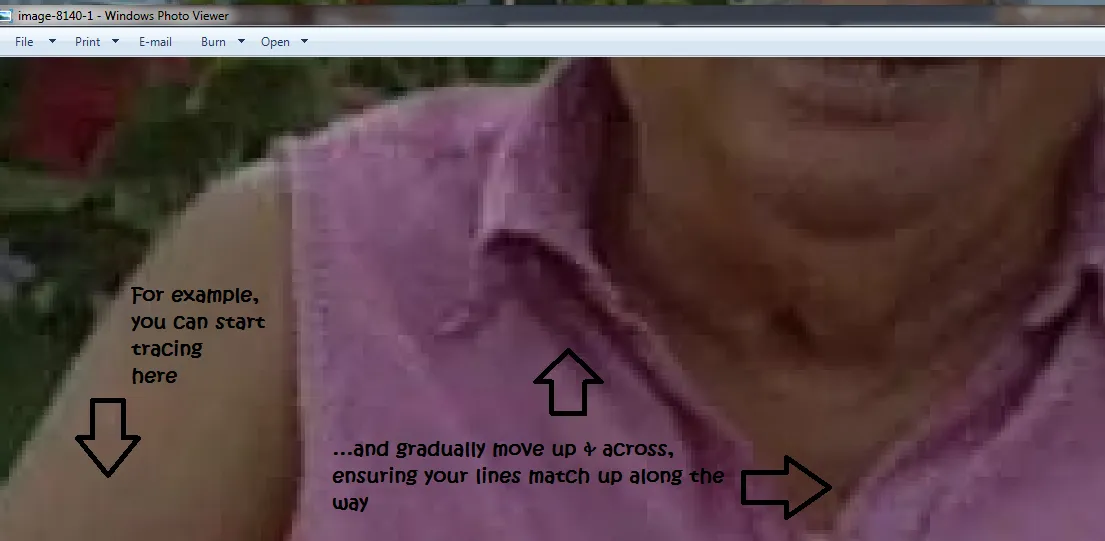
Step 1: Stenciling your reference.
Once you've gotten your reference photo, blow it up on your pc to the size that you would like it to appear in your finished illustration.
Next using either tracing paper or any other transparent/translucent draw-able surface (I use clear sheets of plastic) trace the image outline on the screen. Taping the edges helps to ensure the stencil doesn't move while you're tracing.
The darker the marker or pencil grade the better, it will definitely come in handy for step 2. However be careful with using markers on anything other than plastic. You don't want to end up doodling on your pc screen because the ink ran through, (trust me...v.v''')
If the image needs to be blown up much larger than your visible screen space, simply start in one corner and gradually trace the image piece by piece; ensuring you DO NOT adjust the size on accident while moving between sections.
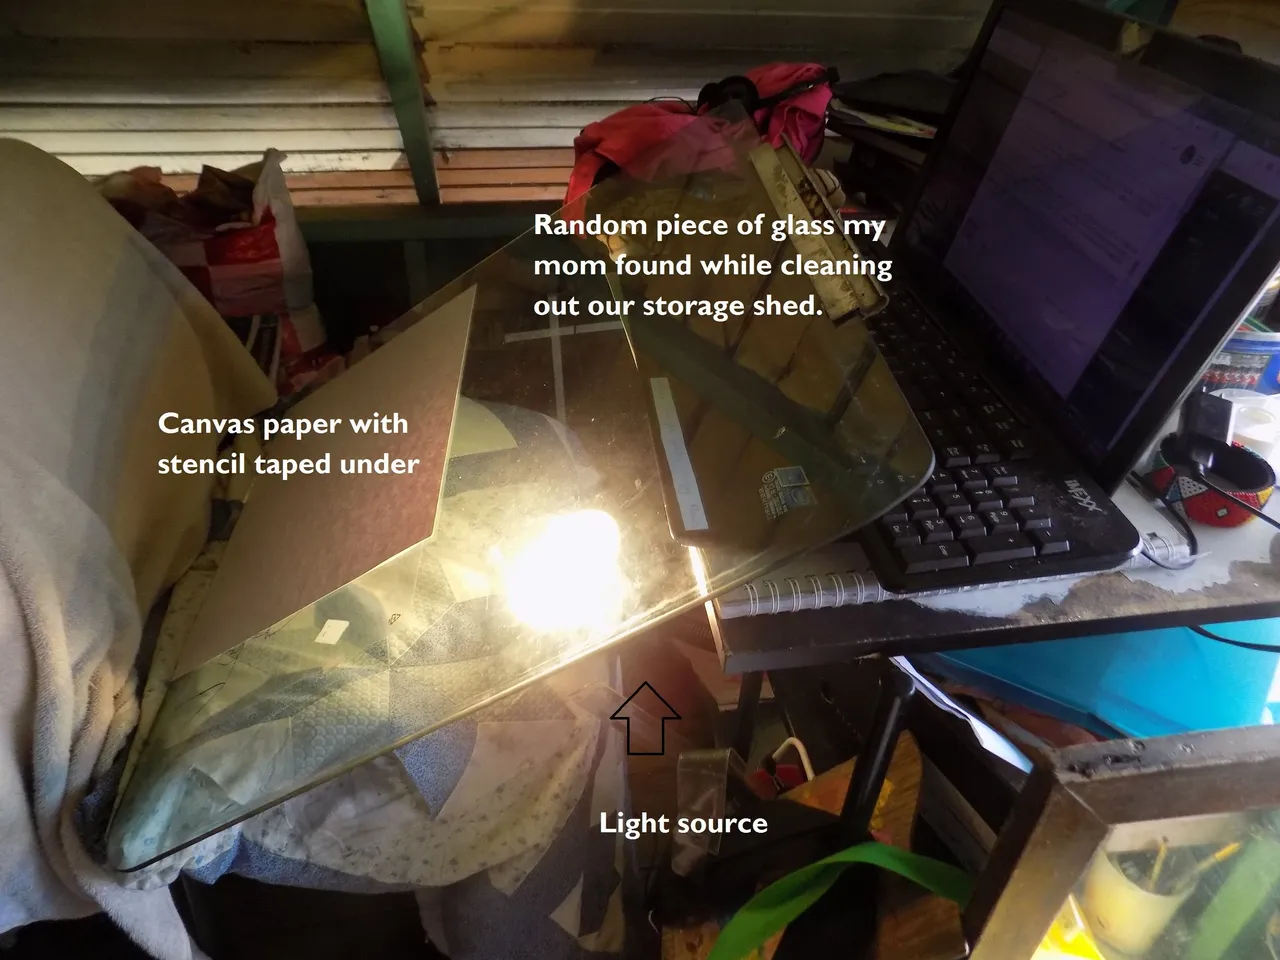
Step 2: Transferring your stencil.
If you already have a light table/box this next step will be a breeze. Simply place the stencil under the paper medium you intend to do the finished portrait on, (of course it needs to be a grade of paper that allows SOME light through. If the paper grade is too dense you'll need a projector instead for this step.)
Now! If you are like myself and you, DO NOT HAVE ANY OF THOSE THINGS :(...
you can try this!
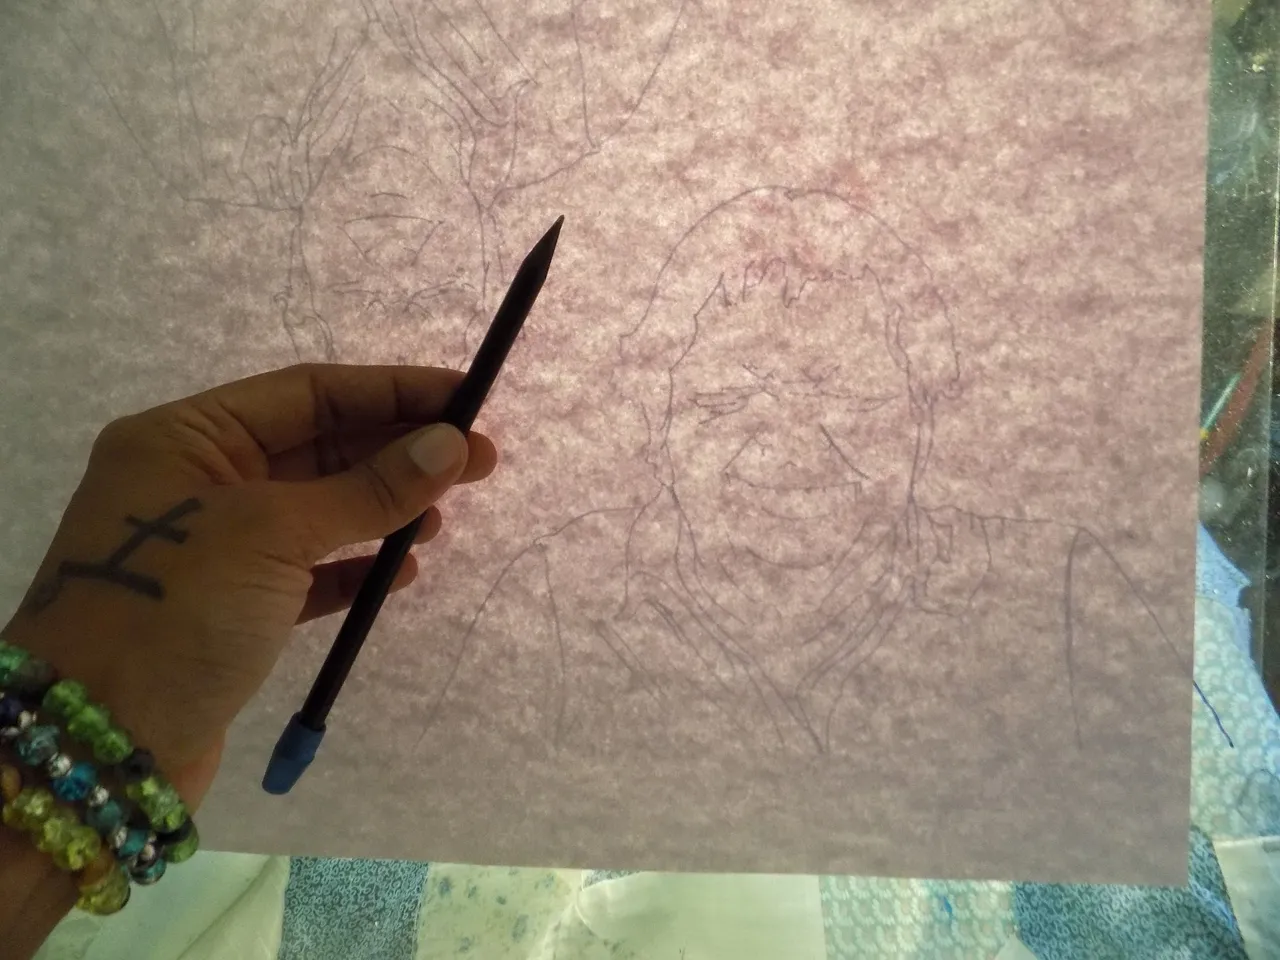
Then you lightly trace the stencil outline onto your canvas paper. Depending on the type of portrait you are doing these lines will need to be erased as you go, so you don't want them too dark. This is a colored portrait so I will be erasing as I go.
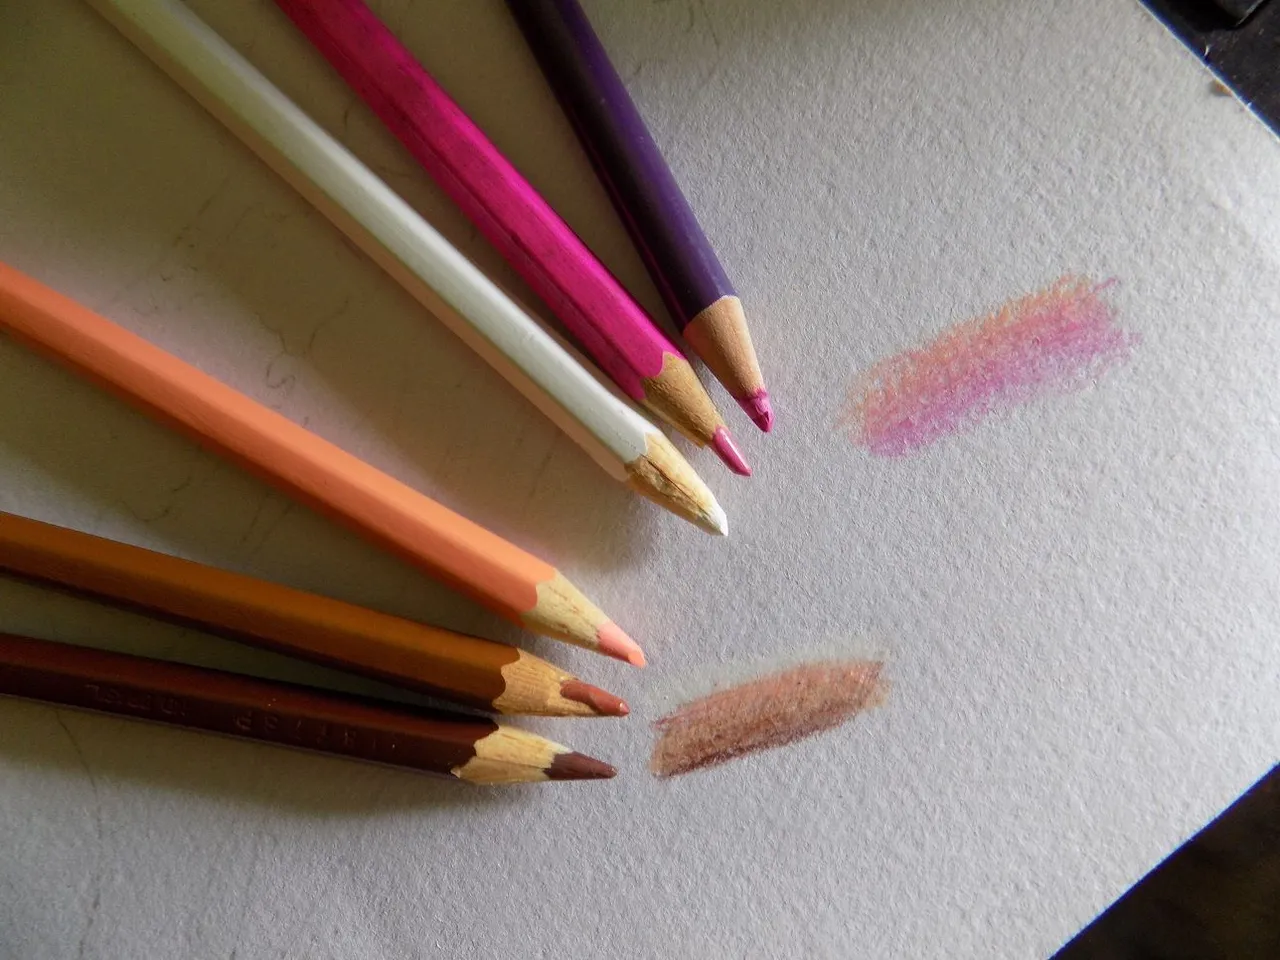
Step 3: Choosing your inks & colors.
This is one of the more challenging steps, but can be made much easier with the use of a color wheel. Have your reference photo up, and using your color wheel, test your colors on a piece of scrap paper of the same grade as your canvas.
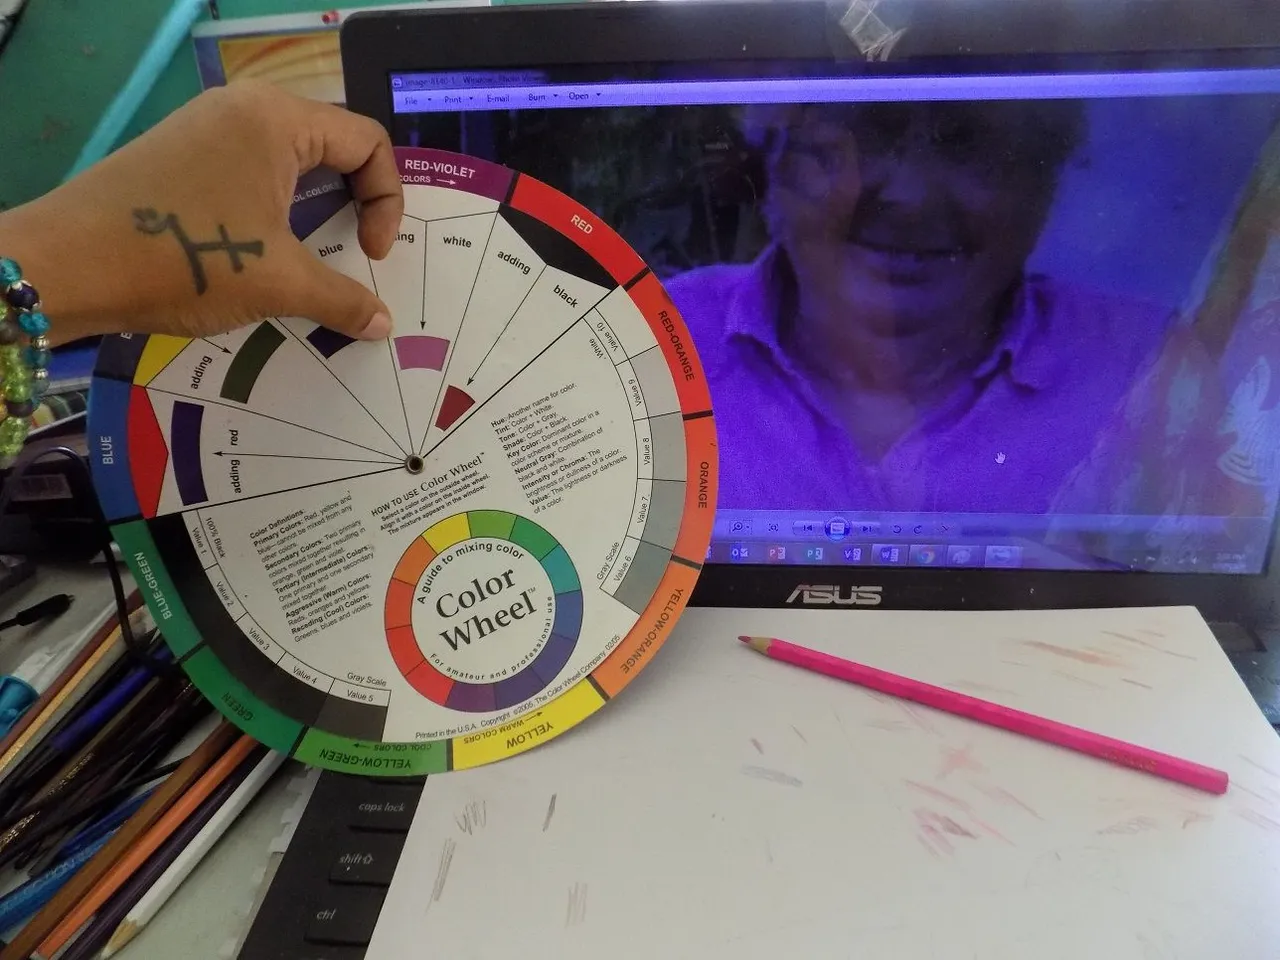
Unfortunately 9/10 times you won't find the perfect colors in the pack so you're going to need to blend. Use the wheel to help you find and adjust specific color grades by adding the appropriate light and dark compliments.
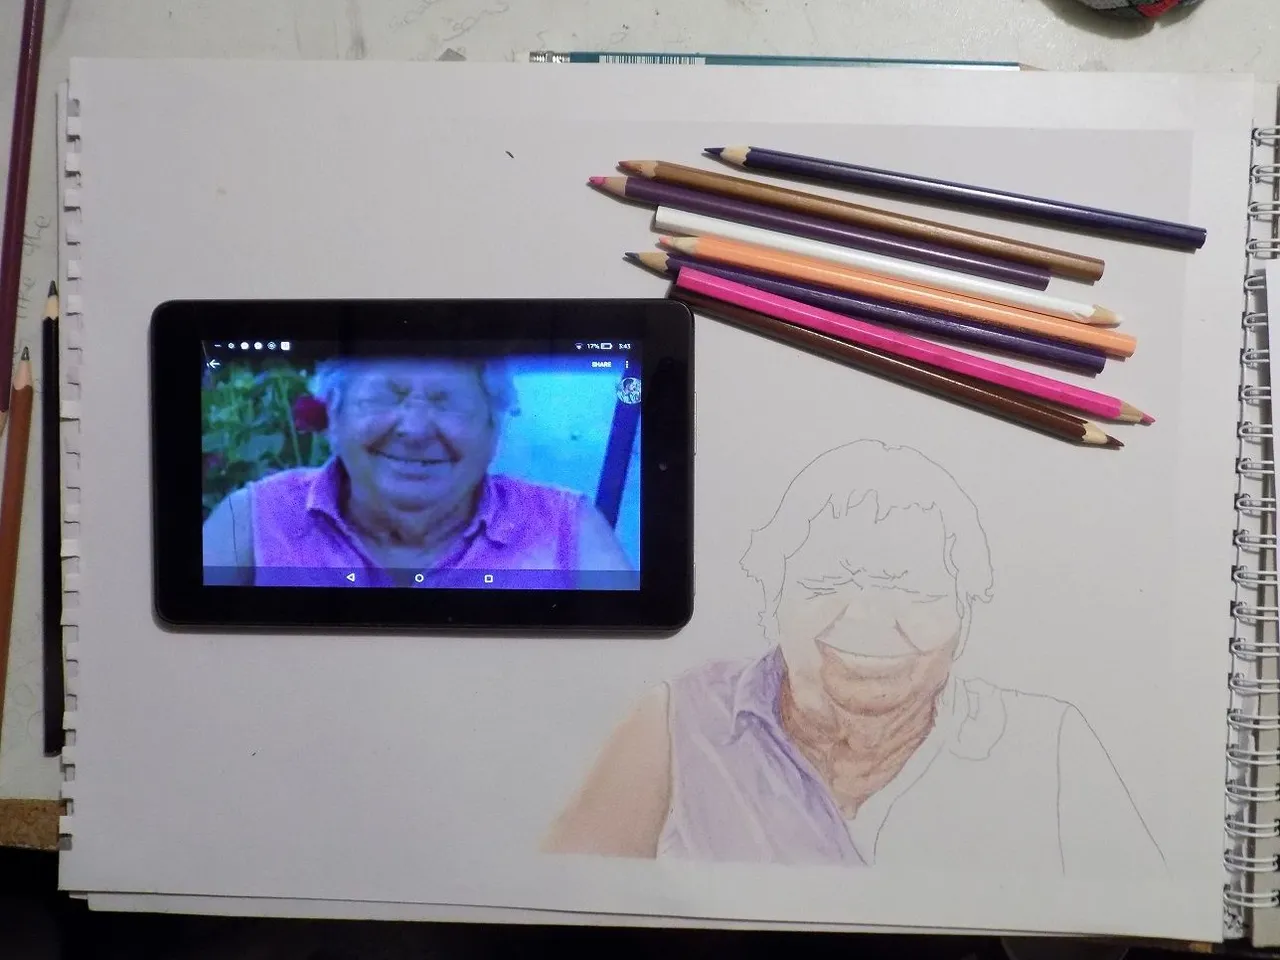
Step 4: Actually draw the thing.
The end.
Just kidding~! :3
Okay, this is where I am currently at on this particular portrait. I was hoping to have it done in time to submit as my last entry for the @Stateofthearts #MarchArtMadness contest but this will have to do.
While going into explicit detail as to 'how' to draw said portrait is possible, I will simply leave you with my golden rule for illustrative portraits.
Start with your highlights and build from there.
Its always easier to build darker tones onto light, and it helps in mentally planning the piece long before you ever start.
However this approach isn't for all artistic mediums. Starting with the highlights on an actual tattoo would be down right pointless in most cases. Just saying.
Hope you guys enjoyed reading this and find it useful in some way. Portraits can be tough but with a little ingenuity and patience, anything is surmountable.