In [Part 4.4] we explored the plugin SuperTable which is robust and used for repeatable, or static content similar to NEO and Matrix.
In [Part 4.3] We installed and went over Relabel which further helps simplify things both for you as the developer/site-builder as well as your content-managers.
In [Part 4.2] we checked out Reasons, which brings some advanced conditional logic with an easy point & click interface to our content management in the dashboard. We got it installed in our build, and looked at how flexible and easy to use it is.
In [Part 4] we looked at NEO one of the most powerful fieldtype plugins available for CraftCMS, we saw all it could do and got it installed on our build.
In [Part 3] we installed Craft and removed the demo fields/sections and templates so that we have an absolutely bare platform to start building upon.
In [Part 2] we covered some of the basics of using the Twig template engine, setting up advanced routes, and of course the eye candy Live Preview.
In [Part 1] we went over the very basics of Craft CMS, what it is, pricing, sections, assets, globals, entry-types, fields, and field-groups.
In [Part 4.5] we're going to look at the plugin LinkIt which greatly simplifies both coding for the developer, as well as selection of links for the content managers.
LinkIt
LinkIt is a field type specific for adding links or buttons to a page/product/entry or anything else for that matter. Without this plugin you would have to use multiple different fields in order to allow selection of different types of links. If you want the content managers to be able to simply click another page on the site for instance, or an asset/image, a product, or just enter an address manually. These would all be separate fields which would clutter the dashboard, and also make for much more code for the developer just for a simple button. That's no fun!
LinkIt to the rescue thankfully! With LinkIt you can use just 1 field (the LinkIt fieldtype) and allow your content managers to select what type of content to link to with all of the options of all the other fields combined, in a very easy to use interface!
You can give the content managers any options you want for the link field, restrict to only certain types of links, only specific types of products, entries, pages, assets, etc.
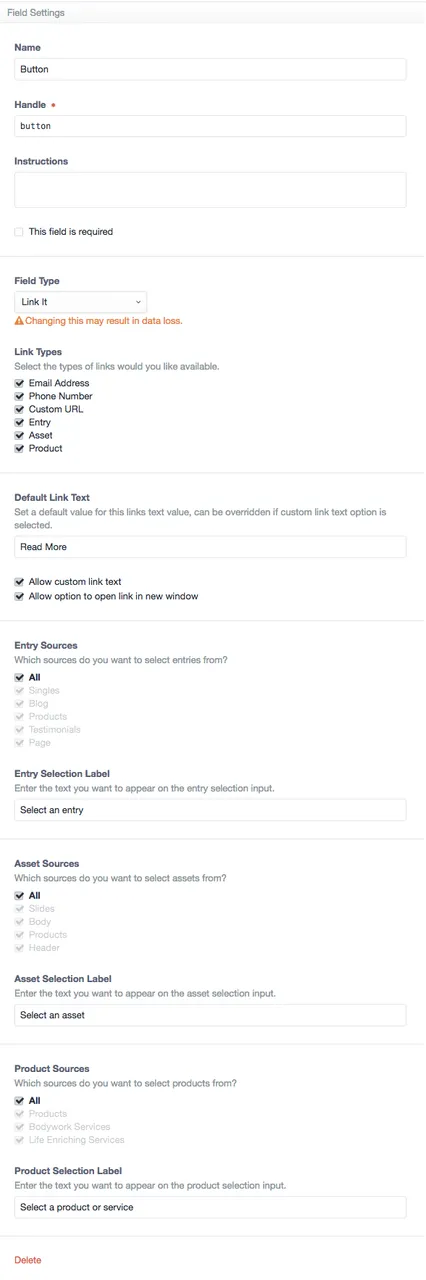
You can even set the text to appear for specific link types to make sure it resonates with what that particular type of content may be used for, allow them to set their own link text (or not), and allow (or not) the content managers to have the links open in the same window, or a new one.
With the options shown above set, this is what will appear for the content managers:
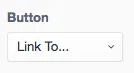
When you click it you are presented with all of the options you allowed:

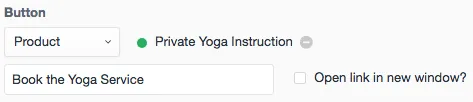
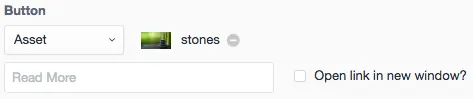
Each option provides it's own unique fields/buttons to make sure the content managers get all the correct info in there and are not bombarded by any they don't need:
Email Address Link - Only accepts valid email addresses and makes the link a MailTo that opens their email application.

Custom URL - Accepts any valid URL

Phone Number - Only accepts phone numbers and allows the link to be clicked to automatically call the telephone.

Entry - Allows you to select any existing page/entry that has already been created.

Product - Allows you to select any existing product/service that has been created in Craft Commerce

Asset - Allows you to select any images or files that have been added to the site.

That's all there is to it! Even better, for basic-use you can output any of the above listed link types as simply as entering this snippet in your code:{{ entry.linkItField }}
Once we start building our site and looking at code, we'll go into other more advanced usage of this field, but for now that's all you need to know to get going with it!
Installing
- Start by downloading the necessary files by clicking here.
- Unzip the files and open the folder.
- Find the folder fruitlinkit and upload it to your server in craft/plugins/
- Open your dashboard and navigate to Settings > Plugins
- Find LinkIt and click install
LinkIt is now installed and ready for use, there is no further configuration necessary.
I HOPE YOU ENJOYED & LEARNED SOMETHING!
As always If you've reached it to the end of the article, given it's not particularly short, I'm going to assume that you enjoyed reading it. Please go ahead and UPVOTE the post, RESTEEM if you think your followers would also find value in it, and make sure to @FOLLOW ME to make sure you don't miss the upcoming articles in this series where we'll get much more in depth and even build a site together from the ground up! EXCITING TIMES!
Thanks to all of my followers both new and old, I hope to continue to bring you quality content that interest you, feel free to comment any requests for any particular topic you'd like to read or learn about if you believe I may be able to answer it for you. Cheers!