Cliffs:
This guide will teach you how to set up gridcoin on Mac OSX, how to change your computer settings so you can find it, how to set up BOINC, link the two together, and start renting your computing power to scientific projects. You may learn a few things about computers along the way, I certainly did.
Backstory
Part of my plan for my deeper dive into the world of cryptocurrency is being more involved with different projects: using, offering, loaning, mining, or coding.
I own a significant amount of Golem coins, which aims to pay users in tokens for lending their computing power to different projects. I commented on a post recently advising an acquaintance who was interested in Storj to also look at the Golem project. Soon afterwards, someone I can only assume is a Gridcoin developer responded to my comment and pouring some salt on Golem while touting Gridcoin, a competitor to Golem. And predictably, when I went to his other posts on steem, they were all about Gridcoin.
That said, Golem is in alpha testing while Gridcoin has a working project I could try, so I decided to throw my hat into the ring and try it out for a few reasons:
- Every time I work with a new coin I'll learn something.
- I wanted to see how much I would receive in rewards.
- I wanted to see how my computer would perform while lending out power.
- There are some really cool projects I could donate my computing power to that are more productive than me reading my twitter feed.
Unfortunately I didn't make very much in rewards.
I actually considered titling this post "I Made $0.005 In Gridcoin Today Lending My Computing Power And You Can Too!"

Gridcoins are currently worth $.025, I made .2 gridcoins, so I made $.0005!
In fact I undoubtedly lost money by increasing my electric bill by more than that. But it was worth the process of learning how to set it up, and as stated before, I'm glad I was able to contribute to a few projects I've heard of before.
I had some issues setting up the requisite software, so I wanted to write an initial guide and review of the process in case other people were interested or had similar problems to me. Most of the advice given was for people on Windows while I have a Mac, so this guide will be geared toward Mac OSX setups.
Note: this is what I did to get it working. I'm not 100% sure that every step is necessary in the process, but I followed a handful of different guides and didn't deviate from tested advice too much and it worked for me.
It required some computer literacy and luckily I had just enough to get it done. Some of you might not, but the process was simple enough that you could copy my steps and follow along.
Part 1: Install Gridcoin
Step 1: Upgrade to Mac OS X 10.12 Sierra
The biggest difference between Sierra and previous versions of the mac operating system is Siri: you can use her in the same way you do on iPhones. But I've noticed other small differences such as font changes and nothing negative. One of the subsequent steps required having this version, so I upgraded.
You can upgrade by going to the mac website and hitting upgrade: https://www.apple.com/macos/sierra/
You'll need at least 15-20 GB of free space on your hard drive, at least 4 GB of RAM, and you need to be currently using version 10.8 or later.
Step 2: Download Xcode
Xcode is an IDE for Mac developers. I do some coding so I figured it would be useful for me down the line, and I assume some other step in this process needed it so I downloaded it.
Just go to this site or your App Store application, and download it.
Step 3: Download Homebrew
Homebrew is a software package management system that helps install software you might need pretty easily.
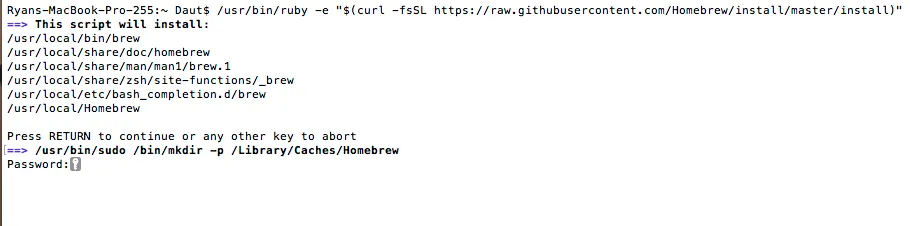
To install it, I went to Homebrew's site and followed the very first step:

Basically you need to open the terminal window and copy paste that line in.
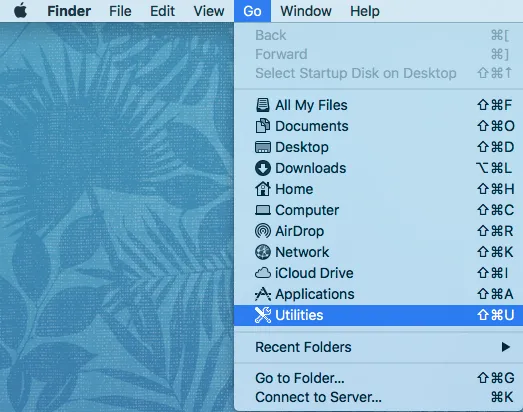
To find the terminal, go to Go -> Utilities on your top menu bar:
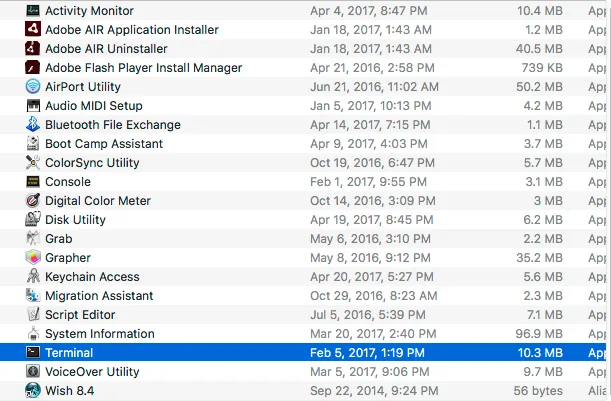
Then scroll down utilities and hit "Terminal":
Inside Terminal, copy paste the text from the HomeBrew site into your window and hit return, then follow the simple instructions--basically hitting return once more and entering your administrator password:
Step 4: Install Gridcoin from Terminal
First you need to tap (homebrew likes to make lots of beer references) the repository where gridcoin is located.
In terminal, type: brew tap git-jiro/jiro

Homebrew will update, then you can install gridcoin immediately after in the terminal:

I already had gridcoin installed so nothing happened, but something will happen in your terminal window!
Step 5: Find Gridcoin
Great, you have Gridcoin installed, but where the #$^& is it? This is actually a harder question than you'd think. Homebrew installed Gridcoin in a hidden folder on my computer and searching for it yielded no results.
Step 5a: Show Hidden Files and Folders in Mac OSX
Go back into Terminal, type the following, and hit enter:
defaults write com.apple.finder AppleShowAllFiles TRUE

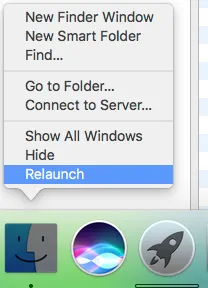
Step 5b: Relaunch Finder and navigate to Gridcoin
Now, relaunch Finder by hitting the option key, right clicking finder on your dock, and hitting "Relaunch":
Reopen finder and you will see a bunch of hidden files and folders that were previously not visible from outside the terminal window.
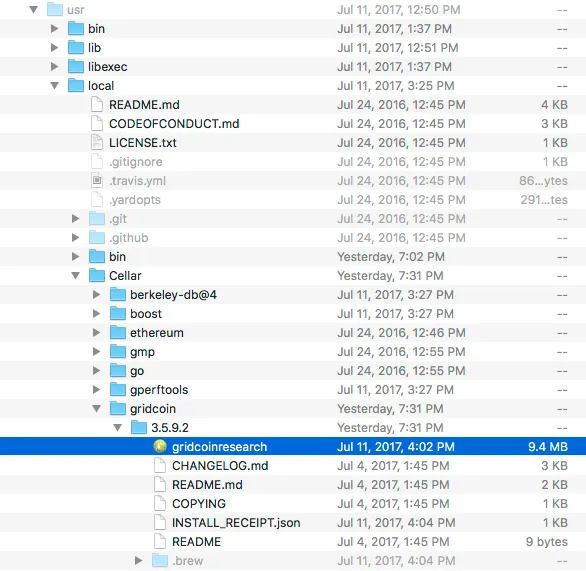
I Navigated through Macintosh HD > usr > local > cellar > gridcoin > 3.5.9.2 > gridcoinresearch
Due to length I decided to do this in multiple parts. Part 2 will come out later today, and that involves installing BOINC and linking your BOINC account to projects that will earn Gridcoin.
My name is Ryan Daut and I'd love to have you as a follower. Click here to go to my page, then click  in the upper right corner if you would like to see my blogs and articles regularly.

I am a professional gambler, and my interests include poker, fantasy sports, football, basketball, MMA, health and fitness, rock climbing, mathematics, astrophysics, cryptocurrency, and computer gaming.