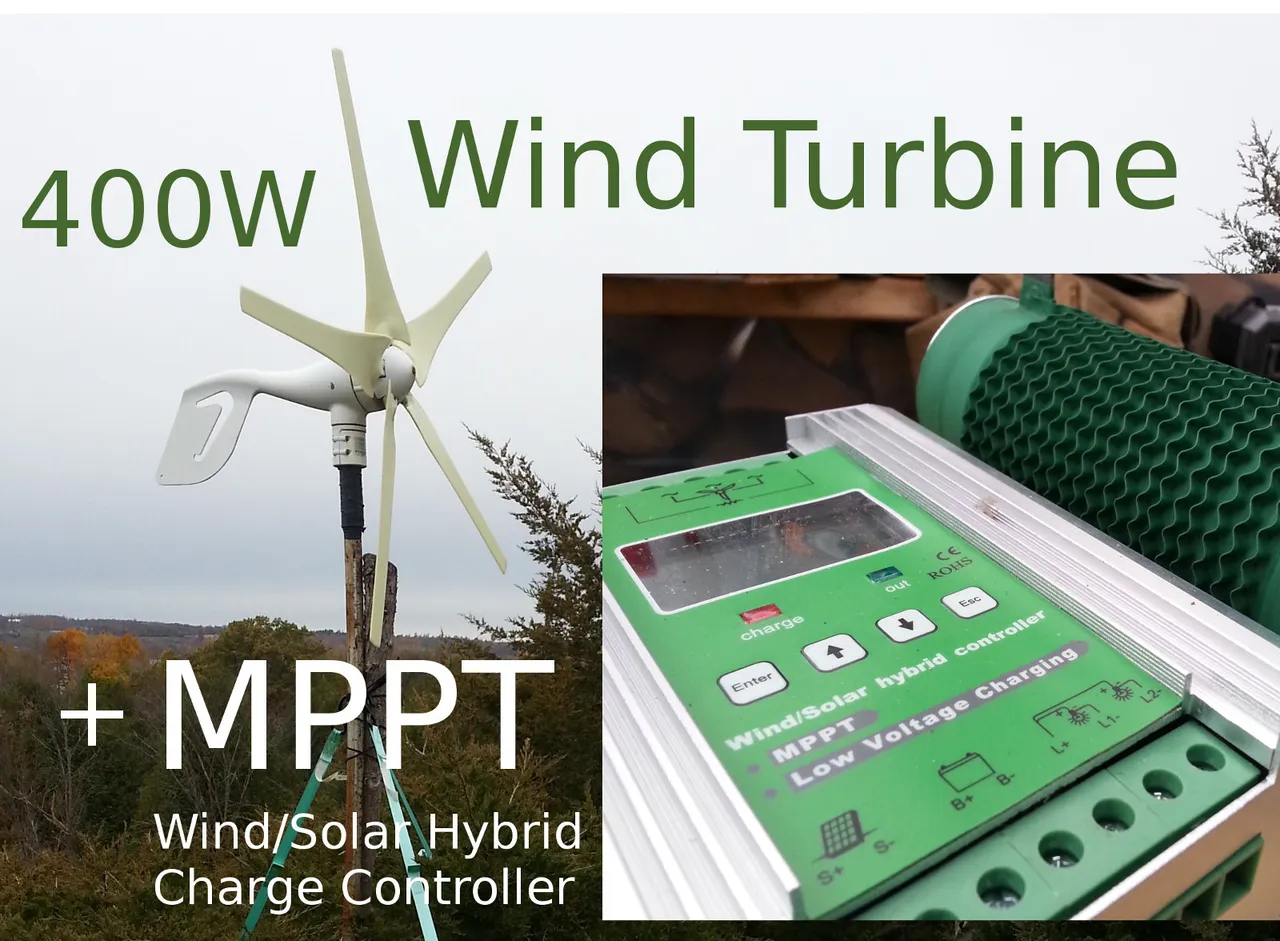
I purchased a 400 Watt wind turbine a little more than a year ago - after living off-grid for a few months. After having the turbine for a year, I didn't feel I was getting the most out of it, so I've replaced the standard PWM wind charge controller with a MPPT hybrid wind/solar charge controller.
Why MPPT Charge Controllers ?
Wind or Solar charge controllers connect to wind turbines or solar panels. The charge controller changes the voltage coming from the turbine or solar panels to 14 volts if it is for charging a 12 volt battery bank. It takes a larger amount of power to charge a larger battery, so if the turbine or panels are not providing enough power, the battery will not be charged. A MPPT charge controller has a capacitor that the low power from a turbine or solar panel input slowly fills. When the capacitor is full, it is able to push the larger amperage of power stored in the capacitor into a large battery.
Why Wind Power ?
I already had 1000 Watts of solar panels on the roof of the cabin, a 60 amp MPPT solar charge controller, a 800 Amp hour bank of batteries, and a backup gas generator with a battery charger for multiple cloudy days. The reasoning for adding the turbine was that at night when the sun is not shining on the solar panels, if the night is windy then the turbine will trickle power to the batteries. There are less hours of daylight in the winter where I live, but it is also much windier than in the summer. It is also often windier in other low light conditions from overcast or storm clouds. Turbine power is a good compliment to a solar power system if there is consistent wind flow where the hybrid wind/solar system is setup.
For more information about off-grid solar power systems and sizing, this previous post goes into more detail: Off-Grid: Complete Solar Power System Flow.
Hybrid Wind/Solar MPPT Charge Controller
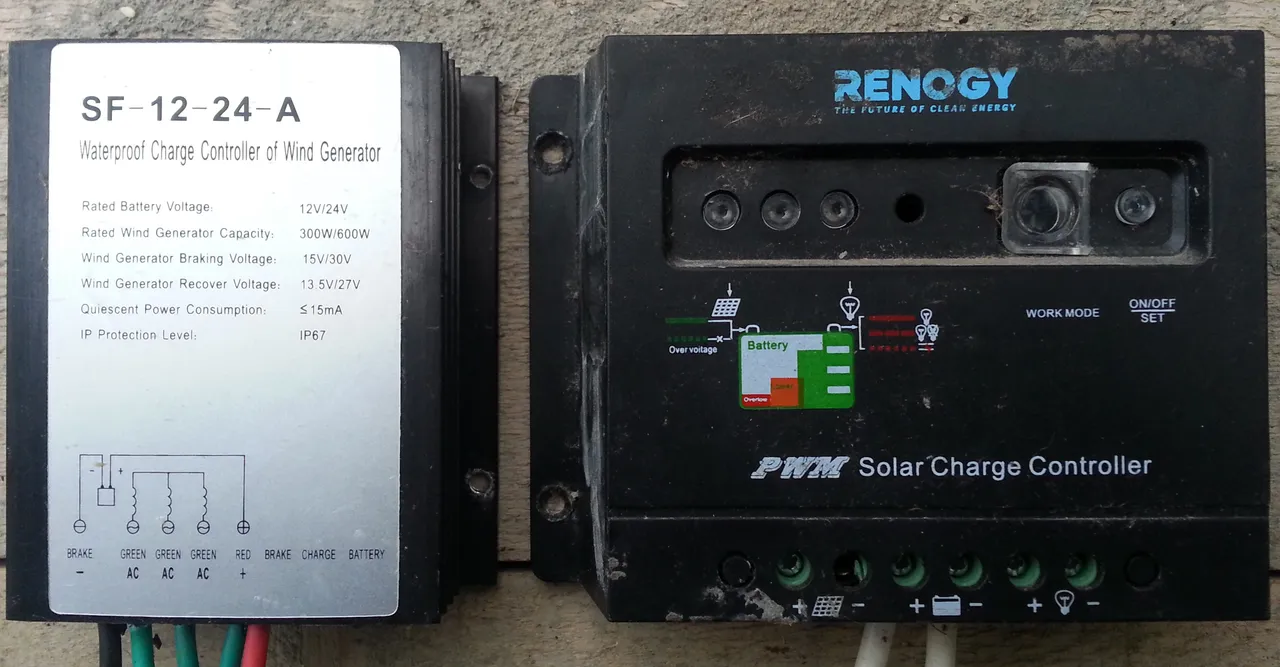
In the first picture below you can see the PWM wind charge controller the 400 Watt turbine came with - next to a standard PWM solar charge controller. Both charge controllers have positive (+) and negative (-) terminals to connect the the battery array. Wind charge controllers have 3 alternating current inputs for the 3 alternating current wires coming from the turbine - the alternating current wires an be connected in any order. Solar charge controllers have positive (+) and negative (-) terminals to connect to the positive (+) and negative (-) wires coming from the solar panels.
|
|
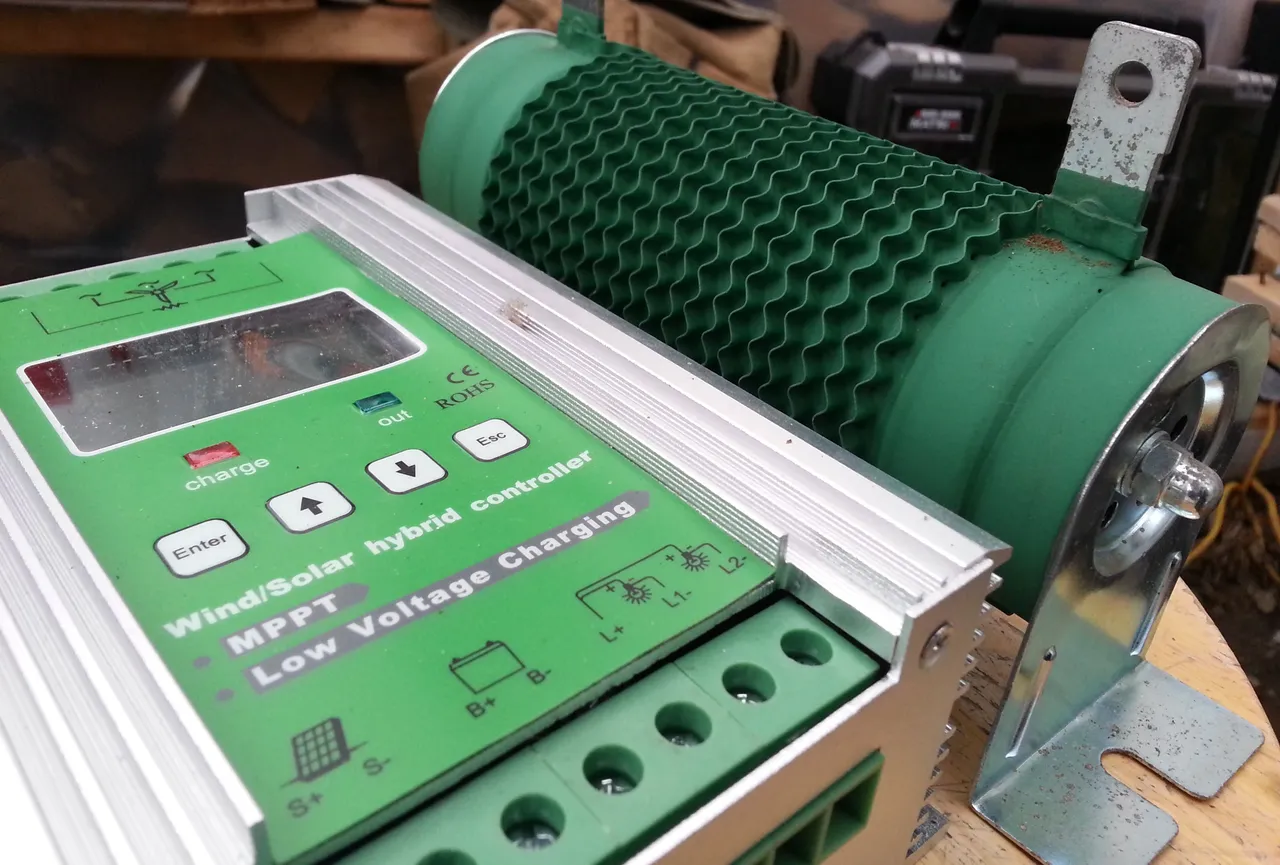
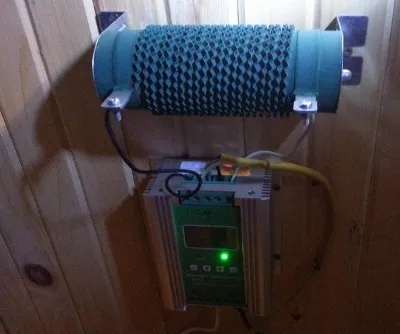
In the second picture above you can see the new hybrid wind/solar MPPT charge controller. The large green cylinder is a heat-sink to prevent the charge controller from overheating. The heat-sink is connected to the two outside resistor terminals on the top of the charge controller.
In the picture below, on the top of the charge controller, you can see the 3 terminals for the 3 attached alternating current wires coming from the turbine. This MPPT charge controller model is rated at 300 Watts, they recommend a wind turbine rated for no more than 600 Watts. My 400 Watt rated wind turbine will not over power this charge controller.
In the picture above, you can see on the bottom of the charge controller, the positive (+) and negative (-) terminals with the wires from the battery connected. To the left of the battery terminals are the terminals for connecting up to 200 Watts of solar panels. To the right of the battery terminals are the load terminals for providing 12 Volt power to electrical devices directly. One of the load terminals are for connecting water heaters, fans, pumps, or other useful devices for when the batteries are full, the charge controller will dump the excess power by powering the devices on this load terminal. Other wind charge controllers, like the PWM one the turbine came with do not have a load dump feature and will apply brakes to the wind turbine when the batteries are full - this is wasteful and potentially damaging to the turbine.
|
|
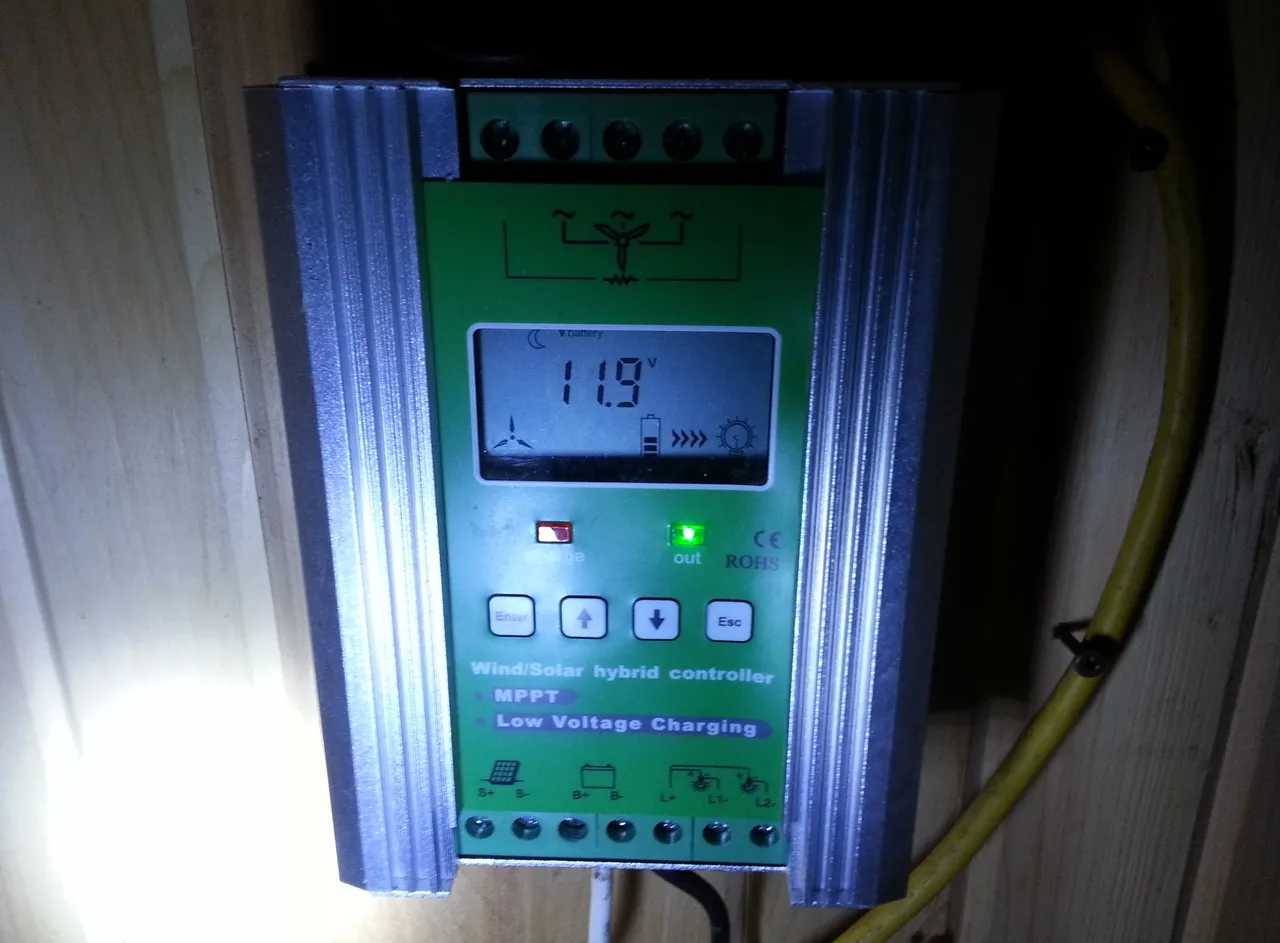
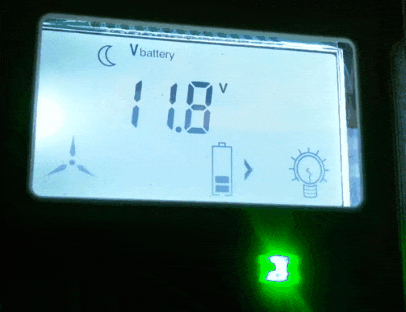
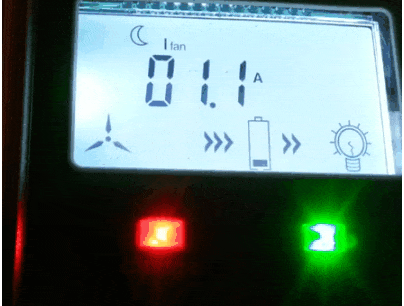
In the first picture above you can see the charge controller and head-sink mounted to the wall inside the cabin. The charge controller has 3 display modes - battery voltage, wind charging amps, and solar charging amps.
For more information about selecting charge controllers and solar panels, Tech Talk: Solar Panel Wattage Selection for your Emergency or Off-Grid Needs
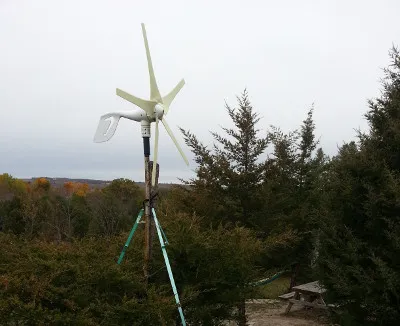
400 Watt Wind Turbine Mount
You can see I have the wind turbine mounted to a topped juniper tree. I found it easier than mounting a pole in the ground. I have another tree trunk lashed to the rooted one, rising above the topped juniper tree. Three tow straps are ran from stakes in the ground to the top of the pole for stabilization. I used a 25 foot extension cord to run the 3 alternating current wires from the turbine to the charge controller inside the cabin.
|
|
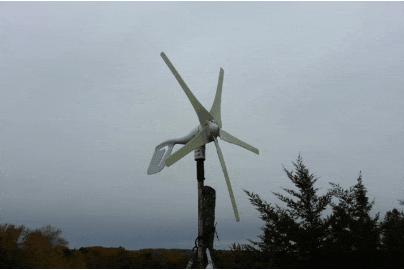
Turbine In Motion
A little breeze finally picked up and I was able to witness the wind charge controller in action. The red charging light was fully lit, the fan display icon was spinning away. It only spun up to 1.3 amps (Amps X Volts (12) = Watts), which is on 15.6 watts, I'll have to wait for a windier day to see the max power I can get out of this turbine.

|
|
Turbine's are a great idea, but larger size turbines are expensive and in most places the sun is much more predicable and consistent than the wind. For anyone building a off-grid power system, I would recommend focusing on the solar side first, then add a turbine later if appropriate.
Have a great day!