I felt like I have been away from the DIY game for sometime now. But I am back with a lengthly project that will test your steady hand, your patients, your organizational skills and your sanity. I performed this project a couple mo the back but I am just now getting this post out.
With the charging port of my iPhone 6 getting really Finicky over the past... I don’t know 6 months or longer, I finally decided it was time to do something about it. I had no idea how difficult this little DIY replacement project was going to be but I went for it anyway. I don’t do well with small intricate, delicate things.... I am a Lineman, we are known for breaking things people say are unbreakable. Hey Ish happens right?! I’m normally wrenching on my Diesel Truck or using power tools to make something. Yet... every once in a while I like to try my luck at some electronics repair action. Wait... did I just say that I Like to??? Great the cat is out of the bag!!! My Manly persona is ruined!!! HAHAHAHA
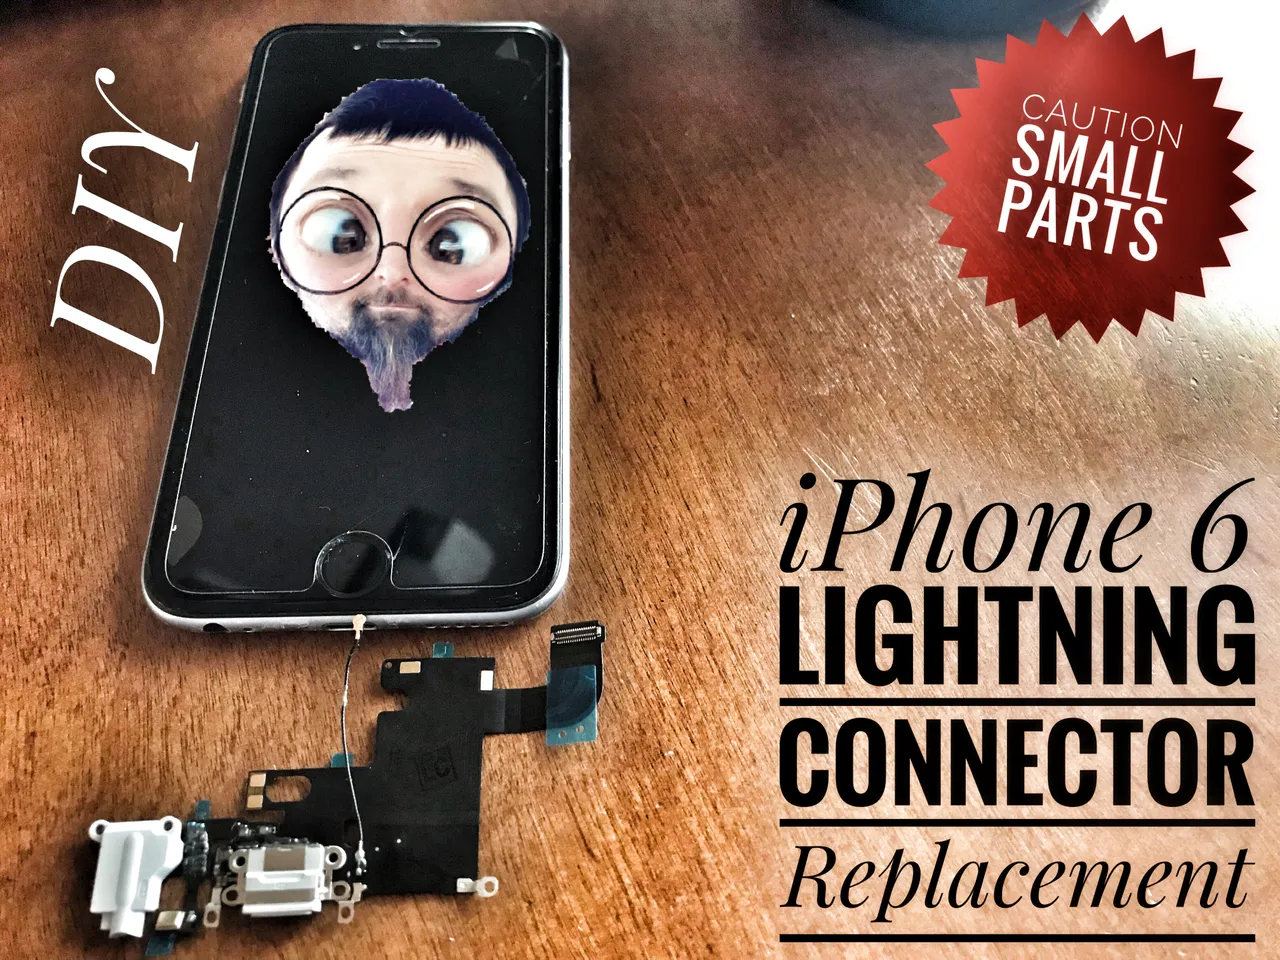
iPhone 6 Lightning Connector Assembly Replacement
Smartphones are stupid expensive and I always like to get the best bang for my buck. Why spend $2 - 3 maybe even $900 on a brand new iPhone when you can spend $20 - $30 and fix a small malfunction or broken part of the iPhone you currently have. Makes sense to me but then again we are a pretty wasteful society. If it breaks get a new one right...
Nope not in the Splatts House!!
My iPhone 6 has taken a royal beating over the years and I am not quite ready to put it to rest. It works just fine despite being dropped repeatedly, constantly getting slammed around in the side pocket of my work jeans, every port on the phone has been filled with dirt numerous times, plus it is quite the swimmer too. After all that abuse over the past 4+ years, my battery finally gave out about a year ago. This was the first time opening up an iPhone to perform a repair. With parts an instructions from iFix-it The repair was a 💯 % success. So why not attempt another?? This time my Lightning port was giving me issues. I have to have the plug in exactly the right position to get the contacts lined up so it would charge. Being that my iPhone 6 acts as my alarm in the morning, sometimes it wouldn’t charge and the battery would be dead in the morning. Therefore no alarm which resulted in nearly late to work a few times.
Ok, Enough Jibber-Jabber!! Let’s get this iPhone 6 fixed up!

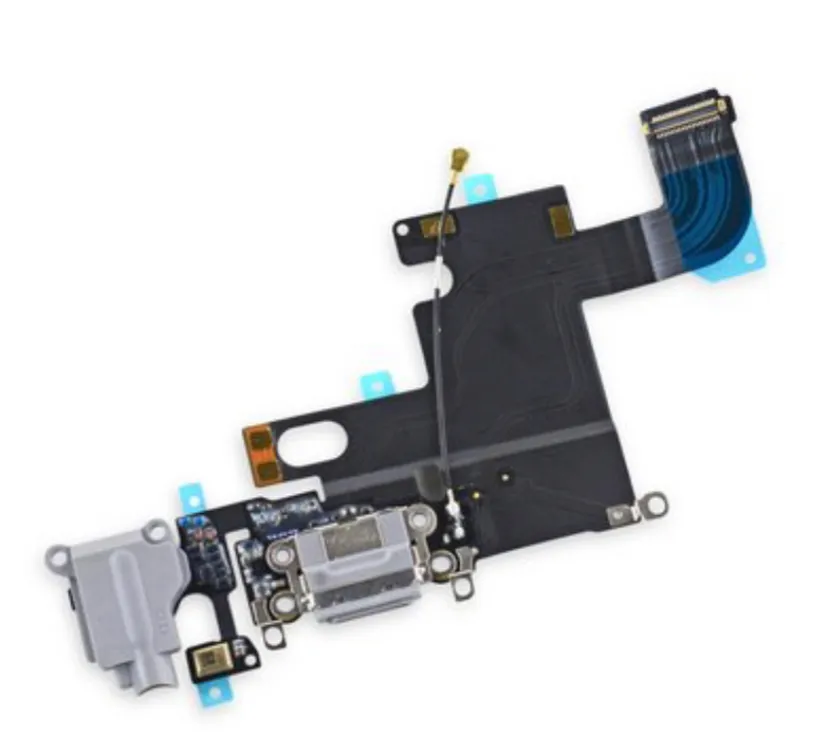
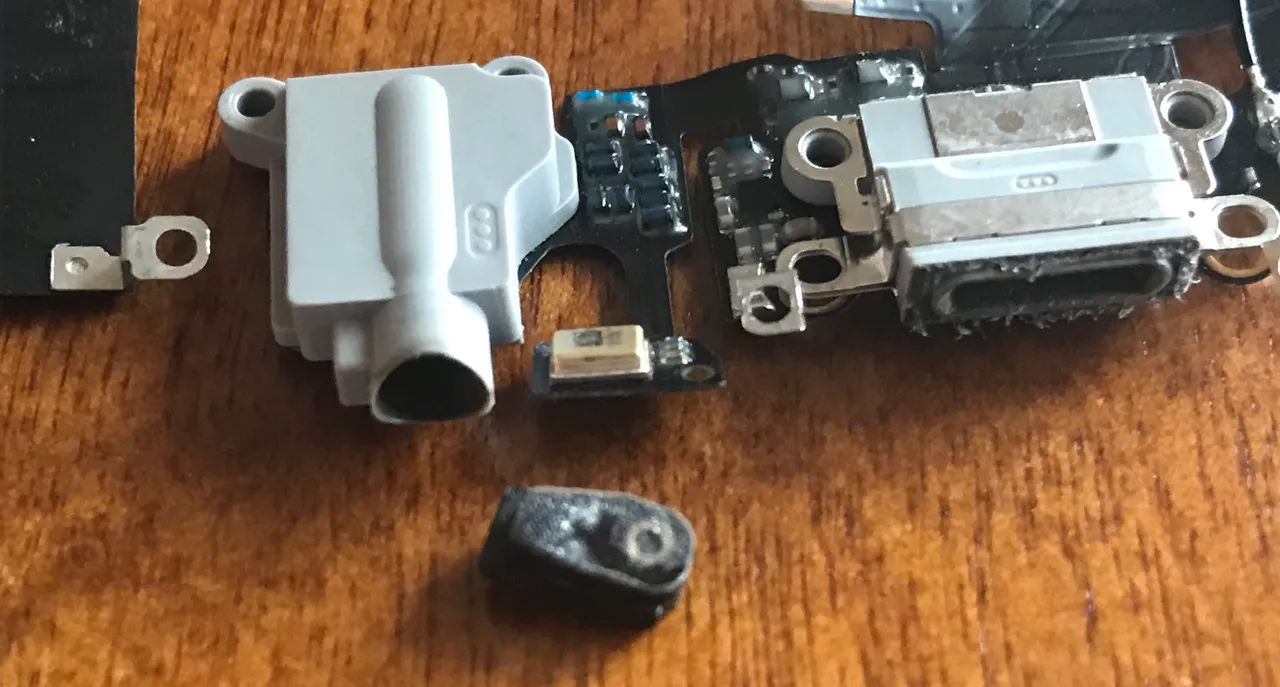
Let’s get started with the parts and tools needed for this DIY repair project. The Lightning Port Assembly consists of a few different pieces all in one. The Aux/headphone jack, microphone, and of course the Lightning port. So we will need one of those which can be purchased Here for $19.99
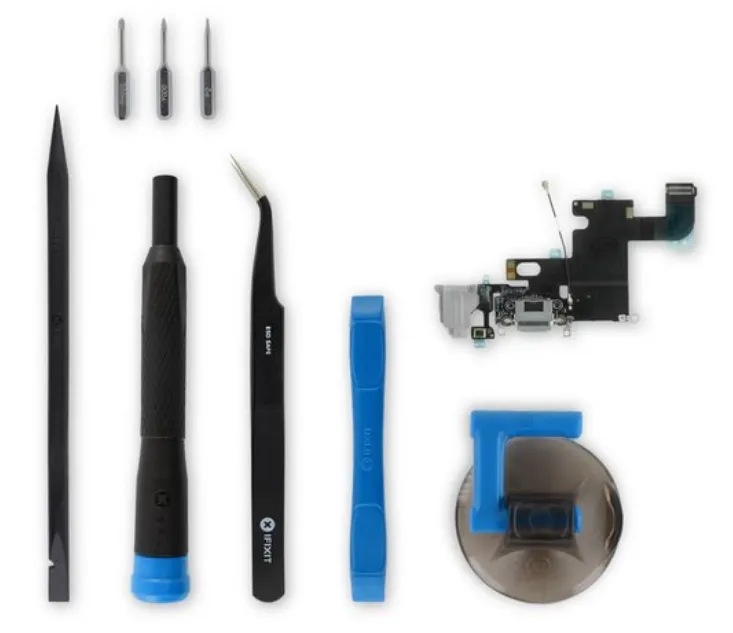
At ifixit they give you the option to buy just the part or you can get the part and the tool kit needed to perform the job. For the tool kit and the Lightning Connector Assembly it wil cost $24.99. That isn’t bad, $5 for the tool kit, that’s cheap!! It is just a basic tool kit to get the job done but that is all you need, right?
So with the part and tools in hand let’s get this project underway!!

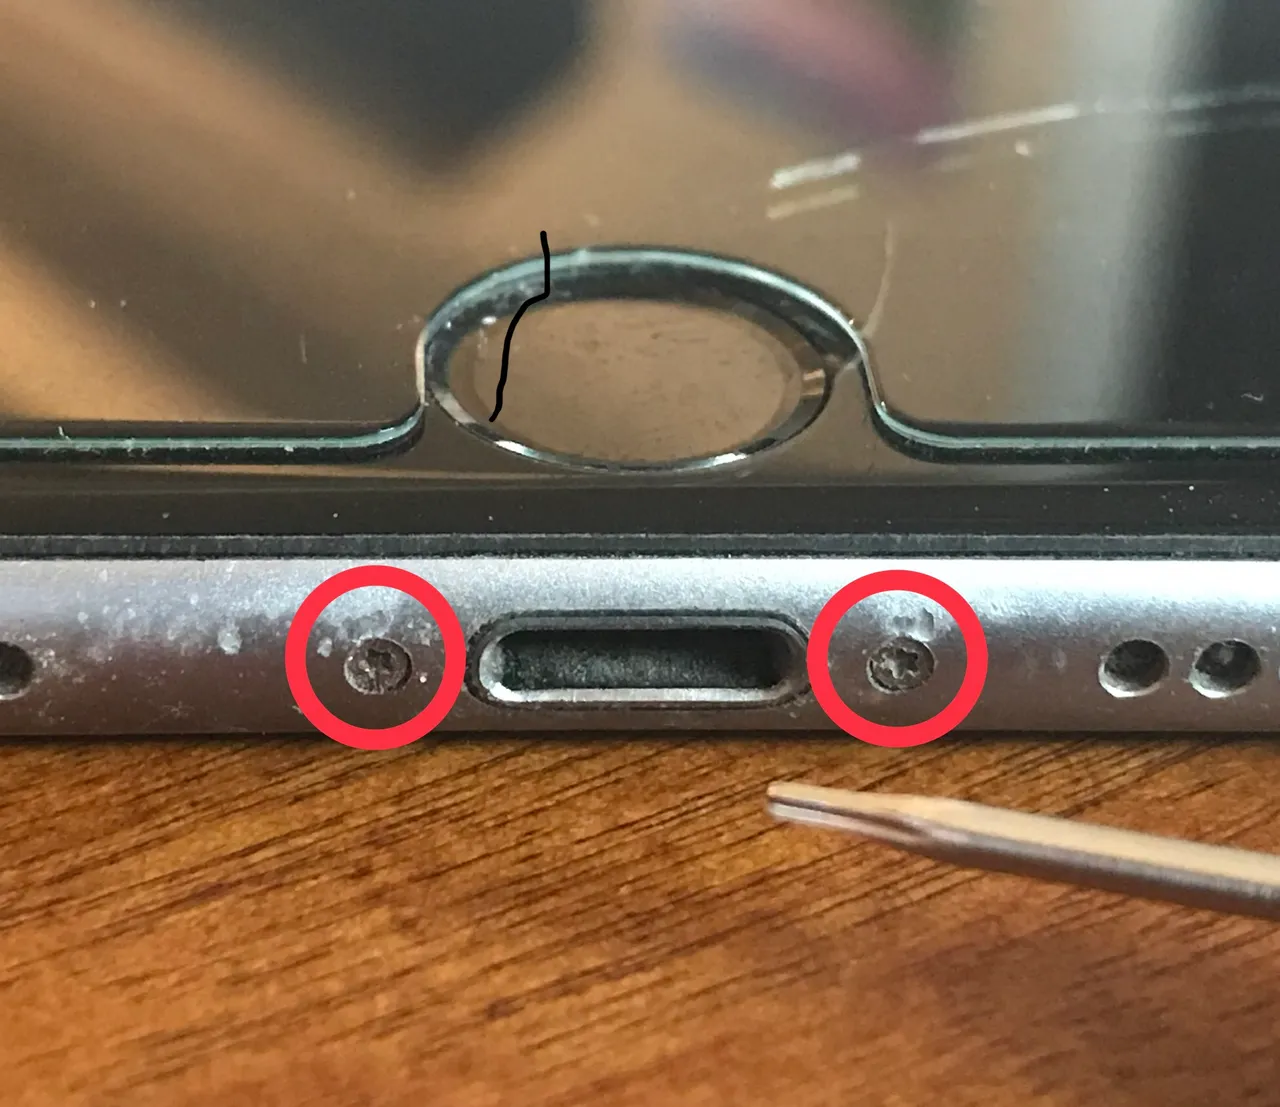
The first step is to split the phone in half, no not with a saw, we need to separate the screen from the back of the phone. First, turn the phone off completely. Then locate the 2 Pentalobe screws on either side of the Lightning Port. Pentalobe.... ya I have no idea who came up with that name. It looks like a star to me, so I will just call them star screws so I don’t have to spell out one of the weirdest word I have seen in a while.
I highly recommend using some sort of magnetic tray to hold all of these tiny screws that you will be removing. Trust me there are going to be quite a few screws and retaining plates.
Take the 2 star screws and place them in your magnetic tray or someplace where you can keep them organized. There are quite a few screws and they are all different sizes and need to go back in their exact places. Keeping organized is the name of the game on this one.
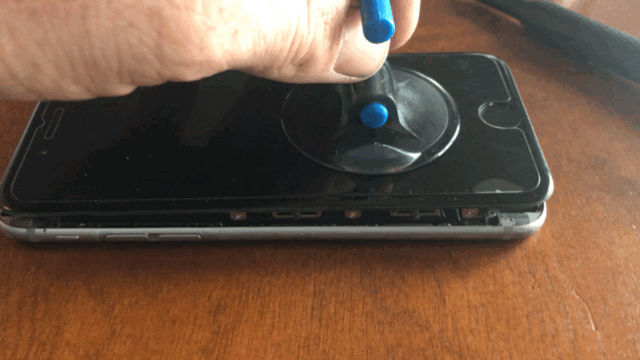
Using the suction cup provided in the tool kit, press it down on the screen just above the home button. Using the blue pry tool gently seperate the screen from the back of the phone. Lifting up on the suction cup and prying with the pry tool to separate.
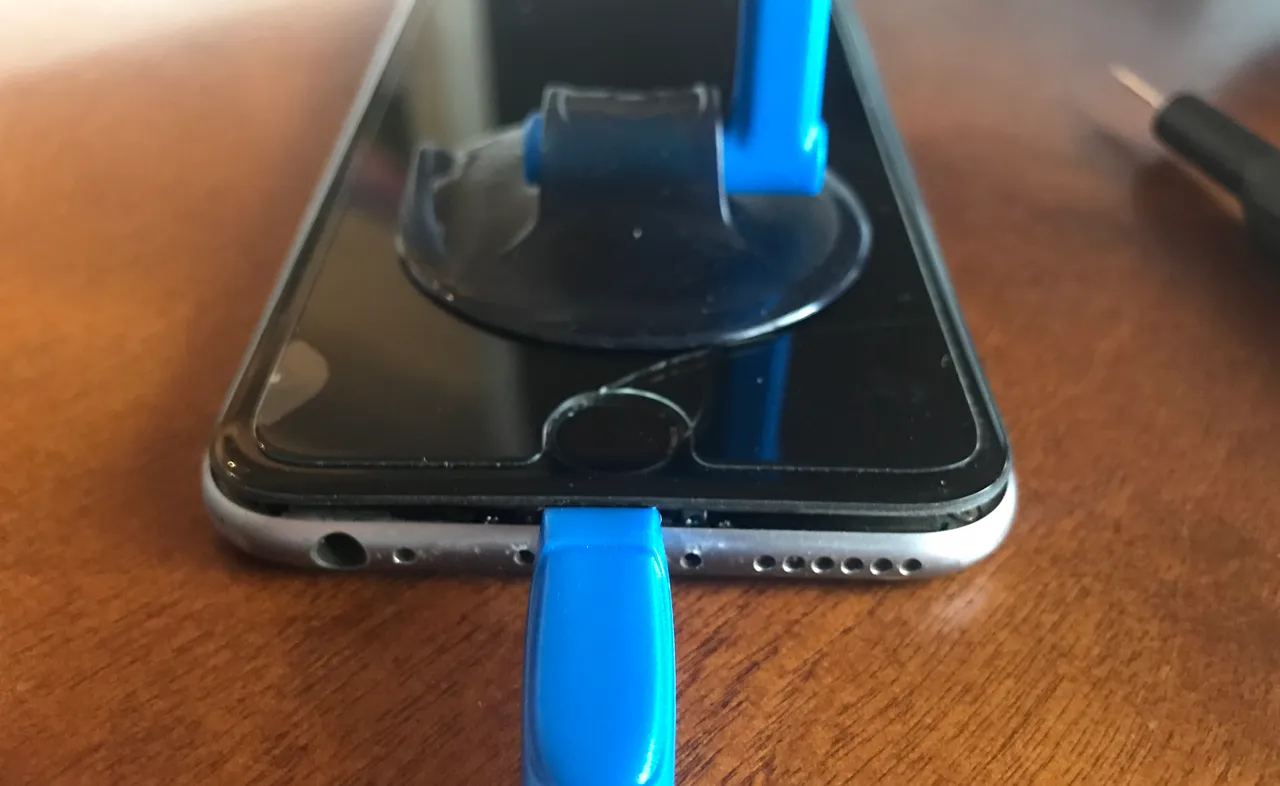
My screen had a big crack in it with a screen protector over the top and it still worked just fine. The screen will flip up toward the top of the phone. Think of the top of the phone having a hinge on it. There are several connectors that hold the screen to the back of the phone, so be careful.
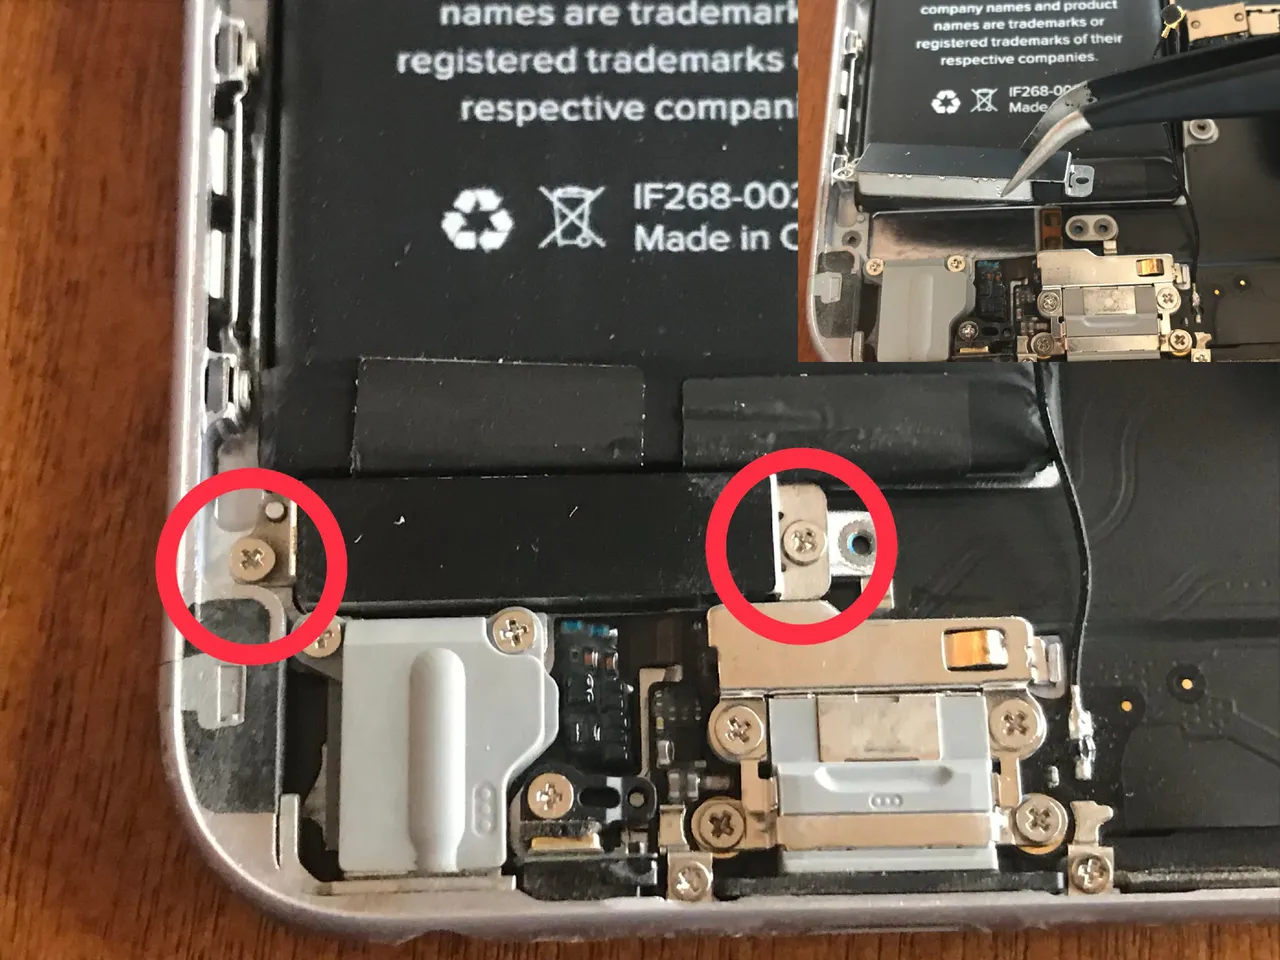
Support the screen with a book or something to keep it at a 90 degree angle while we disconnect the battery. You don’t want the screen just flopping around. Then, remove the 2 Phillips head screws that hold the battery connector retaining plate.
Then remove the plate and place it in a safe place with the screws in their correct places. Again keeping track of each screw and it’s place is very important. I am using my magnetic tray that I use when I am working on my vehicles. I think you can pick one up for around $10.
Disconnect the battery by gently prying up on the connector. Be sure it is just the connector and not the logic board itself. It comes off rather easy and you will know when you got it. Just be gentle.
Now we are going to remove the screen from the back of the phone. This isn’t totally necessary but I think it makes it easier just incase you have to reposition the phone during future steps in the process.
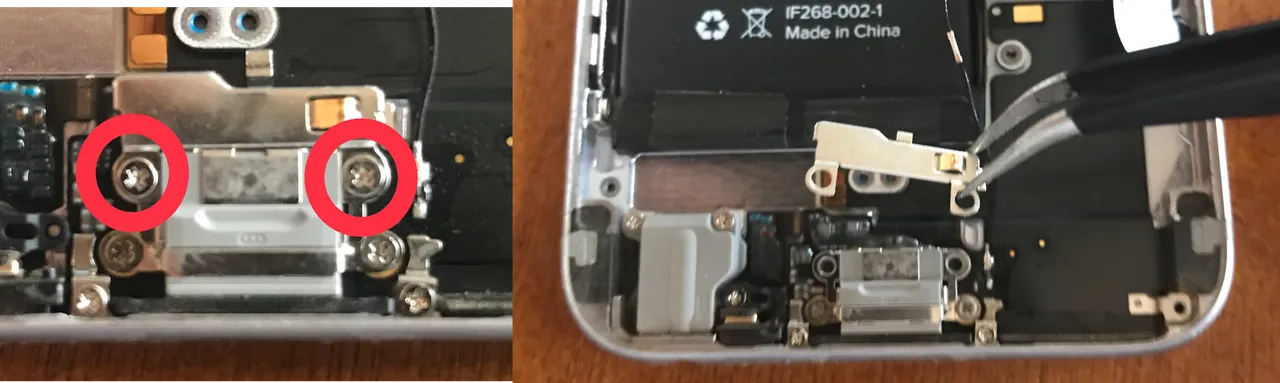
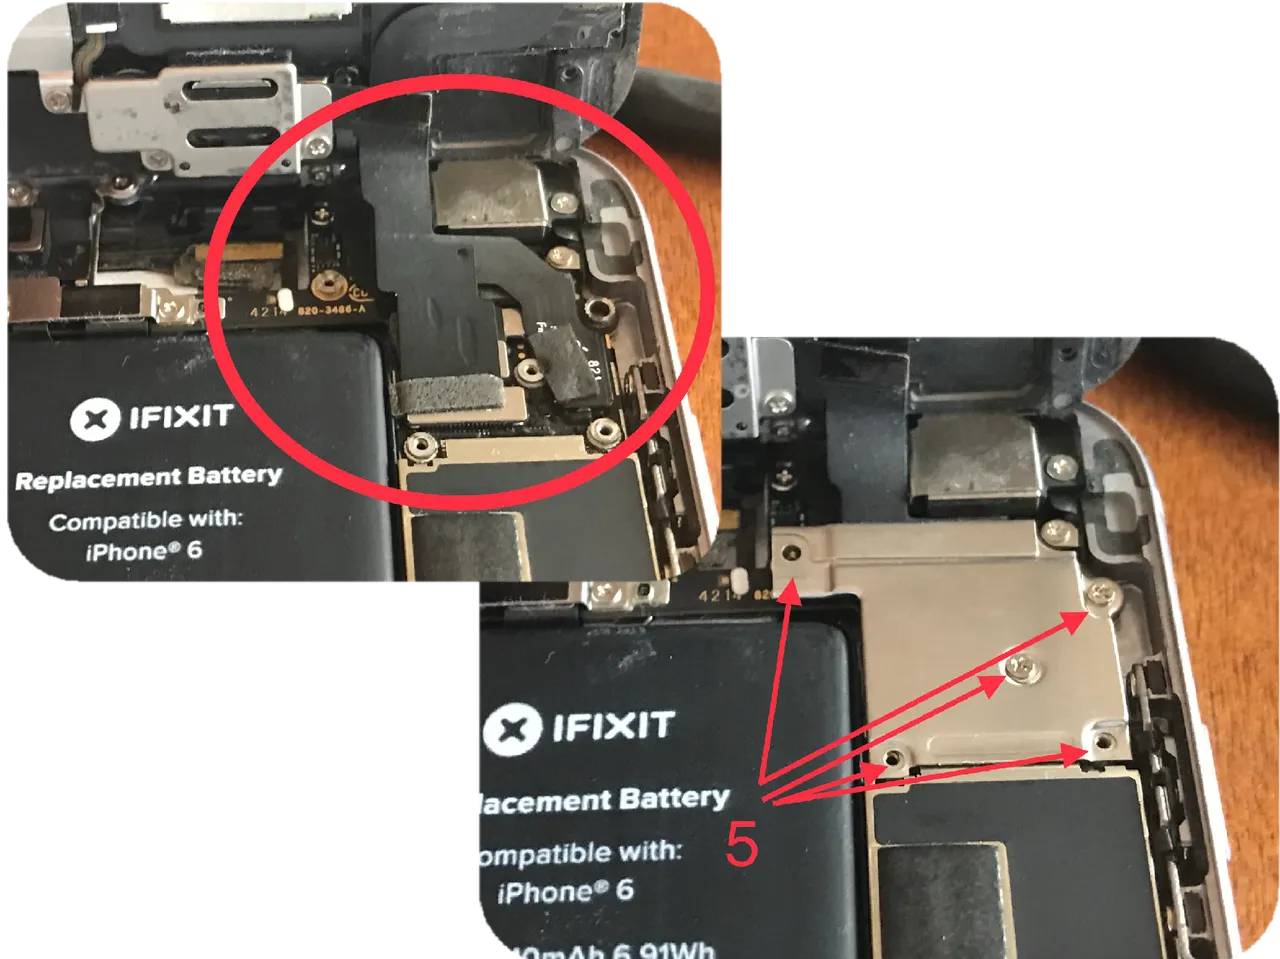
Now we are going to remove the 5 Phillips screws on the connector hold-down plate. Then underneath that there are 5 connectors that will need to be unplugged in order to remove the screen.
With the screen fully separated from the rest of the phone, we can get into freeing up the old Lightning Connector Assembly. There are quite a few screws and connectors that need to come off in order to pull it out. Just be patient, take your time, and stay organized.
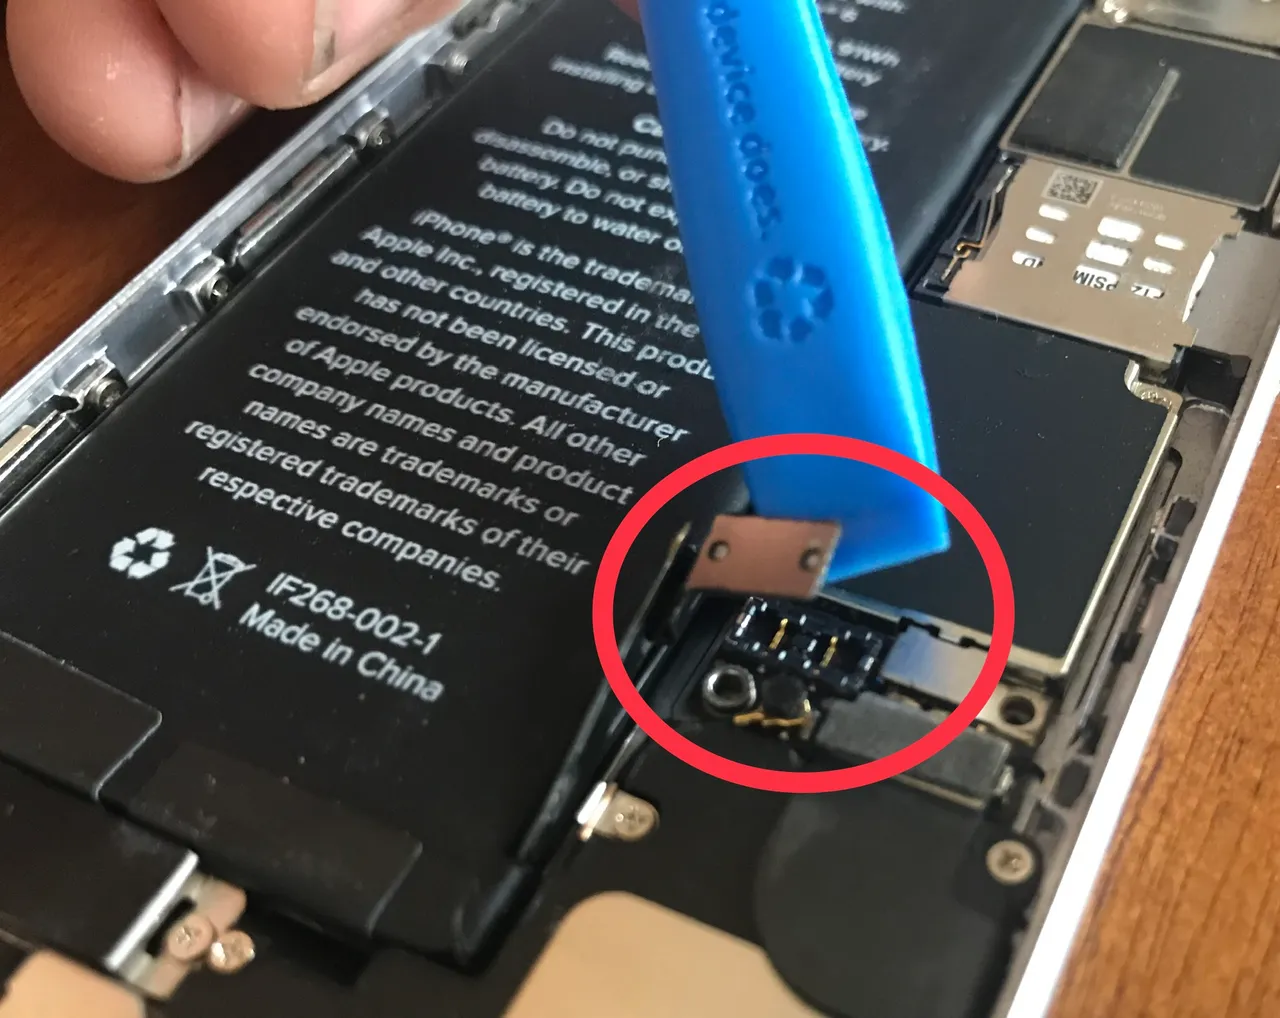
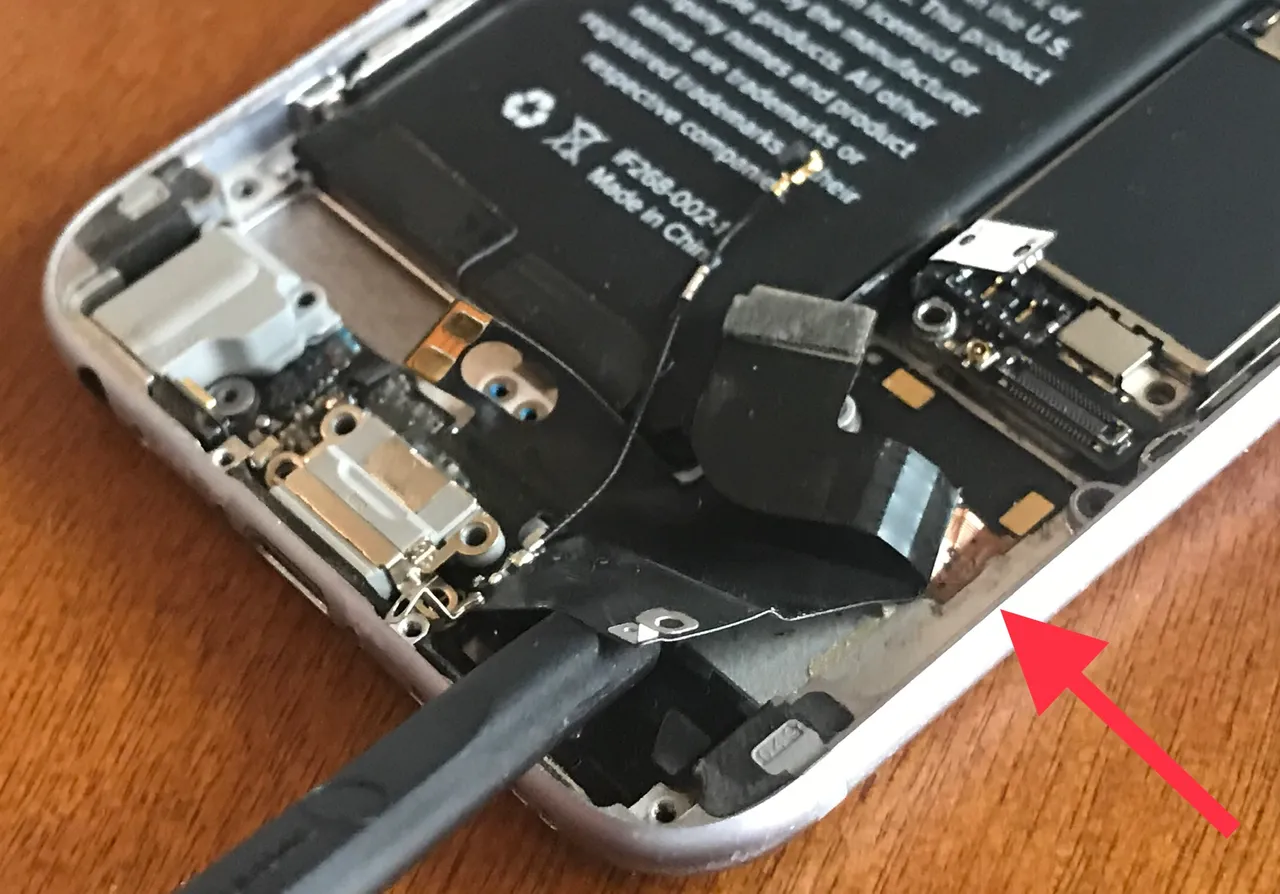
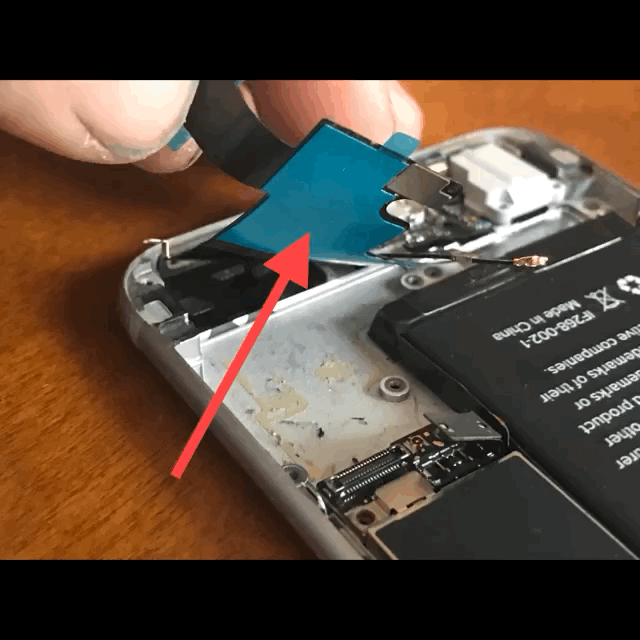
Next we will disconnect the Lightning Connector Assembly Cable using the pry tool. It has a rather thick band attached to it. I placed my pry tool under the band and gently lifted the connector off the logic board
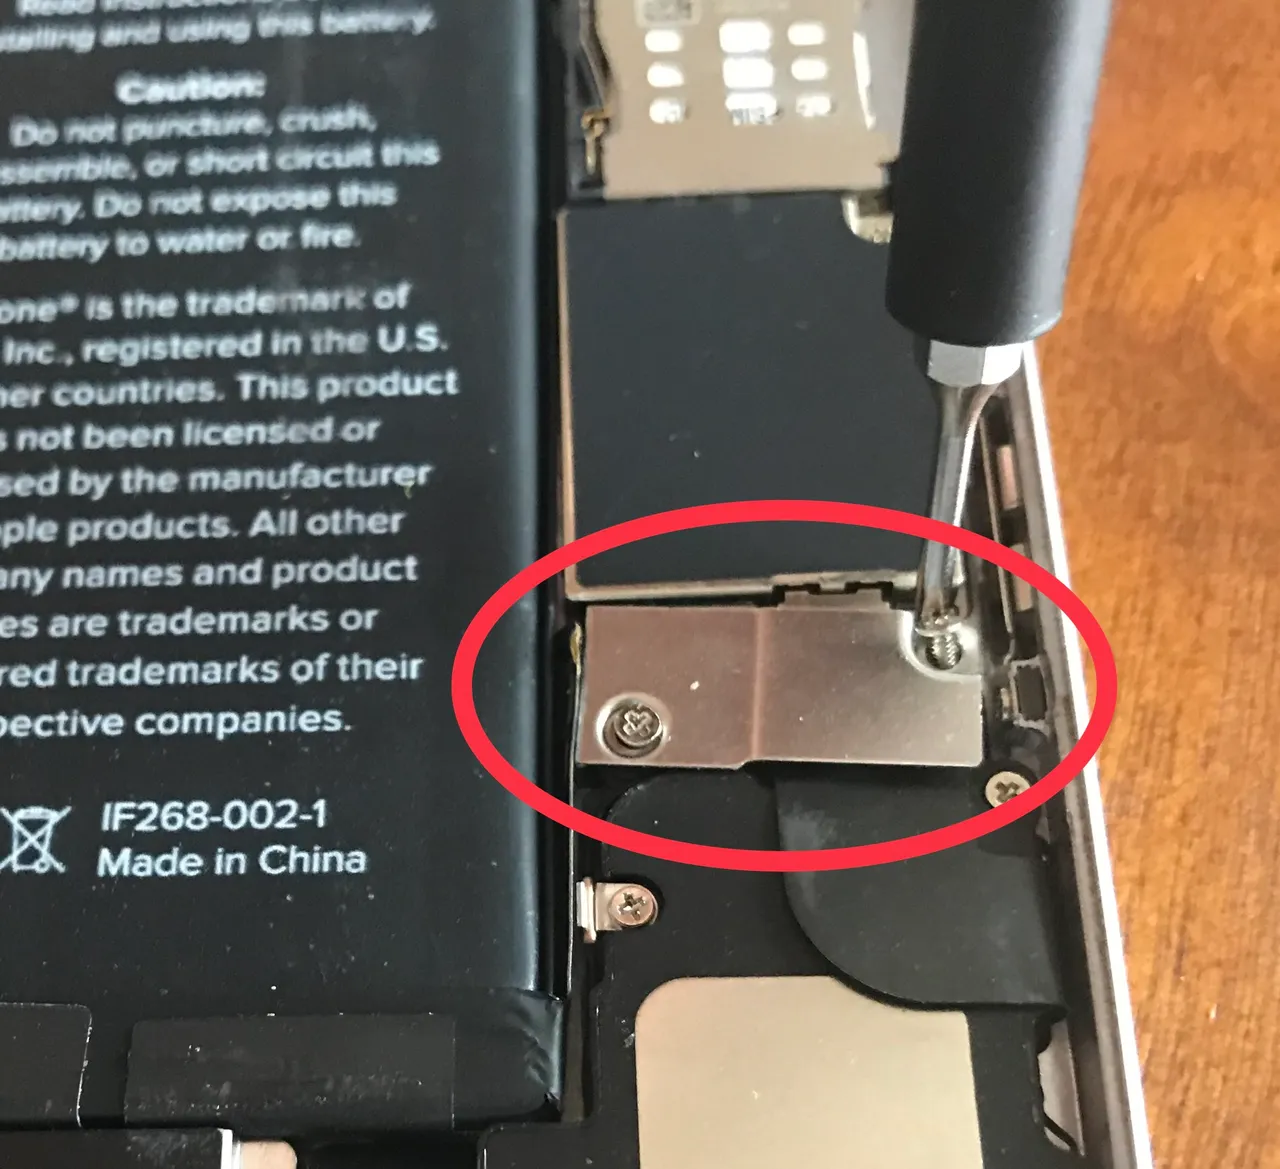
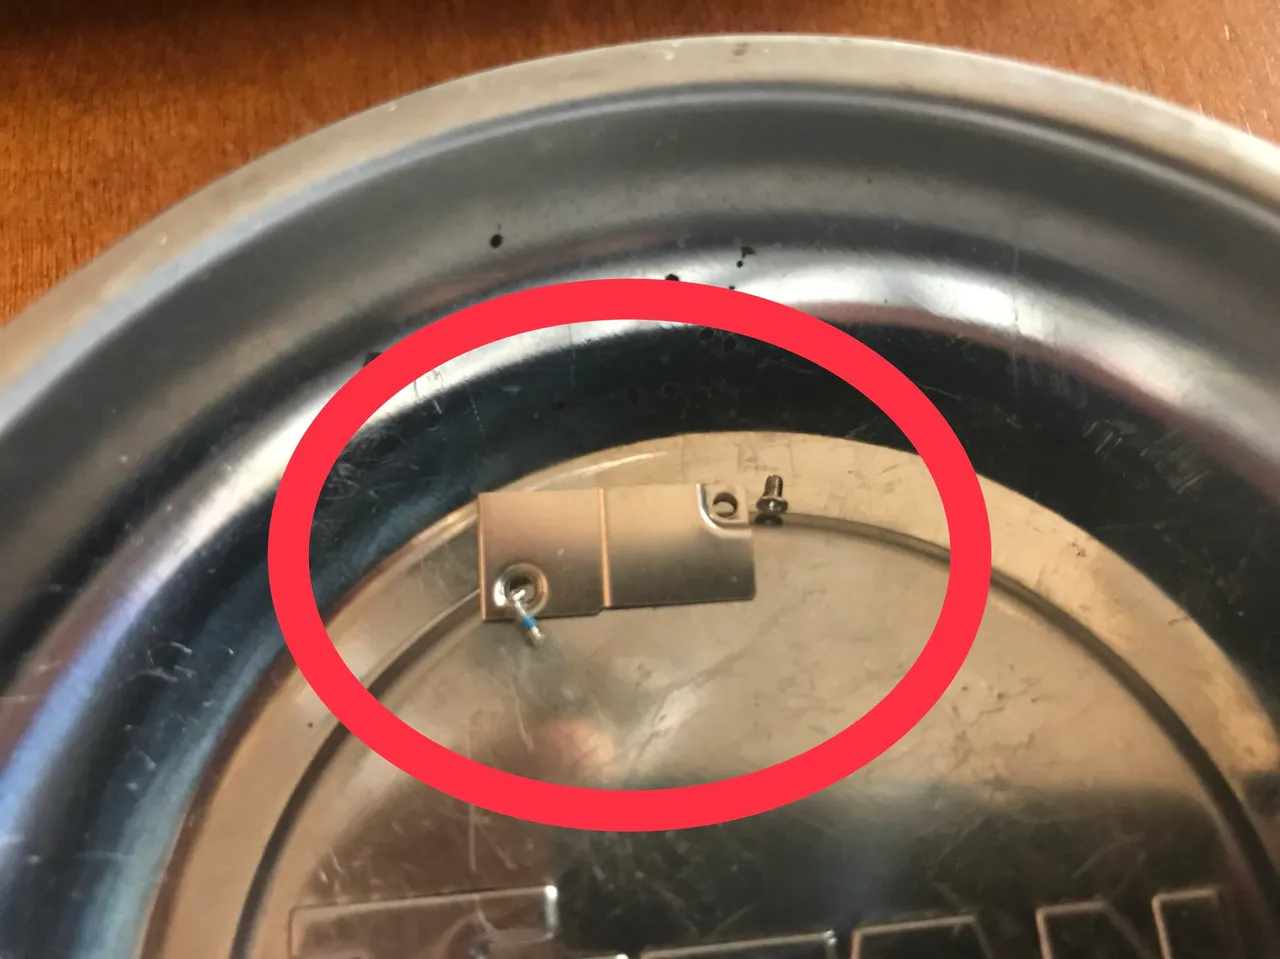
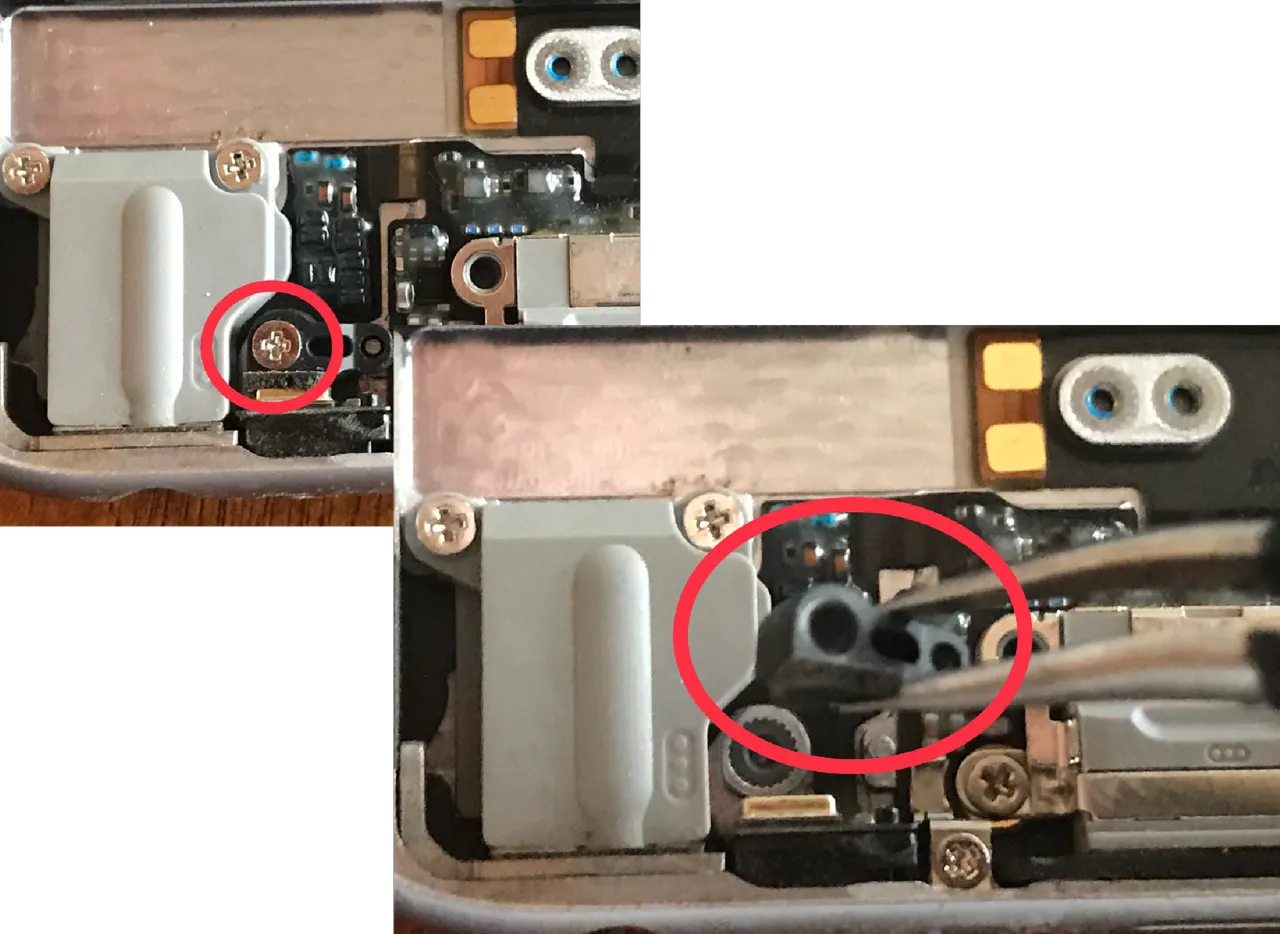
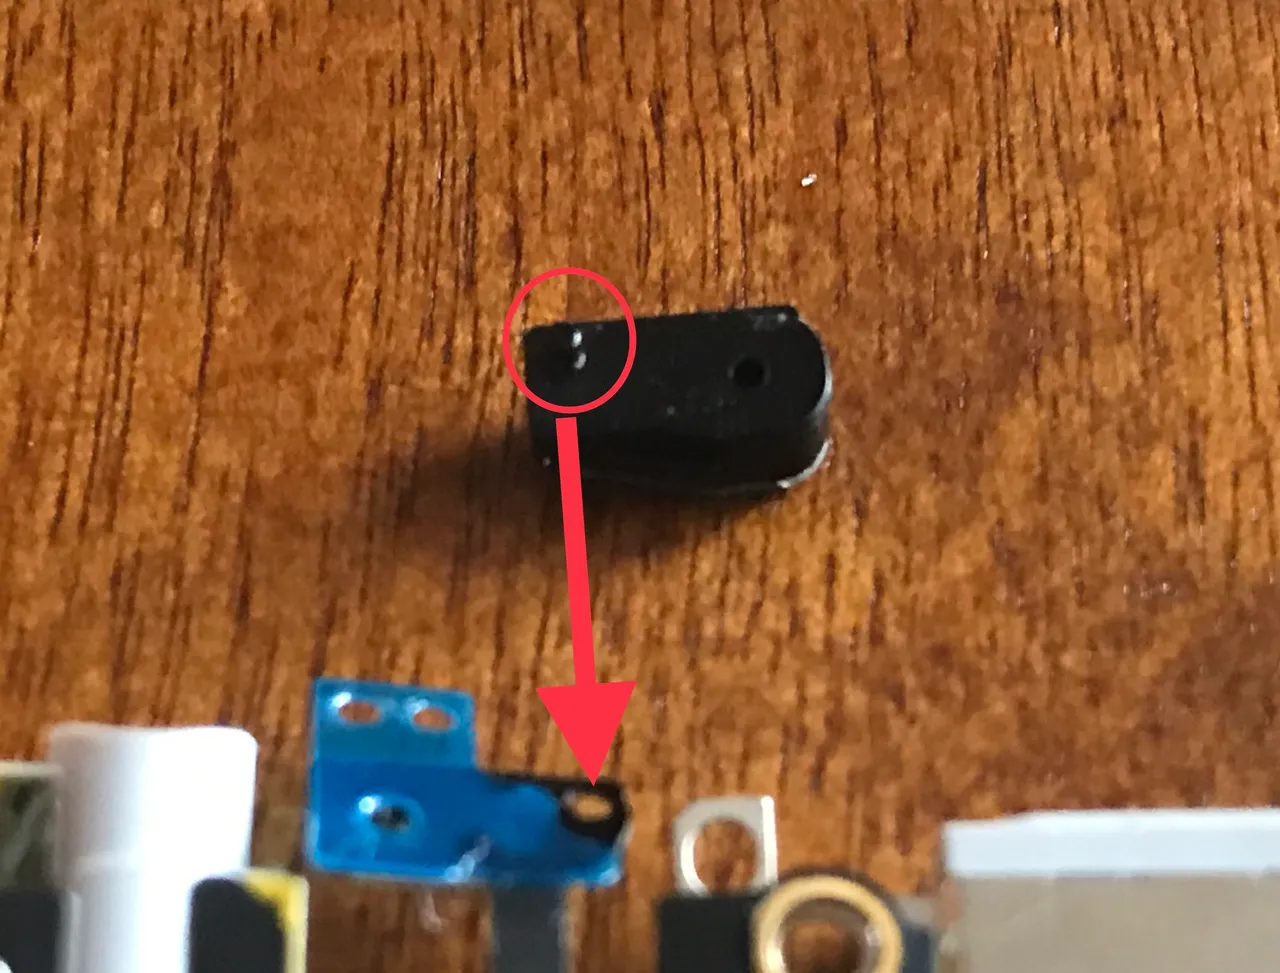
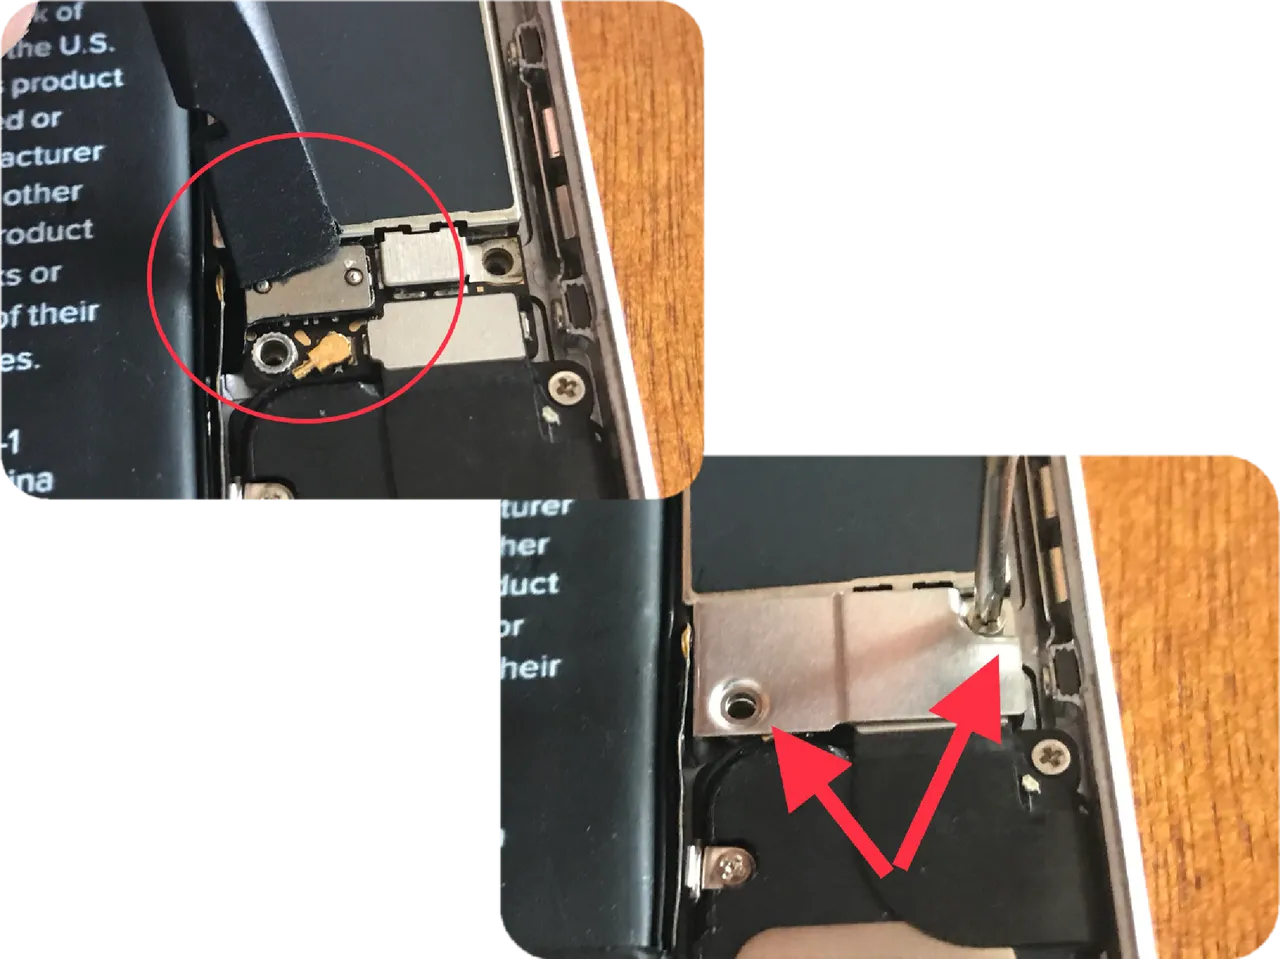
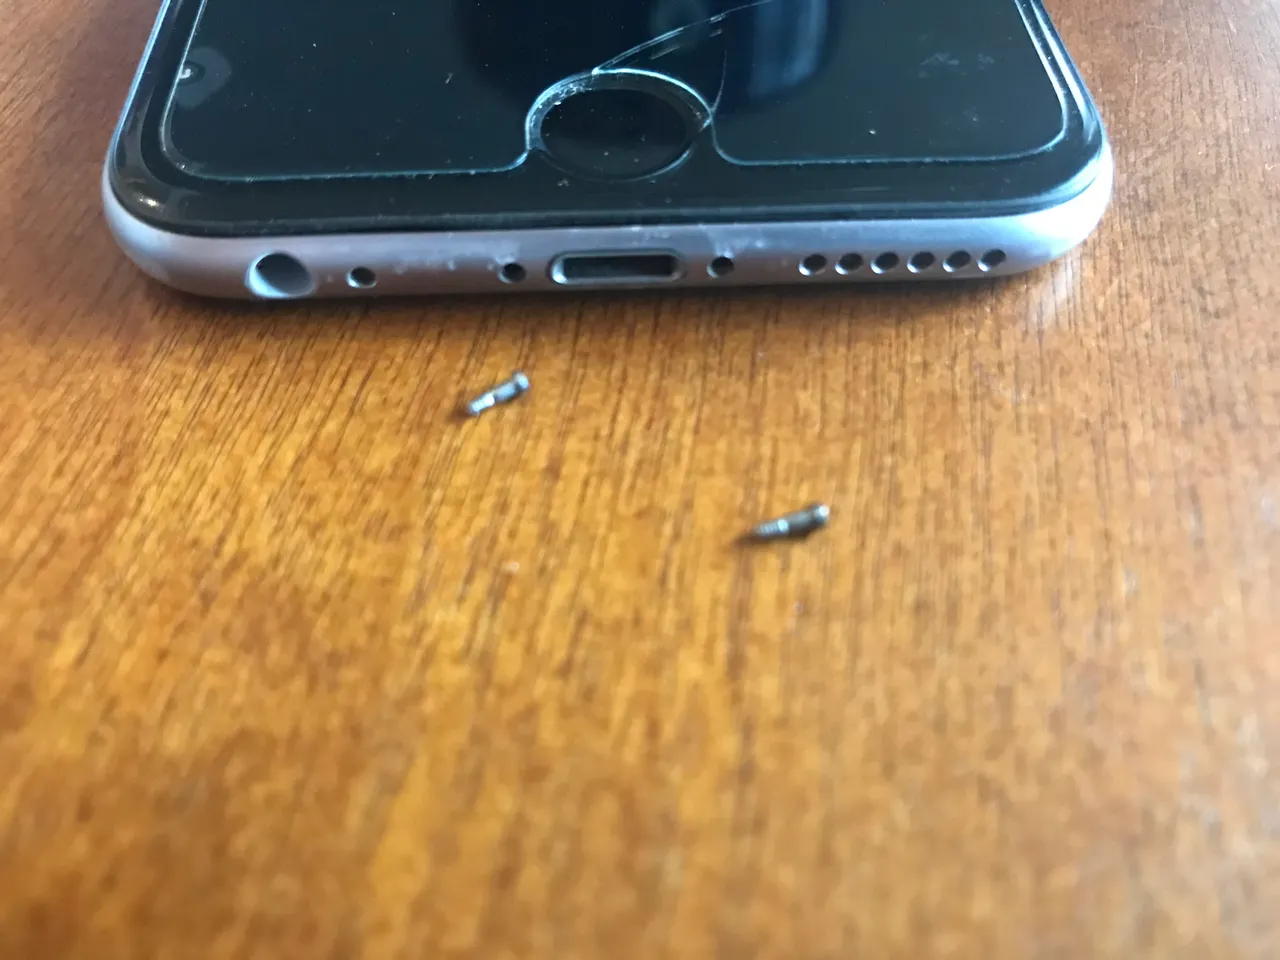
The antenna plug is next and it is tiny!! It is a little circle connector with a thin wire attached to it. That thin wire has a metal protective sleeve that snaps into a clip on the speaker.
One arrow points to the connector, the other points to the cable, while the circle shows the metal clip/sleeve.
Now remove 4 screws holding the speaker in place. You kind of roll the Lightning Connector Assembly cable off the side of the phone to get it out of the way in order to remove the speaker. I swear I felt like I had to take so many parts off just to access the one I wanted. But that is just how it goes sometimes.
Remove the speaker by sliding it towards the top of the phone first, then up and out. Then set it aside with the screws in their appropriate positions.
Getting Closer, Stick with Me
Now we are getting really close to removing the Lightning Connector Assembly, just a couple more parts to remove.... them we get to put them all back in. Lol
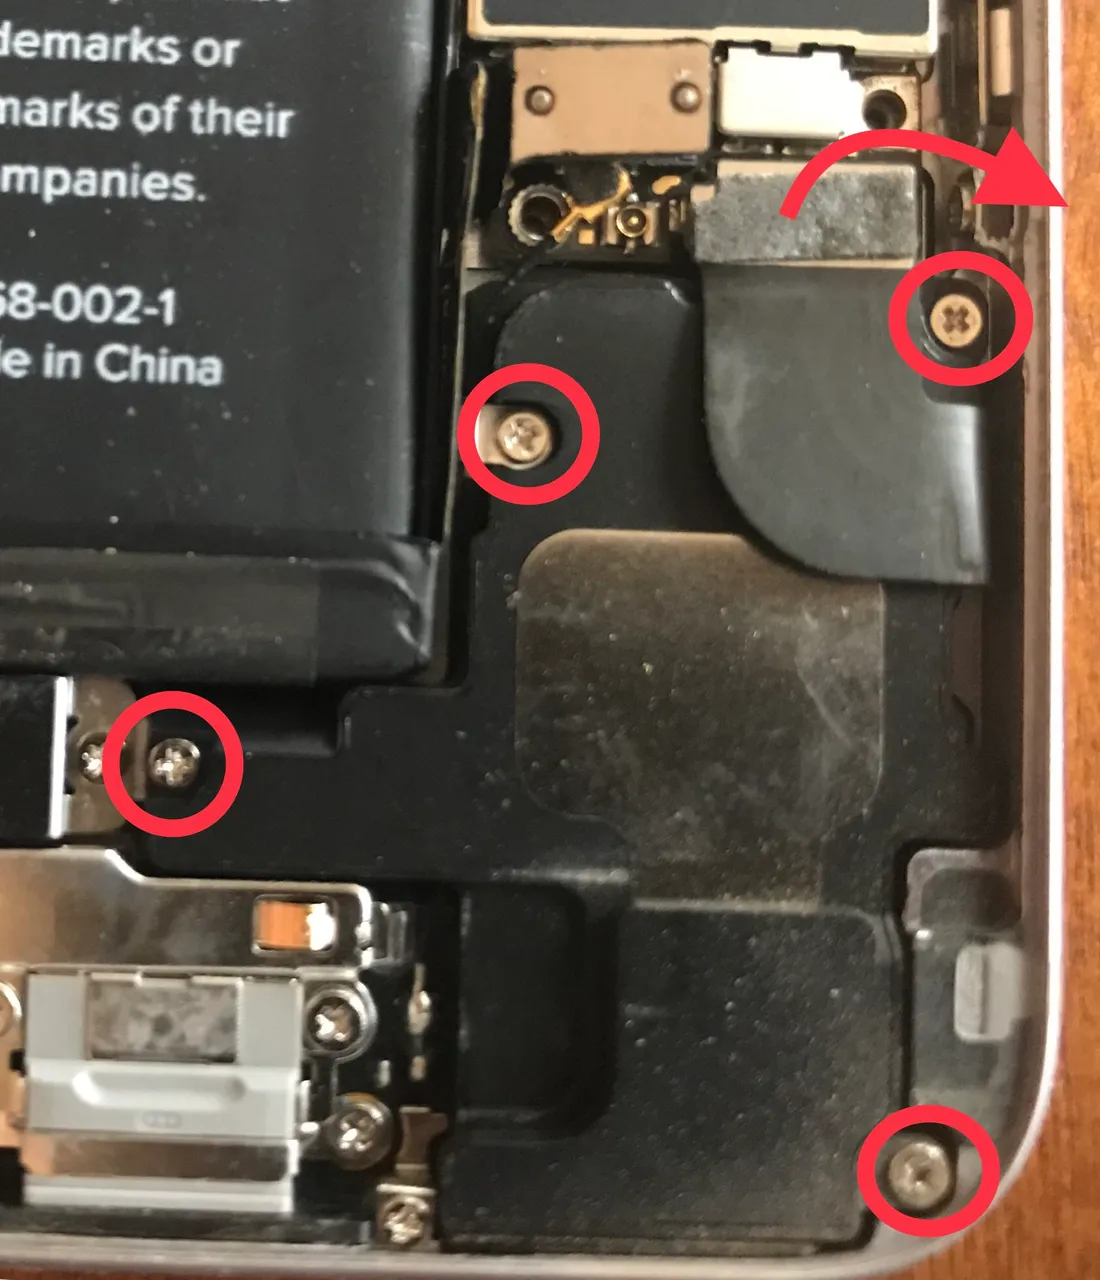
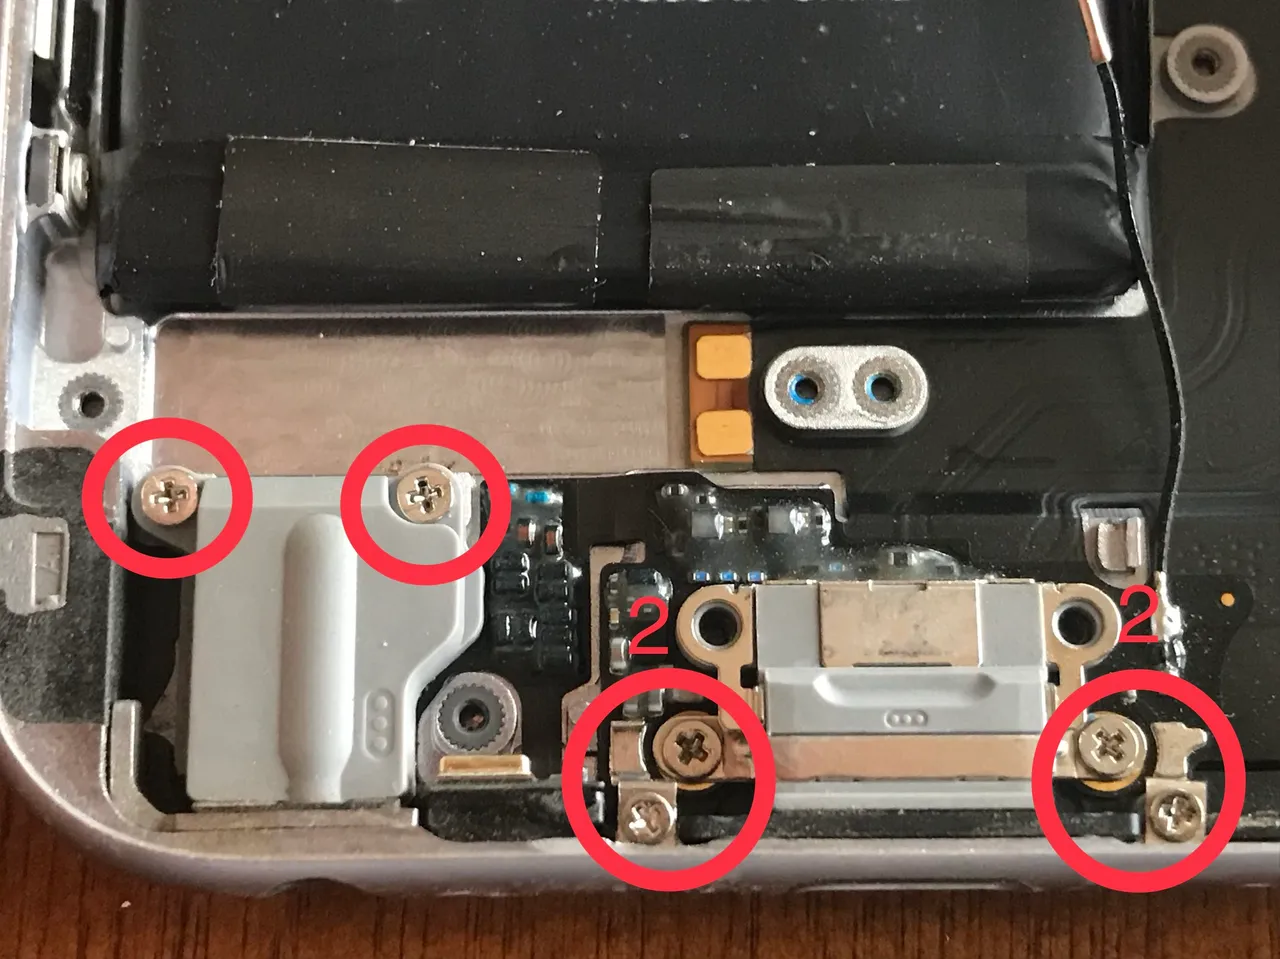
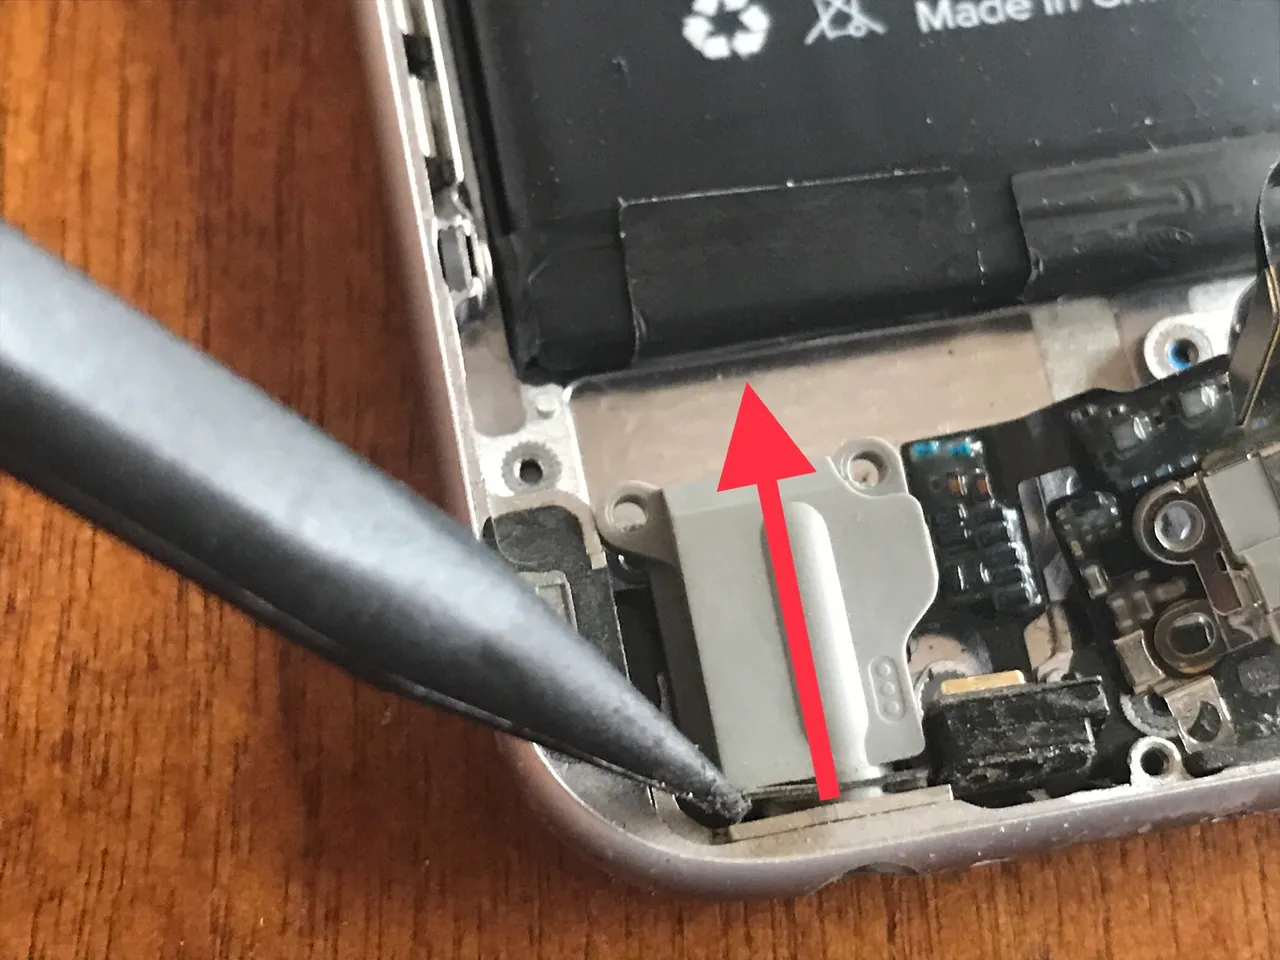
Do you ever wonder what makes your phone vibrate? Yep, you got it... the Vibrator. So remove the 2 screws that hold the vibrator in place and pull that vibrator out of there.
Alright let’s get this Lighting Connector Assembly out of there finally. Just another 30 steps to go...kidding just kidding.
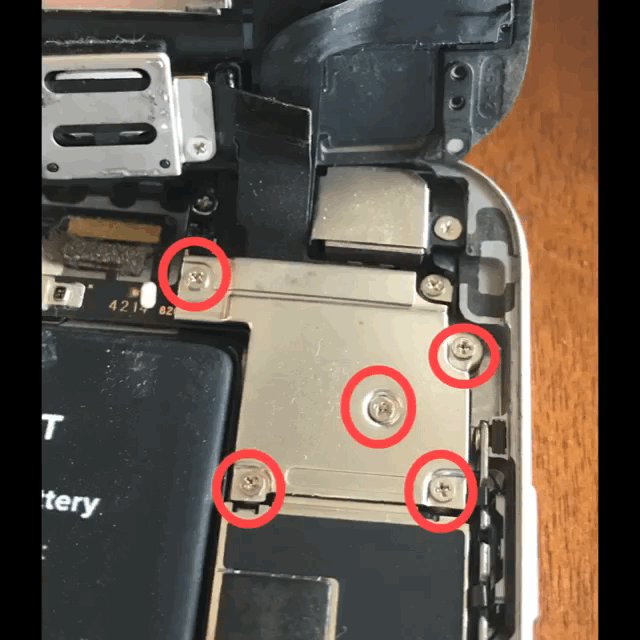
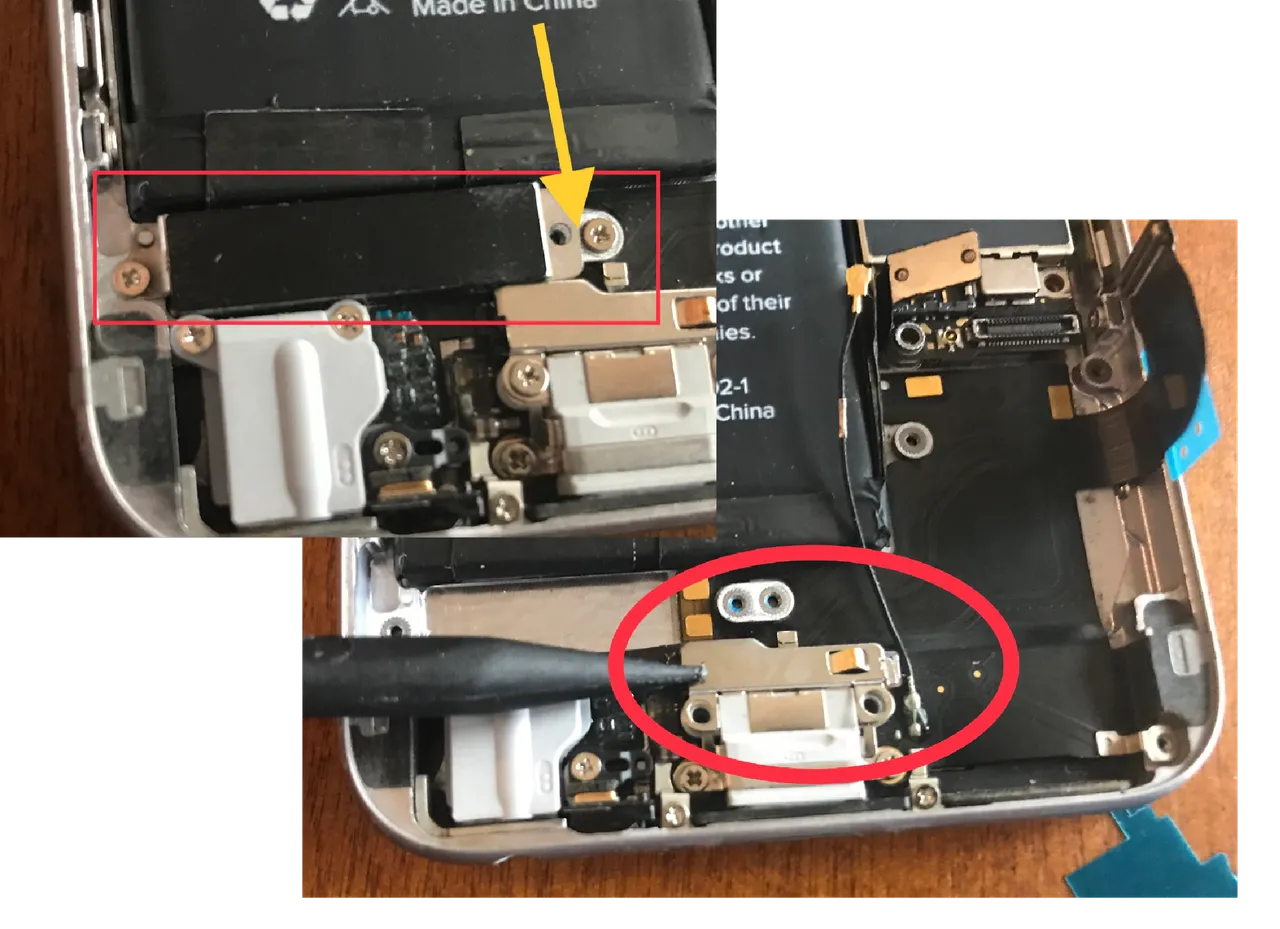
Let’s remove the 2 screws holding the Lighting Port Retainer plate. Then remove the retainer plate and set it aside with the screws.
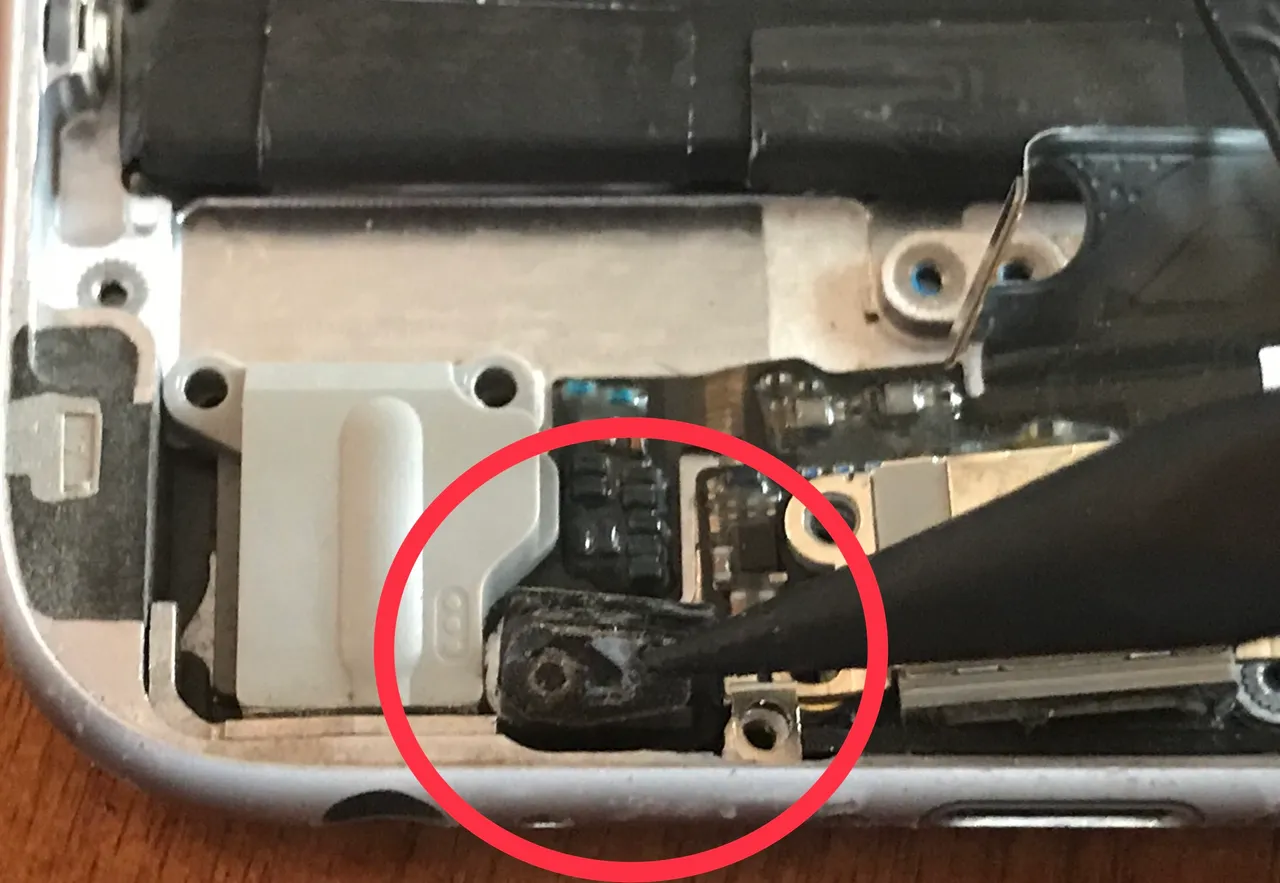
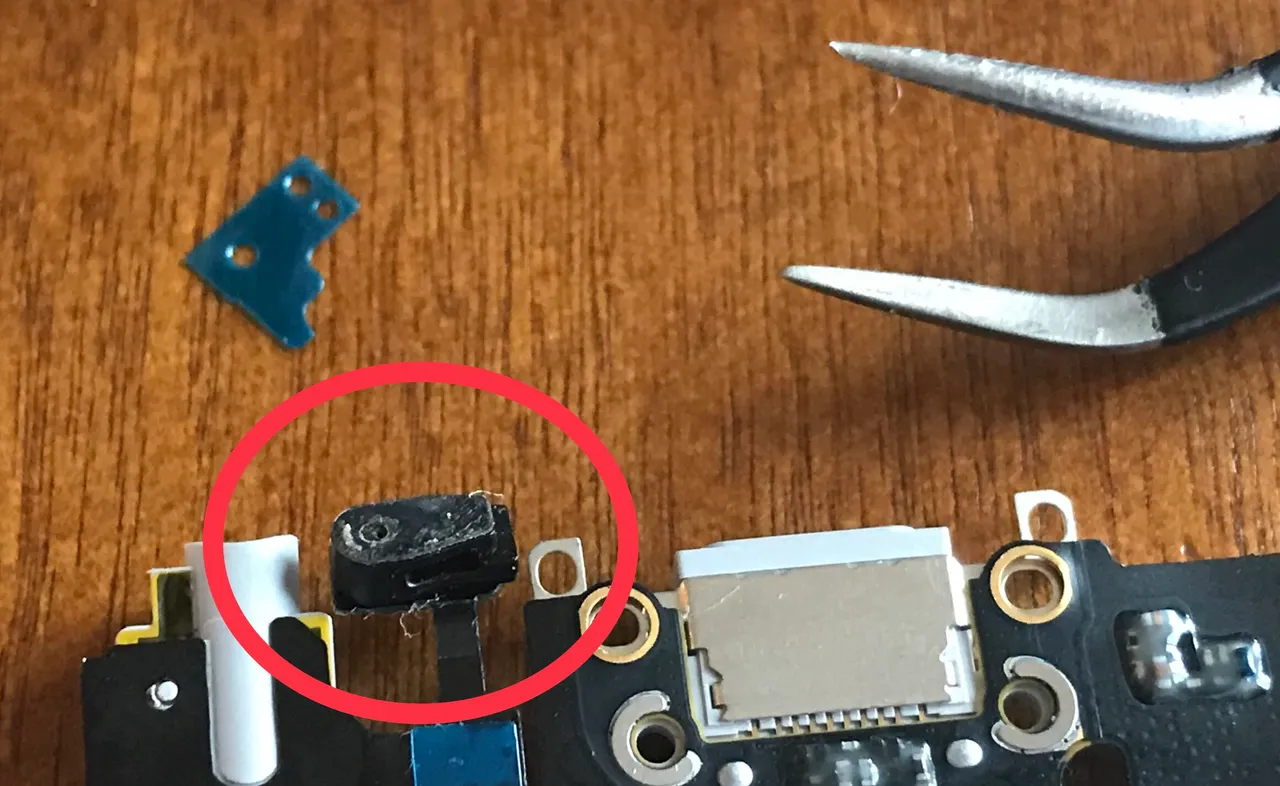
Now there is a single screw holding the microphone brace in place. Remove the screw and the rubber brace deleo.
Finally the last 6 screws and this Assembly will be free for us to remove from the phone. Have you kept all your screws and pieces in order??? I had to tell my kids to stay away from the table because I ran out of room in my magnetic tray. I had those tiny screws on the table all organized with their retaining plates and would hate to lose one.
The Last 6 Screws
After you have removed these screws it’s time to grab your black pry tool and start peeling up The Lightning Connector Assembly from the back of the case. It is held in place by adhesive that doesn’t want to let go very easy. Just be patient and it will come out. This is probably the worst part of the whole thing. Until you realize that this part is getting thrown away. So if you damage it a little bit, it’s not a problem. Just use the tool to get underneath it and pull up, peeling it off the back of the phone.
As you can see I started damaging it and was afraid the piece was going to tear off and I wouldn’t be able to get another corner to peel up. I attacked this thing from all angles and finally got it to peel up.

Once the Assembly is completely free from the back of the phone, the whole Assembly needs to basically slide toward the top of the phone then it can be lifted out.
First start by sliding the microphone toward the top of the phone and out of it’s position in the back of the phone.
It ends up coming off but don’t lose it. You will need it for the install of the new Microphone Assembly. To the left of the microphone is the Aux/Headphone jack. Using the pointed end of your tool, push it out of its position in the case in the direction of the arrow.
Ok now gently wiggle, slide and pry the whole Assembly out of the phone. There may be a couple spots that still have some adhesive on them, just get the pry tool out and do what you need to do to get it out... gently. You don’t want to damage any other parts near by.
YAHOO!! It’s Out!!
Did I fail to mention that on the ifixit.com website they stated that this project was...ummm.... “Difficult”. Ya sorry about that, my bad :wink:wink
Hey we have made it this far there is no turning back now!! We are in deep on this one, so let’s bring this iPhone 6 back to

The Install
Alright now that we have the old Assembly out let’s take a look at the new one and see if there are any parts that need to be transferred from the old one. I found out the rubber piece that connects the microphone to the case needs to be reused. It has a little nipple on it that goes into a hole on the microphone.
Remove the blue plastic film over the microphone, which will expose the adhesive. Remember to get the correct alignment prior to doing so, by test fitting it to the microphone.
While examining the new part you will notice there are a few more pieces of this blue plastic film. Leave it all in place until you are 💯 % sure you have things in the correct position. Check and double check the fitment, looking at everything very closely. Taking pictures during the year down process can help immensely.

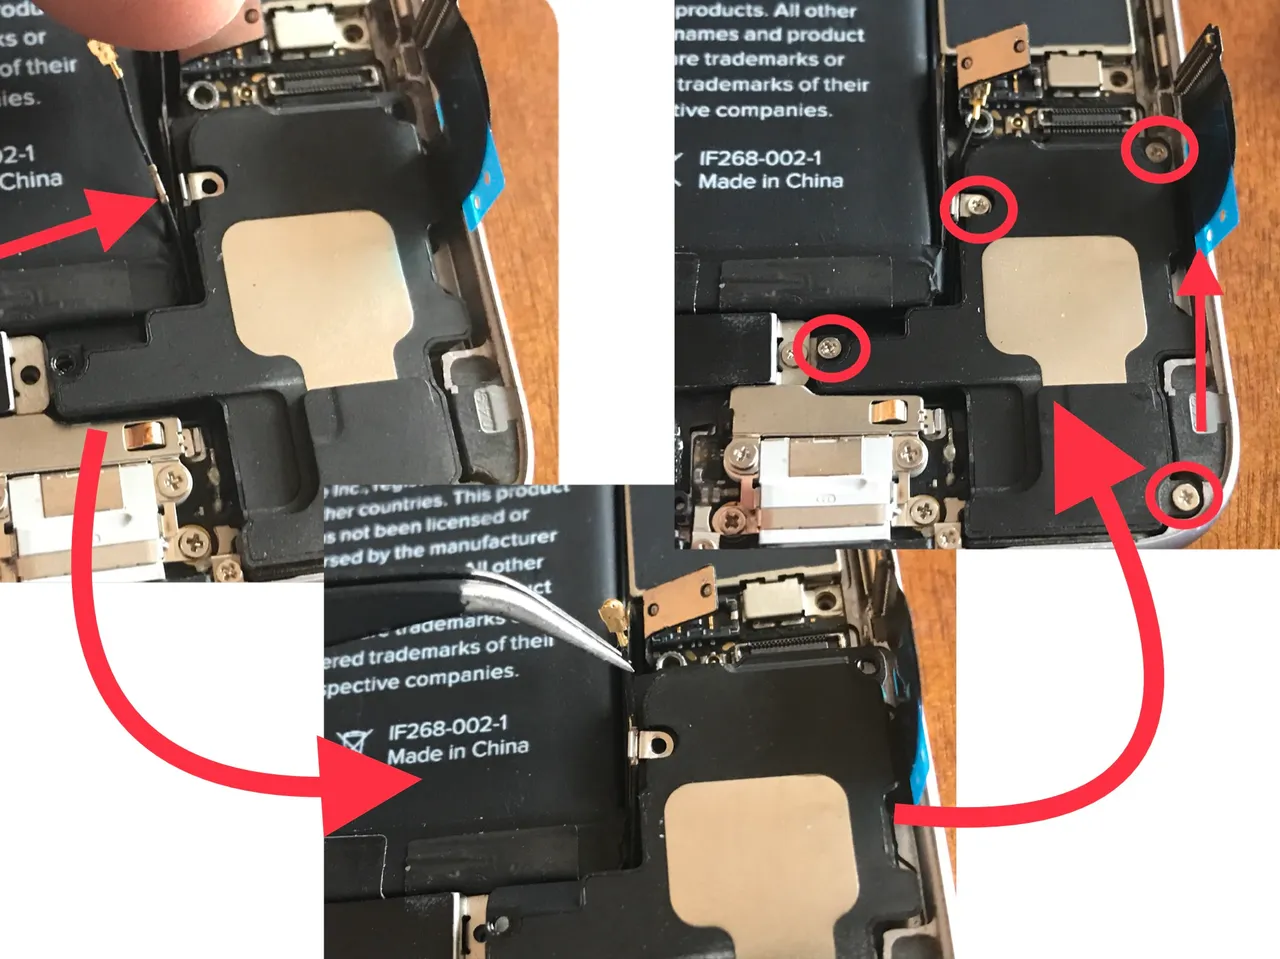
Next to the Aux/Headphone jack is the first adhesive portion of the Assembly that need to be stuck in place. You can lift the left side of the Assembly up to access the blue film in order to remove it.
Align the Aux/Headphone jack in its place, then press down on the adhesive area to the right of it using your finger or the tools provided. Also align the microphone in its place by pressing the black rubber piece into the bottom of the phone.
The next section of adhesive really needs to be aligned properly. Seat the Lightning Port in its place, then check the alignment with the screw holes and the black portion of the Assembly. If you coverup those screw holes you won’t be able to get the screw in very well. Then remove the blue film, get the Lightning Port lined up and be very careful to get the alignment just right.
Start pressing down on all the black surfaces to stick it in place. Use the black tool to ensure that all the adhesive is pressed down into all the corners.
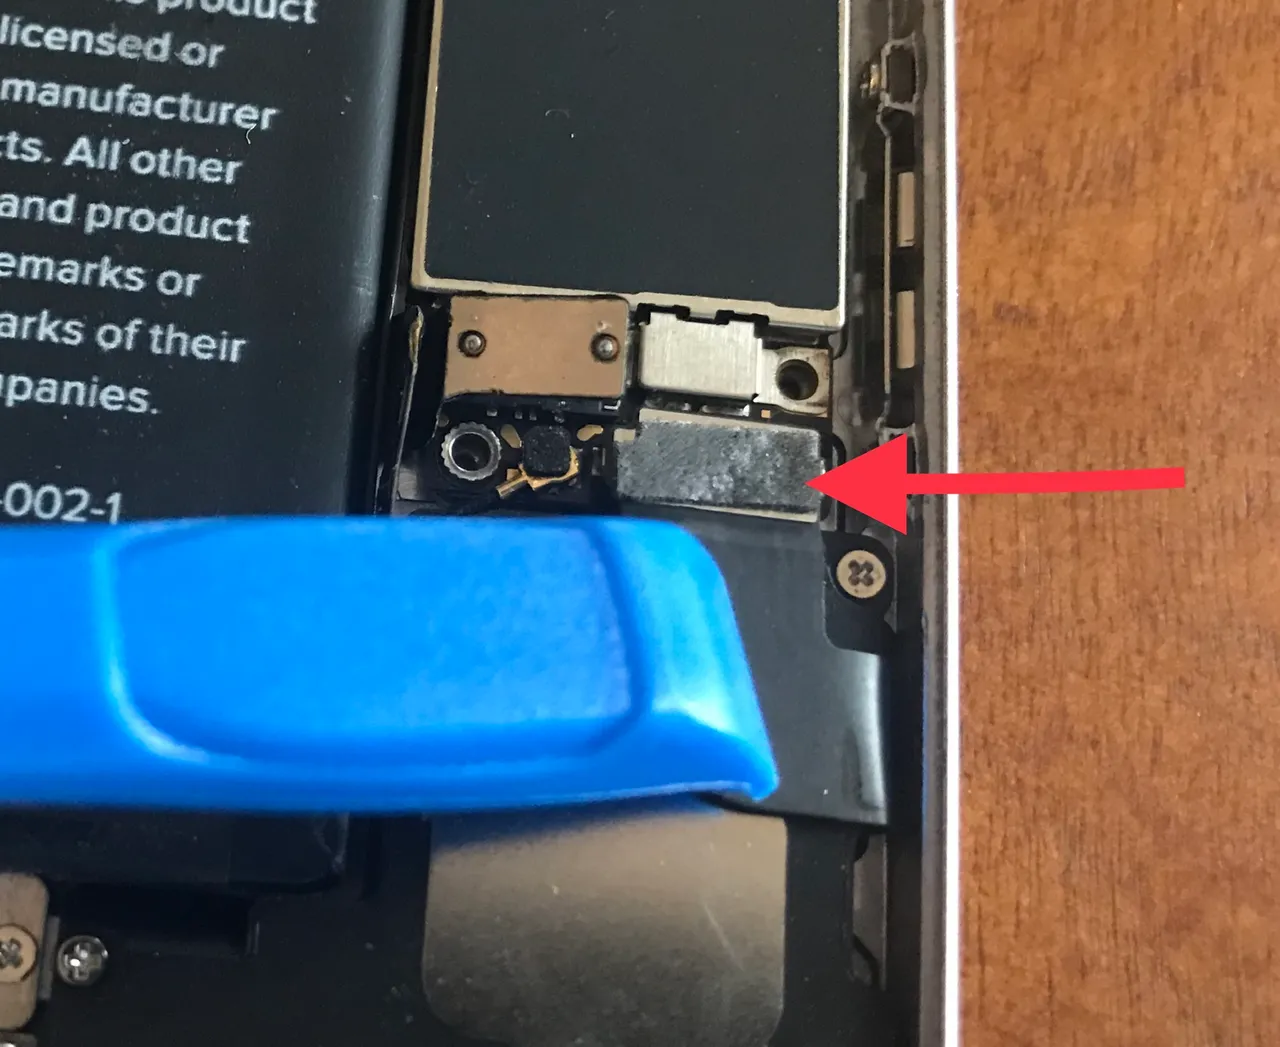
Next we are going to install the speaker. It needs to be seated in the bottom of the phone first. So it needs to be started at a slight angle, then pressed down into place. Be sure to keep the antenna wire out from under it.
Next take the antenna wire and snap it into the metal clip on the side of the speaker. Then install the 4 screws that hold the speaker in position.
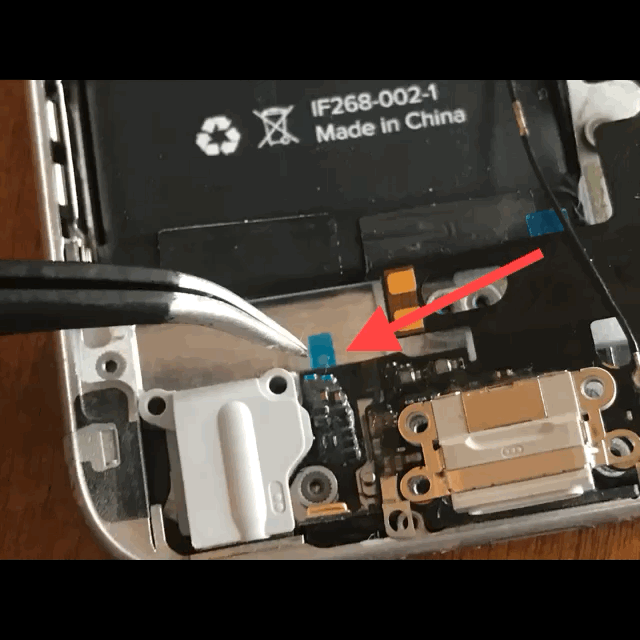
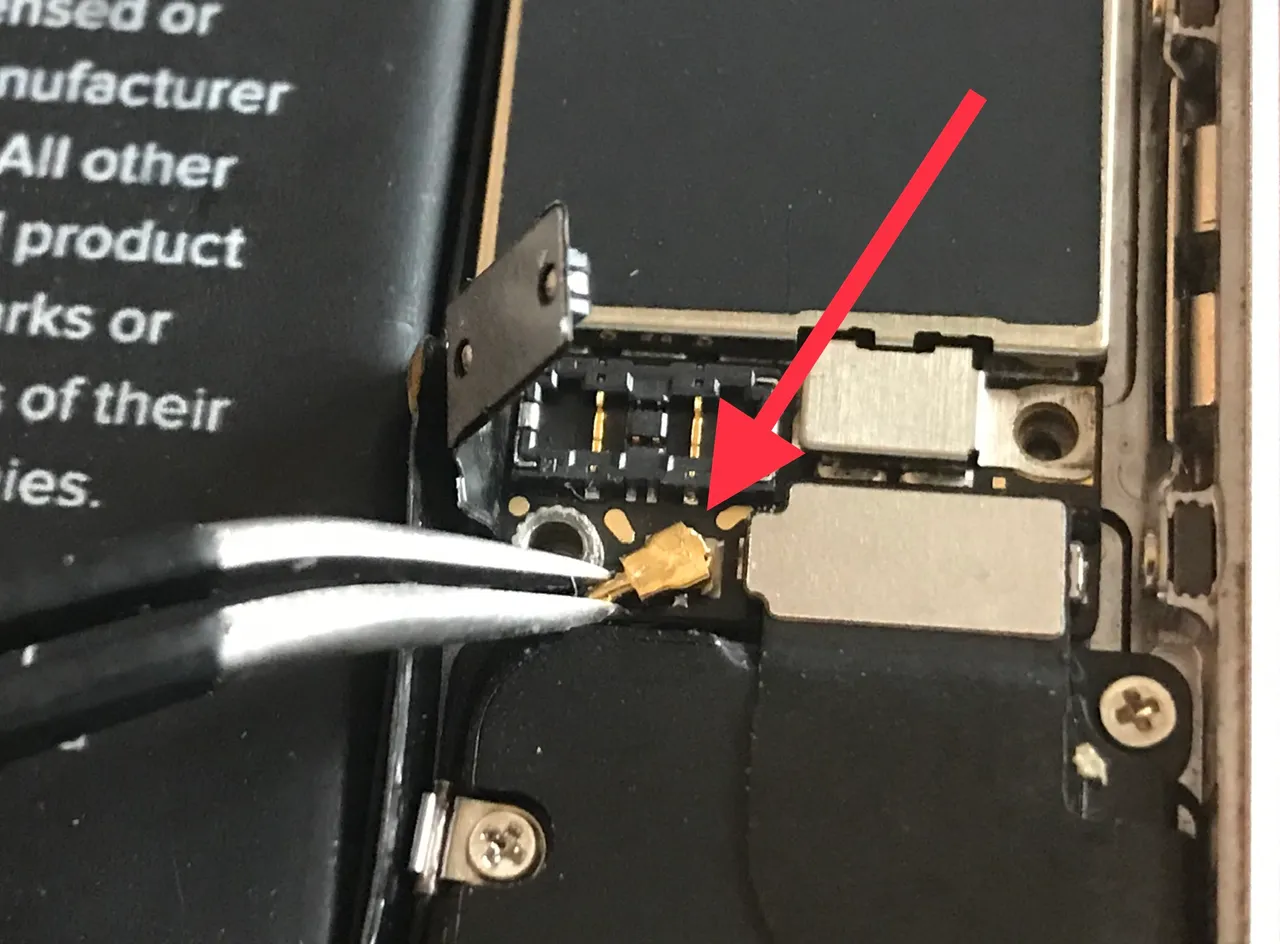
As you can see there is another blue film covering the last adhesive piece. Peel it off and connect the Lightning Port connector to the logic board. Don’t press down on the adhesive until you have the connector fully seated in its place. Then press the adhesive portion into place in the motion of the arrow to ensure a smooth adhesion.

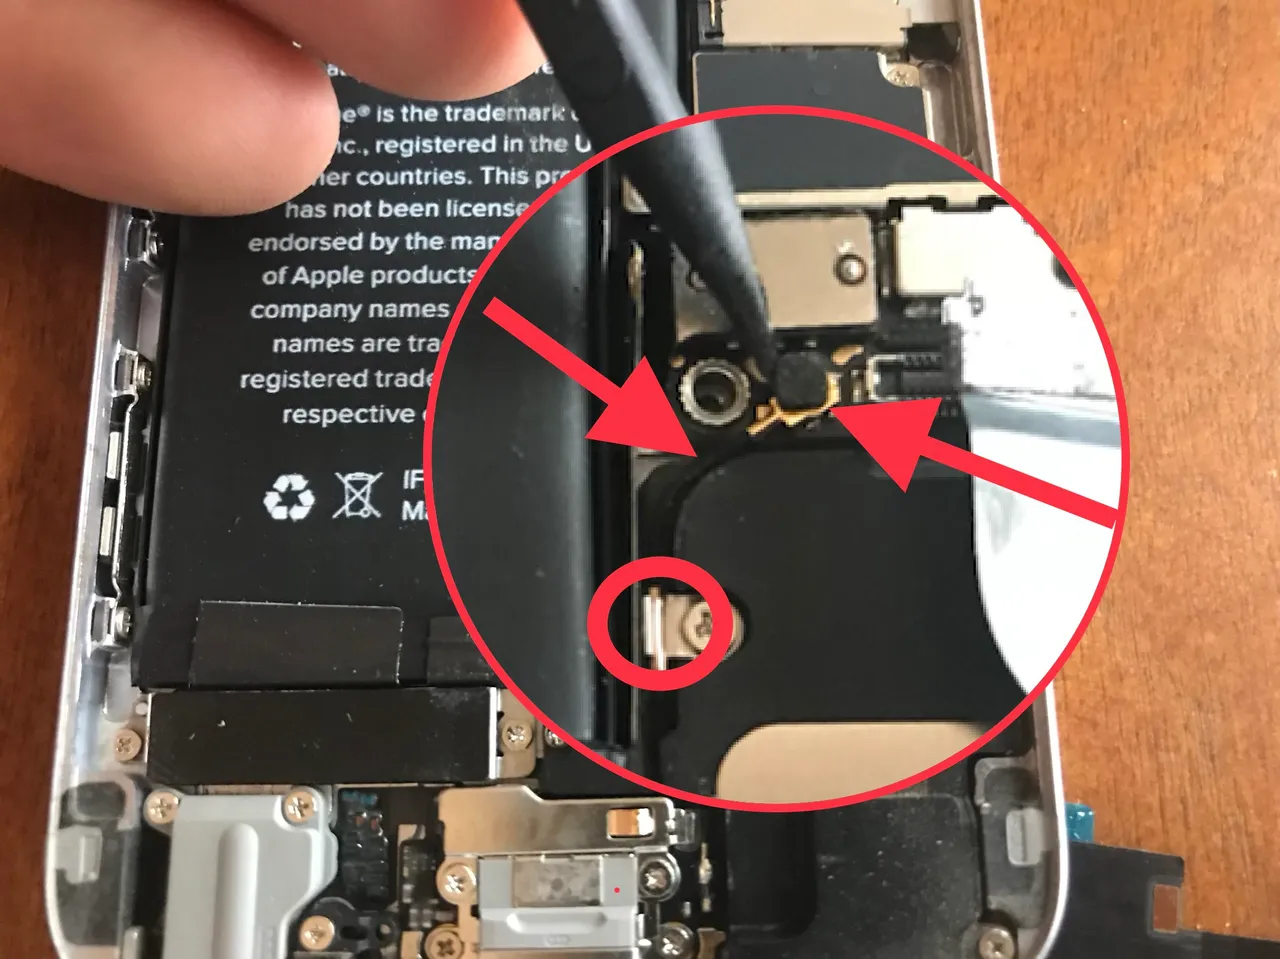
Making the connection between the antenna and the logic board is a bit of a pain. It is really small and the antenna wire is a bit springy. I used the tweezers to hold the curve I needed for the connector to be above the connection point. Then used the point of the black tool to press it into place. Just when I thought I had it, it would pop off. So obviously it wasn’t on just right. Again patients and a steady hand is key, so don’t get all loaded up on coffee before you do this.
Before we connect the battery, we need to get the screen connected to the back of the phone. There are 4 connectors and they can only be plugged in, in a certain order. It’s sort of dummy proof. These connectors are kind of tough to line up but when they are lined up you will know 💯 %., they just pop into place. Then install the retainer plate and 5 screws to hold all those connections in place.
One last connection to make and one more retaining plate to install and we are home free... fingers crossed.
Now plug in the battery and install the retainer plate with 2 screws.
Ok, finally we get to close this IPhone and see if we made all the connections and test of it is working correctly. Remember to use the top portion of the phone as a hinge, installing the top of the screen first then pressing it together.
Power it Up
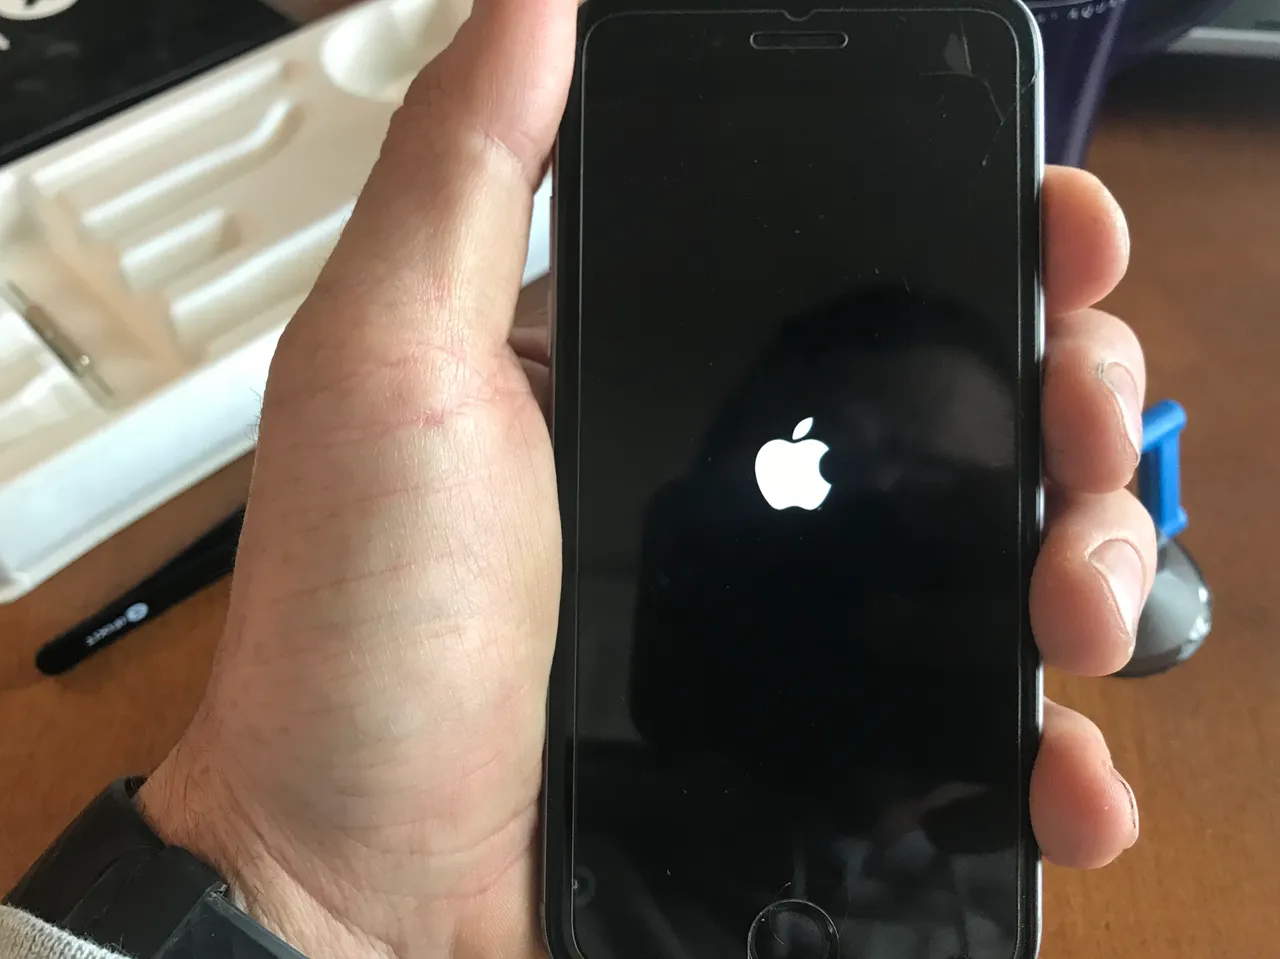
So Far So Good
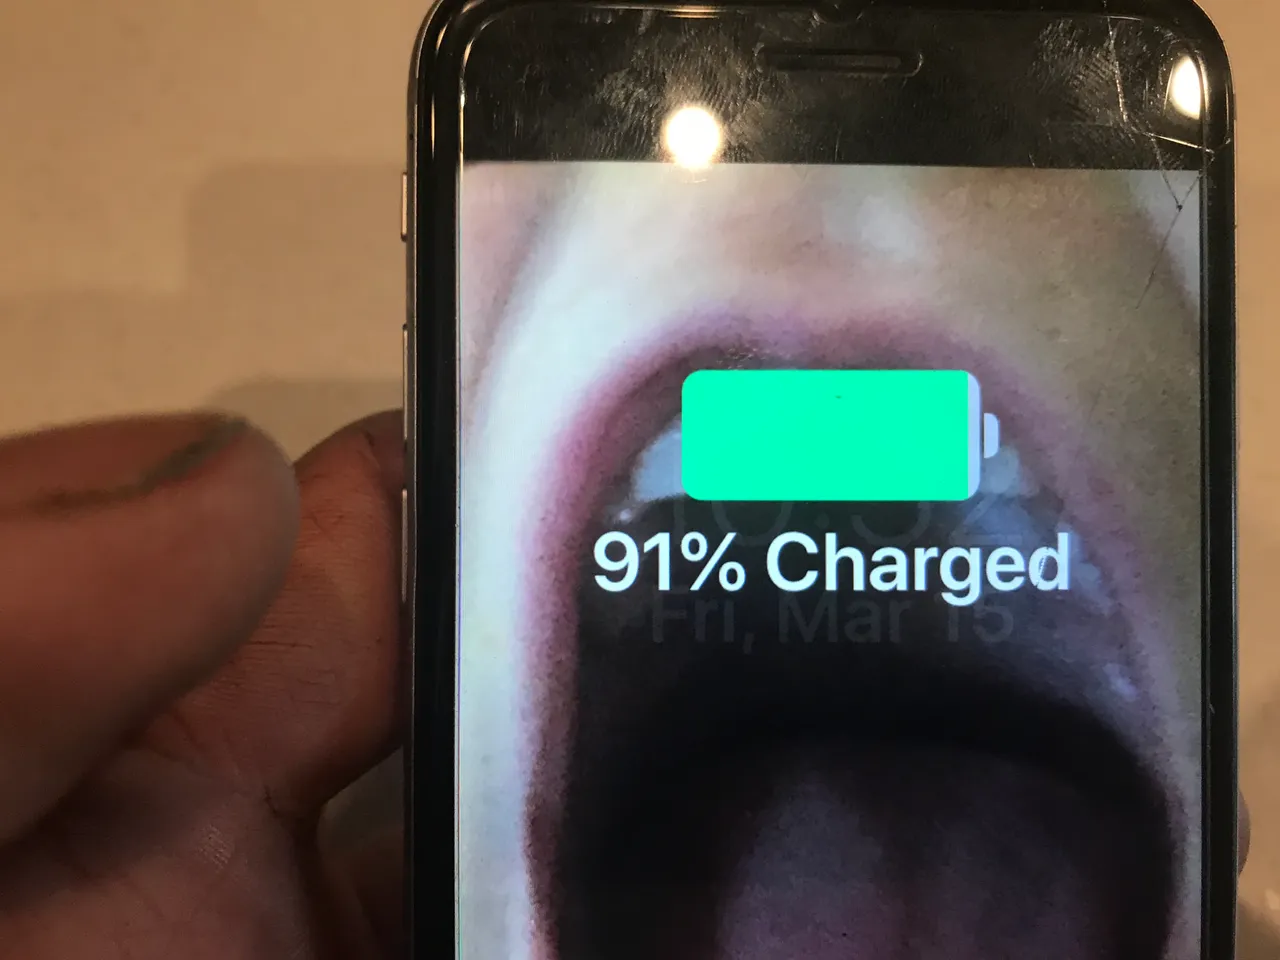
After letting the phone power up completely, I check the touchscreen functions and all the other functions of the phone. Then comes the test to make sure that this new Lightning Port works better than the last. Plug it in and make sure it charges and also plug it into a PC of some sort to make sure it can communicate through the new Lightning port.
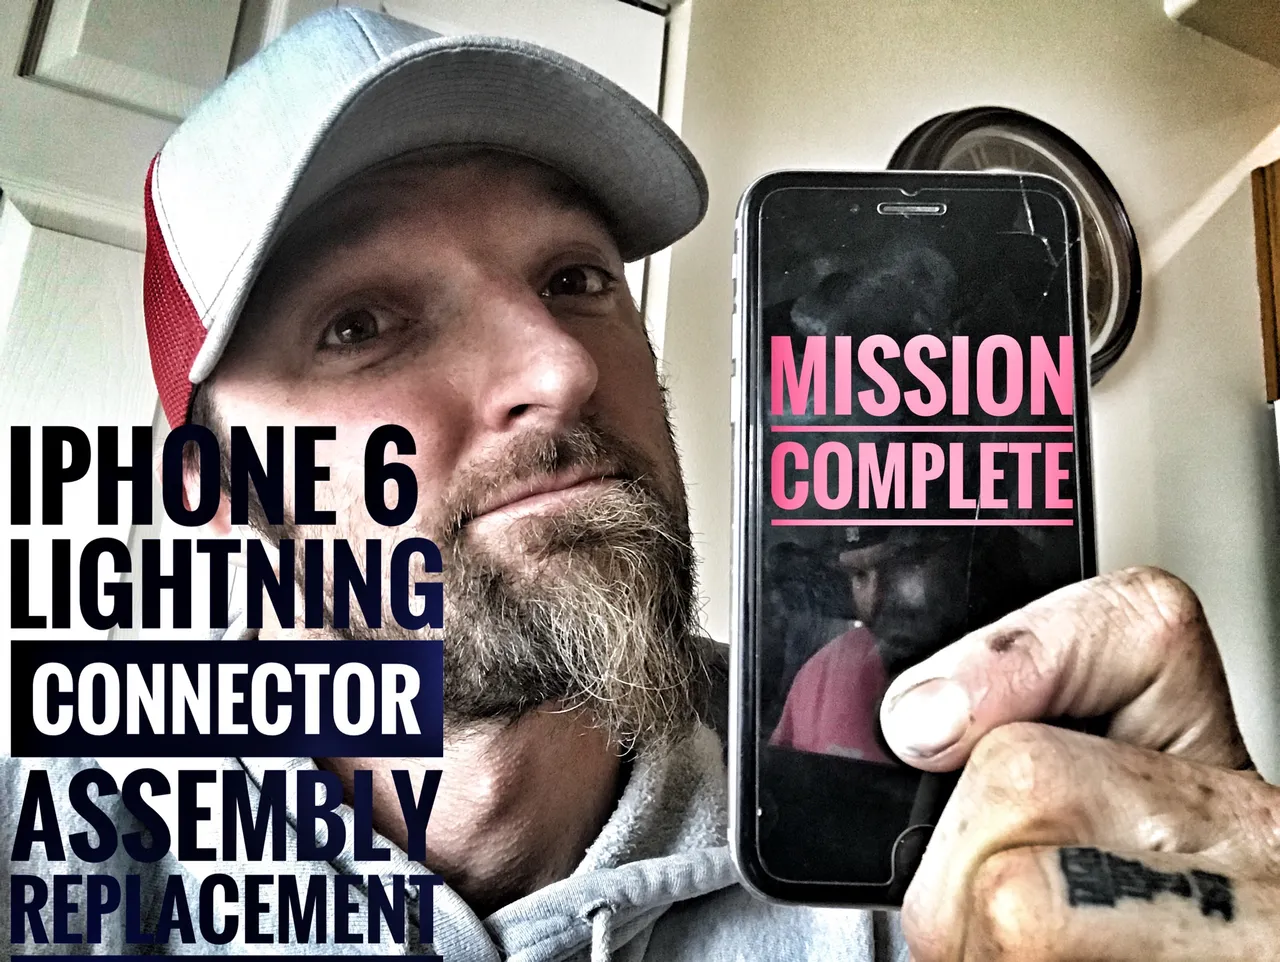
With everything working just the way they were meant to, let’s install the last 2 screws and call this DIY project...
Finished

I did this project a couple months ago and the phone has been working great. I haven’t had a single issue since. This project had a lot of steps and many small pieces. I know I might sound like a broken record but when performing a repair like this....
- Don’t get in a hurry
- Be Patient
- Organize your parts
- Don’t chug down a bunch of coffee before performing this project
I know this DIY project is pretty lengthy but I believe it was necessary in order to get a complete guide on how to do it. I felt like a aged a bit in the process. Between the project itself and taking all the photos and ensuring I didn’t lose any parts. I think I got a few more grey hairs on my head during this process.


Thanks for stopping by and checking out another DIY project done by me...
Splatts

Steem On
and
Save Yourself
Some Cash
and
Learn Something New
By
Doin’ It Yourself