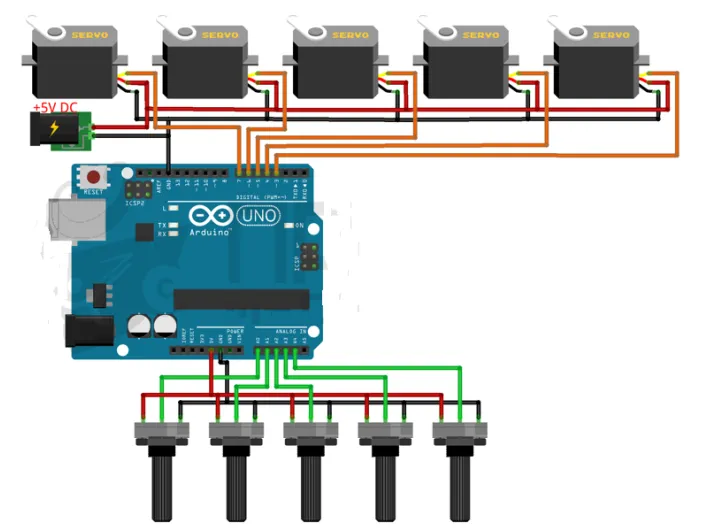
Circuito eléctrico del brazo
Electric circuit of the arm

Programacion // programming
#include
Servo servo1; //creamos un objeto servo
Servo servo2; //creamos un objeto servo
Servo servo3; //creamos un objeto servo
Servo servo4; //creamos un objeto servo
Servo servo5; //creamos un objeto servo
void setup()
{
servo1.attach(3); // asignamos el pin al servo.
servo2.attach(4); // asignamos el pin al servo.
servo3.attach(5); // asignamos el pin al servo.
servo4.attach(6); // asignamos el pin al servo.
servo5.attach(7); // asignamos el pin al servo.
Serial.begin(9600);
}
void loop()
{
int angulo1 = map(analogRead(A0), 0, 1023, 0, 180);
int angulo2 = map(analogRead(A1), 0, 1023, 0, 180);
int angulo3 = map(analogRead(A2), 0, 1023, 0, 180);
int angulo4 = map(analogRead(A3), 0, 1023, 0, 180);
int angulo5 = map(analogRead(A4), 0, 1023, 0, 180);
servo1.write(angulo1); // enviamos el valor escalado al servo.
servo2.write(angulo2); // enviamos el valor escalado al servo.
servo3.write(angulo3); // enviamos el valor escalado al servo.
servo4.write(angulo4); // enviamos el valor escalado al servo.
servo5.write(angulo5); // enviamos el valor escalado al servo.
//----Enviamos los ángulos serialmente--------------
Serial.print("Angulos 1: ");
Serial.print(angulo1);
Serial.print(" 2: ");
Serial.print(angulo2);
Serial.print(" 3: ");
Serial.print(angulo3);
Serial.print(" 4: ");
Serial.print(angulo4);
Serial.print(" 5: ");
Serial.println(angulo5);
delay(10);
}
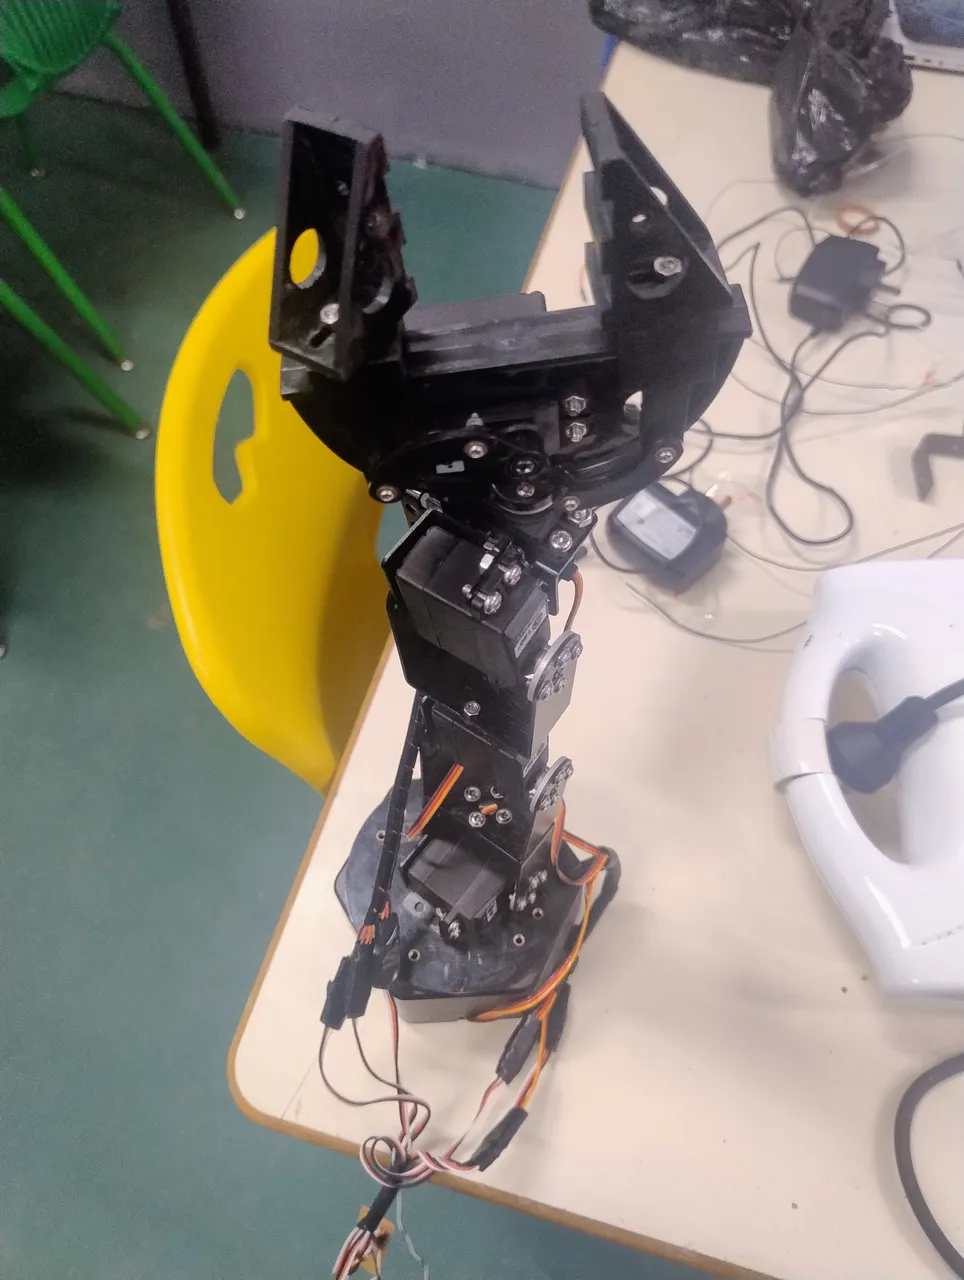
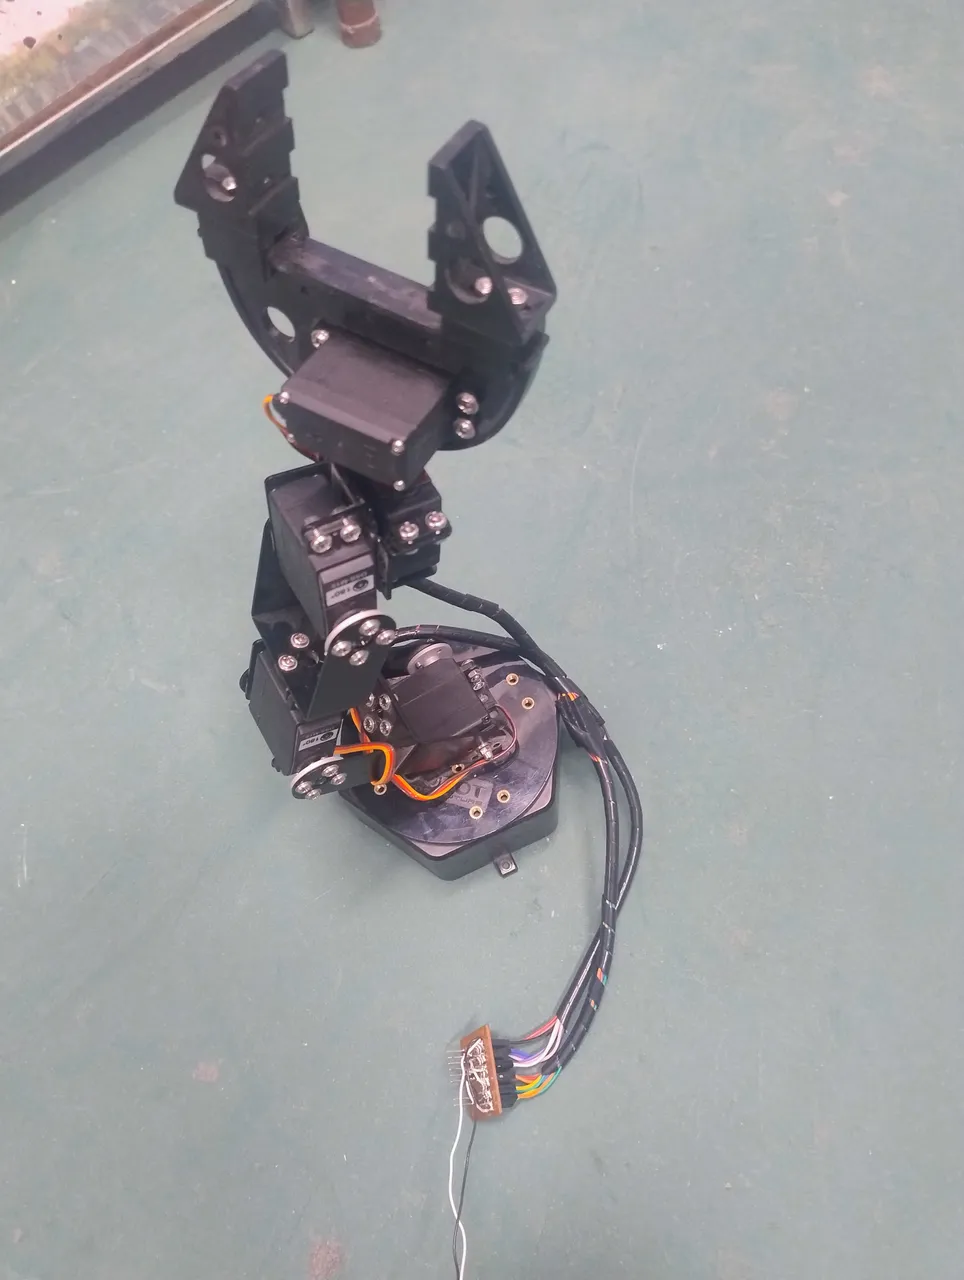
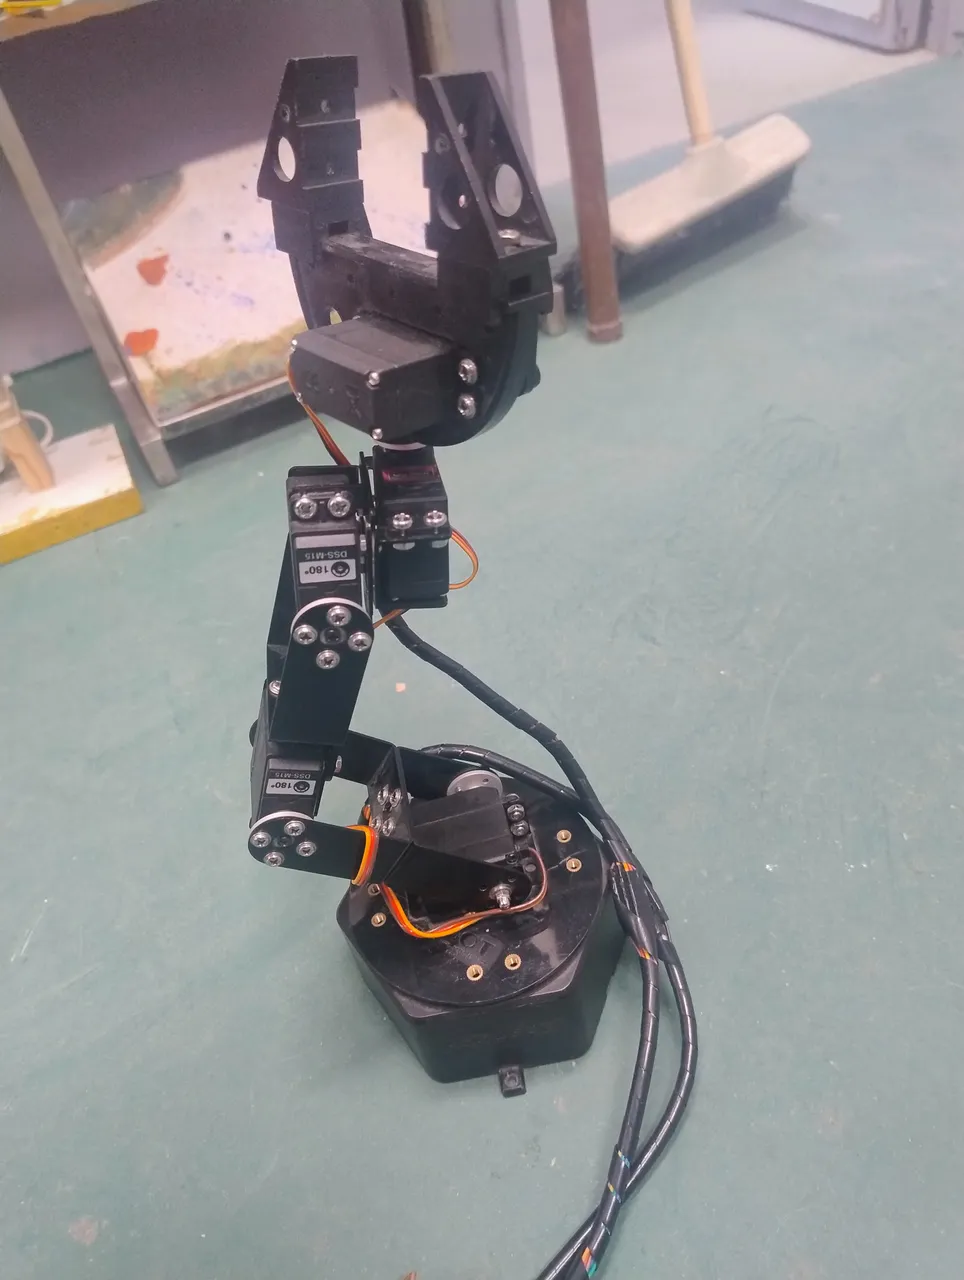
aquí les dejo algunas fotos del brazo robótico terminado. ¡Espero que les gusten tanto como a mí me gusta verlas! Y no se preocupen si tienen algún contratiempo intentando hacer funcionar el brazo.
Algunos tips que les dejo a continuación:
-Utilizar una fuente externa para alimentar los servomotores
-La programación que deje en este post depende mucho muchísimo de los servomotores y de los potenciómetros que utilicen en el armado.
-no olvidar de "unir" los negativos y GND para que todo funcione correctamente.
Here are a few photos of the completed robotic arm. I hope you like them as much as I do! And don't worry if you encounter any hiccups while trying to get the arm to work. Here are some tips for you:
-Use an external power source to power the servo motors.
-The programming provided in this post relies heavily very heavily on the servo motors and potentiometers you use in assembly.
-Don't forget to "connect" the negatives and GND to ensure everything functions correctly.


Bueno compañeros espero que hayan disfrutado tanto como yo del brazo robótico controlado por potenciómetros. Pero eso no es todo: ¿sabían que también pueden ajustar la programación para prescindir de los potenciómetros? Esto les permitirá lograr movimientos repetitivos con una precisión asombrosa en el agarre de objetos. ¡Qué emocionante seguir explorando las posibilidades de este proyecto!
Si quieren más detalles y actualizaciones me lo pueden dejar en los comentarios.
Un saludo compañeros!
Alright folks, I hope you've enjoyed the robotic arm controlled by potentiometers as much as I have. But wait, there's more! Did you know that you can also adjust the programming to do away with the potentiometers? This will allow you to achieve repetitive movements with astonishing precision in grasping objects. How thrilling it is to continue exploring the possibilities of this project! If you want more details and updates, feel free to leave me a comment. Cheers, everyone!