Besides using complementary and analogous colours, some more advanced concepts of using the colour wheel to create a colour palette have been developed. These are most often based on geometric patterns; they work well in many designs.
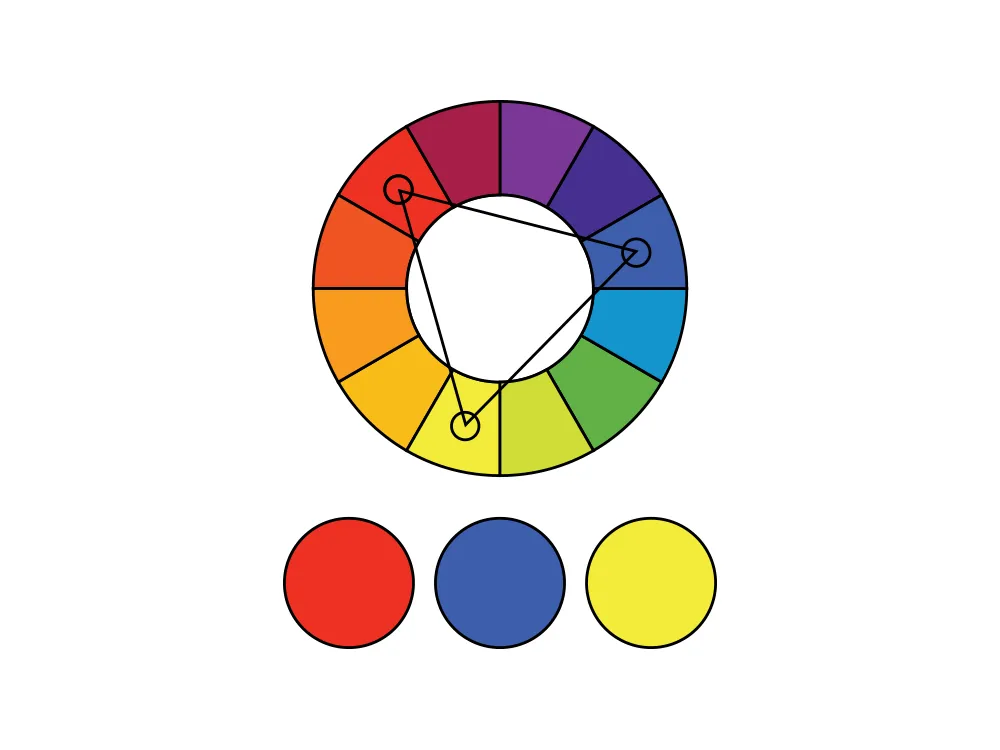
Triadic Colours
With a triangle you can find the triadic colours. All you must do is to find a focus colour that you definitely want to use in your design. Afterwards go 120° to either side of that colour on the colour wheel to find the corresponding triadic colours:
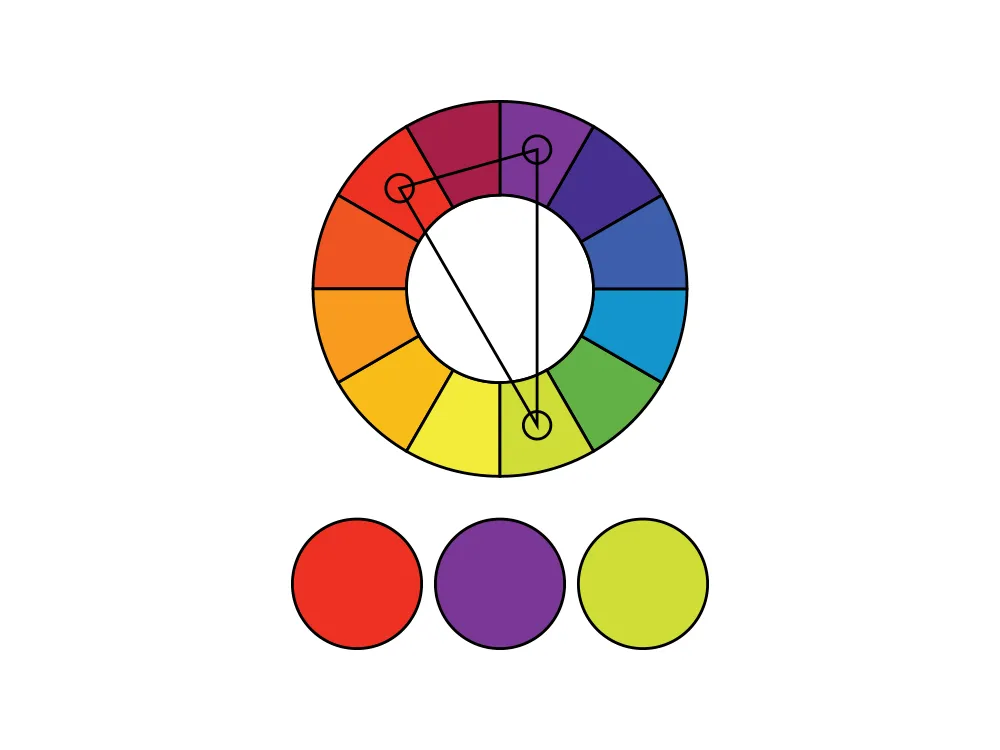
Split Triadic Colours
You can make the triangle narrower or wider by adjusting the angle you apply to the focus colour. Here is an example where a split triadic colour palette is created with a narrow angle:
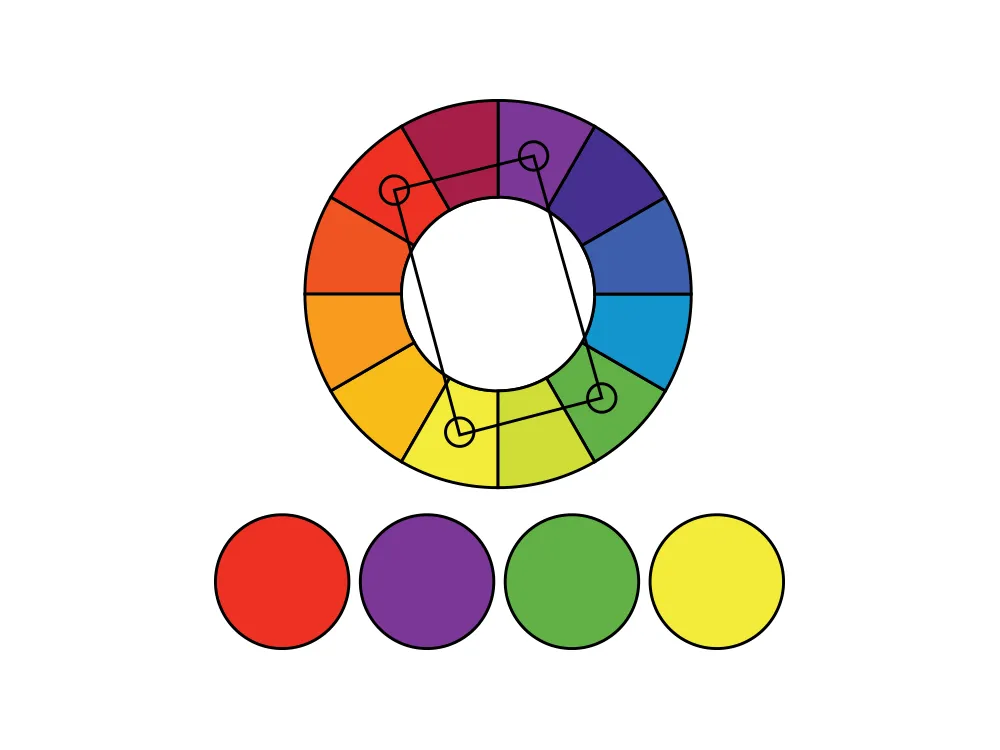
Tetradic Colours
You can also use rectangles (an angle of 90°) to find a colour palette on the colour wheel:
The Colour Wheel is a helping tool not a dogma
As deep as the theory of the colour wheel can go, we should never forget that it is just a helping tool. If you want to break the rules of geometry, do it! Just because a colour palette doesn’t fit an established approach to using the colour wheel, it doesn’t mean that the colour palette is “wrong”.
Use the colour wheel as training wheels. Get rid of the wheels as soon as you don’t have a use for them anymore.