También debes buscar un envase preferiblemente de vidrio (yo lo hago asi) , pero si no tienes, puede ser una botella de plastico grande.
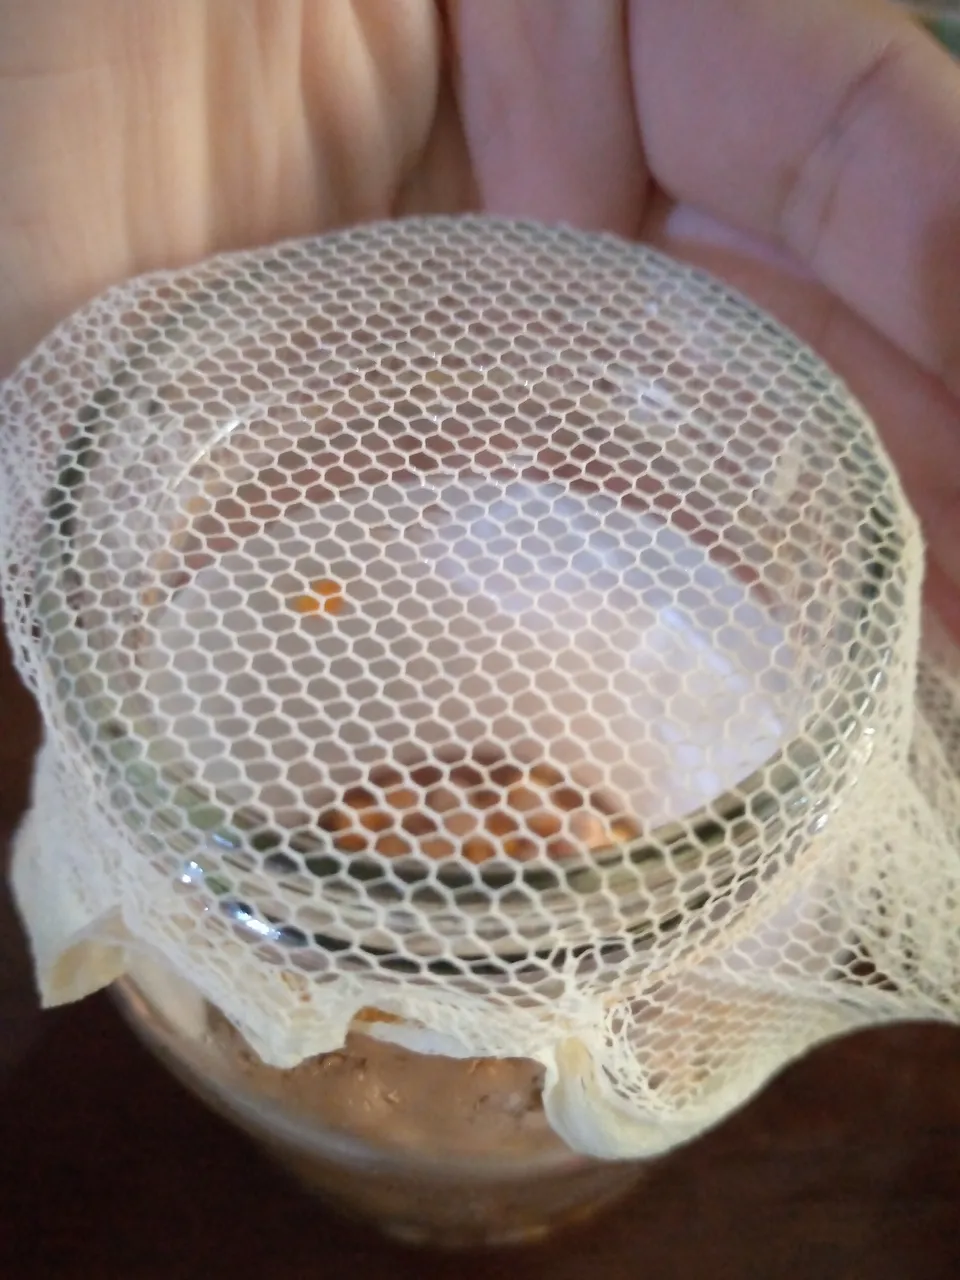
Y por ultimo si tu envase es de vidrio utilizaras una malla para tapar la parte superior para que no entren insectos, respiren los frijoles y enjuagar fácilmente los frijoles mientras se hacen.
Teniendo todos los implementos ahora si comenzamos:
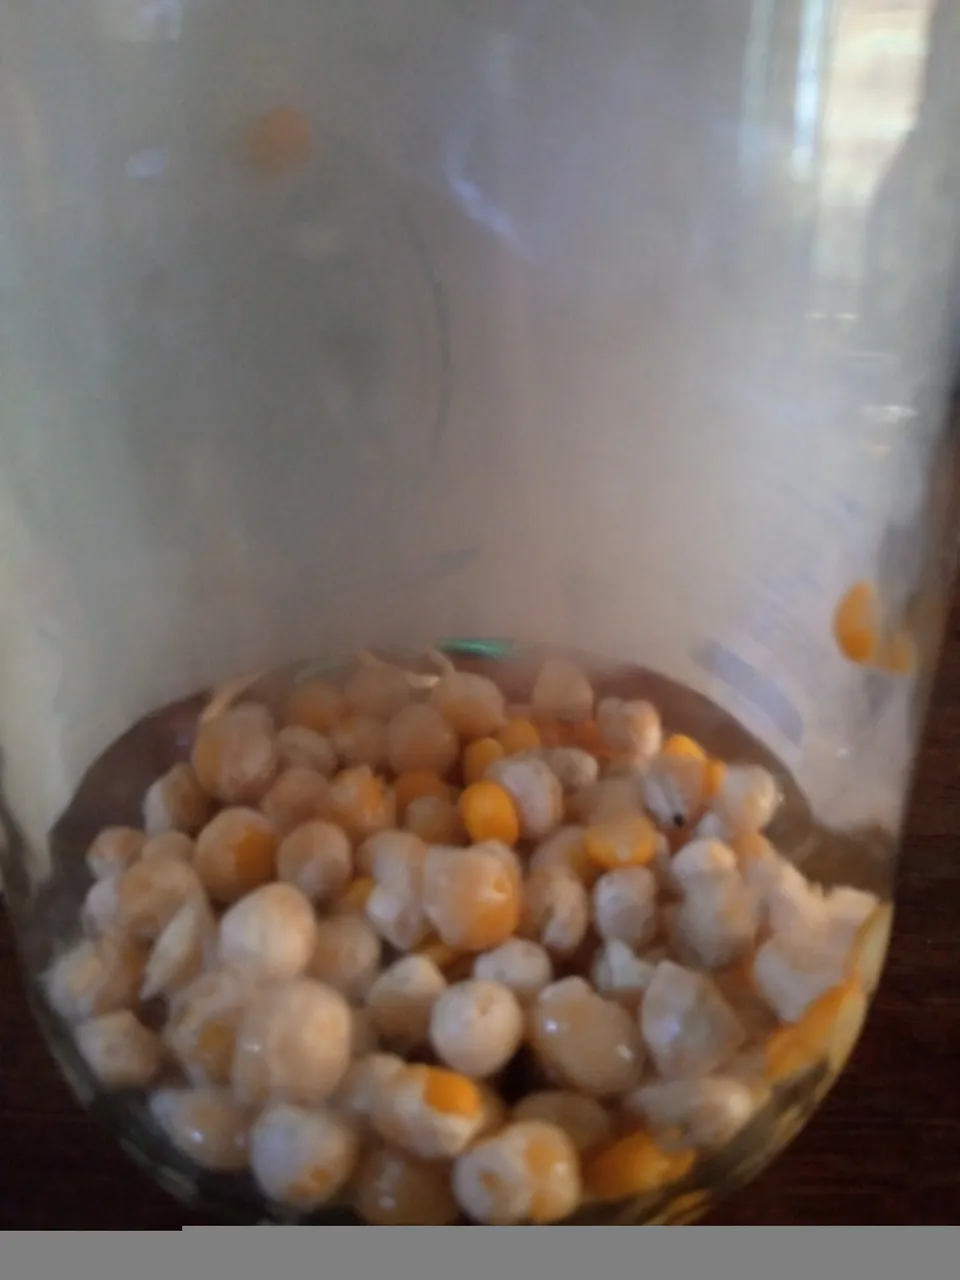
Primero debes colocar una cucharada de granos dentro del envase que usaras
Luego debes lavar bien los granos con agua potable.
Después de lavar le colocarás agua hasta que los rebases dos dedos por encima.
Dejar dos horas en remojo y escurrir bien.
Luego dejar en la oscuridad sin que pegue luz del sol.
Cada 6 horas lavar con mucho cuidado evitando que el agua caiga directo o de golpe en los frijoles para no desprenderlos.
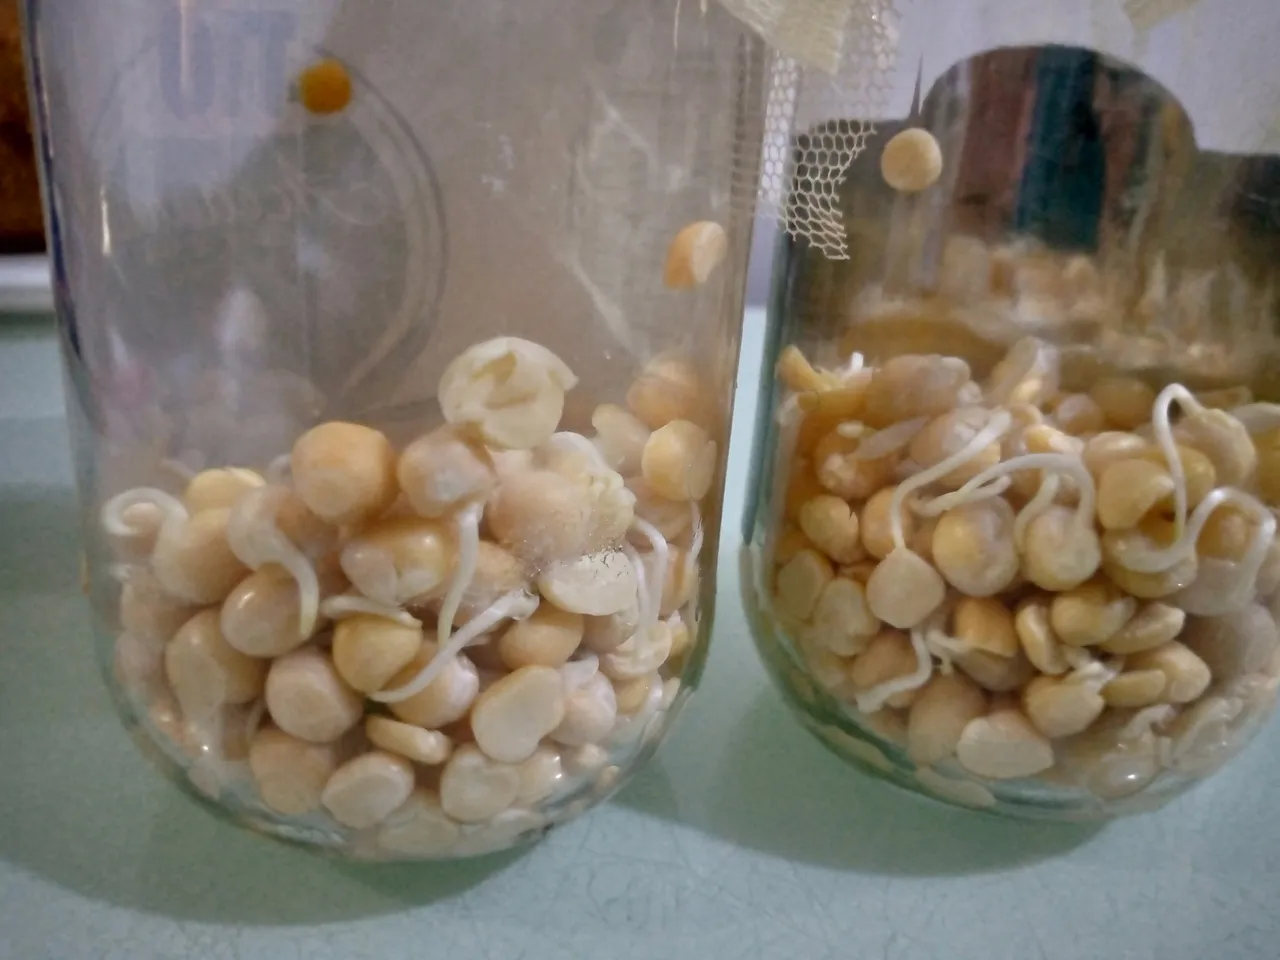
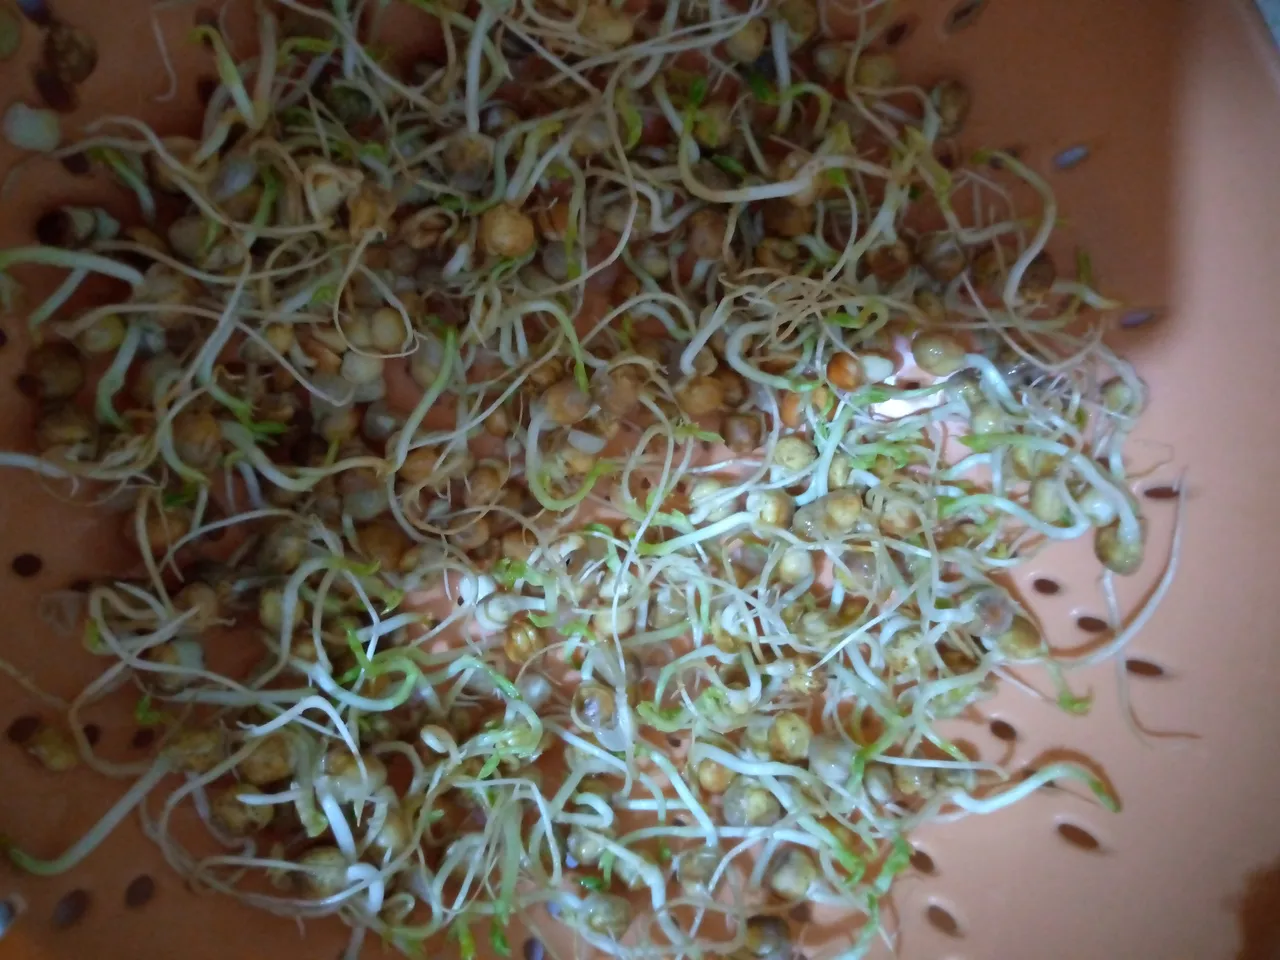
Al 2do dia ya notaras como comienzan a brotar.
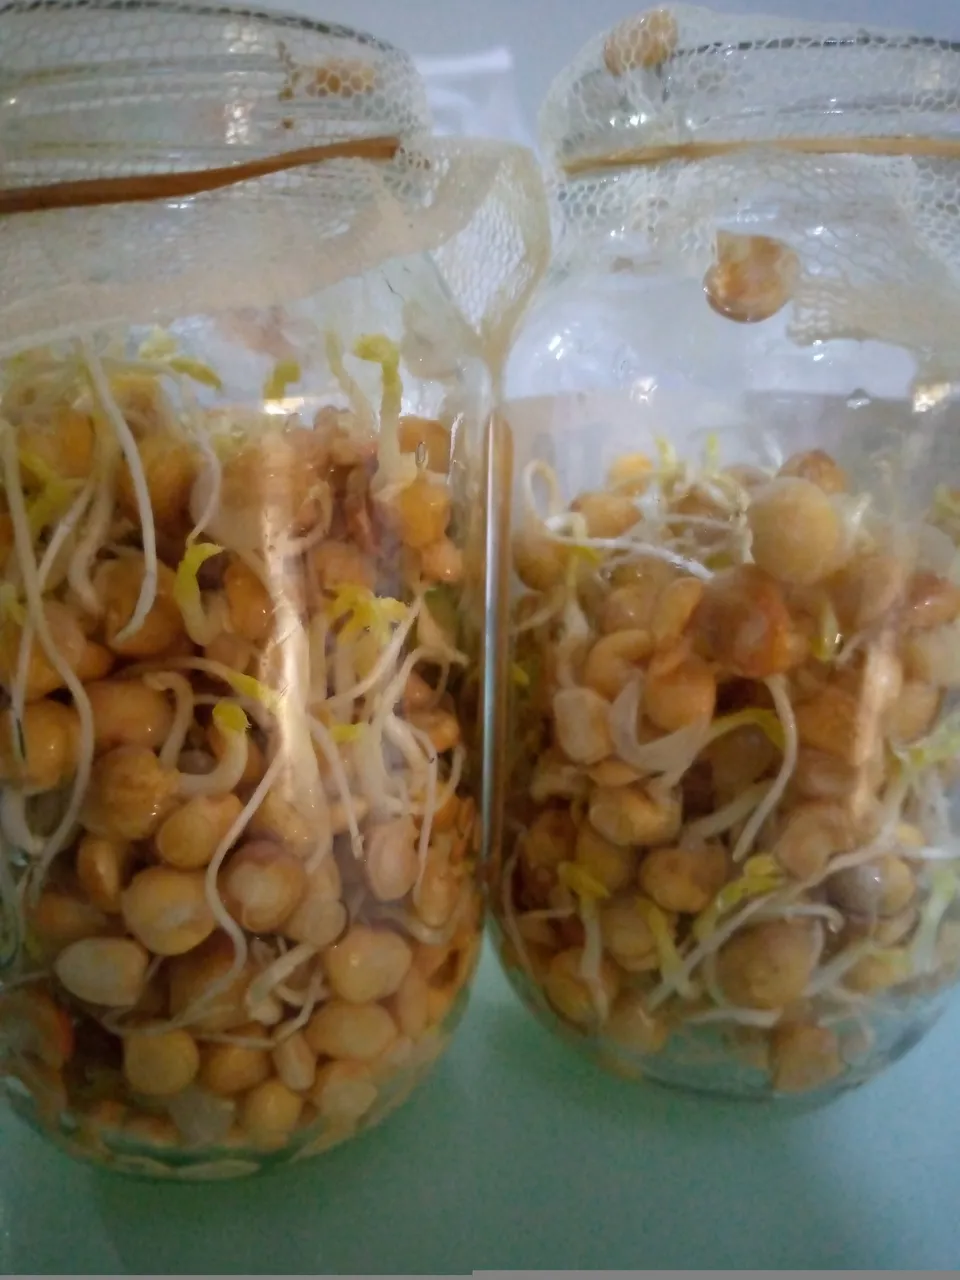
Del 3er al 4to dia veras los tallos mas grandes y colocaras a la luz no directa del sol para que los tallos se pongan verdes y tengas mas vitaminas, la luz del sol es necesaria.
- Entre el 5to y 7mo dia ya tus frijoles entallados estaran listos para comer como quieras, solo debes colocarlos en agua para que las cascaras que se desprendieron de los granos floten y sea mas facil de retirar.
Para mi es una receta super fácil y util, asi que espero que a ustedes les haya gustado también.
Hello bloggers of the hive, I hope you are very well as always! Today I bring you a step by step to make notched beans, those that you put in Chinese rice, but you can also eat them in salads and other meals and they are very nutritious and healthy, they have a lot of vitamins and if you prepare them the right way you can eat them whenever you want.
We start looking for any type of beans you have at home, the best are the small ones, so they will have a thin stalk, they can also be lentils, and you will only need two tablespoons and with this you will have approximately 250 grms of beans.
You should also look for a container preferably made of glass (I do it this way), but if you don't have one, it can be a large plastic bottle.
And finally if your container is glass you will use a mesh to cover the top to prevent insects from entering, allow the beans to breathe and easily rinse the beans while they are being made.
Having all the implements now we begin:
First you must place a spoonful of grains inside the container you will use.
Then you must wash the grains well with drinking water.
After washing you will put water until you exceed two fingers over them.
Leave them to soak for two hours and drain well.
Then leave in the dark without sunlight.
Every 6 hours wash carefully avoiding that the water falls directly or suddenly on the beans so as not to loosen them.
On the 2nd day you will notice how they begin to sprout.
On the 3rd to 4th day you will see the stems getting bigger and place in non direct sunlight so the stems will turn green and you will have more vitamins, sunlight is necessary.
Between the 5th and 7th day and your beans will be ready to eat as you want, just place them in water so that the shells that came off the beans float and is easier to remove.
For me it is a super easy and useful recipe, so I hope you liked it too.