Últimamente estamos más activo con las reparaciones parece que arrancamos eneros a full con todo y bueno como no, tenemos que hacer muchas que quedaron pendientes de el año pasado por lo menos yo hubieron cosas que no hice simplemente por no causar más daños al presupuesto ya que siempre existe la posibilidad de un trabajo de minutos se convierta horas, el día anterior el primer turno fue del A/C ahora le toca a una licuadora la cual tuvo un pequeño percance que la ha dejado incapaz de cumplir su función
Lately we are more active with the repairs, it seems that we are starting January at full speed with everything and well of course, we have to do many things that were pending from last year, at least for me there were things that I did not do simply for not causing more damage to the budget because there is always the possibility that a job of minutes becomes hours, the previous day the first shift was the A/C, now it is the turn of a blender which had a small mishap that has left it unable to fulfill its function.


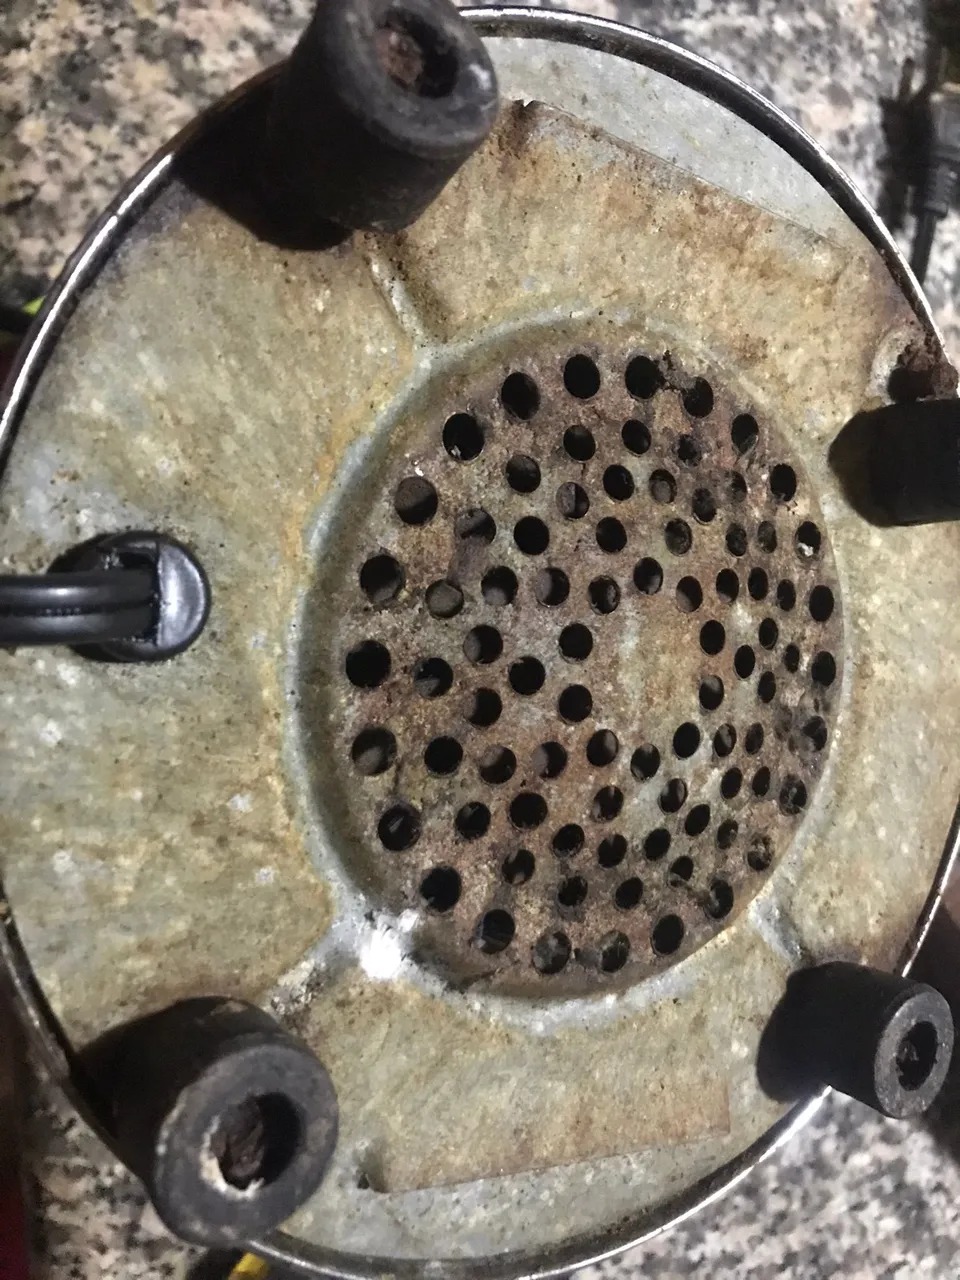
Comencé por poner de cabeza la licuadora para poder llegar a sus entrañas y cambiar el eje que se había partido es acá donde me doy cuenta que los tornillos estaban en pésimo estado estaban tan corroídos que literalmente se rompieron al sacar las gomas, ni siquiera tenían cuadrante algo insólito, pero digamos que lo puedo tomar como algo normal debido a la cantidad de años que tengo entendido tiene esta licuadora.
I started by turning the blender upside down in order to get to its entrails and change the shaft that had broken, it is here where I realized that the screws were in terrible condition, they were so corroded that they literally broke when I took out the rubbers, they did not even have a dial, something unusual, but let's say that I can take it as something normal due to the number of years that I understand this blender has been in use for.
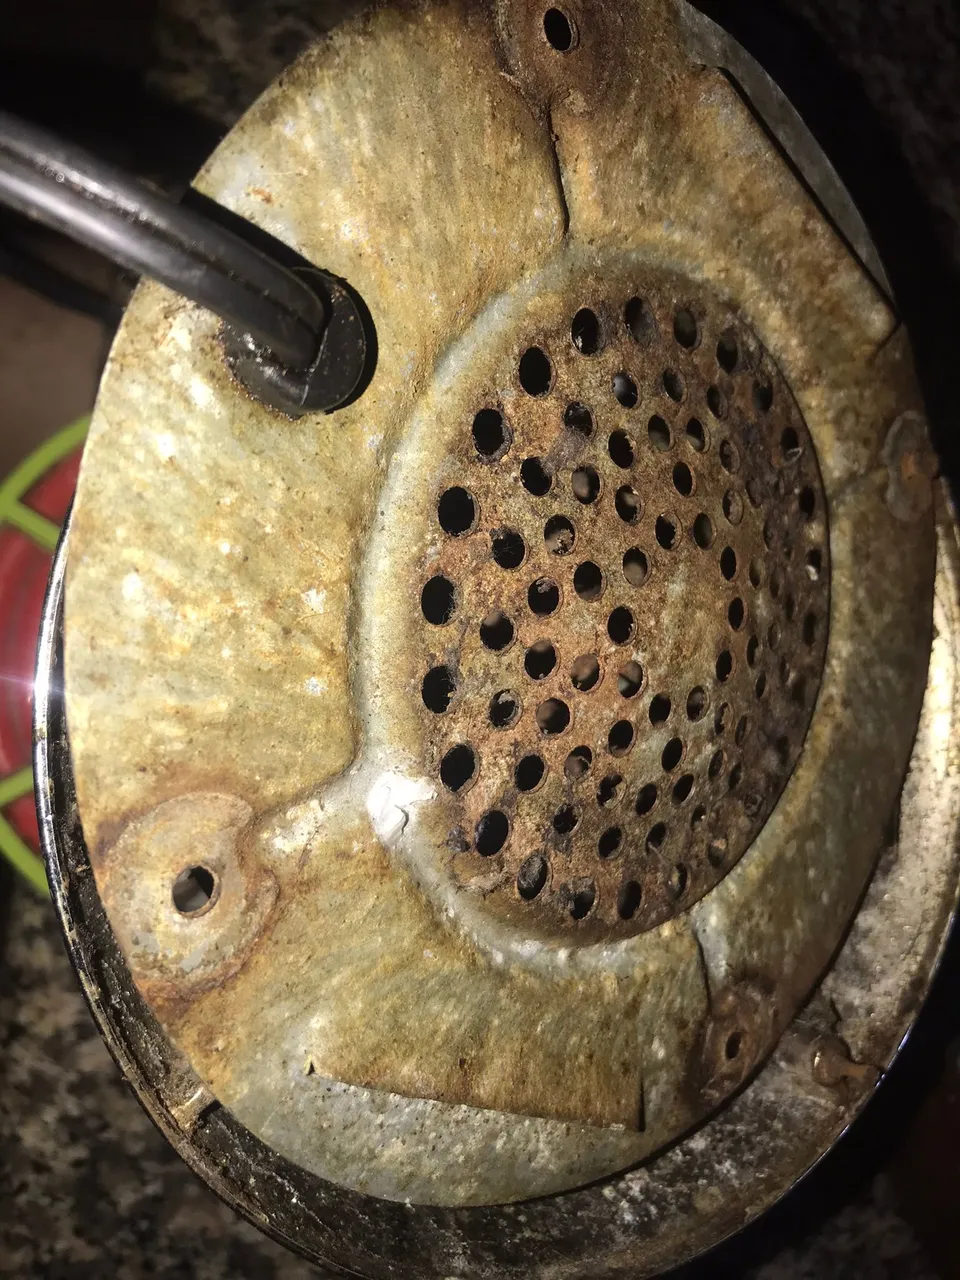
En la foto pudieron apreciar lo mal que estaban esos tornillos no tenían forma, luego de quitar las 4 gomas fue momento de ver que tal el interior y efectivamente como se ve por fuera, peor estaba por dentro
In the photo you could see how bad those screws were, they had no shape, after removing the 4 rubber bands it was time to see how was the inside and indeed, as seen from the outside, the inside was worse.
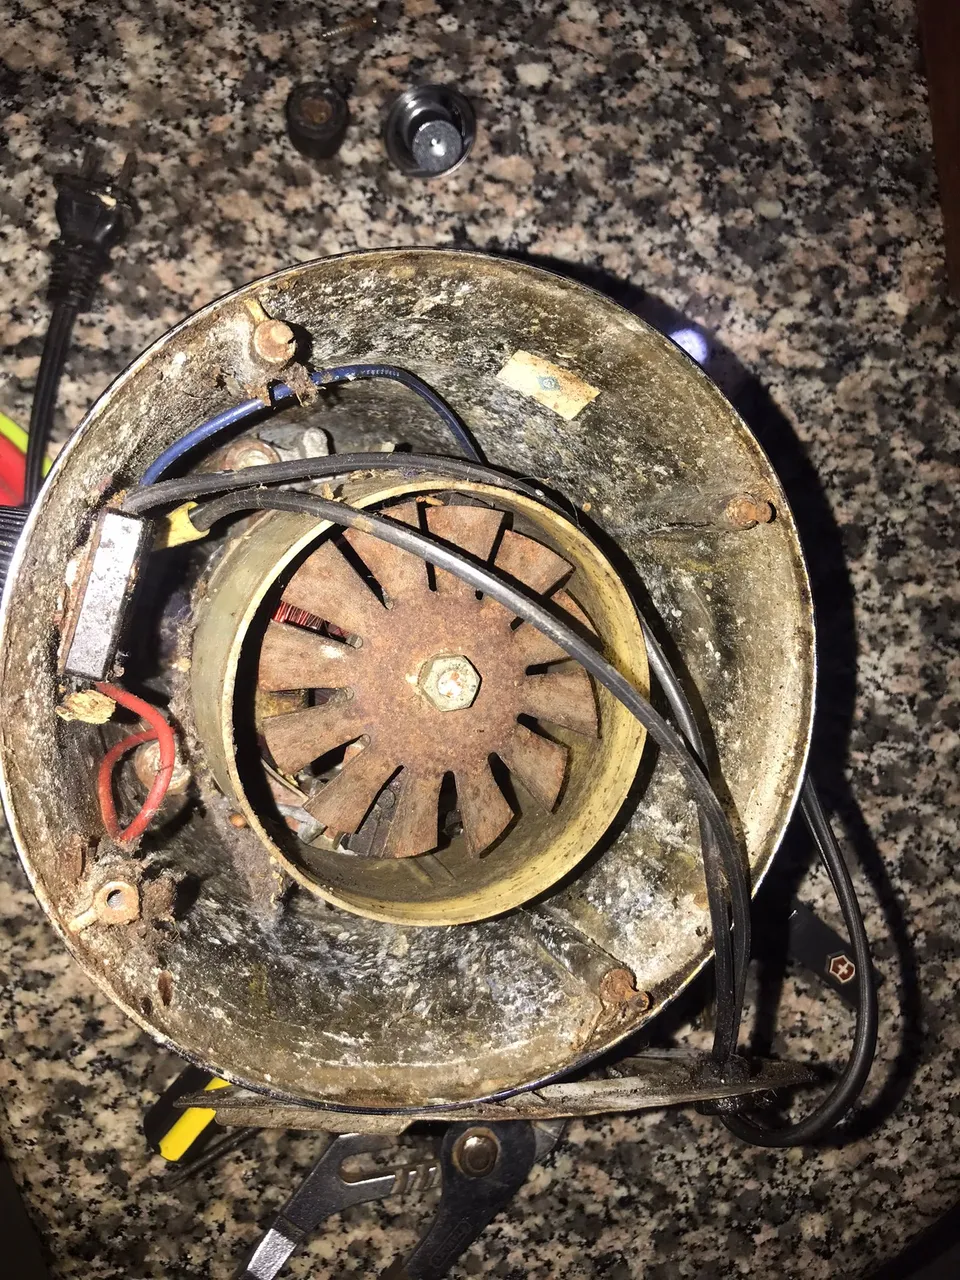
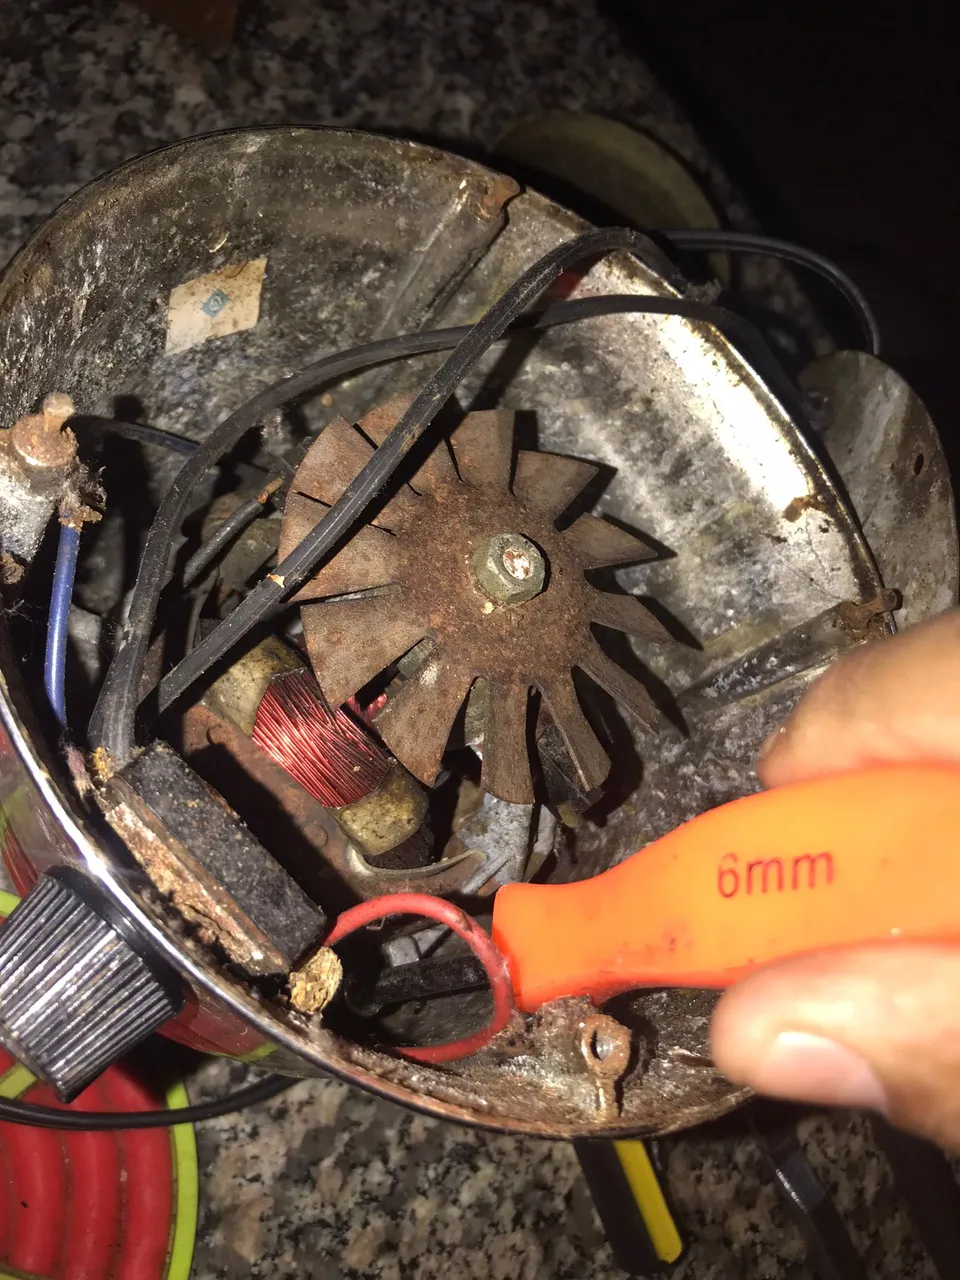
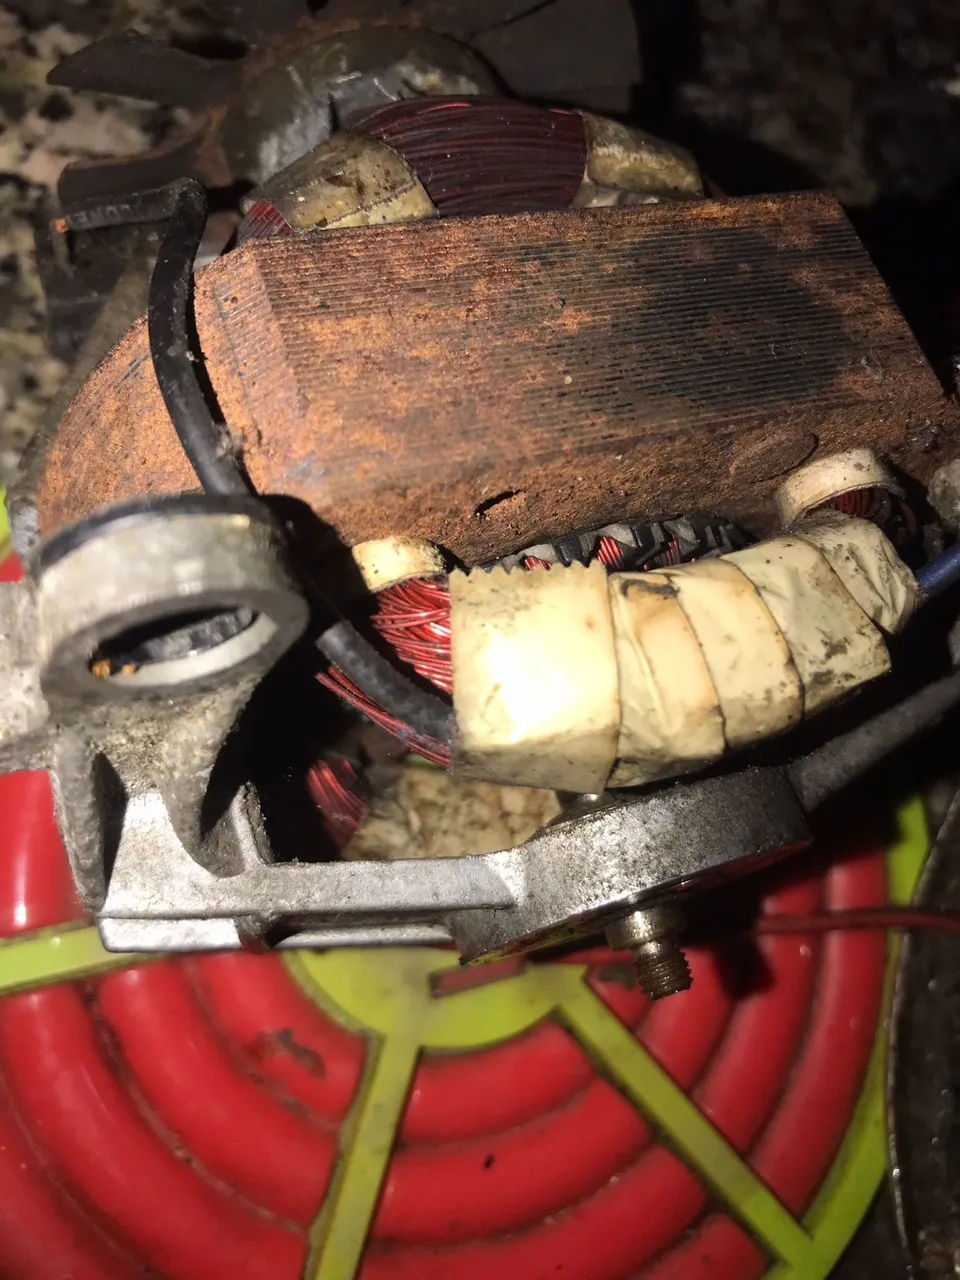
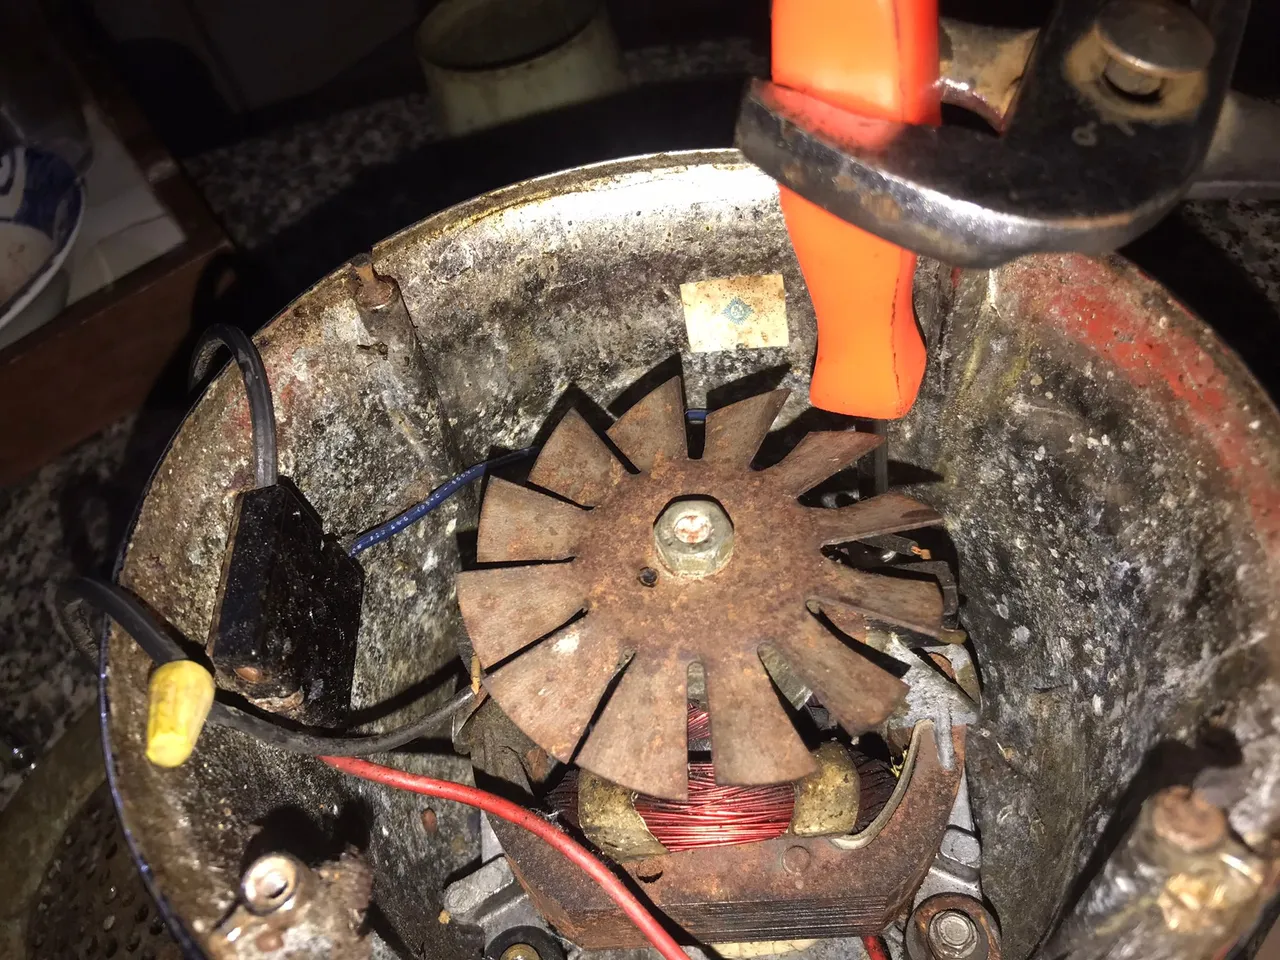
Mucha corrosión telas de araña y mucho sucio, mas de lo que pensaba para algo tan pequeño y con poco espacio, lo siguiente a quitar fueron los tornillos que sostiene el motor fijo a la base me ayude de un destornillador de copa Número 6mm el cual me funciono para todo el proceso de desmontaje del motor.
A lot of corrosion, spider webs and a lot of dirt, more than I thought for something so small and with little space, the next thing to remove were the screws that hold the motor fixed to the base, I used a 6mm cup screwdriver which worked for the whole process of disassembling the motor.
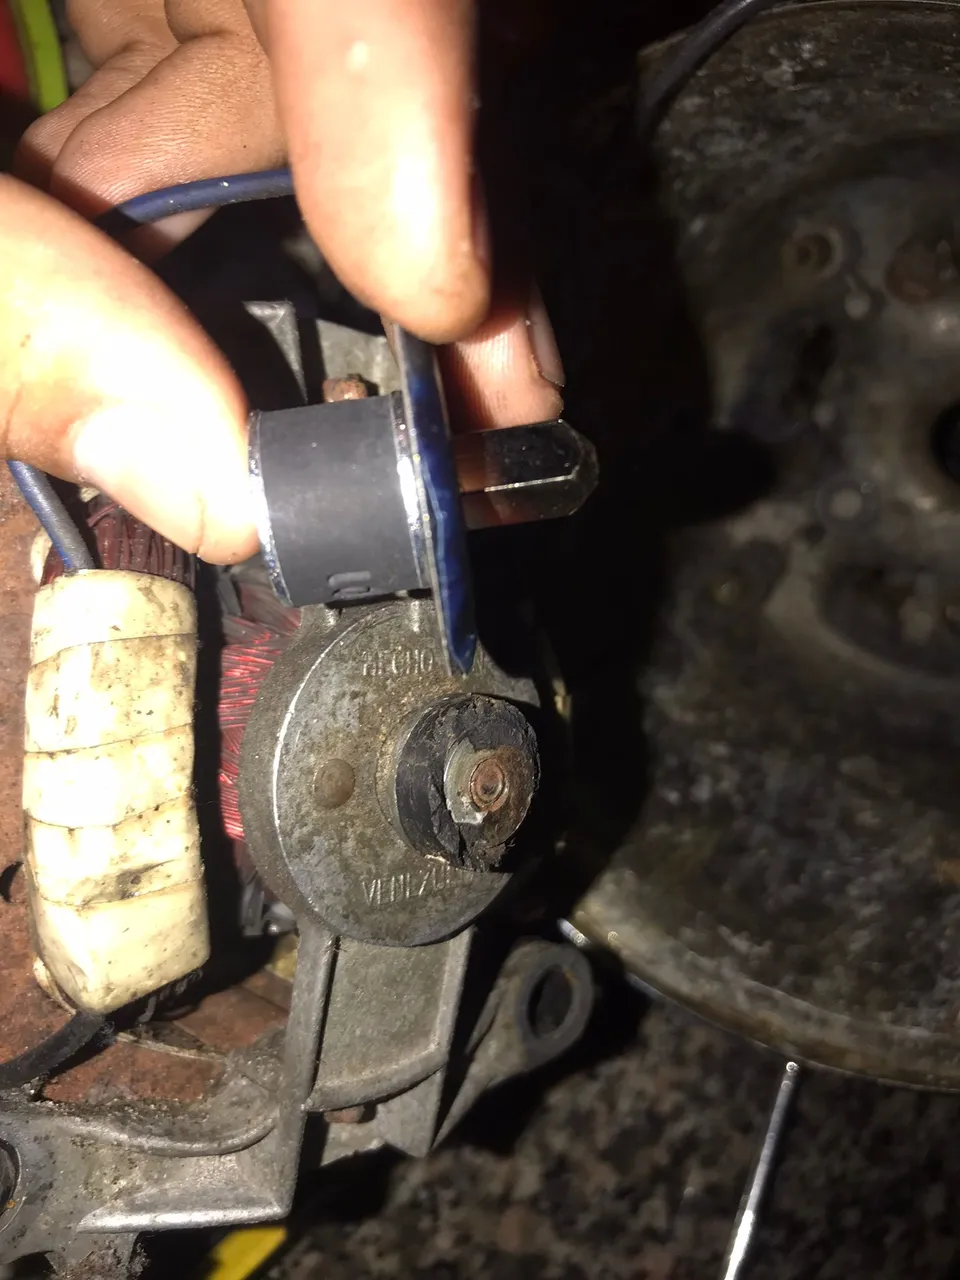
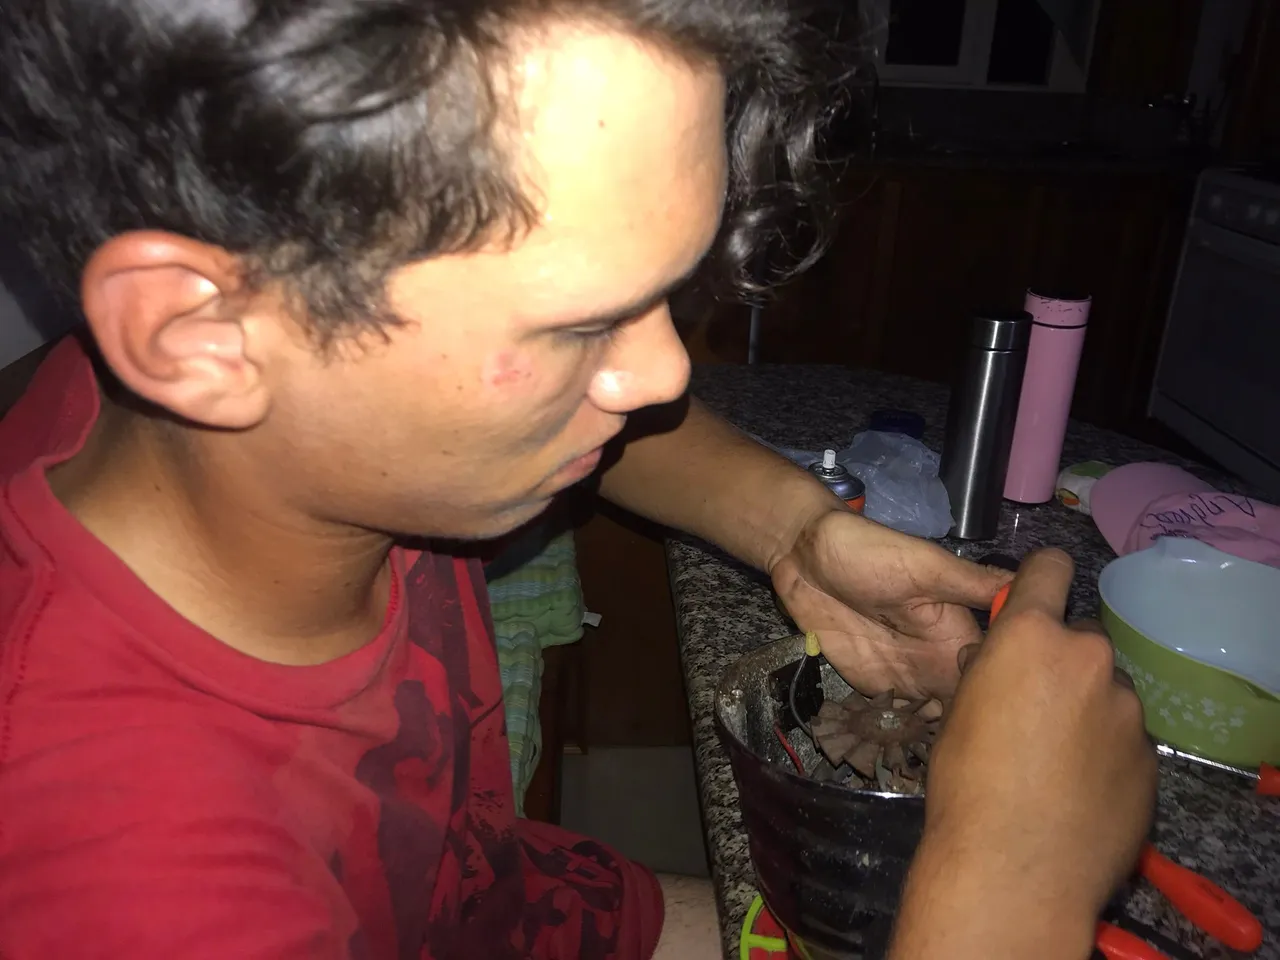
Una vez afuera ya podía trabajar libremente en el pedazo del cuadrante que había quedado partido para lo cual me ayude de un alicate y con otro destornillador de copa numero 10 si mal no recuerdo me ayude para trancar el eje en la parte trasera pero este se resistía a salir
Once outside I could work freely on the piece of the quadrant that had been broken for which I helped myself with a pair of pliers and with another number 10 cup screwdriver if I remember correctly I helped myself to lock the shaft in the rear part but it resisted to come out.

Comparación del eje viejo junto al nuevo, bueno lo que queda del viejo , para poder sacarlo tuve que usar un poco de un aflojador de tuercas que tenía en la malo, ya que la verdad este se resistía a salir por las buenas
Comparison of the old axle next to the new one, well what is left of the old one, to be able to take it out I had to use a little bit of a nut loosener that I had in the bad one, since the truth is that this one resisted to come out by the good ones.
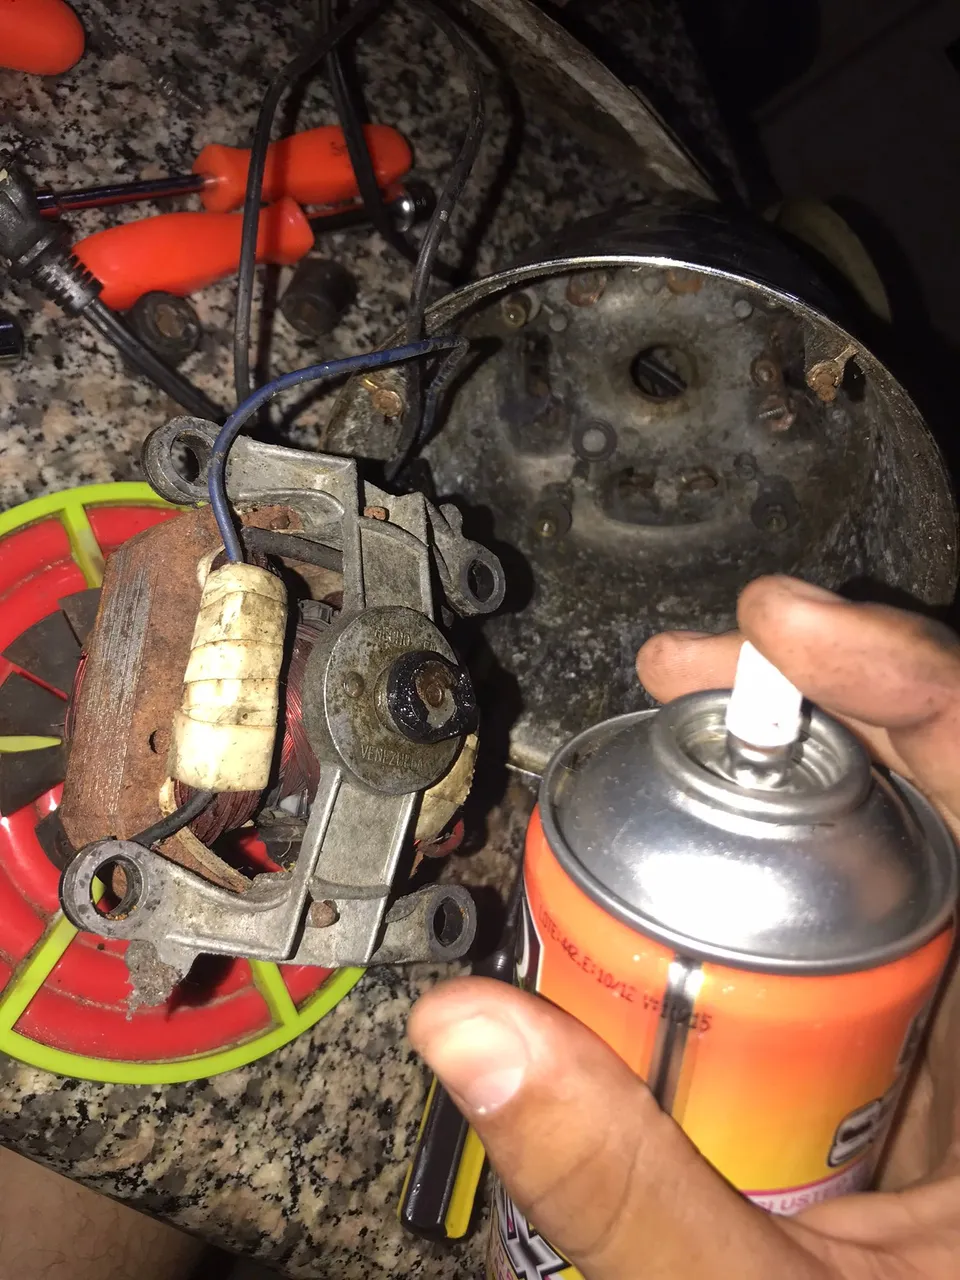
Espere unos minutos y ya después fue sencillo retirar el pedazo de eje de una manera más sencilla, no soy muy fanatico de usar ayudantes mecánicos pero en este caso me hizo falta, me ayudó mucho con el proceso de sacar el dichoso pedazo de eje. ahora pudiendo seguir con el armado puse el eje y arme todo nuevamente.
I waited a few minutes and then it was easy to remove the piece of shaft in a simpler way, I'm not a fan of using mechanical helpers but in this case I needed it, it helped me a lot with the process of removing the piece of shaft. now I could continue with the assembly I put the shaft and put everything back together.
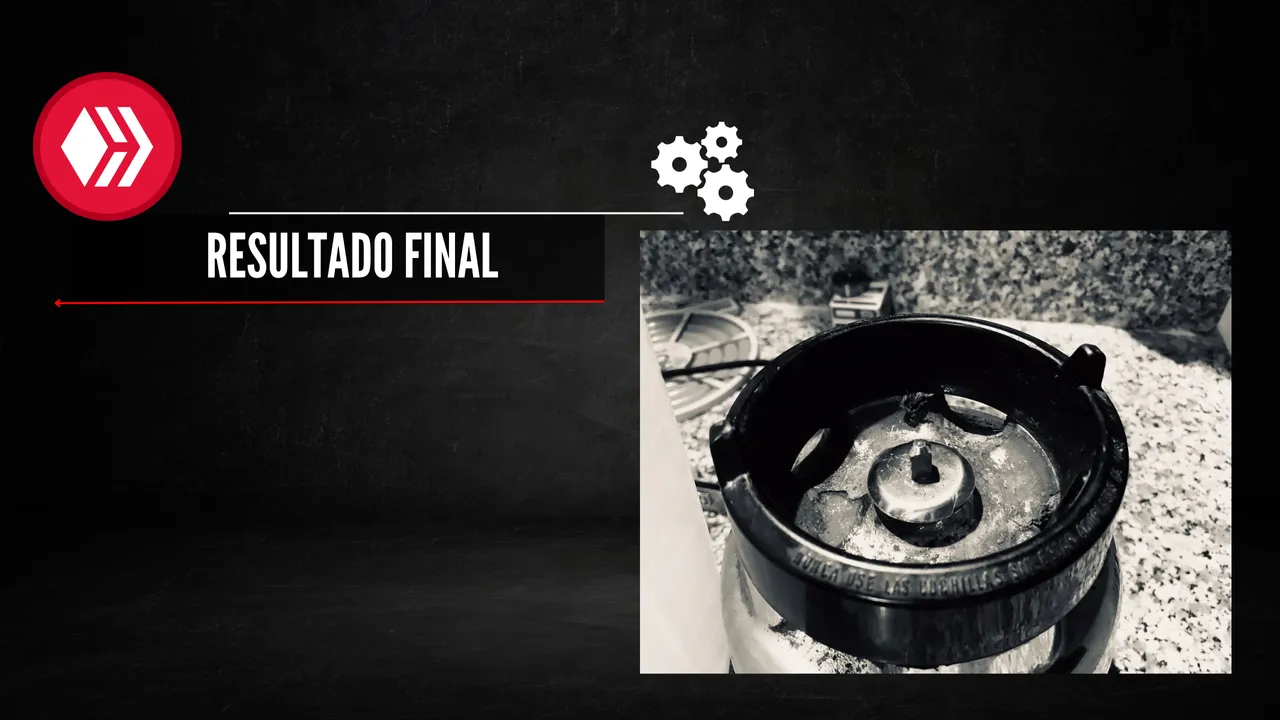
Pues es hora de mostrar el resultado final!, siendo sinceros no me dio mucho trabajo esta reparación y claro esto fue rápido tal vez fueron 1 hora a 40 minutos de trabajo y quedo a la perfección!, creo que lo mas complicado de todo el trabajo fue sacar los tornillos partidos que había en la parte inferior que se dañaron debido a toda la corrosión que había en las patitas de goma, pero sin embargo no fue algo que detuviera el proceso si lo alargo mas no acabo con esto y ahora si en la siguiente foto el resultado final!
Well it's time to show the final result, being honest I did not give me much work this repair and of course this was fast maybe it was 1 hour to 40 minutes of work and it was perfect, I think the most complicated of all the work was to remove the split screws that were at the bottom that were damaged due to all the corrosion that was in the rubber feet, but nevertheless was not something that stopped the process if I lengthen it more not just with this and now if in the next picture the final result!
Muchas gracias por llegar hasta acá! nos vemos en el próximo contenido ! hasta luego!
Thank you very much for coming this far! see you in the next content! see you later!
Traducido desde Translated with www.DeepL.com/Translator (free version)
Las fotos son editadas desde canva, videos editados desde capcut desde mi iphone 7 plus
Translated from Translated with www.DeepL.com/Translator (free version)
Photos are edited from canva, videos edited from capcut from my Iphone 7 plus