As technology advances, and logically with the constant appearance of new equipment for the home, which require electrical outlets according to their type. We need to update those electrical outlets, either because they have expired, or because they are in very bad condition. In my case, the two previous premises are fulfilled since I have an electrical outlet with two inputs, and it is already broken and burned. This need arises because that outlet is where the new fiber optic equipment will be installed, which will provide Internet service to our home, so I like to be prepared to avoid inconveniences.
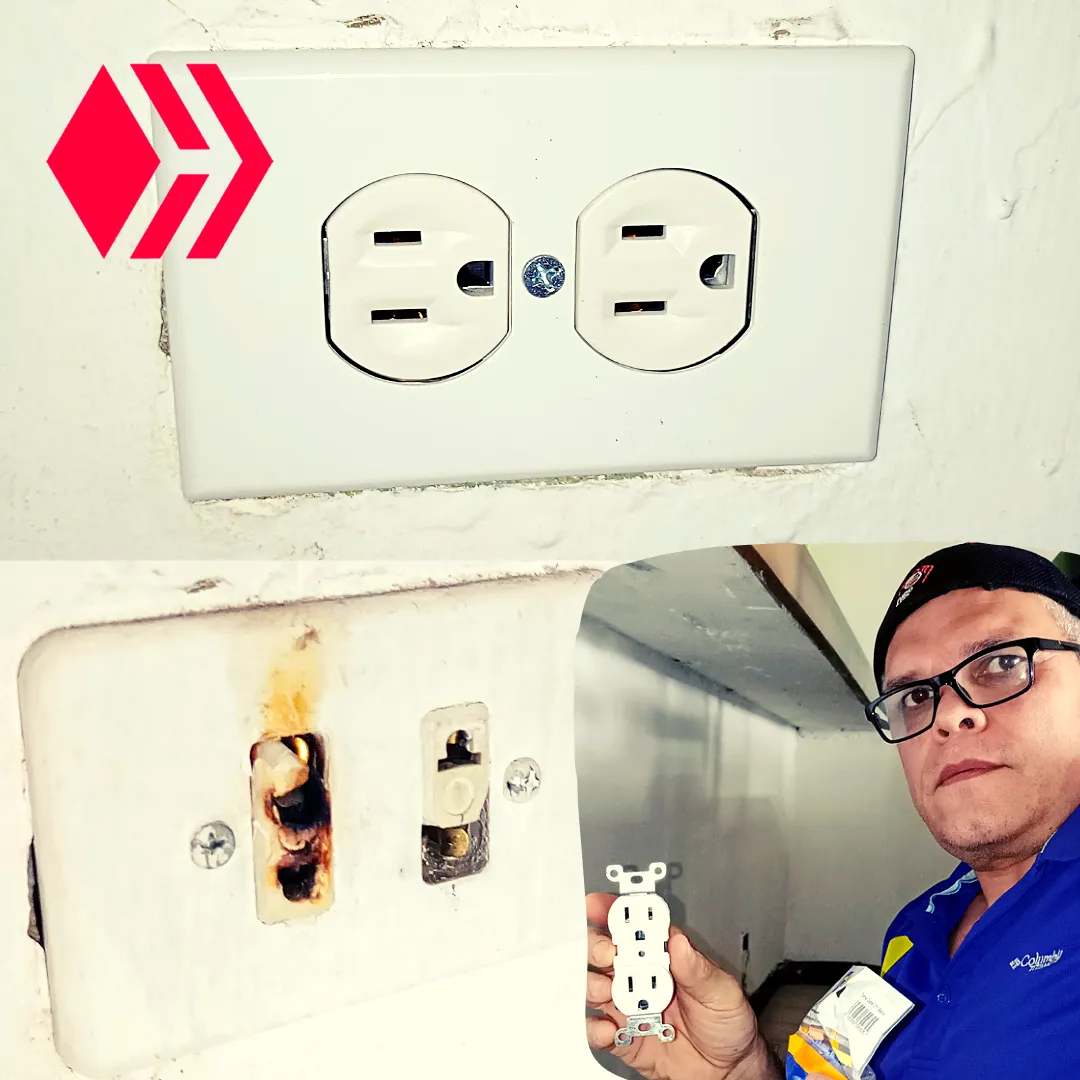
Imagen de mi Autoría Editada por/Image of my Authorship Edited by Canva
A medida que avanza la tecnología, y lógicamente con la constante aparición de nuevos equipos para el hogar, que requieren de tomas eléctricas acordes a su tipo. Nos vemos en la necesidad de actualizar esas tomas eléctricas o tomacorrientes, bien sean porque las mismas han caducado, o porque se encuentran en muy mal estado. En mi caso, las dos premisas anteriores se cumplen ya que cuento con una toma eléctrica de dos entradas, y la misma ya está rota y quemada. Esta necesidad surge porque en esa toma es donde será instalado el nuevo equipo de fibra óptica, que surtirá del servicio de Internet a nuestro hogar, por lo que me gusta estar preparado para evitar inconvenientes.

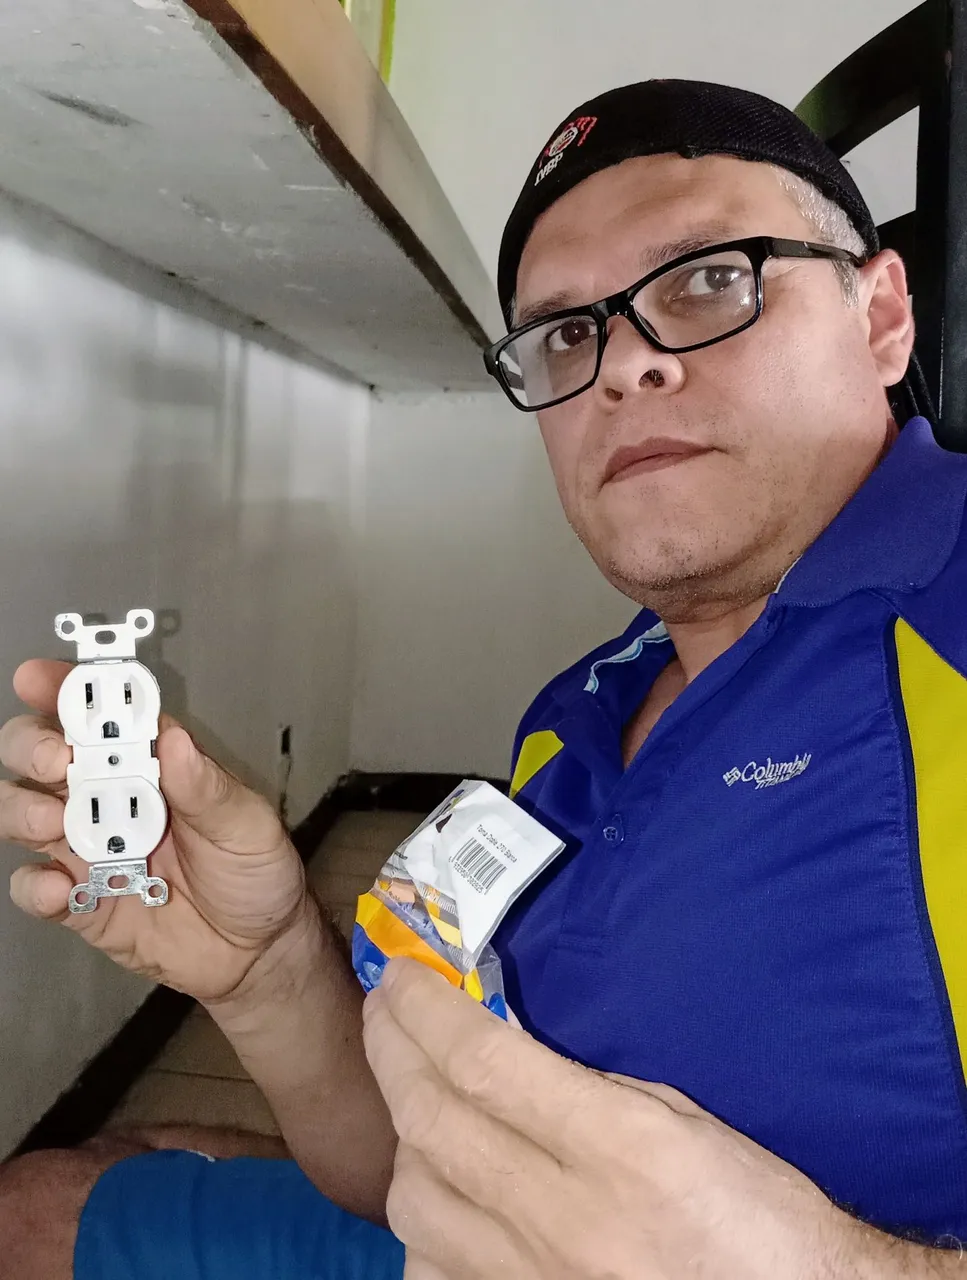
For the time being, the idea is to replace the damaged socket with a new model 270 triple input socket. The technical characteristics of this new model is 125 volts (V), 15 amps (A), 60 hertz (Hz); and it had a modest cost of $2.00 plus $1.00 for the cover. It is valid to mention that I am not an electrician, however, I defend myself in certain things related to the house; because in this life one must know a little bit of everything. Of course, you have to comply with certain safety measures in order not to suffer an electrocution. Now, if you don't know what to do, then call a specialist because the best hunter misses the hare.
Por lo pronto la idea es cambiar la toma dañada por una nueva de triple entrada modelo 270. Las características técnicas de este nuevo modelo es de 125 voltios (V), 15 amperios (A), 60 hertz (Hz); y tuvo un módico costo de 2$ más 1$ por la tapa. Es válido mencionar que no soy electricista, sin embargo me defiendo en ciertas cosas relacionadas a la casa; porque en esta vida se debe saber de todo un poco. Claro está, que se tienen que cumplir ciertas medidas de seguridad para no sufrir una electrocución. Ahora, sino sabe lo que se debe hacer, entonces llame a un especialista porque al mejor cazador se le escapa la liebre.
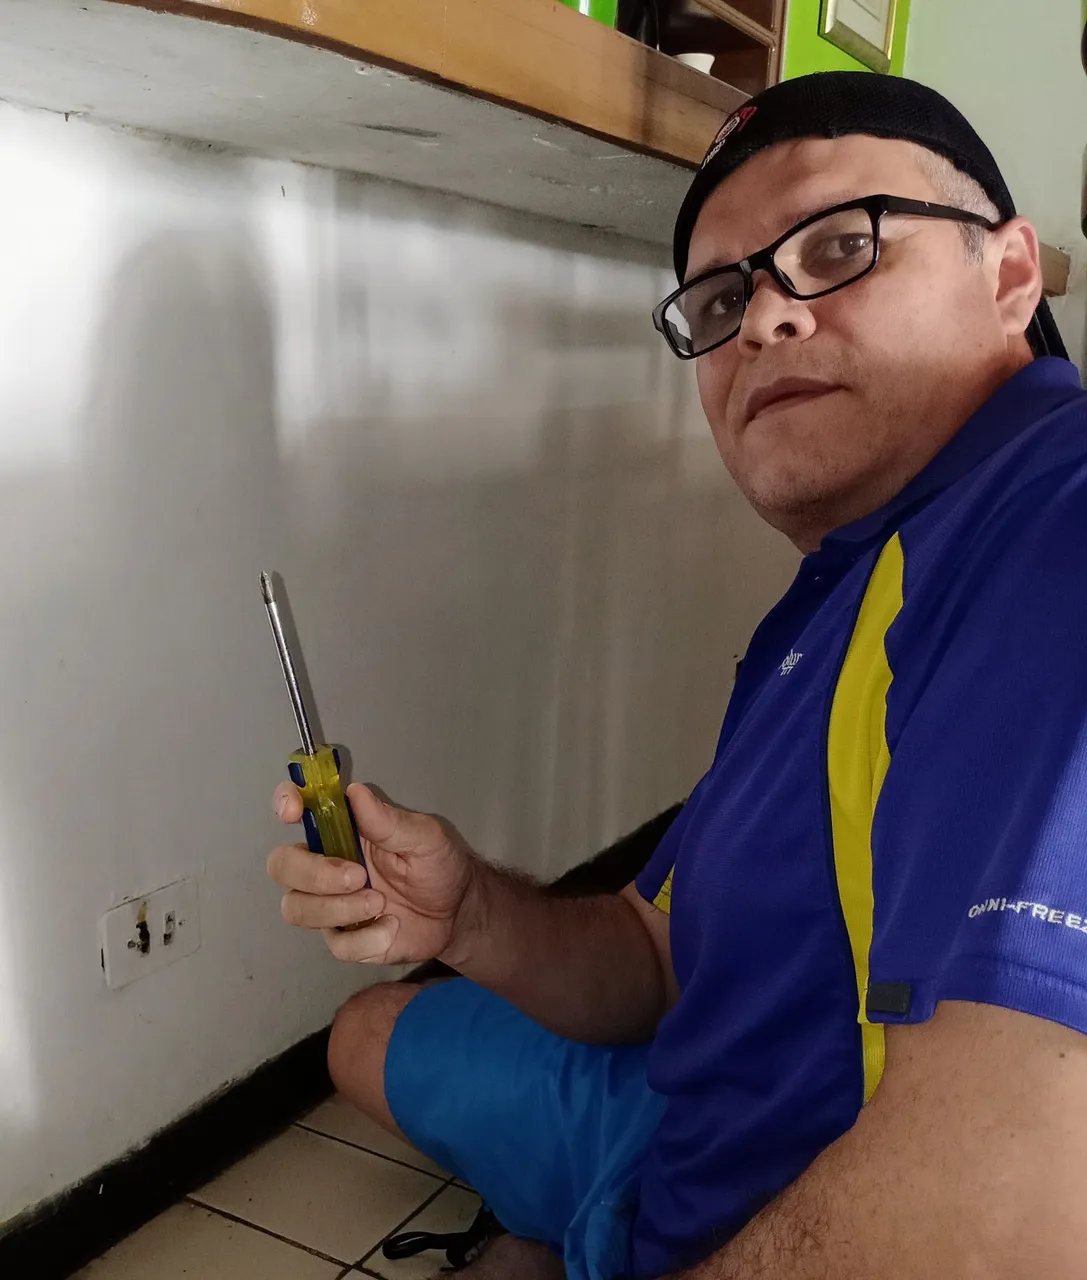
To make the replacement, we must keep in mind some materials to achieve our goal. Logically we need the new electrical outlets, since in the house we are going to make two changes, one in the living room, and another in the kitchen; however, we will take the step by step of the change of the outlet located in the living room of the house. Continuing with the necessary materials, we will use a star screwdriver (with it we can test if there is current) and a blade screwdriver, although at first sight we observe that the damaged socket has star screws, we do not know what type of screw is inside. We have a clamp with cutting capacity, a voltage protector to check the installation; and in case it is needed, we also have a black teipe. Now we go to the action.
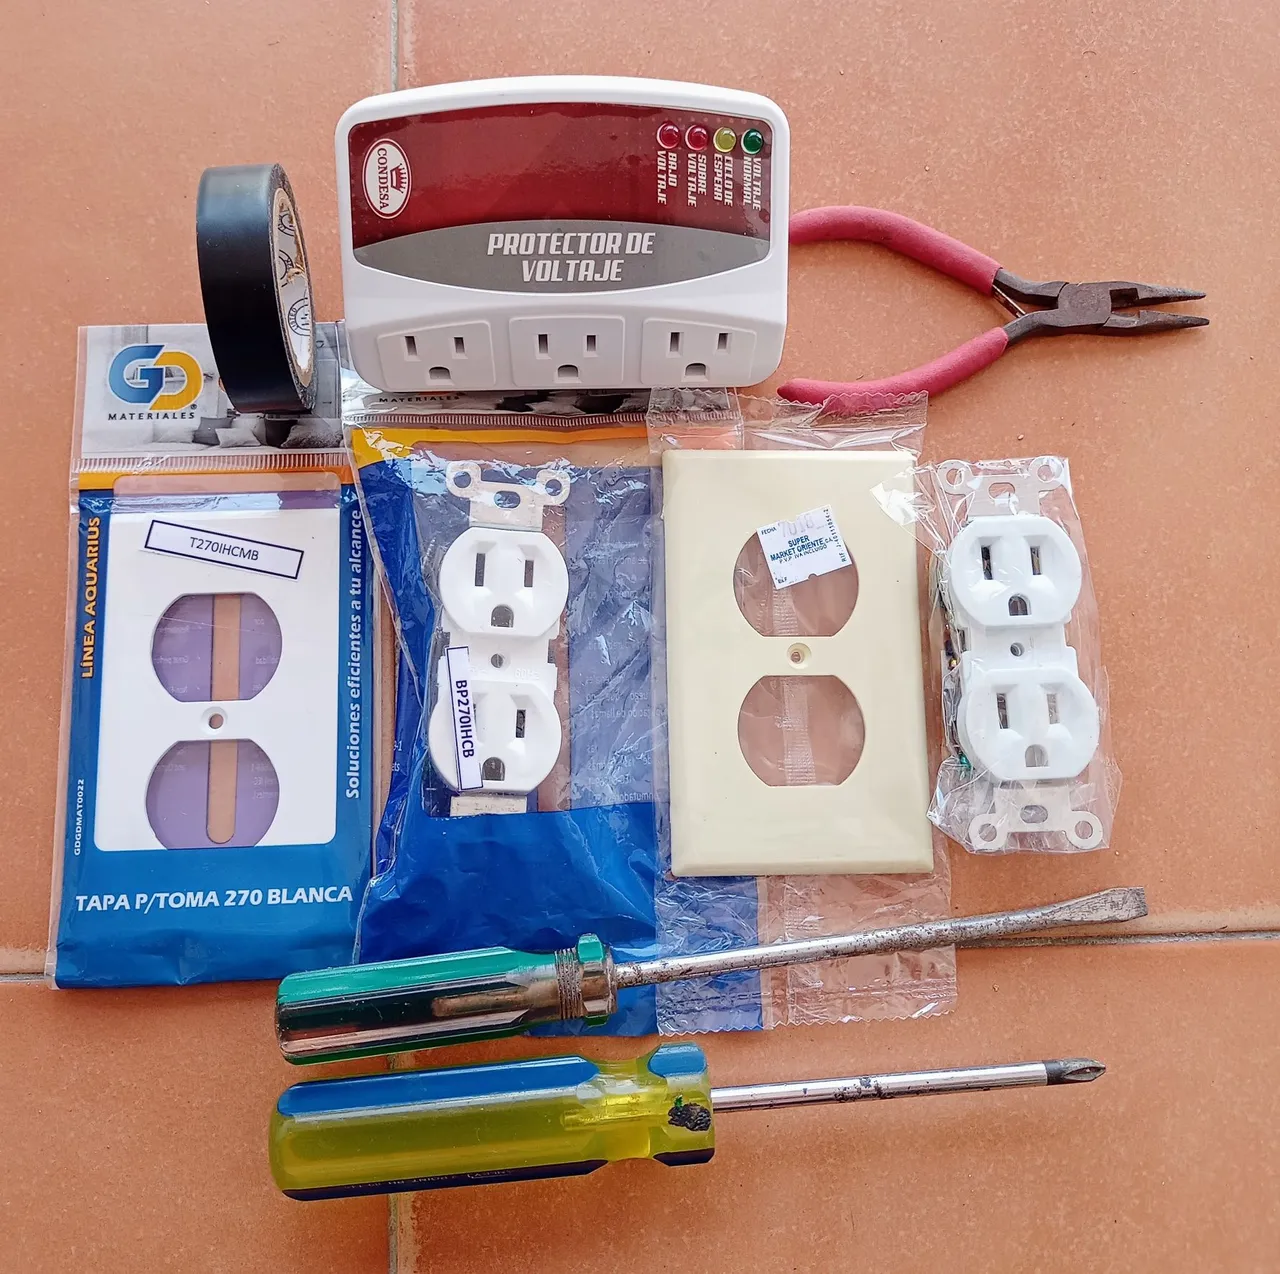
Para realizar la sustitución, debemos tener presente algunos materiales para lograr nuestro objetivo. Lógicamente necesitamos las tomas eléctricas nuevas, ya que en la casa vamos a realizar dos cambios, uno en la sala, y otro en la cocina; sin embargo, llevaremos el paso a paso del cambio de la toma ubicada en la sala de la casa. Continuando con los materiales necesarios, usaremos un destornillador de estrella (con él podemos probar si hay corriente) y uno de pala, aunque a simple vista observamos que la toma dañada tiene tornillos de estrella, no sabemos que tipo de tornillo están por dentro. Contamos con una pinza con capacidad cortadora, un protector de voltaje para comprobar la instalación; y por si se necesita, también contamos con un teipe negro. Ahora nos vamos con la acción.
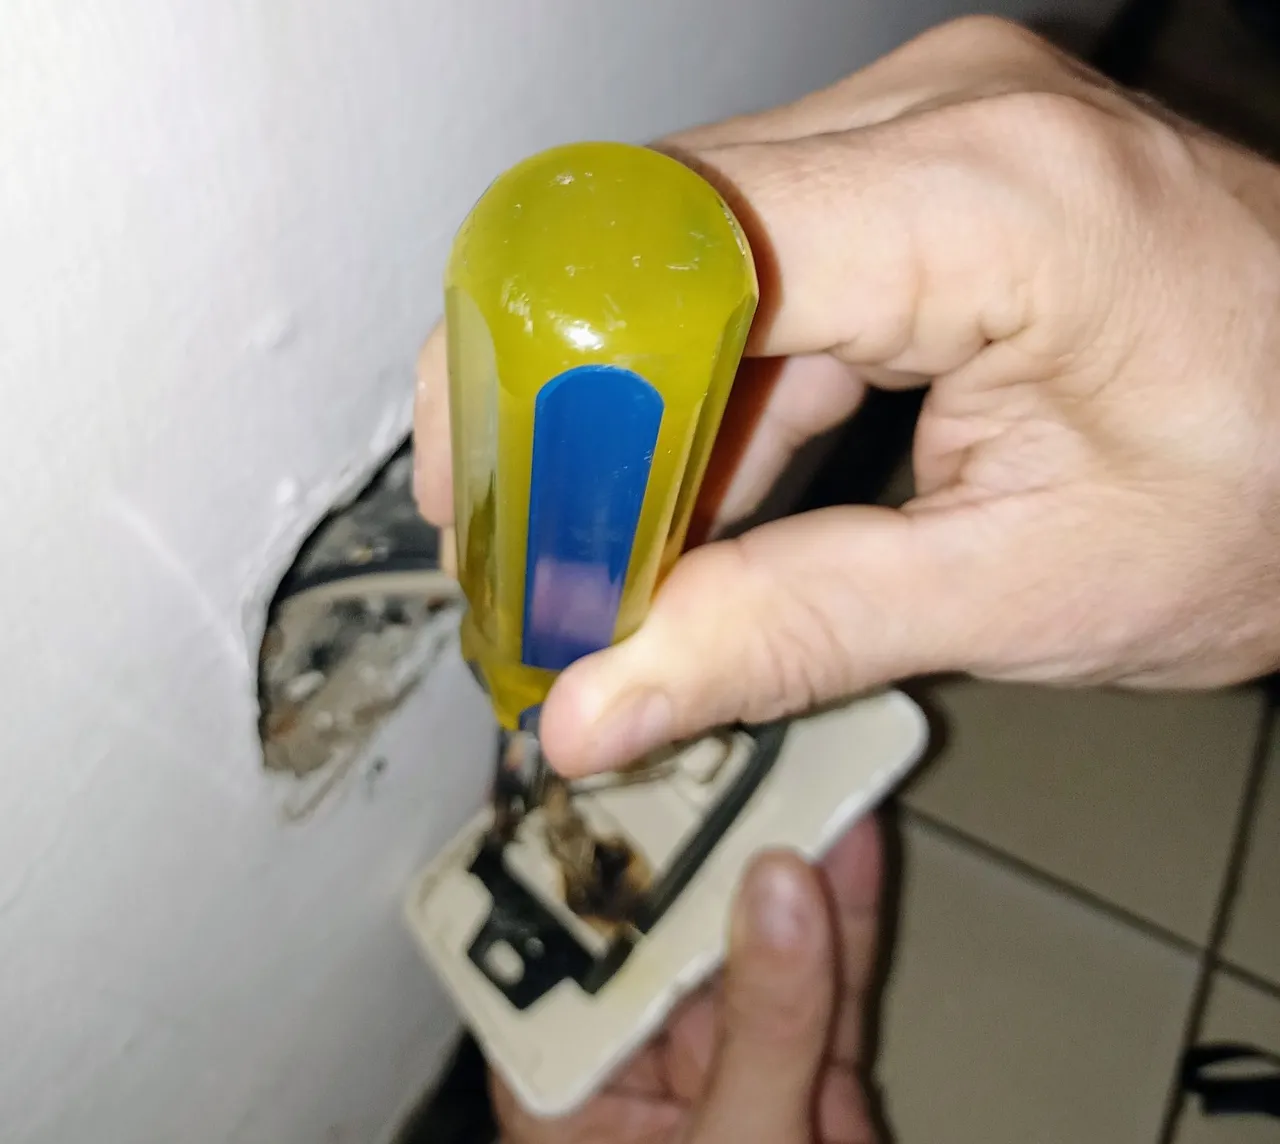
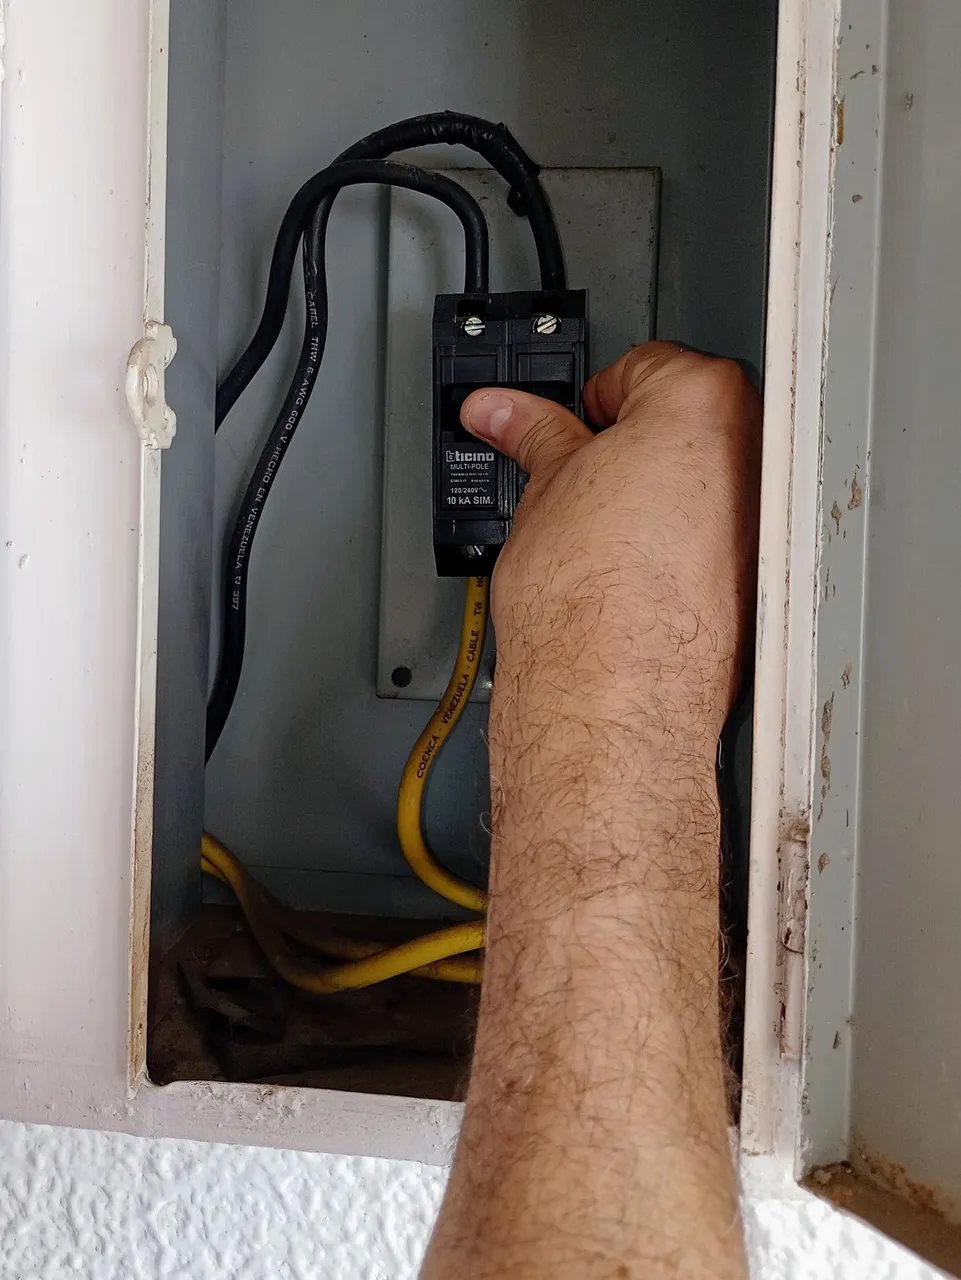
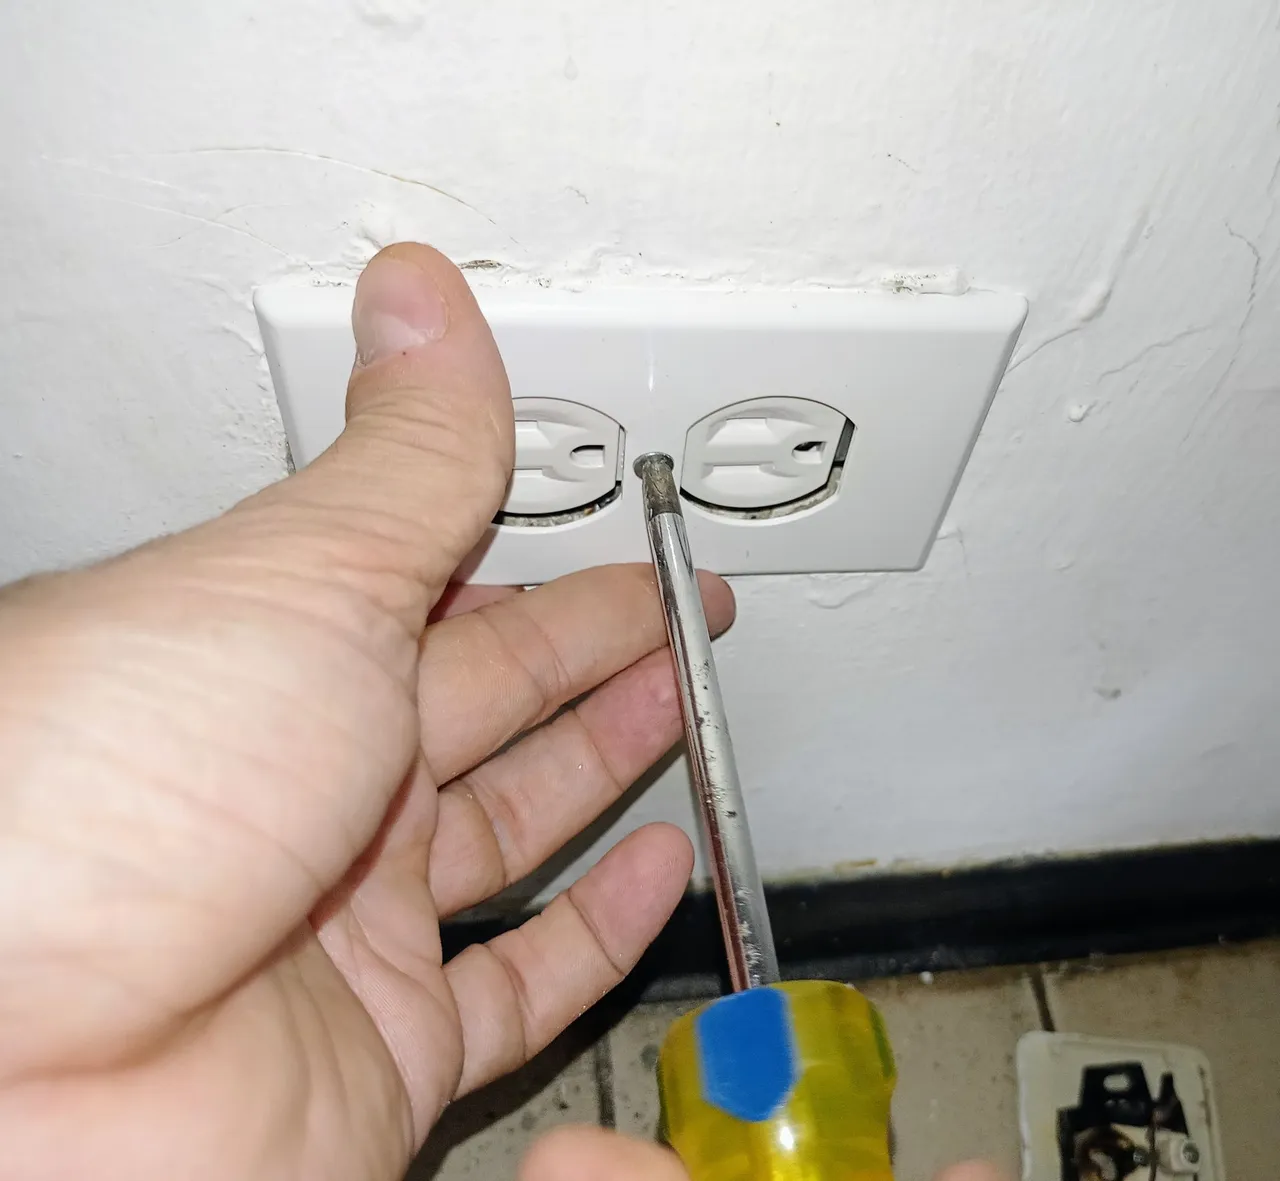
Many expert people work without cutting the electricity, however, as I said before, the best hunter misses the hare. Then, as I am always cautious, the first thing I do is to lower the main breaker, to cut the electricity; then, as it is observed that the screws are of star or groove, logically we use the star screwdriver. Then, we proceed to unscrew each one of the screws, redundancy aside, and then with the same screwdriver, test if the current was really cut off, since this instrument works as a tester.
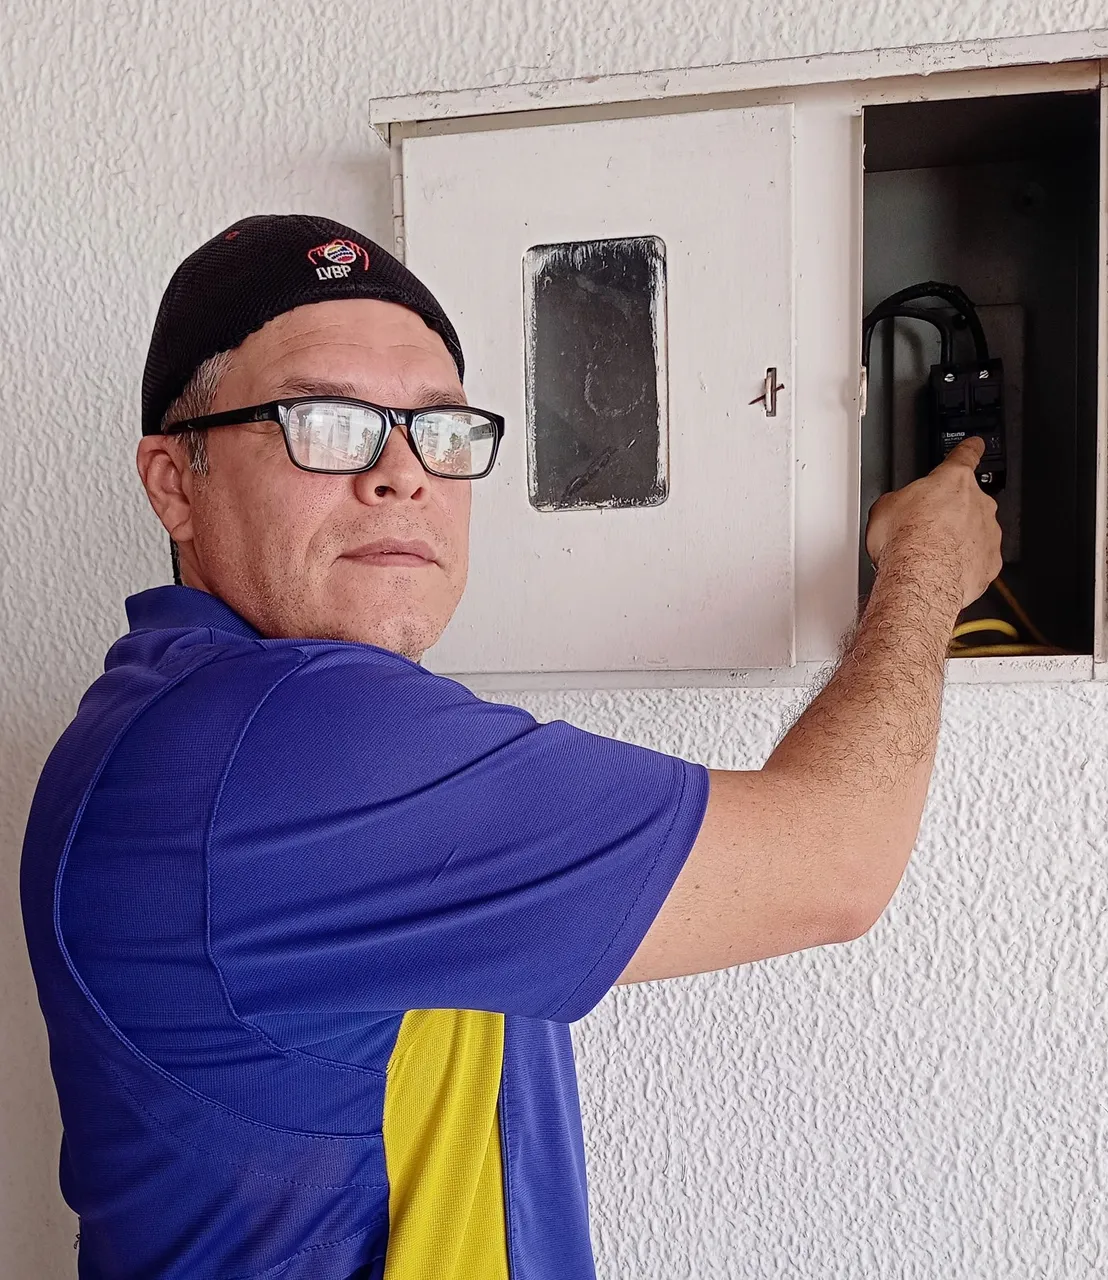
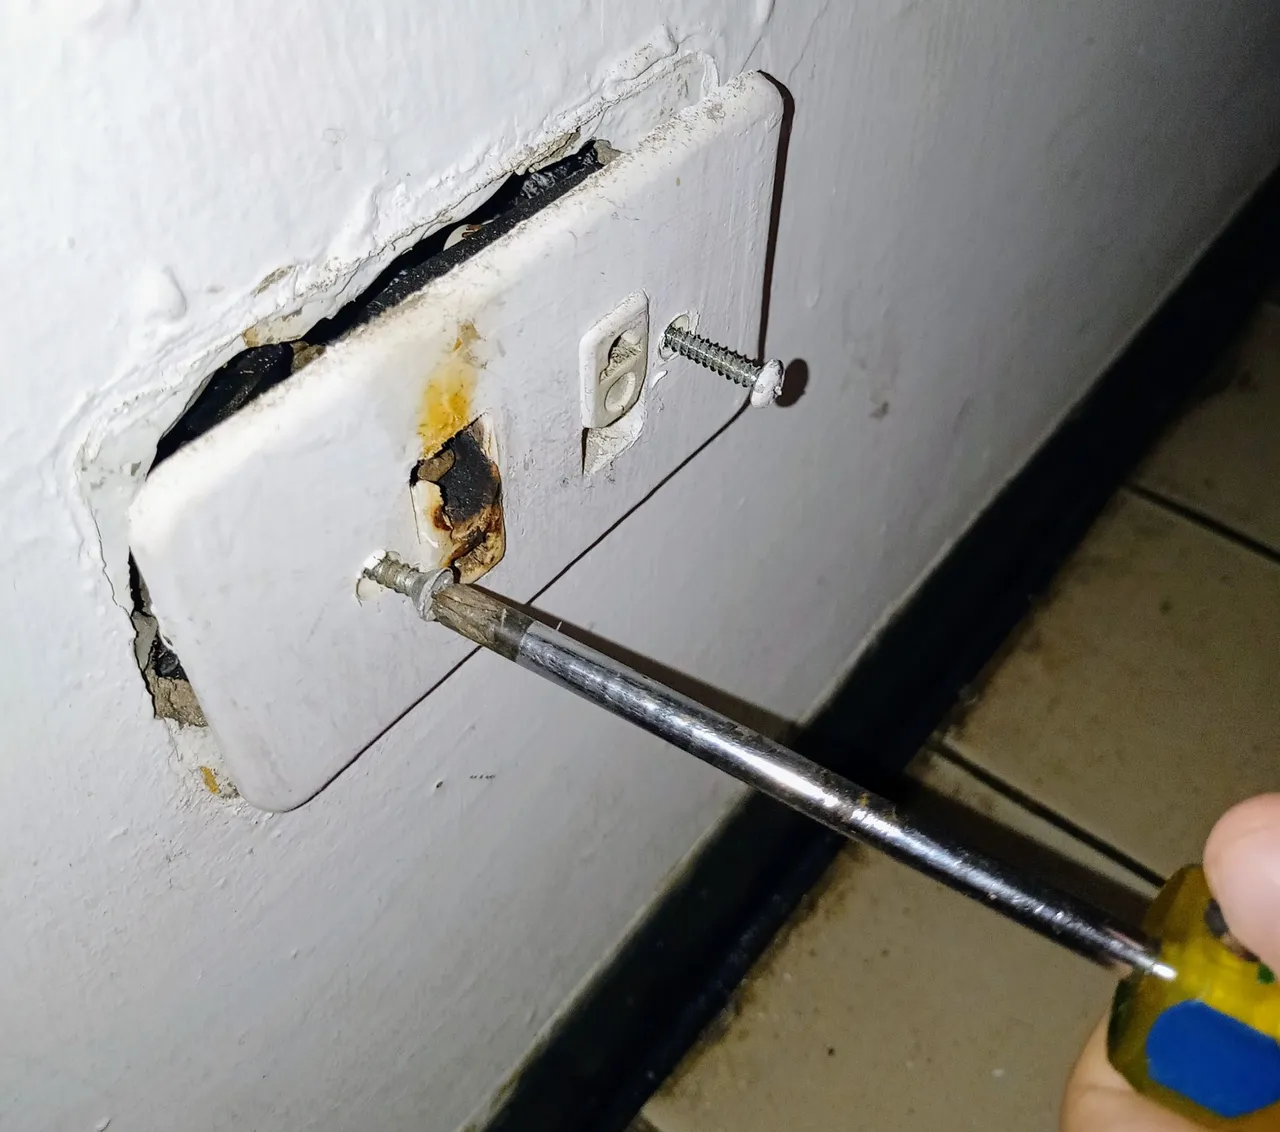
Muchas personas expertas trabajan sin cortar la electricidad, sin embargo, como dije anteriormente, al mejor cazador se le escapa la liebre. Entonces, como siempre soy precavido lo primero que hago es bajar el breaker principal, para cortar la electricidad; luego, como se observa que los tornillos son de estrella o estría, lógicamente usamos el destornillador de estrella. Acto seguido, procedemos a desatornillar cada uno de los tornillos, valga la redundancia; para luego con el mismo destornillador, probar si de verdad la corriente fue cortada, ya que este instrumento funciona como probador.
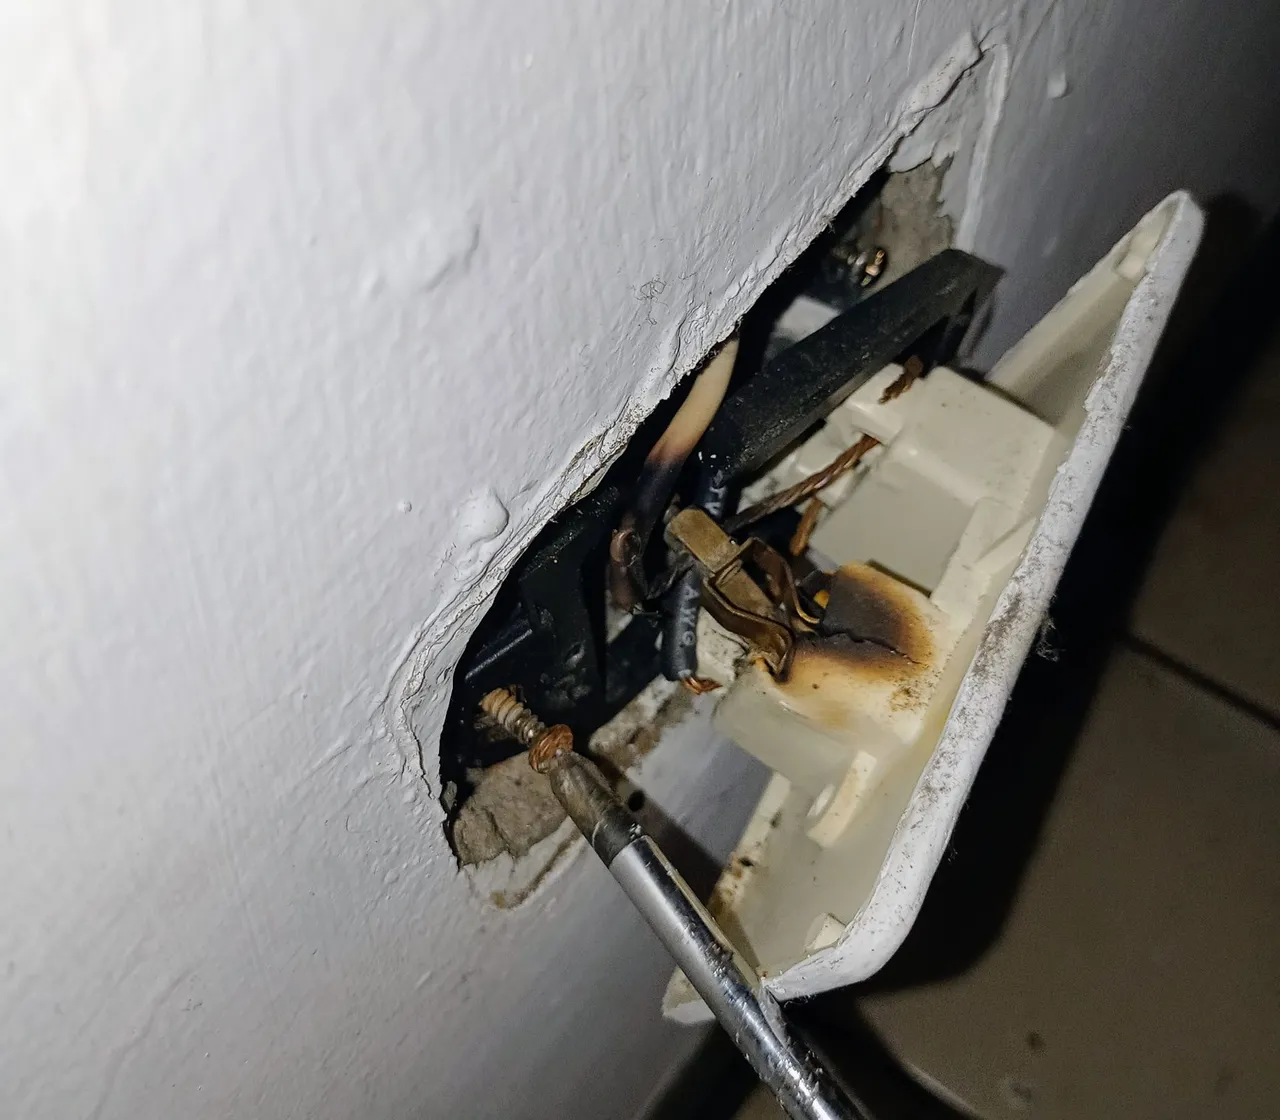
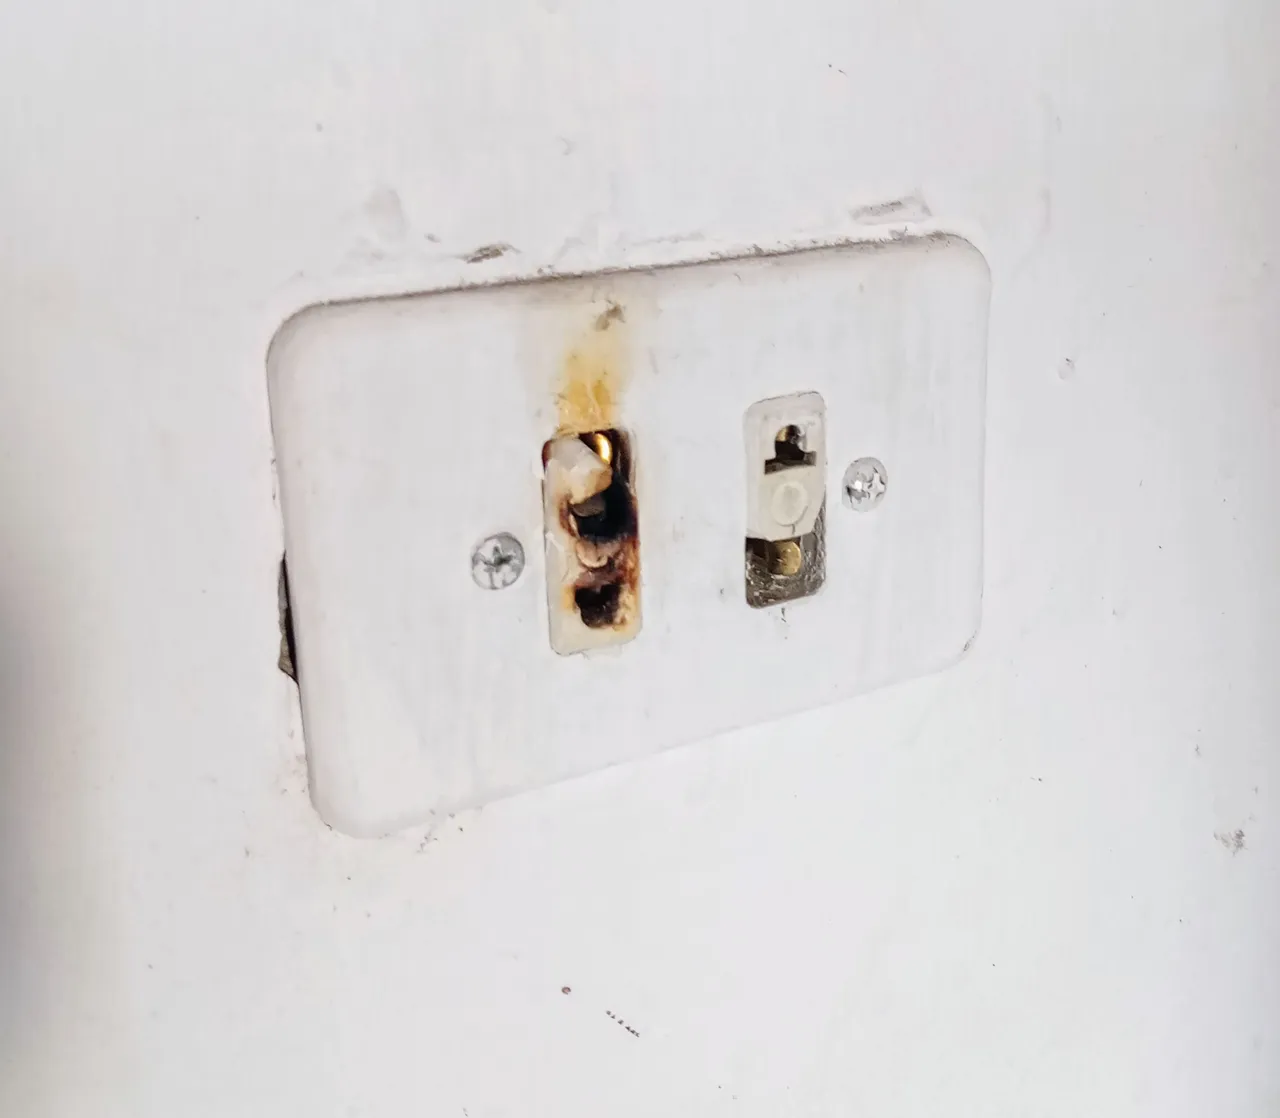
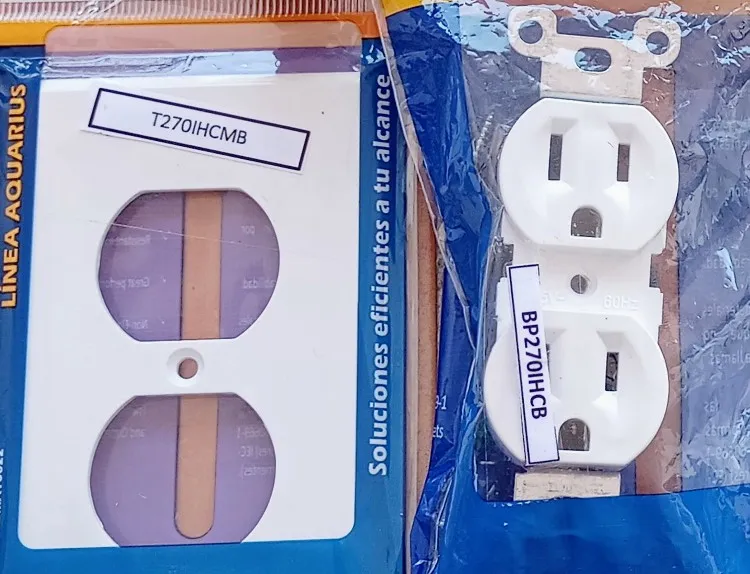
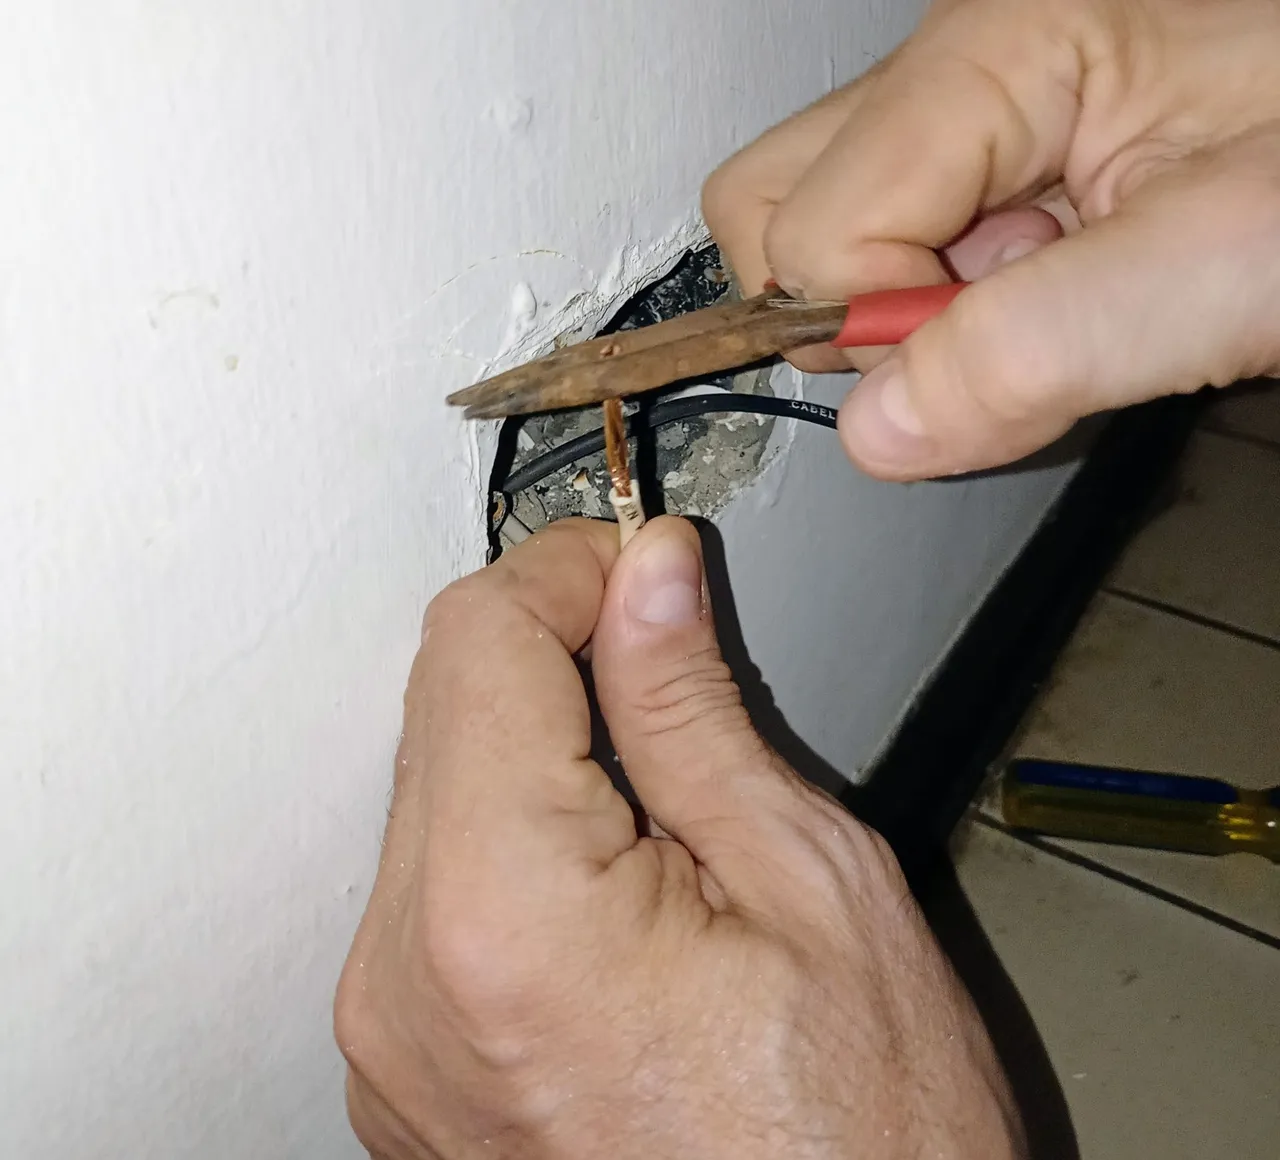
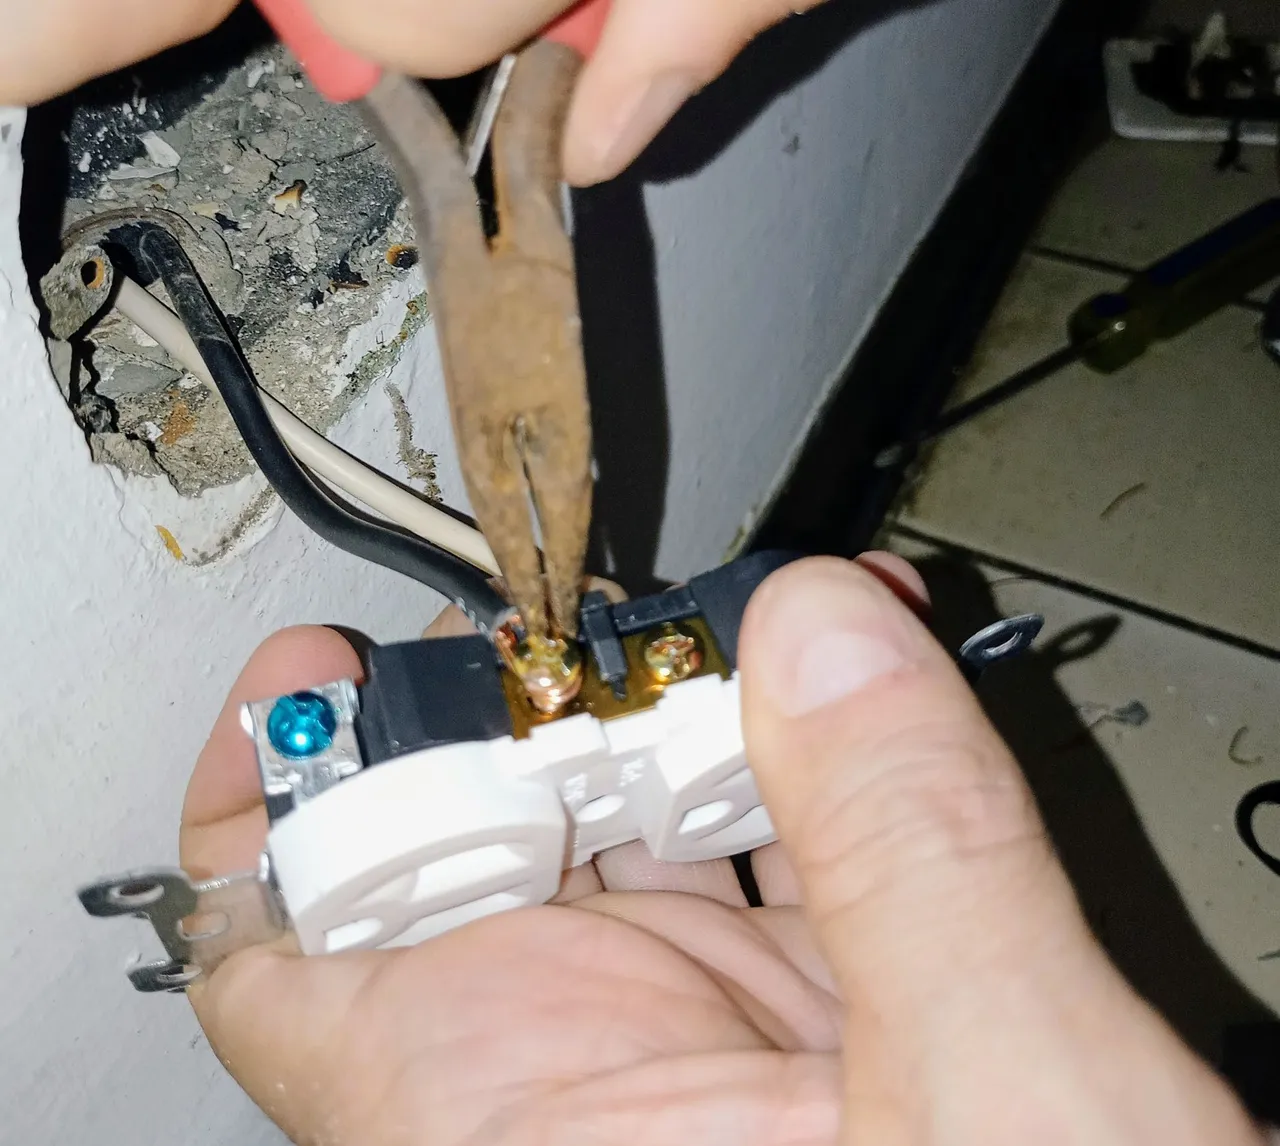
As we can see, the inside of the outlet is worse than the outside, the wires are burned. Usually we straighten the wires, unscrew them, and remove the wires to place them in the new socket. However, here we are going to cut the wires directly using the cutting pliers; we cut the end of each wire a little bit to remove the rubber and uncover the ends that will be placed in the new socket. Now, we unpack the 270 socket, the protagonist of this story.
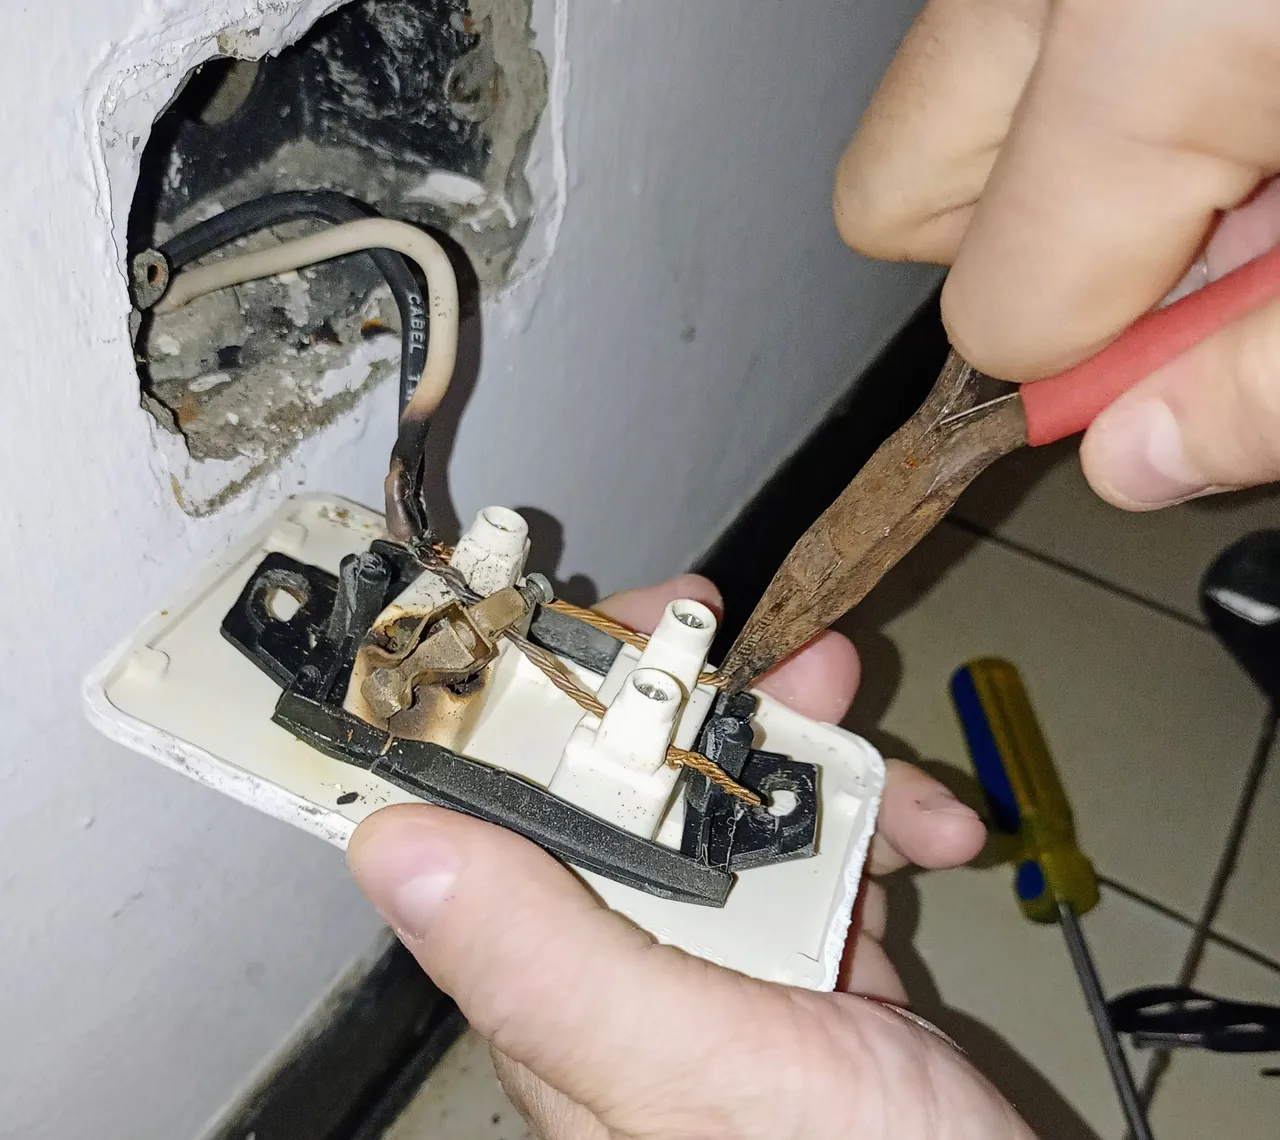
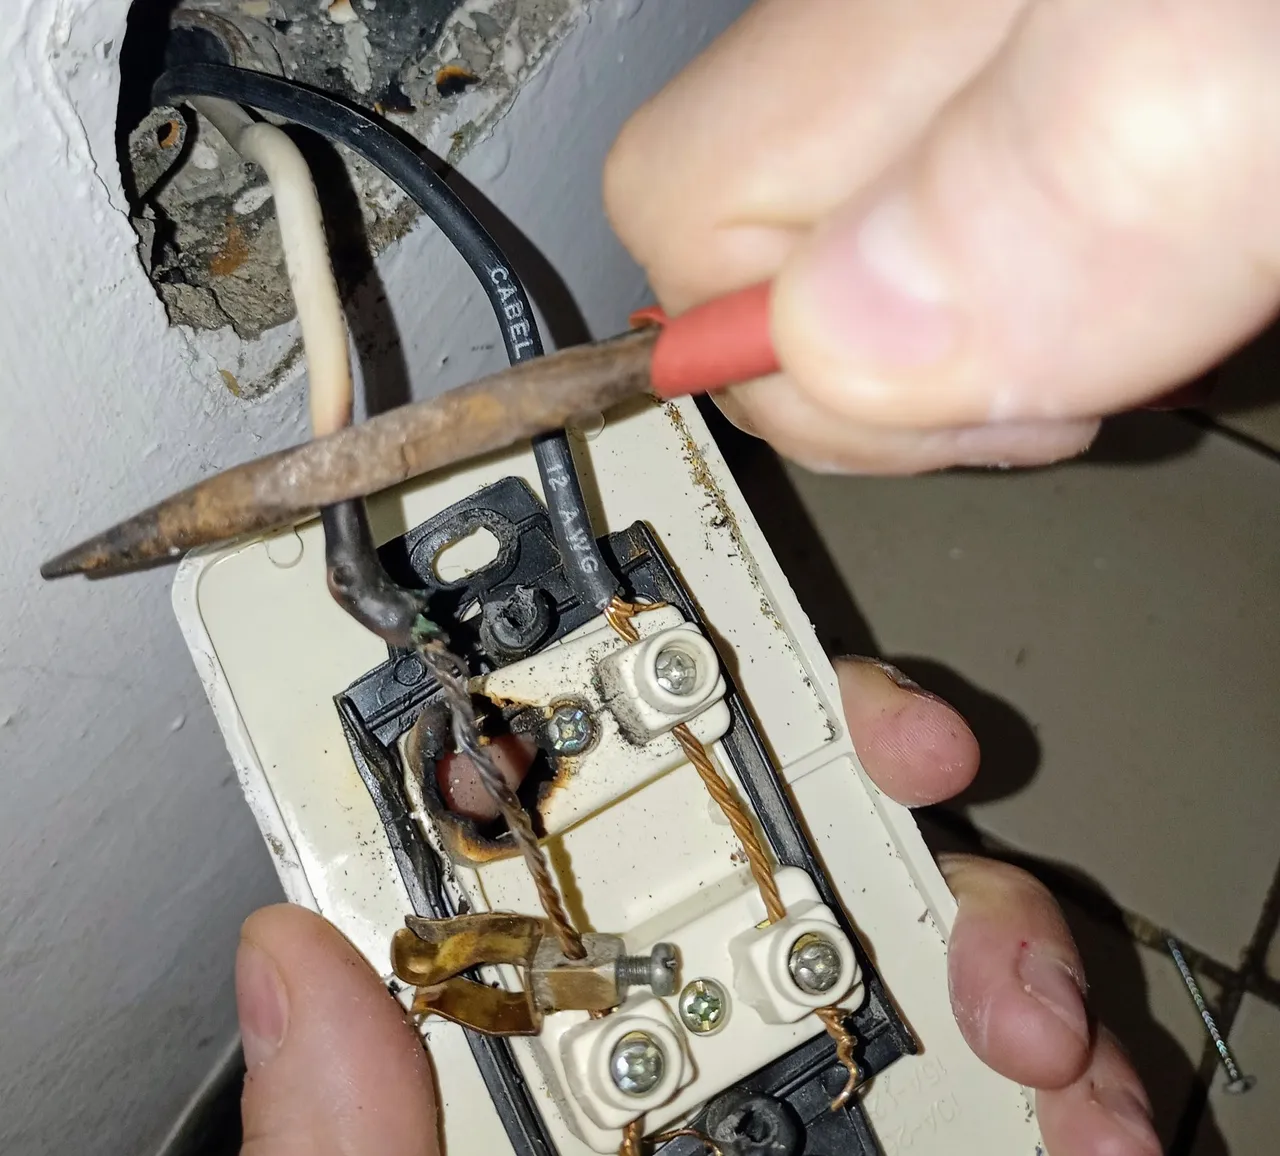
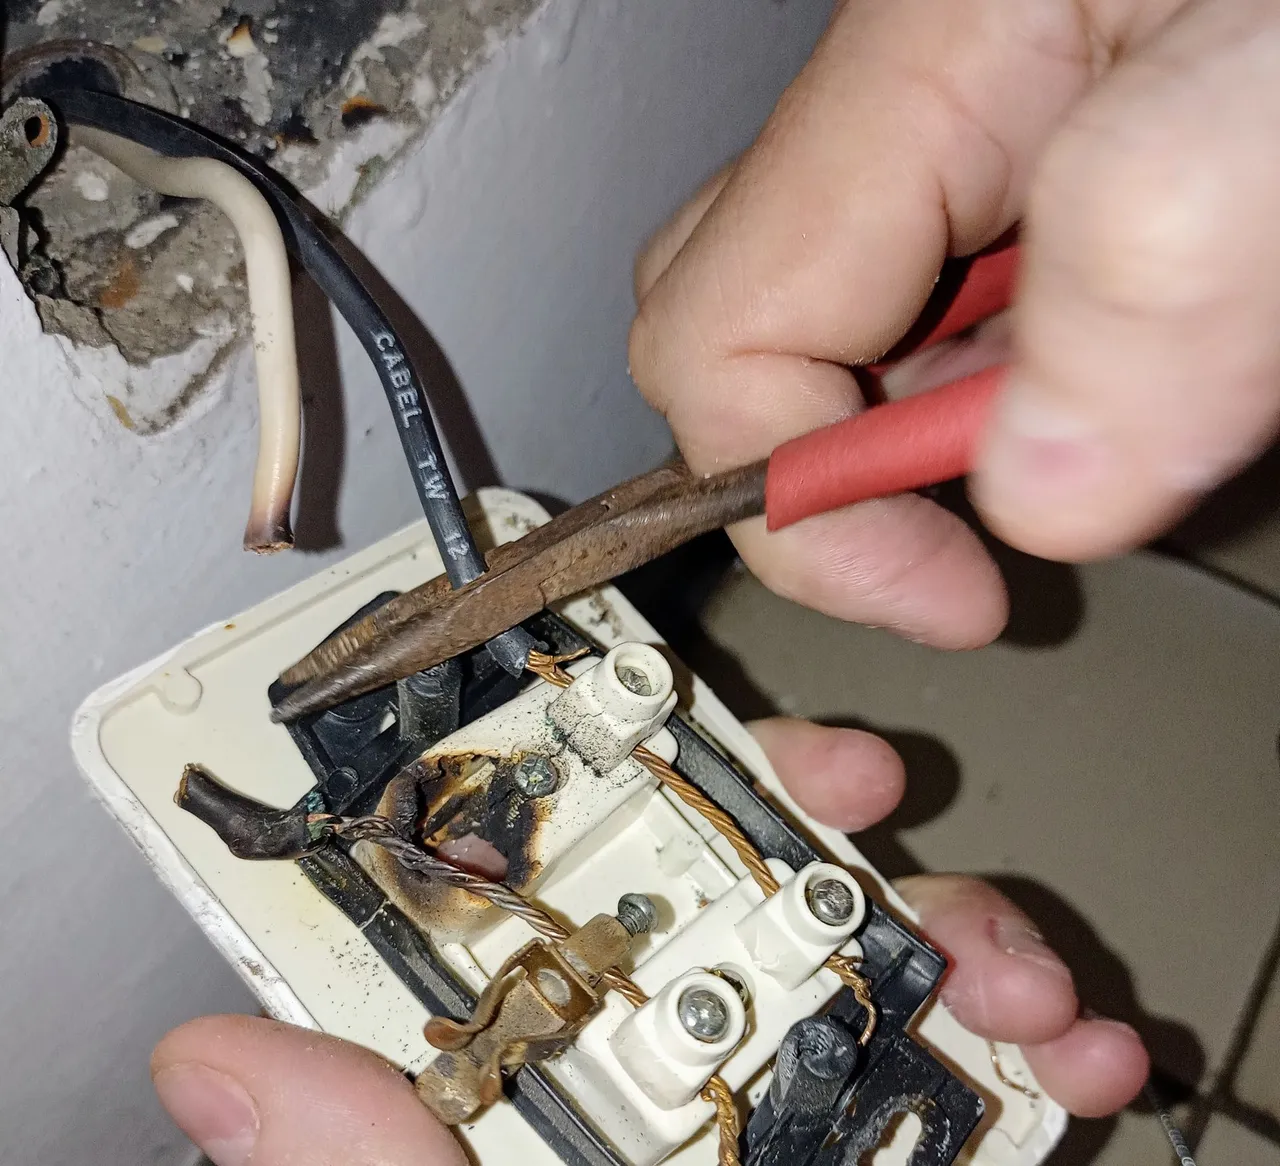
Como podemos ver, el tomacorriente por dentro está peor que por fuera, los cables están quemados. Generalmente enderezamos los cables, desatornillamos, y sacamos los cables para colocarlos en la toma nueva. Sin embargo, aquí vamos a cortar directamente los cables utilizando para ello la pinza cortadora; cortamos un poco el extremo de cada cable para quitarle la goma y descubrir las puntas que serán colocadas en la nueva toma de electricidad. Ahora, desempaquetamos el tomacorriente 270, el protagonista de esta historia.
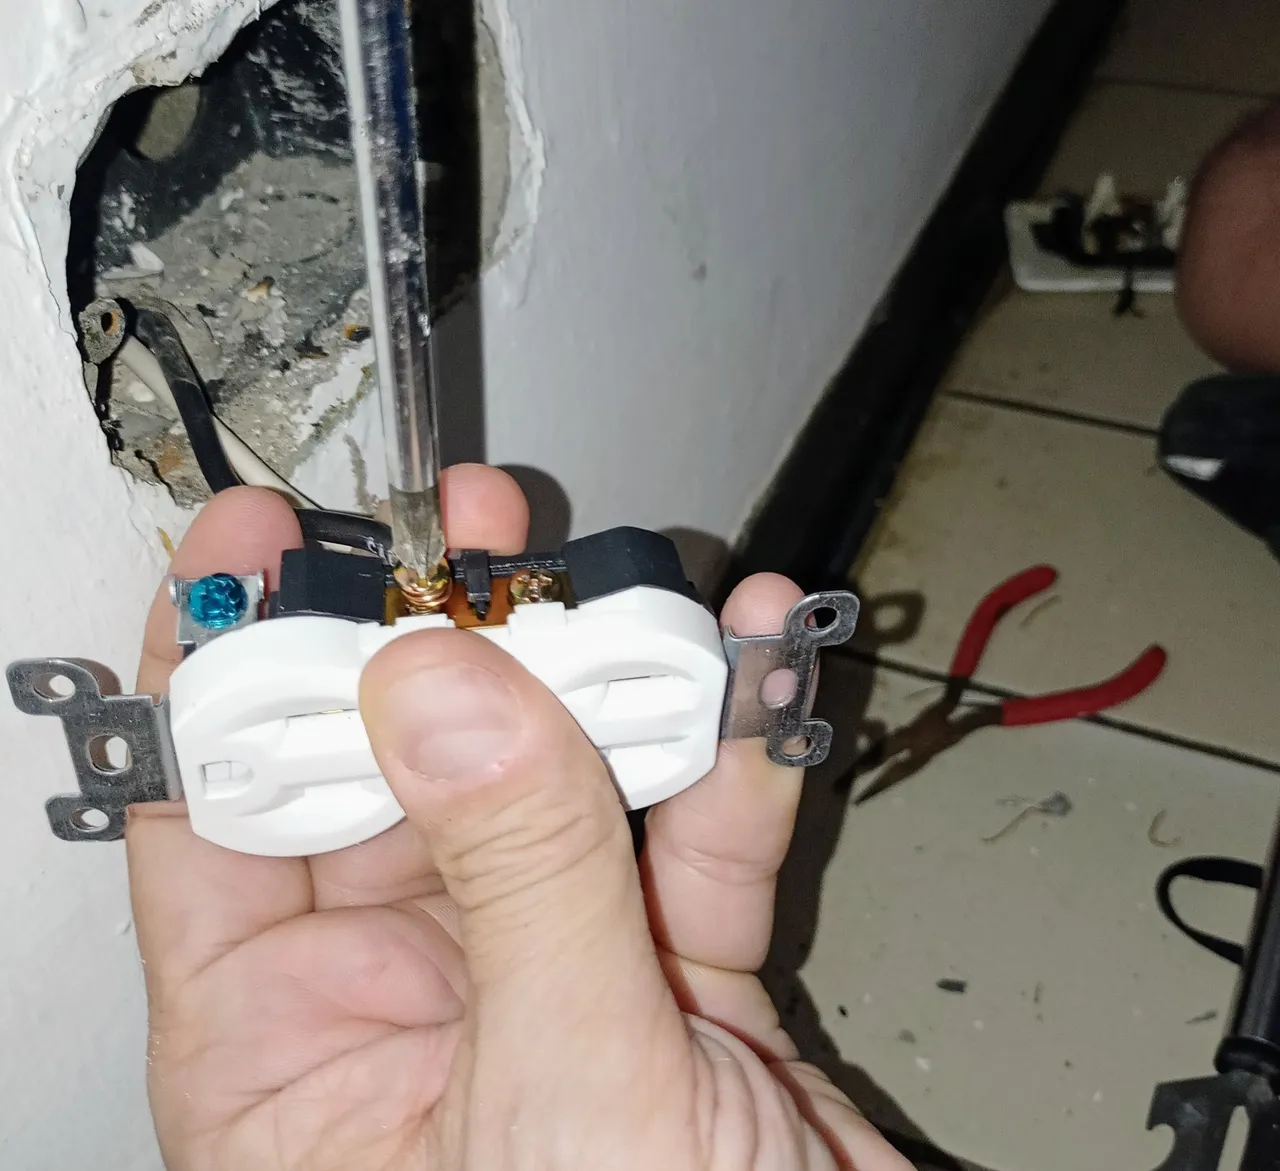
Before placing the wires, we must keep in mind where each one goes. Depending on how the socket is placed, in the upper and lower part there are two screws where the wires can be placed, and in one part there is a small screw where the ground connection is placed. Now, generally the wire is white or green, and black; then on the silver colored screw at one end we connect the white or green wire, we turn it around and screw it in.
To place the black wire, we observe at the other end the copper-colored screw, we also turn it so that it is well adjusted and we screw it. Remember the smallest screw, there we make the ground connection, placing the wire at one end, and the other end in the entrance where the screw that adjusts the outlet will pass.
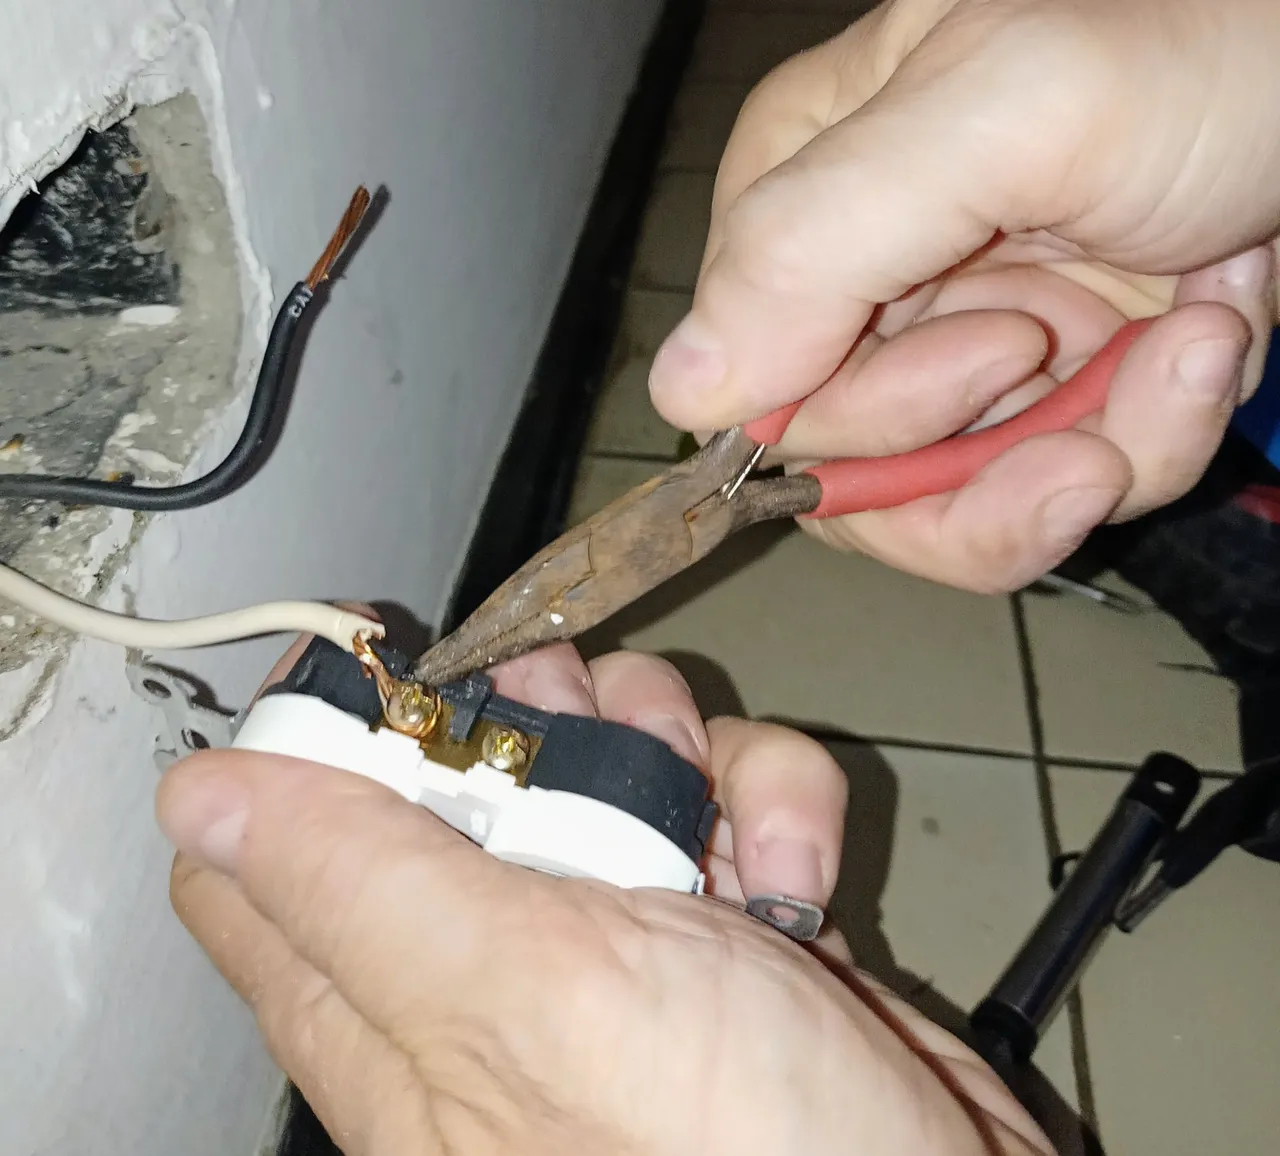
Antes de colocar los cables, debemos tener presente donde van cada uno. Dependiendo como se coloque la toma, en la parte superior e inferior se encuentran dos tornillos donde se pueden colocar los cables, y en una sola parte está un tornillo pequeño donde se coloca la conexión a tierra. Ahora, generalmente el cable es blanco o verde, y negro; entonces en el tornillo de color más plateado de un extremo conectamos el cable blanco o verde, le damos su vuelta y lo atornillados.
Para colocar el cable negro, observamos en el otro extremo el tornillo de color más cobrizo, igualmente le damos su vuelta para que quede bien ajustado y lo atornillamos. Recuerdan el tornillo más pequeño, allí realizamos la conexión a tierra, colocando el cablecito en un extremo, y el otro extremo en la entrada por donde pasará el tornillo que ajusta el tomacorriente.

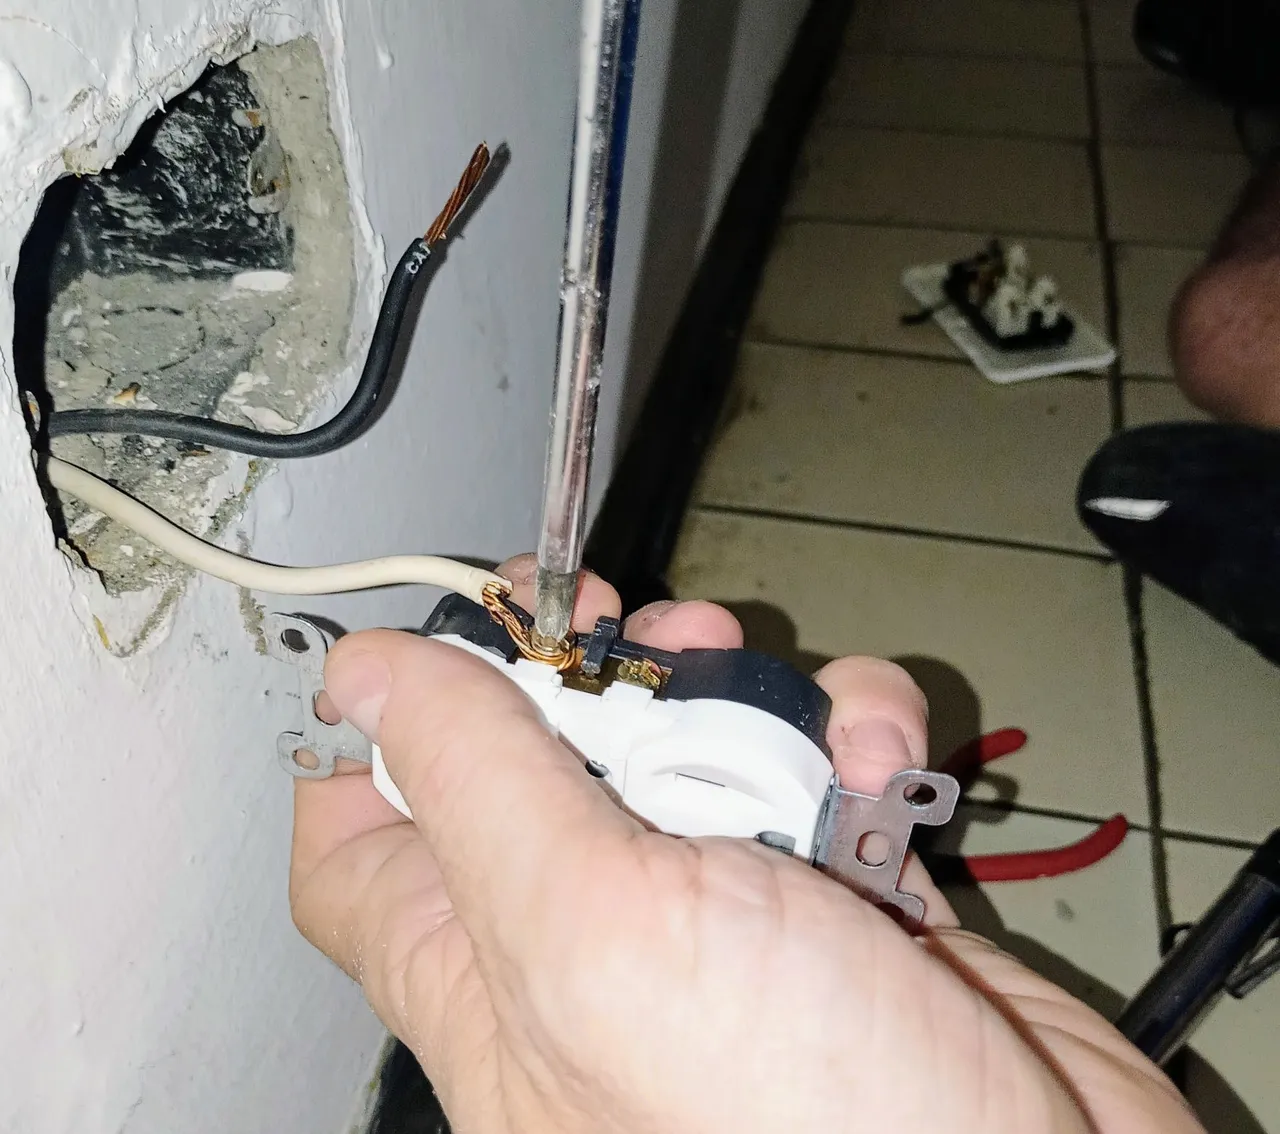
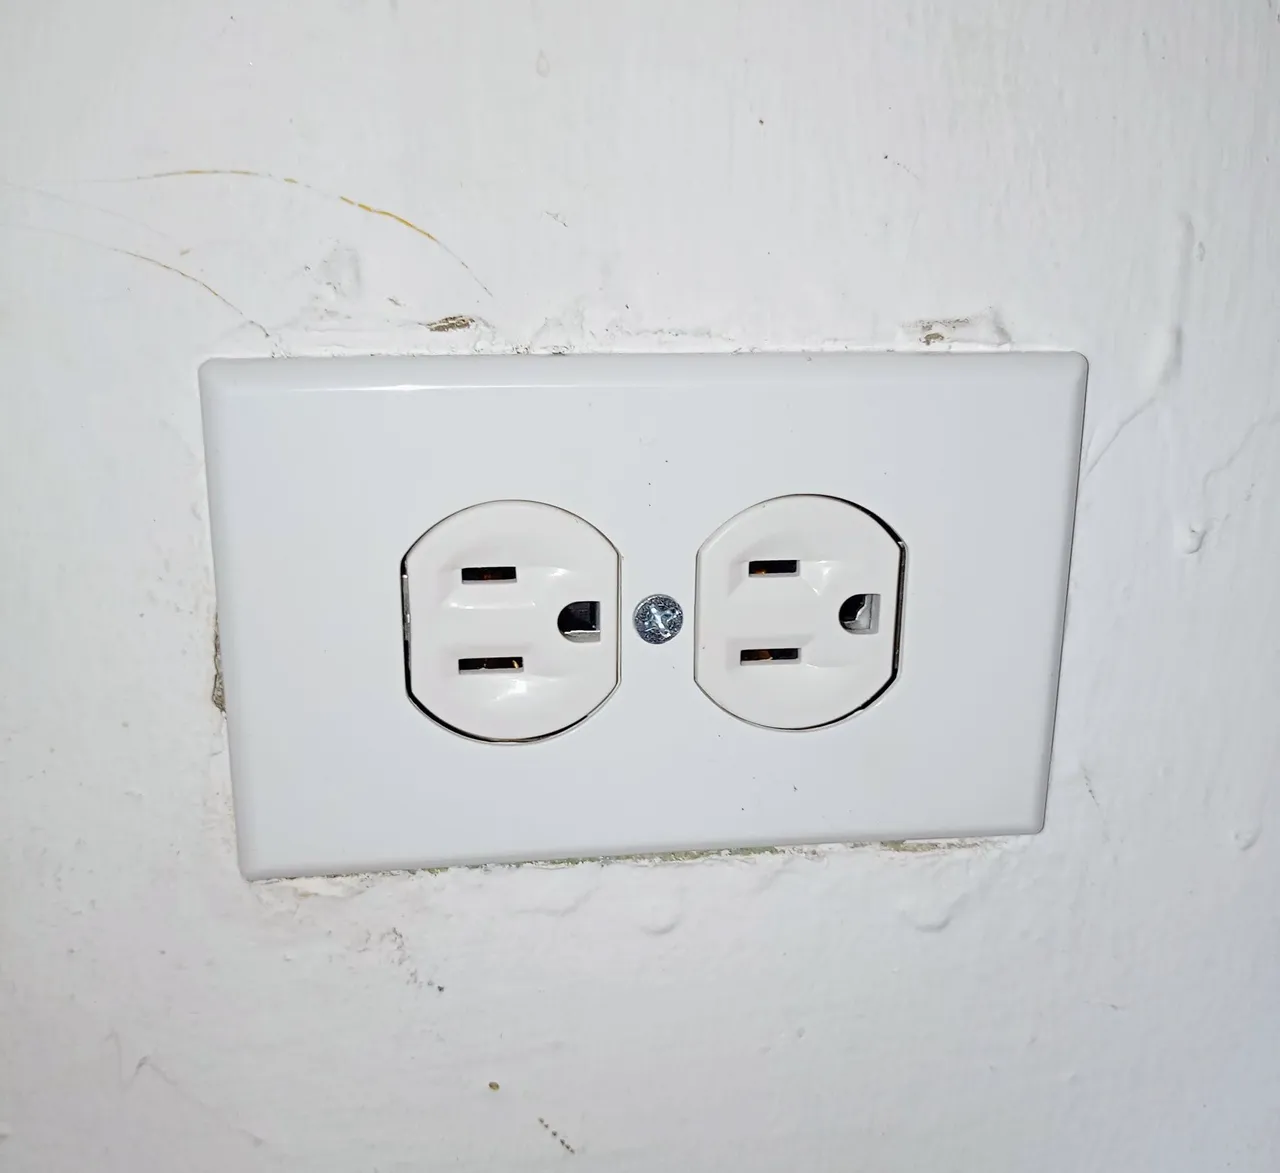
Once all this procedure is done, we screw the new 270 socket into the inputs of the box, for this we use the Phillips screwdriver. Now, before placing the cover I proceed to test that the connection is correct, for it, first I go to the main brekera to supply electric current to the house. To perform the test, I connect the voltage protector, we observe that it lights the orange light of the standby cycle, we wait 3 minutes, and we see that the green bulb lights up, indicating that the voltage is normal, everything is fine. Finally we place the cover of the socket, we adjust, and we have already finished with the substitution.
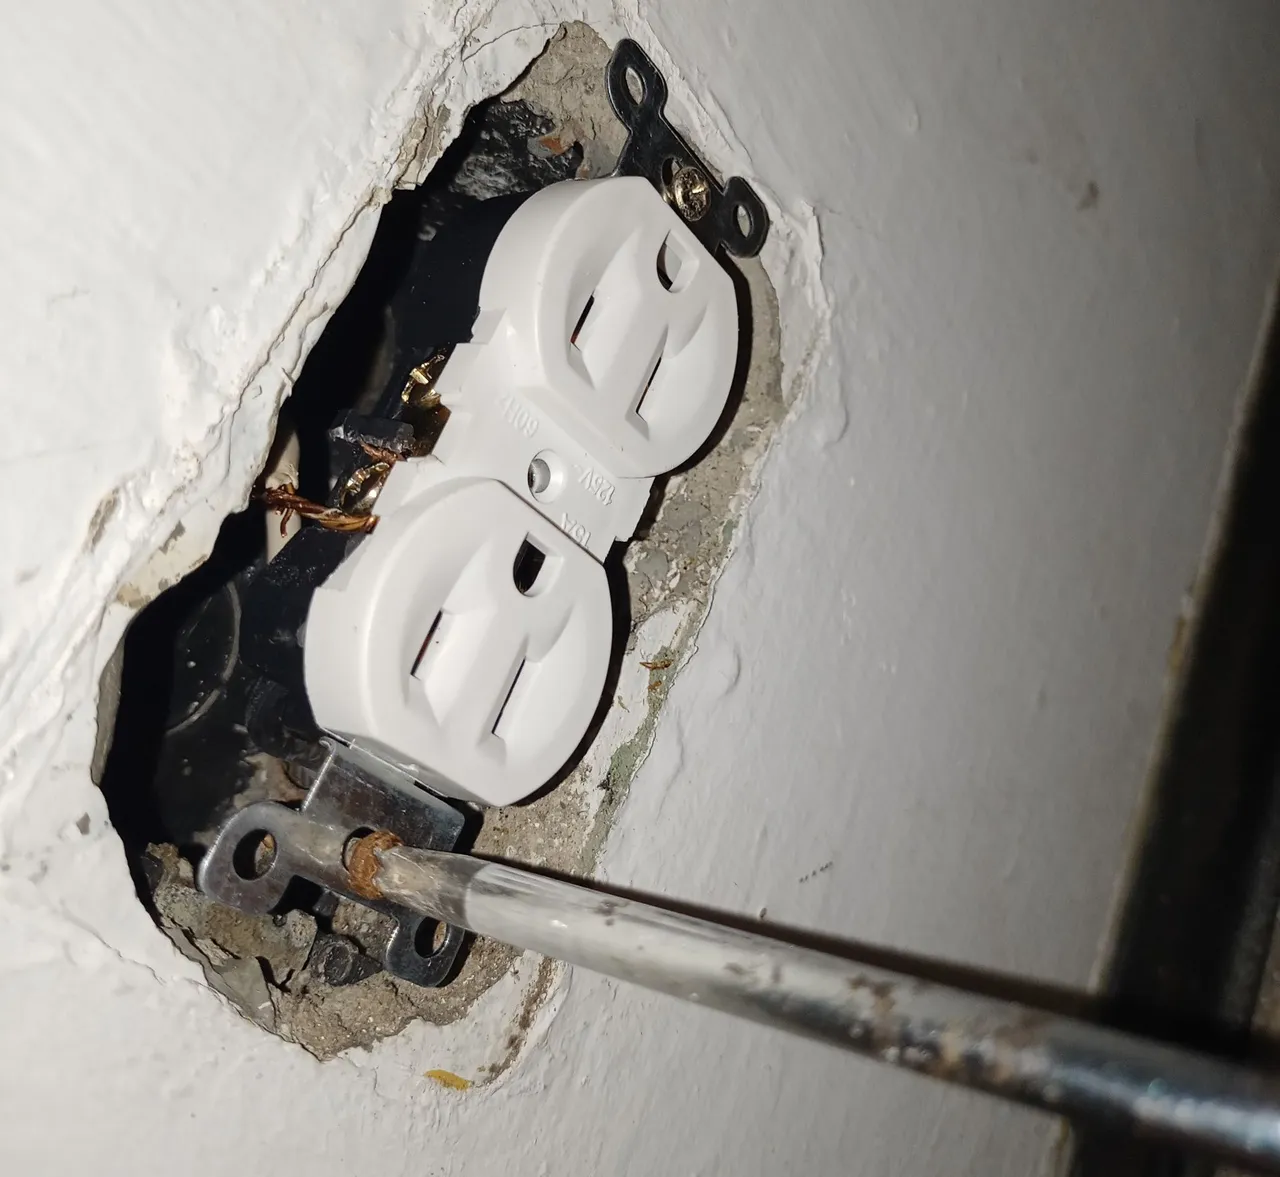
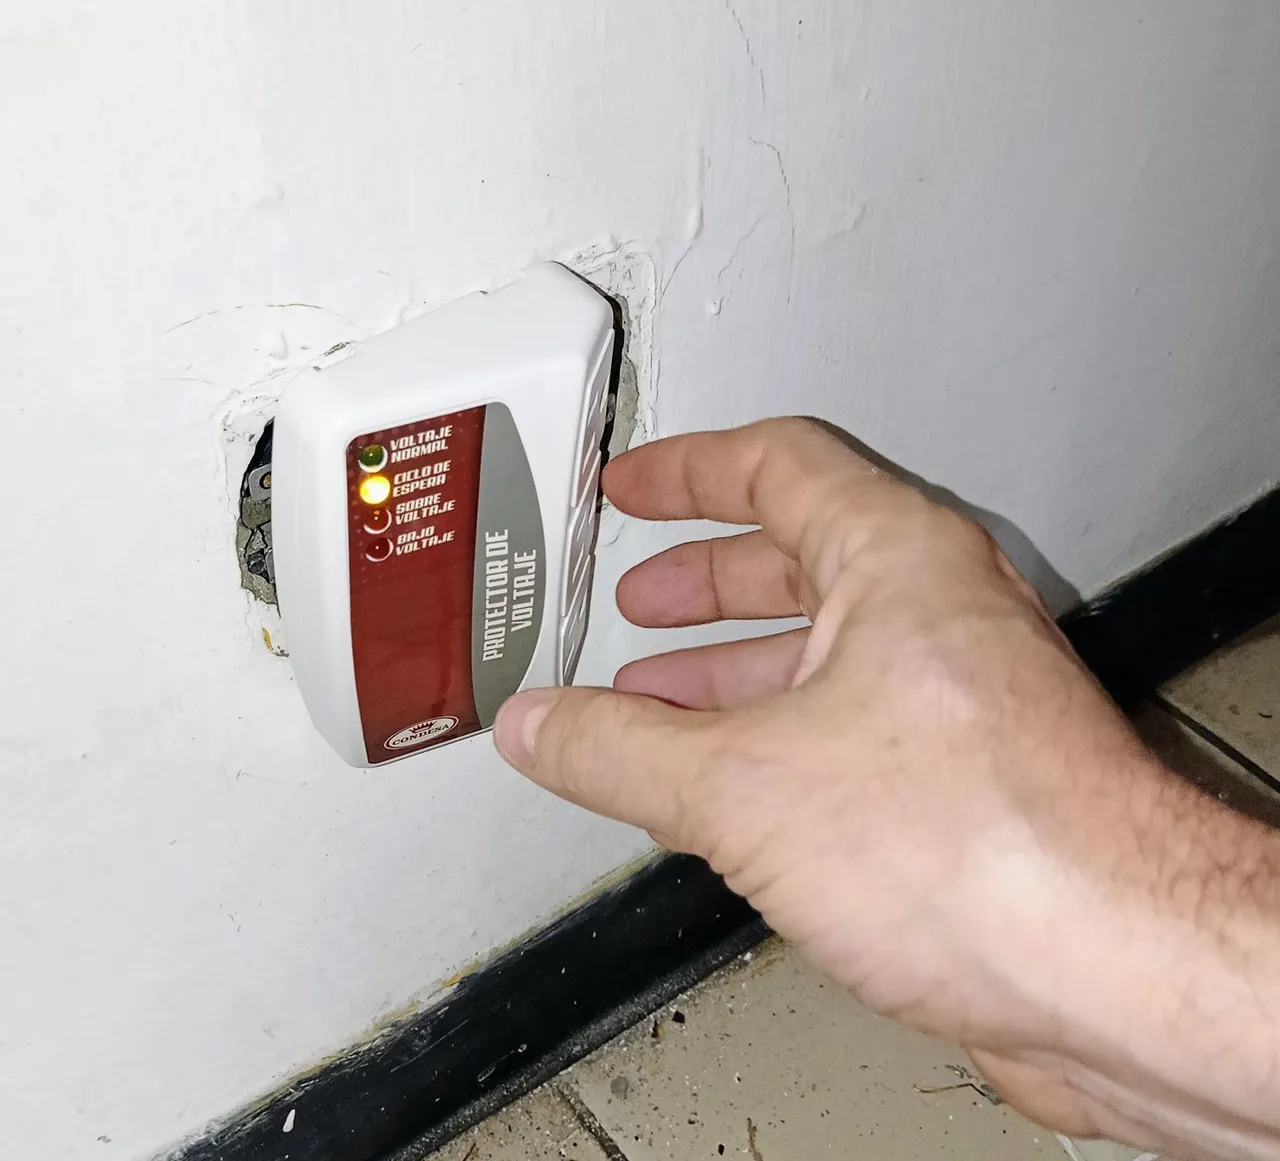
Ya realizado todo este procedimiento, atornillamos el nuevo tomacorriente 270 en las entradas del cajetín, para ello usamos el destornillador de estrella. Ahora, antes de colocar la tapa procedo a probar que la conexión este correcta, para ello, primero me dirijo a la brekera principal para suministrar corriente eléctrica a la casa. Para realizar la prueba, conecto el protector de voltaje, observamos que enciende la luz naranja del ciclo de espera, aguardamos 3 minutos, y vemos que se ilumina el bombillo verde, indicando que el voltaje está normal, todo está bien. Finalmente colocamos la tapa del tomacorriente, ajustamos, y ya hemos terminado con la sustitución.

Well friends, we have reached the end of this tutorial, hoping it will be useful to all of you, because taking the necessary precautions, if we can make changes with this in our home. Many times we do not have an electrician at hand, but if we have some knowledge about it, there is nothing we can not achieve. It's all about knowing what to do and how to do it. Greetings to all, and it was an honor to write for the first time in this very useful community.
Bien amigos, hemos llegado al final de este tutorial, esperando que sea de utilidad para todos ustedes, ya que tomando las precauciones necesarias, si podemos realizar cambios con este en nuestro hogar. Muchas veces no tenemos a la mano un electricista, pero si tenemos algo de conocimiento al respecto, no hay nada que no podamos lograr. Todo es saber que hacer y cómo hacerlo. Saludos a todos, y fue un honor escribir por vez primera en esta muy útil comunidad.
...Gracias Por Visitar...
...Thanks for visiting...


Photographs taken by me and Suhaill Núñez.
Fotografías tomadas por mí y Suhaill Núñez.
Sorry. English is not our native language. Therefore, a web translator is used for texts in English. (Spanishdict)