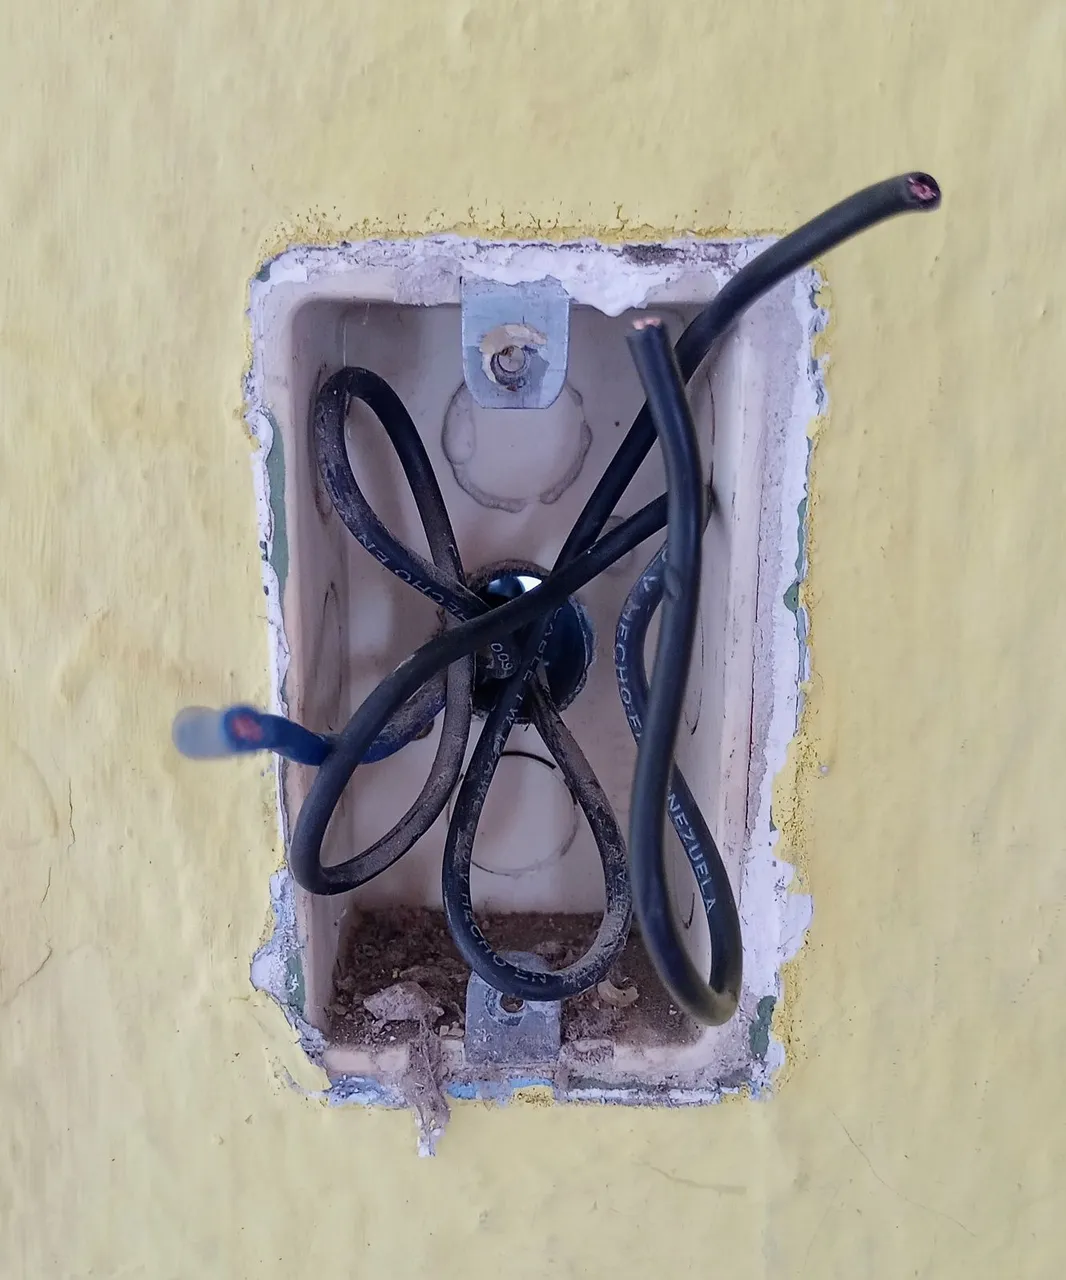
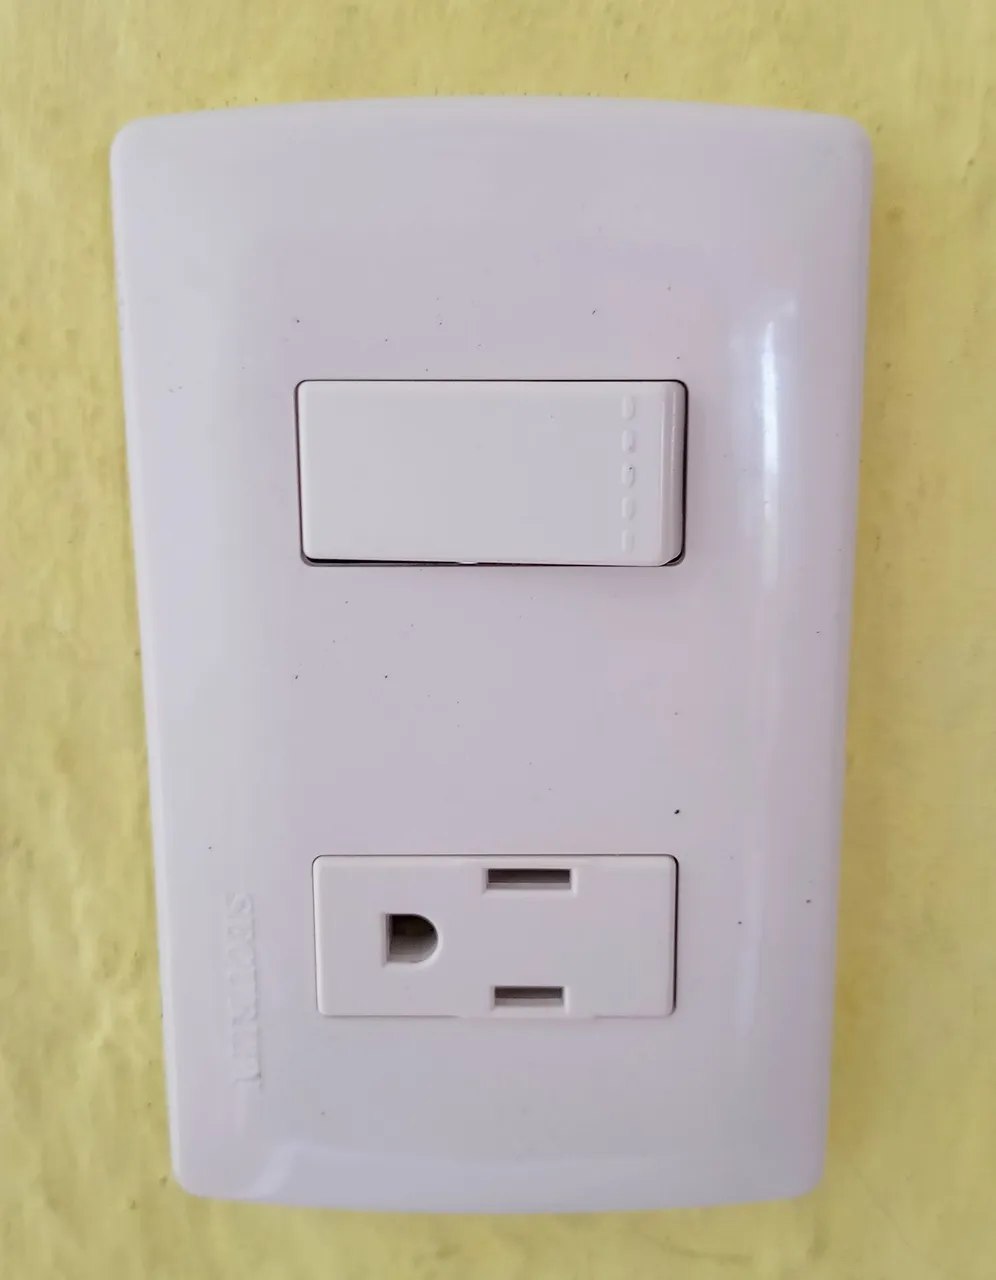
At home, specifically in the garage area, a space was taken to create a guest room. It was placed with its trellis with glass and its respective door. Some time ago it was taken for that purpose, however, it is currently used as a storage room. Now, the idea is to condition it to become an office, so it must be stripped of much unusable material. In addition, a mixed switch must be installed, that is to say, a switch that turns on and off, and a power outlet. On the other hand, we also have to install a porcelain light bulb socket in the ceiling. I was going to take care of the installation of both materials, I am not an electrician but I have my knowledge about it. The thing was, even though I had already bought the switch and the socket, I only installed the socket, and I will tell you why. My person had to leave home for a few days, so I could not start the work, but I had to do it when I returned. But since my parents are impatient and don't wait long, they hired a person to do both installations.
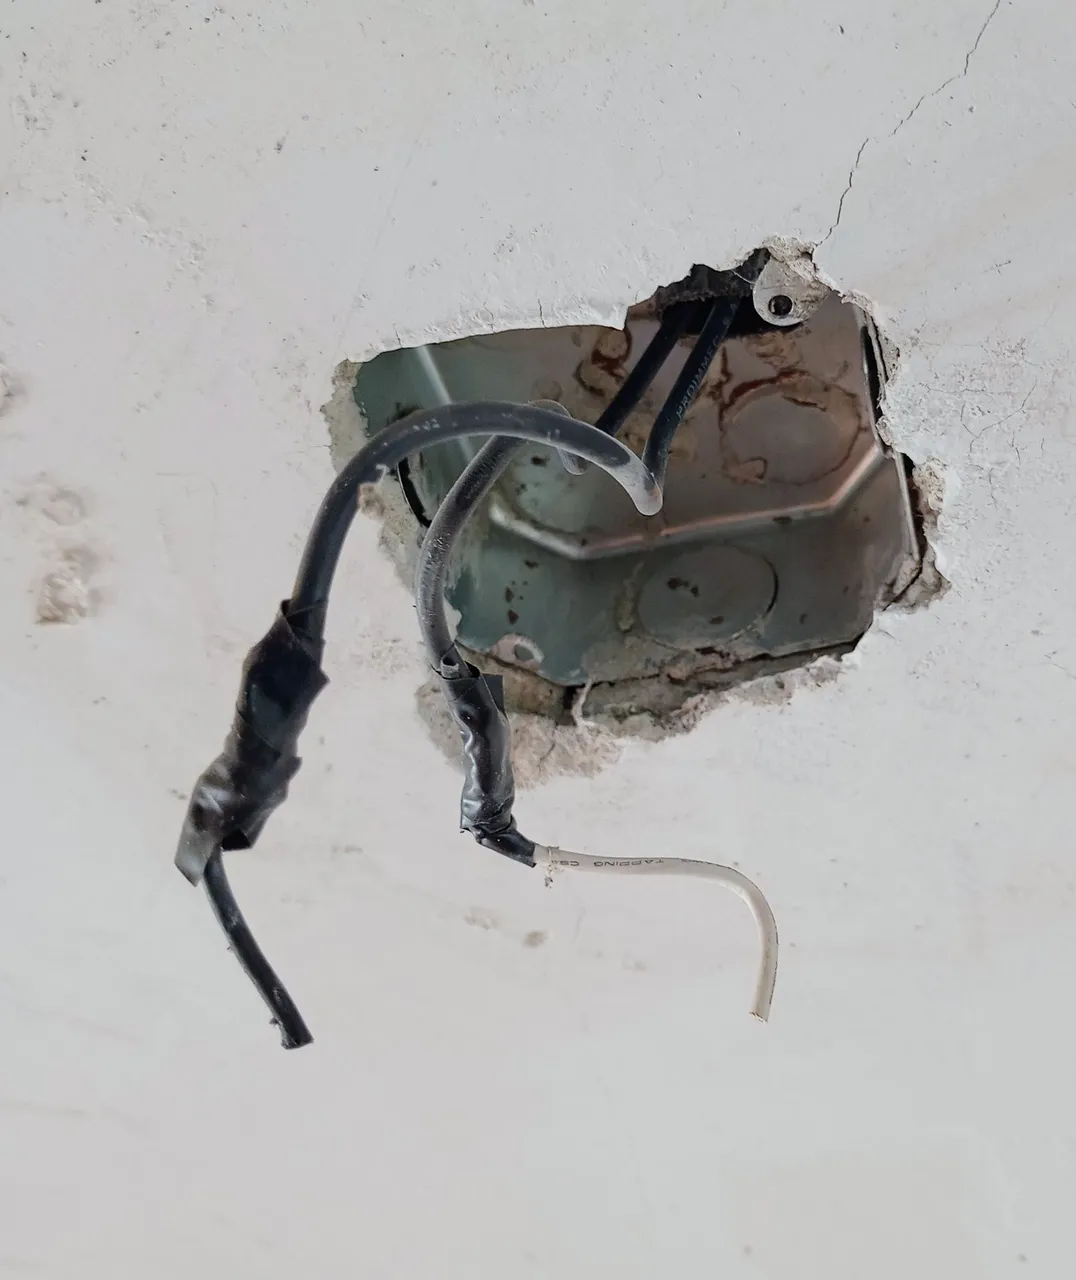
It turns out that the person hired installed only the switch, left, and did not install the socket. As we say in Venezuela, he killed the tiger and was afraid of the leather, to this day we are still waiting for it, since it was no big deal. Now, I had to check that the switch was well installed, because with those mixed sockets you have to do a job, because if you do not make a bridge between the on/off switch and the socket point, electricity will only reach the socket if the switch is opened, that is, the socket will have electricity when the bulb is on. I will check it at the end, I am going to install the socket. Normally in this type of connections there are 3 wires, one phase or positive. One of return, and the neutral wire; these last two are the ones that go to the socket where the porcelain socket will be placed. It is valid to emphasize that the work is of installation, because in the places there are only the uncovered cables.
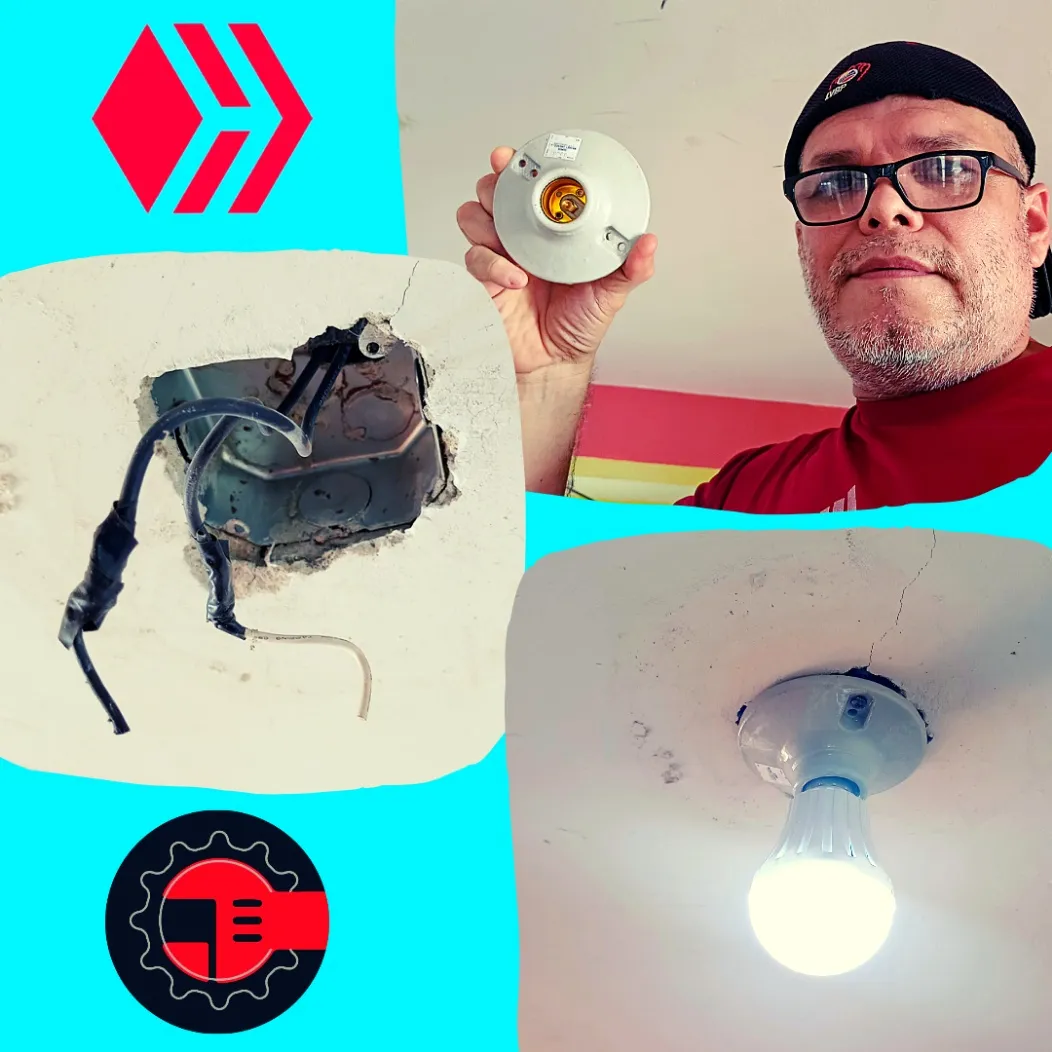
Imagen de mi Autoría Editada por/Image of my Authorship Edited by Canva

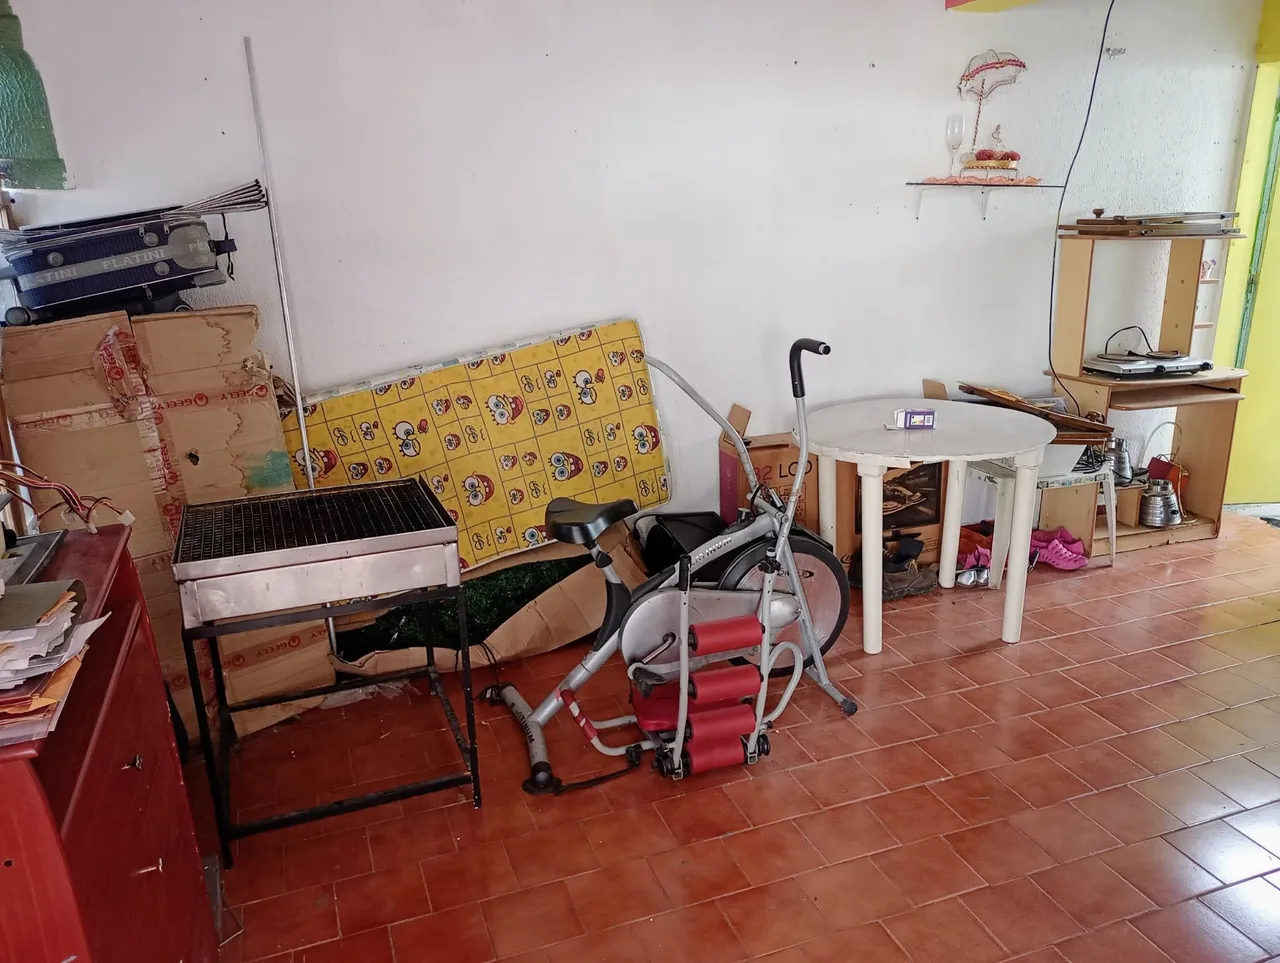
En casa, específicamente en área del garaje, se tomó un espacio para crear un cuarto para visitas. Se colocó su enrejado con vidrio y su respectiva puerta. Tiempo atrás se tomó para tal fin, sin embargo, actualmente se tiene como deposito. Ahora, la idea es acondicionarlo para que se torne en una oficina, por lo que hay que despojarlo de mucho material inservible. Además de que se debe instalar un interruptor mixto, es decir, un equipo que tenga prende y apaga, y su tomacorriente. Por otro lado, también tenemos que instalar en el techo un sócate de porcelana para bombillo. Yo me iba a encargar de la instalación de ambos materiales, no soy electricista pero tengo mis conocimientos al respecto. La cuestión fue, que aunque ya había comprado el interruptor y el sócate, solo instalé el sócate, y les diré el por qué de esto. Mi persona se tuvo que ausentar de casa unos días, por lo que no pude iniciar el trabajo, sino realizarlo cuando regresara. Pero como mis papás son impacientes y no esperan mucho, contrataron a una persona para que hiciera ambas instalaciones.
Resulta que la persona contratada instaló solo el interruptor, se fue, y no instaló el sócate. Como decimos en Venezuela, mató el tigre y le tuvo miedo al cuero, hasta la fecha lo estamos esperando, ya que no era nada del otro mundo. Ahora, debía comprobar que ese interruptor estuviera bien instalado, ya que con esas tomas mixtas hay que hacer un trabajo, porque sino se hace un puente entre el prende y apaga y el punto de tomacorriente, solo le llegará electricidad al mismo si se abre el interruptor, es decir, el tomacorriente tendrá electricidad cuando el bombillo esté encendido. Lo comprobaré al final, me voy a instalar el sócate. Normalmente en este tipo de conexiones existen 3 cables, uno de fase o positivo. Uno de retorno, y el cable neutro; estos dos últimos son los que van hacia la toma donde se colocará el sócate de porcelana. Es válido destacar que el trabajo es de instalación, porque en los lugares solo están los cables descubiertos.

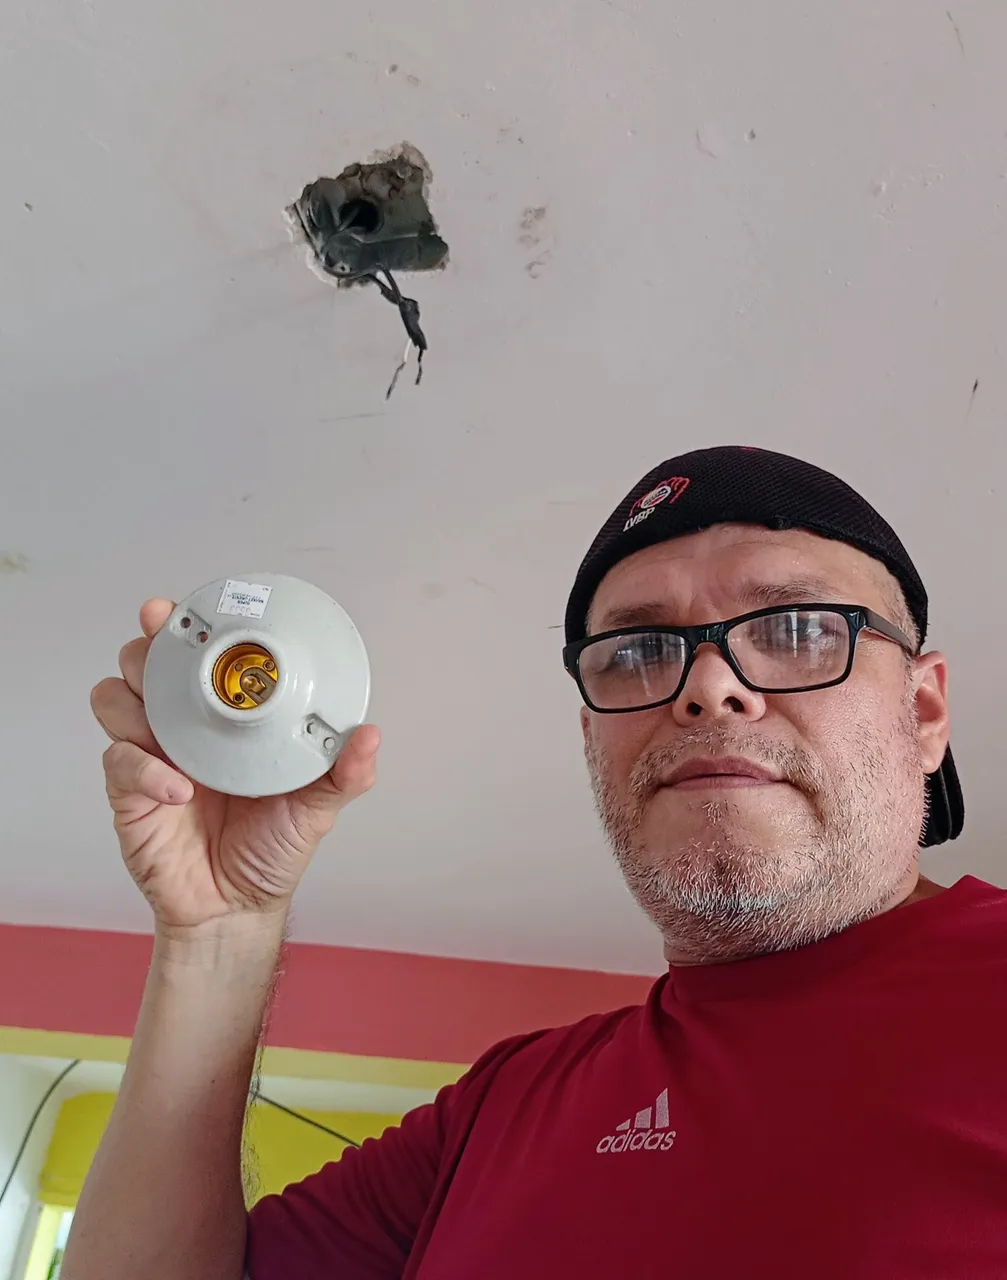
So, here I am going to show you a step by step of how I installed the socket. We know it is not a big deal, however, many people are afraid of electricity, or simply do not know how to do this job. Case in point, my parents and they could see what happened. For this activity I purchased a porcelain socket type E27, 110v to 130v to be placed on the ceiling of the garage. The equipment had a cost of 2$ or 12 bolivars, because here in Venezuela practically they are not governed, neither by the official dollar, nor by the parallel one, here they are above both. I only ask that at the moment of doing the work, take all the security measures. We are not professional electricians, that is why we have to take care of ourselves, although sometimes even to the professionals the hare escapes; then we have to take care of ourselves and take measures.
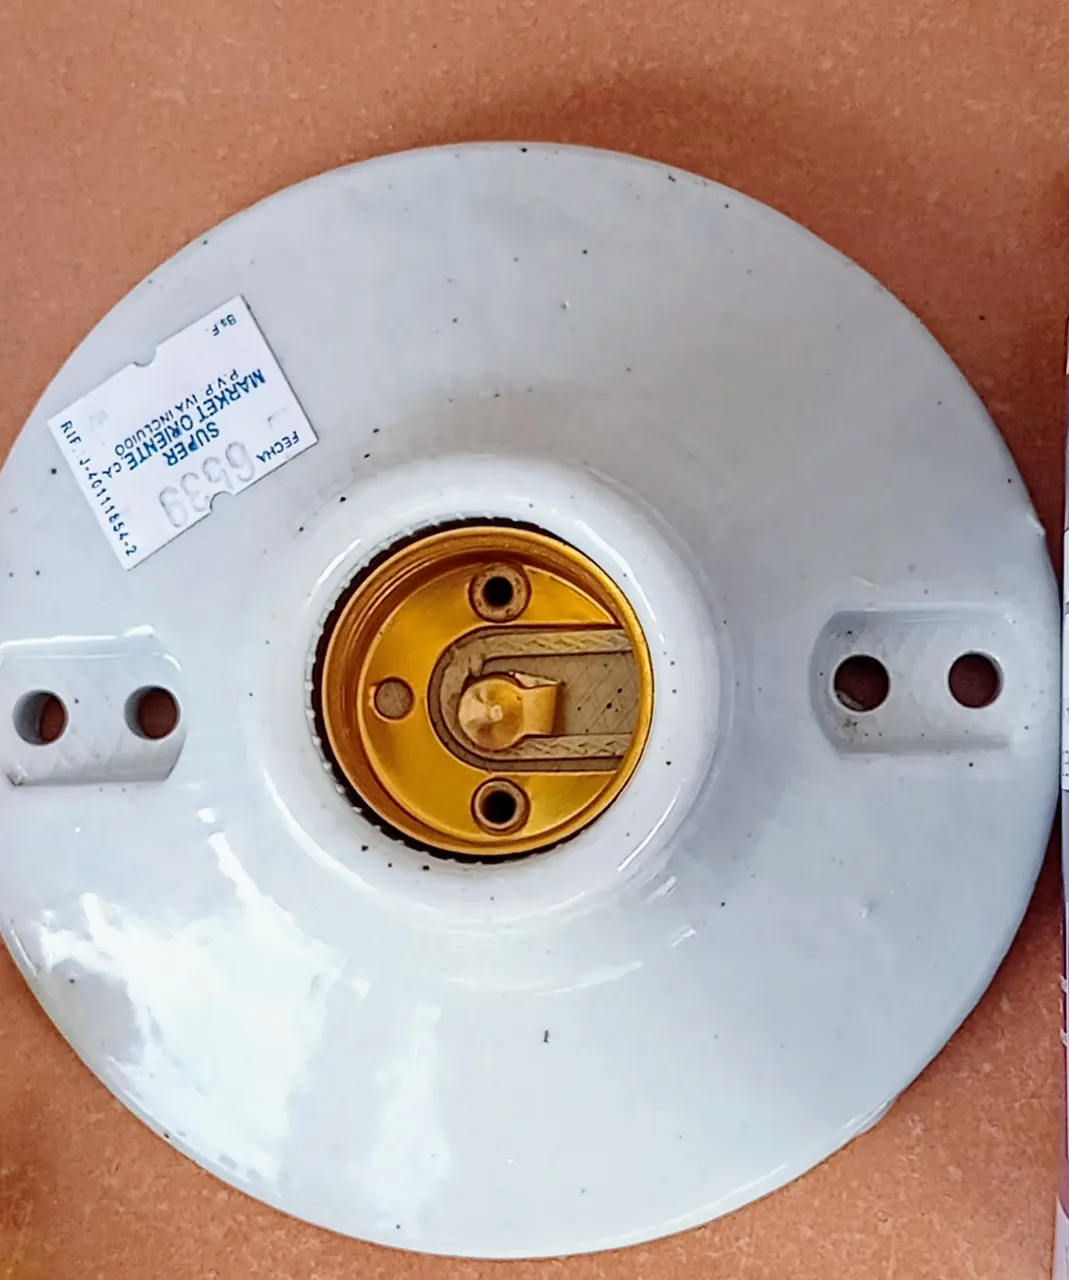
Entonces, aquí les voy a mostrar un paso a paso de como instalé el sócate. Sabemos que no es algo del otro mundo, sin embargo, muchas personas le tienen temor a la electricidad, o sencillamente no saben como hacer este trabajo. Ejemplo de ello, mis padres y pudieron apreciar lo que pasó. Para esta actividad adquirí un sócate de porcelana tipo plafón de rosca E27, 110v al 130v para ser colocado en el techo del garaje. El equipo tuvo un costo de 2$ o 12 bolívares, porque aquí en Venezuela prácticamente no se rigen, ni por el dolar oficial, ni por el paralelo, aquí están por encima de ambos. Solo les pido que al momento de realizar el trabajo, tomen todas las medidas de seguridad. No somos electricistas profesionales, por ello hay que cuidarse, aunque a veces hasta a los profesionales se les escapa la liebre; entonces nosotros a cuidarnos y tomar medidas.
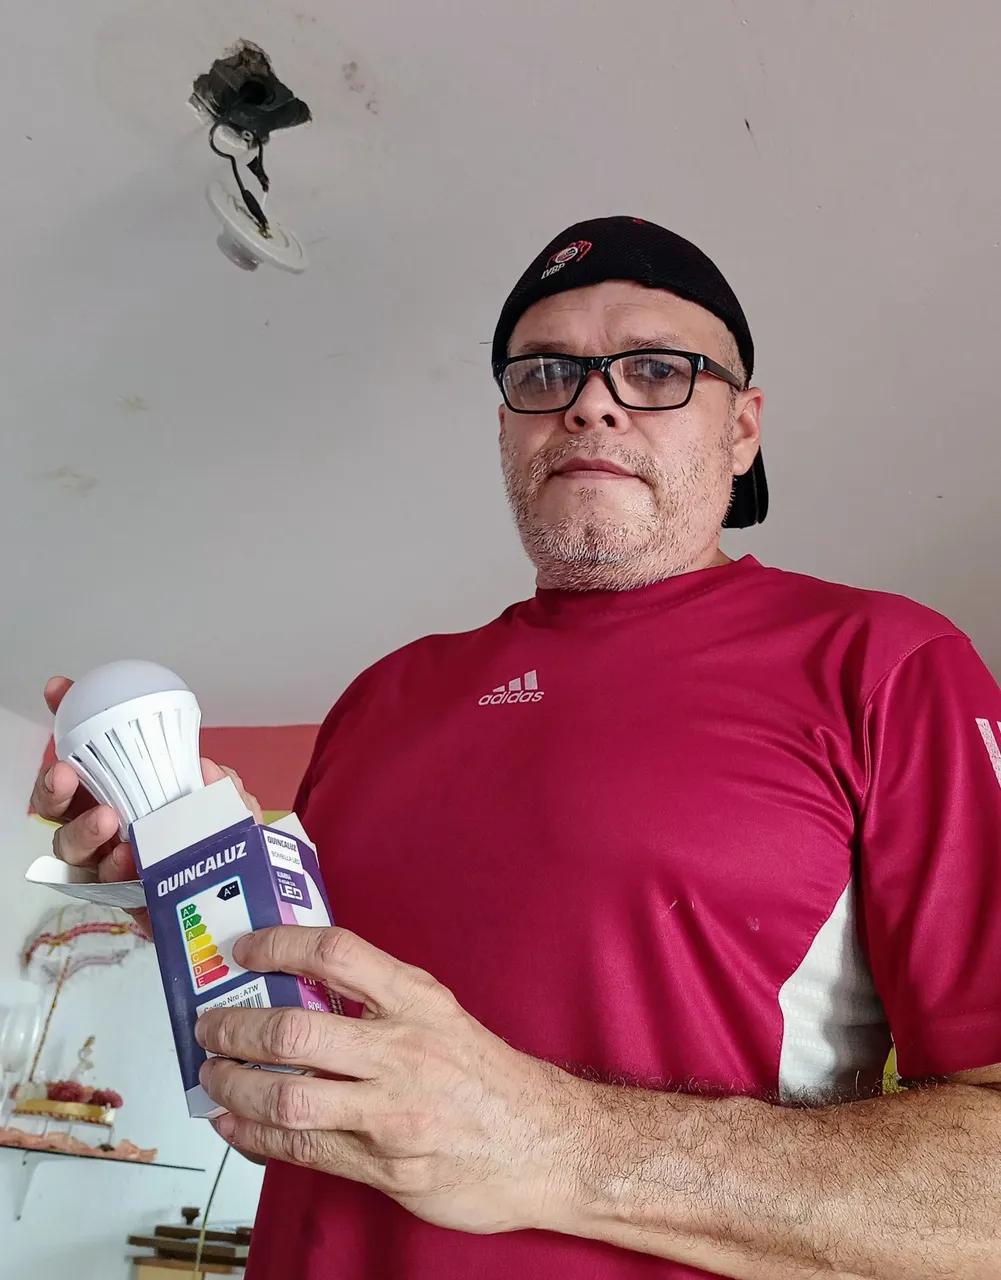
To carry out the installation, we must keep in mind some necessary materials for this purpose. In this sense, apart from the porcelain socket that is logical to have it, we will use a 7w LED bulb, a star screwdriver that also works as a tester, a screwdriver shovel as a precaution, a black teipe, and a cutting pliers. Simple materials that most of us have at home. Now, let's get to work.
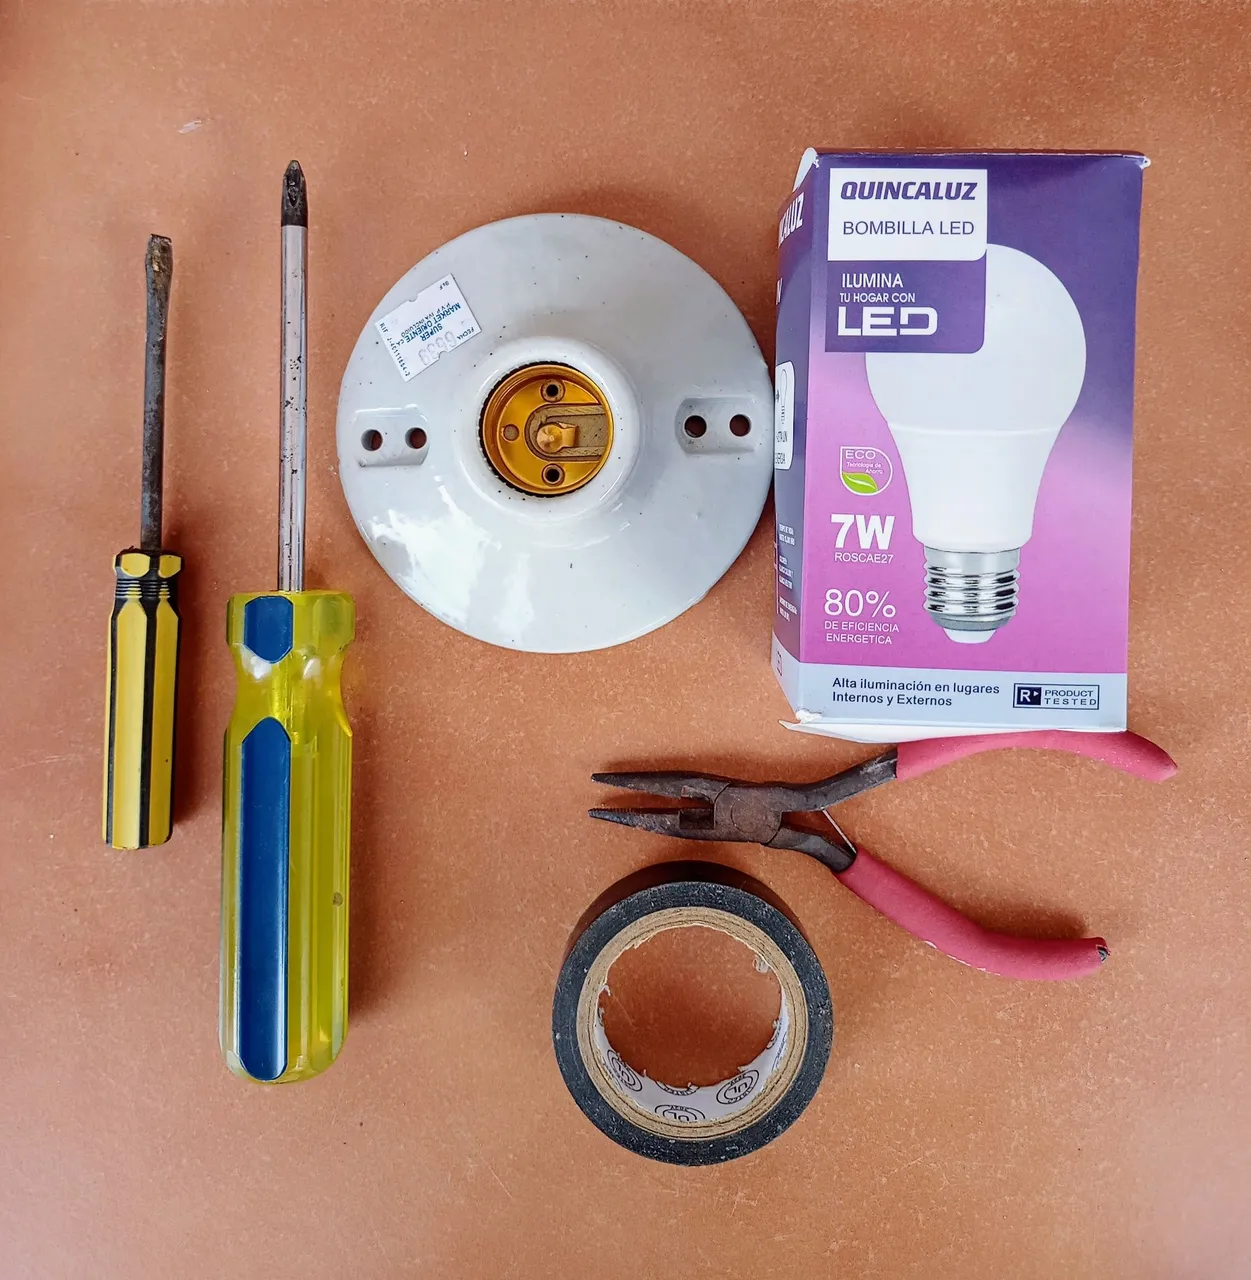
Para llevar a cabo la instalación, debemos tener presente algunos materiales necesarios para tal fin. En tal sentido, aparte del sócate de porcelana que es lógico tenerlo, vamos a usar un bombillo Led de 7w, un destornillador de estrella que también funciona como probador, un destornillador de pala por precaución, un teipe negro, y una pinza cortadora. Materiales sencillos, que la gran mayoría de nosotros tenemos en casa. Ahora, manos a la obra.
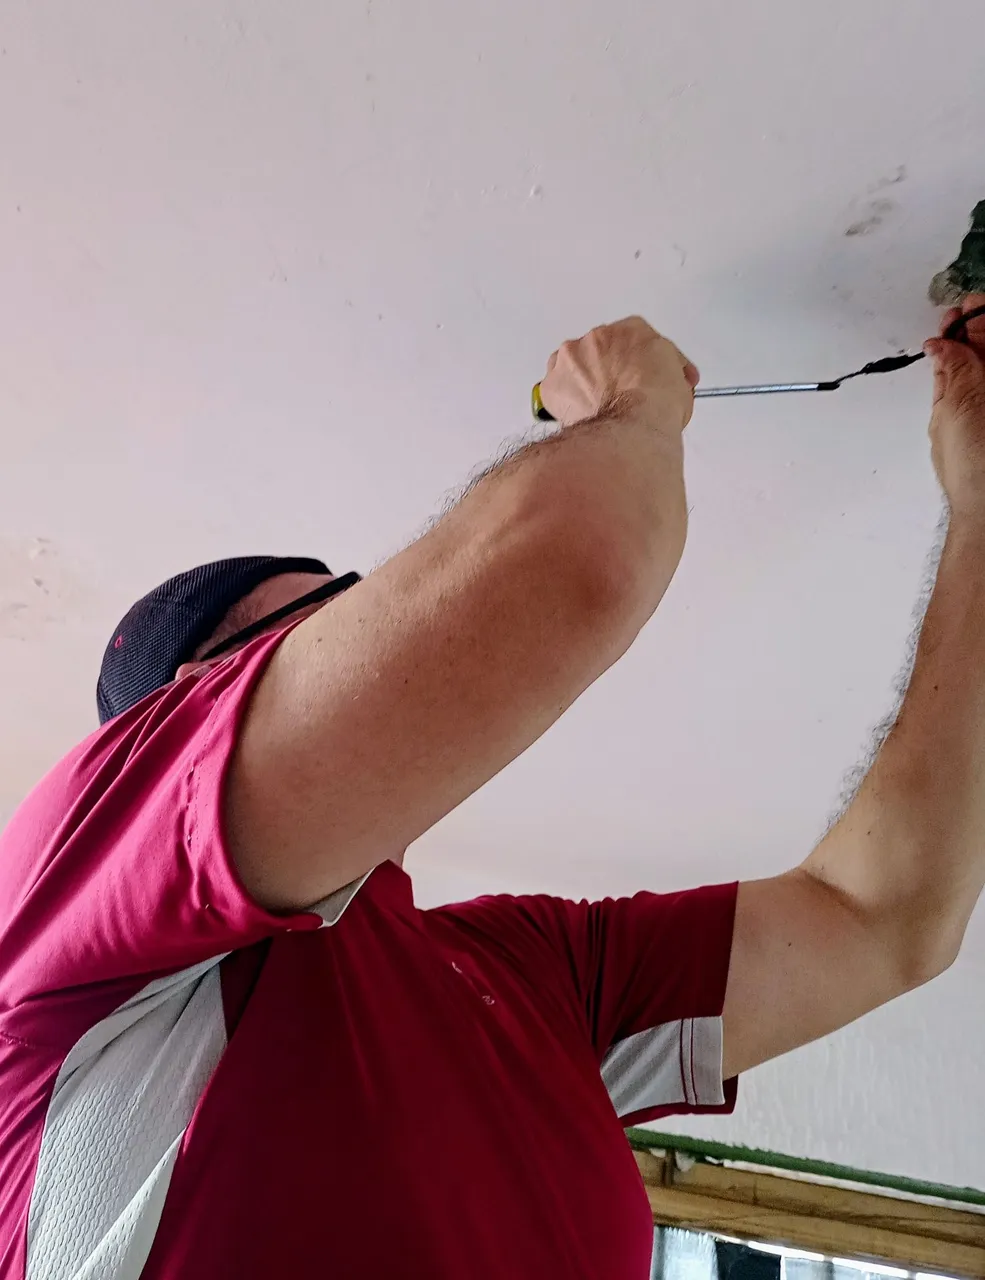
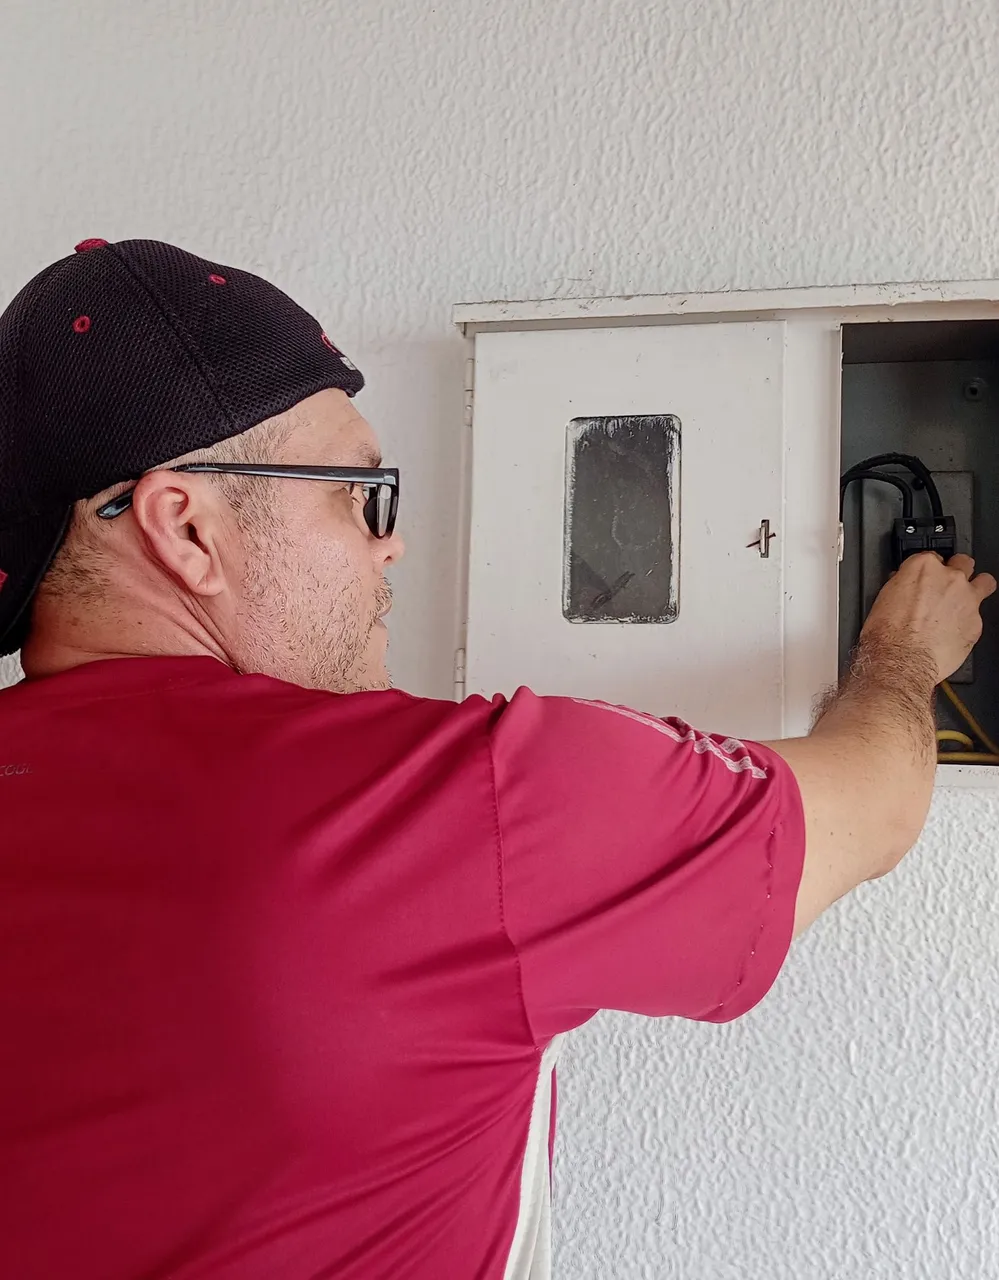
This installation will be quick, easy, and well explained. First of all, starting with the safety measures, we go to the brekera and cut all the electricity in the house. Here I will not be doing like others, who work without cutting the electricity because they know too much. You never know when a carelessness happens, we touch a wire without wanting to, and we get electrocuted. We'd better put down the breaker, and work calmly. To check, I take the screwdriver, since I do not have specialized equipment, and I place the tip of it on the tip of the cable, we see that the screwdriver does not light its bulb, there is no current.

Esta instalación será rápida, fácil, y bien explicada. En primer lugar, iniciando con las medidas de seguridad, nos dirigidos a la brekera y cortamos toda la electricidad de la casa. Aquí no voy a estar haciendo como otros, que trabajan sin cortar la electricidad porque saben mucho. Nunca se sabe cuando ocurre un descuido, tocamos sin querer un cable, y nos electrocutados. Mejor bajamos la brekera, y trabajamos tranquilos. Para comprobar, tomo el destornillador, ya que no tengo equipos especializados, y coloco la punta del mismo en la punta del cable, vemos que el destornillador no enciende su bombillo, no hay corriente.
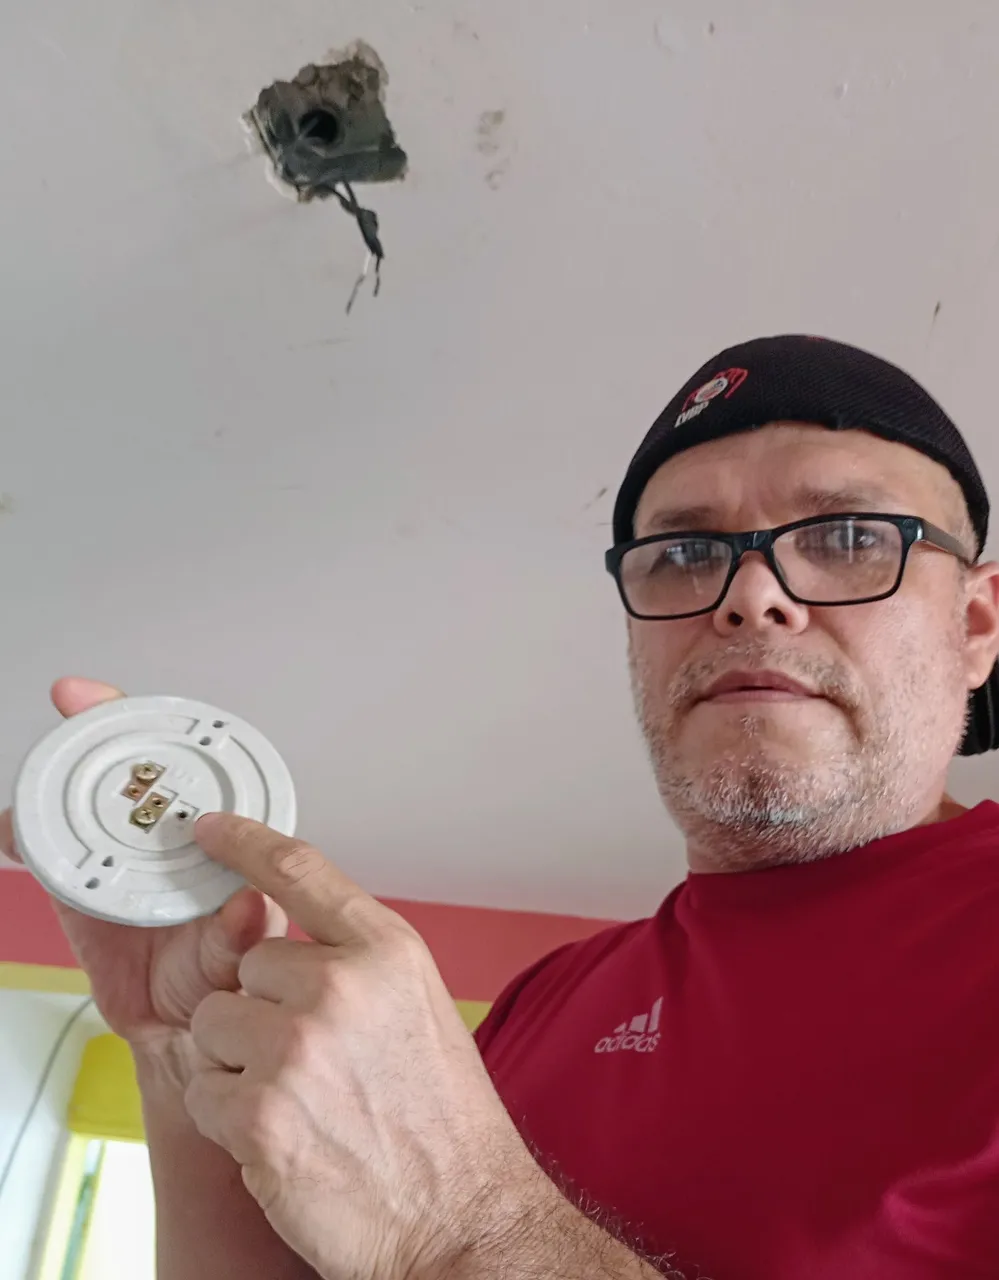
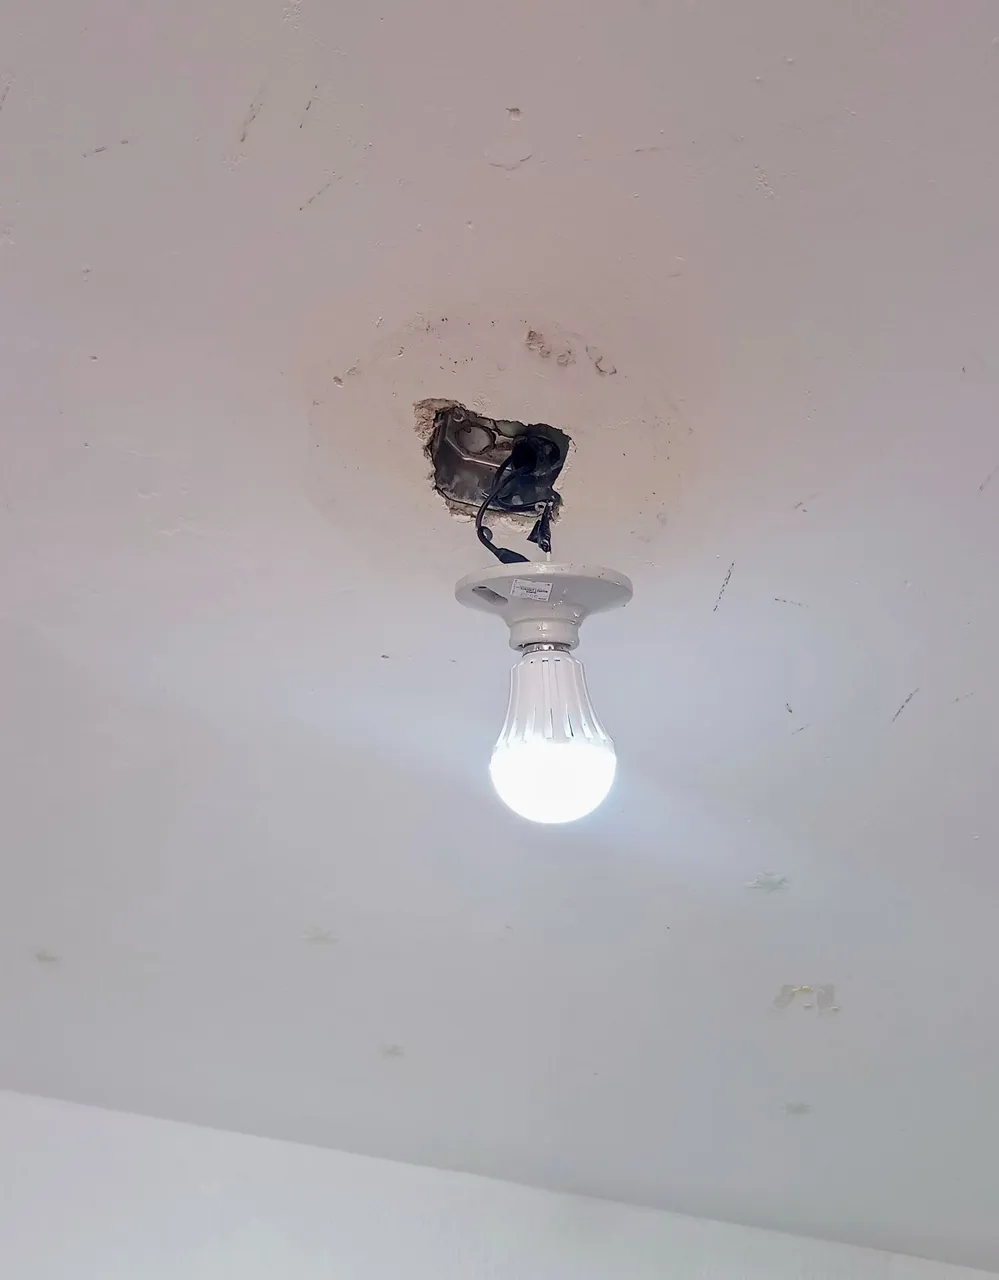
As there is no lamp or socket in the work area, we just installed the new porcelain socket. First, we cut the ends of the wires, and then remove about 1 cm of rubber. These new tips will be placed in the socket. On the other hand, we see that there are two wires, the return wire and the neutral wire. And as in the socket there are no cables, or guides where to place the cables of the ceiling, there are only two screws, then, in each one of them we place a cable. If it were a normal socket with two colored cables, the cable would be connected in the corresponding color to avoid any mishap.
Como en la zona de trabajo no hay lámpara ni sócate colocados, solo nos limitamos a instalar el sócate de porcelana nuevo. En primer lugar, cortamos las puntas de los cables, para luego quitar aproximadamente 1cm de goma. Estas puntas nuevas serán colocadas en el sócate. Por otra parte, Vemos que hay dos cables, el de retorno, y el neutro. Y como en el sócate no hay cables, o guías donde colocar los cables del techo, solo hay dos tornillos, entonces, en cada uno de ellos colocamos un cable. Si fuera un sócate de los normales que tienen dos cables de colores, se conectaría el cable en el color correspondiente para evitar algún percance.
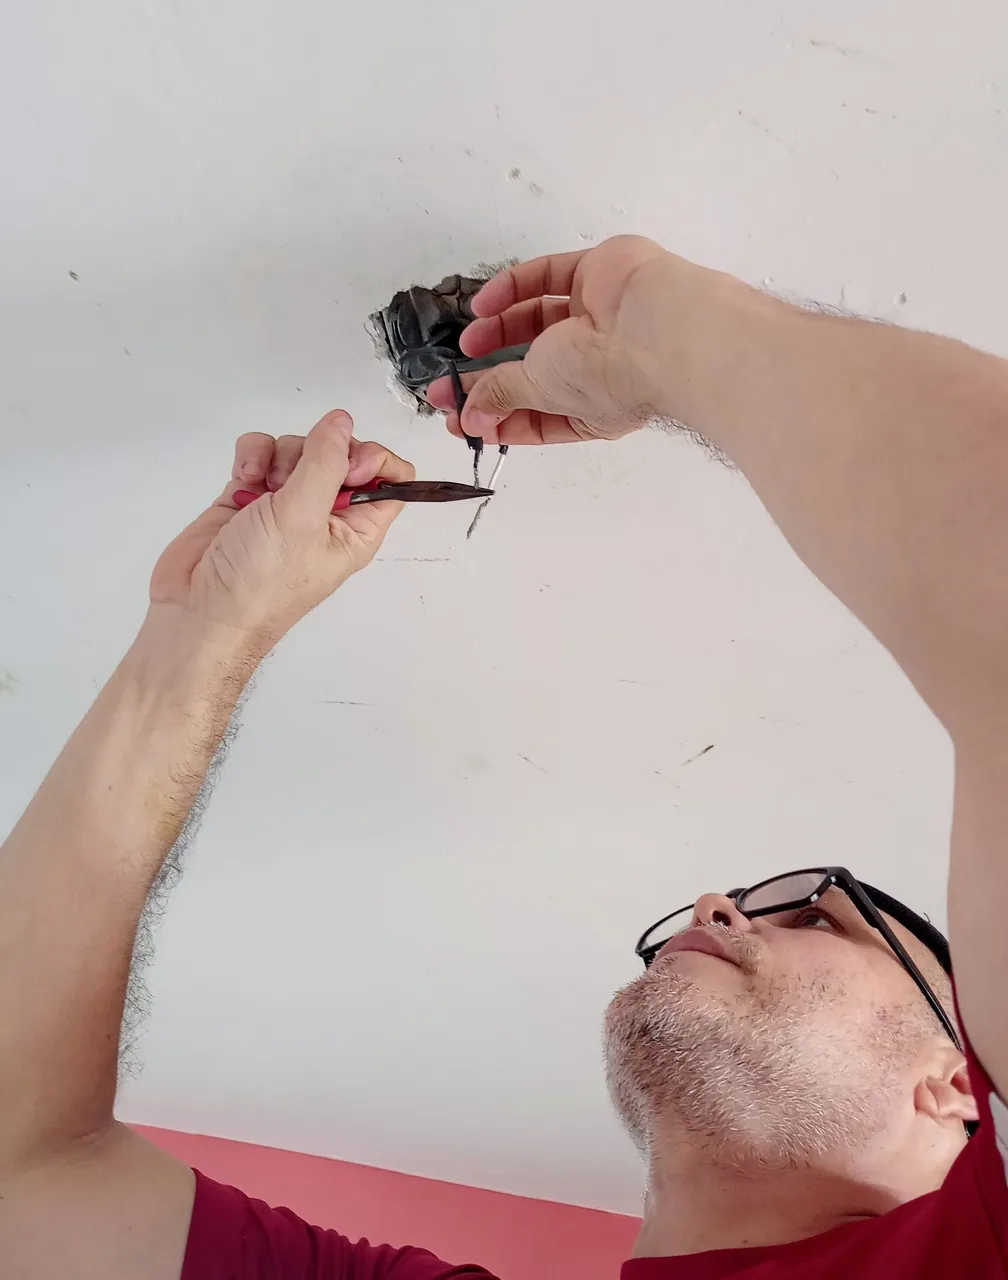
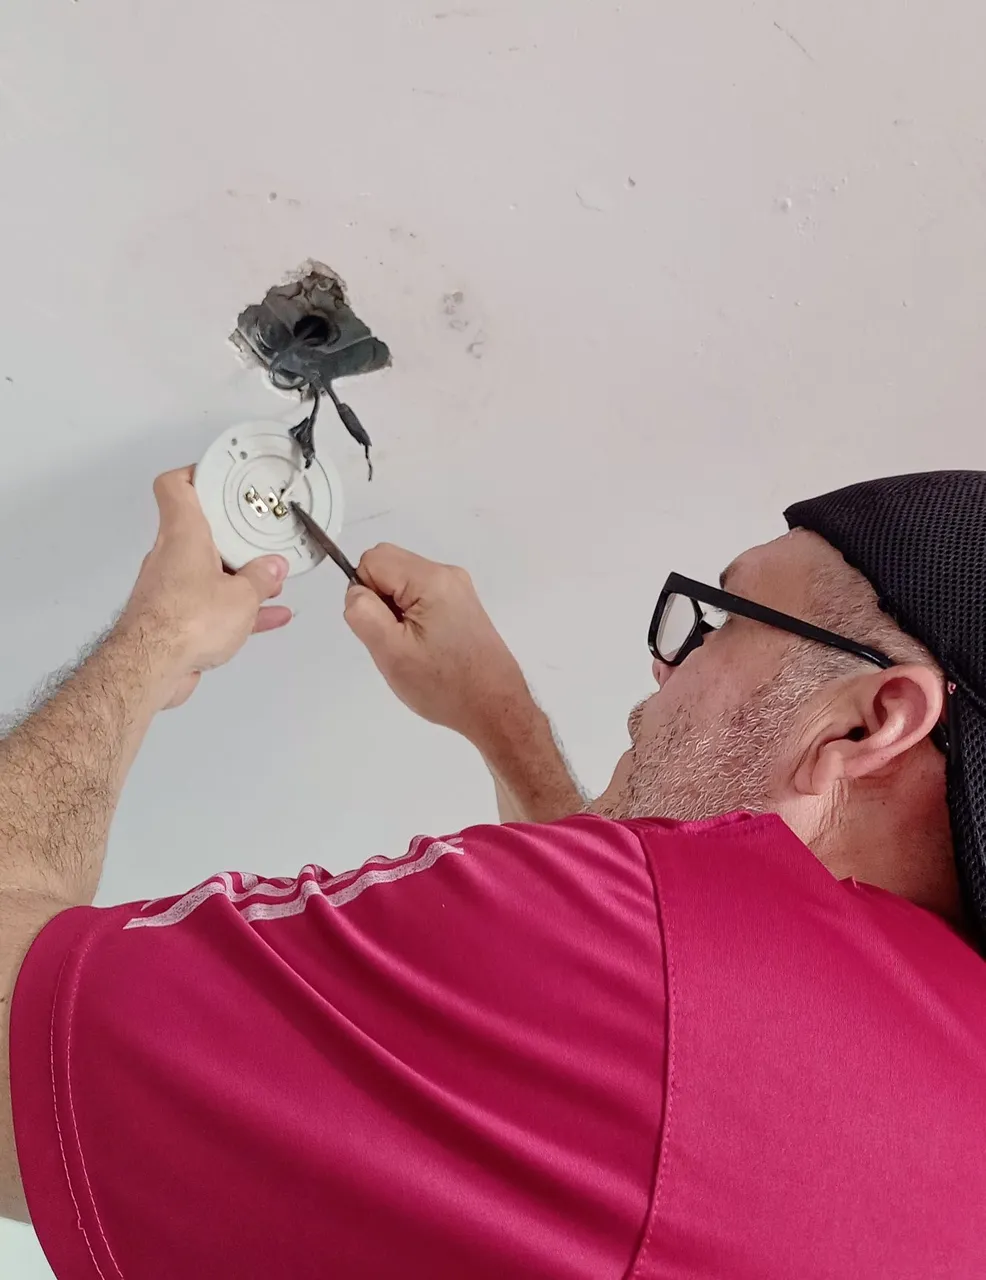
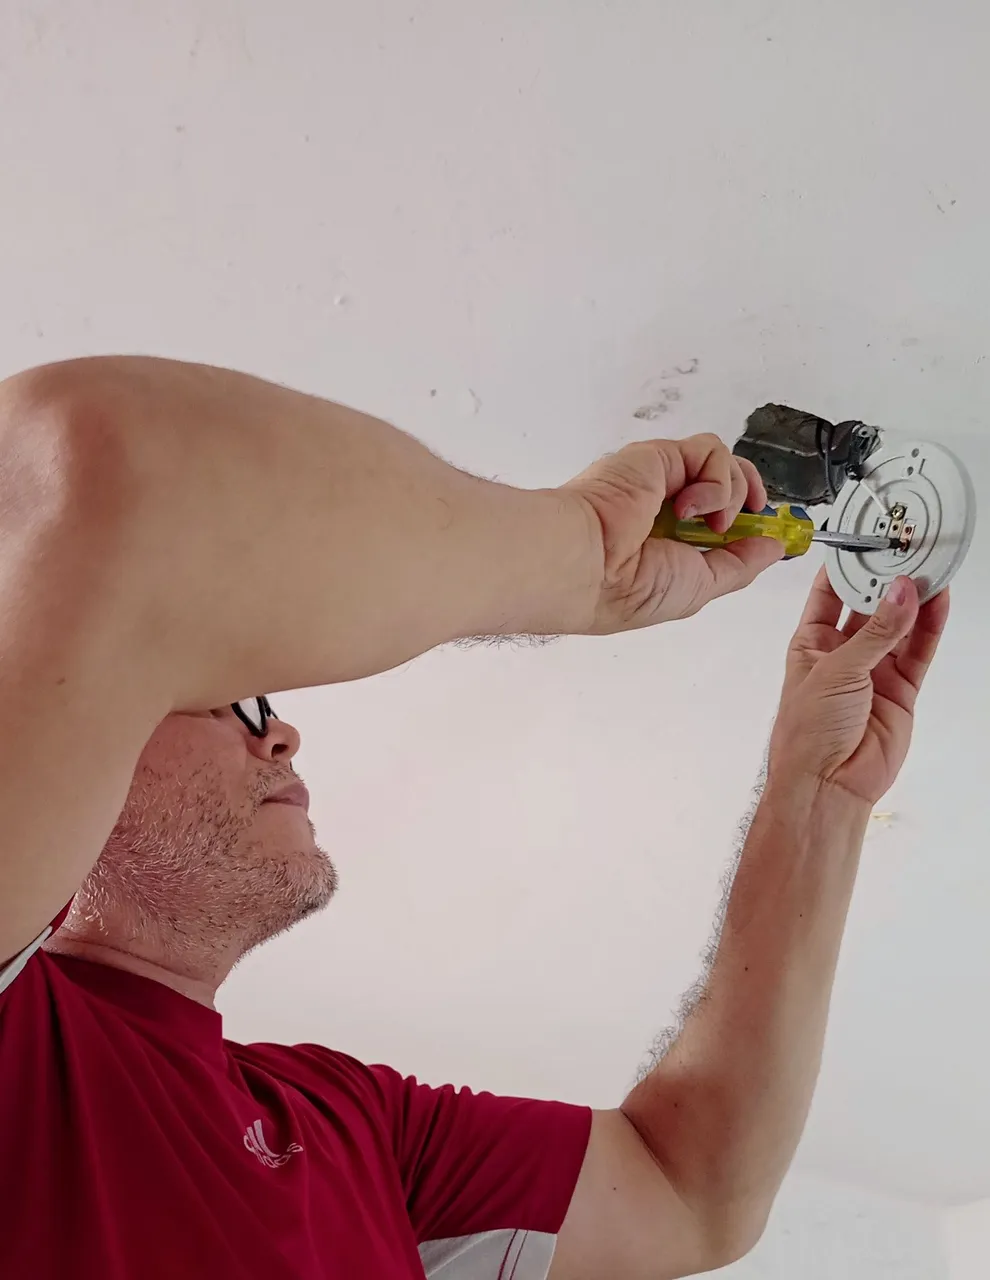
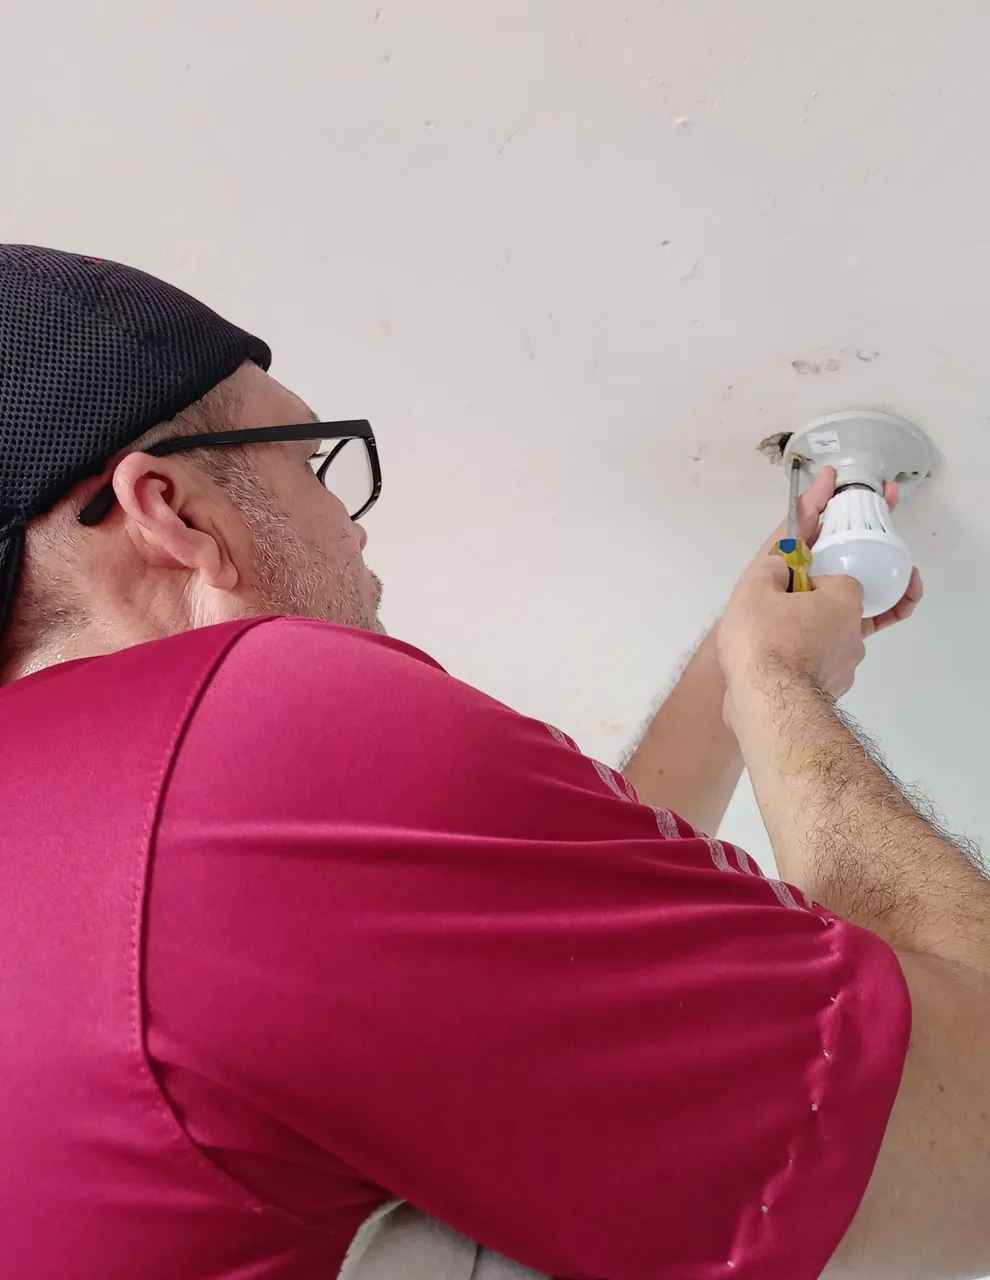
We can see that the screws of the socket are star type, so we will use the same screwdriver. Next, we unscrew a little each screw, since in them we will entangle the cables that are in the ceiling. Now, with the pliers we introduce alternately, a cable in each screw, and with the star screwdriver we give pressure so that they are well fastened. Here we must be alert, since the cables have to be well separated, for that reason at the moment of putting them in the screws, we must observe that at no moment they get to cross.
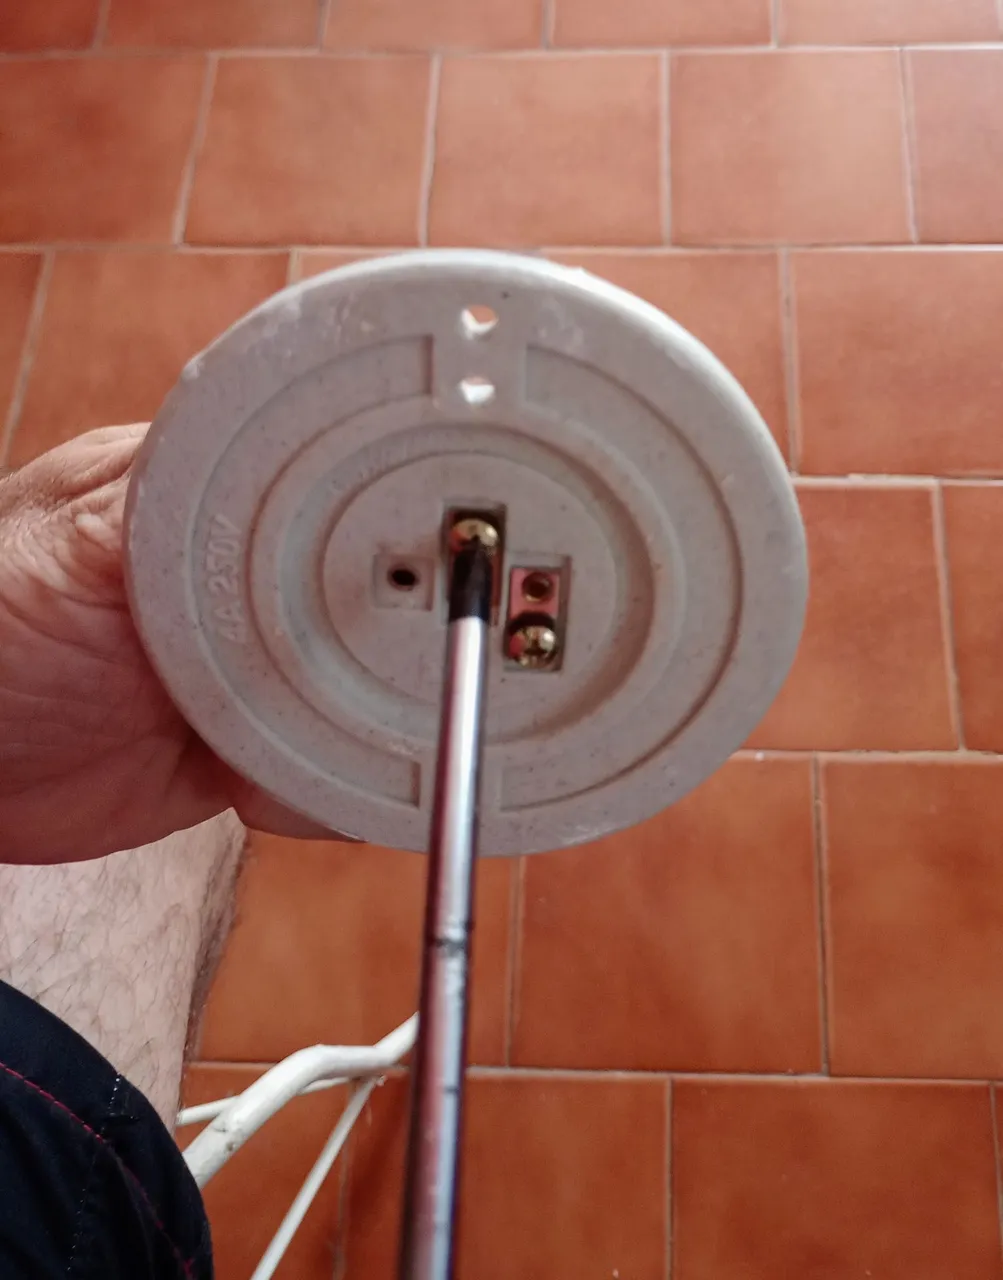
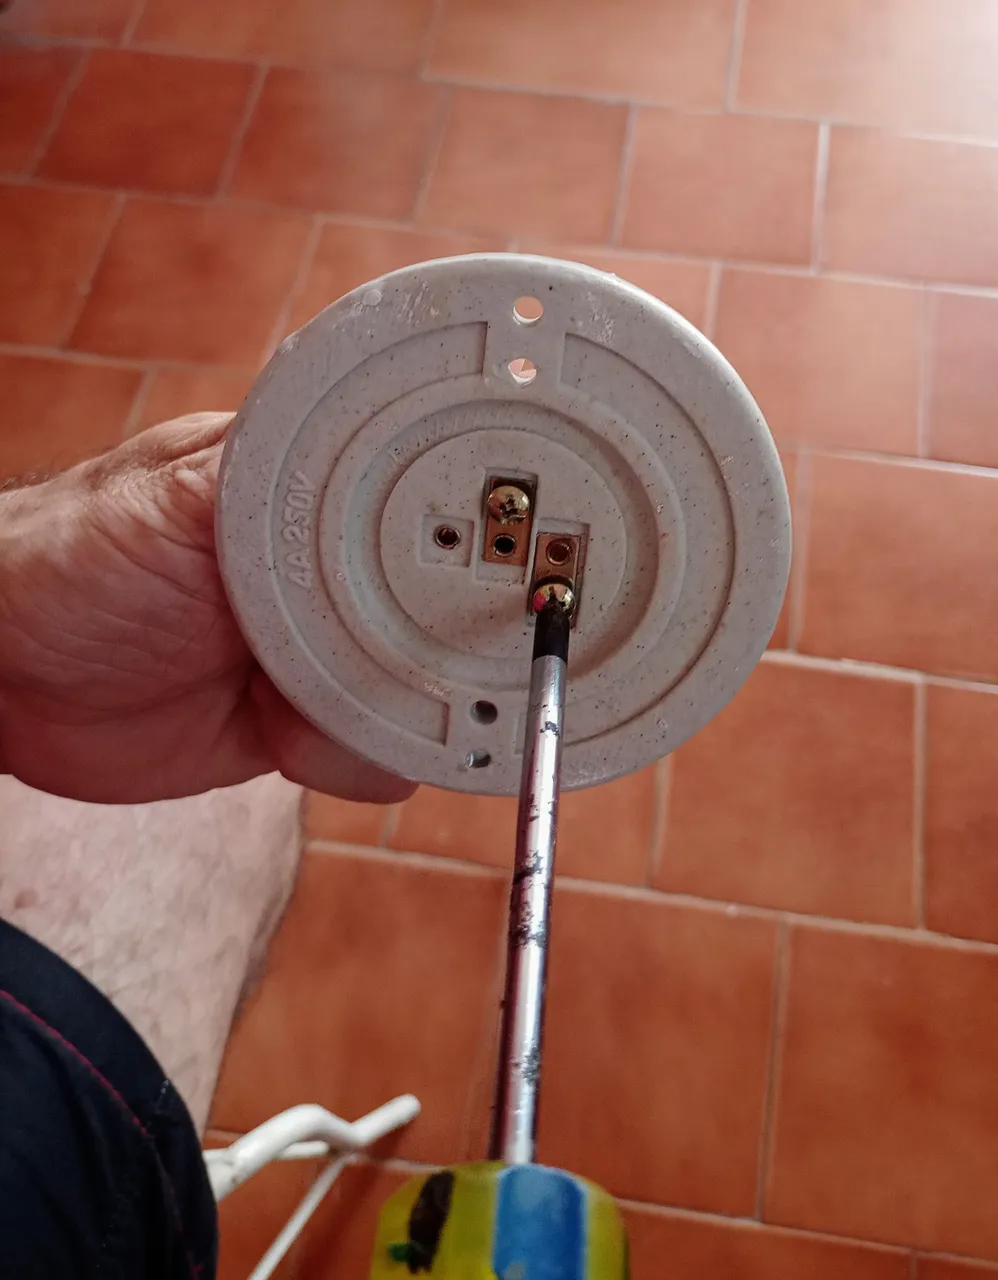
Vemos que los tornillos del sócate son tipo estrella, por lo tanto ese mismo destornillador vamos a usar. Acto seguido, desatornillamos un poco cada tornillo, ya que en ellos enrredaremos los cables que están en el techo. Ahora, con la pinza introducimos de forma alterna, un cable en cada tornillo, y con el destornillador de estrella le damos presión para que queden bien sujetos. Aquí debemos estar alertas, ya que los cables tienen quedar bien separados, por ello al momento de ponerlos en los tornillos, debemos observar que en ningún momento se lleguen a cruzar.
Now, before adjusting the socket to the ceiling, we take the 7w Led bulb out of the box, screw it into the socket, and we go to the breaker to turn on the electricity. We pass the switch and we see that the bulb turns on, everything is fine, and apparently the technician installed the mixed switch well, later we test the area of the outlet with the bulb off.
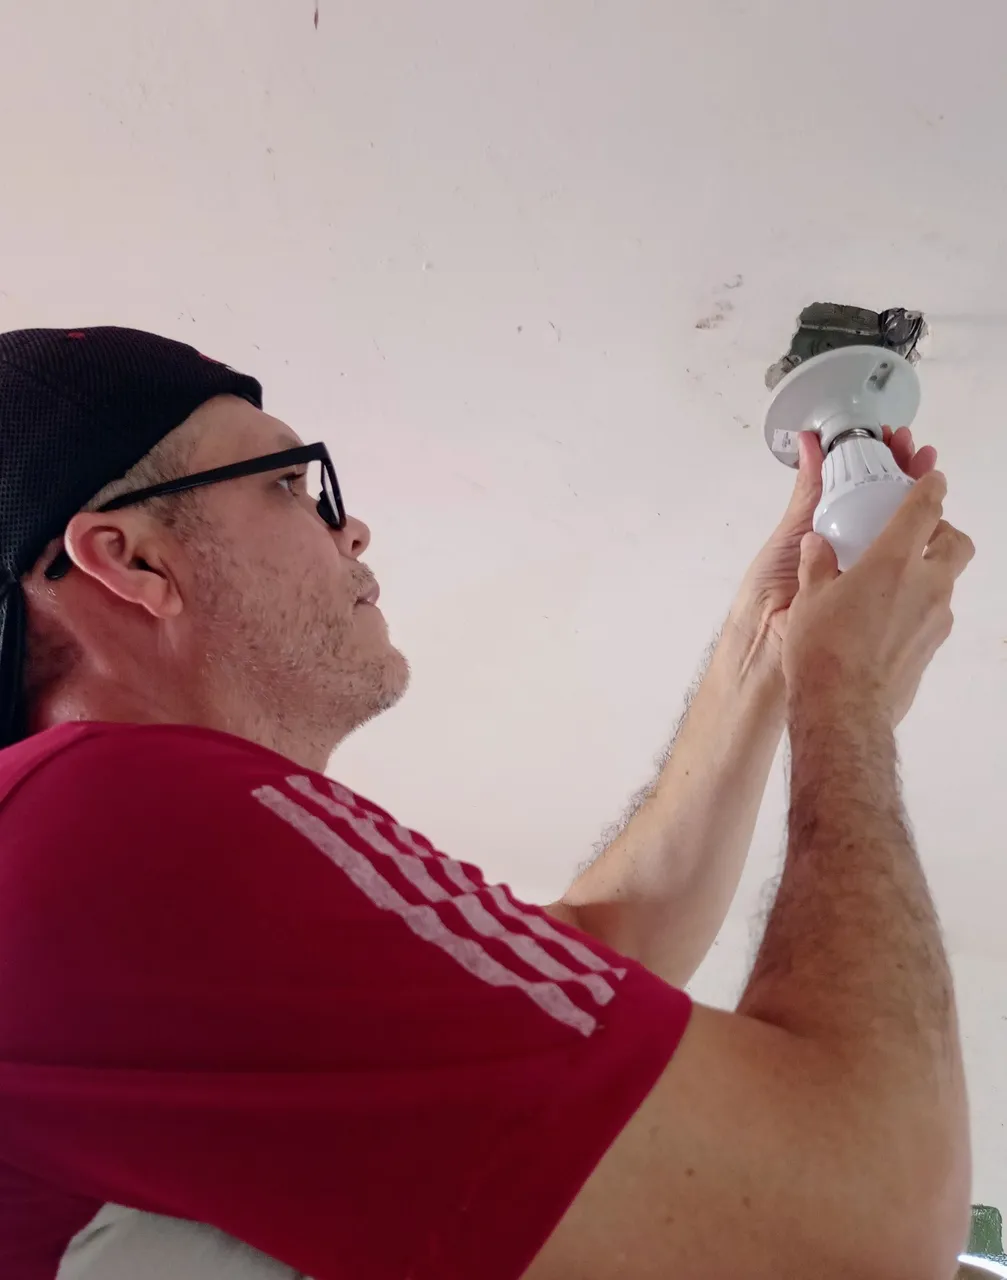
Ahora, antes de ajustar el sócate al techo, sacamos de la caja el bombillo Led 7w, lo enrroscamos en el sócate, y nos vamos a la brekera para activar la electricidad. Pasamos el interruptor y vemos que prende el bombillo, todo está bien, y al parecer el técnico instaló bien el interruptor mixto, más adelante probamos la zona del tomacorriente con el bombillo apagado.
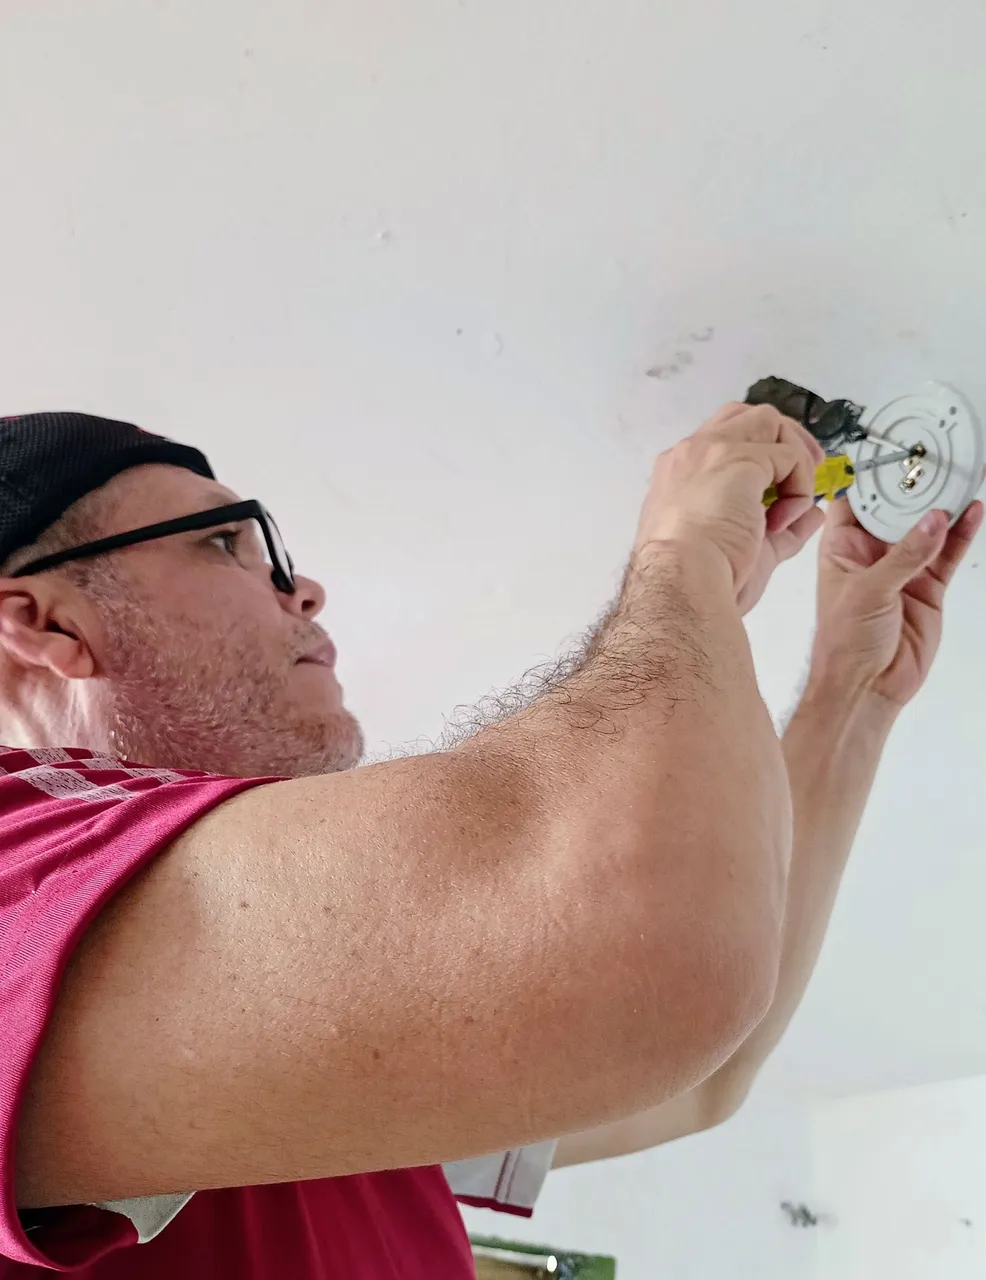
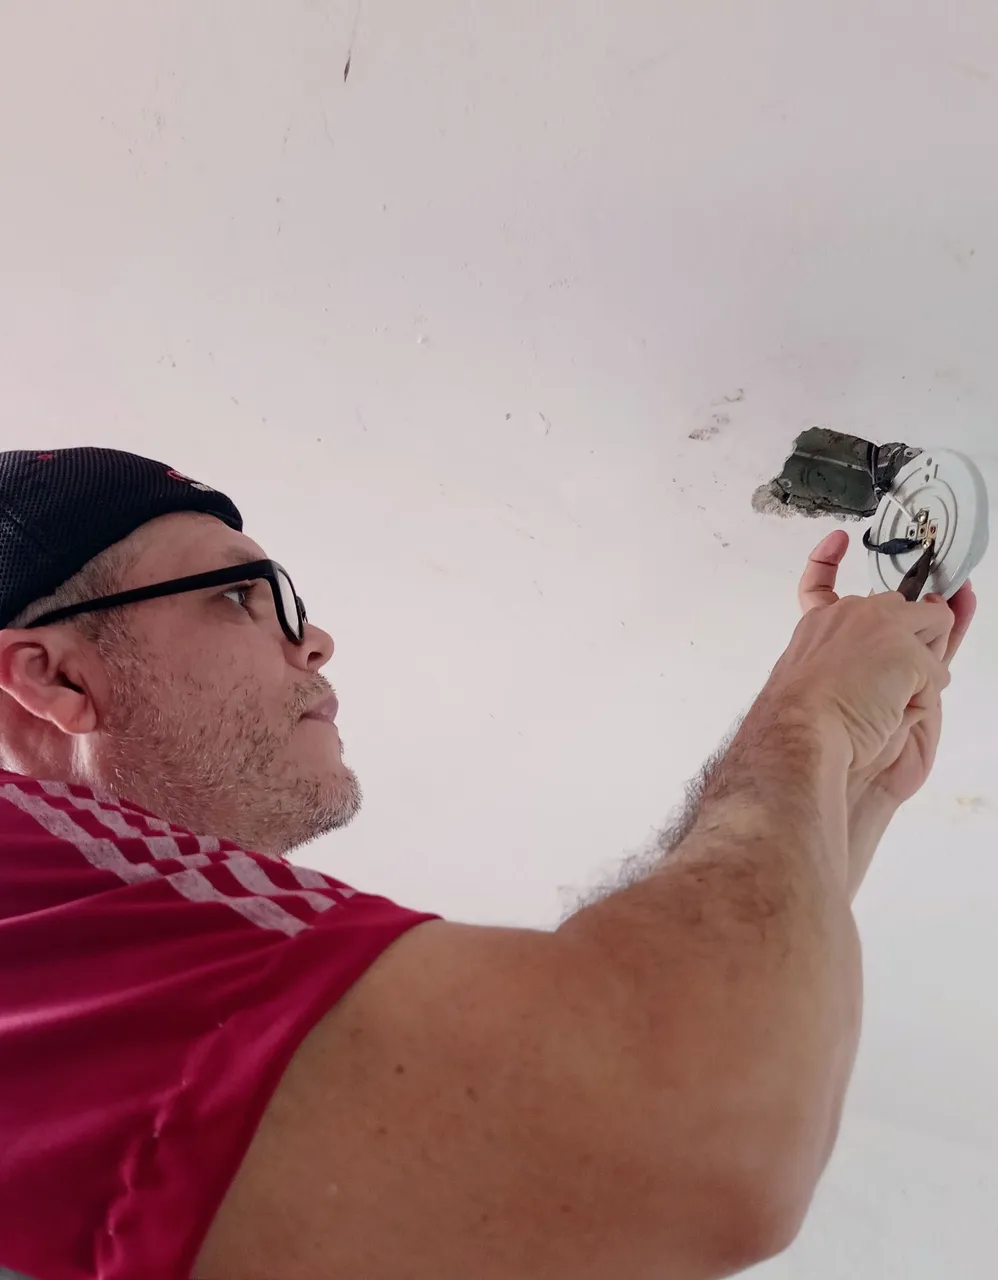
Having checked that everything is going well, and as I am still taking safety measures, I turn off the power again to proceed to adjust the socket on the roof. Well, as the screws that came with the socket are too short. We had to look in our inventory to locate some longer ones, since the box that is in the ceiling was placed a little deep. Finally, we took the Phillips screwdriver, placed each screw in the slots of the socket, and screwed them into the internal connectors of the socket. We turn the power back on, flip the switch, and see that the bulb turns on, all is well, we are done for this part.
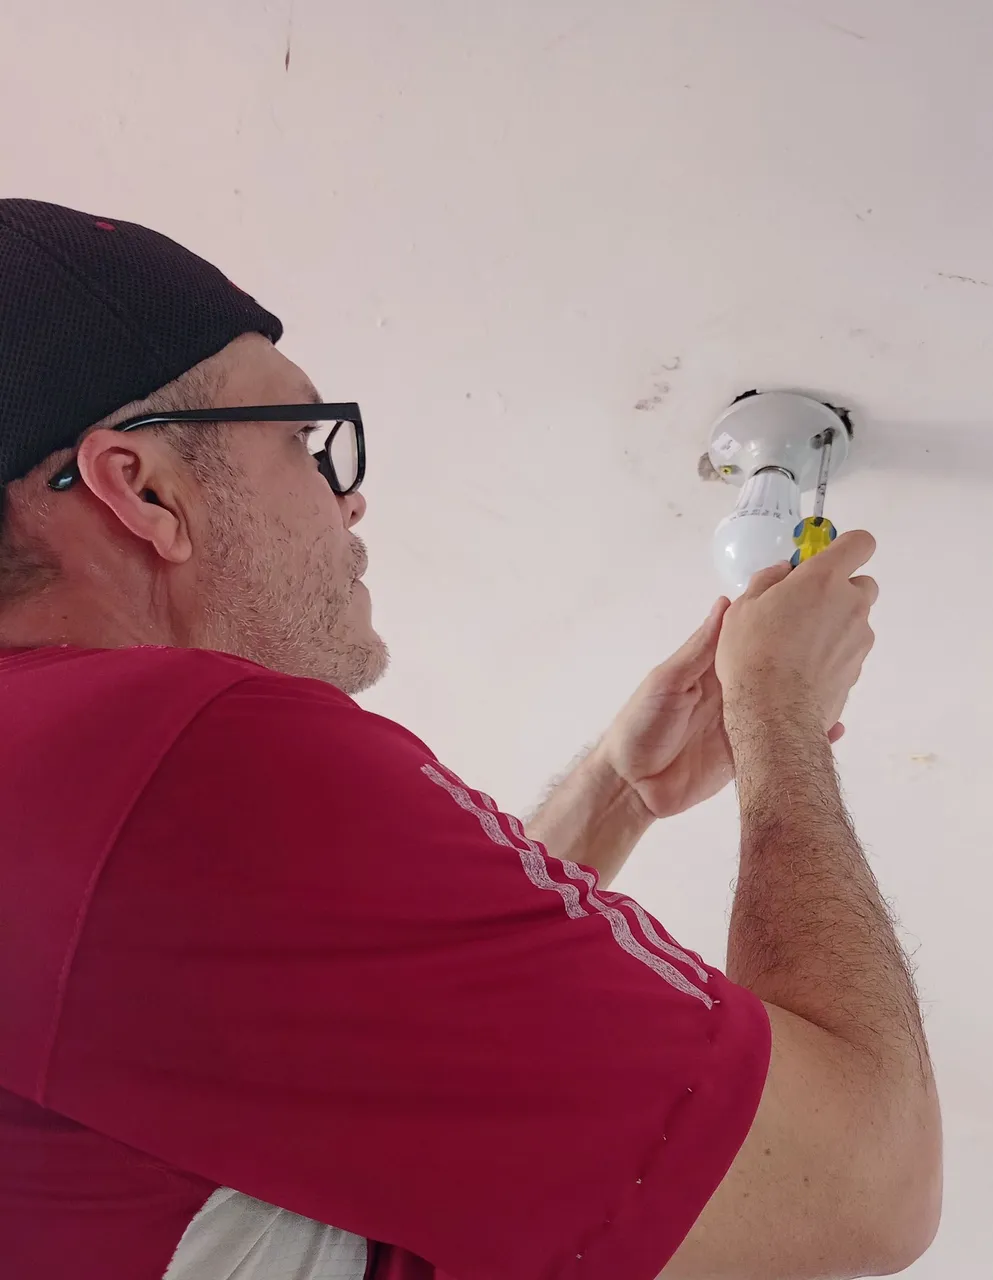
Una vez comprobado que todo marcha bien, y como sigo tomando medidas de seguridad, vuelvo a cortar la corriente para proceder ajustar el sócate en el techo. Bueno, como los tornillos que vinieron con el sócate son muy cortos. Tuvimos que buscar en nuestro inventario, para ubicar unos más largos, ya que el cajetín que está en el techo lo colocaron un poco profundo. Finalmente, tomamos el destornillador de estrella, colocamos cada tornillo en las ranuras del sócate, y los atornillamos a los conectores internos del cajetín. Conectamos de nuevo la electricidad, pasamos el interruptor, y vemos que el bombillo enciende, todo está bien, hemos terminado por esta parte.
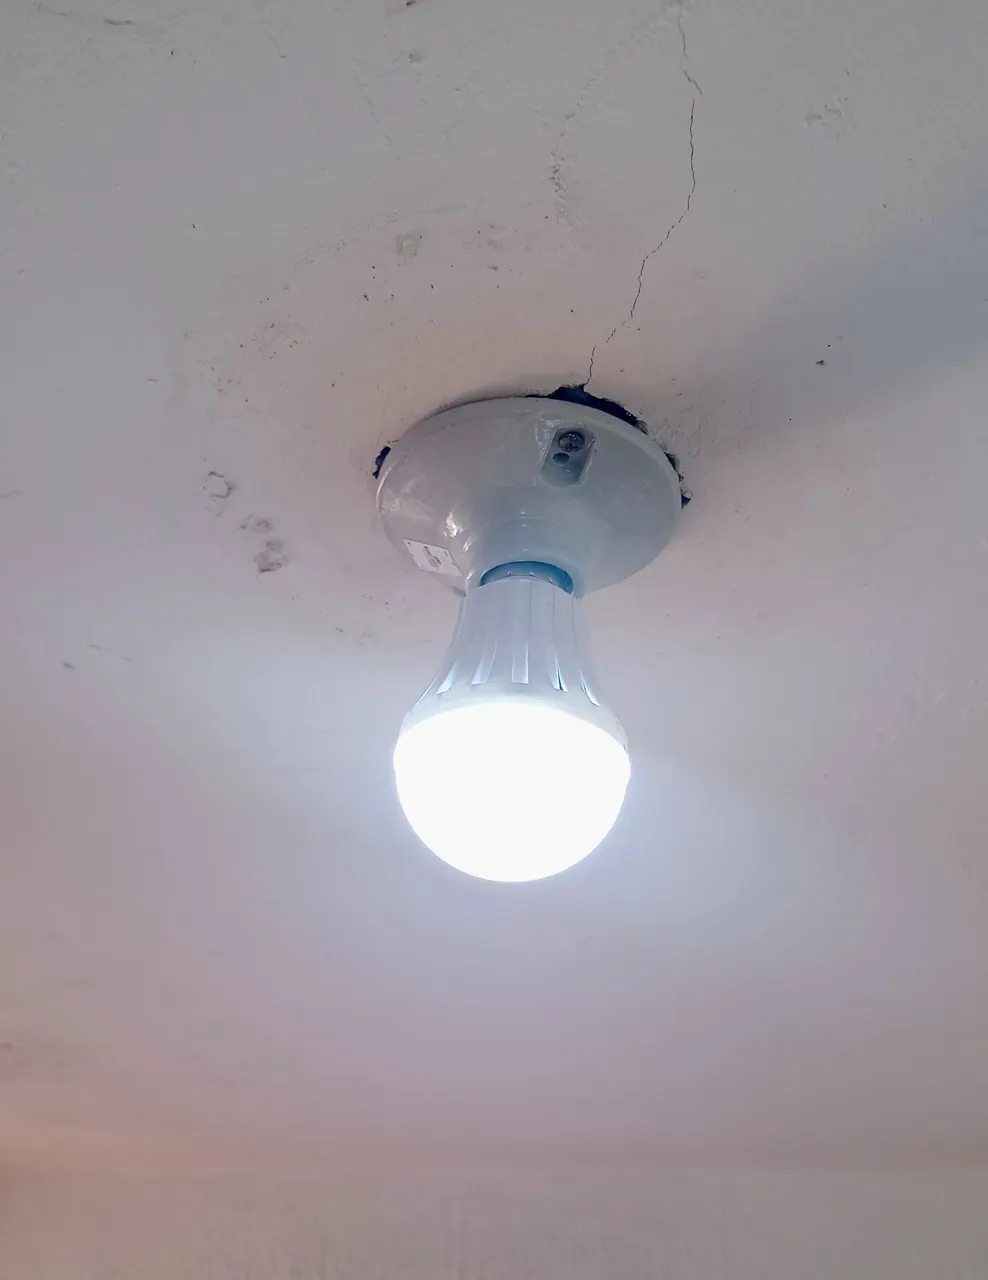
We turn off the bulb to check if the technician made the jumper properly. With the switch off, the socket part should have electricity without problems. To do this, I used a 110v protector, and when we insert it we notice that the bulb in the standby cycle turns on, it means that the installation of the mixed switch was successful. Well friends, we have reached the end of this new tutorial, easy, simple, well explained, and for the benefit of all of you. I hope you find it very useful, greetings, and hugs to all.
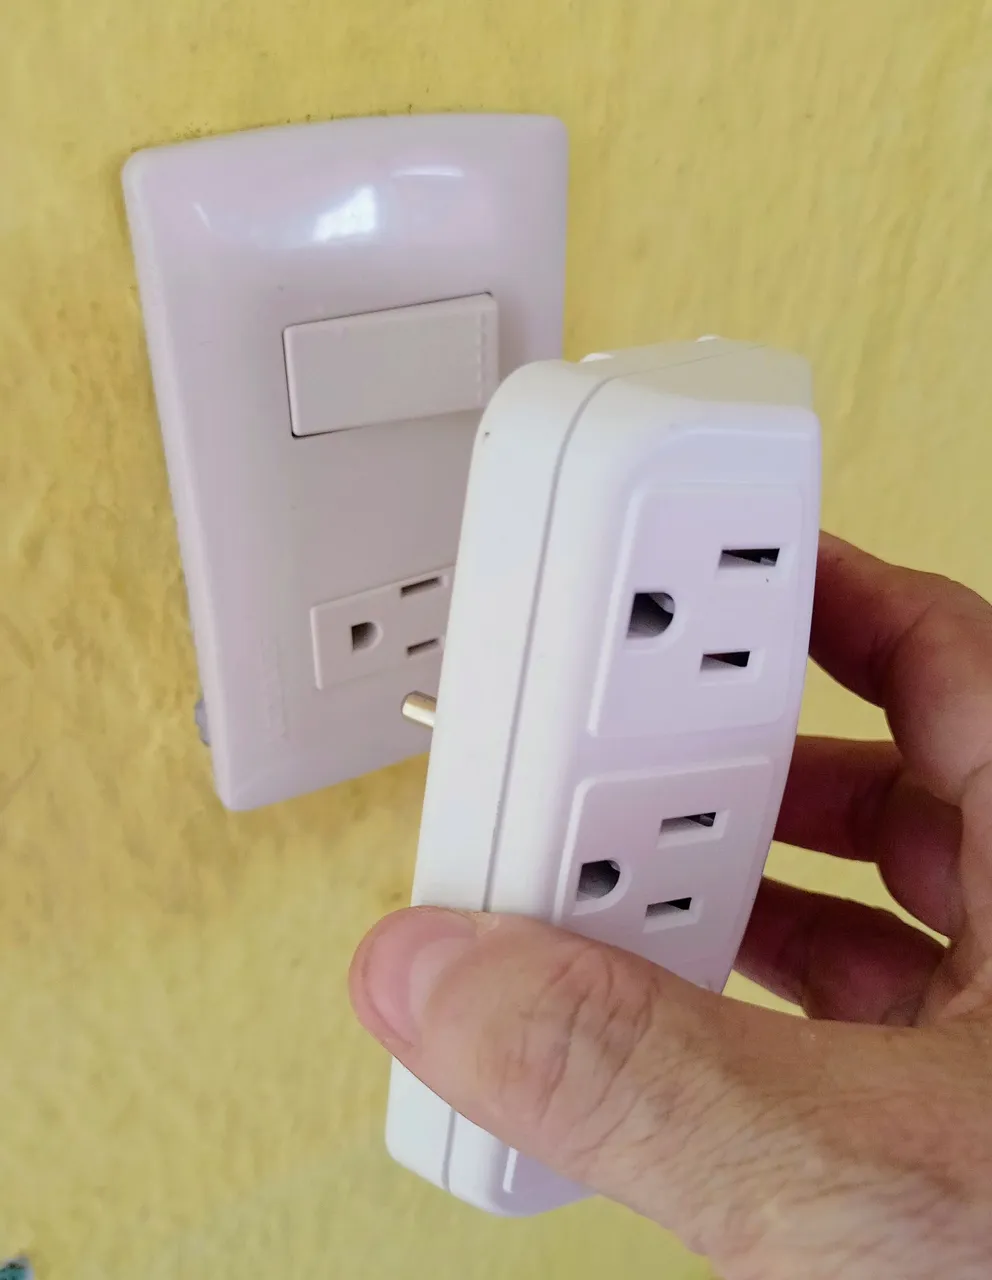
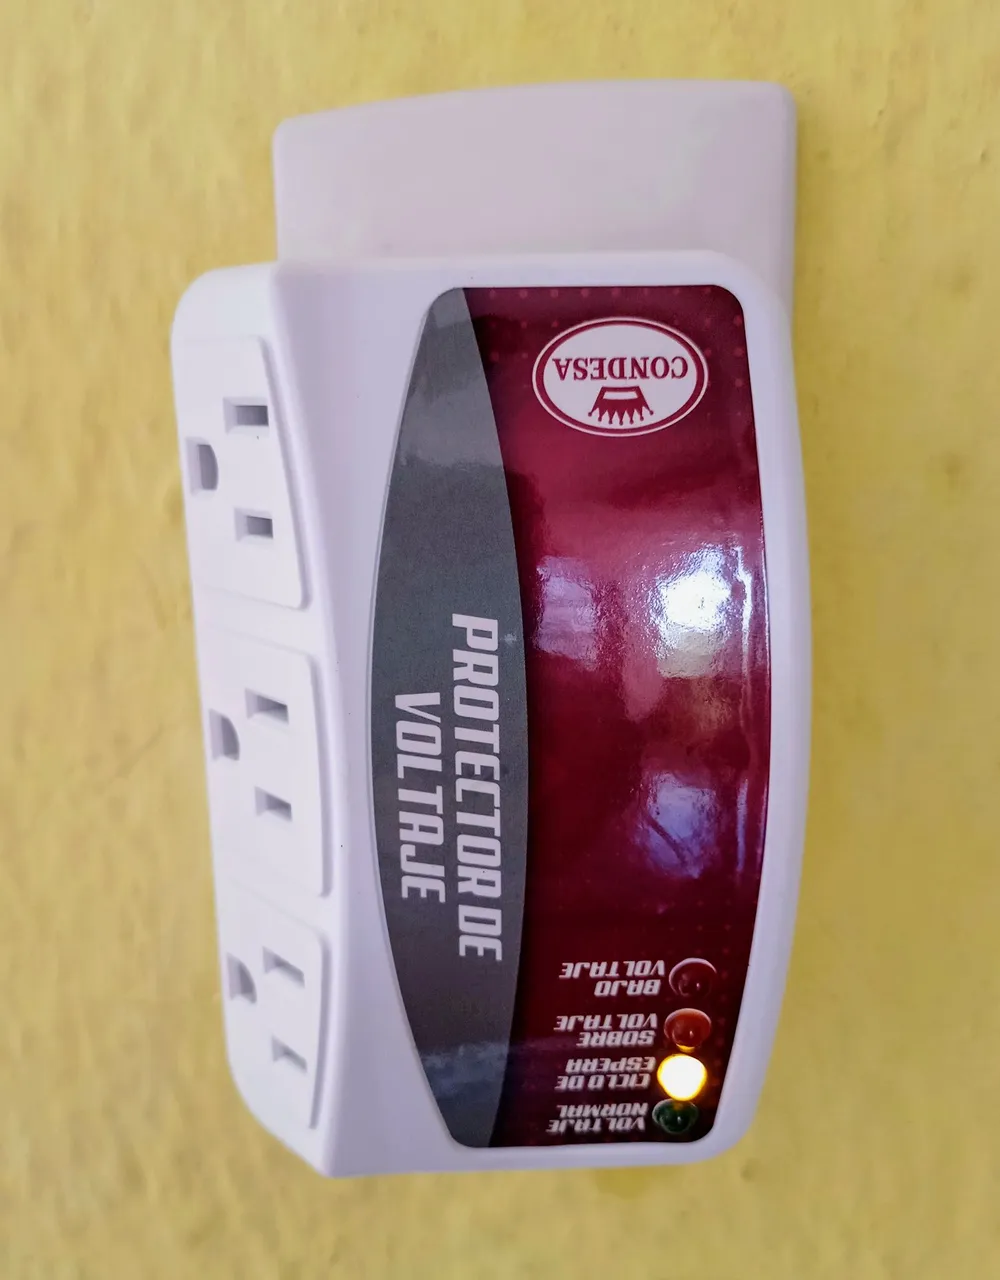
Apagamos el bombillo para comprobar si el técnico hizo el puente como es debido. Con el interruptor en off, la parte del tomacorriente debe tener electricidad sin problemas. Para ello, utilicé un protector 110v, y al introducirlo notamos que el bombillo del ciclo de espera enciende, quiere decir que la instalación del interruptor mixto fue realizada con éxito. Bueno amigos, hemos llegado al final de este nuevo tutorial, fácil, sencillo, bien explicado, y para el beneficio de todos ustedes. Espero que les sea de mucha utilidad, saludos, y abrazos a todos.
...Gracias Por Visitar...
...Thanks for visiting...


Photographs taken by me and Miguel Rojas
Fotografías tomadas por mí y Miguel Rojas.
Sorry. English is not our native language. Therefore, a web translator is used for texts in English. (Spanishdict)