

Hi fellow Hivers!
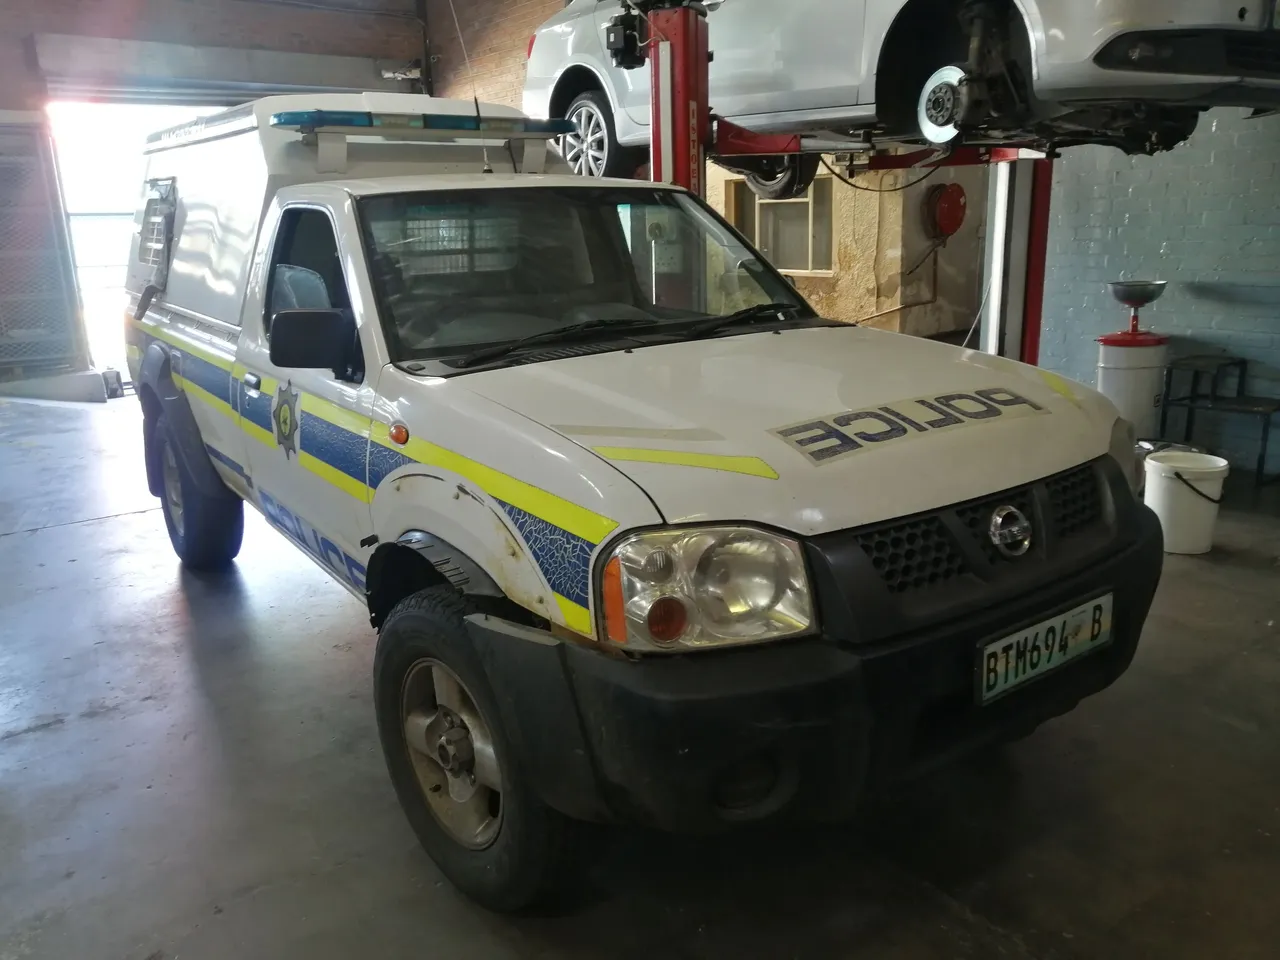
We got another police unit vehicle to repair. This one is pretty beat up, I am almost certain they were chasing some people through dense vegetation or something of the sort.
We wont be doing any cosmetic work on the vehicle, only mechanical so it's sad to say it will be leaving the shop in this ugly exterior state, none the less it will be A okay on the mechanical side.
I'll be giving a quick run through on how to assemble this Nissan 4x4 vehicle, please do not fully use this as a guide to fix or repair or replace anything on your own vehicles, and if so please use discresion, I will not be running through all the steps but I will try and cover as much as possible. Please feel free to comment for advice if you or anybody you know might need some I'll be more than happy to help.😁
Okay so back to the story! Or run through? Call it what you will.😆
It took a long time for the clearance to go through on this vehicle and the longer the clearance takes the longer we have to sit with this puppy, obviously we cant bill them with extra storage fees seeing that we have a contract with them. Even though they don't always abide by the contract we do have to comply fully.
In this post I will be sharing/guiding you through the preparations you need to do before installing the gearbox itself. I will create a second post for the fitment of the gearbox otherwise it's going to get very stretched out, and I mean very long.
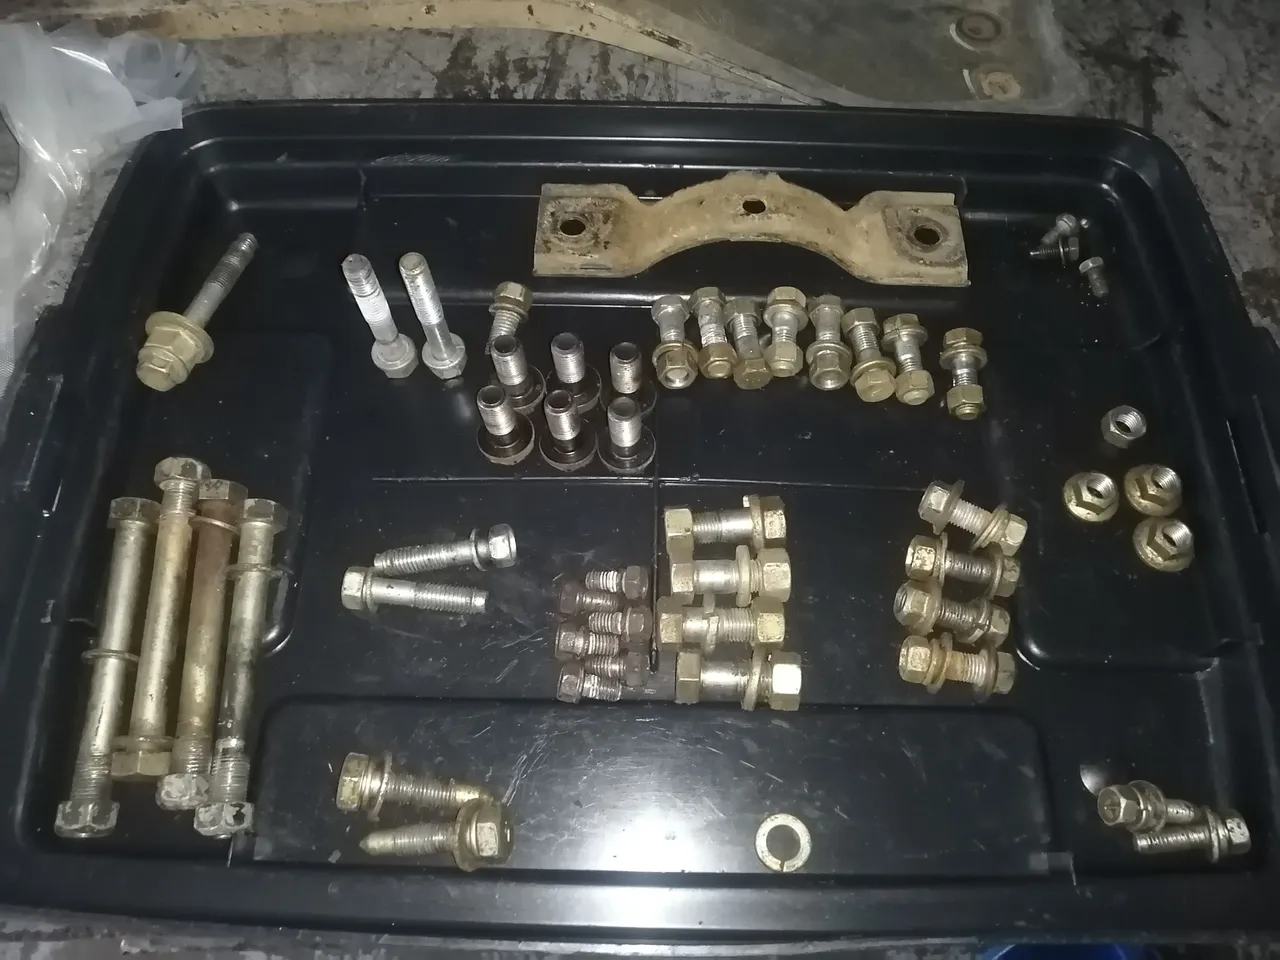
Yes, I know it's not a lot of bolts compared to other 4x4 pickup vehicles but this is indeed all of the bolts needed for the assembly of this specific one. (Minus the bolts holding the gear lever housing in place.)
It makes you wonder if this is actually a good design or a bad one? Maybe the manufacturers pinpointed the stress points on the vehicle adiquitly and bolted accordingly.
- As always sort all of your bolts and nuts. (It makes for a very easy assembly.)
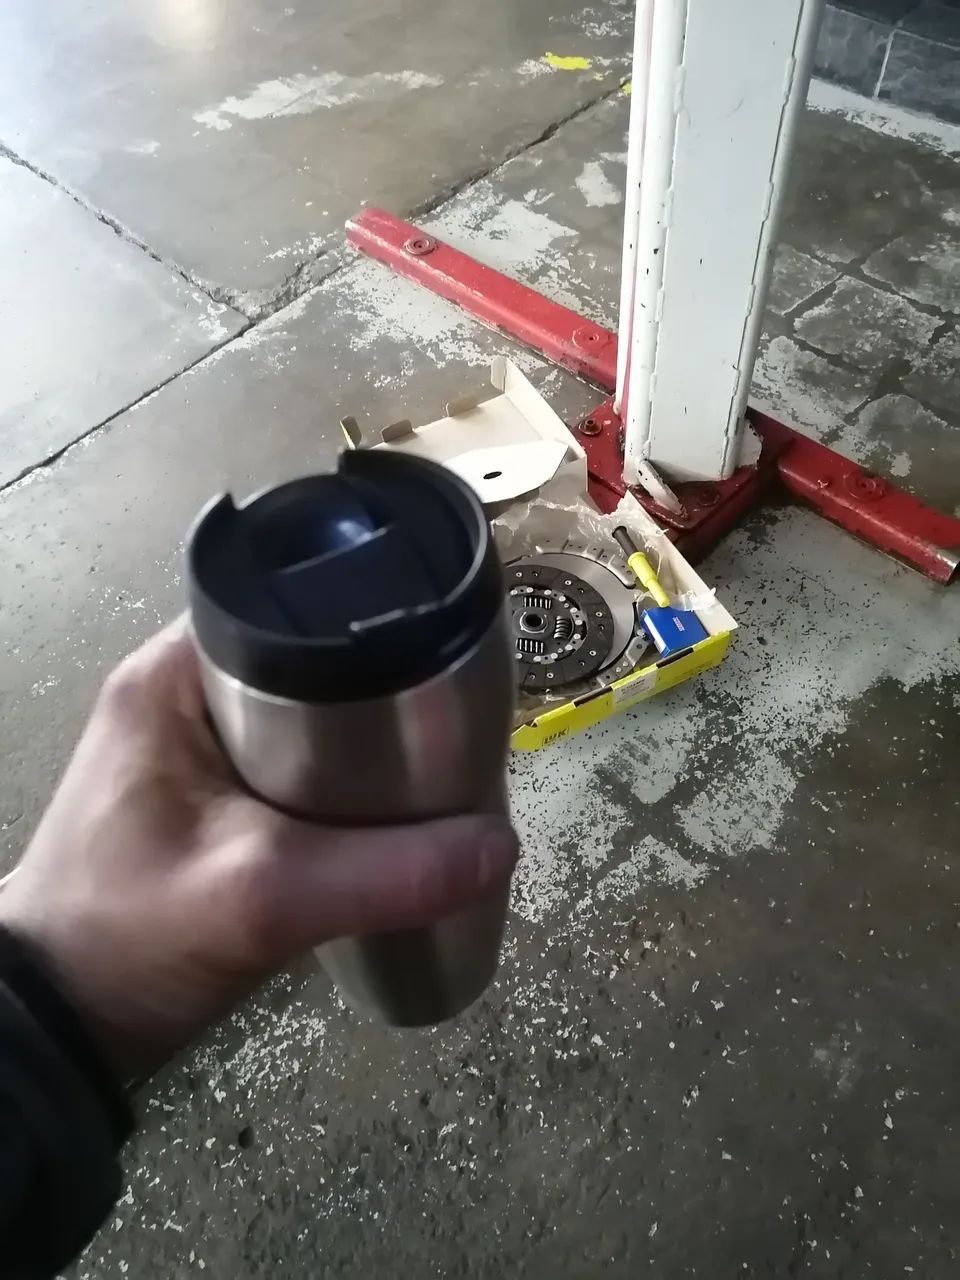
Before we start this morning off I absolutely needed my cup o caffeine, besides one cant just jump in ey? Got to smooth into it if you know, let the muscles and body get loose a bit.
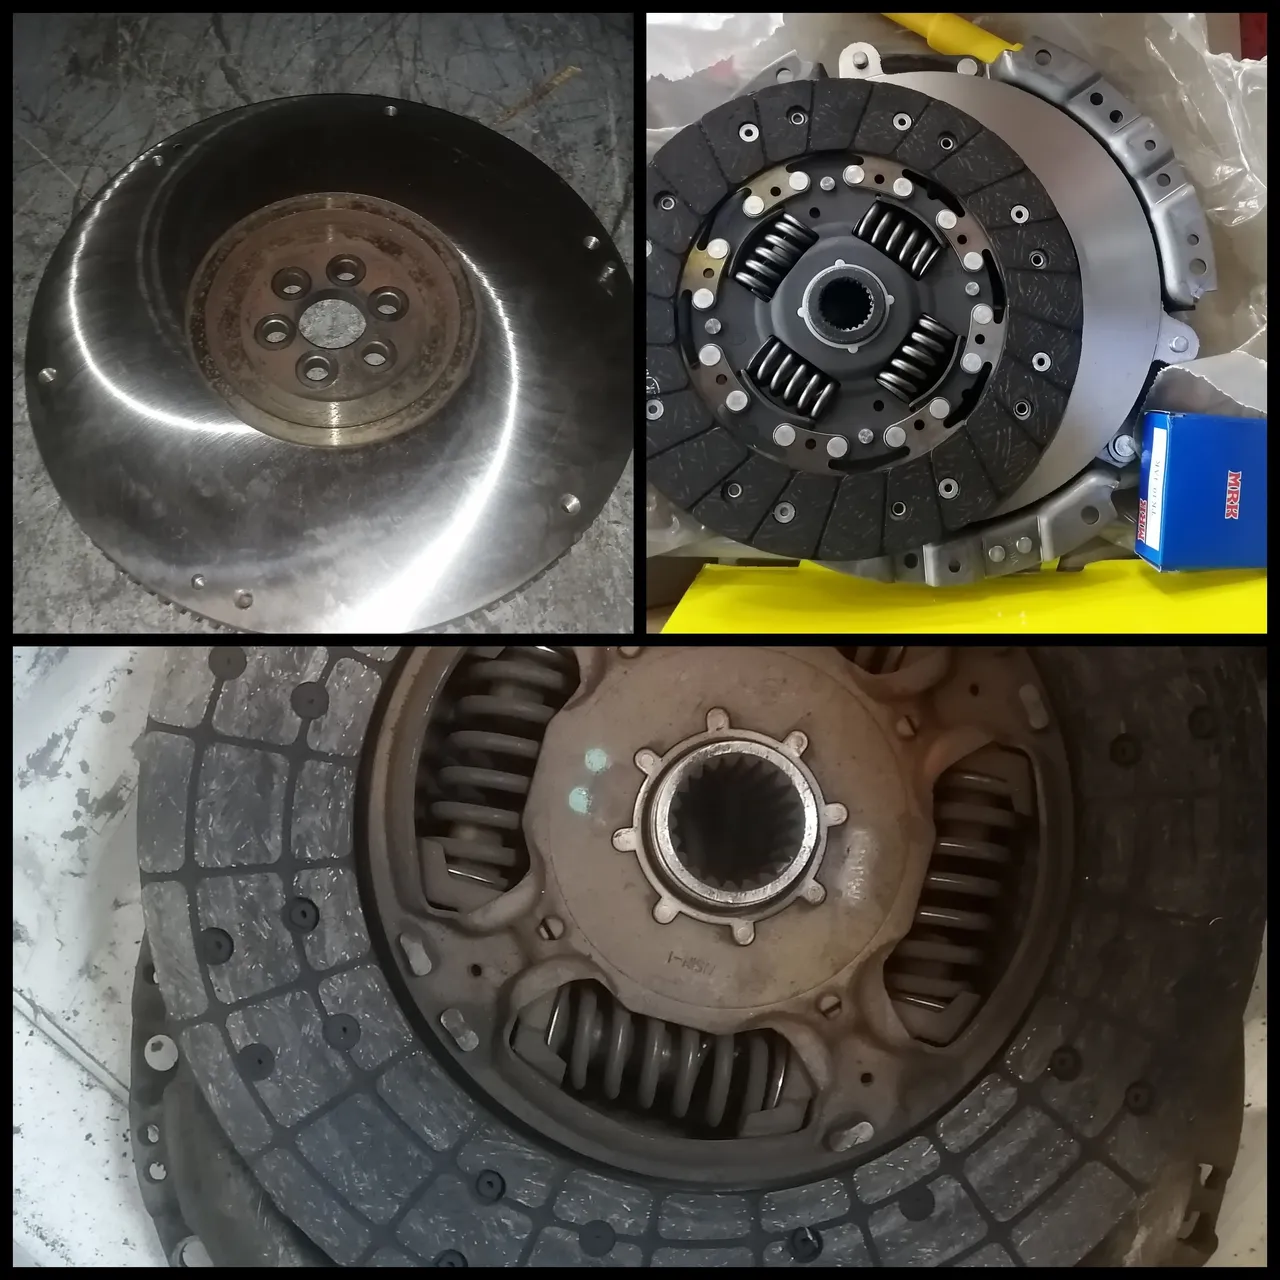
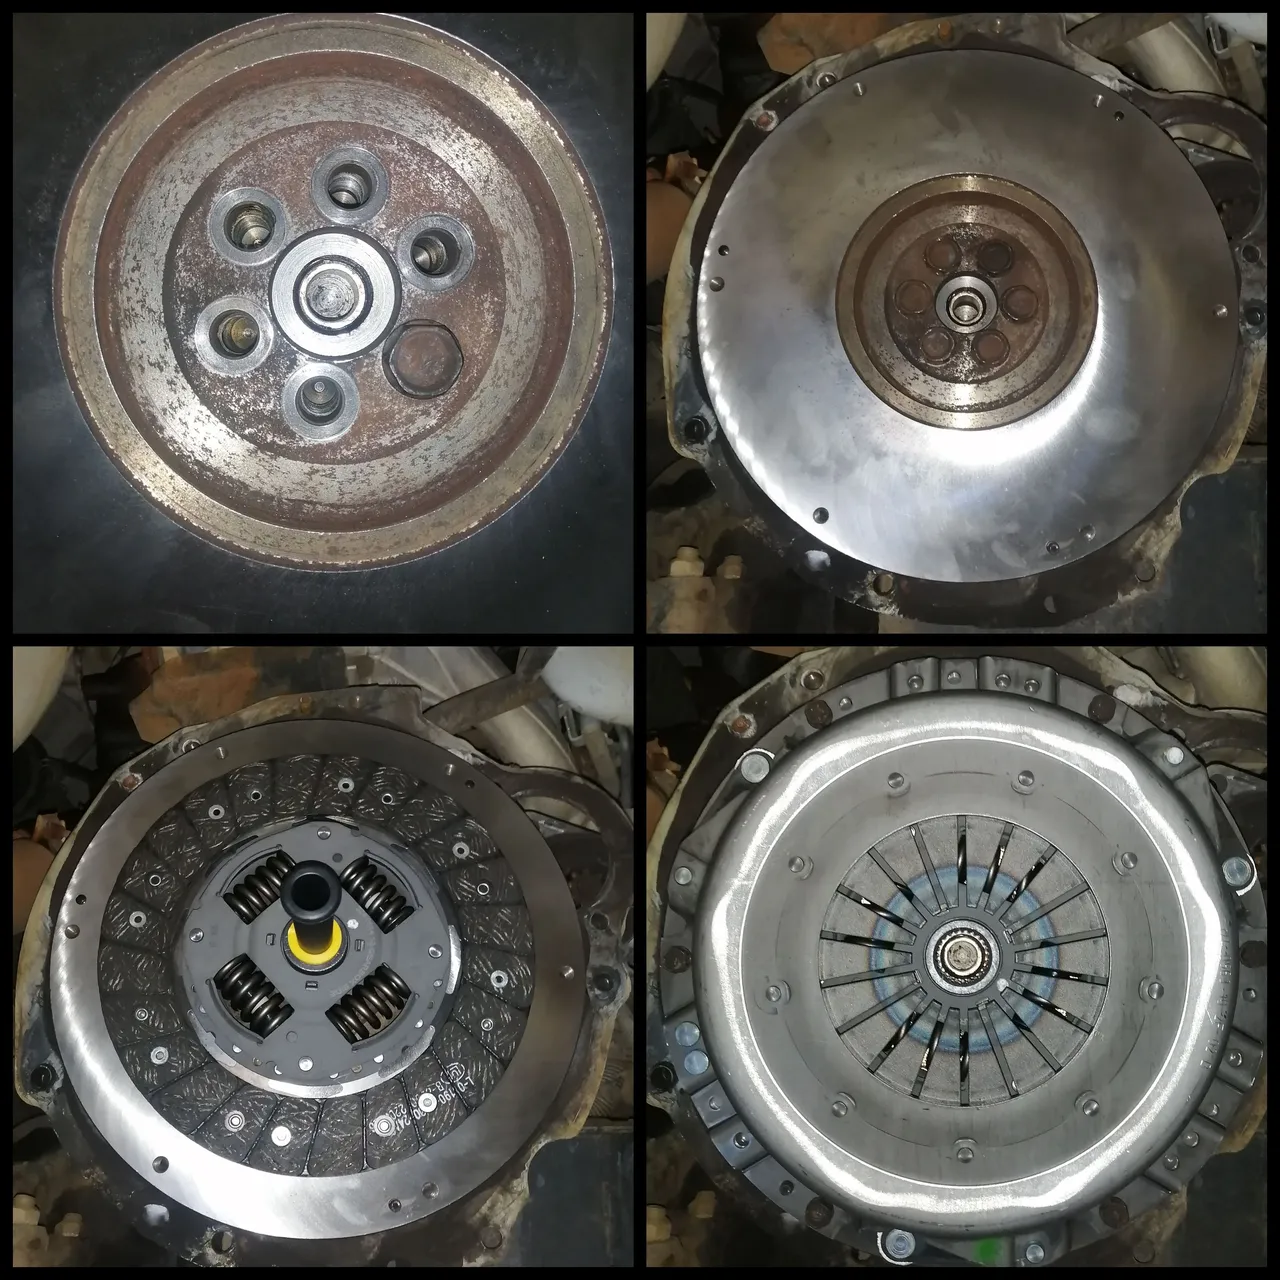
See the freshly skimmed flywheel along with a brand new clutch, yaaa cant wait for that smooth transition of the transmission!
Below you can see the wear on the old one, and the flywheel had heavy high spots on it so skimming was a must.
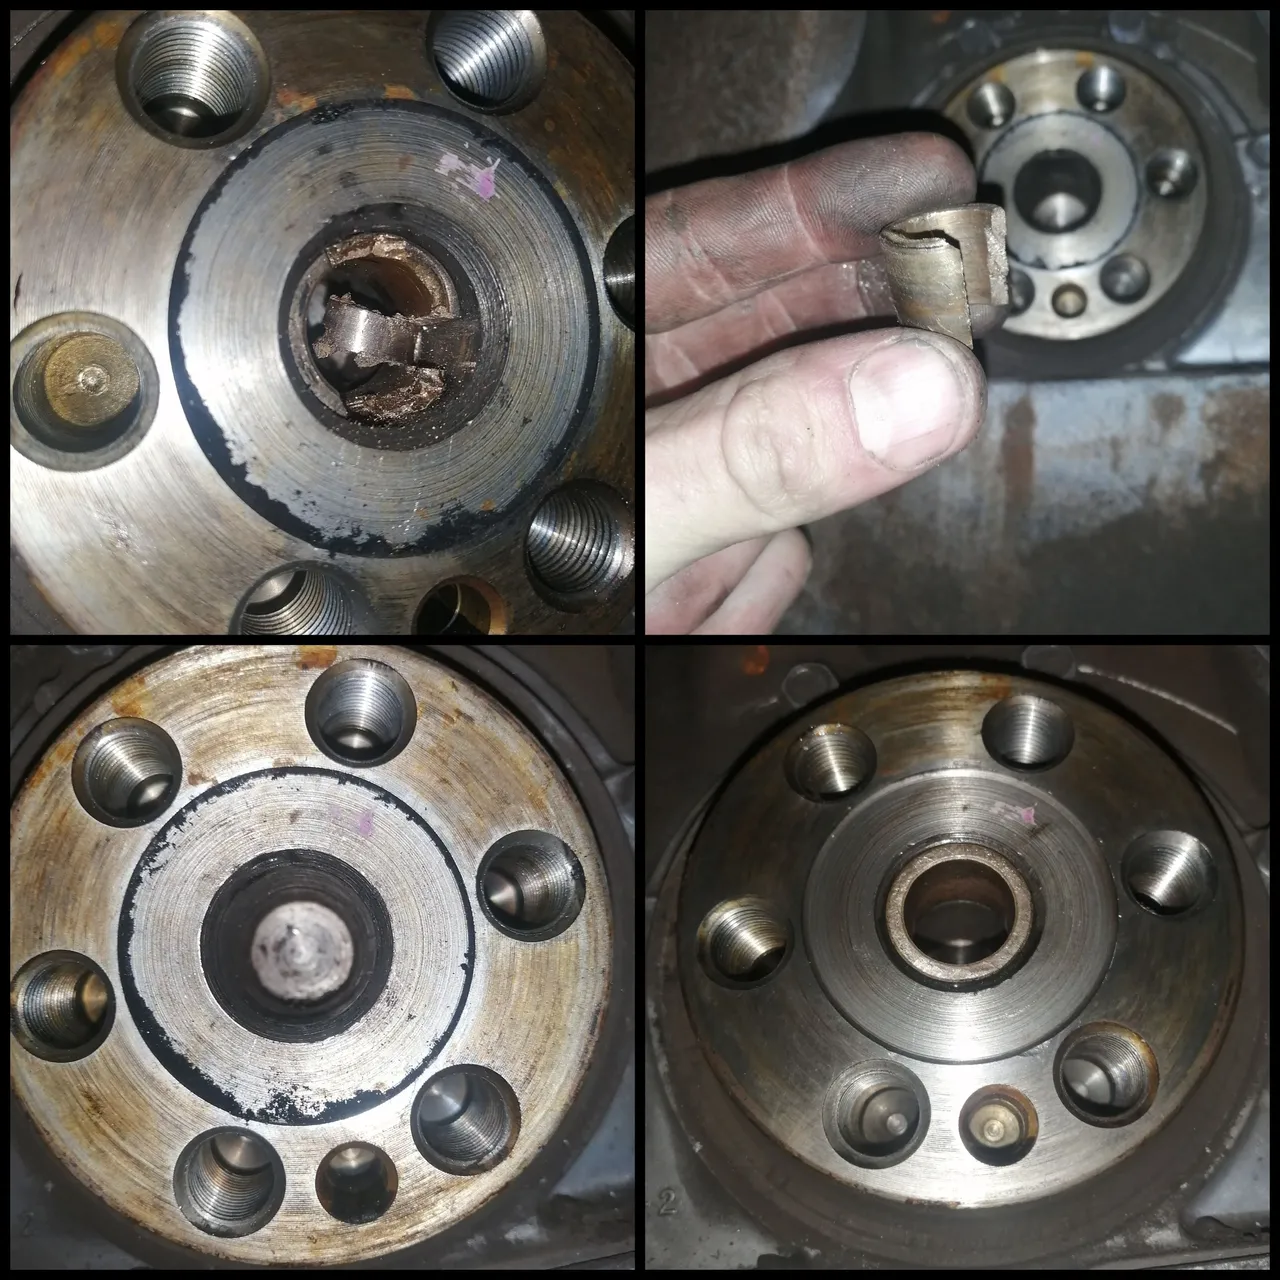
Changing the Bush on the Pilot Hole.
Most vehicles have a pilot bearing instead of a pilot bush. I personally don't think that either one has benefit of the other, they both wear out eventually and both of them needs to be replaced when doing a major gearbox reparations. Or even just a basic clutch overall.
I use a small hexagon punch that is sharpened like a chisel.
Tuck it in right between the outside wall of the bush where it meets with the inner wall of the crank.
Using a small ball peen hammer. (I don't know why but I find those little hammers very usefull, well until you need some weight behind those punches of-course. For this job a small hammer will do fine.)
Once you punched all the way through the bush it will lose tension and "collapse" in some manor. You can then start to pull it out. (Doing a twisting motion while pulling should make it release much easier.)
Clean the crankshaft and give it a little polish with some fine grit paper. (No grittier than 250 grit, otherwise you might risk removing metal from the surface.)
- Inserting the bush is fairly easy.
(Scroll down to where I prime the bush first before inserting bush.)
What I usually do is get a dolly the exact same size as the bush and gently tap it into place with the ball peen hammer. A socket more or less the same size can also work, preferably a old socket.
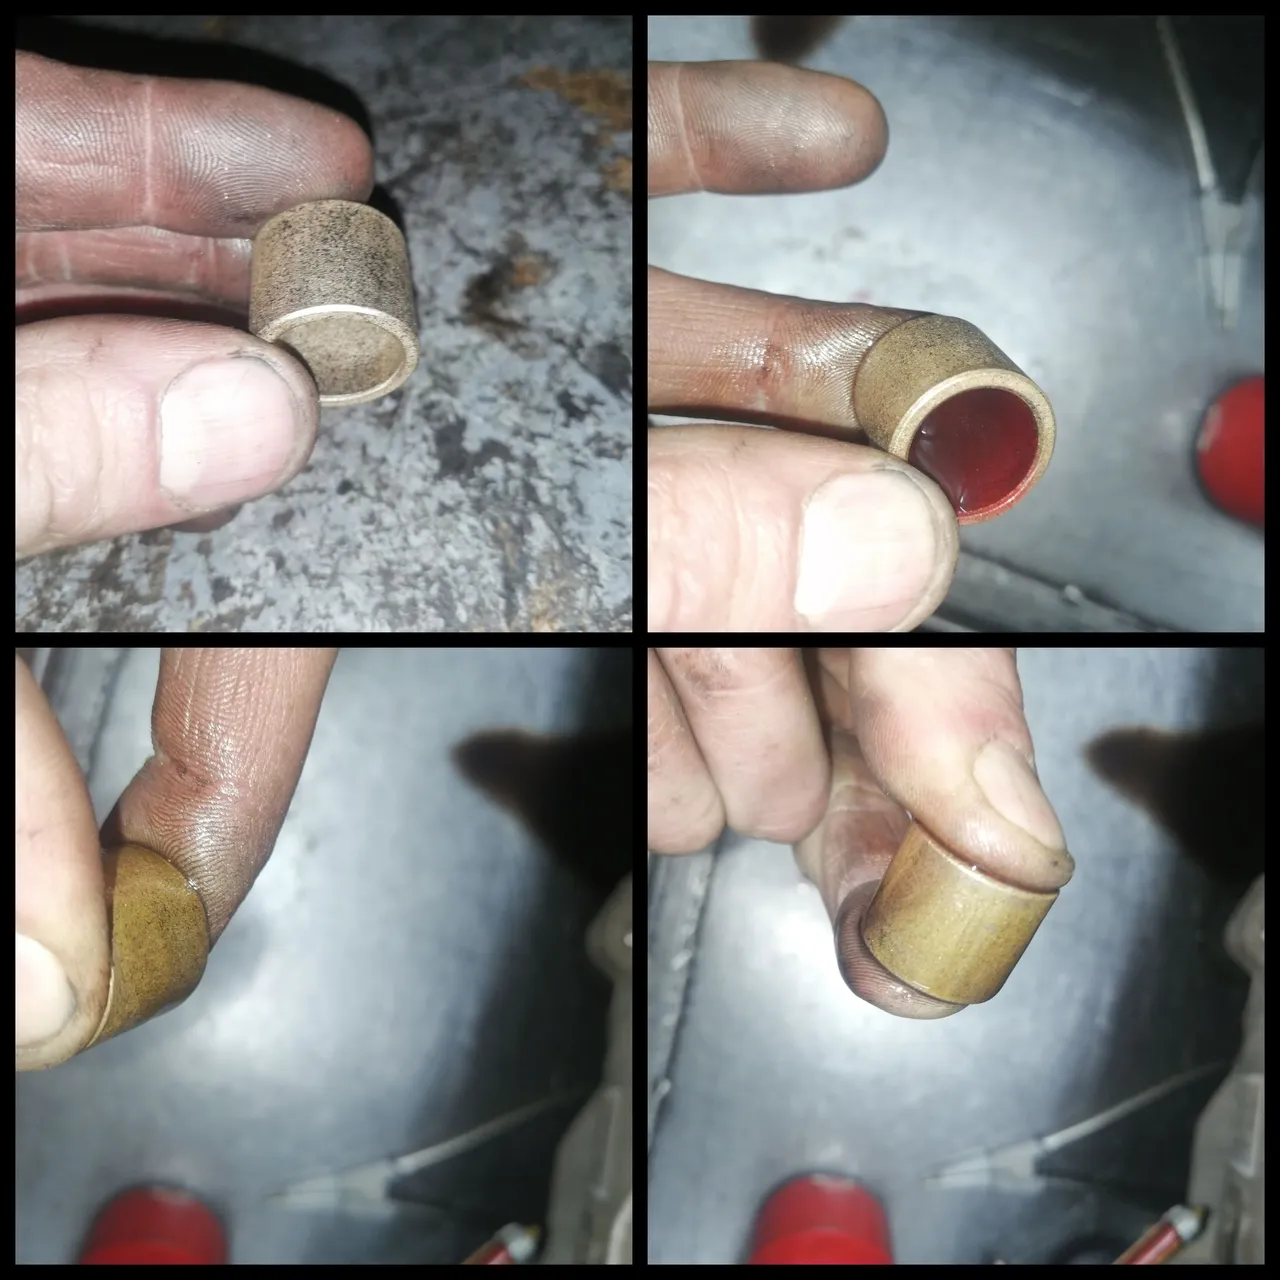
Priming the Bush.
So not a lot of people know this trick, if you do count yourself in as the "Elite Few" I myself found it a little intriguing at first, almost like how is that possible.
Sorry I know the one photo is a little cock eyed! Apologies for that!
While holding close one of the open ends of the bush you can start adding some oil into the "bowl" and fill it up to the brim.
Close the top of the "bowl" with another finger and squeeze tightly, once you do this you will see the oil starting to push through the bush wall and then you'll know it's primed.
Installing the Flywheel and Clutch.
When rebuilding a gearbox one of the most vital parts replacements will be the flywheel and clutch system replacement. Yes it's not always necessary but it plays a big role in the longevity of the gearbox and ultimately the drive-chain.
First you need to line up the flywheel and add at-least one bolt just to keep it in place.
Add a little drop of lock tight to the rest of the bolts and bolt them into place, torquing them properly as to not come loose. (Remember to remove the first bolt and add a little lock tight to that bolt as well.)
Depending on what brand and make of clutch you bought you might or might not get a clutch alignment tool with it. If indeed you did get a tool, use it as displayed in picture three. (If not you have to line up that sucker with your eye, It's not that hard but good luck.)
While clutch tool is still in place add the pressure plate and add the clutch bolts tightening them little by little using a criss cross method until fully bolted down.
Once the pressure plate is bolted down tightly you can now remove the clutch alignment tool.
Just look at that perfect alignment, of course the tool did the work. But I find some beauty in a freshly installed clutch. 😍
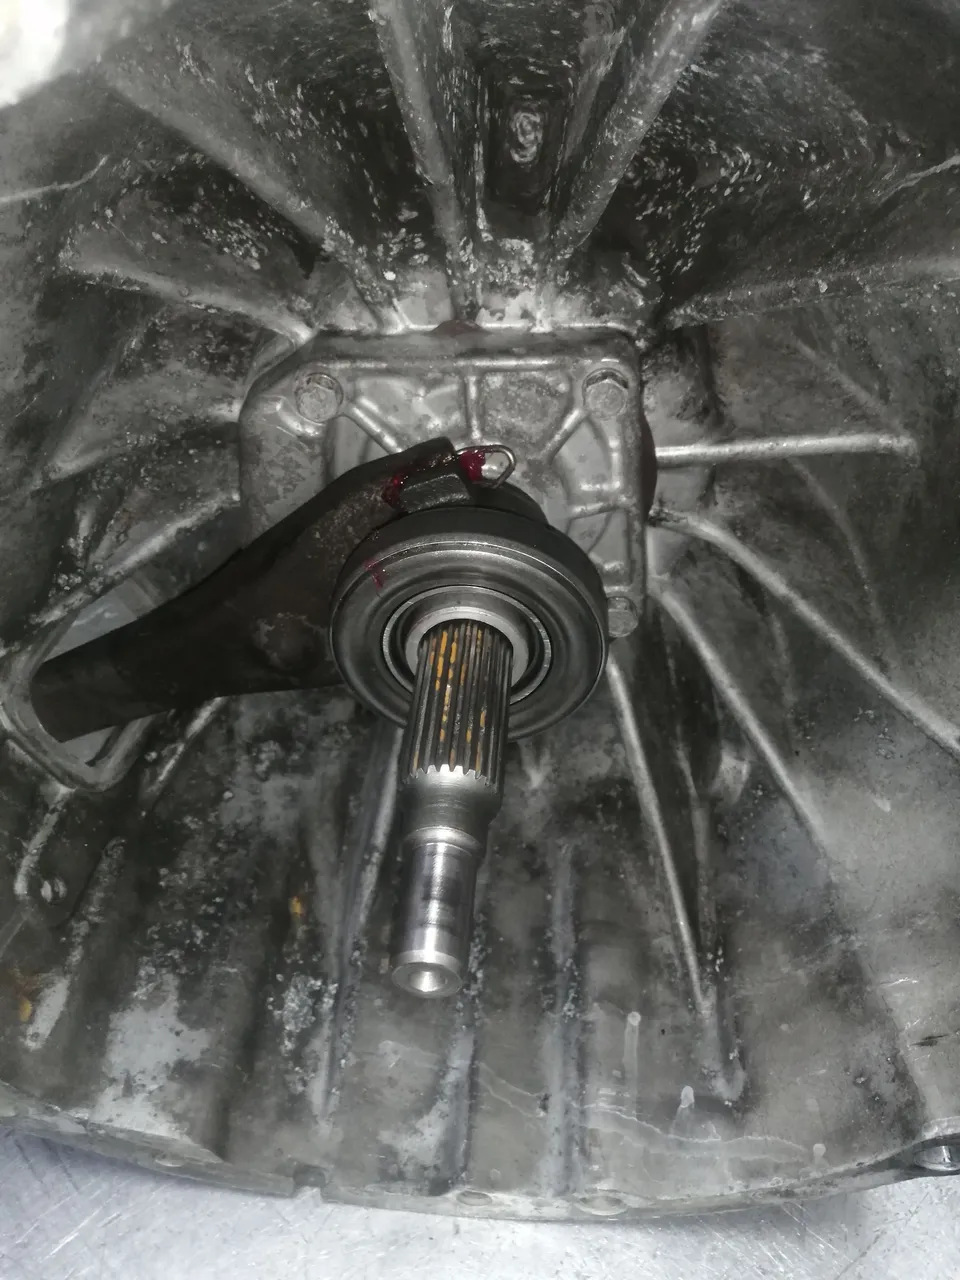
Installing the Release Bearing and Clutch Fork.
I know the clutch fork looks dirty, it's not and is in fact cleaned with paraffin.
Add a little bit of grease to all the pivot points on the clutch fork as well as the release bearing guide.
You have to press the old release bearing from the release bearing guide in order to install the new release bearing over it.
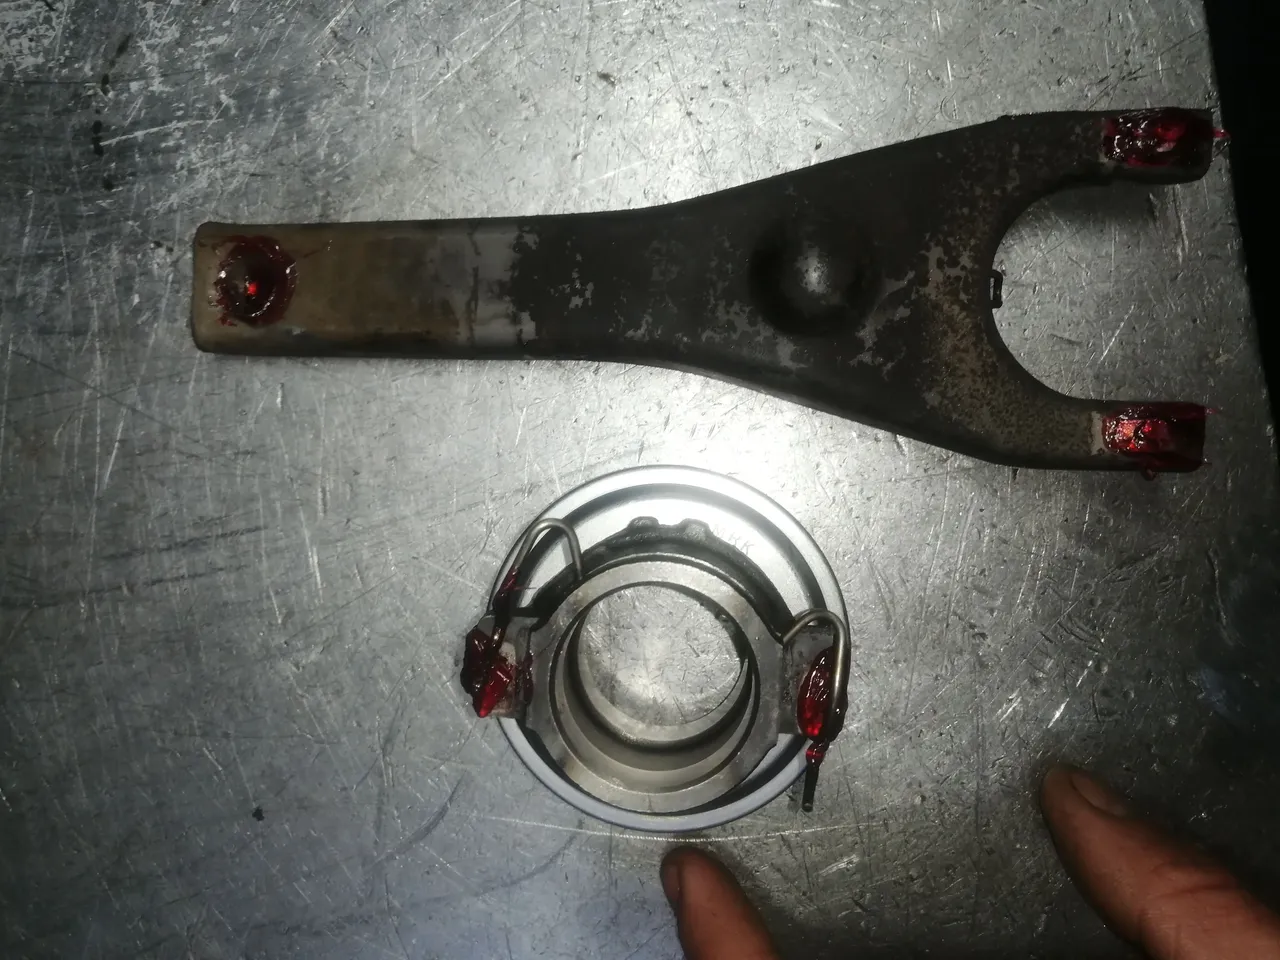
Place the release bearing over the clutch fork.
Make sure the spring clips pop into place.
As a unit you have to guide the release bearing over the input shaft while simultaneously guiding it through the gap hole in the bell-housing where it joins in with the clutch slave cylinder.
While in place push the bearing as far back as possible and give the clutch fork a little thump making sure the cir-clip pops over at the backside.
You are now ready to install the gearbox. Keep an eye out for part two on my blog or in #hivemotors where I will share extensive details on how to properly fit the gearbox.
Sharing my life experience on the Hive blockchain is a great pleasure for me to do, I have been on the hive blockchain since the days of steemit, I only recently rediscovered this blockchain and I completely forgot what a blast it was sharing my everyday life and its happenings with the blockchain and its community's. I want to give a big thanks to all of the supporters out there making the blockchain great and adding value to it everyday.
Once again your feedback would be highly valued and appreciated.


Connecting the people of #HIVE across South Africa. #hive