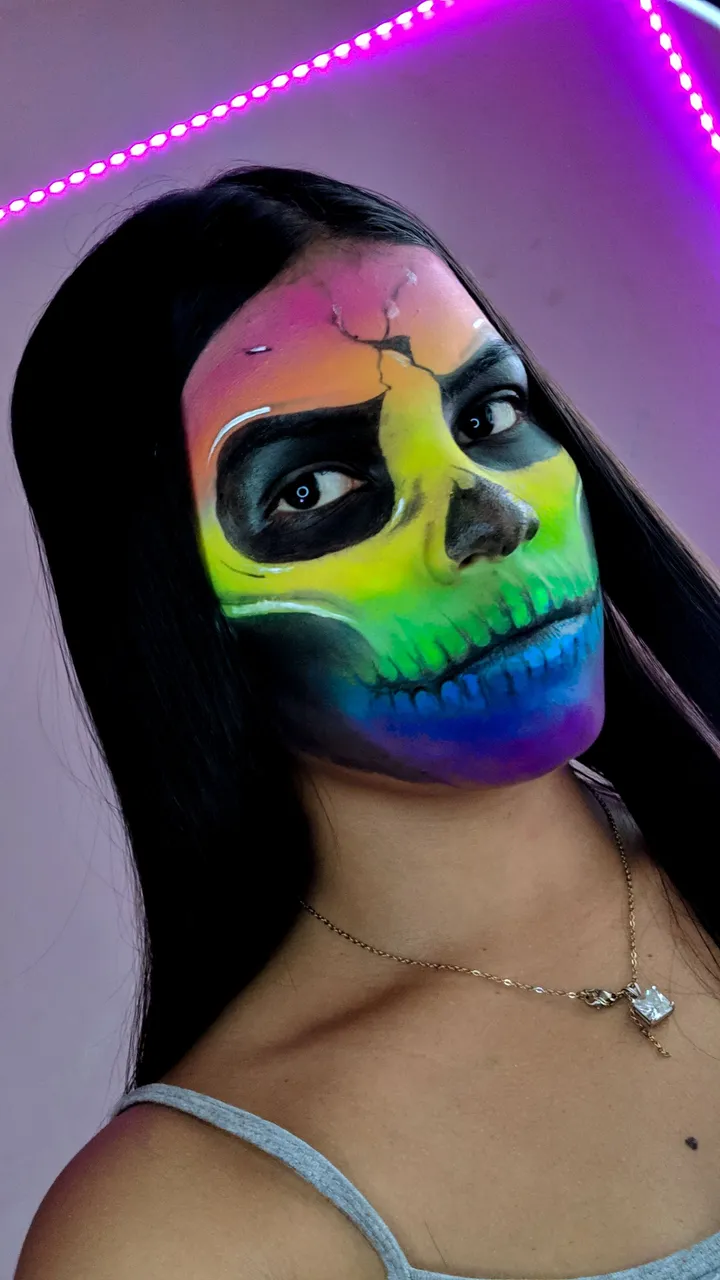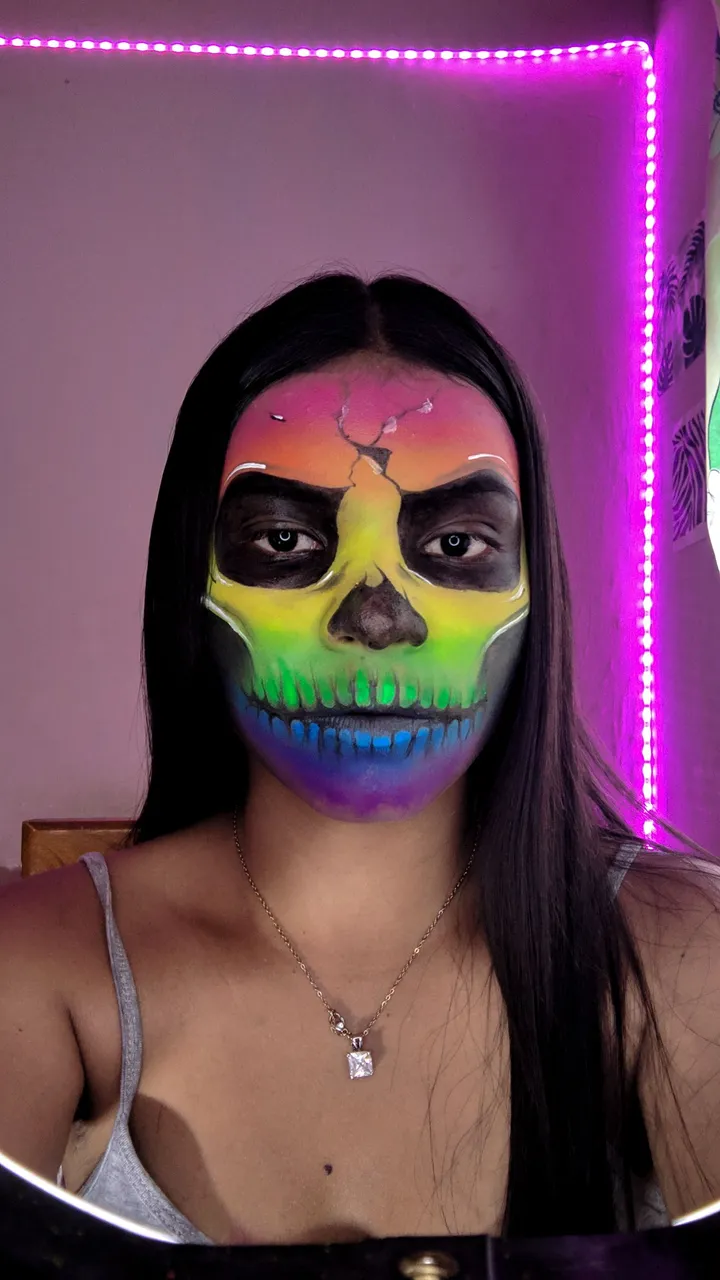
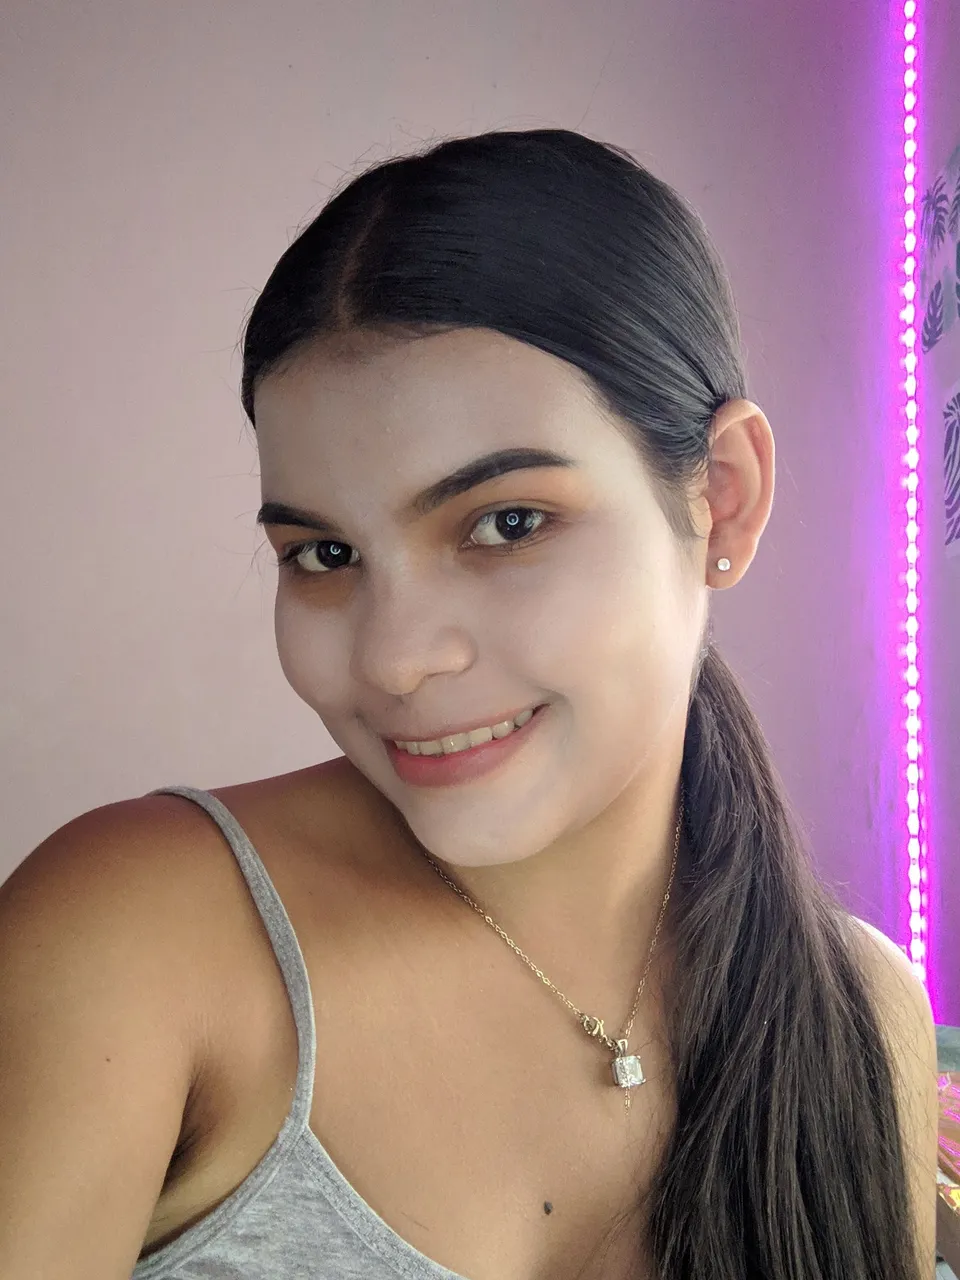
¡Hola amigos de Hive! 💛🌸
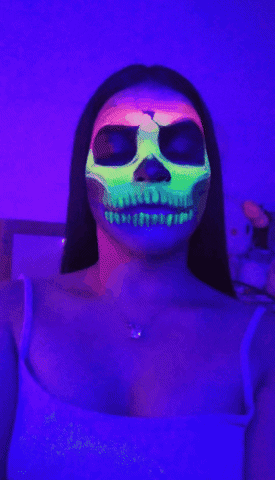
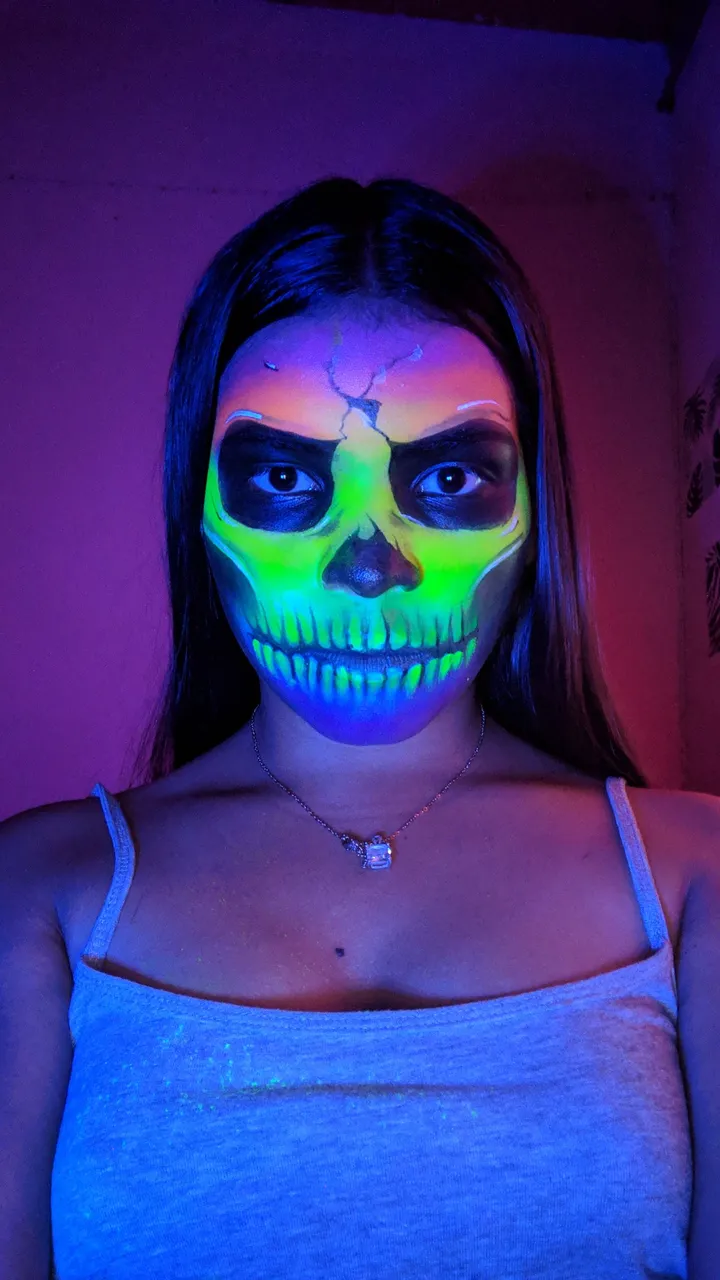
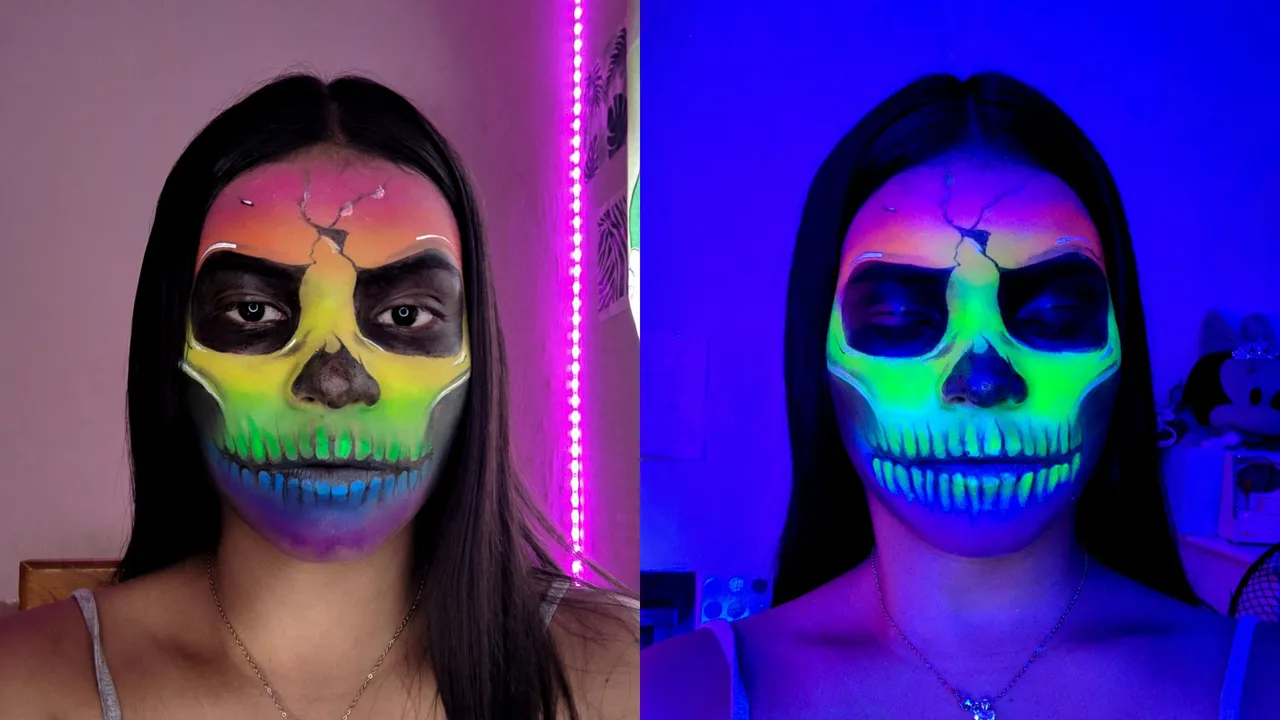
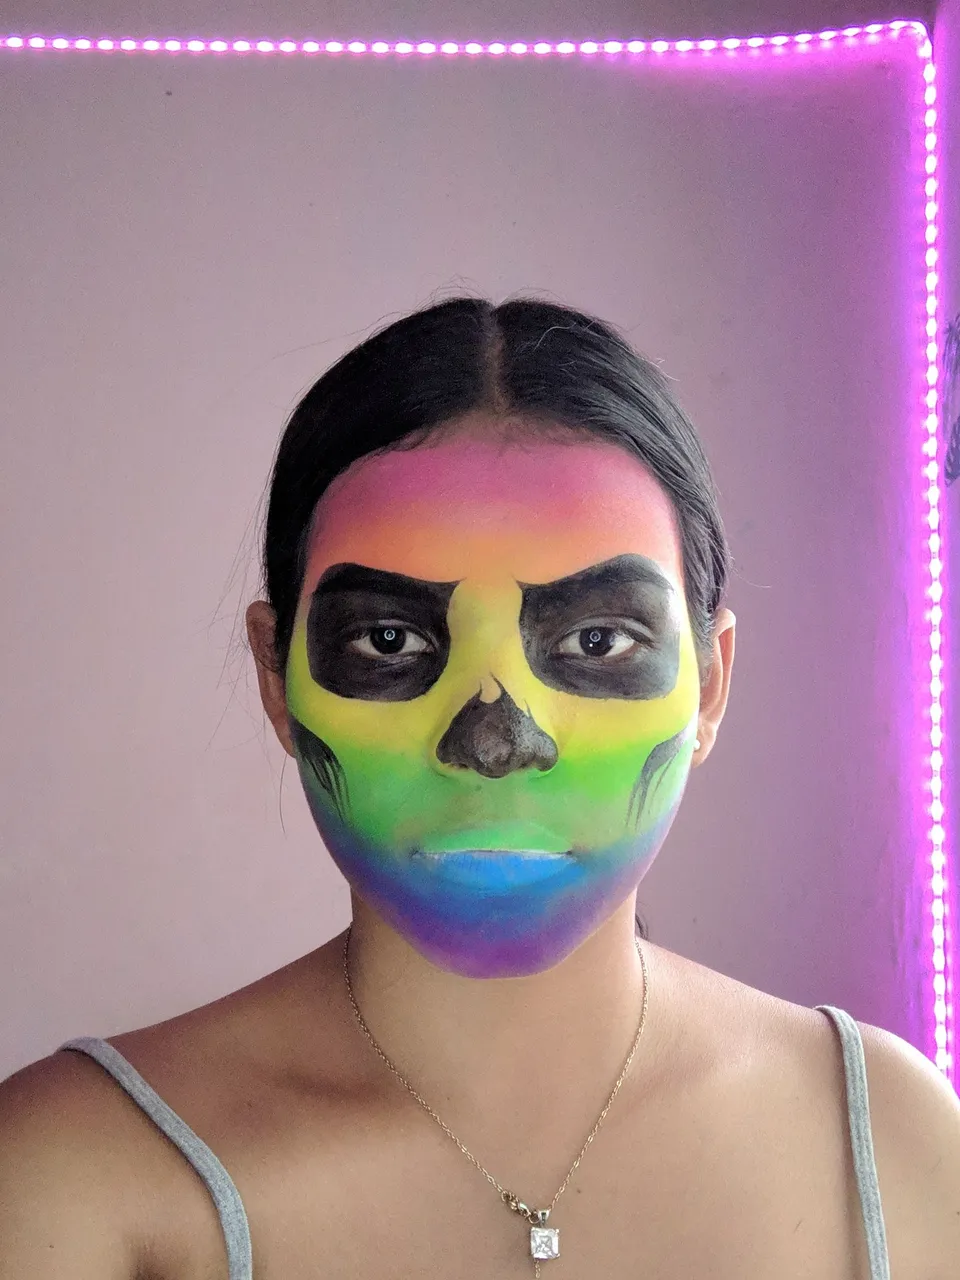
Les doy la más cordial bienvenida a un nuevo post dónde les muestro este maquillaje de calavera neón 💀🌈 Este maquillaje la verdad era algo que yo tenía en mente hace muchísimo tiempo pero no tenía materiales para realizarlo no tenía lo necesario pero de poco a poco pude reunir lo que necesitaba y aquí está mi maquillaje soñado 😻 Este maquillaje lo realicé mientras llovía y eso hizo que la experiencia fuera única, aunque acá en Venezuela cada vez que llueve se va la luz y tenía mucho contenido por realizar y estaba algo apurada y aún así amé el resultado. Aunque no tengo pinturas faciales de colores, en realidad solo tengo dos una negra y una blanca, utilicé pigmentos neón de la marca salome que brillan en la oscuridad sobre un corrector blanco para hacer los colores así que les estaré mostrando el paso a paso.
Hello friends of Hive! 💛🌸
I give you the warmest welcome to a new post where I show you this neon skull makeup 💀🌈 This makeup was really something I had in mind a long time ago but I didn't have the necessary materials to do it but little by little I could gather what I needed and here is my dream makeup 😻 I did this makeup while it was raining and that made the experience unique, although here in Venezuela every time it rains the light goes out and I had a lot of content to do and I was in a hurry and I still loved the result. Although I don't have colored face paints, actually I only have two, one black and one white, I used salome neon pigments that glow in the dark over a white concealer to make the colors so I'll be showing you the step by step.

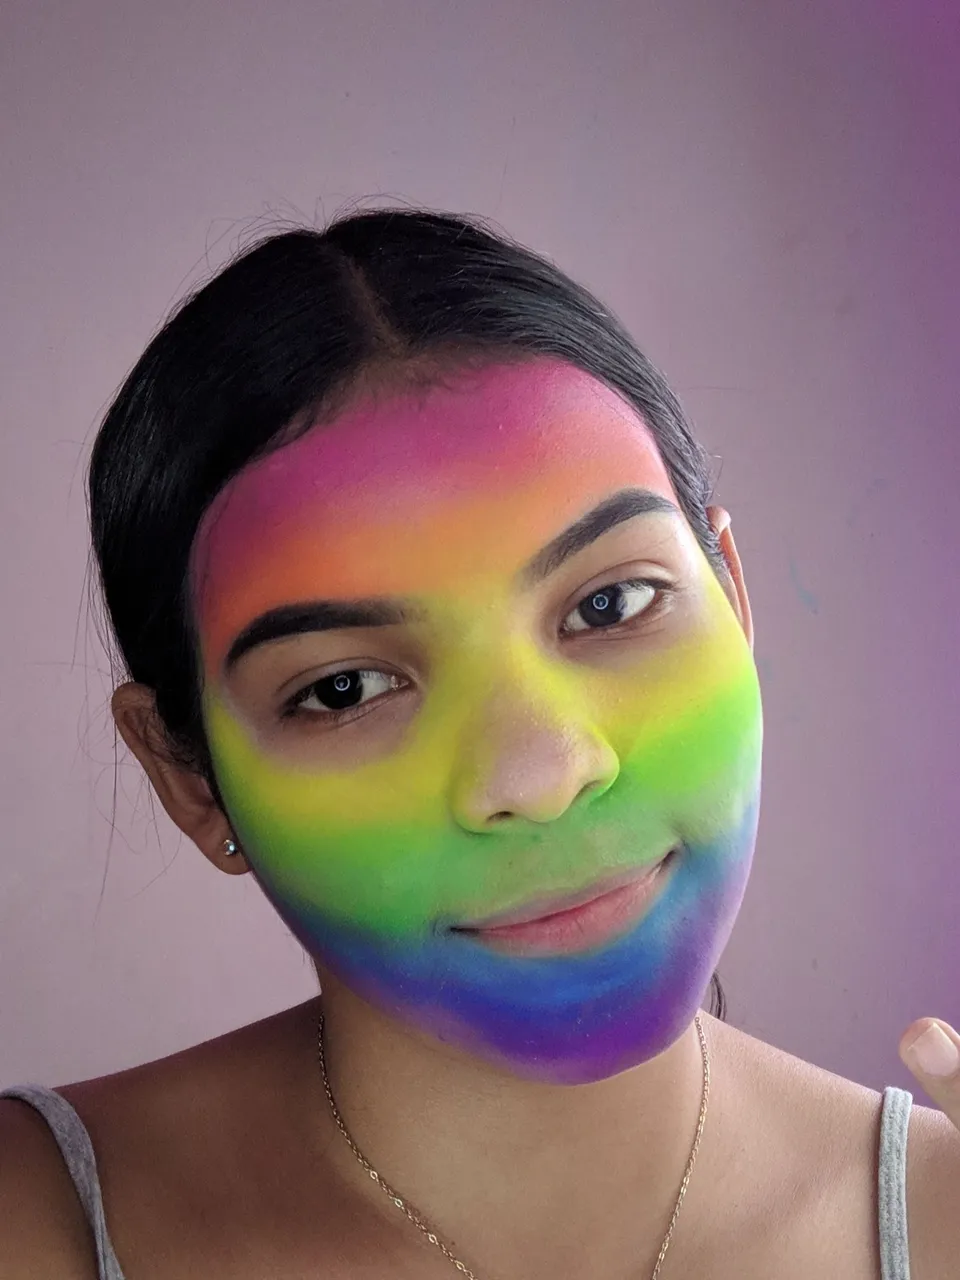

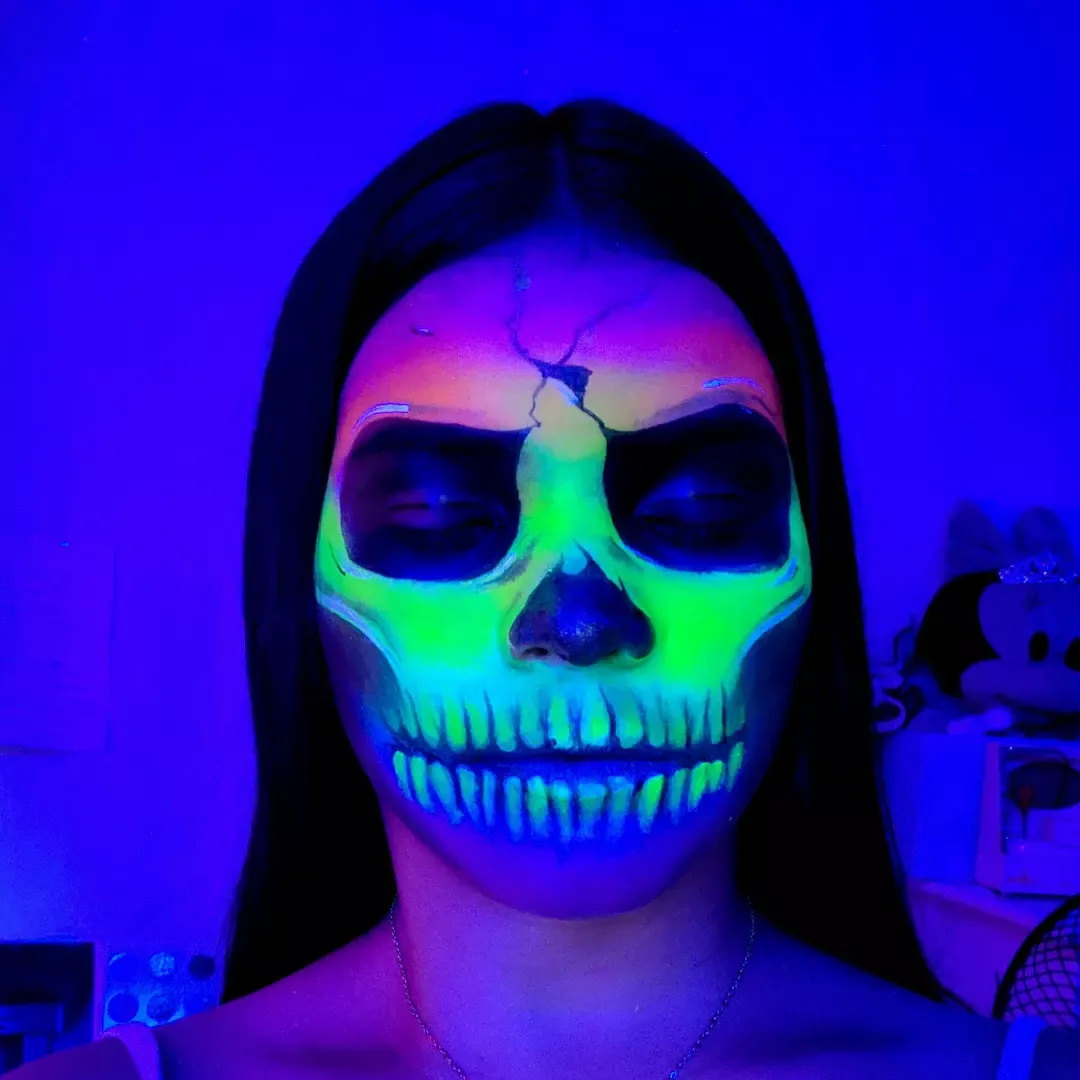
Primero comencé colocamos una base blanca para poder potenciar el color y al no tener pinturas faciales resuelvo de esta forma y sobre la base blanca comencé a aplicar los pigmentos neón con una brocha de cerdas amplias y lo aplique en en siguiente orden: Rosa, naranja, amarillo, verde, azul y por último morado, difuminando los colores entre sí a medida que los iba aplicando, teniendo mucho cuidado de no crear un parche porque al ser un pigmento suelto difuminarlo es un poco más complicado. La base blanca te ayudará a que el color se adhiera de una mejor manera y se pueda pontenciar el color. El rosa solo a mitad de la frente, el naranja hasta el inicio de las cejas, el amarillo en toda la nariz hasta las orejas, el verde en las
zona superior del labio, el azul en la parte inferior del labio y por último el morado en la barbilla.
First I started by placing a white base to be able to enhance the color and not having face paints I solve in this way and on the white base I began to apply the neon pigments with a wide bristle brush and applied it in the following order: Pink, orange, yellow, yellow, green, blue and finally purple, blurring the colors together as I applied them, being very careful not to create a patch because being a loose pigment blurring it is a bit more complicated. The white base will help the color adhere in a better way and the color can be spread. The pink only in the middle of the forehead, the orange up to the beginning of the eyebrows, the yellow on the nose up to the ears, the green on the upper part of the lip, the blue on the lips, the yellow on the nose up to the ears.
upper lip area, blue on the lower lip and finally purple on the chin.
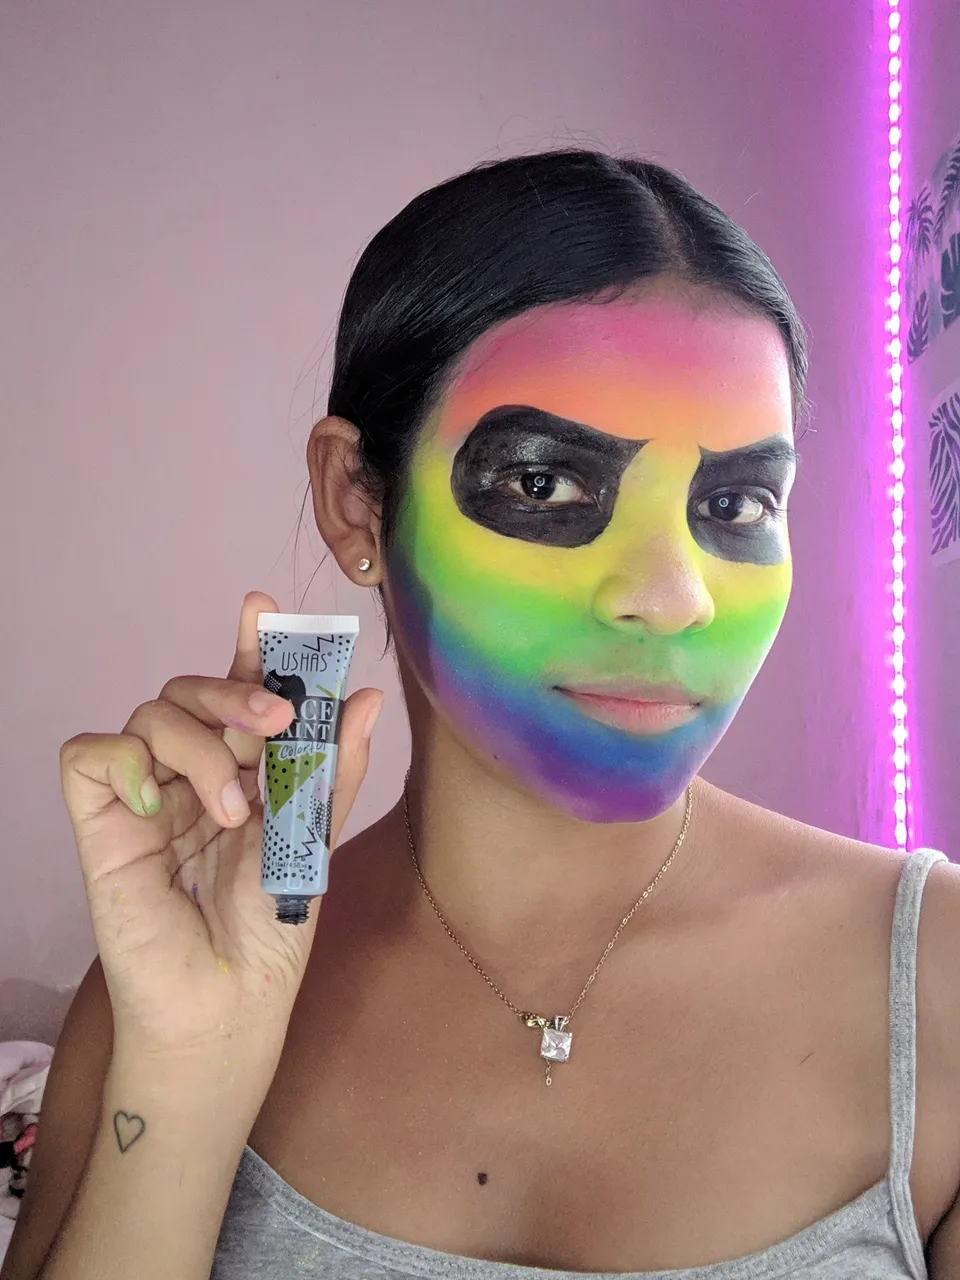
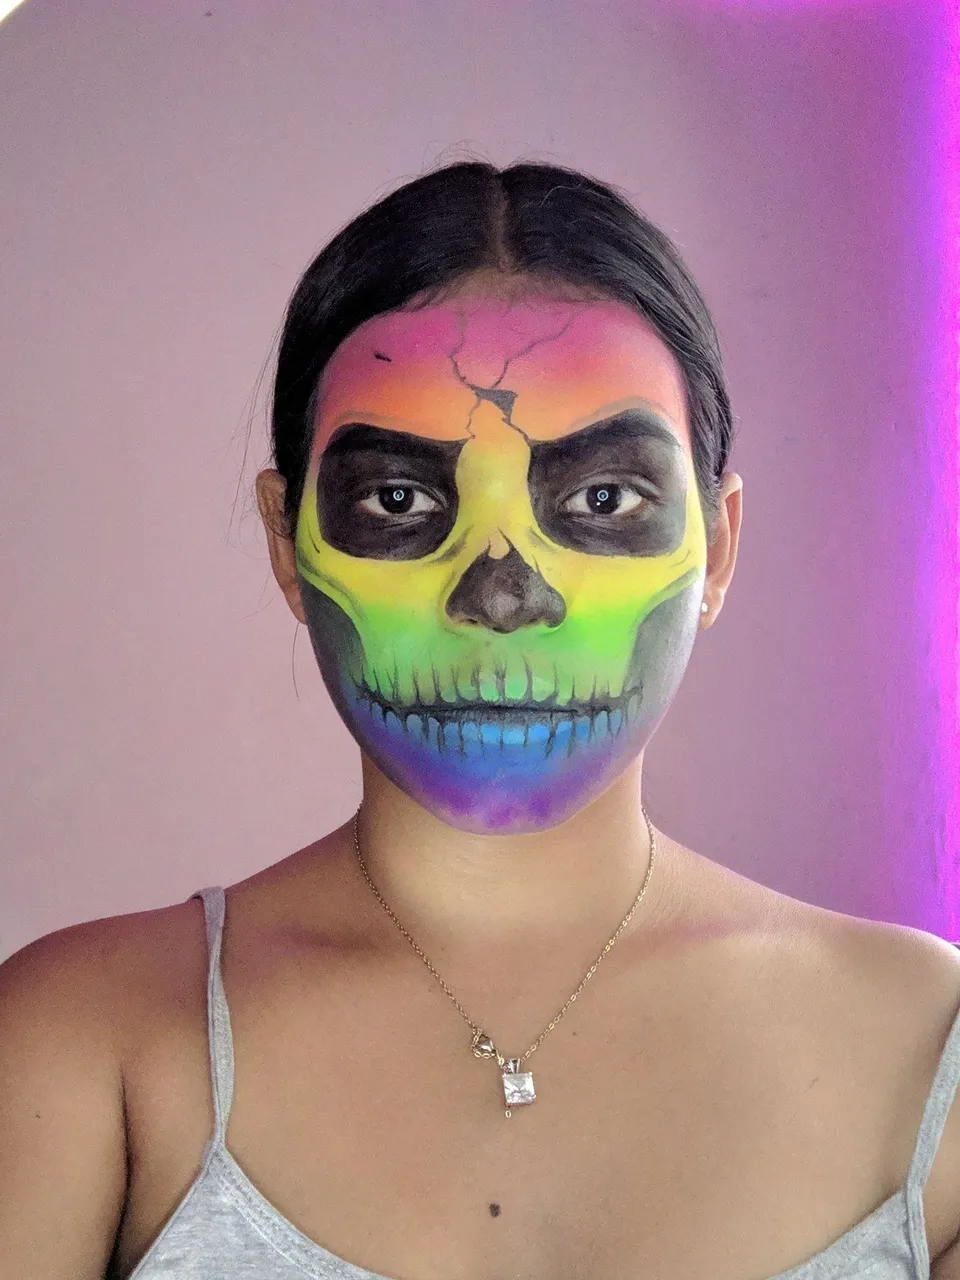
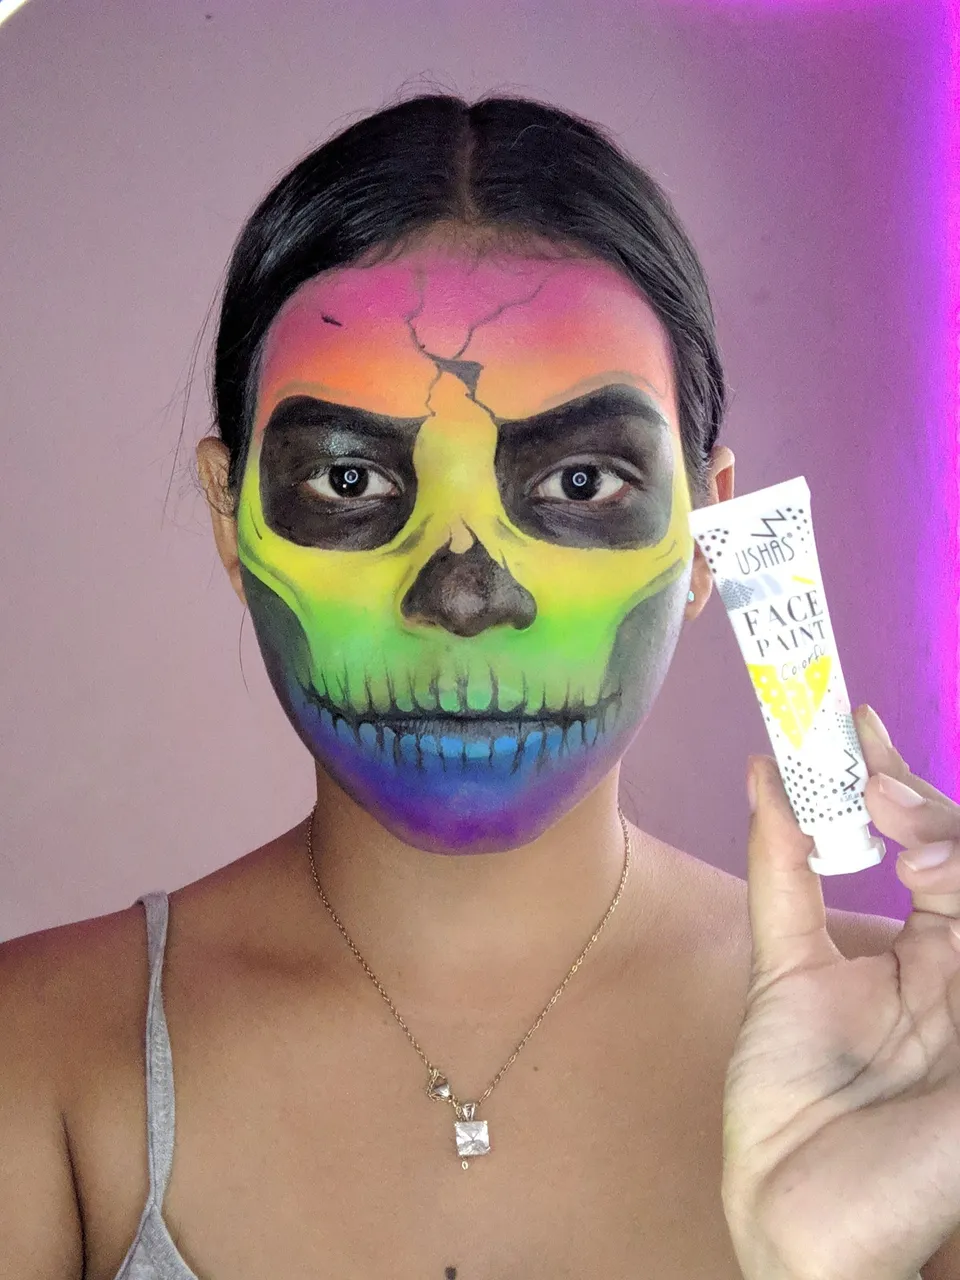
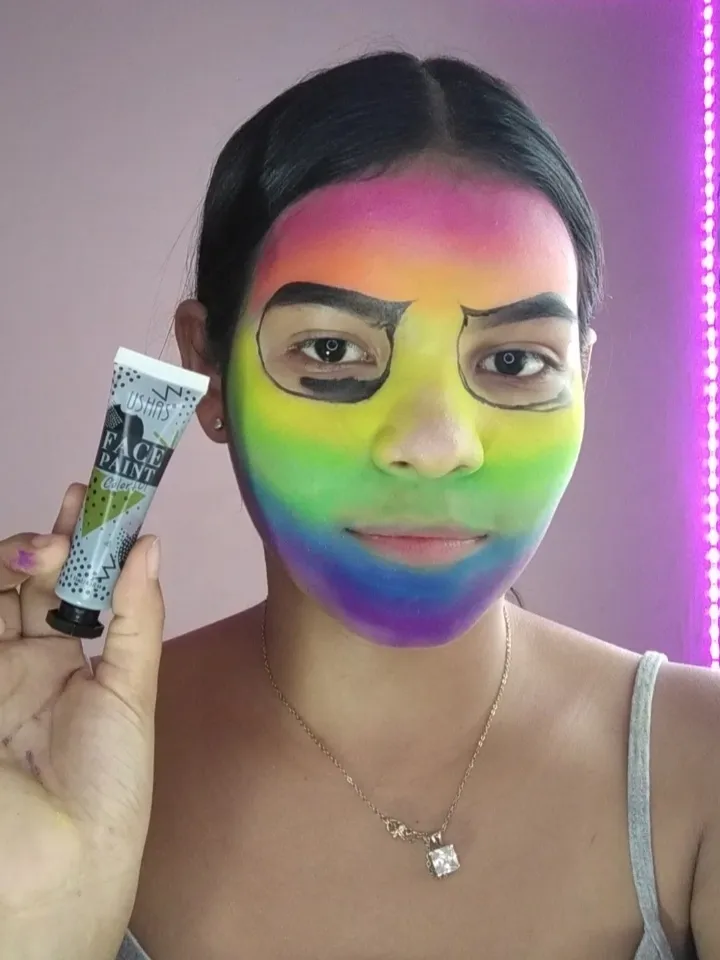
Luego comencé a hacer con un pincel liner o 00 los trazos en mis ojos y sobre mi cejas, sin necesidad de taparlas porque las pintaría de negro con pintura facial de la marca USHAS y en la parte de la unión de las cejas hice una línea inclinada que da un mejor aspecto a este maquillaje de halloween. Luego en los pómulos hice unas línea formando un trazo con negro al igual que en la nariz difuminando todo, luego seguí con los dientes, haciendo primero las medidas de estos y luego haciendo los detalles con el mismo pincel y el resto de la pintura facial negra, también hice unas pequeñas grietas con líneas sin planeación alguna y para finalizar con pintura facial blanca en las partes más altas del rostro apliqué pequeñas líneas y listo!
Then I started to make with a liner or 00 brush the strokes in my eyes and on my eyebrows, without the need to cover them because I would paint them black with USHAS face paint and in the part of the union of the eyebrows I made a slanted line that gives a better look to this halloween makeup. Then on the cheekbones I made a line forming a line with black as in the nose blurring everything, then I continued with the teeth, first making the measures of these and then making the details with the same brush and the rest of the black face paint, I also made some small cracks with lines without any planning and to finish with white face paint in the highest parts of the face I applied small lines and that's it!
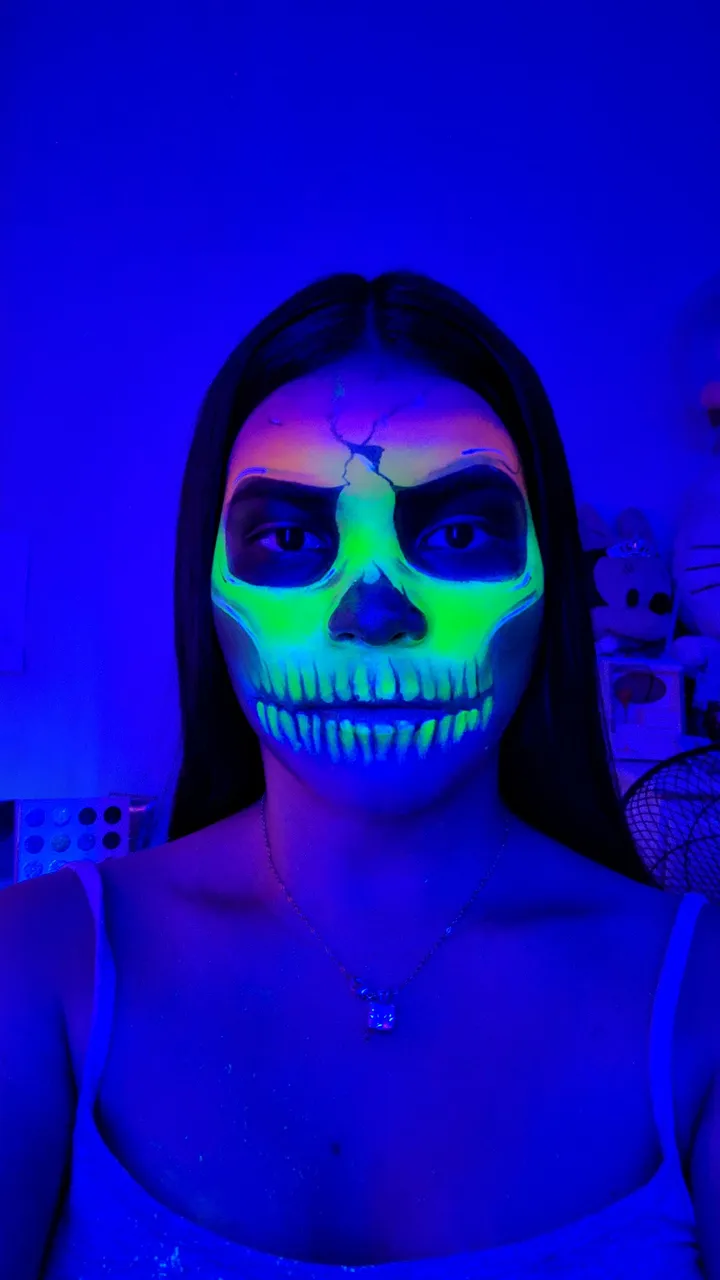
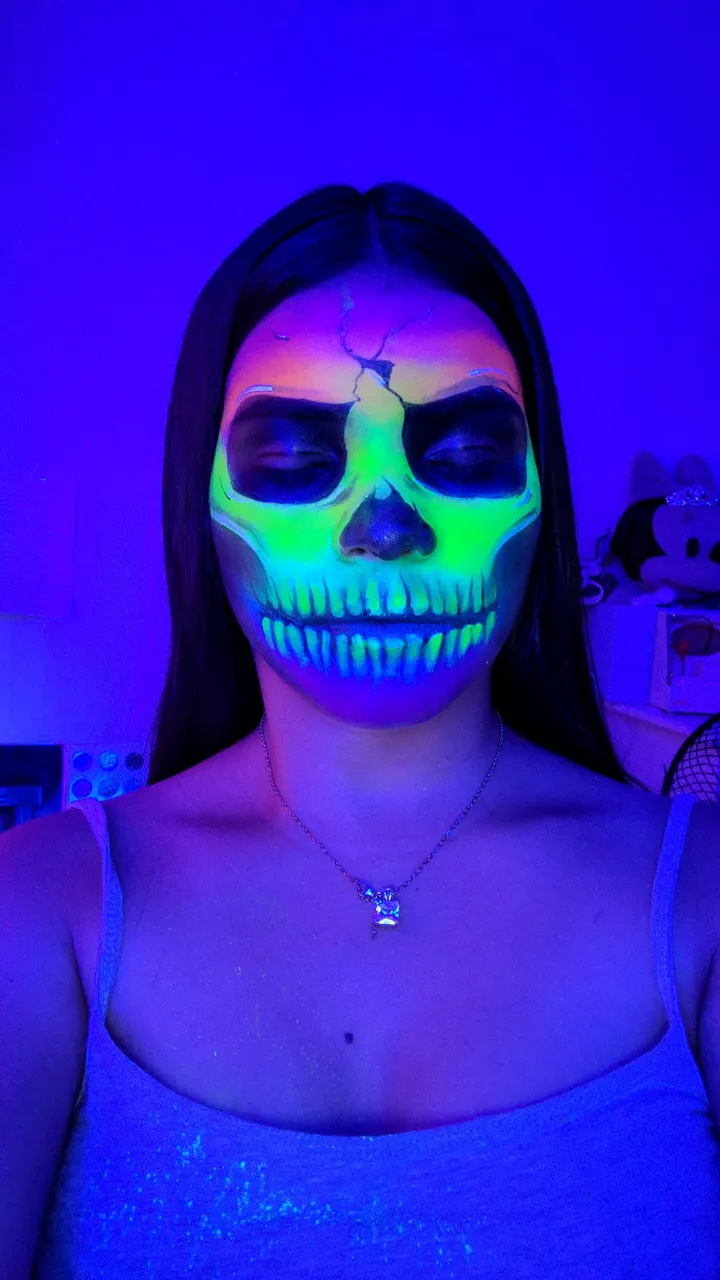
Siempre busco resolver aunque no tenga pinturas faciales de todos los colores, para resaltar el color neón y lograr que brille coloqué las luces LED que mostré en el post anterior puedes mirarlo aquí Post. Le coloqué un color azul y el color del pigmento neón se veía impresionante, realmente quedé enamorada del trabajo realizado, así que acá les dejo los resultados y espero que les guste tanto como a mí 💗
I always look to solve even if I don't have face paints of all colors, to highlight the neon color and make it shine I placed the LED lights that I showed in the previous post you can look at it here Post.
I placed a blue color and the color of the neon pigment looked awesome, I really fell in love with the work done, so here I leave you the results and I hope you like it as much as I do 💗.