Greetings to all members of the community, I'm Nitsu and I want to tell you my experience when changing the nozzle of my printer to make bigger pieces much faster, explaining some concepts, configurations and also talking about the mechanical part of the machine to achieve an optimal result.
Saludos para todos los miembros de la comunidad, soy Nitsu y quiero contarles mi experiencia a la hora de cambiar la boquilla de mi impresora para poder hacer piezas más grandes y muchísimo más rápido, explicando algunos conceptos, configuraciones y también hablando de la parte mecánica de la máquina para lograr un resultado optimo.
To begin with, a few months ago I bought a CR10-V3 that has a printing area of 30x30x40 cm, a huge space to make giant pieces but my printing capacity was limited by the time to have a standard nozzle of 0.4mm so to take advantage of the potential of this machine I replaced the nozzle with a 0.8mm one.
Para comenzar, yo hace unos meses compre una CR10-V3 que cuenta con un área de impresión de 30x30x40 cm de impresión, un espacio enorme para hacer piezas gigantes pero mi capacidad de impresión se veía limitada por los tiempos al tener una boquilla de serie de 0.4mm así que para aprovechar el potencial de esta máquina reemplace la boquilla por una de 0.8mm
 |  |
|---|
Generally commercial printers come with a 0.4 nozzle, a very good standard size that allows us to work with very good qualities for a wide range of projects, but when something very specific is needed, it is convenient to replace the nozzle with another size. Here I will not go into the details of using brass, stainless steel, hardened steel or ruby tip nozzles, I will only focus on talking about the nozzle diameters.
Generalmente las impresoras comerciales vienen con una boquilla de 0.4 una medida estándar muy buena que nos permite trabajar con muy buenas calidades para una amplia gama de proyectos, pero ya cuando se necesita algo muy específico conviene reemplazar la boquilla por una de otra medida. Aquí no entrare en detalles de usar boquillas de latón, acero inoxidable, acero endurecido o punta de rubí solo voy a centrarme en hablar sobre los diámetros de las mismas.
A nozzle with a larger nozzle means that the plastic that will come out will be wider so what we save in time we will spend in material. Our parts will be heavier and more resistant so this change should be made with a clear objective in mind.
Una boquilla con una tobera más grande implica que el plástico que saldrá será más ancho así que lo que nos ahorremos en tiempo lo gastaremos en material. Nuestras piezas serán más pesadas y resistentes así que este cambio debe realizarse con un objetivo claro en mente.

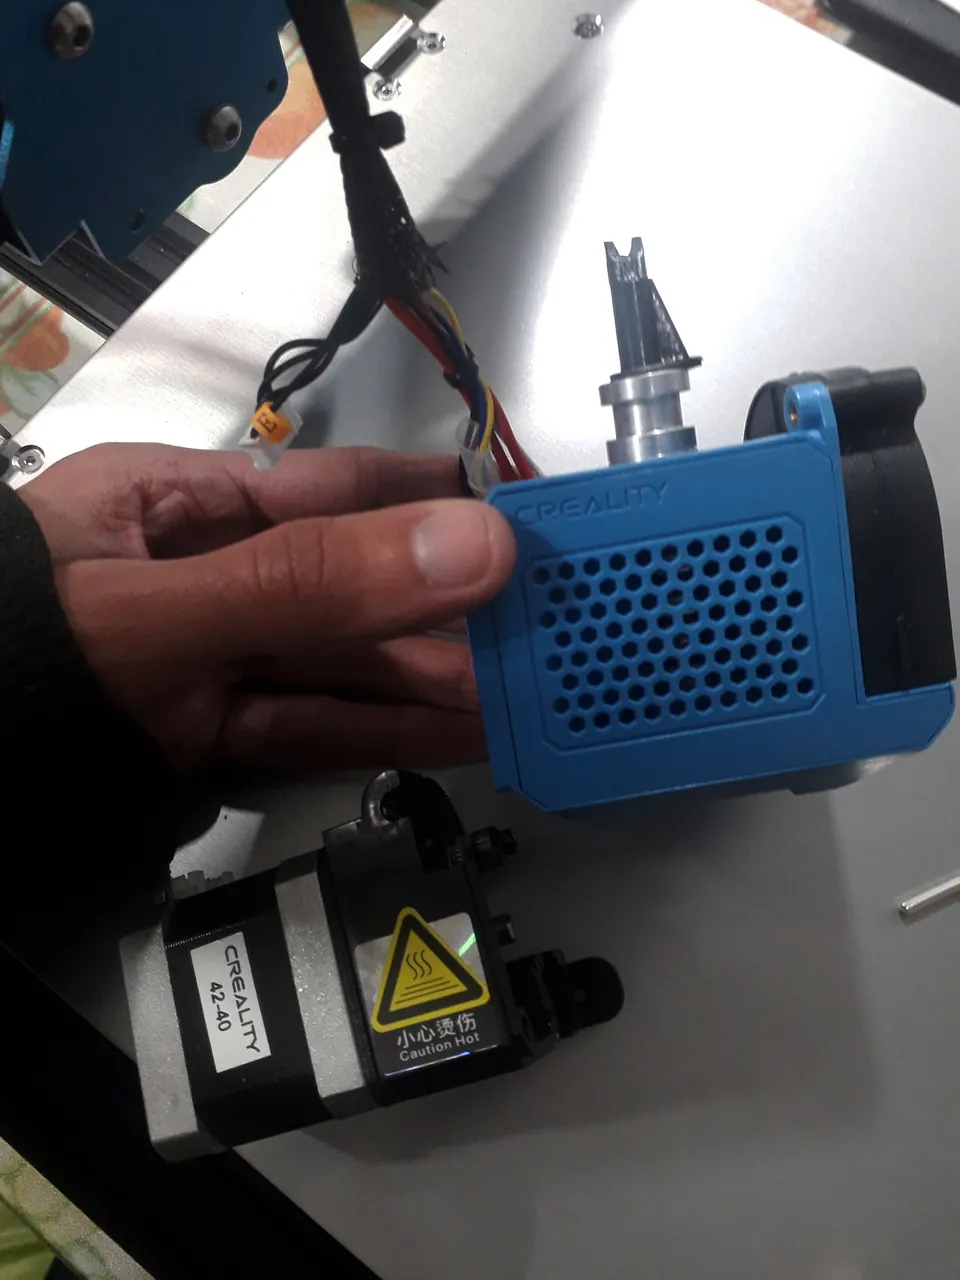
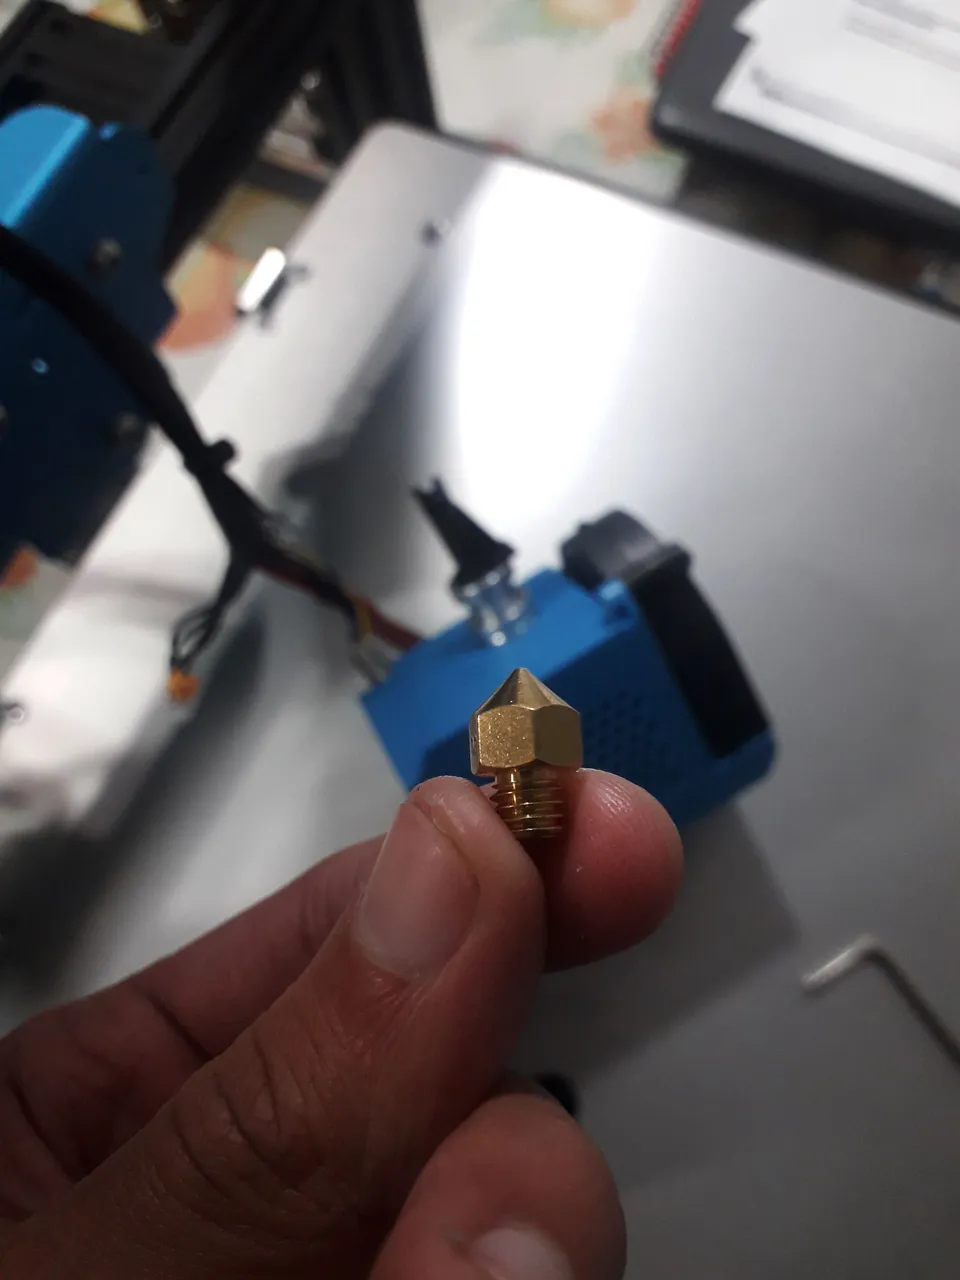
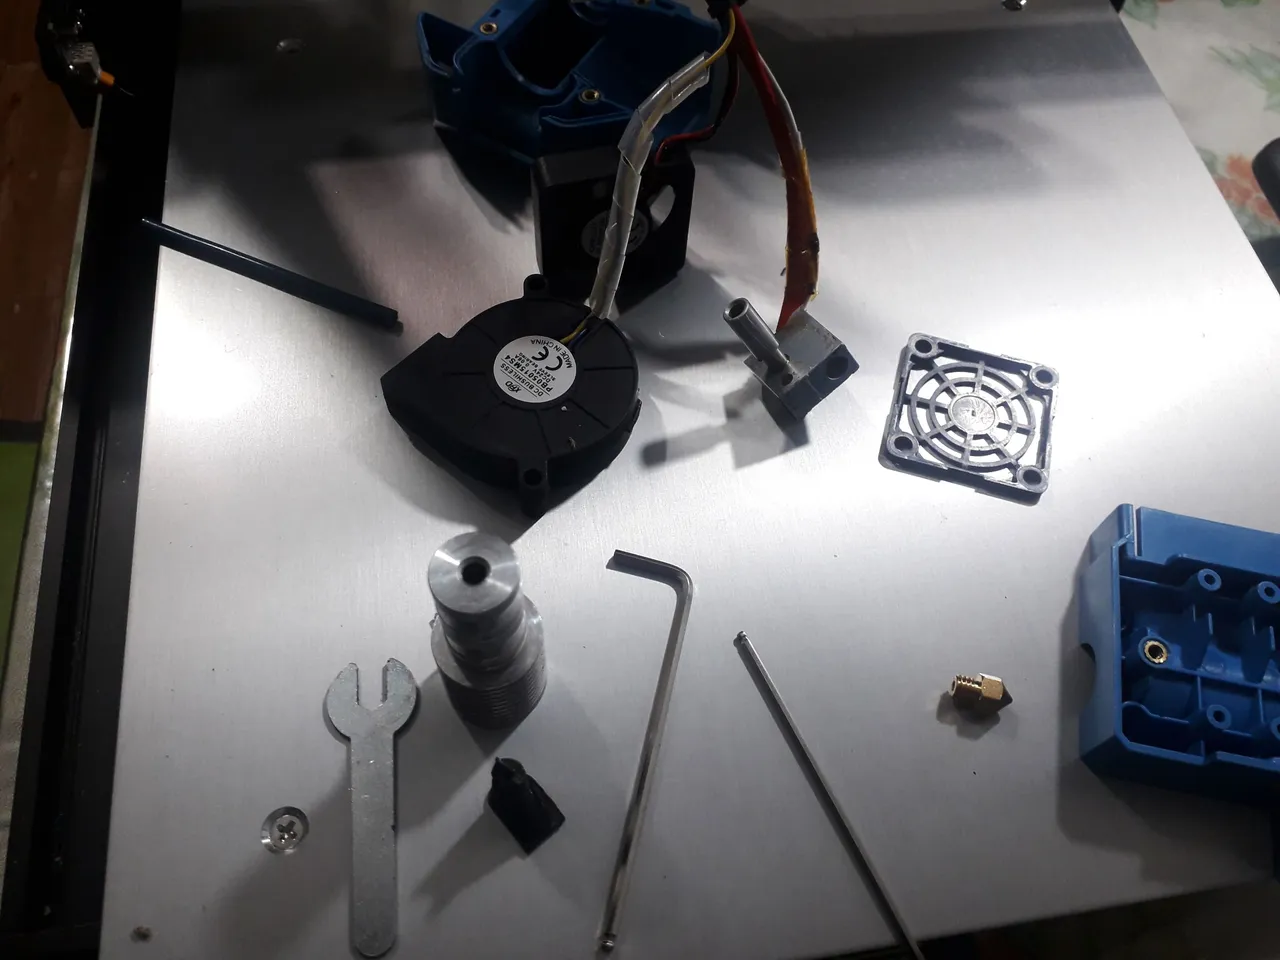
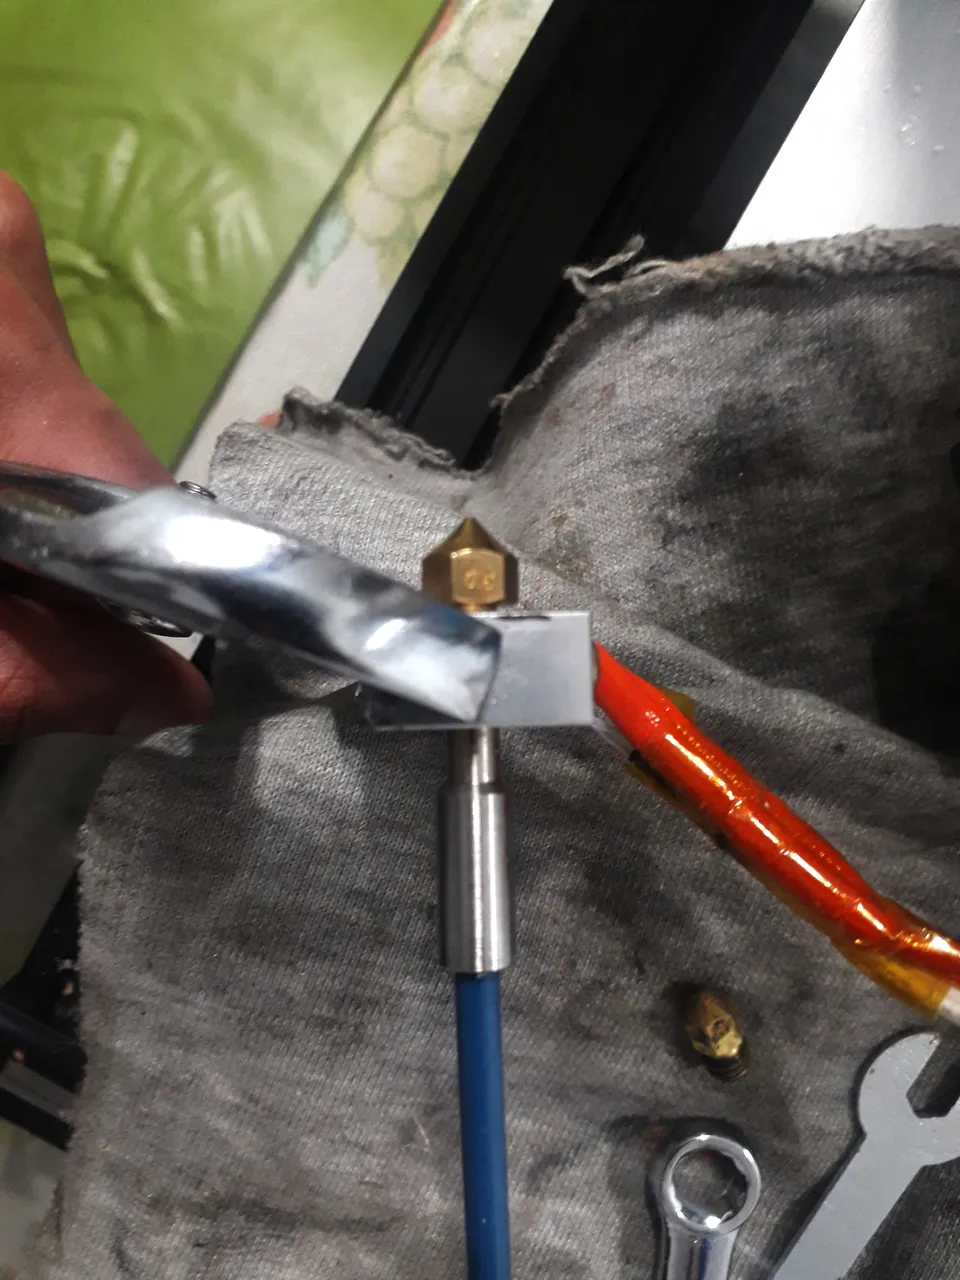
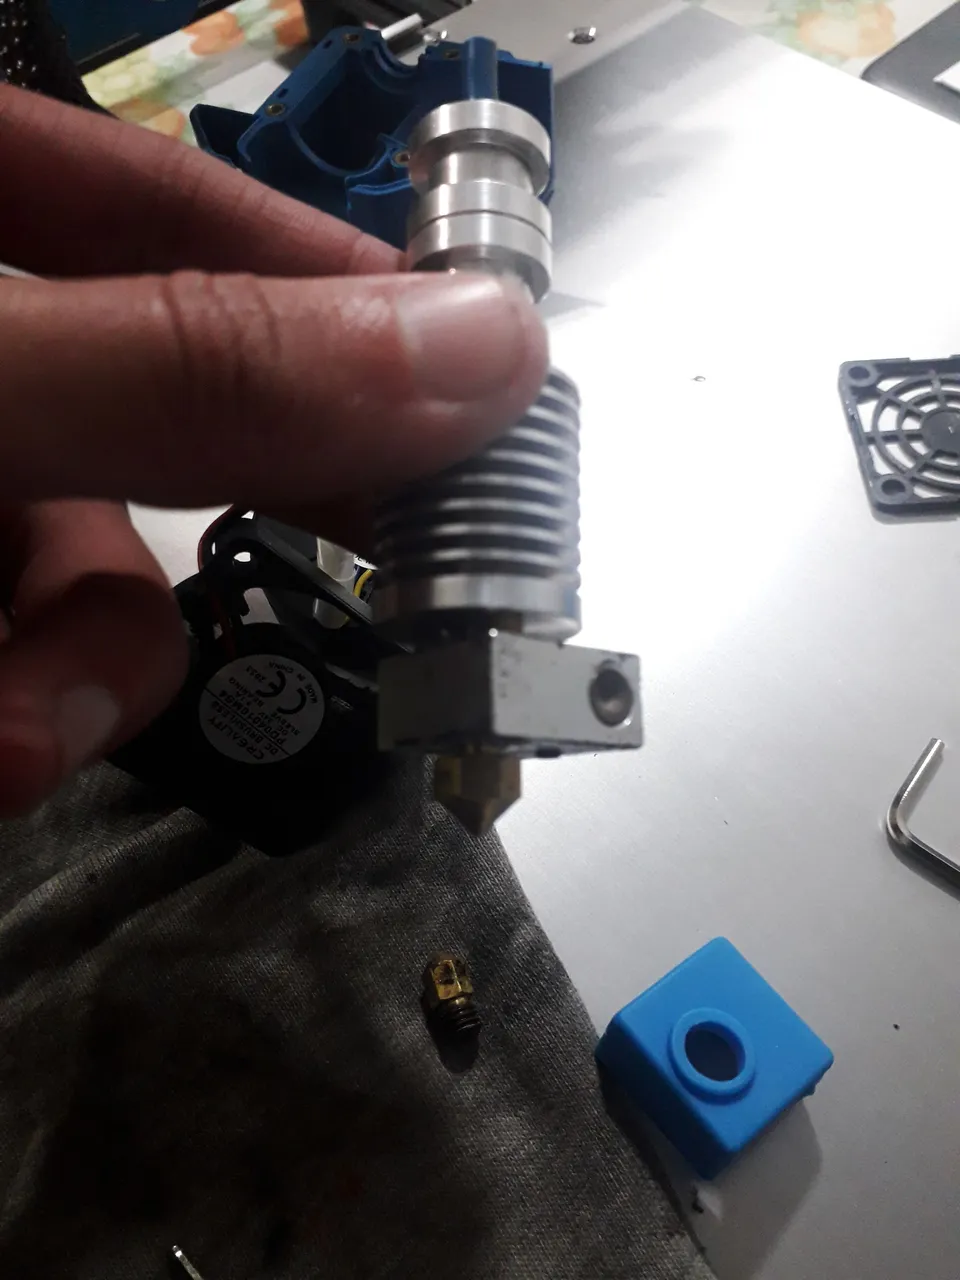
Now to continue the most important thing is to have a 0.8mm nozzle and replace the one we have by default in our machine. Remember that this process must be done hot and carefully so that we do not burn ourselves and do not damage any element of the printer. I am going to attach a video that explains how to do this process since expanding more would make this post too long.
Ahora para continuar lo primordial es tener una boquilla de 0.8mm y reemplazar la que tenemos por defecto en nuestra máquina. Recuerden que este proceso debe hacerse en caliente y con cuidado para que no nos quememos y no dañemos ningún elemento de la impresora. Voy a adjuntar un video que explica cómo hacer este proceso ya que ampliar más dejaría este posteo muy largo.
¿Cómo cambiar la boquilla?
Once we have made the change we will have to check manually if the plastic passes well to rule out possible obstruction failures due to a bad assembly of the hot end. Once this is done we move on to the part of the laminator configuration and printing tests.
Una vez hayamos hecho el cambio tendremos que verificar manualmente si el plástico pasa bien para descartar posibles fallos de obstrucción por un mal armado del hot end. Una vez hecho esto pasamos a la parte de la configuración en el laminador y las pruebas de impresión.
 |  |
|---|
We have to take into account that we are now extruding a larger volume of material. What do we have to take into account? More material means that the motor must extrude more, also that the extrusion temperature must be higher to heat the volume of material well, we must have a good ventilation to cool the extruded material when deposited and we must also be careful with the printing speed to obtain a good final result. Broadly speaking, these are the most important parameters to take into account.
Tenemos que tener en cuenta que ahora estamos extruyendo mayor volumen de material ¿Qué tenemos que tener en cuenta? Más material implica que el motor debe extruir más, también que la temperatura de extrusión debe ser mayor para calentar bien el volumen de material, tenemos que tener una buena ventilación para enfriar el material extruido al depositarse y también hay que tener cuidado con la velocidad de impresión para obtener un buen resultado final. A grandes rasgos esos son los parámetros más importantes a tener en cuenta.
The values I am going to share now are the ones that worked for me for my printer, this does not mean that they are perfect for all printers, you will have to find the configuration that gives you the best results.
Los valores que voy a compartir ahora son los que me funcionaron a mi para mi impresora, esto no quiere decir que sean perfectos para todas las impresoras, ustedes tendrán que encontrar la configuración que les de mejores resultados.
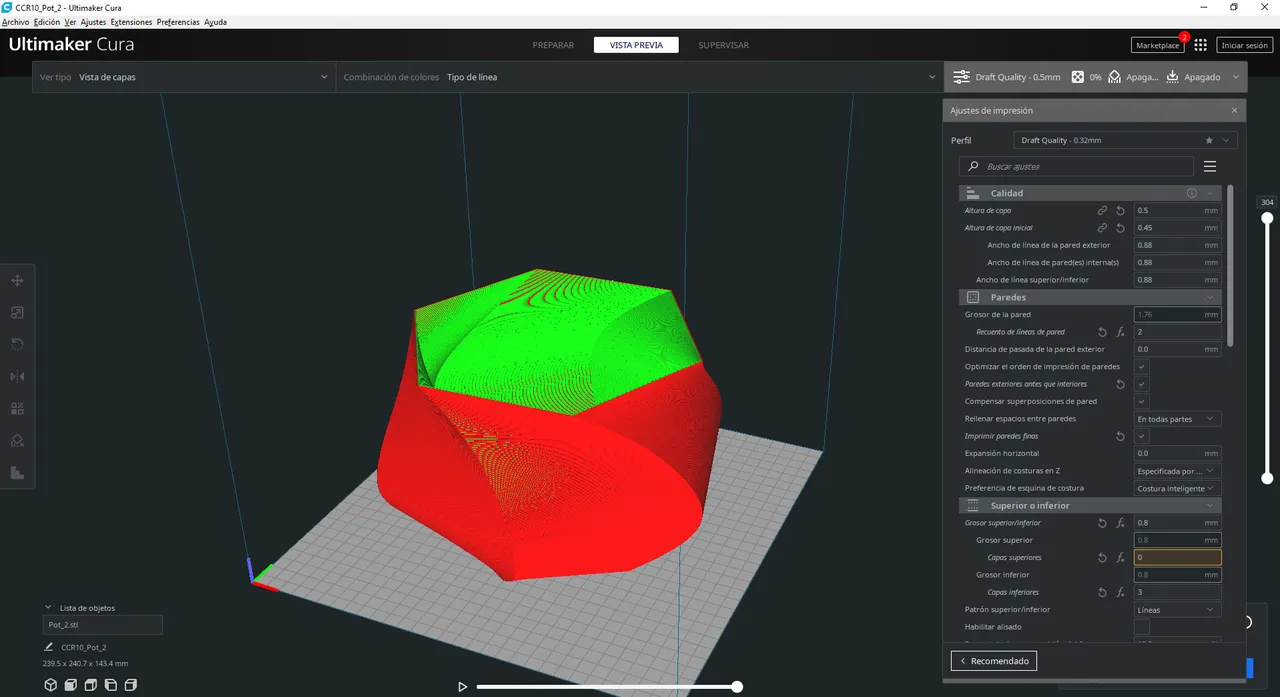
I used a print temperature of 210°, after doing a shrinkage test I found that 3mm at a speed of 40mm/s gave me the best results, I left the material flow at 100%. The layer height I am using is 0.4mm with a line width of 0.88mm. The number of walls will depend on the requirements of your part, we can use one or two, with two walls the parts would be very resistant since the line width in which we print is 0.88mm when using two we would have a wall of 1.76mm thick more than enough.
Utilice una temperatura de impresión de 210°, luego de hacer un test de retracciones encontré que 3mm a una velocidad de 40mm/s era la que mejor resultados me daba, el flujo de material lo deje al 100%. La altura de capa que estoy utilizando es 0.4mm con un ancho de línea de 0.88mm. El número de paredes va a depender de los requerimientos de su pieza, podemos usar una o dos, con dos paredes las piezas quedarían muy resistentes ya que el ancho de la línea en el que imprimimos es de 0.88mm al usar dos nos quedaría una pared de 1.76mm de espesor más que suficiente.
Something that I recommend is to activate the option to print walls before filling, this way we will avoid that the filling of the interior is marked on the faces of our piece leaving a very good final finish.
Algo que recomiendo es activar la opción de imprimir paredes antes que relleno, de esta manera evitaremos que el relleno del interior quede marcado en las caras de nuestra pieza dejando un acabado final muy bueno.
And finally the printing speed that I used for my tests is 40mm/s, let's think that we are extruding a lot of material and a high speed will cause a bad deposit and delamination of layers. Everyone can try other speeds and draw their own conclusions.
Y por último la velocidad de impresión que yo utilice para mis pruebas es de 40mm/s, pensemos que estamos extruyendo mucho material y una velocidad alta va a provocar un mal depósito y deslaminación de capas. Cada uno puede probar otras velocidades y sacar sus conclusiones.
 |  |
|---|
conclusions.
The layer heights with which we can work with a 0.8 nozzle are from 0.2mm to 0.64mm as maximum recommended height, this leaves us a wide range for testing layer heights.
conclusiones. Las alturas de capa con las que podemos trabajar con una boquilla de 0.8 son desde 0.2mm hasta 0.64mm como altura máxima recomendada, esto nos deja una amplia franja para hacer pruebas con alturas de capa.
Here you are free to start printing your pieces, but I recommend that you test for shrinkage. For example, in my tests I found some errors and I want to mention them because it is very likely that you have them too.
Aquí ya son libres de comenzar a imprimir sus piezas, pero yo recomiendo que hagan pruebas de retracciones. Por ejemplo, en mis pruebas encontré algunos errores y quiero mencionarlos porque es muy probable que ustedes también las tengan.
|
|
|
|---|
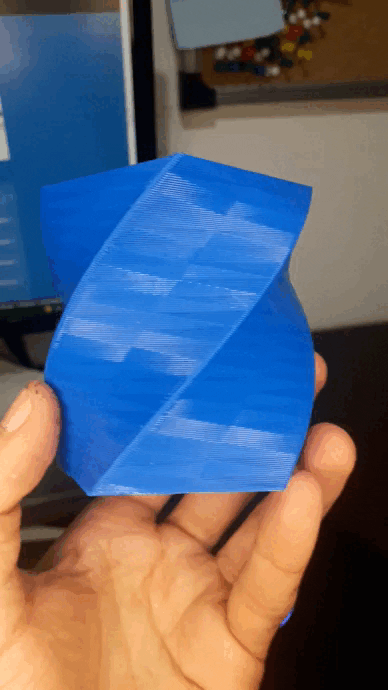
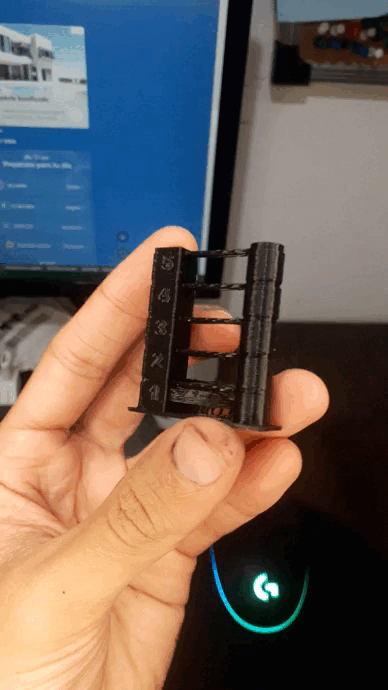
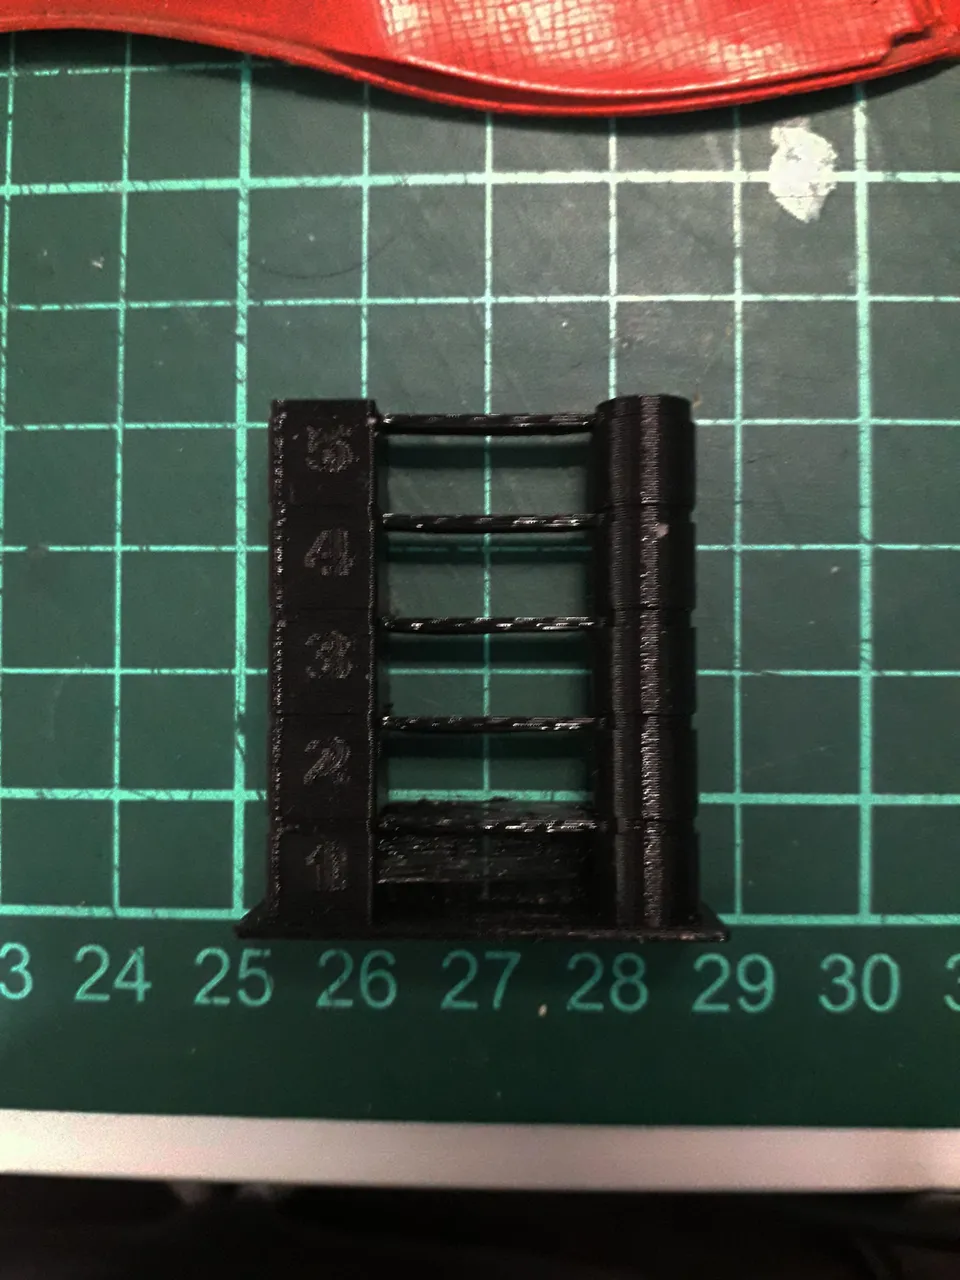
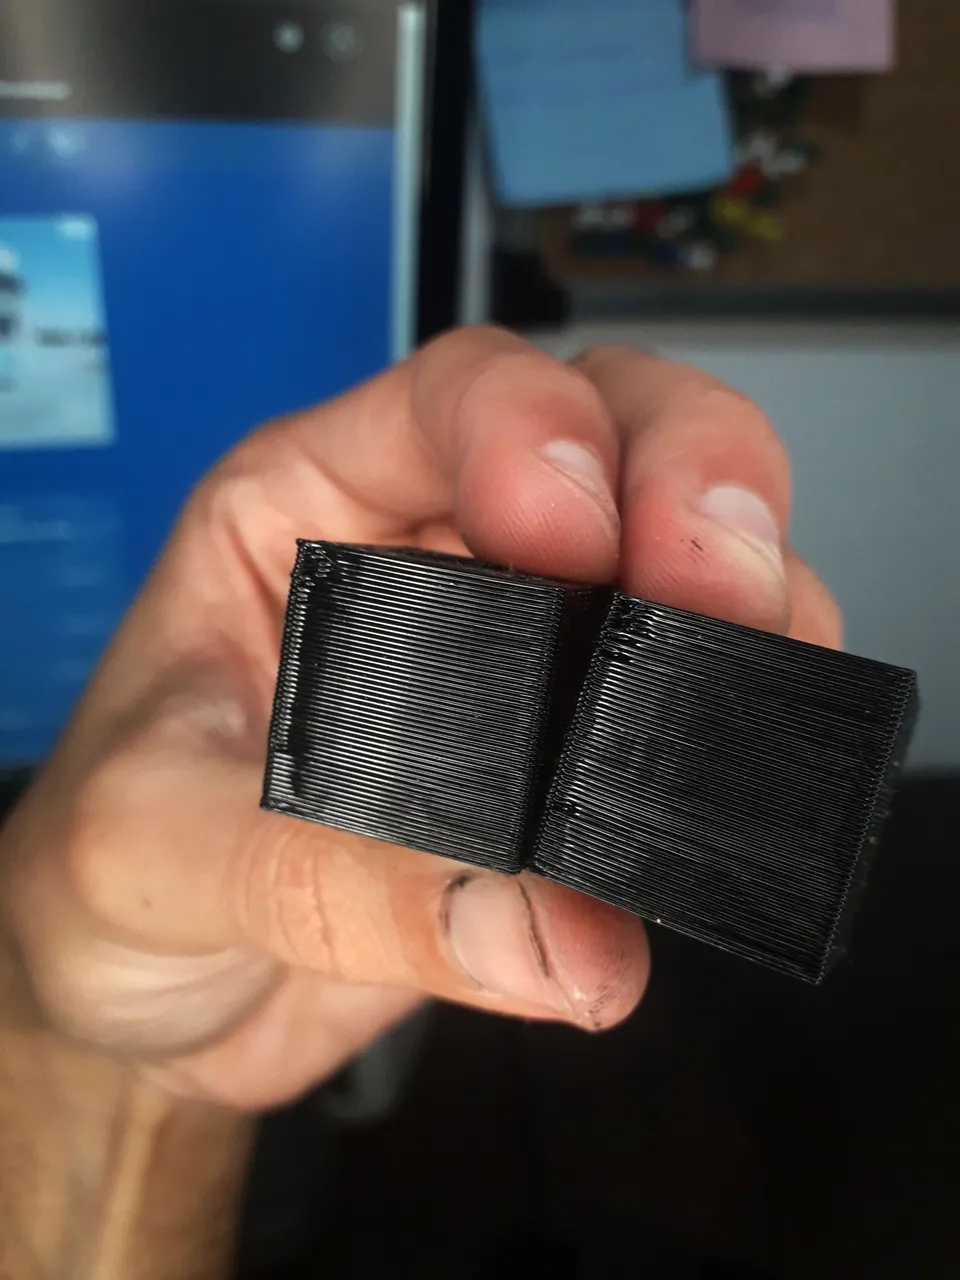
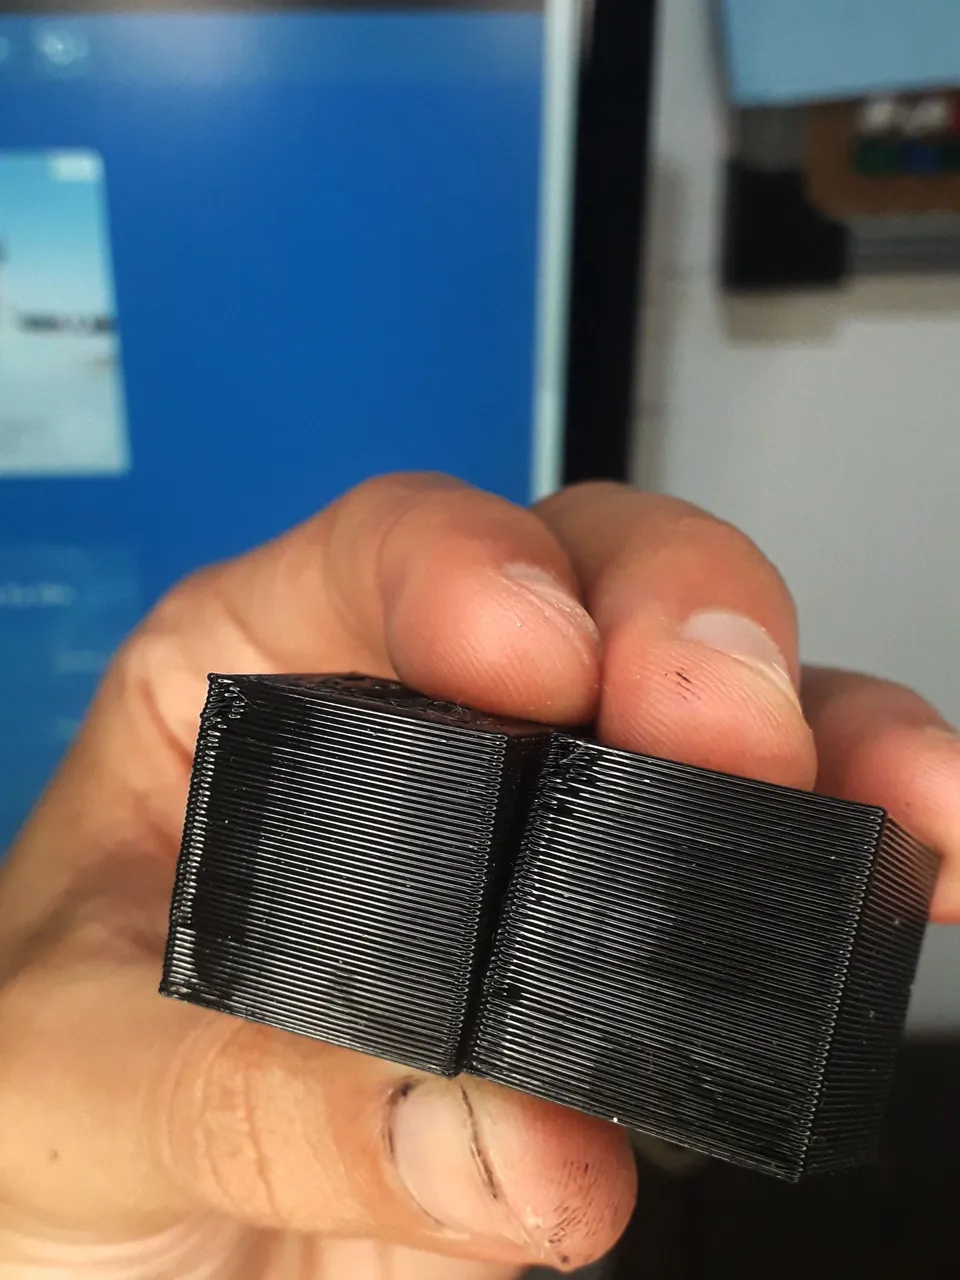
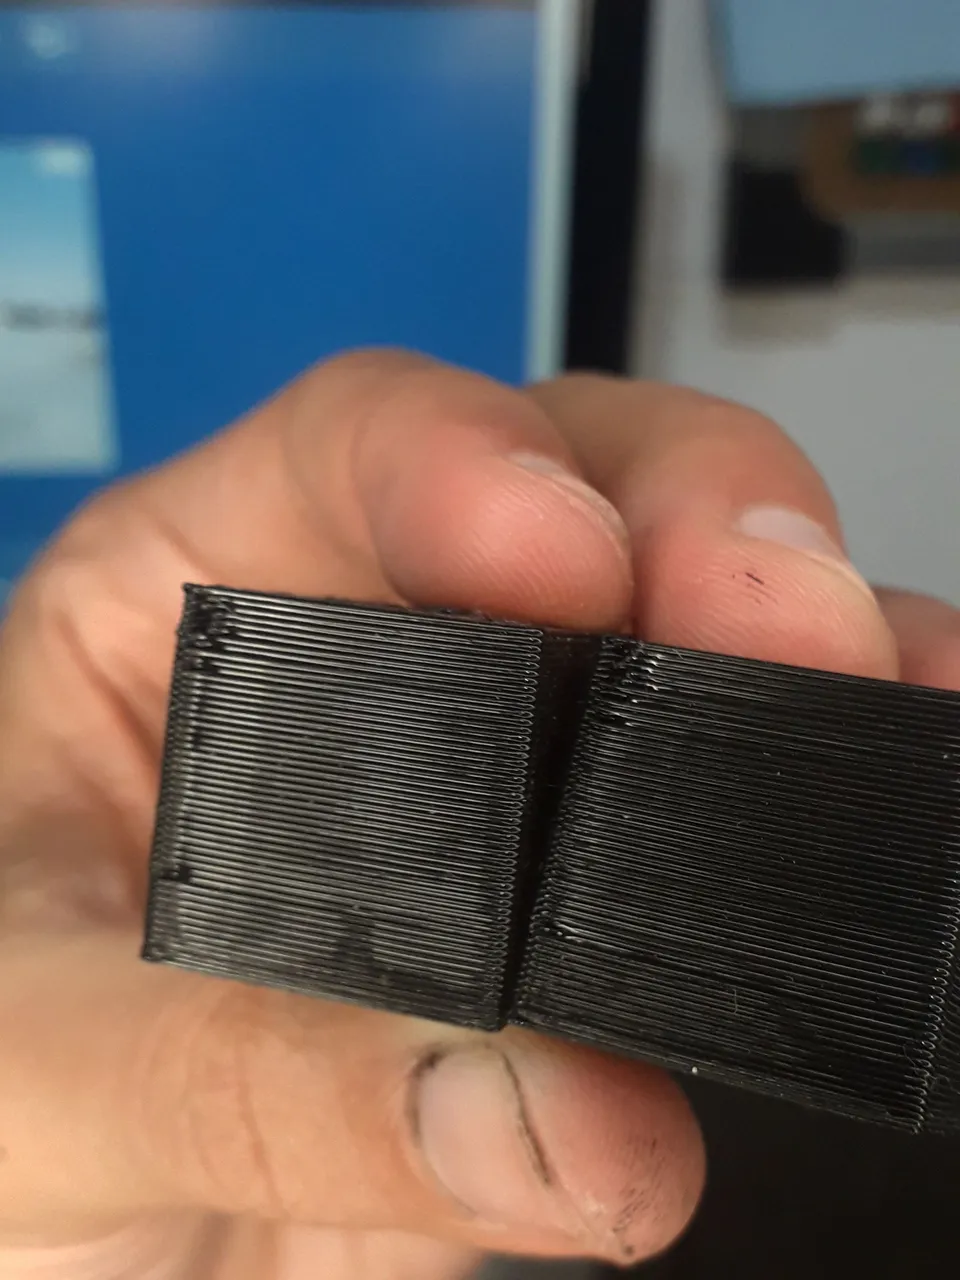
In the test calibration cubes that I made I noticed that in the area of seams of the piece (the seams are the initial and final points of the printed layer) there were small holes after researching, reading and asking I came to the conclusion that I could solve it with the inertia deposit parameter, with the 0.4 nozzle I had 0.6 mm cubic doubled this value in the configuration and in the next test the problem was solved, in the photo you can see the differences and I apologize for the unfinished cube but I had run out of plastic to print.
En los cubos de calibración de prueba que hice note que en la zona de costuras de la pieza (Las costuras son los puntos iniciales y finales de la capa impresa) había pequeños agujeros tras investigar, leer y preguntar llegue a la conclusión que podía solucionarlo con el parámetro deposito por inercia, con la boquilla 0.4 yo tenía 0.6 mm cúbicos duplique este valor en la configuración y en la siguiente prueba el problema estaba solucionado, en la foto pueden ver las diferencias y les pido disculpas por el cubo sin terminar pero me había quedado sin plástico para imprimir.

If the opposite happens, i.e. you see drops or bumps, you should do the opposite which would be to lower the inertia deposit value as this means that you are extruding extra material but most likely the former is the case. If this parameter does not improve the finish you will have to look at the additional priming parameter by raising or lowering this value until the surface finish improves.
Llegado el caso de que les ocurra lo contrario o sea ver que queden gotas o protuberancias deben hacer lo contrario que sería bajar el valor de depósito por inercia ya que esto significa que están extruyendo material extra pero lo más probable es que suceda lo primero. Si este parámetro no mejoro el acabado tendrán que ver el parámetro de cebado adicional subiendo o bajando este valor hasta mejorar la terminación superficial.

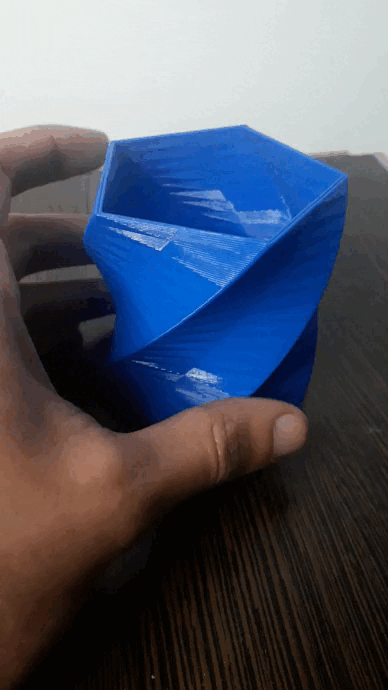
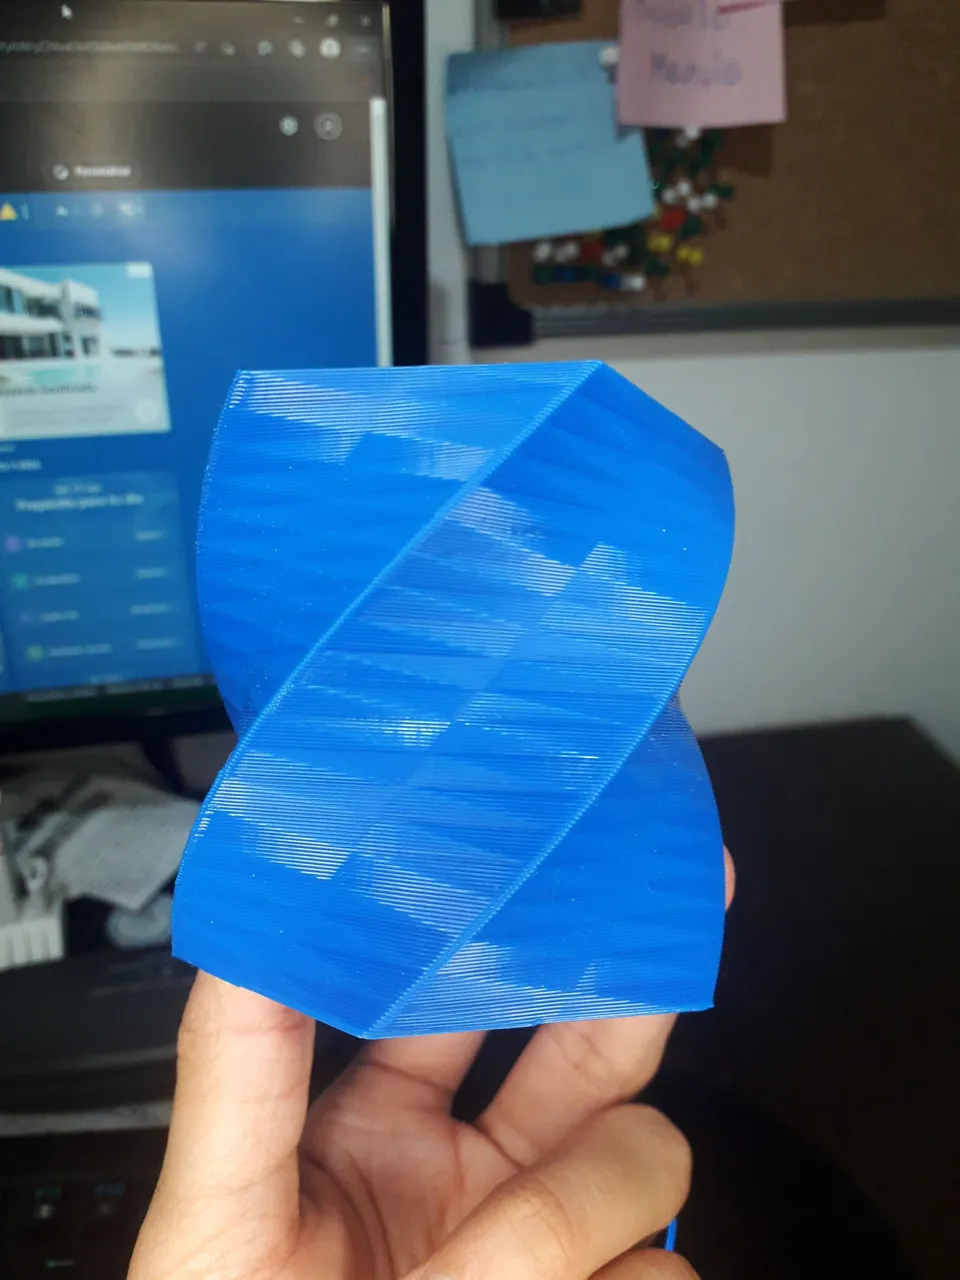
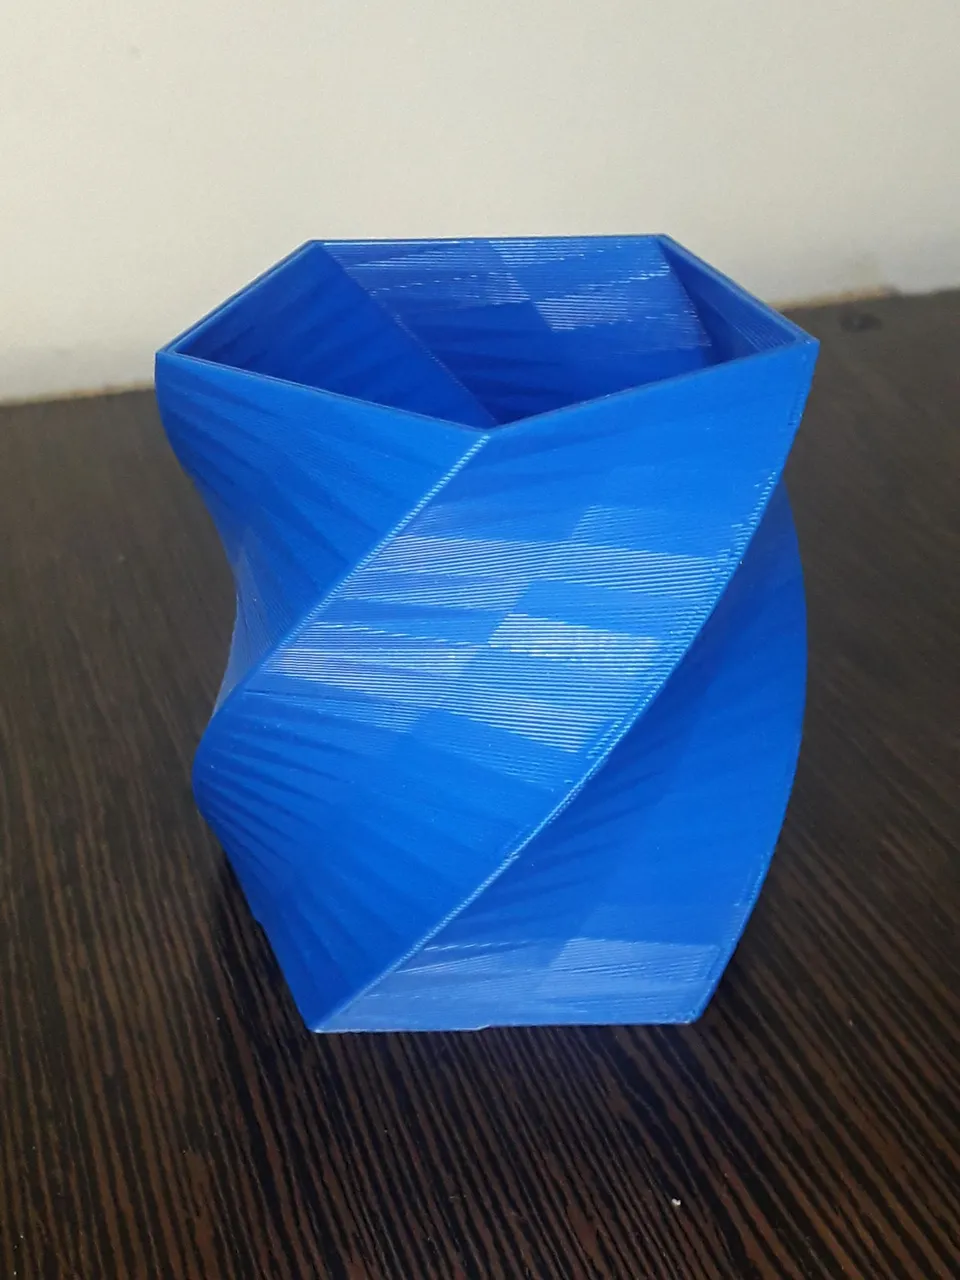
When I was more confident I printed a small pen and noticed that it came out perfect, this pen took 1 hour 30 minutes with a height of 0.4mm and the 0.8mm nozzle that I installed, if this same pen had printed it with a layer height of 0.2mm and a 0.44 nozzle it would have taken 5 hours 30 minutes is a huge difference in comparison.
Cuando ya tuve más seguridad imprimí un pequeño lapicero y note que salió perfecto, este lapicero tardo 1 hora 30 minutos con una altura de 0.4mm y la boquilla de 0.8mm que instale, si este mismo lapicero lo hubiera impreso con una altura de capa de 0.2mm y una boquilla de 0.44 hubiera tardado 5 horas 30 minutos es una diferencia abismal en comparación.
Below the publication I will be mentioning the videos that were useful to inform me and learn about the changes I made, I hope my post is useful and can serve to make your great projects. Any opinion, advice or doubt are always welcome in the comments.
Debajo de la publicación estaré mencionando los videos que me fueron de utilidad para informarme y aprender sobre los cambios que hice, espero que mi posteo les sea de utilidad y pueda servir para que realicen sus grandes proyectos. Cualquier opinión, consejo o duda siempre son bienvenidas en los comentarios.
Link to the video that I used for the investigation
Link del video que me sirvió para la investigación

My 3D printing works @nit_3dprinting
Mis trabajos de impresión 3D @nit_3dprinting
Translated by DeepL
Traducido con DeepL
All images are my own
Todas las imágenes son de mi autoría
My last post Epic battles against Jotums [ENG-ESP]
Mi último post Epic battles against Jotums [ENG-ESP]