Hello, dear friends Hivers.
I'm Zulay Pulido, Painter Apprentice, with Philosophical Thought.
" Inspiration is to work every day.” - Charles Baudelaire.
All the drawings in this publication are my own.
Today is Friday, December 17, 2021.

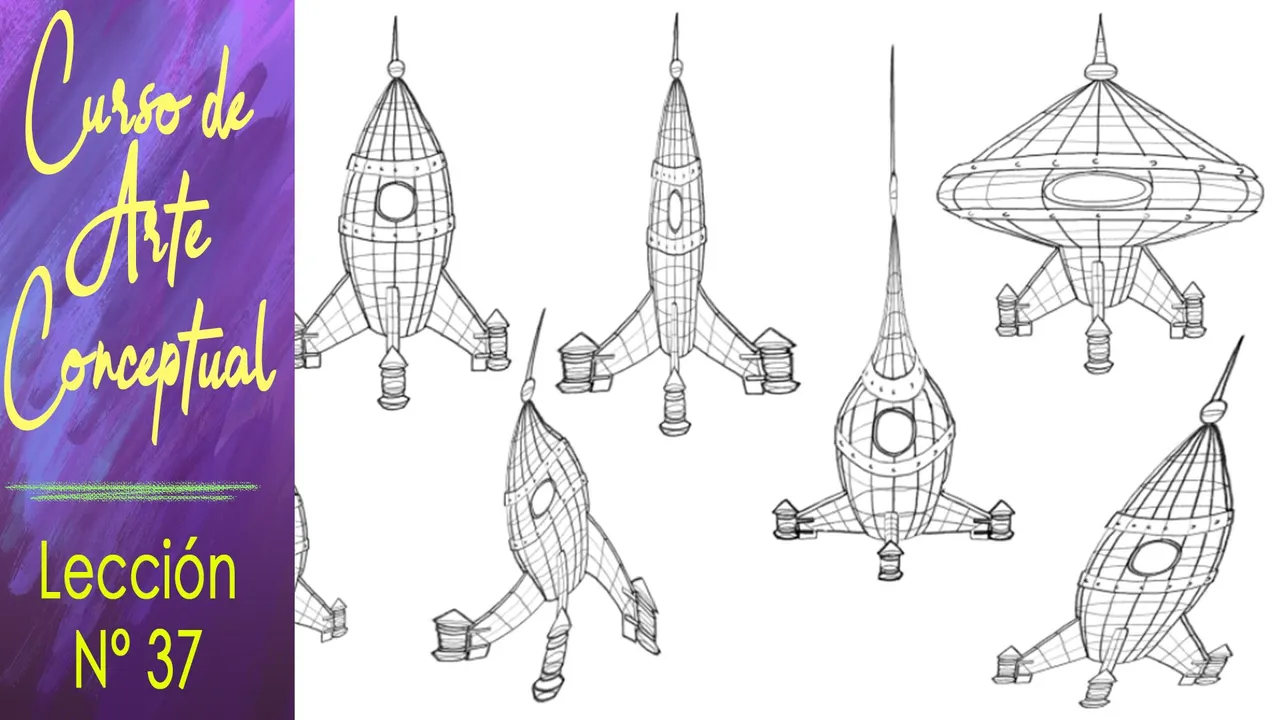
Curso de Arte Conceptual: Lección 37 (Español – Inglés)
Hola, queridos amigos Hivers.
Soy Zulay Pulido, Aprendiz de Pintura, con Pensamiento Filosófico.
“ La inspiración es trabajar todos los días.“ - Charles Baudelaire.
Todos los dibujos de esta publicación son de mi autoría.
Hoy es viernes 17 de diciembre del 2021.
Now, I am going with the Lesson N° 37, of my works of the Conceptual Art Course that I am doing virtually.
Today, I will continue with a new module of Advanced Perspective.
In the next assignments, I am going to work on the modification of the copied object and its structure mesh.
The idea is to learn how to deform the volume without losing, increasing, or decreasing the original skeleton lines.
With this activity, I would be acquiring the ability that, for example, movie animators have to deform characters without losing their appearance.
To carry out the tasks of this course, I recommend using free downloadable photographs (without copyright), obtained from web pages, such as https://www.pexels.com/ https://pixabay.com/ https://unsplash.com/ and other similar ones, since they have a huge amount of images and are of great quality.
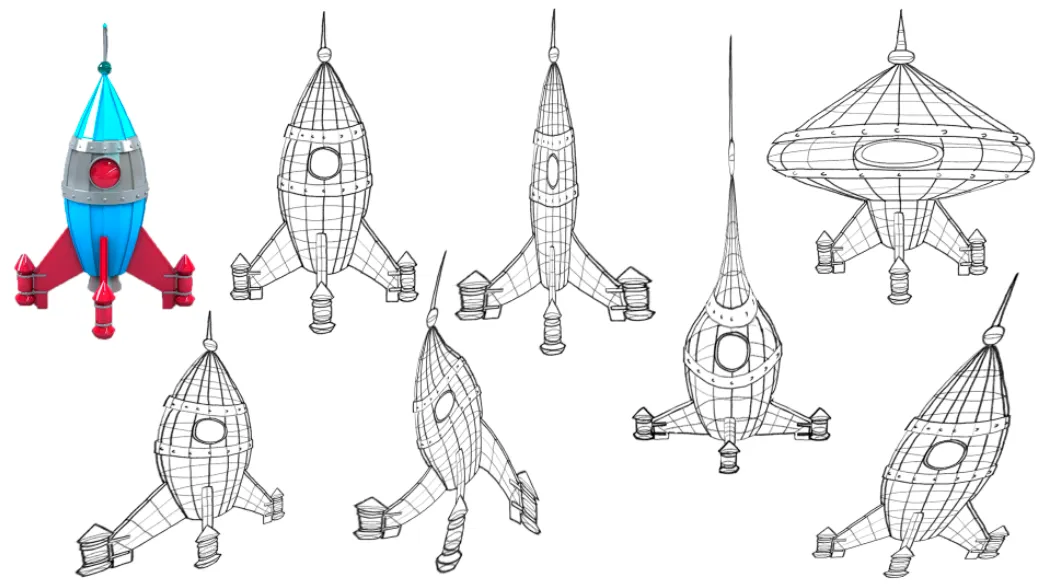
Task N° 1: Build the External and Internal Structure of an Object in Perspective Analytically and deform it in several versions.
Step N° 1: Place in Photoshop the photo downloaded from the internet.
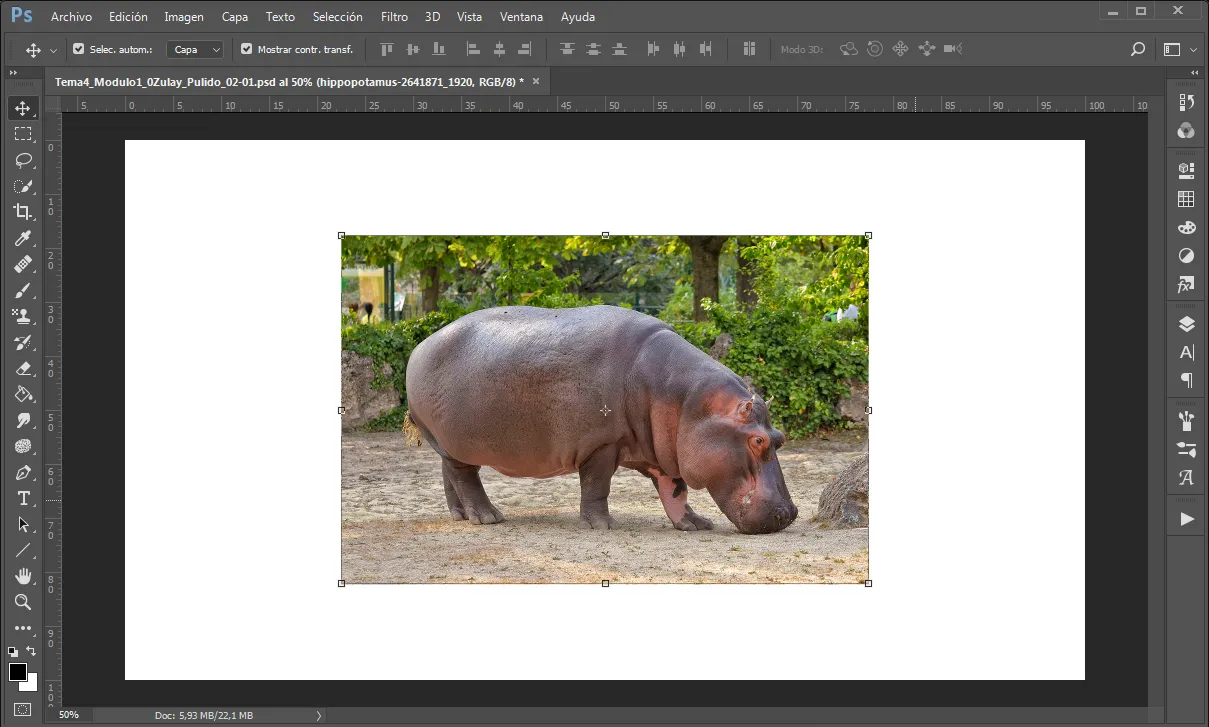
Image by onkelramirez1 on Pixabay
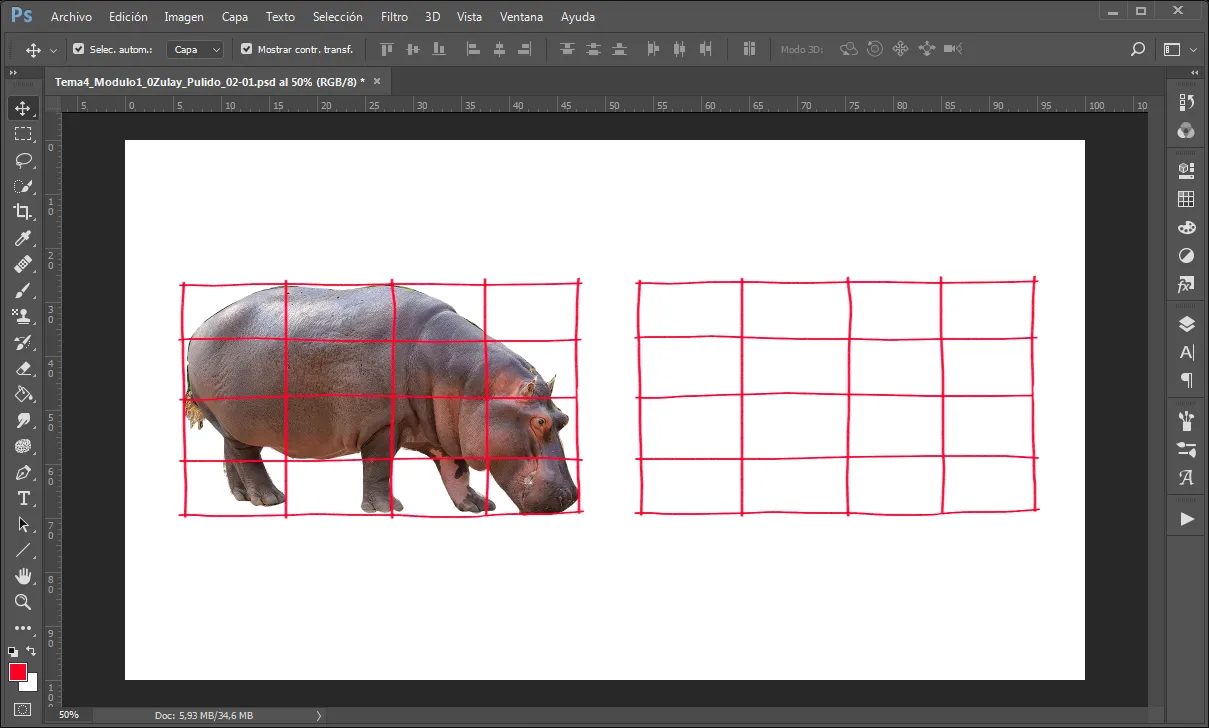
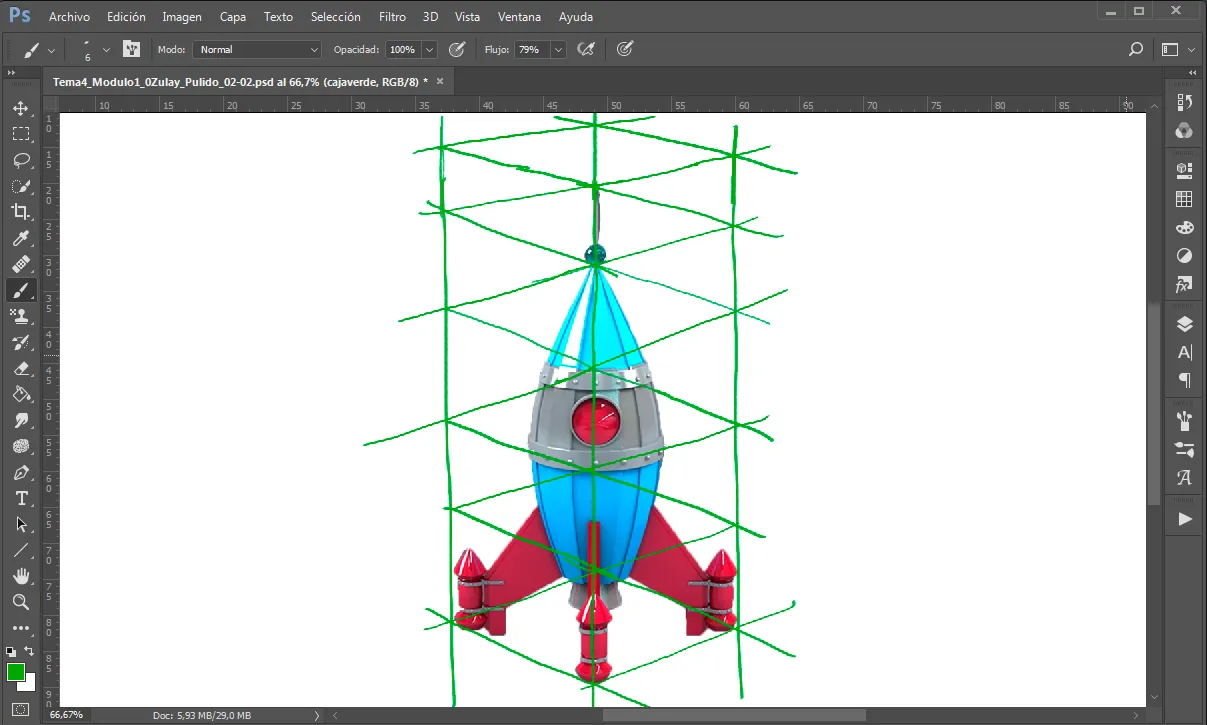
Step N° 2: Create the box containing the object. This must have the maximum width and length dimensions of the object.
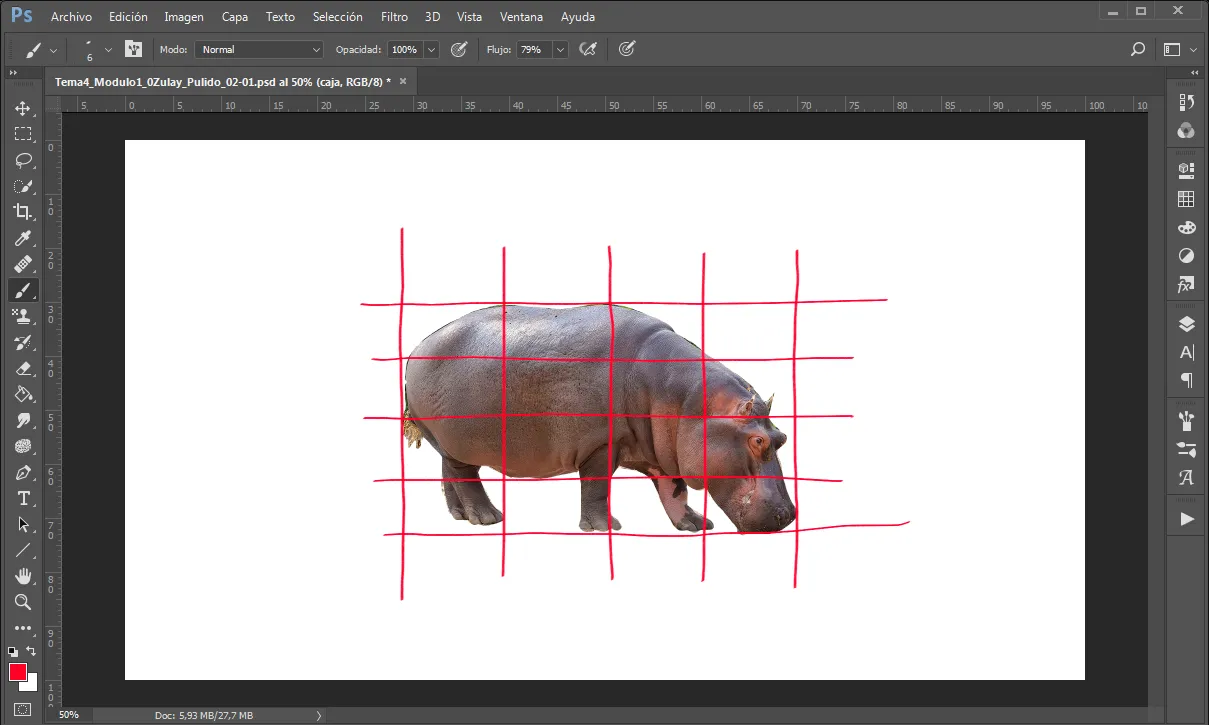
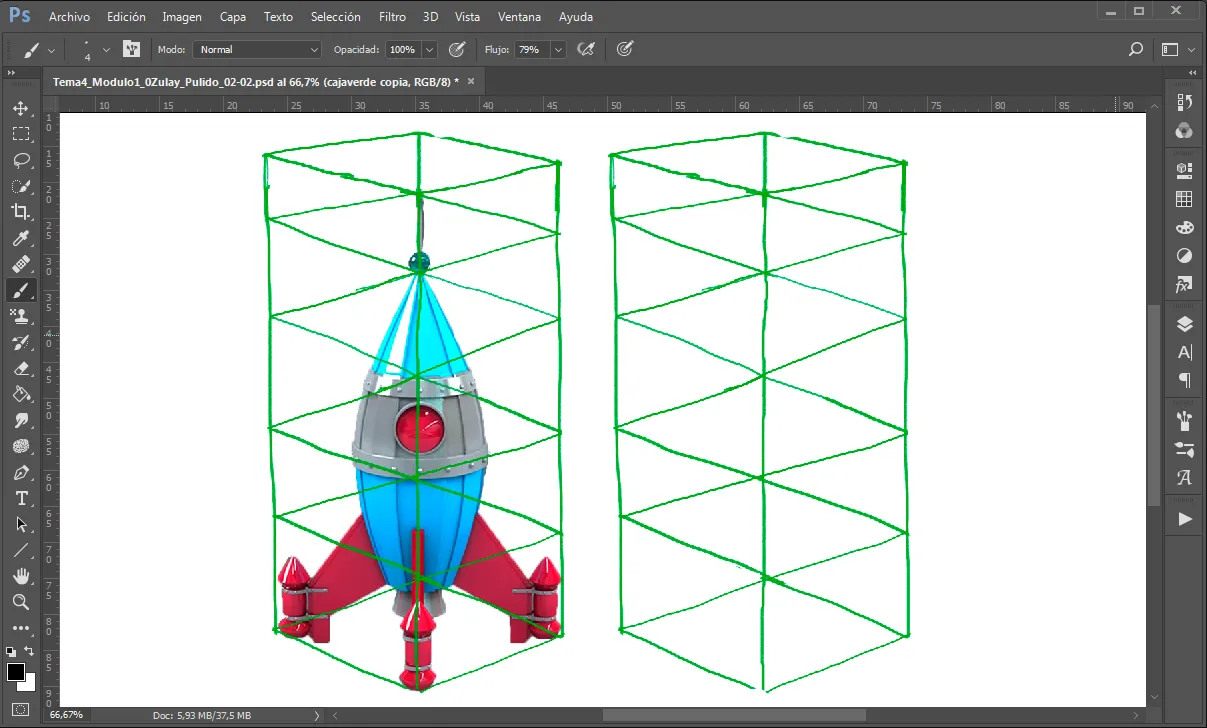
Step N° 3: Copy the box to one side of the object.
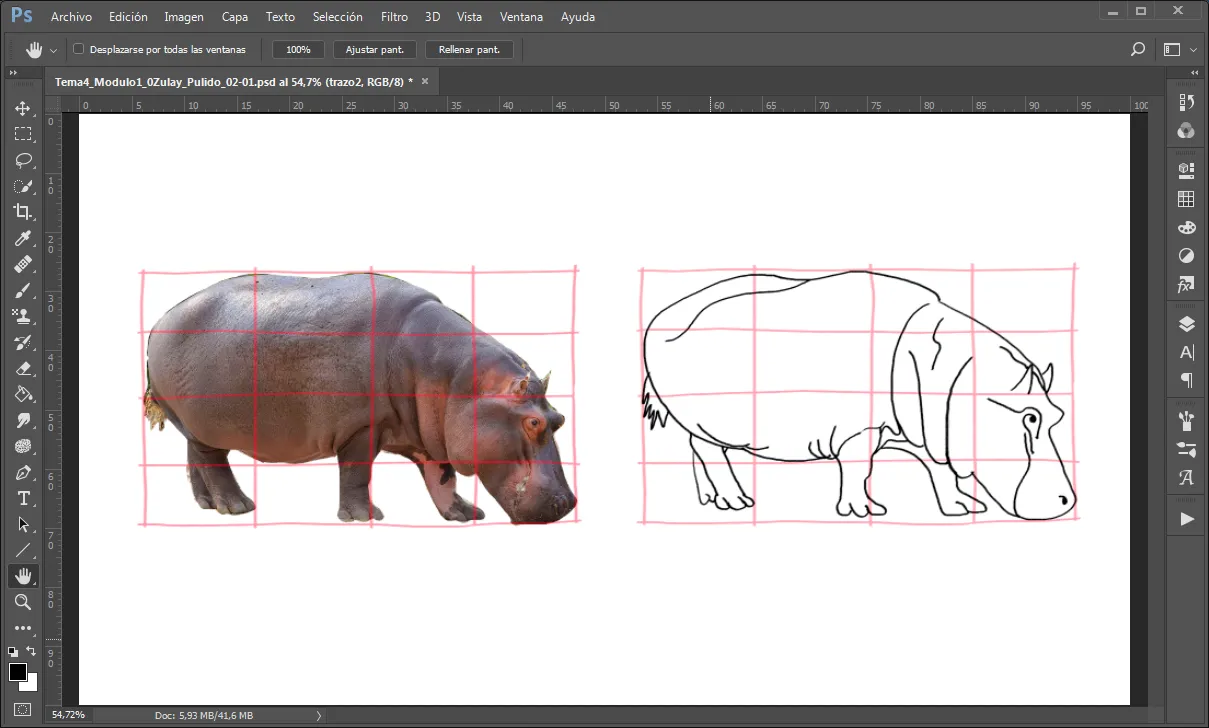
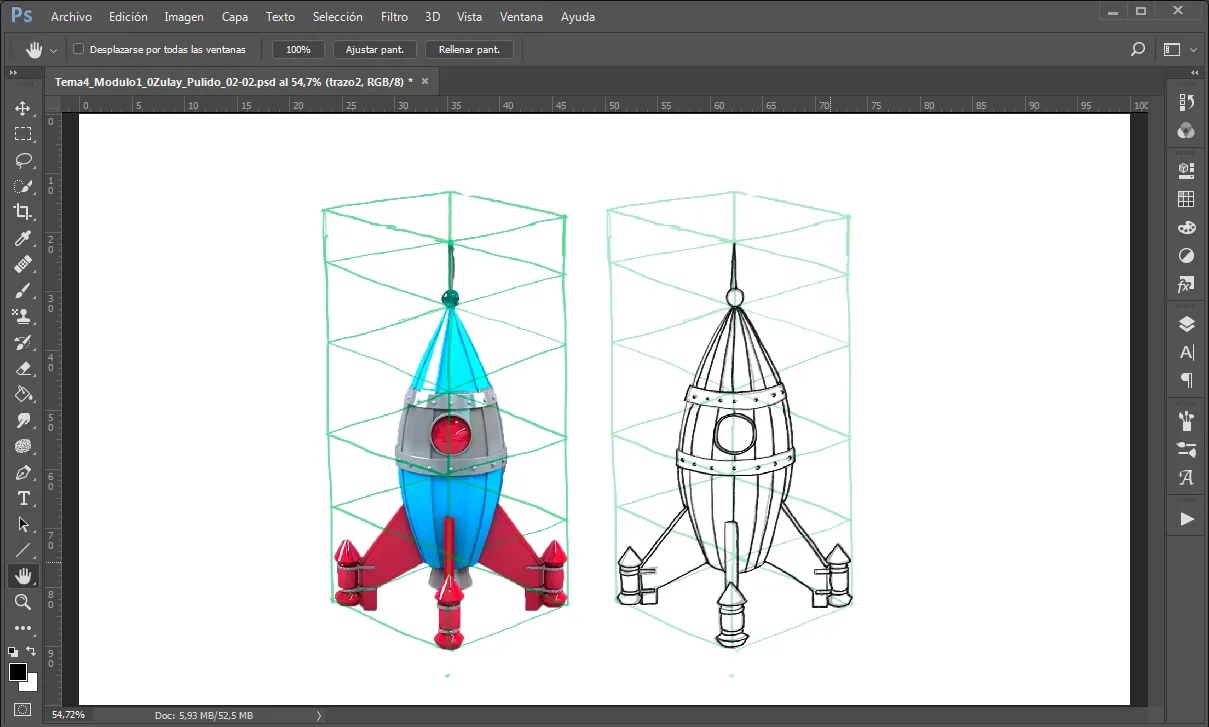
Step N° 4: Draw the copy of the object.
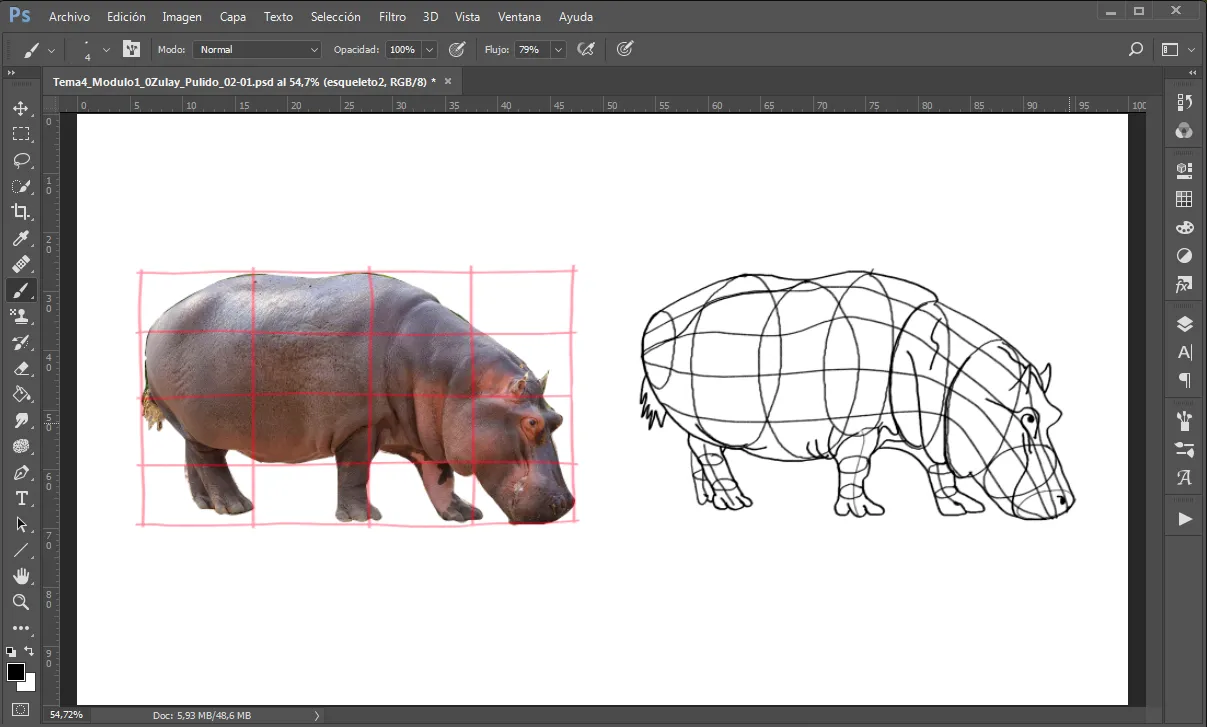
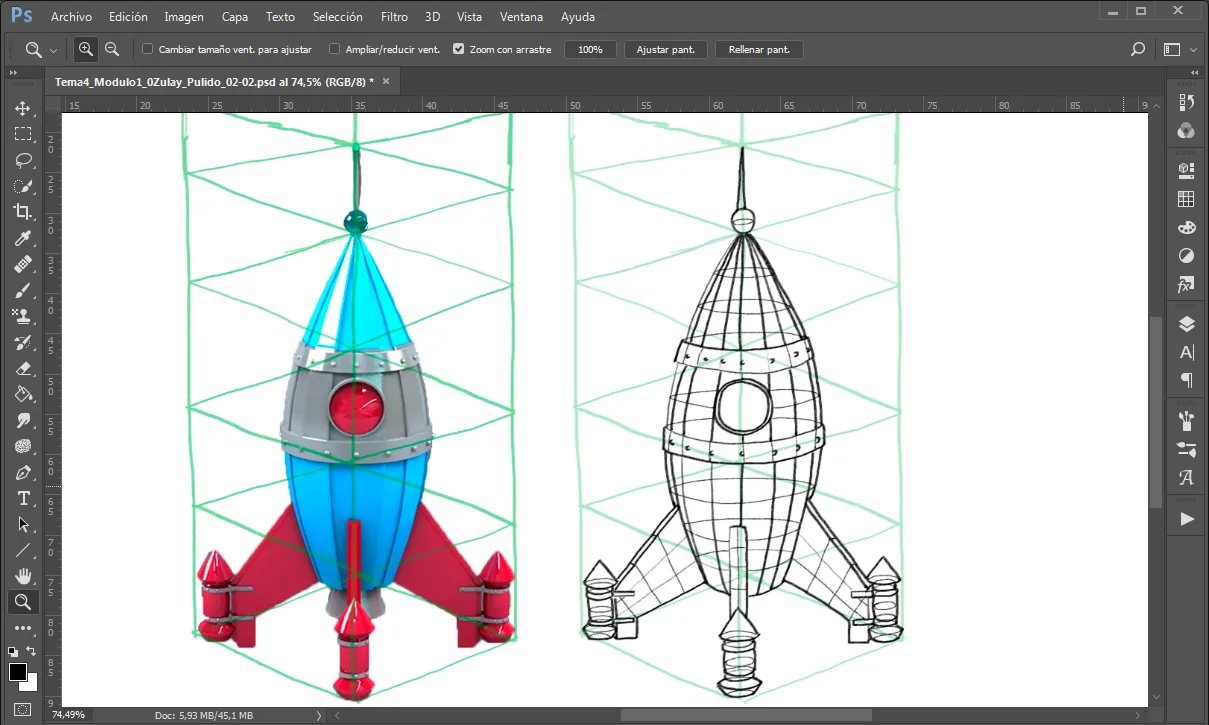
Step N° 5: Draw the skeleton of the object to understand how it would look from any side or point of view.
Step N° 6: Create several deformed versions of the same object, respecting the structure mesh.

Task N° 2: Build the External and Internal Structure of an Object in Perspective Analytically and deform it into several versions.
Step N° 1: Place in Photoshop the photo downloaded from the internet.
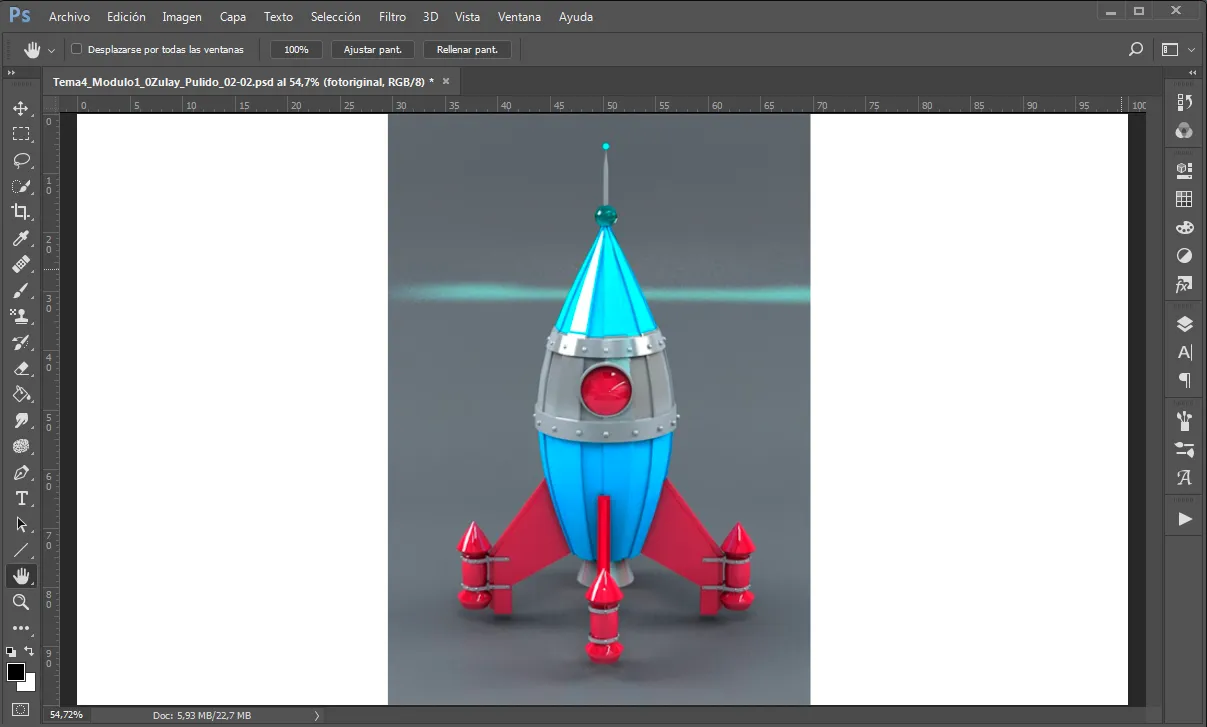
Image by fernando zhiminaicela on Pixabay
Step N° 2: Create the box containing the object. This must have the maximum width and length dimensions of the object.
Step N° 3: Copy the box to one side of the object.
Step N° 4: Draw the copy of the object.
Step N° 5: Draw the skeleton of the object to understand how it would look from any side or point of view.
Step N° 6: Create several deformed versions of the same object, respecting the structure mesh.
It took me eight (8) hours to do this work.
This task was done in Photoshop 2017 with my Star 03 V2 XP-PEN Graphics Tablet.
I hope it is of interest and benefit.
If you would like to visit the above lesson, you can use the following link: Go to Lesson N° 36.
Ahora, voy con la Lección N° 37, de mis trabajos del Curso de Arte Conceptual que estoy realizando de forma virtual.
Hoy, continuaré con un nuevo módulo de Perspectiva Avanzada.
En las próximas tareas voy a trabajar sobre la modificación del objeto copiado y su malla de estructura.
La idea es aprender a deformar el volumen sin perder, aumentar o disminuir las líneas originales del esqueleto.
Con esta actividad estaría adquiriendo la capacidad que tienen, por ejemplo, los animadores de cine para deformar los personajes sin que dejen de parecerse.
Para efectuar las tareas de este curso, recomiendo utilizar fotografías de descarga gratuita (sin derechos de autor), obtenidas de páginas web, tales como: https://www.pexels.com/ https://pixabay.com/ https://unsplash.com/ y otras similares, ya que tienen una inmensa cantidad de imágenes y son de gran calidad.
Tarea N° 1: Construir la Estructura Externa e Interna de un Objeto en Perspectiva de forma Analítica y deformarlo en varias versiones.
Paso N° 1: Colocar en Photoshop la foto descargada de internet.
Imagen de onkelramirez1 en Pixabay
Paso N° 2: Crear la caja contenedora del objeto. Esta debe tener las dimensiones máximas de ancho y largo del objeto.
Paso N° 3: Copiar la caja a un lado del objeto.
Paso N° 4: Trazar la copia del objeto.
Paso N° 5: Trazar el esqueleto del objeto para entender cómo se vería desde cualquier lado o punto de vista.
Paso N° 6: Crear varias versiones deformadas del mismo objeto, respetando la malla de estructura.
Tarea N° 2: Construir la Estructura Externa e Interna de un Objeto en Perspectiva de forma Analítica y deformarlo en varias versiones.
Paso N° 1: Colocar en Photoshop la foto descargada de internet.
Imagen de fernando zhiminaicela en Pixabay
Paso N° 2: Crear la caja contenedora del objeto. Esta debe tener las dimensiones máximas de ancho y largo del objeto.
Paso N° 3: Copiar la caja a un lado del objeto.
Paso N° 4: Trazar la copia del objeto.
Paso N° 5: Trazar el esqueleto del objeto para entender cómo se vería desde cualquier lado o punto de vista.
Paso N° 6: Crear varias versiones deformadas del mismo objeto, respetando la malla de estructura.
Hacer este trabajo me tomó ocho (8) horas.
Esta tarea fue realizada en Photoshop 2017 con mi Tableta Gráfica Star 03 V2 XP-PEN.
Espero que sea de tu interés y beneficio.
Si deseas visitar la lección anterior, puedes utilizar el siguiente enlace: Ir a la Lección N° 36
Mis Redes Sociales personales son:
Facebook: https://www.facebook.com/zupulido,
y Twitter: https://twitter.com/zupulido, pero no las uso con frecuencia.
Sin embargo, las de la FAVTachira,
Facebook: https://www.facebook.com/FAVTachira/,
Twiiter: https://twitter.com/favtachira
e Instagram: https://www.instagram.com/favtachira/,
sí se actualizan constantemente.
If you liked this post, I thank you for leaving your kind comment and some recommendations to improve my work.
Remember, you can find me at @librepensadora
Greetings from Venezuela, a country with Great Drawers.
Si te gustó esta publicación, te agradezco dejar tu gentil comentario y algunas recomendaciones para mejorar mi trabajo.
Recuerda, puedes encontrarme en @librepensadora
Un saludo desde Venezuela, un país con Grandes Dibujantes.
Welcome dear friend.
I recommend you join the @theterminal Community, the best option that exists in Hive, specialized in teaching the most advanced techniques and methods of creating quality articles. That will undoubtedly serve you throughout your journey through this important Blockchain.
If you want to be part of this great initiative, you just have to contact via Discord to @brittandjosie or @justclickindiva
Bienvenido, querido amigo.
Te recomiendo unirte a la Comunidad @theterminal , la mejor opción que existe en Hive, especializada en la enseñanza de las más aventajadas técnicas y métodos de creación de artículos de calidad. Eso te servirá, indiscutiblemente, en todo tu trayecto por esta importante Blockchain.
Si deseas formar parte de esa grandiosa iniciativa, solo tienes que contactar, a través de Discord, a @brittandjosie o @justclickindiva