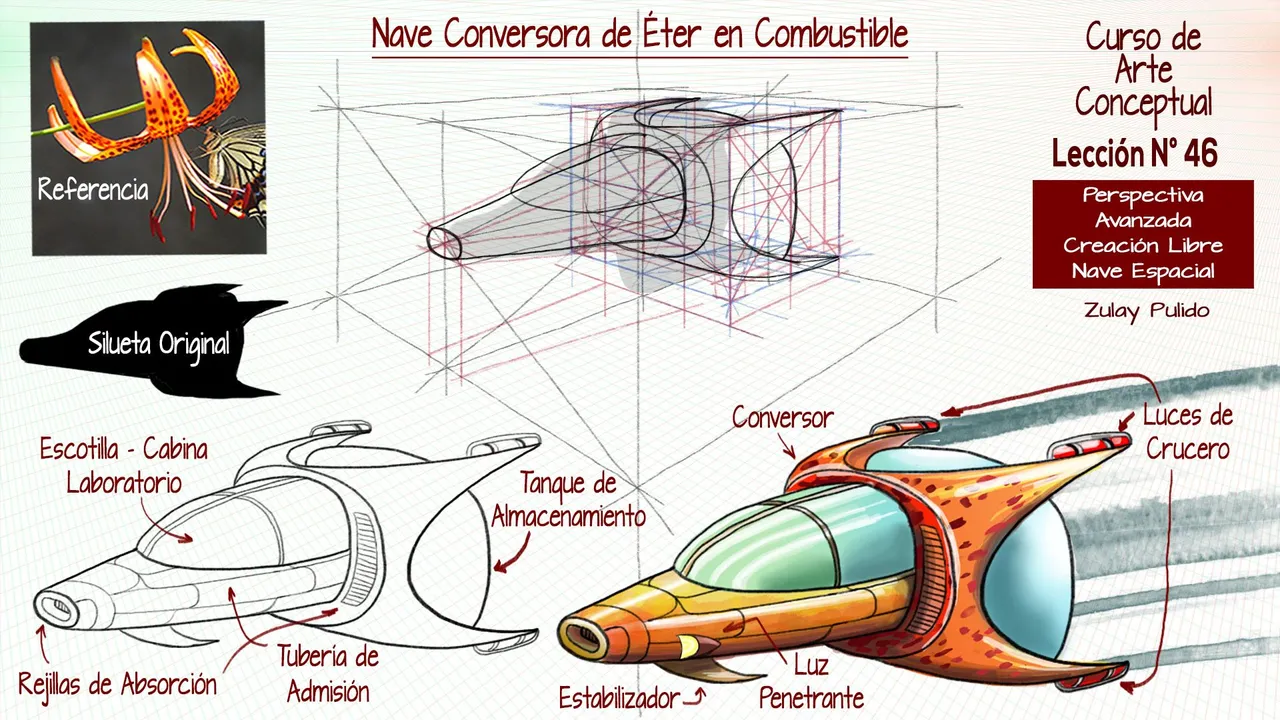
Concept Art Course: Lesson 46 (Spanish - English)
Hello, dear friends Hivers.
I'm Zulay Pulido, Painter Apprentice, with Philosophical Thought.
“ Art attracts us only when it reveals secrets in us.” - Jean Luc Godard
All the drawings in this publication are my own.
Today is Tuesday, January 4, 2022.

Curso de Arte Conceptual: Lección 46 (Español – Inglés)
Hola, queridos amigos Hivers.
Soy Zulay Pulido, Aprendiz de Pintura, con Pensamiento Filosófico.
” El arte nos atrae solamente cuando revela en nosotros secretos.” - Jean Luc Godard
Todos los dibujos de esta publicación son de mi autoría.
Hoy es martes 4 de enero de 2022.
At the dawn of this year 2022, I bring you the Lesson N° 46, of my works of the Conceptual Art Course that I am doing virtually.
Today, I will continue with a new Advanced Perspective module.
The assignment is about creating a new Space Ship that will participate in a contest.
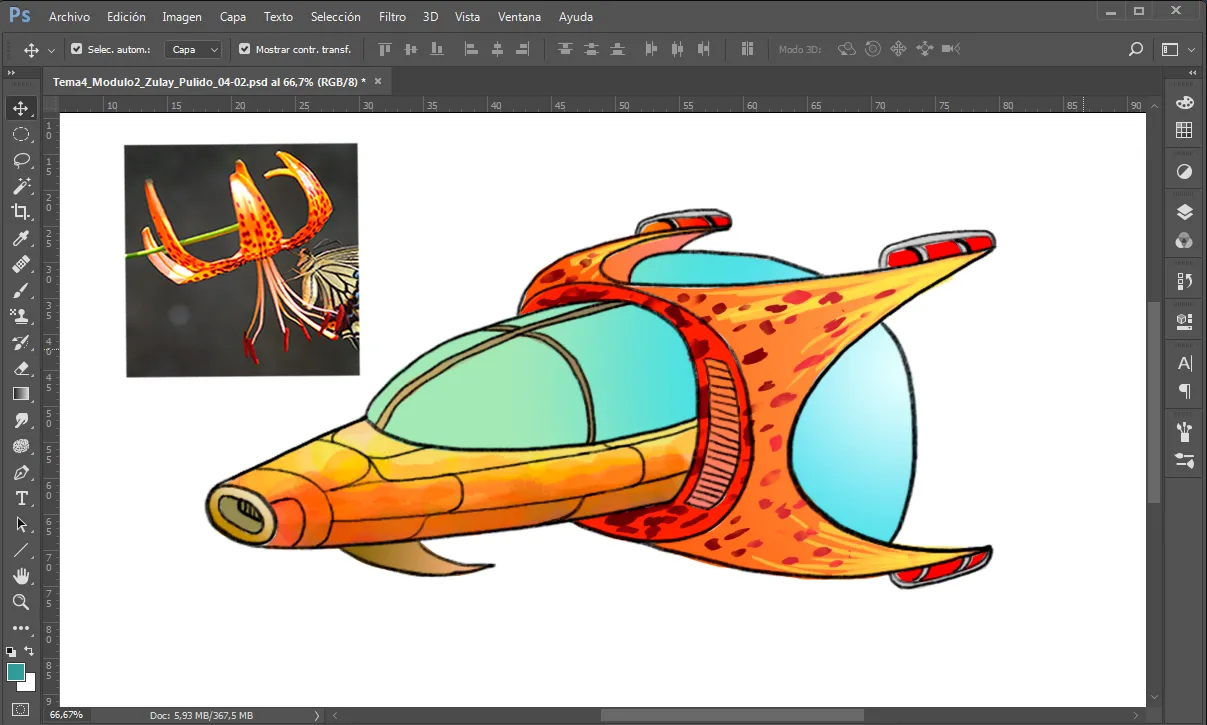
The task is to take a random object as a reference and build a Spaceship that looks like the object. I chose an exotic flower with warm colors to guide me, but it doesn't necessarily have to look like a flower.
The great difficulty with this drawing is that I have to do it under strict Perspective rules, starting from a small interesting silhouette.
The Conceptual Art requires us to know and understand the component elements of each object that we want to draw.
It is important to do previous research to find out how the parts and devices look like in real reference photos on the internet, in order to master the names, what they are for, and how they work. This will result in a better result, that is, it will give more realism to the product of our work.
Finally, I added basic colors in a gradient, to give a better appearance, but I must clarify, that we have not yet seen the classes related to this topic.
To perform the tasks of this course, I recommend using free downloadable photographs (copyright-free), obtained from web pages, such as https://www.pexels.com/ https://pixabay.com/ https://unsplash.com/ and other similar ones, since they have a huge amount of images and are of great quality.
Task: Build a Spaceship attached to the correct Perspective.
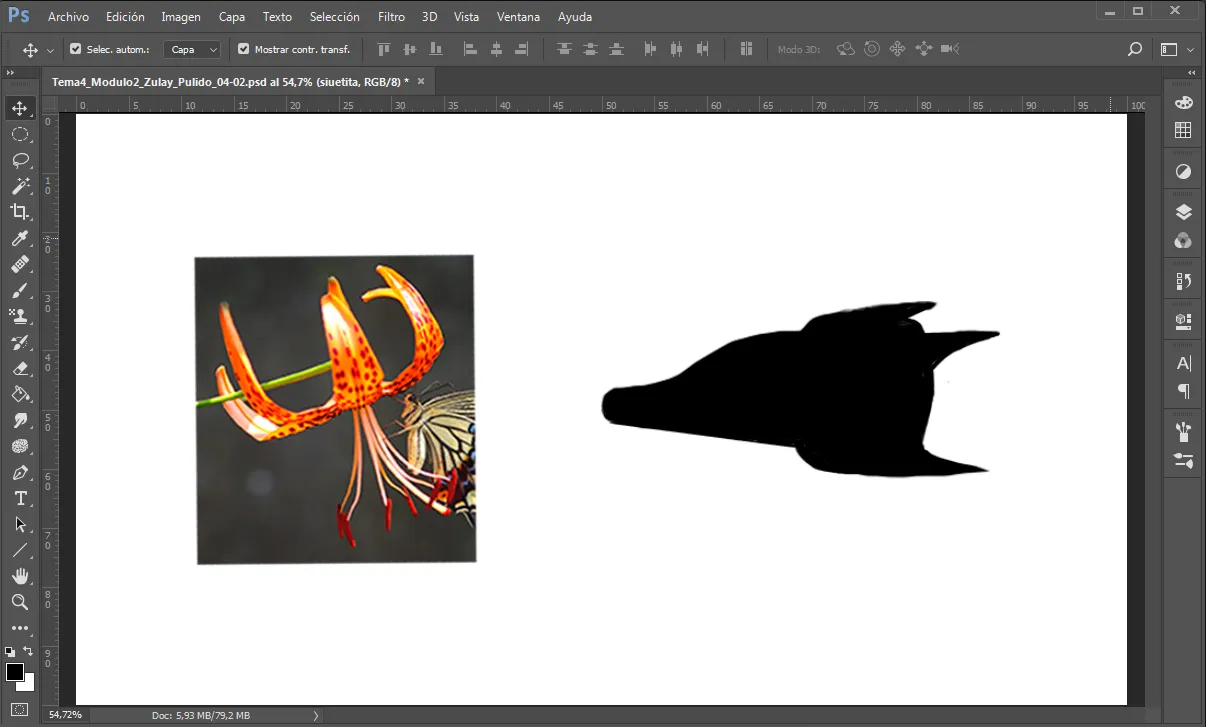
Step N° 1: Place in Photoshop the photo downloaded from the internet.

Image by dae jeung kim on Pixabay
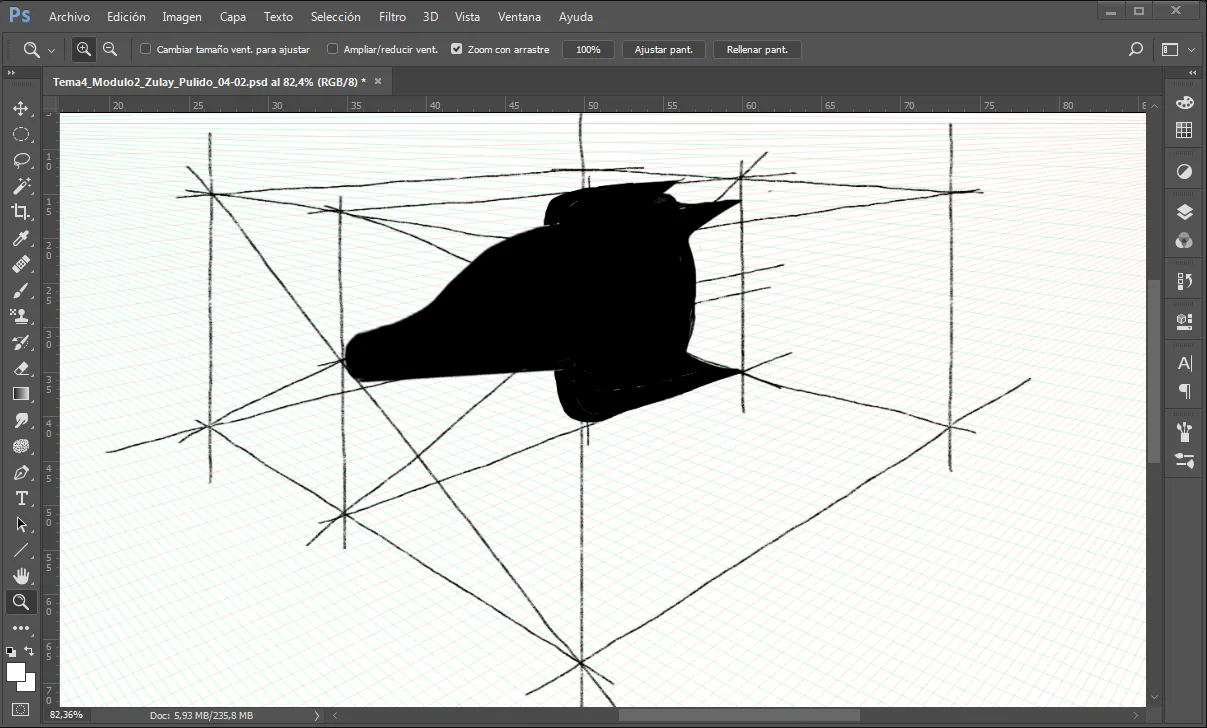
Step 2: Create a silhouette of a SpaceShip that looks like the selected exotic flower, but with SpaceShip characteristics.
Step 3: Prepare a Perspective Mesh in Carapace and upload it to Photoshop.
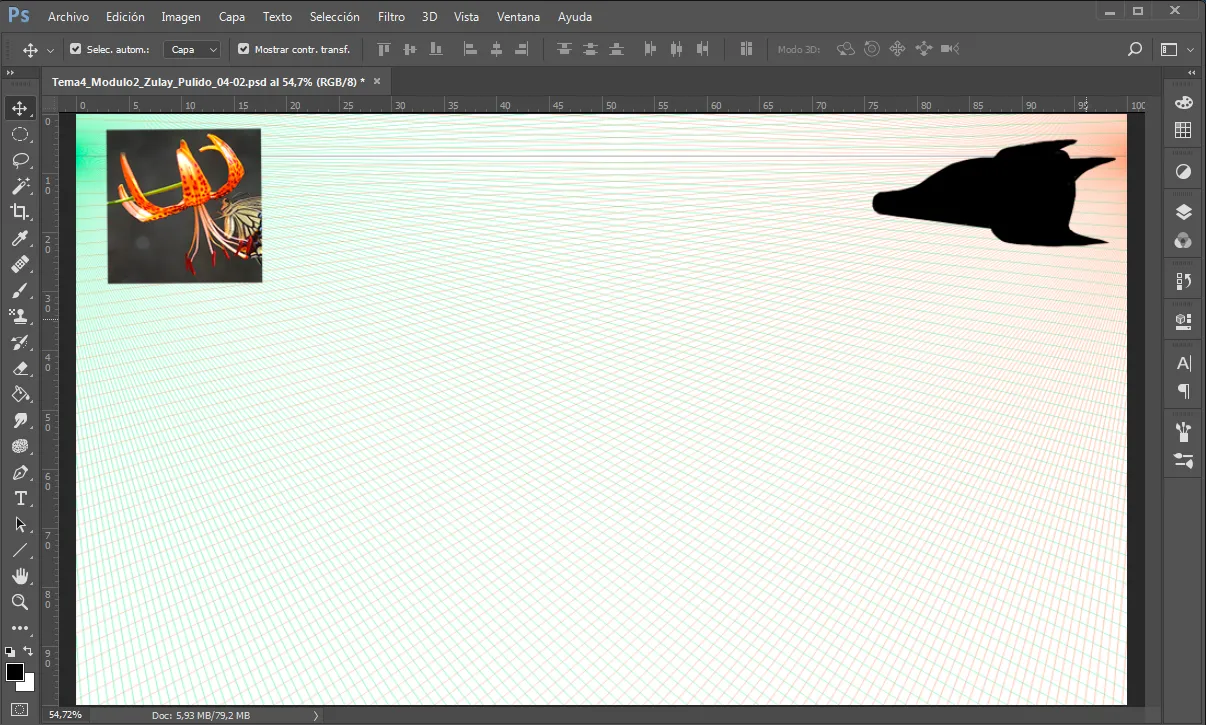
Step N° 4: Build a Cube that will contain the drawing.
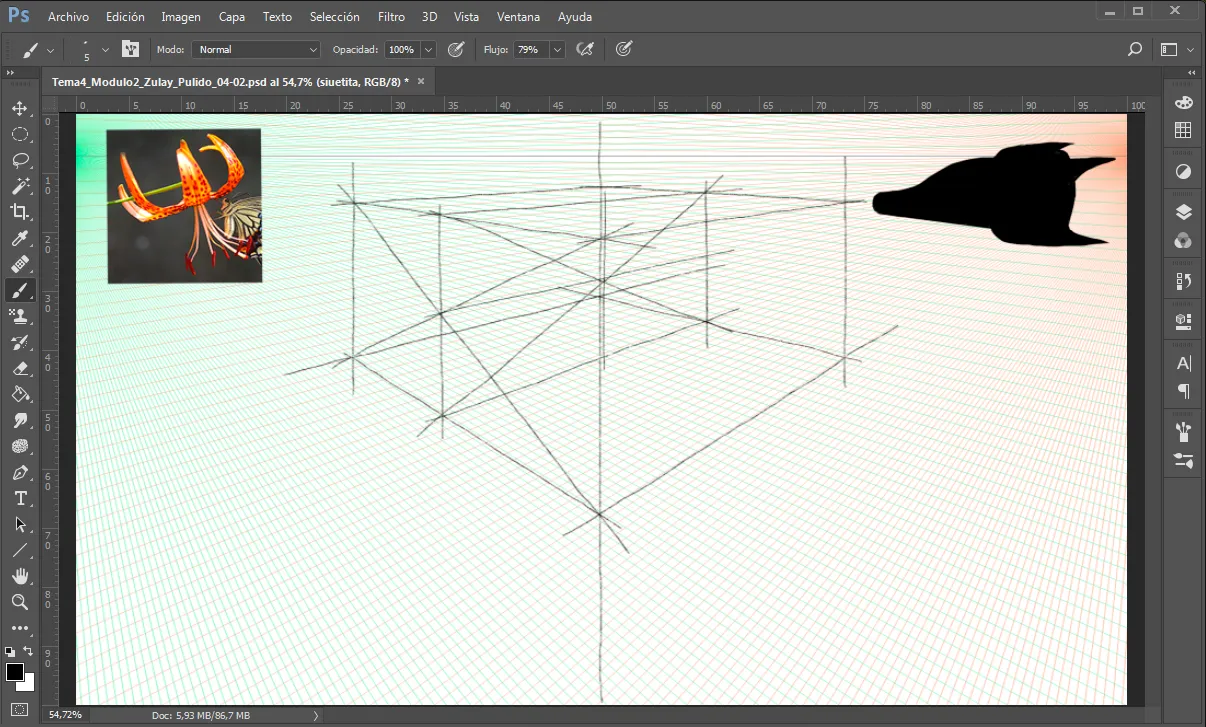
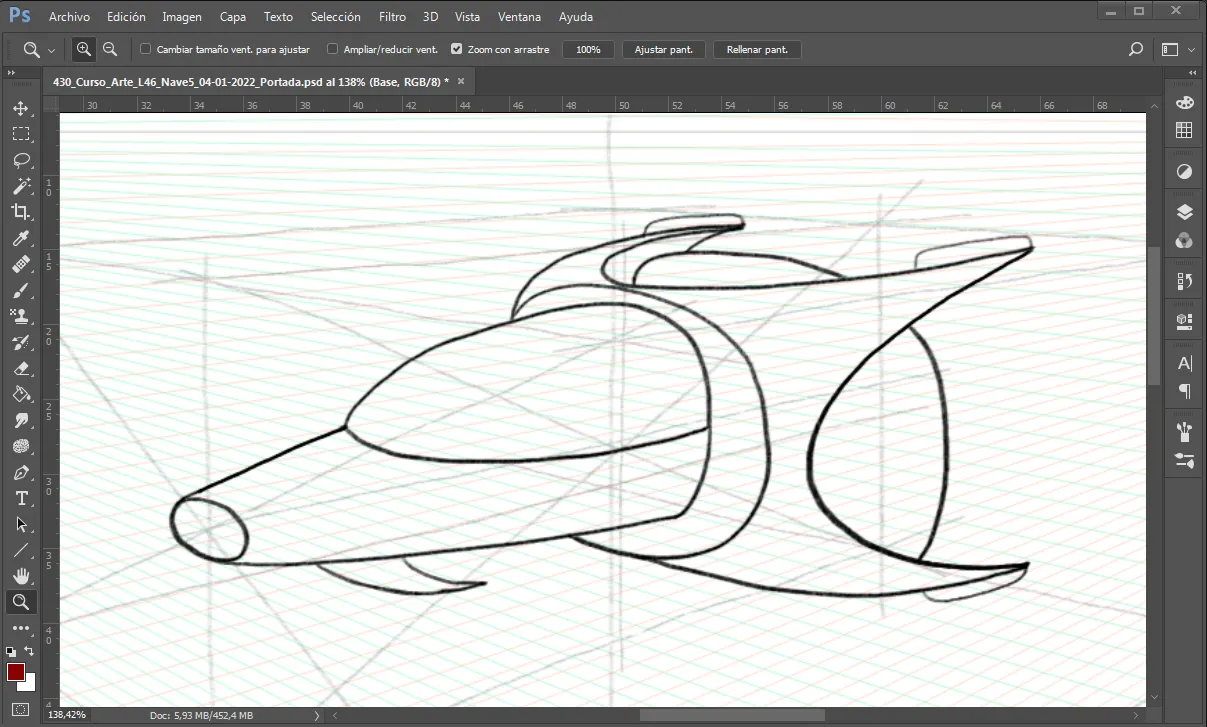
Step N° 5: Draw the Silhouette in Perspective inside the cube.
Step N° 6: Create the whole coordinate system that will allow drawing the object with more fidelity, according to the Perspective achieved.
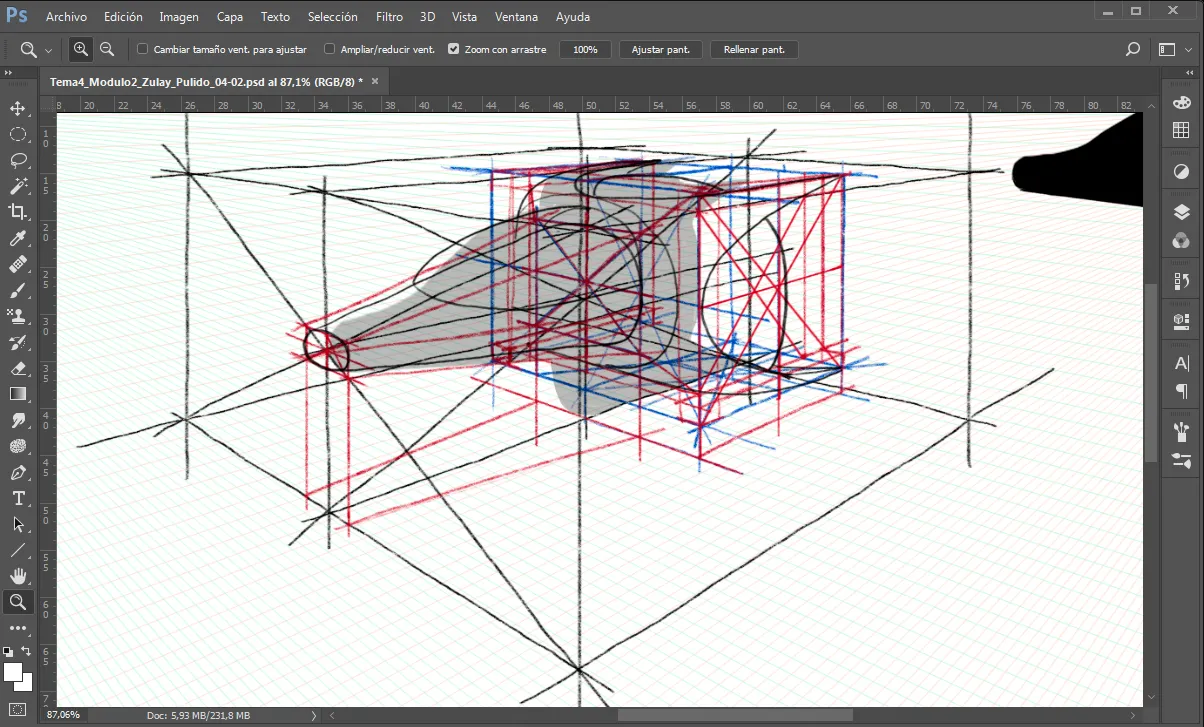
Step N° 7: Draw the outline of the object following faithfully the coordinate system.
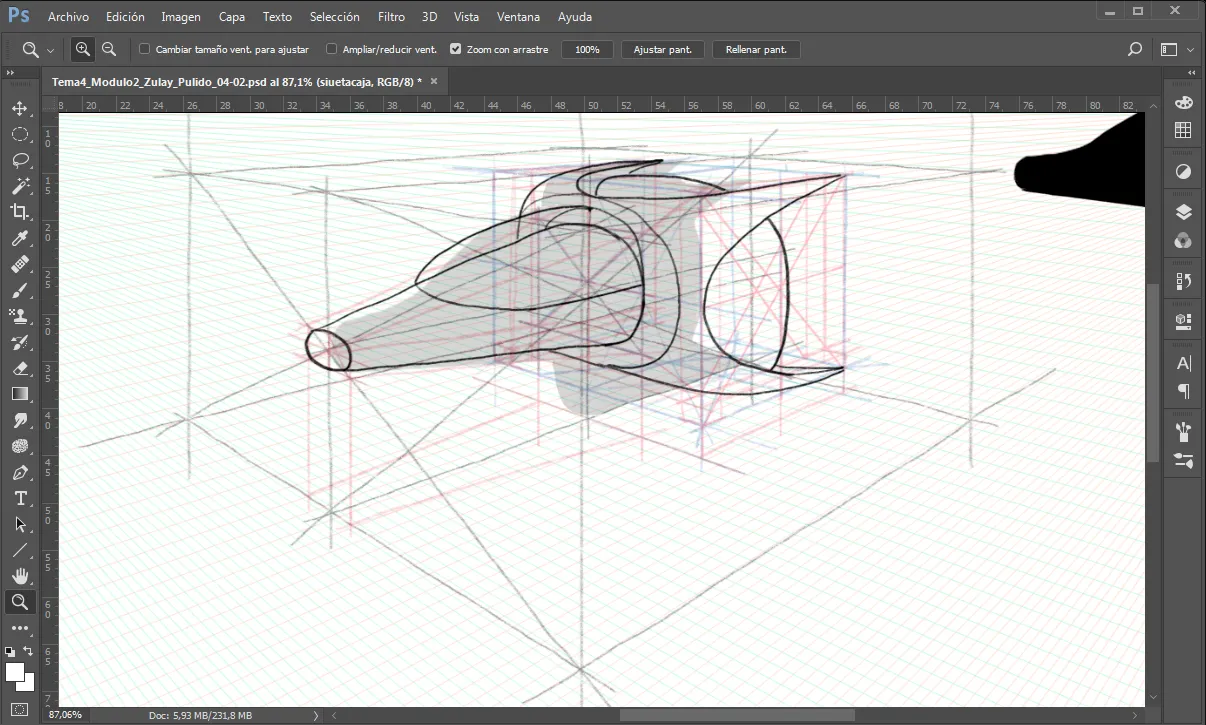
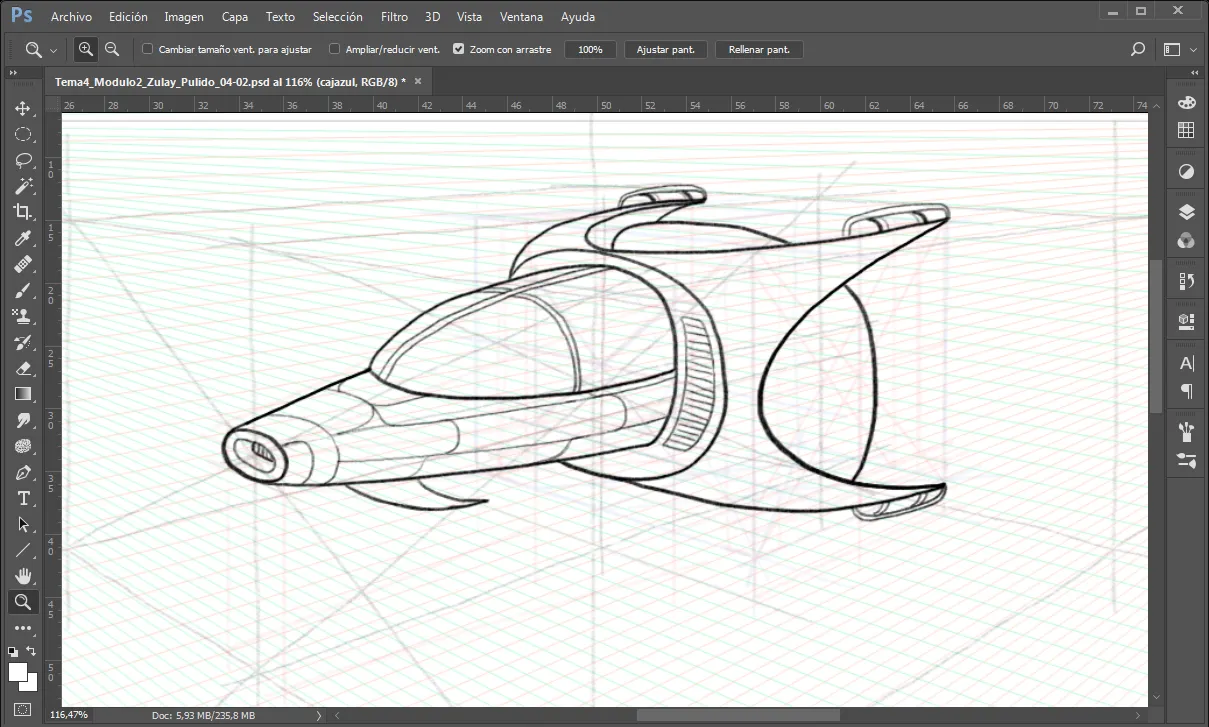
Step N° 8: Clear the background of the Perspective mesh with all the construction lines and increase the size of the object.
Step N° 9: Draw the details of the object.
Step N° 10: Paint basic colors.
Step N° 11: Apply shadows and lights to make it more eye-catching.
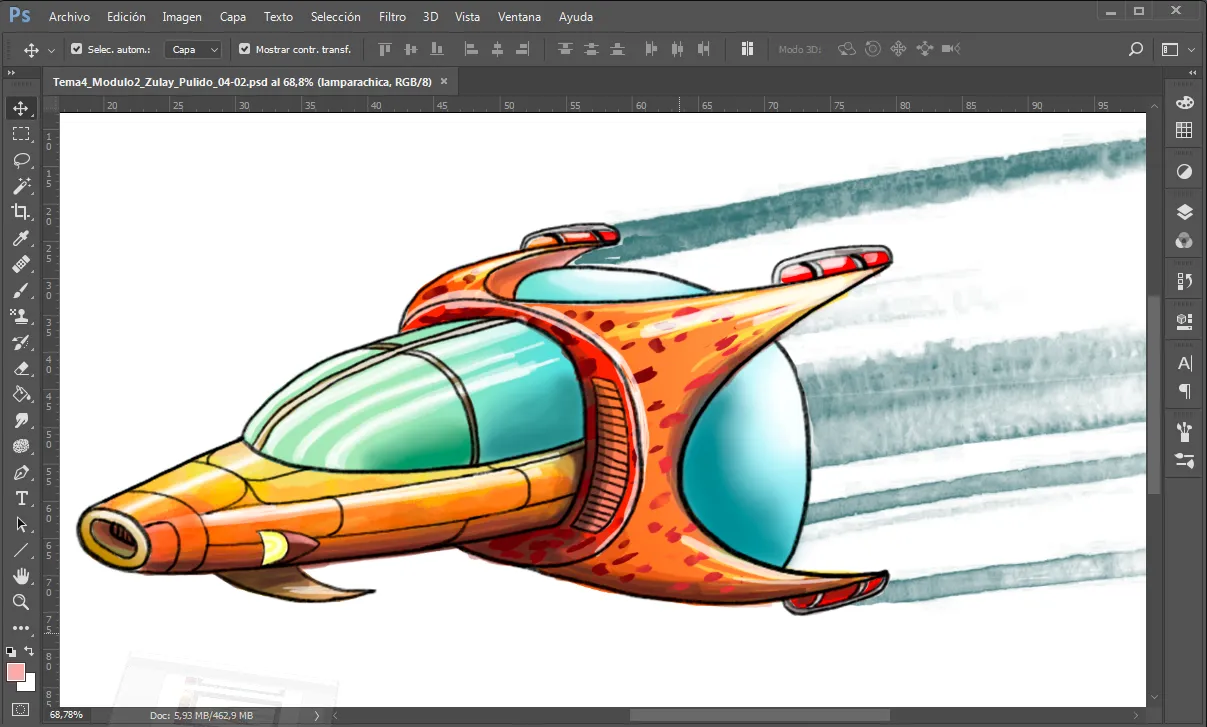
Final result:
It took me eight (8) hours to do this job.
This task was done in Photoshop 2017 with my Star 03 V2 XP-PEN Graphics Tablet.
I hope it is of interest and benefit.
If you would like to visit the above lesson, you can use the following link: Go to Lesson No. 45.
En el amanecer de este año 2022, les traigo la Lección N° 46, de mis trabajos del Curso de Arte Conceptual que estoy realizando de forma virtual.
Hoy, continuaré con un nuevo módulo de Perspectiva Avanzada.
La tarea trata sobre crear una nueva Nave Espacial que participará en un concurso.
El trabajo consiste en tomar como referencia un objeto cualquiera y construir una Nave Espacial que se parezca al objeto. Escogí un una flor exótica de colores cálidos para guiarme, pero no necesariamente debe quedar ni quedó igual a la flor.
La gran dificultad que acarrea este dibujo es que debo hacerlo bajo estrictas normas de Perspectiva, partiendo de una pequeña silueta interesante.
El Arte Conceptual requiere de conocer y entender los elementos componentes de cada objeto que queremos dibujar.
Es importante hacer una investigación previa para descubrir cómo se ven las piezas y dispositivos en fotos reales de referencia en internet, con el fin de dominar los nombres, para qué sirven y cómo funcionan. Esto redundará en un mejor resultado, es decir, le dará más realismo al producto de nuestro trabajo.
Finalmente, le añadí colores básicos en degradado, para dar una mejor apariencia, pero debo aclarar, que aún no hemos visto las clases relacionadas con este tema.
Para efectuar las tareas de este curso, recomiendo utilizar fotografías de descarga gratuita (sin derechos de autor), obtenidas de páginas web, tales como: https://www.pexels.com/ https://pixabay.com/ https://unsplash.com/ y otras similares, ya que tienen una inmensa cantidad de imágenes y son de gran calidad.
Tarea: Construir una Nave Espacial apegada a la correcta Perspectiva.
Paso N° 1: Colocar en Photoshop la foto descargada de internet.
Imagen de dae jeung kim en Pixabay
Paso N° 2: Crear una silueta de una Nave Espacial que se parezca a la flor exótica seleccionada, pero con características de Nave Espacial.
Paso N° 3: Preparar una Malla de Perspectiva en Carapace y subirla a Photoshop.
Paso N° 4: Construir un Cubo que contendrá el dibujo.
Paso N° 5: Dibujar la Silueta en Perspectiva dentro del cubo.
Paso N° 6: Crear todo el sistema de coordenadas que permitirá dibujar con mayor fidelidad el objeto, de acuerdo a la Perspectiva lograda.
Paso N° 7: Trazar el contorno del objeto siguiendo fielmente el sistema de coordenadas.
Paso N° 8: Despejar el fondo de la malla de Perspectiva con todas las líneas de construcción y aumentar el tamaño del objeto.
Paso N° 9: Dibujar los detalles del objeto.
Paso N° 10: Pintar colores básicos.
** Paso N° 11:** Aplicar sombras y luces para hacerlo más llamativo.
Resultado Final:
Hacer este trabajo me tomó ocho (8) horas.
Esta tarea fue realizada en Photoshop 2017 con mi Tableta Gráfica Star 03 V2 XP-PEN.
Espero que sea de tu interés y beneficio.
Si deseas visitar la lección anterior, puedes utilizar el siguiente enlace: Ir a la Lección N° 45
Mis Redes Sociales personales son:
Facebook: https://www.facebook.com/zupulido,
y Twitter: https://twitter.com/zupulido, pero no las uso con frecuencia.
Sin embargo, las de la FAVTachira,
Facebook: https://www.facebook.com/FAVTachira/,
Twiiter: https://twitter.com/favtachira
e Instagram: https://www.instagram.com/favtachira/,
sí se actualizan constantemente.
If you liked this post, I thank you for leaving your kind comment and some recommendations to improve my work.
Remember, you can find me at @librepensadora
Greetings from Venezuela, a country with Great Drawers.
Si te gustó esta publicación, te agradezco dejar tu gentil comentario y algunas recomendaciones para mejorar mi trabajo.
Recuerda, puedes encontrarme en @librepensadora
Un saludo desde Venezuela, un país con Grandes Dibujantes.
Welcome dear friend.
I recommend you join the @theterminal Community, the best option that exists in Hive, specialized in teaching the most advanced techniques and methods of creating quality articles. That will undoubtedly serve you throughout your journey through this important Blockchain.
If you want to be part of this great initiative, you just have to contact via Discord to @brittandjosie or @justclickindiva
Bienvenido, querido amigo.
Te recomiendo unirte a la Comunidad @theterminal , la mejor opción que existe en Hive, especializada en la enseñanza de las más aventajadas técnicas y métodos de creación de artículos de calidad. Eso te servirá, indiscutiblemente, en todo tu trayecto por esta importante Blockchain.
Si deseas formar parte de esa grandiosa iniciativa, solo tienes que contactar, a través de Discord, a @brittandjosie o @justclickindiva