Welcome to the Golem Overlord Module Guide!
The purpose of this series of guides is to introduce you to the features and mechanics of modules and crafting in Golem Overlord. This is the fourth post of the series and will focus on crafting.
Need to Know: Modules, the Pyrite Forge, and Forge Sigils
If you are not already familiar with the basics of modules, the Pyrite Forge, and Forge Sigils you should read the first three posts in this series before continuing with this section of the guide.
- Golem Overlord Module Guide: Module Basics
- Golem Overlord Module Guide: The Pyrite Forge
- Golem Overlord Module Guide: Forge Sigils
Introducing Crafting
In this guide, I will try to make the strongest possible ultra amplifier. Starting with one ultra amplifier and five superior amplifiers.
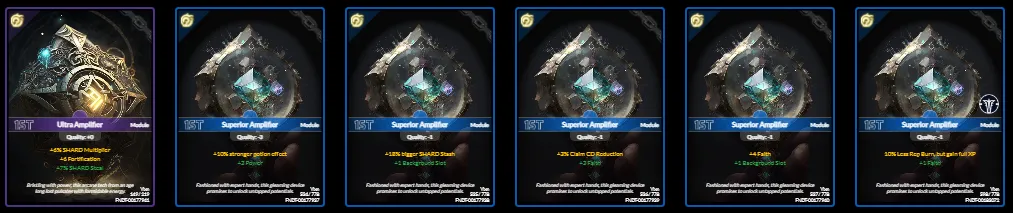
My Forge Sigil Inventory
Before you start crafting, I recommend reviewing your inventory of Forge Sigils carefully and creating a plan of operations for what you want to accomplish. Here is the material I am working with.
- (5) Smelter's Trinity Enigma (Orange):
- 10% chance nothing happens
- 00% chance for a small stat
- 15% chance for a medium stat
- 75% chance for a big stat
- (5) Void Stone Enigma(Orange):
- 40% chance nothing happens
- 30% chance to reroll all stats
- 5% chance to downgrade and reroll
- 5% chance to destroy
- 20% chance to upgrade
- (3) Transmutative Orb Enigma (Orange): removes not a strongest modifier on a module and adds a random modifier on a module.
- (2) Transmutative Orb Invaluable (Yellow): removes not a strongest modifier on a module and adds a medium or lower modifier on a module.
- (2) Transmutative Orb Exceptional (Purple): removes a random modifier on a module and adds a random modifier on a module.
- (2) Transmutative Orb Precious (Blue): removes a random modifier on a module and adds a medium or lower modifier on a module.
- (1) Nullification Crystal Enigma (Orange): removes a weakest magnitude modifier on a module.
- (1) Nullification Crystal Invaluable (Yellow): removes a modifier on a module that is not the strongest.
- (10) Arcane Dice Invaluable (Yellow) = rerolls 2 stat values on a module.
Note: it is not recommended to use any crafting material above purple on lower modules. In an ideal scenario, it is best to use your forge sigils and pyrite on a yellow or higher module. I am using these only for demonstration purposes for the sake of this guide.
My Planned Order of Operations
After creating and reviewing my inventory, this is my planned order of operations. Thanks to @megabloop for helping me with this. He wanted me to remind everyone that void stones are for hardcore gamblers only! Void Stones are risky to use because of the chance of destroying or downgrading a module.
- Step 1: use Void Stones on the blue superior amplifier and see if I get lucky with an upgrade. If I get a second purple I may use the rest on one of the purple to go for yellow.
- Step 2: use Transmutative Orbs to remove/add stats
- Step 3: use Nullification Crystals to remove weak modifiers
- Step 4: Possibly repeat steps 2 and 3.
- Step 5: use Smelter's Trinity to add stats
- Step 6: use Arcane Dice to reroll stat values
- Step 7: add quality to final module(s)
- Step 8: Use Yixn's Hair to duplicate the strongest module
With my plan in place, I'm ready to begin crafting!
Step 1: Void Stones (high risk, for gamblers only!)
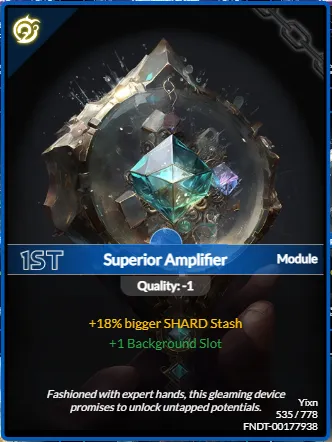
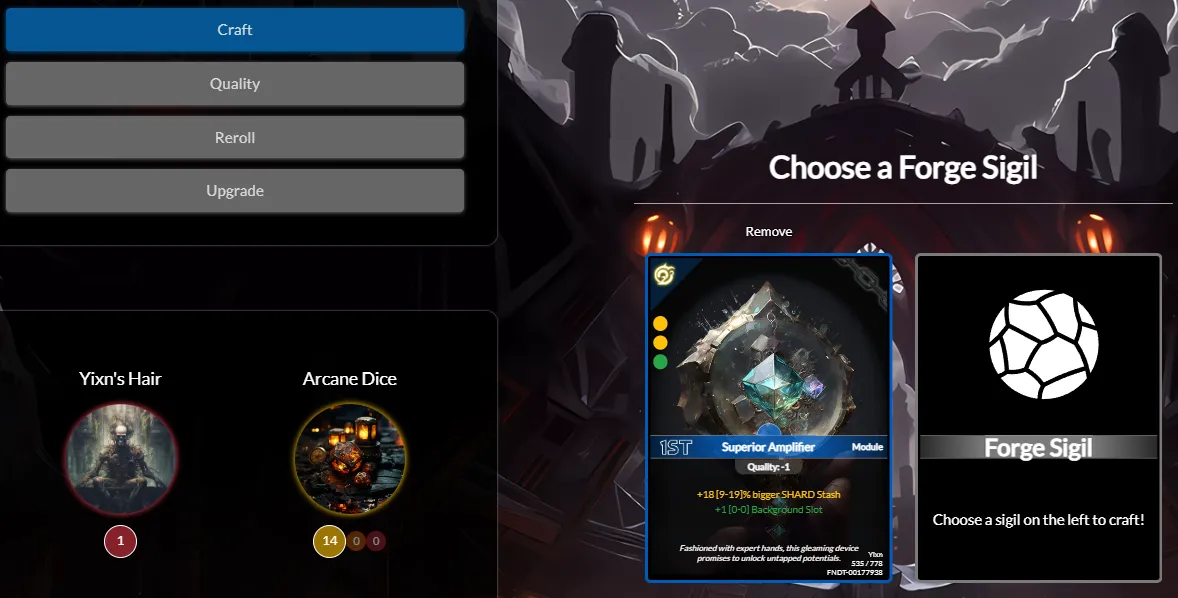
To begin crafting, I will select one of the weakest blue superior amplifiers from my inventory.
From the inventory, I can click on the module and select "Craft this Module."
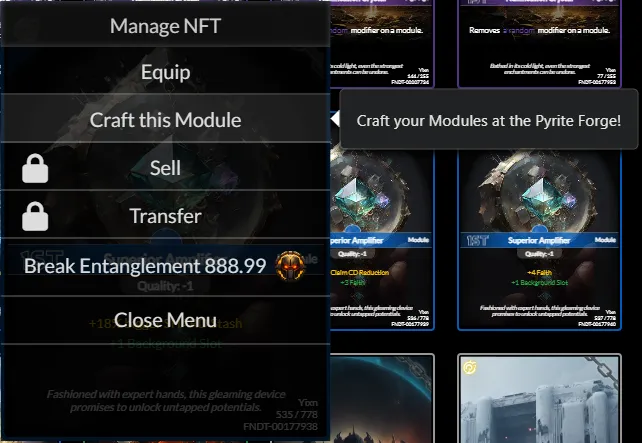
Clicking on "Craft this Module" brings me to this screen in the Pyrite Forge.
From this screen, I've selected the orange circle under the "Void Stone" on the left side of the screen. This adds the Enigma (Orange) Void Stone to the right side of the crafting pair.
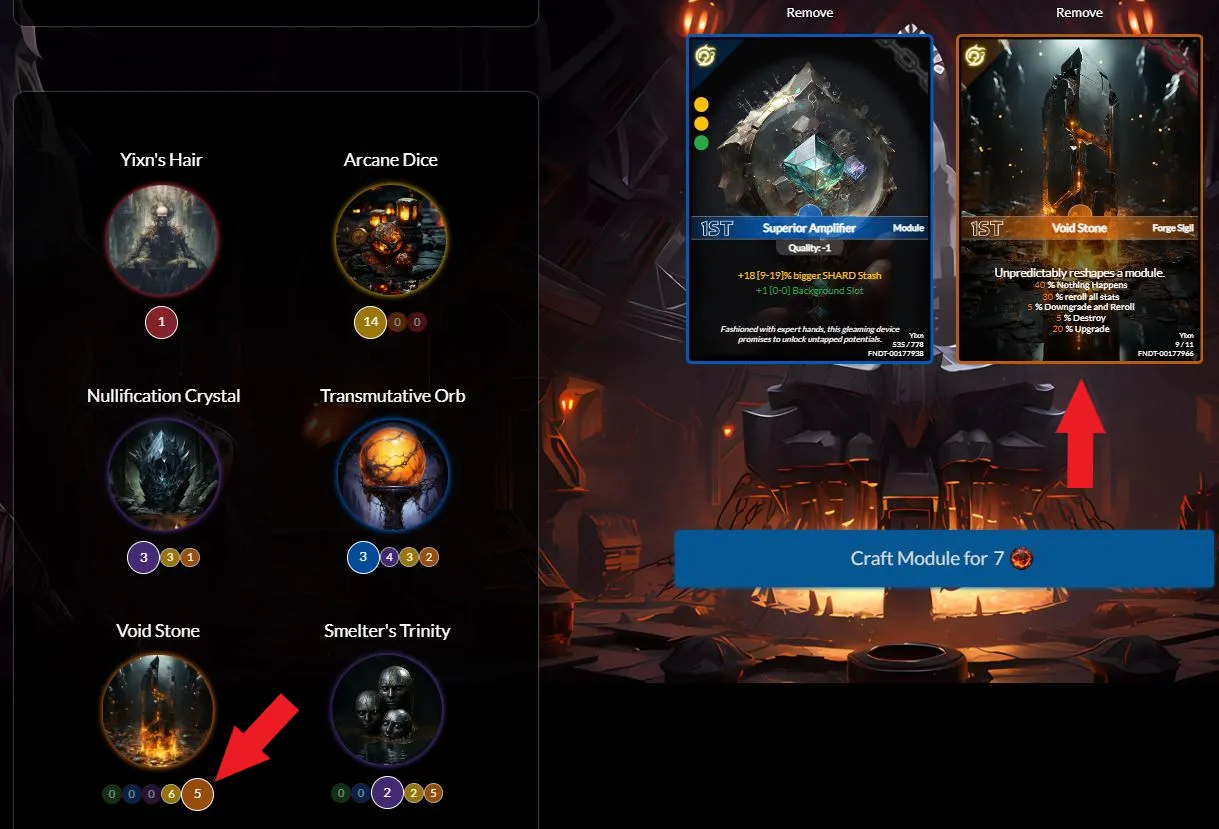
As a reminder, these are the possible outcomes of using the enigma (orange) void stone.
- 40% chance nothing happens
- 30% chance to reroll all stats
- 5% chance to downgrade and reroll
- 5% chance to destroy
- 20% chance to upgrade
It's very risky to use but I'm going for it anyway. I click on "Craft Module for 7" which means it will cost 7 pyrite to use this crafting feature.
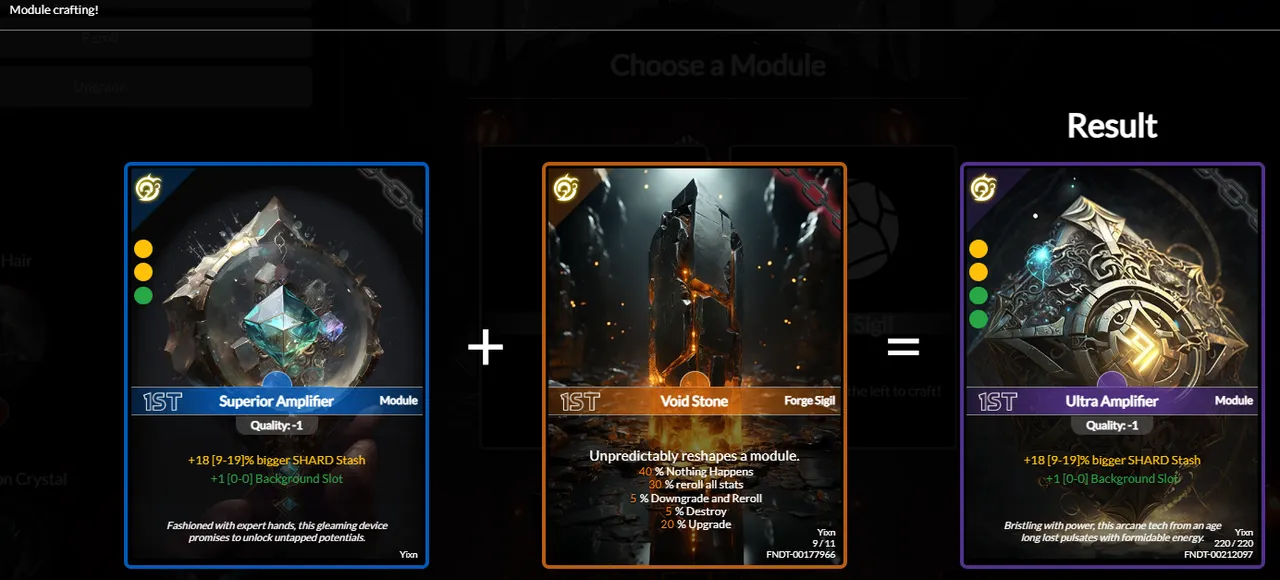
Here are the results from the first void stone! I'm not kidding, this was my first time using a void stone and I got lucky to hit the 20% chance of upgrade.
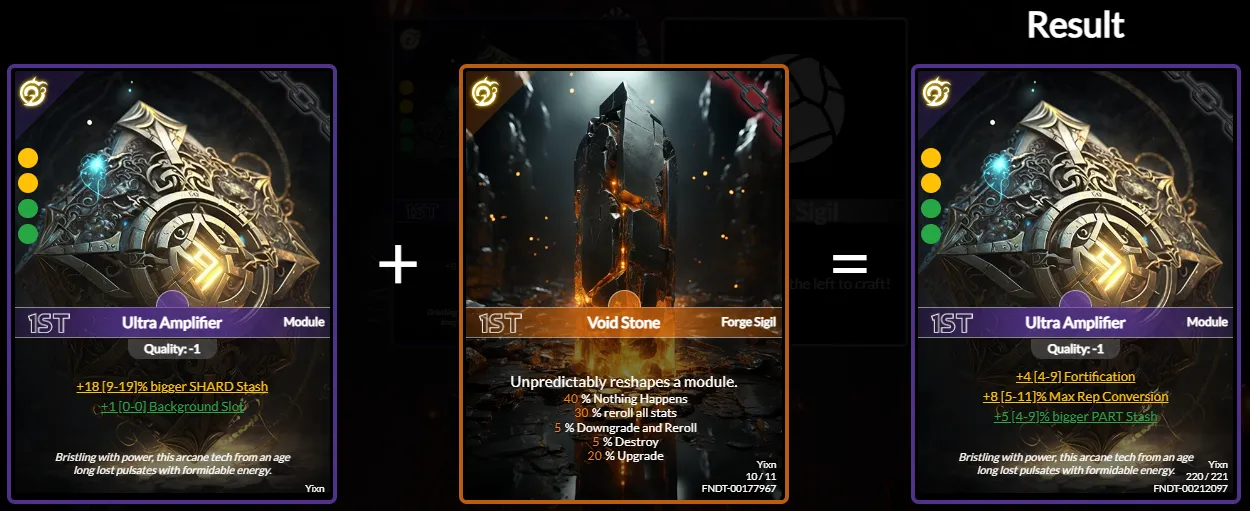
I'm going to try pushing my luck again to see if I can turn this purple Ultra Amplifier into a yellow Omega Amplifier using the rest of my Void Stones.
I've followed the same steps for crafting as shown previously: select from inventory, click "Craft this Module" from the inventory page, and then click the void stone from the left side of the page. As you can see from this screenshot, it costs 13 pyrite to craft the Ultra Amplifier as compared to the cost of 7 pyrite for crafting the blue Superior Amplifier.
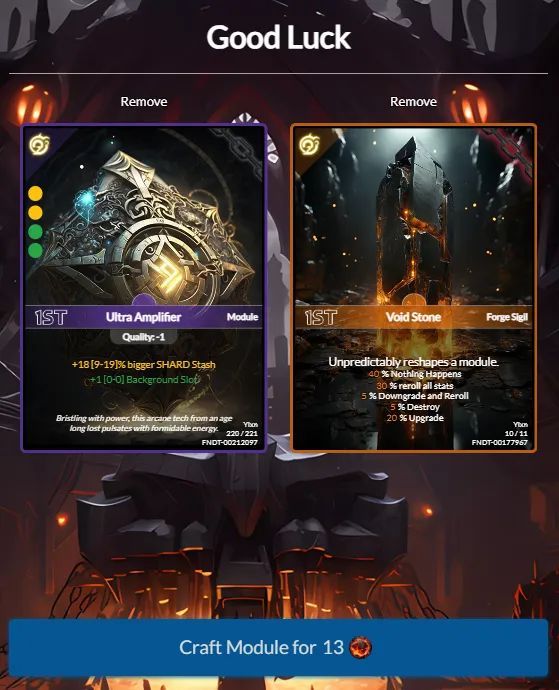
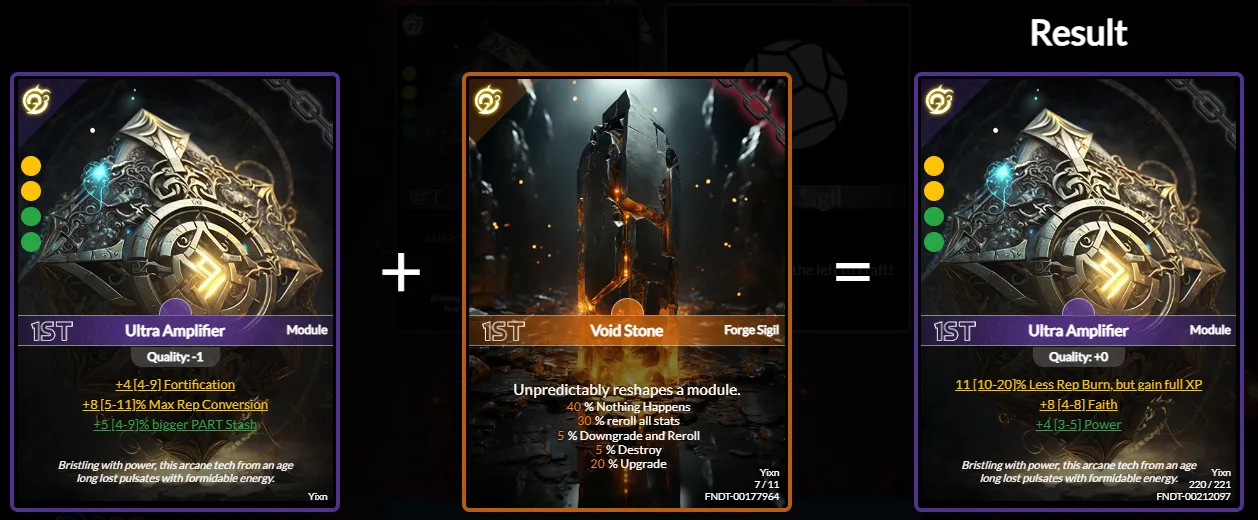
Result 2: This time I got the 30% chance and rerolled all stats. The module now has two medium stats and one small stat.
I have three more enigma (orange) void stones, so I'm going to try using them until I run out or get another upgrade.
Result 3: I got another 30% chance and rerolled all stats. This time I like the stats quite a bit, I think I will keep this one and try the last two void stones on my other Ultra Amplifier.
You will also notice that the quality changed from -1 to +0, this is important because upgrading from quality -1 to 0 is always an upgrade to stats.
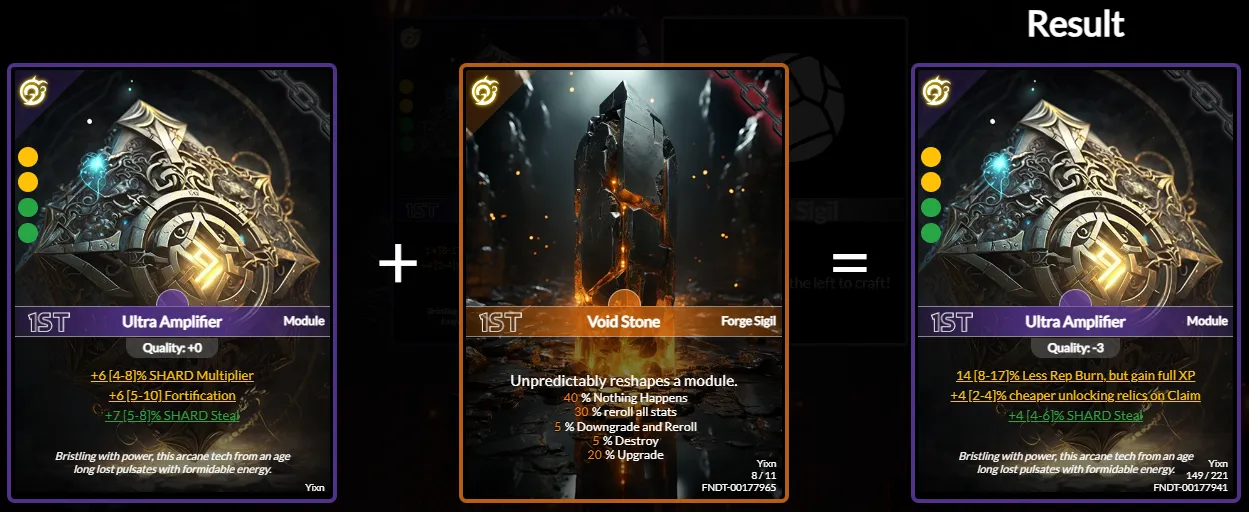
Result 4: Yet another 30% chance and rerolled all stats. This time I like the stats quite a bit, I think I will keep this one and try the last two void stones on my other Ultra Amplifier.
Unfortunately, the quality changed from +0 to -3 on this reroll. Note how the possible range for rep burn is now 8-17% instead of 10-20% like like the quality +0 amplifier from result 3. In this case, we got lucky being on the higher end of the roll at 14%.
Result 5: We got super lucky again on the final Void Stone and hit the 20% upgrade chance! The stats remained the same, but now we have a chance to get one big stat, two medium stats, and one small stat.
The quality is -3 so we will definitely want to upgrade that to at least +0 at some point.

Up Next - Golem Overlord Module Guide: Crafting Continued
In the next post, Golem Overlord Module Guide: Crafting Part 2 I continue using Forge Sigils to improve the yellow Omega Amplifier. I also add some quality to the module and discuss the ideal module stats.
Please leave feedback on this post in the comments or the Golem Overlord Discord. I'll do my best to keep it updated as a reference for players.
Video Guide
Golem Overlord player @viaxgg made this YouTube tutorial: Modules, Forge Sigils and Nano Tonics and posted the link in the Golem Overlord Discord. You may find it helpful so I wanted to include the link here at the end.