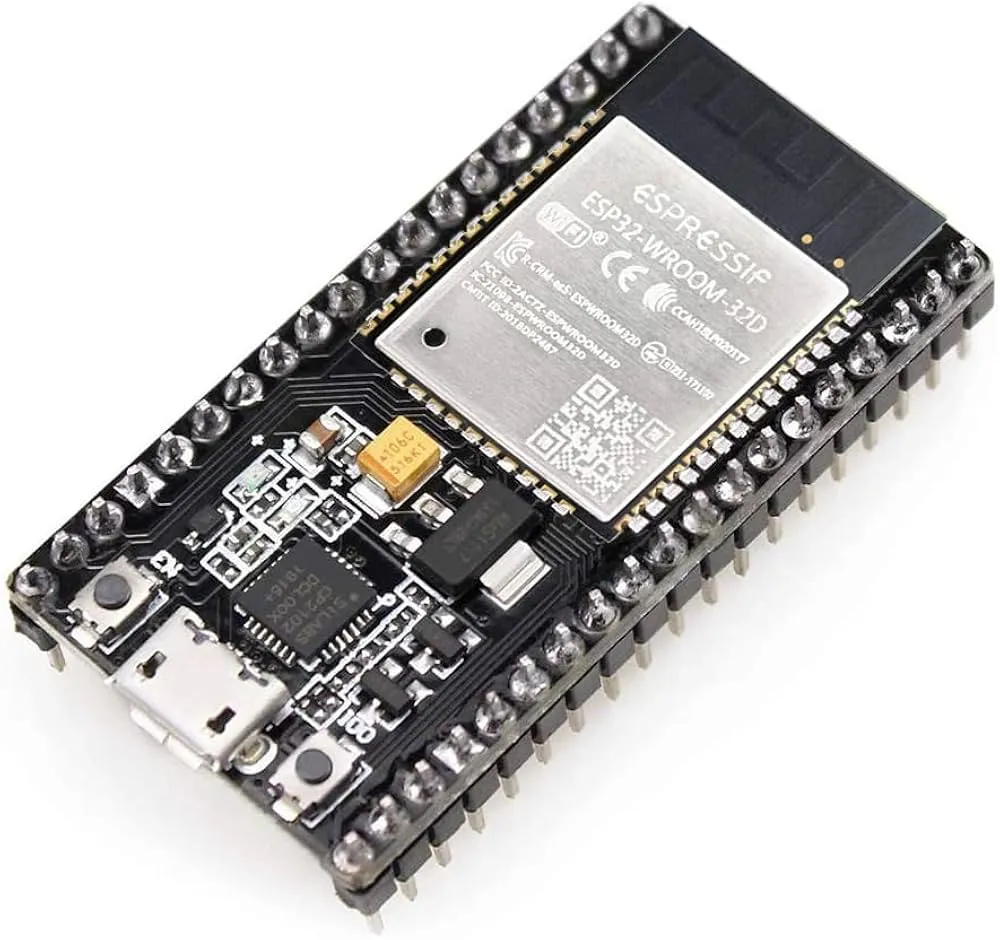
Esp32 is a very small and cheap chip, you can control many things with it and it can be very useful in our daily life.This is a very small chip that gives you Wi-Fi and Bluetooth, which makes it even better and more advanced.And it has a dual-core processor that further enhances its power.A host of features that make it ideal for hobbyists, engineers, and developers.
Why Choose the ESP32?:
1:dual core CPU:It comes with a dual-core processor which is very fast which makes it easy for us to do many things at a time.
2.Built-in Wi-Fi and Bluetooth:There is no need to buy any external audio to make it, rather it has Wi-Fi and Bluetooth modules at the same time, which makes it even smaller and a lighter chip.
3. Low Power Consumption:
The processor installed in it gives it the ability to use less energy.
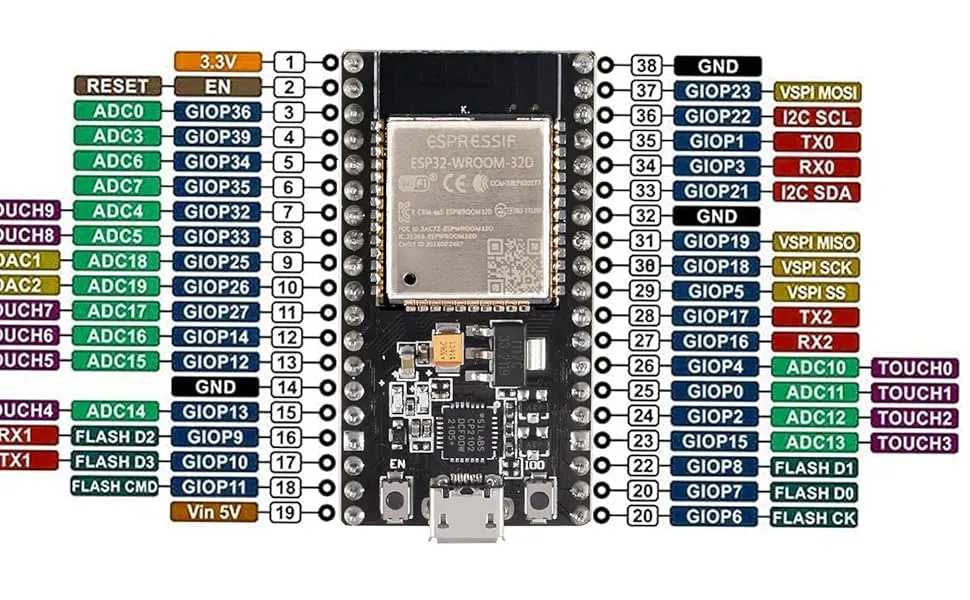
4. Rich I/O Options:And along with that it supports analog inputs, digital I/Os, touch sensors, PWM, I2C, SPI, UART.
5. Large Community and Library
And to learn and understand it, you can find many videos and information online that make it even easier.
Popular Uses of ESP32
Home Automation:
With this, we can control lights, fans, and many other things in our home that work on electricity.
RC Projects:
It helps us create projects from scratch because it already has Wi-Fi and Bluetooth and it's very easy.
Weather Stations:You can add sensors to it and check the weather in your surroundings.
Surveillance Systems:It has Wi-Fi and it allows us to add a camera module to it and do live streaming anywhere.
Wearable Tech:We can make some watches by attaching this play to it.
Programming the ESP32
If you are a mobile user and you don't have a PC, you can program it with the Arduino Driod.If you have a PC, you can also program it with the Arduino IDE.
Sample Project: Blink an LED
Let's create a simple project with it, the wiring and coding of which I have given you below.
** ESP32 Chip Variants**
ESP32-H2,ESP32-H2,ESP32-C6,ESP32-S3,ESP32-S2,ESP32-C3
To make this, you will need some wires and an LED.Here’s a basic code snippet to blink an LED using the Arduino IDE:
Programing code
void setup() {
pinMode(2, OUTPUT); // Built-in LED on most ESP32 boards
}
void loop() {
digitalWrite(2, HIGH);
delay(1000);
digitalWrite(2, LOW);
delay(1000);
}
The code uses pin 2, which is often connected to the on-board LED on most ESP32 development boards. But if your board does not have a built-in LED, or you want to connect an external one, follow this wiring.
Final Thoughts
The ESP32 is a game-changer for DIY electronics and IoT applications. Whether you're a student, hobbyist, or engineer, it's a must-have tool for modern embedded development. With its power, flexibility, and affordability, there's no limit to what you can create.And it is very easy to use.
What did you do with it and what problems did you encounter? You can tell me in the comment box.