Early on in this new venture in our lives, we decided we would be "all in!" That is pretty much how @roleerob has "rolled" his whole life. Why change now? 😉
So ... Having covered our adventures in wood chipping, I would now like to cover what we have done and learned related to composting.

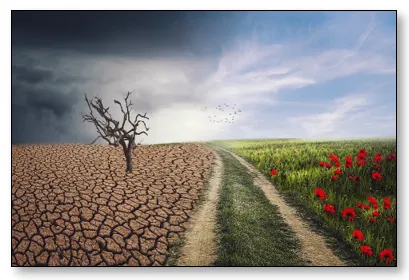
Lead image for @roleerob's "Back to Eden" gardening series, based on Deuteronomy 30:19
What is composting? Here is one excellent definition:
"Composting is the biological decomposition of organic waste such as food or plant material by bacteria, fungi, worms and other organisms under controlled aerobic (occurring in the presence of oxygen) conditions. The end result of composting is an accumulation of partially decayed organic matter called humus."
Note well, dear reader, the reference to "under controlled aerobic conditions." For the rich diversity of live organisms in the soil to properly perform their "magic," they (like us!) must have an adequate supply of air! And if they don't? Bad things happen!
With that, let's take a closer look!
- Interesting side note: For its illustration of a "backyard composter," on the Composting Wikipedia web page linked above, we see a picture of the same product we will be covering in this post!

"Hot" Composting with a YIMBY!
Over and over, throughout this adventure, we have seen repeated references to taking intentional steps to reduce the time natural processes typically need to complete their "magic."
"Hot" composting is a perfect example. The idea is to accelerate the decomposition process through somewhat artificial means. Specifically, to set it in motion inside a device not found in the natural world - a "backyard composter."
To illustrate, here is what we settled on, for our "hot" composter:


Photos: "Hot" composting with a YIMBY!
A YIMBY (more product information in the "Materials List" section below)! Both expense, as well as operation, wise, this seemed like a great choice.
Jumping straight to the time-savings aspect of why anyone would go to the trouble of using one of these, this is what the product literature sets, as far as expectations:
"Fill it up, give it a turn every other day with the built-in hand holds, and in as little as two weeks you'll have a nourishing batch of compost for your garden."
[emphasis added mine]
Note well, dear reader, it says "... as little as ..." Of course, you can just "jump right in" and have this little gizmo performing at this level "right out of the box!" Yes? No?
Yes, well, there's setting expectations. And then there is marketing ... Later, in the fine print, we read it could also take "... as much as ..." eight weeks. Okay, now we're getting a little closer ...
At the end of nine weeks, given how much of our growing season was already gone and hoping to "harvest" at least one more batch before snow began to fall, I emptied our YIMBY out, as shown in the 2nd and 3rd photos above.
The good news is that the resulting compost really did have a wonderfully earthy smell (or was that just the decomposed coffee grounds ... 😉), as well as a dark, rich appearance. As shown in the 4th photo, I spread this out at the base of some of our raspberry canes. 👍
The bad news? Well, it was quickly very clear to us there is a lot to learn to get this little gizmo to work in an optimal manner. Once we purchased a very helpful thermometer (more product information in the "Materials List" section below) designed for this purpose, we learned that we never actually got the temperature into the "hot" (minimum of 130°F / 54°C) range!? 😧 The best temp we ever achieved was ~ 120°F / 49°C and, most of the time, hovered around 110°F / 43°C.
All right then. True confessions ... 😏 Rather than "hot" composting, the best we managed in our first season was more like "lukewarm" composting ... 😞
But, hope springs eternal, so we will do better next season! 😊
"Cold" Composting
In contrast with the "hot" composting method described above, we also had "cold" composting, inside a simple wire fence enclosure (next to our shed and to the right of the tomatoes in our Earthboxes in the 2nd photo below) we made from materials we had around:


Photos: "Cold" composting inside our simple wire fence enclosure
What were we going to put in it? Pretty much anything and everything which did not end up in the YIMBY! From our yard, we had grass clippings, leaves from our discarded irises, weeds, etc. From our kitchen, we had coffee grounds and any plant-derived products which did not belong in with our worms (subject of our next post).
We followed this simple step-by-step outline, throughout the summer:
- Place plants on a patch of soil to dry in the sun. For 2 to 3 days.
- Pick these piles up with our bedding fork and spread them out over our lawn.
- Run our lawn mower back and forth over them and catch the chopped up remains in its rear bag.
- Dump the mower bag contents into the wire enclosure.
- Water every 2 to 3 days, to keep the compost pile moist down inside.
- Every 7 to 10 days, simply lift the fence up off of the compost pile. With the bedding fork, turn the pile over, top to bottom, off to the side.
- Put the fence back in place. With the bedding fork, put the compost bed back into it. Which "fluffs" it up, to maximize aeration.
Starting into it, we were concerned about "overflowing" this little fenced enclosure and having to figure out where else we would put all of our compostable material.
Not a problem!
In the pictures above, you can see we didn't even get it half full. The maximum depth the compost bed ever reached was maybe 15 to 18 inches (38 to 46 cm). We were amazed at how well this worked considering, in past seasons, how many bags of various plant-based material we were accustomed to taking out to our curb. To be hauled away by our waste removal service to be dumped into a local landfill somewhere ...
We will never
take another load of
any sort of plant-based
waste to our curb, for trash
disposal again!
take another load of
any sort of plant-based
waste to our curb, for trash
disposal
There is value in all of it, even the weeds! For it can and now will be turned back into a nutritious base in the soil, from which future generations of plants can sprout and flourish!!
Lessons Learned
As a lifelong committed "continuous learner," I truly enjoy learning new stuff. As a "contrarian," I have never wanted the old adage "you can't teach an old dog new tricks" to apply to me! 😉

With each of these posts on our new adventure, I will be putting what I have learned into this section. I trust in investing the time to write it, dear reader, if you ever choose to travel a similar path, that you may find something of value and so save yourself from making mistakes similar to ours.
Dry It Out!
Juicy green weeds or grass, when freshly dug up or mown, is a bit of a problem, although I suspect others might disagree. We found that simply leaving any items headed for composting out in the sun for a day or two, before chopping it up with our lawn mower (see below) worked very well.
In some climates, that might not work so well. Here, it seldom rains and we have a lot of sunny days. Note that the original green plant material does not get completely dried out in this period of time, but it is dry enough to make chopping it up easier.
Chop It Up!
By far the most important lesson we learned working on composting was the value of chopping up the plants we intended to mulch - whether hot or cold. The "secret weapon?" Our lawn mower!
Ours has a bag on the rear of it, so just running the mower back and forth over the dried (see above) plant material works well. We then just take the bag off and dump it in the "cold" compost pile!
"Green" vs. "Brown" Ratios in Composting
This is something we read about being important. Classically referred to in the "instructions," you are told the compostable material should be added in a ratio of 2:1, brown to green. Supposedly, in turn, part of keeping the carbon / nitrogen ratio high - ~ 30:1. All while balanced with the proper moisture content. And turning it over, from time to time, for the proper aeration ...
Sounds "easy peasy" right?
Yeah, well ... Starting with learning that each compostable material has its own, unique carbon / nitrogen ratio, we did not find this to be at all "easy peasy". We can say we have a ways to go to get this figured out. And there is the good news that, even if you get this wrong, your compostable material will still decompose. Eventually ... 😏
Hopefully, we will be able to share some "success stories" next season.
There is no question many of you will have your own wisdom and experience to add to what you have read about in this post. As always, I'd love to receive any feedback you may be inspired to provide!
Materials List
The phrase "time and materials" has long been a standard reference at the beginning of undertaking any project. From my father, I learned his oft-quoted reinforcement that, to do a job well, you needed to have the right tools.

With this, he also taught me that we would almost certainly not have been the first person to run up against whatever challenge was in front of us. Requiring some new tool ... We just had to put in the effort (this was BG! Before "Google It!" 😉) to find it.
So ... As a part of these posts going forward, dear reader, I will always provide you a listing of what I have found to be of value. Will it be the "right" tool? Is there a better one? I will always welcome input on these questions in the comments! 😊
YIMBY - FCMP Outdoor IM4000 Tumbling Composter, 37 gallon
For "hot" composting, you need to use something which allows for ease of turning it over. And over ... And over ...
Something like a YIMBY (Yes In My Back Yard)!

Made by FCMP Outdoor, this nifty little composter was just what we needed. Compact, dual compartments, and overall pretty easy to use.
Just add compost items, per their instructions, and "give it a whirl" every 2 to 3 days.
- Price (here): $74.84 USD + shipping
- True Confessions! This was in a box in our shed unopened. For over 2 years! 😧 My wife had purchased it for us, but my work situation over the last 2 to 3 years of my career just consumed me ... 😞
Cate's Garden Compost Thermometer ...
... Premium Stainless Steel Bimetal Thermometer for Backyard Composting - 2 Inch Diameter Fahrenheit/Celsius Dial, 20 Inch Temperature Probe.
That's a mouthful!
Thermometers come in all shapes, sizes, and for different purposes. In searching for one specifically suited for composting, this one seemed well suited to the task.

Note that the thermometer face clearly tells you what temperature range you are in. We found this very helpful!
- Price (here): $20.95 USD + shipping
- Cate's Garden's associated website also has a nice newsletter, for which you may wish to sign up.
10-Tine Welded Bedding Fork
As you read about in more detail above, for our "cold" composting, there was still the need to get the composting bed turned, from time to time. To make sure it was being properly aerated.
Our collection of hand tools did not have anything suitable to this task. In searching for what we needed, here is what we settled on:
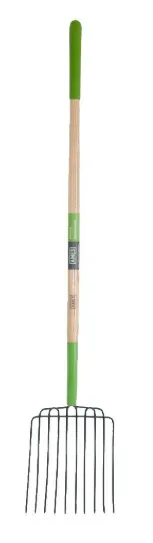

I am a big fan of quality workmanship (even preferring the word craftsmanship)! All you need to do is pick this bedding fork up and you just know it is a great tool. It has a 15-year warranty, but it is hard to imagine it ever wearing out. It just seems too well made for that!
The manufacturer, Ames, has been in business since 1774, so I think they should know by now what they are doing. Right?
Perfect for what we needed!
- Price (here): $37.98 USD in the store
Philosophical Postscript
Wrapping up this post, dear reader, I would like to briefly touch on some of my philosophical reflections, 🤔 while working in the peace and quiet of my own garden. Based on how unexpectedly refreshing and inspiring I have found this time to be ... 😉
Harnessing Power!
The vision behind permaculture in general and "Back to Eden" gardening in particular, is based upon harnessing power in natural processes. There is power unseen in these processes. Power of life!
From my background, while admittedly from a very different world than gardening, I find this concept illustrated by the creation of hydroelectric power.

Source: U. S. Bureau of Reclamation website
Okay, the damming up of a river and the resulting cascades of water coming down it spillways is clear enough. And relatively simple to understand.
But what about harnessing the power of this falling water by creating electricity with it?

By directing it down a penstock into a turbine. Much, much more complicated ...
Can we see the electromagnetic fields used by these turbines to create electricity? No. Is it "real" nonetheless? Of course it is!
Walking by Faith
In a similar manner, we are learning about the rich diversity in all of the life forms and their unseen power under the undisturbed surface of the mulch and wood chips covering our soil.
Reminds me of a passage of Scripture:
"Now faith is the assurance of things hoped for, the conviction of things not seen."
Yes! The power of this all working together, as individually they seem next to nothing to us. We can't see them, although they are there faithfully performing their function, day and night, as designed ...
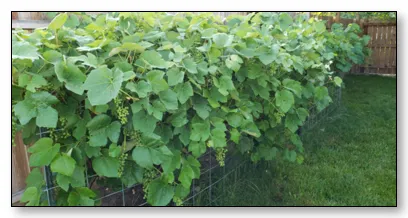
"Fruit" of our Labors!
To what end? An abundance of nutritious food, as written about in detail in my first post on this topic!


Source Image 2: Creator Pixabay on Pexels
With both the nutrition and abundance being provided at levels unmatched and untouchable by modern agricultural methods.
☝ More to follow! ☝
Closing
A final thought on writing this post was on our ever growing understanding of how intricate all of the "moving parts" are in permaculture. This whole movement is based upon simply observing what is going on in nature and trying to mimic it. If we simply just leave it "out there" and undisturbed in the wild "as is," then much of the marvel and wonder is left unknown. It is in attempting to mimic and even speed up these processes, that we begin to have a much deeper appreciation of and respect for all that is happening "out there" by design.
In my next post, as the final part of our "all in" approach to this new adventure in our lives, I will be covering what we have done and learned about worms, the source of what the experts claim to be two of the most beneficial substances you can put on your garden - the "black gold" of castings and "worm tea!" Formally known as the wonderful world of vermicomposting and vermiculture ...
Until then, I’d love to hear any feedback you may be inspired to provide.
Until "next time," all the best to you for a better tomorrow, as we all work together to build up our Steem Communities and add increasing value to our Steem blockchain! 👍 😊
Respectfully,
Steemian @roleerob
Posted using SteemPeak and “immutably enshrined in the blockchain” on Thursday, 20 February 2020!


Interested in reading more of my related posts?
| Lead Image | Title, Link, & Summary |
|---|---|
 |
Observations: Gratitude and the Simple Things
Summary: Reflections on a quiet, peaceful morning about what is truly important and being grateful for what we so often take for granted. |
 |
R2R Reflections: For Such a Time as This ...
Summary: While on my road trip, what I probably thought about more than anything else was our time. While these reflections were focused on my own personal history, I also thought a lot about the time in human history into which I was born. |
 |
R2R Reflections: "Golden Years" and our Legacy ...
Summary: While on my road trip, my primary focus was on the "next chapter" of our lives. Our legacy and the "footprints in the sands of time" we would leave behind. |
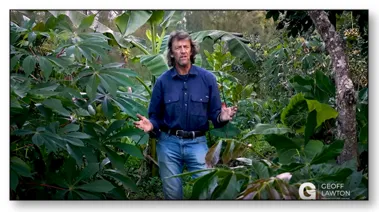 |
Reflections: Permaculture, Food Forests, and "Back to Eden!"
Summary: The response to this question - "What is a "food forest?" The story behind all the surprising and life-changing inspiration it has provided to me and my beloved. |
 |
"Back to Eden" Gardening: Journey Begins with Step One ..."
Summary: The adventure begins with the first step - making initial decisions and clearing the inevitable first hurdles. |
|
""Back to Eden" Gardening: Adventures in Wood Chipping with a Sun Joe!"
Summary: The work begins in earnest, as we begin learning to use wood chips to reach our "Back to Eden" objectives, before the "snow flies!" |


SteemPeak: An awesome interface for our Steem blockchain.
Check it out!