From out in the field where we make the concrete cylinders to back at the Lab where we break them, the work is never finished.
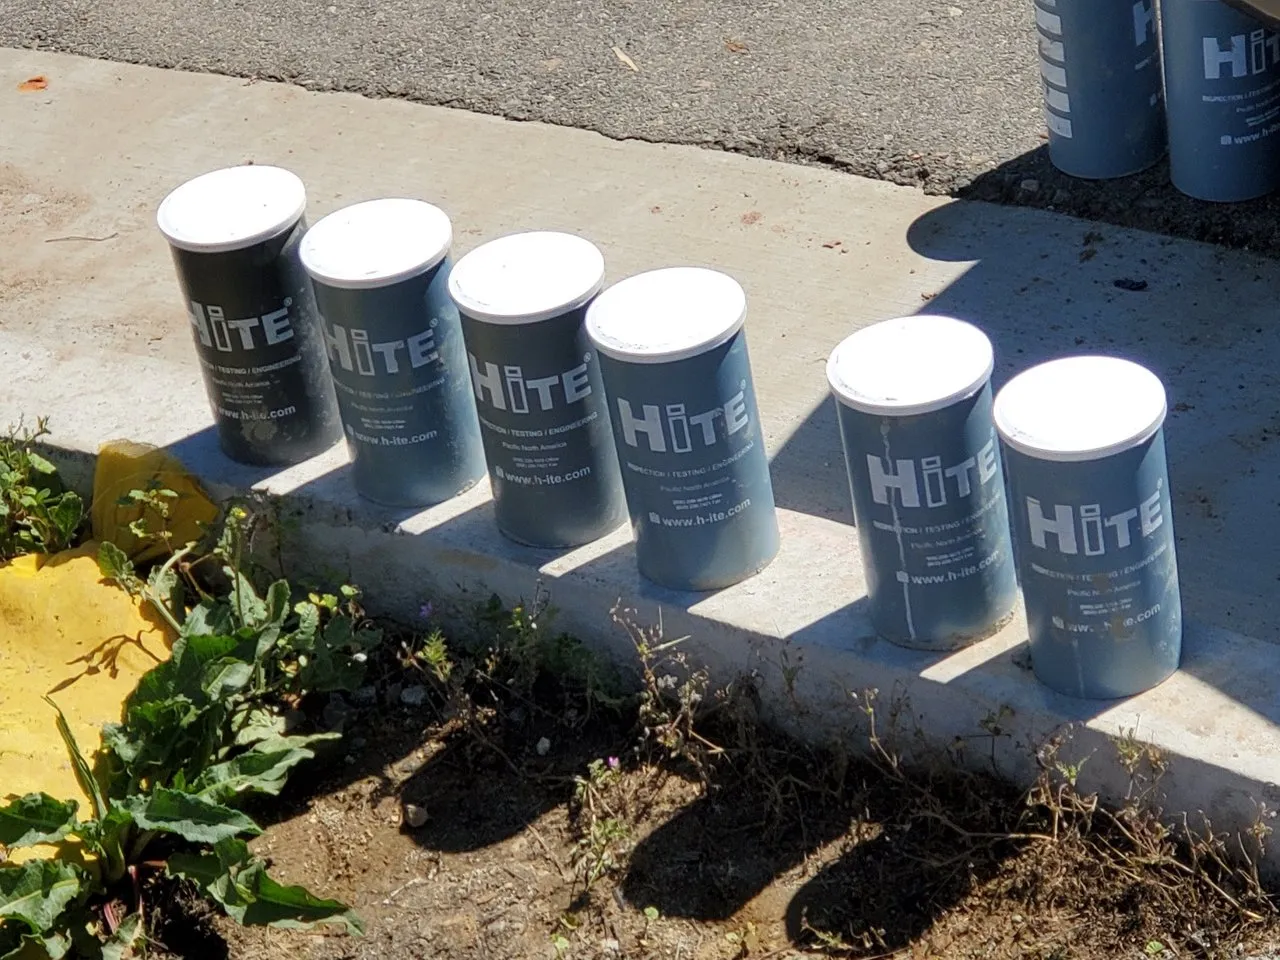
Today was an easy day for the most part, though I had more than a few cylinders to take care of. As you can see from the feature image, the cylinders are made of plastic and get capped once full.
We are HiTE! It's just my boss who went back to school to get his Civil Engineering degree and I.
When the cylinders come in, I usually strip them open with a tool that cuts down the side. I just push down on the handle while holding the cylinder with my foot and it rips the side as it goes.
When you have 12 - 16 cylinders to open it's a good method, but not so much if you let them build up. That was the case today.
I didn't even count how many there were with all the work that needed to be done. There were well over 50.
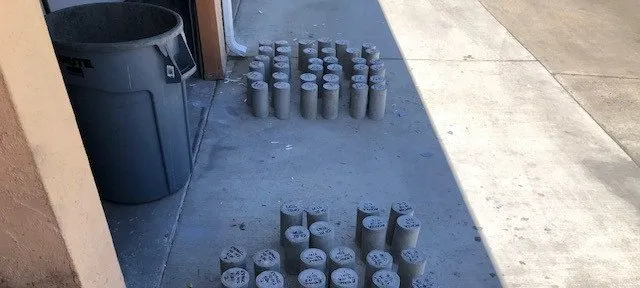
There they are above after I removed the plastic molds. How do you do so many without the tool? Well, I had to break out the air compressor.
First, I set all the cylinders outside and smashed the lids with a rubber mallet. This makes them easier to take off. Being careful not to mix up the sets of 4, I then flipped them all upside down.
Next I took a drill with a very small bit and put a 1/16" hole right in the middle of the bottom plastic. At this point, the cylinders are ready for blast off.
And I mean blast off. This was the 1st time I used this technique to remove the plastic molds and my boss warned me.
Sometimes the plastic sticks to the concrete and the air pressure from the compressor shatters the bottom. Using a hose with a trigger nozzle, I put it up to the small hole and fire.
The very first cylinder I shot blew the bottom right off. A good chunk hit my hand and boy did it smart! I had safety glasses on, of course, but next time I'm using thicker gloves.
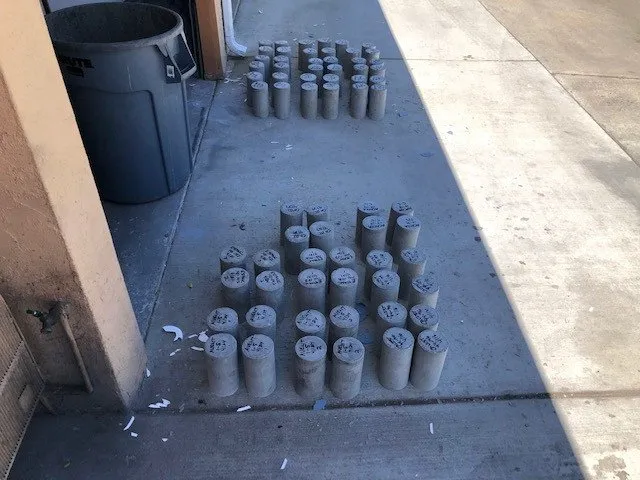
You might also notice that I kept them all organized by sets of 4 and labeled each cylinder. This is important because it leads to the next step.
Into The Curing Tank
Once the molds are stripped, the cylinders go in a tank filled with water. We put a layer of lime in the bottom to aid with curing the concrete. Also, the tank is setup to circulate the water and keep it within a predetermined temperature range.
All the info from the tank routes to the computer where we save the data. We test the concrete but our lab also gets tested to ensure we meet all standards.
Testing By Breaking
We break cylinders according to how long it's been since the date they were made. With a set of 4, we typically break one cylinder at 7 days and the other three at 28.
Today I had quite a few breaks to do after I stripped all the new built up cylinders. Laying them all out following a chart on Excel, I'm then ready to use the machine.
The break machine has two metal pucks that hold the cylinder on top and bottom. These pucks have rubber soles, so to speak, to absorb the impact from the machine.
The Breaking Machine has a machined surface on the bottom with a circular mark to show the user where to line up the cylinder in pucks.
On top of the machine is a fixed round metal plate that's on a 360 degree swivel. If the top of the cylinder isn't level, this swivel can handle some variation.
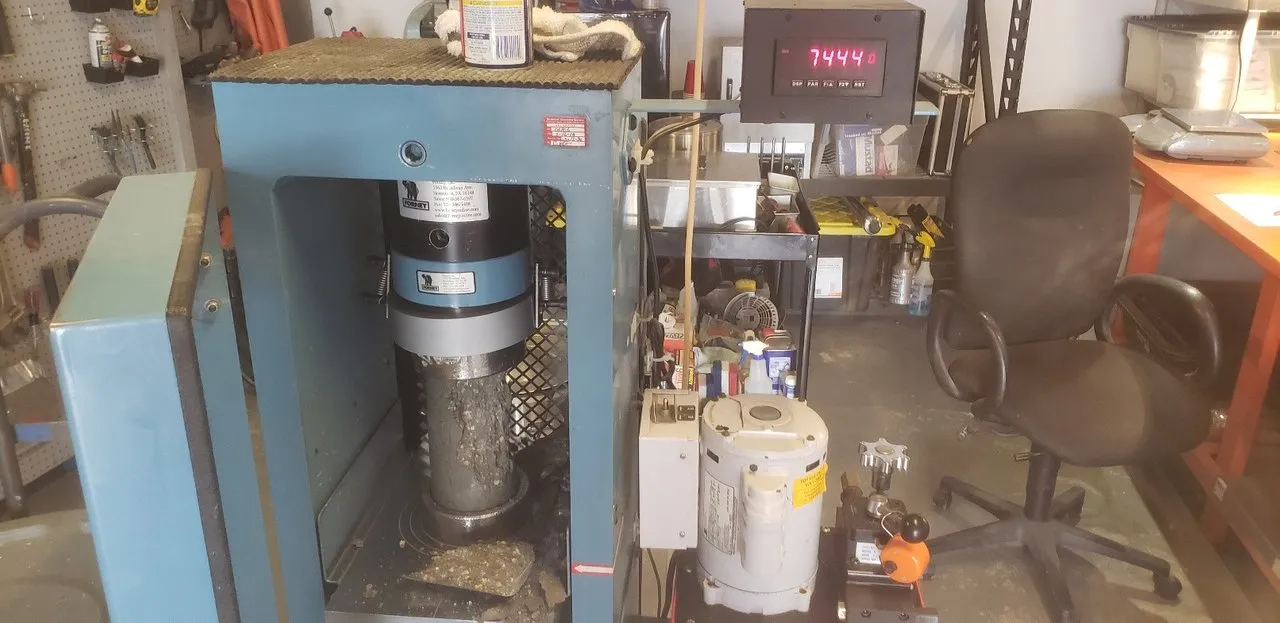
Above is a good look at the Compression Breaking Machine in action. It has a digital meter on the top right that reads the mounting pressure then stops when the cylinder breaks.
Sometimes the cylinder shatters into thousands of pieces and sometimes it just kind of smashes down. It all depends on the mix of the concrete and how long it has cured for.
The final result of the break test is recorded and goes into a report for the building company. These results determine whether or not the foundation passes inspection.
And my days work at this point was almost done. There was still a huge mess to clean up and a heavy trash can full of broken concrete to take out.
All's well that ends well, and I hope you learned something about how we test concrete today.
Happy Hiveing!
Bottom Image Of Hive.io Brand Assets