When we first moved onto our land, it was simply that. Just land. No outbuildings, Nada. Just Olive trees as far as the eye can see, set in a valley surrounded by hills. As much as I loved to shower outdoors and answering the call of nature with the breeze gently caressing my backside, we really did need a place to wash and do our business that was a little less exposed to the elements.
We had tried our hand at building with earthbags, but in the searing Spanish nighttime heat, this was backbreaking work digging up the soil, dumping it into the bags, and then carrying the bags into their final resting place. Perhaps if there had been a team of us it may have been easier, but it was just the two of us and a little help from the little dudes when they took an interest.
When we lived in Sark, I bought a book called "The Hand Sculpted House", written by Ianto Evans, Michael G. Smith, and Linda Smiley. I have a fascination with Hobbit-style homes with their round contours and large roof overhangs. It was more of a dream idea and it eventually became forgotten. Until I was unpacking the last box of books that we brought and found this hidden gem. It was like the universe was saying to me right there and then,
"I think this is what you are looking for"...
As I began to paw through the pages, it seemed to hold more purpose this time. It has a step-by-step guide on everything to do with Cob building and more. After excitedly reading the whole book, the first thing I set out to do was a soil test. I knew we had baked clay on our land so I dug a few little test spots, placing a bit of soil from each area in jars. I then filled them with water, gave them a good shake, labeled them, and left for a few days to see which had the higher clay content. The idea is that when the particles settle, the sediment rests in clearly visible layers. I wish I still had the photos that I took but I can't seem to find them.
Once I had established the area where I was to get the soil from, we set about making the cob mix. This was a test run of muddy balls and squishier slips. We used the squishier stuff to coat the already half-built earthbag shed. It was a task that needed doing to prevent the sun from making the bags brittle.
There is something quite therapeutic about working with natural materials. The clay soil on our land was no exception to this. The process of mixing the water, straw, and soil barefoot was probably the best earthing I had received in a long time.
The picture above shows the room about midway through the build. Notice the tarp on the ground just behind. This is where the magic cob ball-making took place and the kids even had fun joining in stomping and rolling it.
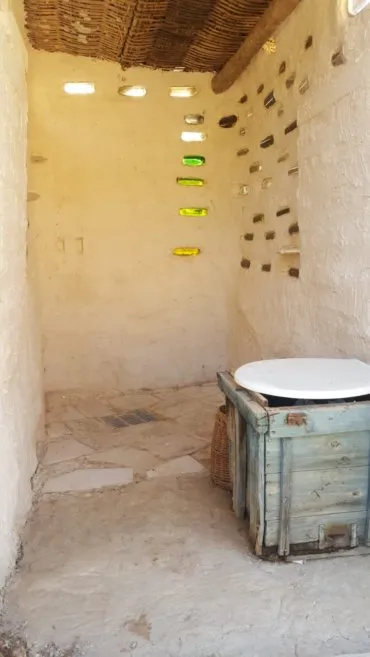
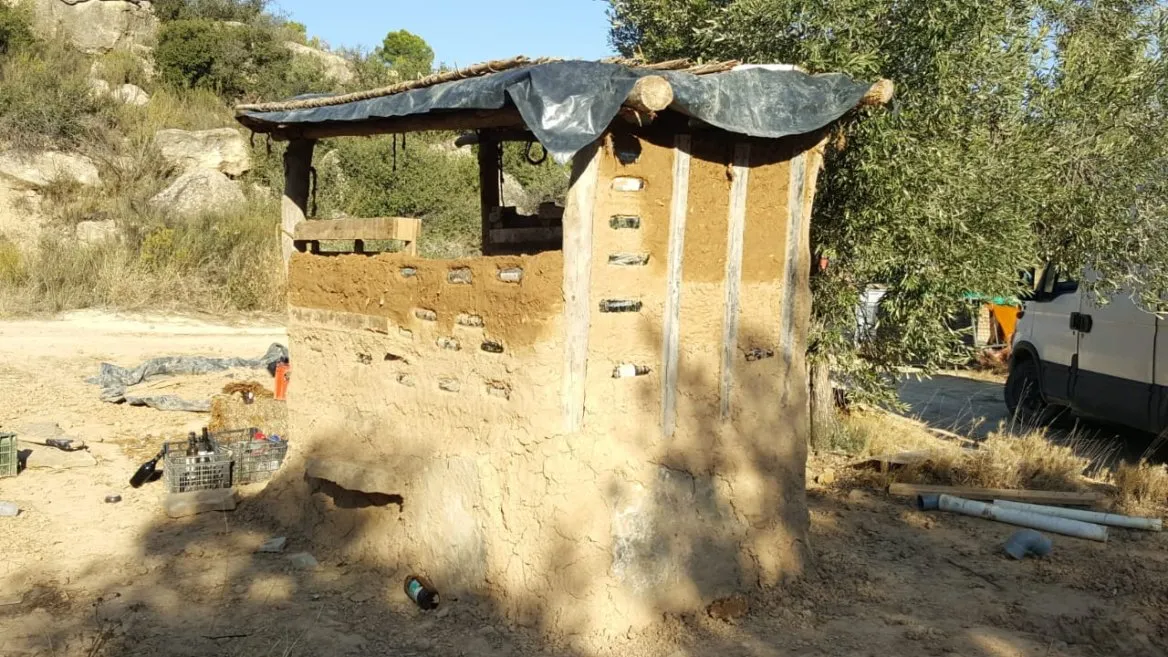
The base of the room was composed of large rocks that we sourced from the hill in the background of the picture. There are four beams which I believe are old telegraph poles that we found at the dump. Pallets helped to reduce the amount of cob we needed and add strength to the build. We had plenty of bottles and a lovely piece of glass that helped to make the room light during the day but also give us enough privacy. For the roof, we used some old reed wall dividers that had probably come from an old Spanish casa restoration. The waterproof layer was some old pond liner that we had laying around.
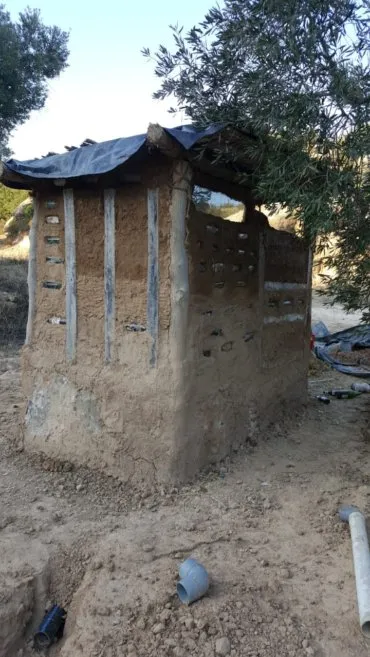
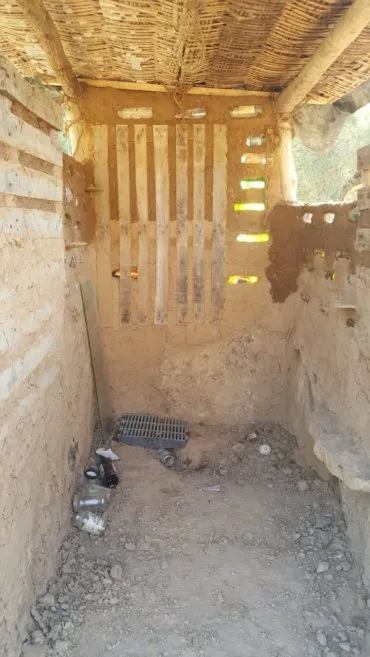
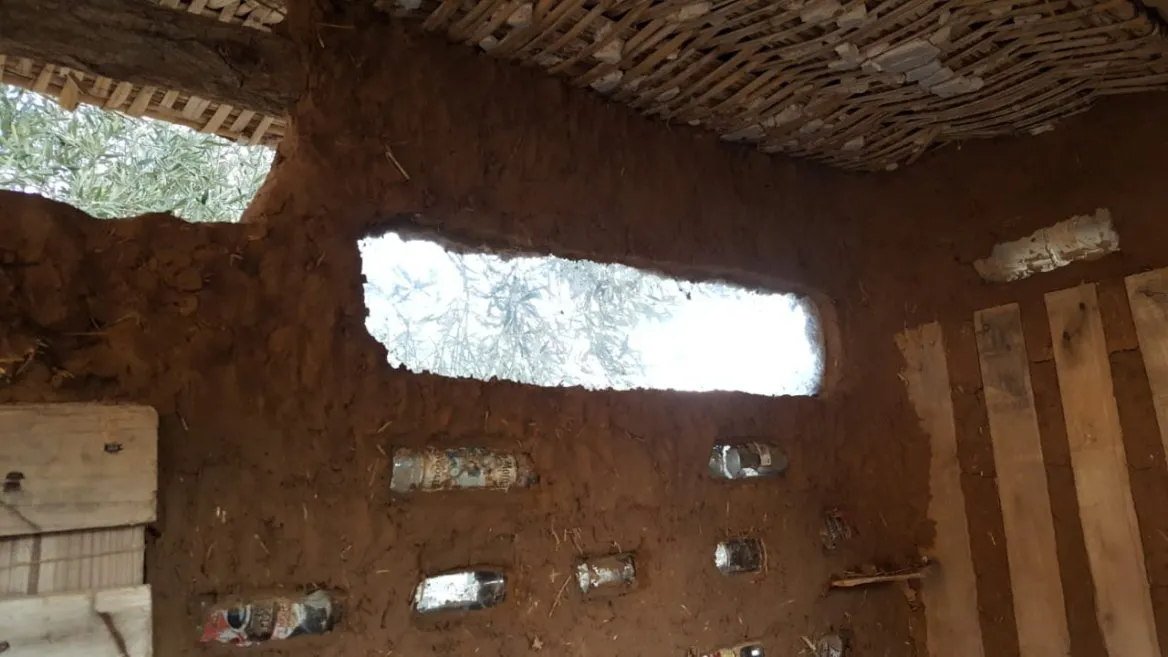
As you can see from the images above, the clay balls mold nicely into each other. At one point, D and I were building the wall while the boys were rolling them up and throwing them over to us. We added the bottles as we went, another great dump find, along with glass jars that I had no use for. Notice that we dug a trench and placed a pipe for water drainage. The idea was to have a reed bed just behind the building that would filter the water and recycle it onto the plants.
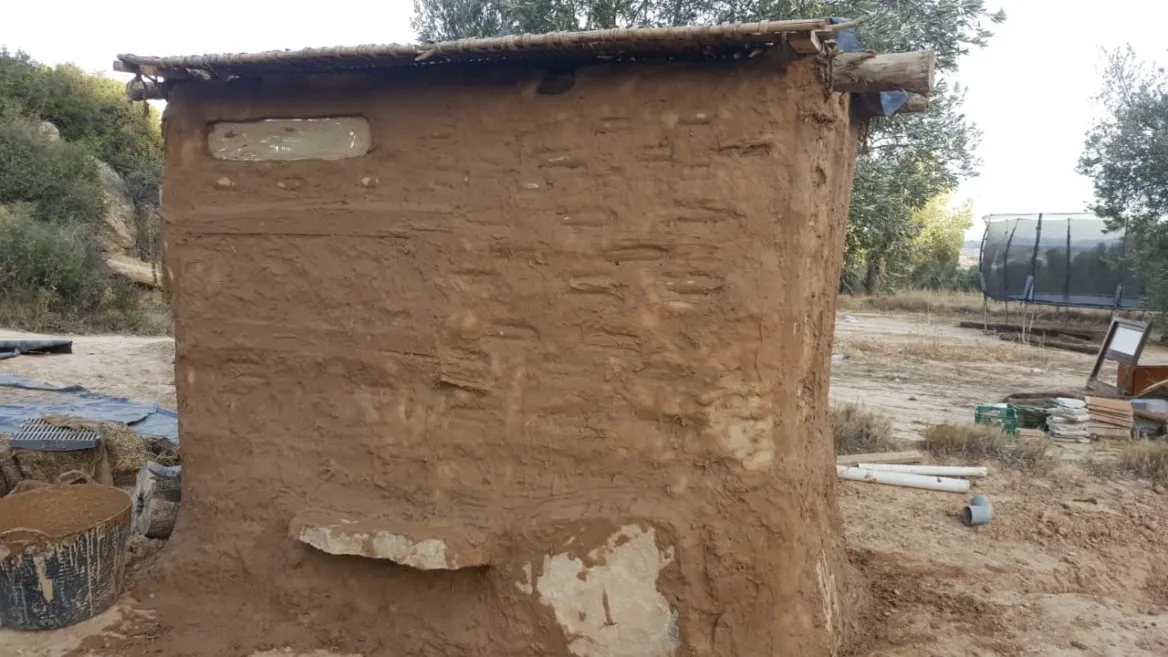

Once the main shell was complete, we added a slip layer. Once dry, we buffed the glass and bottles up. I think the only thing we bought was a bag of lime to add to the slip coat and use on the internal walls. Lime calcifies over time and has been traditionally used in whitewash. This was a particularly useful technique in the UK and used on most traditional cob buildings to protect them from the onslaught of rain that the UK is so famous for.
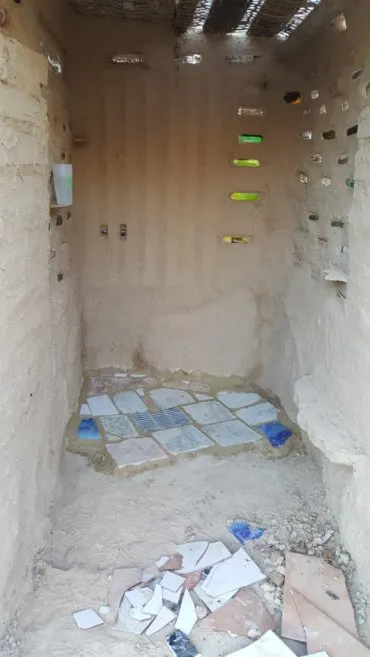
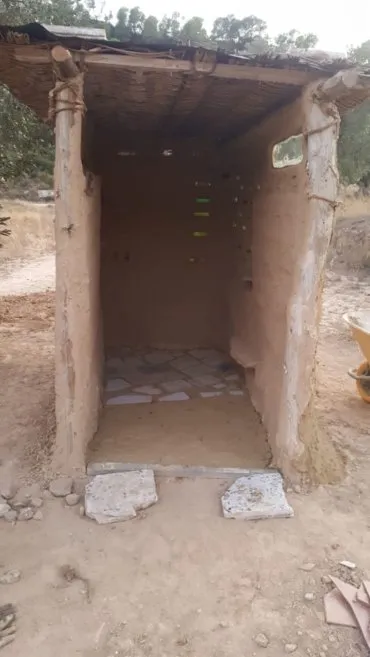
The compost toilet was made from an old beehive that we found... yep you guessed it, at the dump too. No bees were living in there but a bucket fit into it perfectly and a toilet seat sat snugly on top. To finish, we added a curtain at the entrance for private but the plan was to add some doors, it just relied on another dump run and pot luck finds.
Would I do it again?
There are so many reasons this type of building works well. Particularly in the hot Spanish climate. During the day the interior stays cool. While the sun beats down on the building, the thermal properties of the cob allow it to warm up slowly which keeps the room at an ambient temperature in the slightly cooler evenings.
Building something from scratch no matter how rustic, (this was our first attempt at it), felt great. The feeling that this achievement brings is really rewarding. Working with natural materials also helps keep us connected to the earth and I feel happy knowing that, should this building ever need to be removed it can be done with little to no impact on the environment and it blends in well with the area that it sits upon too. Doing this as a family also brought connection, moments of laughter, frustration, and sheer joy. It was an emotional journey as much as a physical one and certainly one I would do again.
So yes, yes I would do it again and again if given the opportunity. When I eventually return to my land, the plan is to build a house made of cob and as many reclaimed materials as I can get my hands on.
I'll leave you with this lovely movie about Earthing and the benefits it has on our health.
~ONE LOVE~


CommunityIIDiscord