Edited in Canva Pro.

Sources and Materials
Below are the materials I used in this art.
Edited in Canva Pro.
Introduction
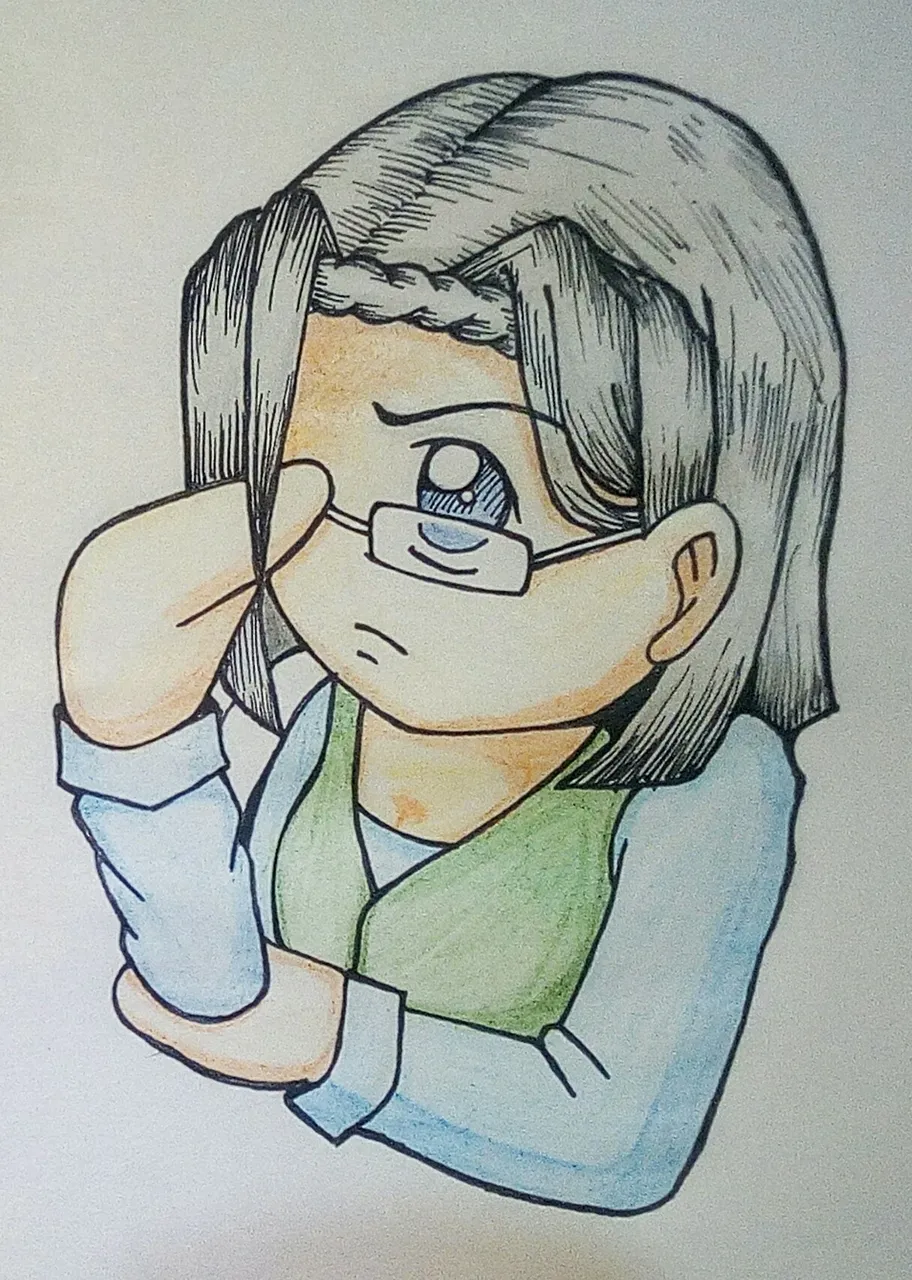
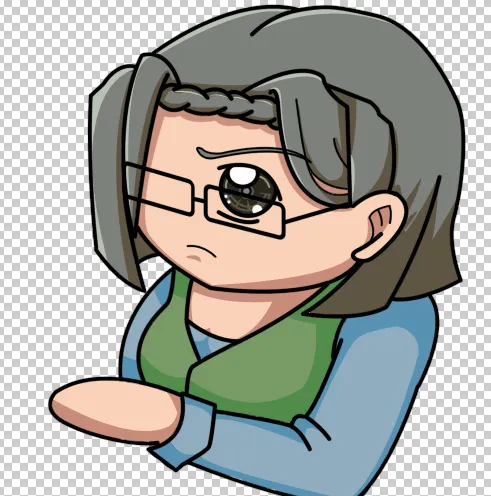
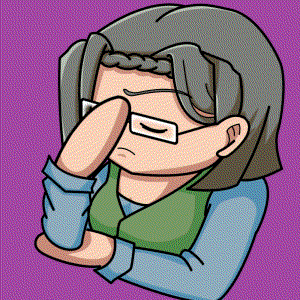
I wanted to animate some pre-made stuff that I was using in my articles. For this emote, I'll use this drawing that I call, "Teacher Aqua."
I would like to do some simple animation like blinking and touching her glasses. In the future, we may revisit this and do some more complicated animations but this would do for now.
PART I: Coloring Stage
Step 1 Draft
As I've said, I already made this emote, complete with color using my colored pencil. We'll use that as a guide as we color it digitally.
Step 2 Digital Lineart
Create a new layer and name it, "Lineart." These are where all your Linearts are going to go so we can place the color layer below them. This allows us to color safely without affecting the lines. But for me, I usually use multiple lineart layers and put the respective parts on it. This just makes it really easier for me when I need to rearrange the layers like this:
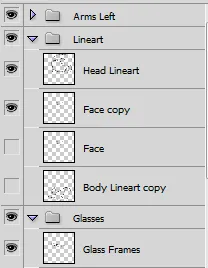
I decided to separate the right arm touching the glasses and the body. It would look like overlapping but in actuality, these are separated by layers so it doesn't really overlap.

Step 3 Coloring by Parts
Whenever I do these guides, I'm really having a hard time getting the right way for my readers to easier understand it. I've talked to some friends and they suggested to do it by parts and do it as I go. We'll do that today.
Step 3.1 Hair and Eyebrows Base
Create a new layer and name it, "Hair Base." Place it under the Lineart, then fill in the hair and eyebrow area with this swatch:

It would look like this:

Step 3.1.1 Hair Shadows
My light normally comes in front and left. therefore, shadows is produced right and back.
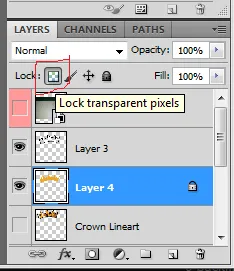
Duplicate the Hair Base Layer, and rename it as "Hair Shadow." Click on Lock Transparent Pixels, so only colors would be affected when the layer is locked.
I added a few shadow colors using this swatch.

It would look like this:

Step 3.1.2 Hair Highlights
Duplicate the Hair Shadow Layer, then rename it, "Hair Highlights."
Honestly, I don't know how to do the highlights so I tried to do very little on where I think the light would hit using this swatch:
The end result became like this:
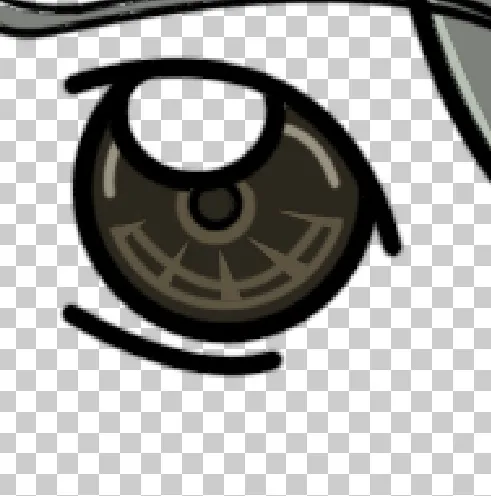
Step 3.2 Eyes Base
Create a new layer and name it, "Eyes Base." Place it under the Lineart Layers as well. For this one, I used the same swatch as the Hair Shadow:
Then, I filled it in and it would look like this:

Step 3.2.1 Eyes Shadow
Duplicate the Eyes Base Layer. Rename it as, "Eyes Shadow."
I used these two swatches:

For the first swatch, create a new layer first. It doesn't matter what is the name since this is only temporary. Using the Ellipse tool, I created a circle then stroke with a brush of 4 px using the first swatch.
I did it again a little bit above then erased the upper half using the Eraser tool.
Using the pen tool, I created small triangles pointing towards the center and fill it in with the shadow swatch until it forms something like this:
Using the 2nd swatch, I simply used a pen tool and stroke with a 4 px brush.
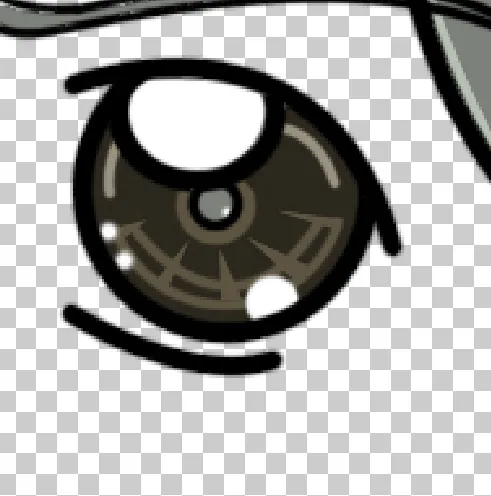
Step 3.2.2 Eyes Center
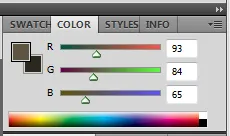
The center eyes is easiest. Duplicate the Shadow Layer and name it, "Eyes Center." Using this swatch:
fill in the center part.

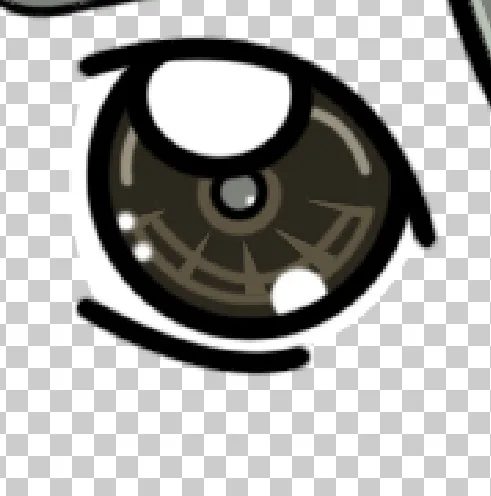
Step 3.2.3 Eyes Highlights
The highlights on the eyes is normally just white:
Using varying size of brushes, add a few dots on the edges. It would look something like this:
I would like to say, "Do the same on the other eyes." But this art has only one eyes as the other is hidden by the hair and hands. I'll also like it to be that way so I'll stick with it.
Step 3.2.4 Eyes White
Create a new layer and name it, "Eyes White." Place it below the Eyes Base Layer. We'll be adding the white of the eyes with this swatch:

Using the pen tool, fill in the whole back of the eyes. It should look like this:
Step 3.3 Skin Base
For the Skin, I used the same swatch as my Prince Julian Emotes.

Create a new layer and name it as "Skin Base." Then fill in the appropriate parts.

Step 3.3.1 Skin Shadow
Duplicate the layer and name it, "Skin Shadow." For the shadow, this is the swatch I used:

Add some shadows beneath the hair, inside the ears, around the neck and under the hands. Of course, since our little teacher is a bit grouchy and pouting, add a shadow beneath the lips.
Step 3.4 Clothes Base
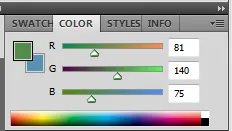
For the clothes, she's wearing a blue long sleeves and green vest. Here's the swatch for both:


Create a new layer and name it, "Clothes Base." Fill in the color of the clothes as provided in this example:

Step 3.4.1 Clothes Shadow
Duplicate the Clothes Base layer and name it, "Clothes Shadow." Since the clothes has 2 base colors, it would require 2 shadow colors as well:
The lighting is above and right. Following the same rules in the hair shadows, we put shadows on parts where the light will not come through. One place to not is you should use pen tool when doing the shadows under the breasts. It's not a straight one, and should always shape a littlle bit round.
Step 3.5 Glasses Inner Glow
There are two ways I was thinking on making this type of glow. First is doing a stroke around the glass lineart with a 0 hardness brush. The other is filling the glass with white color, then erasing the center with a 0 hardness brush. This would allow the edge of the erased part to have a light and "feather-y" feel. I used the latter.
Create a new layer, and name it, "Glass Inner Glow." Fill in the glass with this color:

Using the Eraser tool, make it at least 30 px size with 0 hardness. Erase the middle part. Lastly, set the mode to Soft Light. This would make the glasses look like reflecting on the sides while being transparent in the middle:
I hid the left arm, by clicking on the eye icon at the left of the layer, for the meantime so you can see the colors clearly.
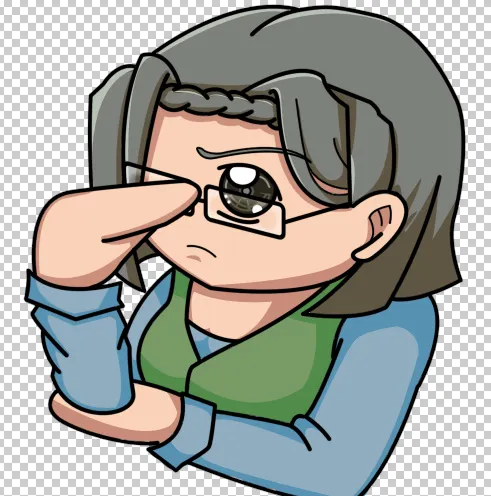
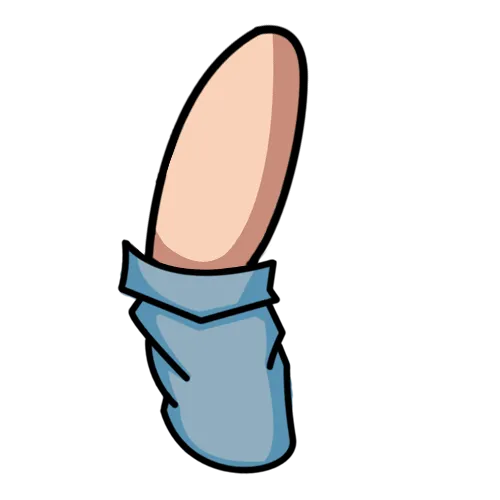
Step 4 Right Arm
The right arm which is separated from the rest of the body is the one we'll use in the animation.
For coloring, the swatches and the techniques are the same as the ones above. Use those examples and guides above to finish this part.
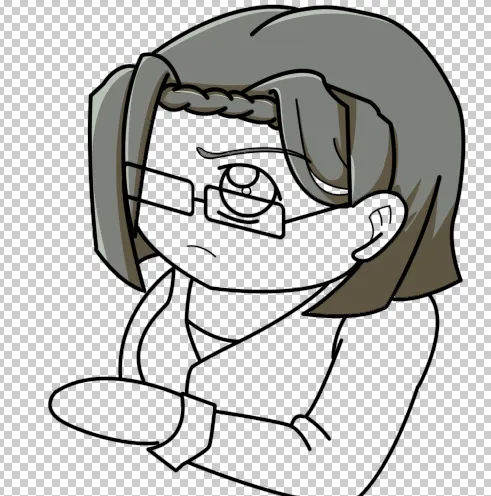
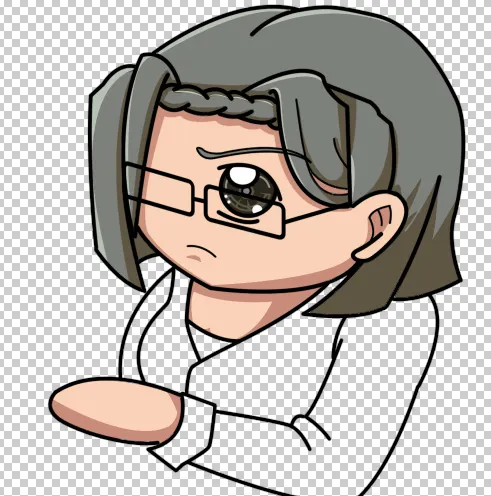
Final colored Output should look like this:

PART II: Pre-Animation Stage
Step 5 Saving the Layers as Assets
We'll need a few assets so we'll need to hide some layers before saving.
Hide and unhide layers until you get these results then save it:
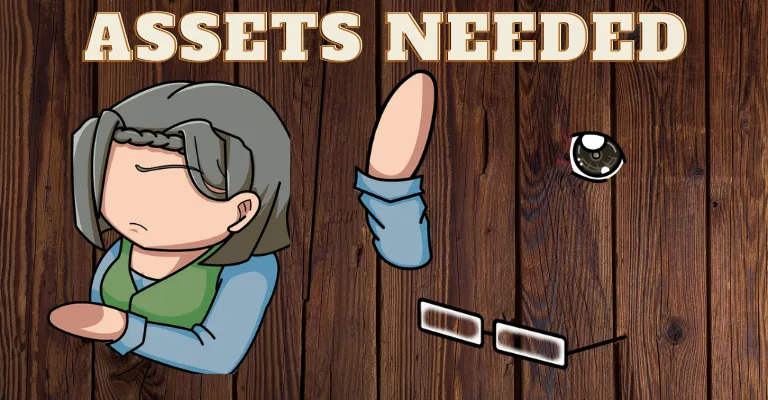
On your menu bar, click on file, then save as, then, name it as "Preanimation." On the file type, check that the file will be saved in PNG format.
Step 5.1 Emergency Changes in the Right Arm
As you can see in my initial drawings above, the hands on the right arm are bent.

Original Right Arm
However, while doing the animation, I find it really awkward once I bent the arm to have her like a cross-arm position. You will see it in the animation later.
With this new information, I decided to change the hands of the right arm to a straight one. You might see a few errors in the pics here and there and that is because of this issue. However, this would be the final adjustment I did and I'm only inserting the context after I finished the final animation.
Updated Right Arm
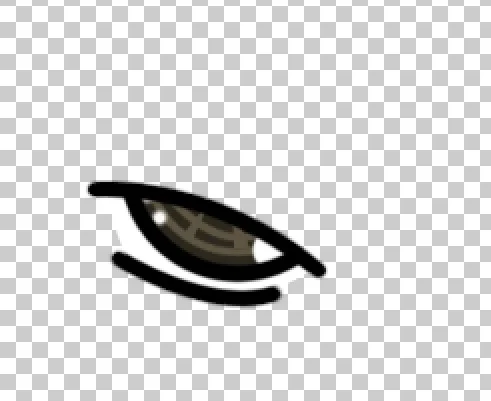
Step 6 Eyes for Blinking

Since in our animation, the eyes would be blinking, we would also need 4 sets of eyes, slowly closing. We can do this by repeating this process:
- Hide all the layers except for the eye colors and the lineart.
- Create a new layer.
- Using the Pen Tool, create a curve line a little bit below the upper eyelid. Do a stroke with an 8 px brush.

- Duplicate the eye color and lineart, then hide the duplicated layer. On the new layer, make sure it's below the layer we did the curve line. Then, delete the contents from the upper eyelid, to the new eyelid including the eye lineart.

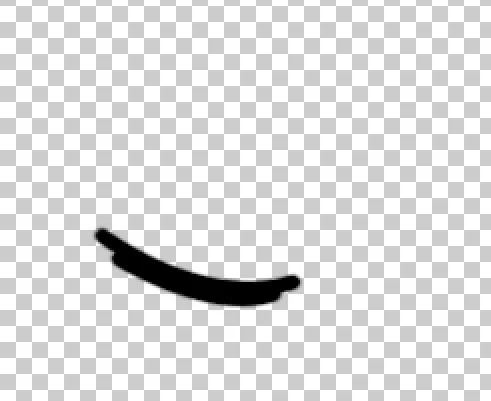
- Do it again but having this layer as your base:
- Do it one last time closing the eyes:
PART III: Animation Stage
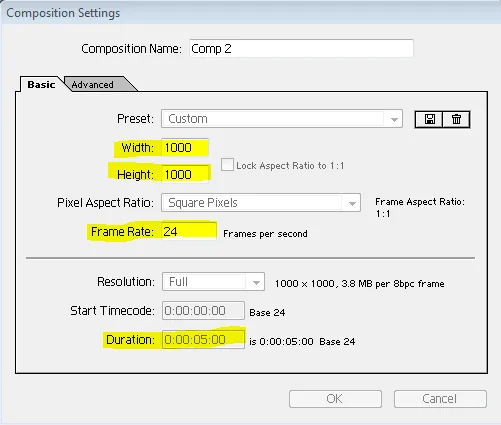
Step 7 Creating New Animation Project
Open our Adobe After Effects, create a new composition with the usual size:
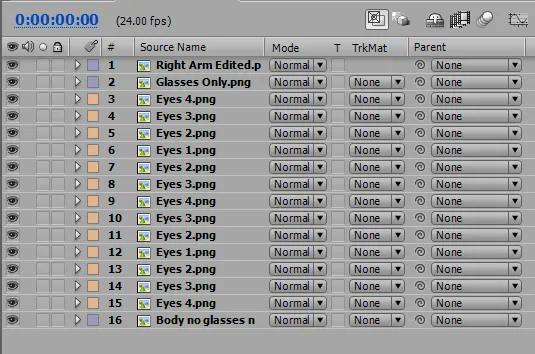
Then import all the assets we're going to use. I'll show you these so you know what names I am using for the editing area's values later.

Step 8 Arranging the Composition
Drag and drop your assets from the Project Area to the Workspace Area. Arrange until it looks like the same as before.
Arranging the order on the Editing Area also affects the order in the Workspace Area. The one at the very top is on the foreground, and the one at the very last is the background layer.
Step 9 Animating the Eyes (Body Swap Method)
The blink is a total of 12f or half a second (24f = 1 sec). In between when eyes open (Eyes 1) and Eyes closed (Eyes 4), the in-between animation is 4f for both Eyes 2 and Eyes 3.
On the Timeline Panel, click and drag the silver bar from the right to left until each eye is 4f long.

Then, arrange it on the Timeline Panel like this:

On my timeline, the Eyes 2 and Eyes 3 are the only 4f long because I combined the in-between Eyes 1 and Eyes 4 so the timeline is less chaotic. Otherwise, it would be something like this:

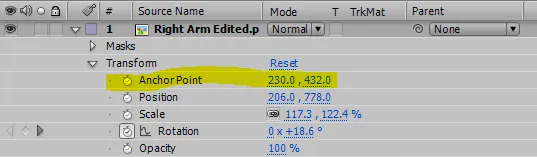
Step 10 Anchor Point
On my last Prince Julian Good Luck Emote, we used joints for doing the manual rigging. I learned that you can do the same by using a feature in After Effects called, "Anchor Point."
An asset's anchor point is it's point of rotation. Adjusting the position of the anchor point also means that the asset rotates based on where the anchor point is.
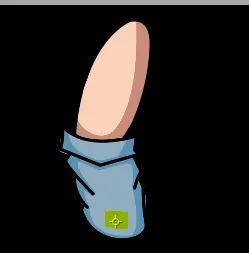
To change the anchor point, we can adjust the values in the Editing Area:
or click and drag the crosshair-like guide in the Workspace Area:
Step 11 Animating the Right Arm
Note #1: For the sections to be animated, always click on the stopwatch on the left of the value at 0f. We only need to click this once.
Note #2: This may be a little bit confusing at first but this would avoid more confusion. For the timeline values, we're going to do it in this format: " seconds:frame " (Example: 03:f4 means 4th frame on 3rd second.)
Set the Anchor point on this value:
230.-, 432.0
Go to 00:08f, then set the rotation values to 18.6°.
Go to 01:08f, then set the rotation values to 103.5°.
Go to 02:02f, then set the rotation values to 103.5°.
Go to 02:16f, then set the rotation values to 103.5°.
Go to 03:16f, then set the rotation values to 18.6°.
Step 12 Double Checking the Animation
Place the blue arrow at the start then press the Space Bar for the animation to play. Let it run a few times and see if there's any obvious issues with your animation and adjust accordingly.
I'm pretty happy with mine:

Step 12.1 Adding Purple Screen
I'll put a Purple screen before going to the rendering or saving stage. The screen is required on my end because my version of photoshop does not allow mine to be saved with transparent background. If yours can do it, you can skip this step.
Normally, I do green screen but since I have a lot of greens in this emote, I'll be using another color not found in this emote.

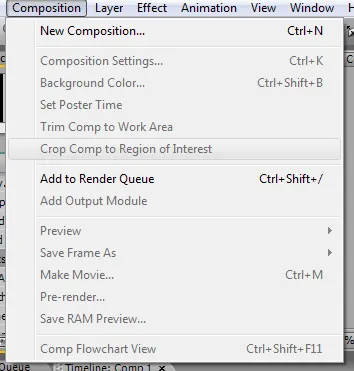
Step 13 Rendering or Saving the Animation
On your menu bar, go to Composition, then Add to Render Queue.
Your timeline area should show like this:

We're going to adjust some options in the rendering stage so we can save it as gif.
Click on this option:

Then follow the filled options below. I only changed the one that is highlighted.

Once done, click ok, then click on Render. Wait for a few seconds or minutes to finish the rendering and you'll have this final result:
On this end, I added a green screen because even though I managed to save it as GIF instead of AVI, the transparency still didn't work. I'll do the green screen work around which means an extra step.
Step 14 Green Screen Removal (Photoshop Way)
I recently learned that you can import gif into photoshop for further editing. Then it hit me, "Is there a way to remove a certain color (our screens) from multiple layers in Photoshop CS5?"
And I was surprised when I did the research and saw that...
"It was not possible."
BUT
It is possible to hide certain colors during the saving process as gif in photoshop. Here's how to do it.
Import your gif in Photoshop by drag and dropping it into the workspace. Then, on your menu bar, click File, Save for Web & Devices. You will then be greeted with this screen.

First, Adjust the Size to 300 px x 300 px.
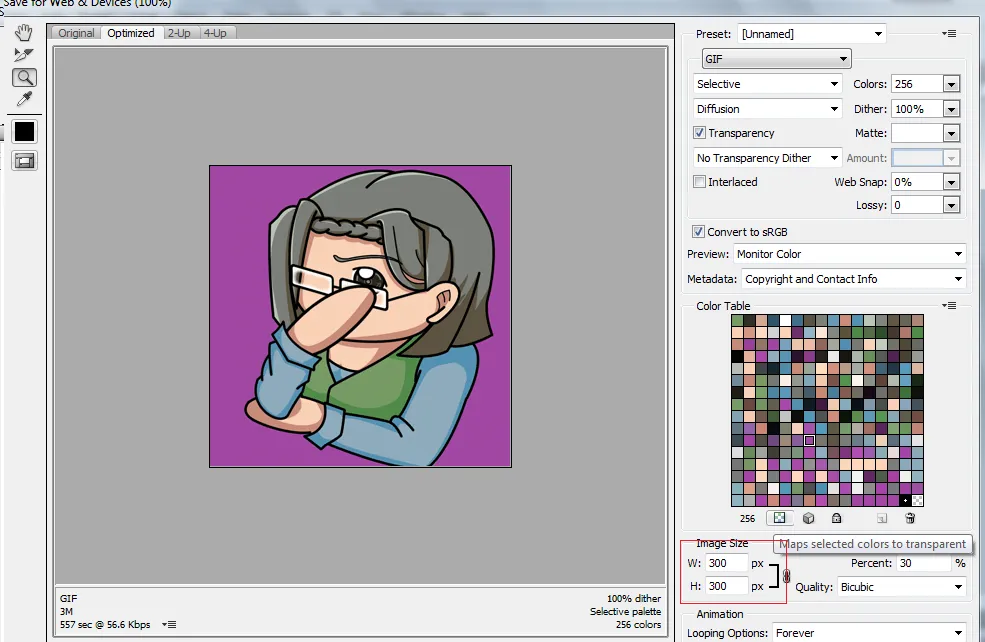
On the left, you can select the Color Picker Tool, to get the right color, it would then be highlighted in the Color Table on the right, then the color selected by clicking on the Maps Selected Color to Transparent. Repeat this process until you get all the screens color hidden.

Once you're done selecting all the colors, it should show something like this:
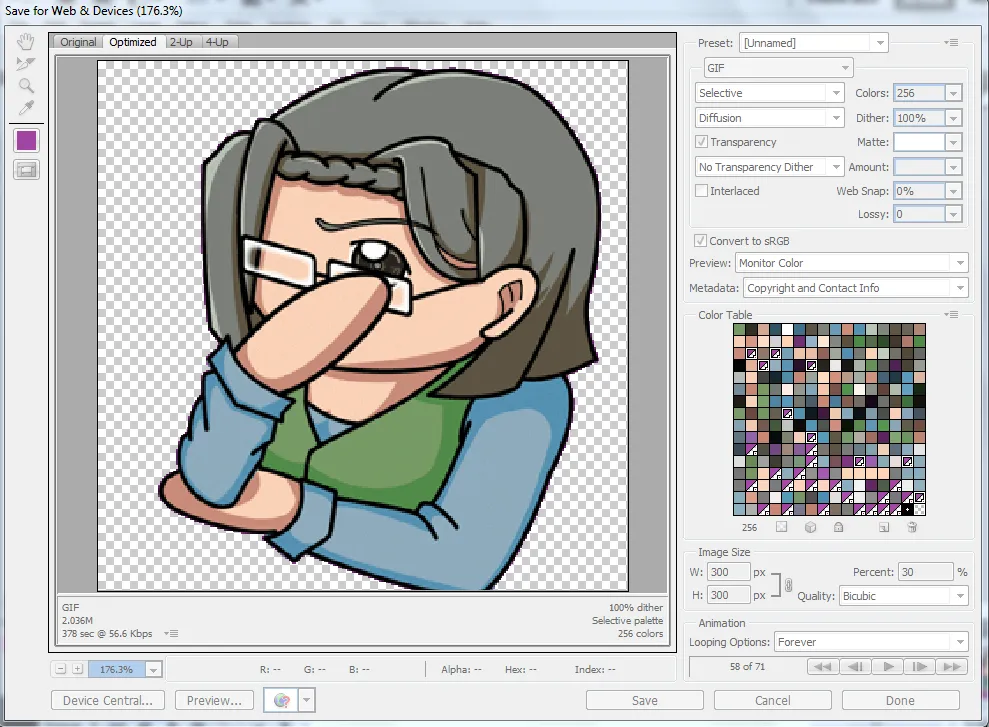
The advantage of this is it's fast and the quality is not reduced. The down side is it can affect other colors used in the art if the colors are the same.
Make sure to set the Looping Options to Forever. Then, click on Save, Name it as the file name you desire, mine is, "Aqua Teacher Final xxx" then click ok.
And we're done with the final output of my upgradedTeacher Aqua Emote.
This was supposed to be a short post of how I did my improvements but it went long for some reason. I'm a talkative person in real life so maybe it shows in my works as well.

I apologize for that.
Disclaimer
- This post is an entry for Splinterland's art contest.
- Other sources that I do not own are cited under their respective photos. Photos and drawings without cited sources are mine and made for this post.
- Animated Banners and Dividers are edited in Canva.
If you're interested in playing the game, support me by registering using my referral link here
Have Fun Drawing!