School project
A few weeks ago, my daughter told me she had an assigment for English classes where she'd need to make an animal. The info was very vague, it was litteraly: an animal and no drawing or painting. The size was probably like her hand at least, but that's all she shared.
To make sure we'd not deliver anything that was not within the assignment, I told her to double check in the next English class what the size should be and other instructions. She did and told me that it has to be at least the size of her hand and it doesn't matter which animal but she should explain all the parts of the animal in English as well as share which parts the DIY toy didn't have.
I think it was quite a cool assignment, I knew she was going to nail it because this English from these classes in her year are at a level she understood several years ago, there's actually no stress ever from these classes but of course some creativity will make it more exciting for her.
Picking the animal
Together we browsed online, endlessly, to find inspiration for the animals we could pick. In the end, I never recreate something exactly but just use it for inspiration and often combine tutorials to make it easier with the tools I have available. For example, sewing is not something I'm fond off because I have to do it by hand and I have shitty needles with holes that are too tiny for all the thread I have, every time I forget this until I have something to sew, lol. So it happened again this time as well.
But I often find a way around sewing by using my glue gun as I've used that thing for years and years day in day out when I had my webshop in the past. I would not trust my daughter with it but as she could help me to draw the lines and cut fabric, we'd create the project together, which was allowed as well.
Our first choice of animal was a koala made from a sock, I happened to have a pair of these warm winter socks and was ok to sacrifice one of them for this project. Yet I wasn't a fan of the ears and sewing part so I decided to browse for cat options instead. We saw a good option (with sewing) but upon watching the video, I told my daughter we can do this without sewing, let's do it. As a cat momma, she was of course very pleased that we now found a cat because this would make her presentation even more fun.
Selecting the supplies
We did the project very last minute because we were out in the weekend but I reassured her that it would be done in an hour tops so no stress about it. I was right, thankfully. Right after she came back from school, we picked the correct supplies we needed:
- One grew winter sock
- A glue gun
- Scissors
- White felt (for the eyes, nose and mouth)
- A black marker
- Lentils for the filling
At first, the thought was to fill it with cotton but as the toy needs to be firm I had the suspicion that we'd not have enough so during school hours, I went into the kitchen to find a replacement, lentils were the solution.
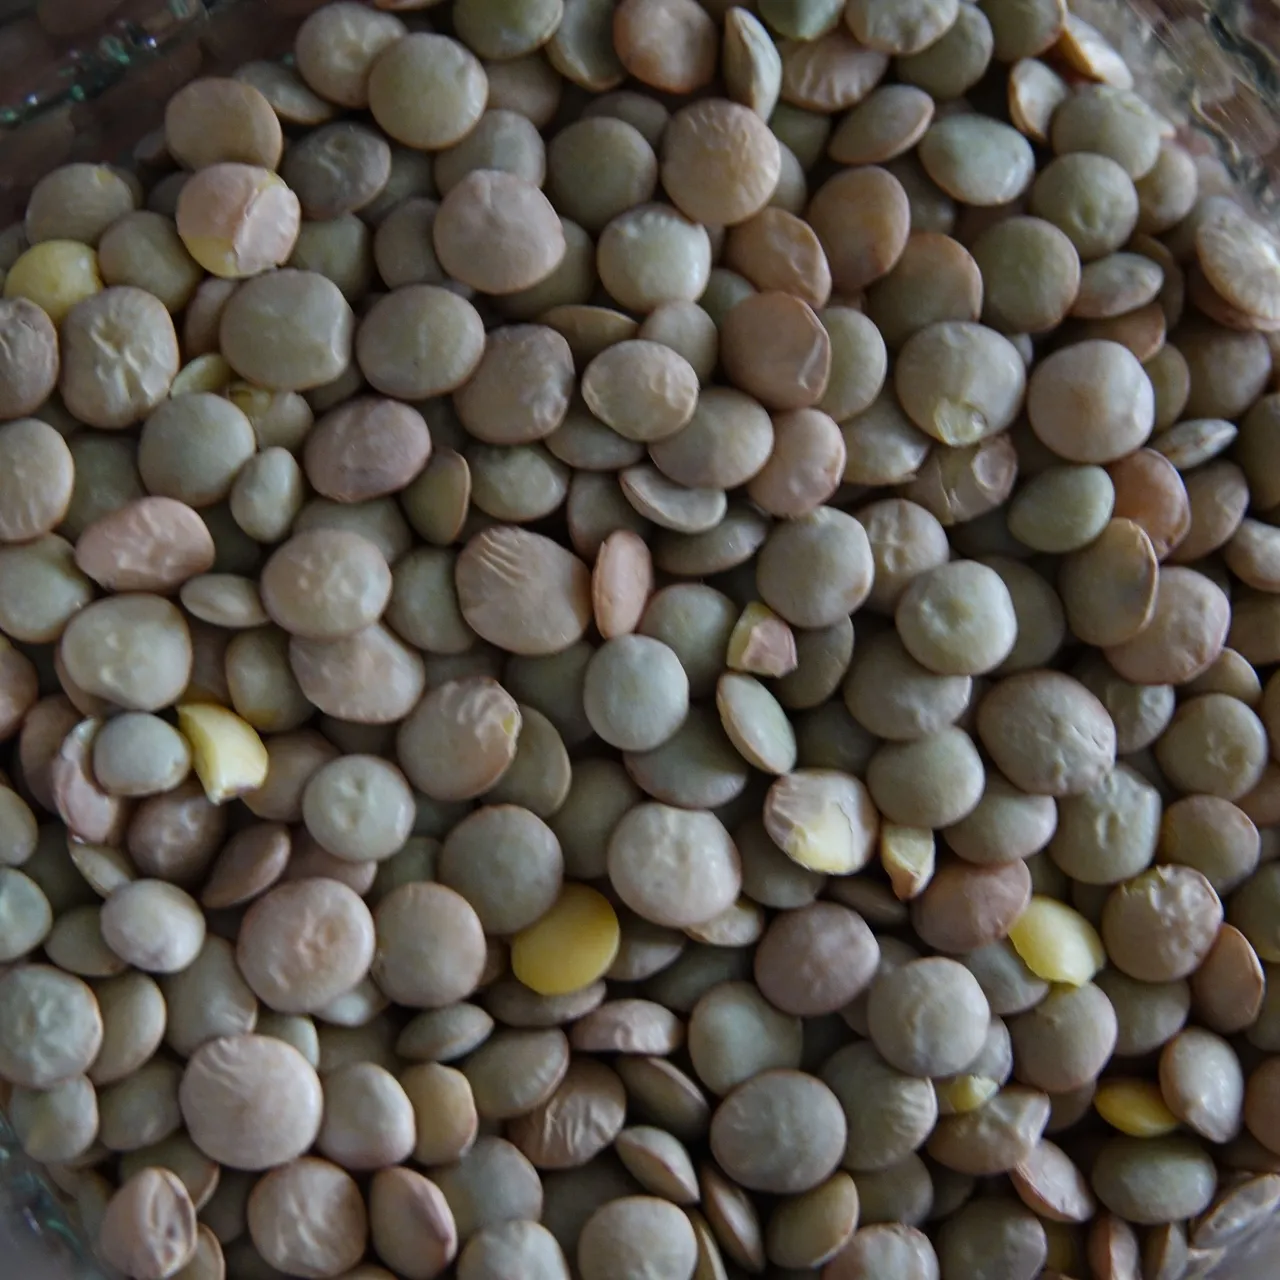
We had 2 big glass jars filled with lentils and we don't really like eating them so I figured I could sacrifice these for the filling. As soon as I felt how they felt and tested it within the sock, I was sold, much better than cotton! My daughter agreed when I let her test it in the sock. Great, otherwise I'd have to make a quick run to the store for more cotton, lol. Glad we could get to work instead.
The steps
I'm very sorry but I didn't take the picturse of the steps this time because it was way too annoying to handle a glue gun (needed constantly) as well as getting out the camera. I'm always very focussed on the glue gun and still burn my fingers. But I will tell you how easy this was to make.
You fold the sock nicely with the opening of the sock on the bottom and draw the cat ears on the top, just a flat line in the middle and a line on both sides to get the cat ear pattern, everyone can do it, it's super simple! This is where you cut the fabric, just not cut it ON the line but a bit next to it (for the glue part) Oh, I forgot to mention, turn the sock inside out for this drawing part!
You can then glue the parts together, I first turned the sock back around, but if you sew it, do it inside out instead. This type of sock is very easy to handle even with a glue gun.
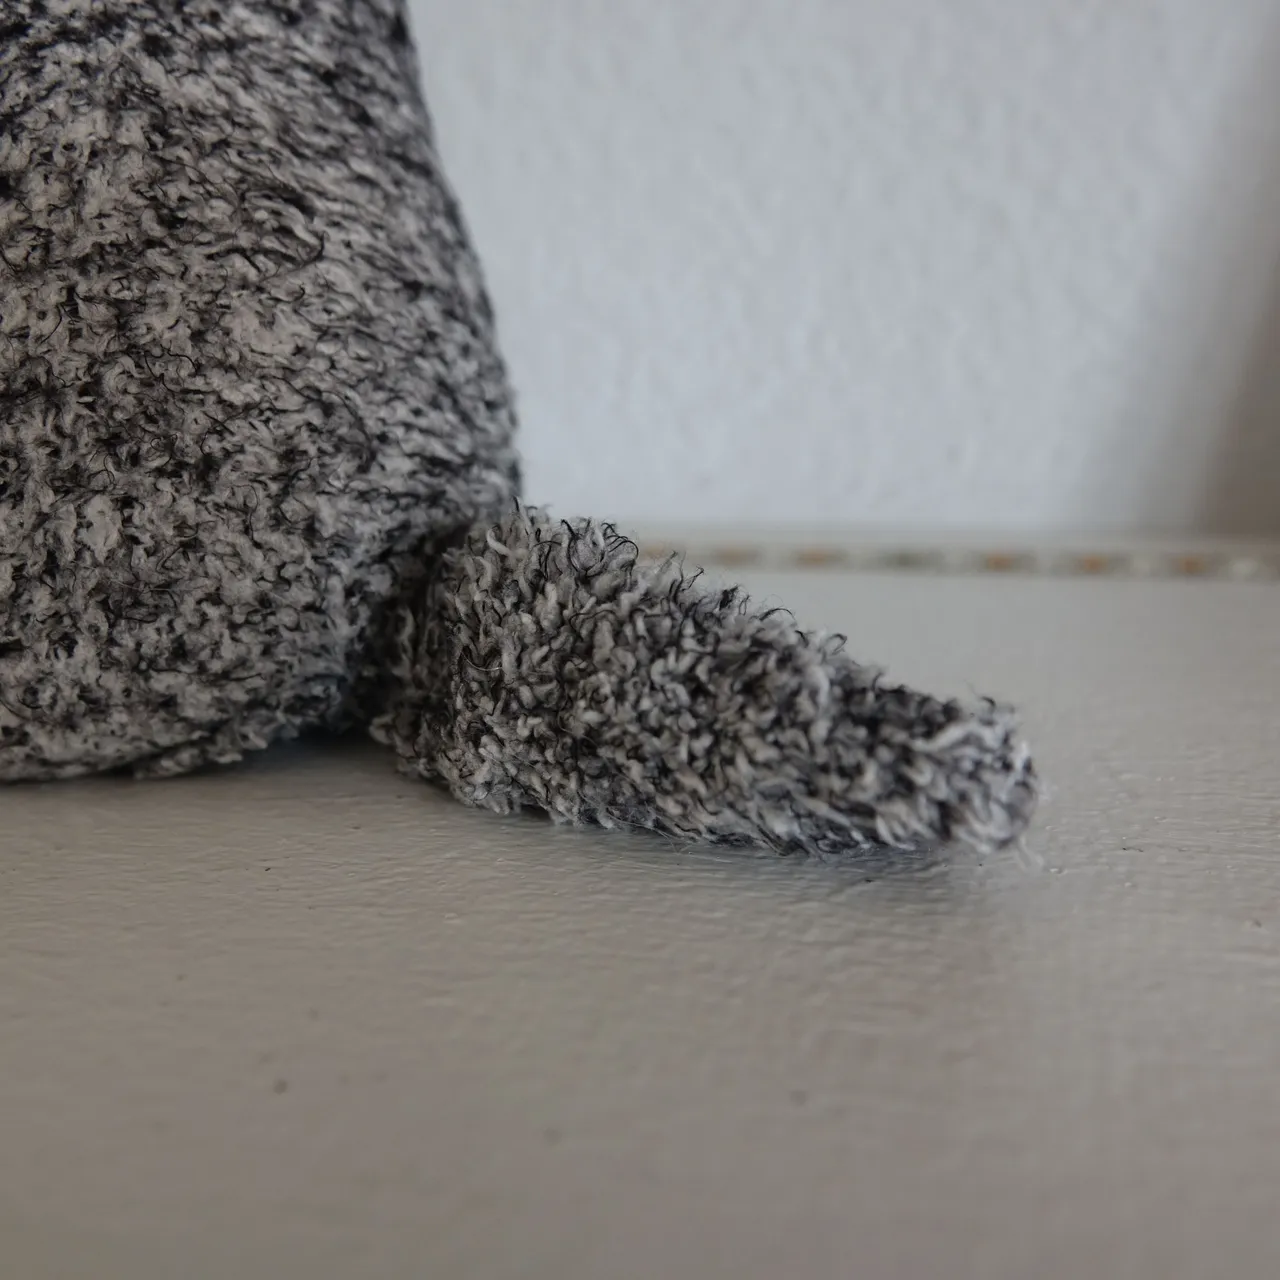
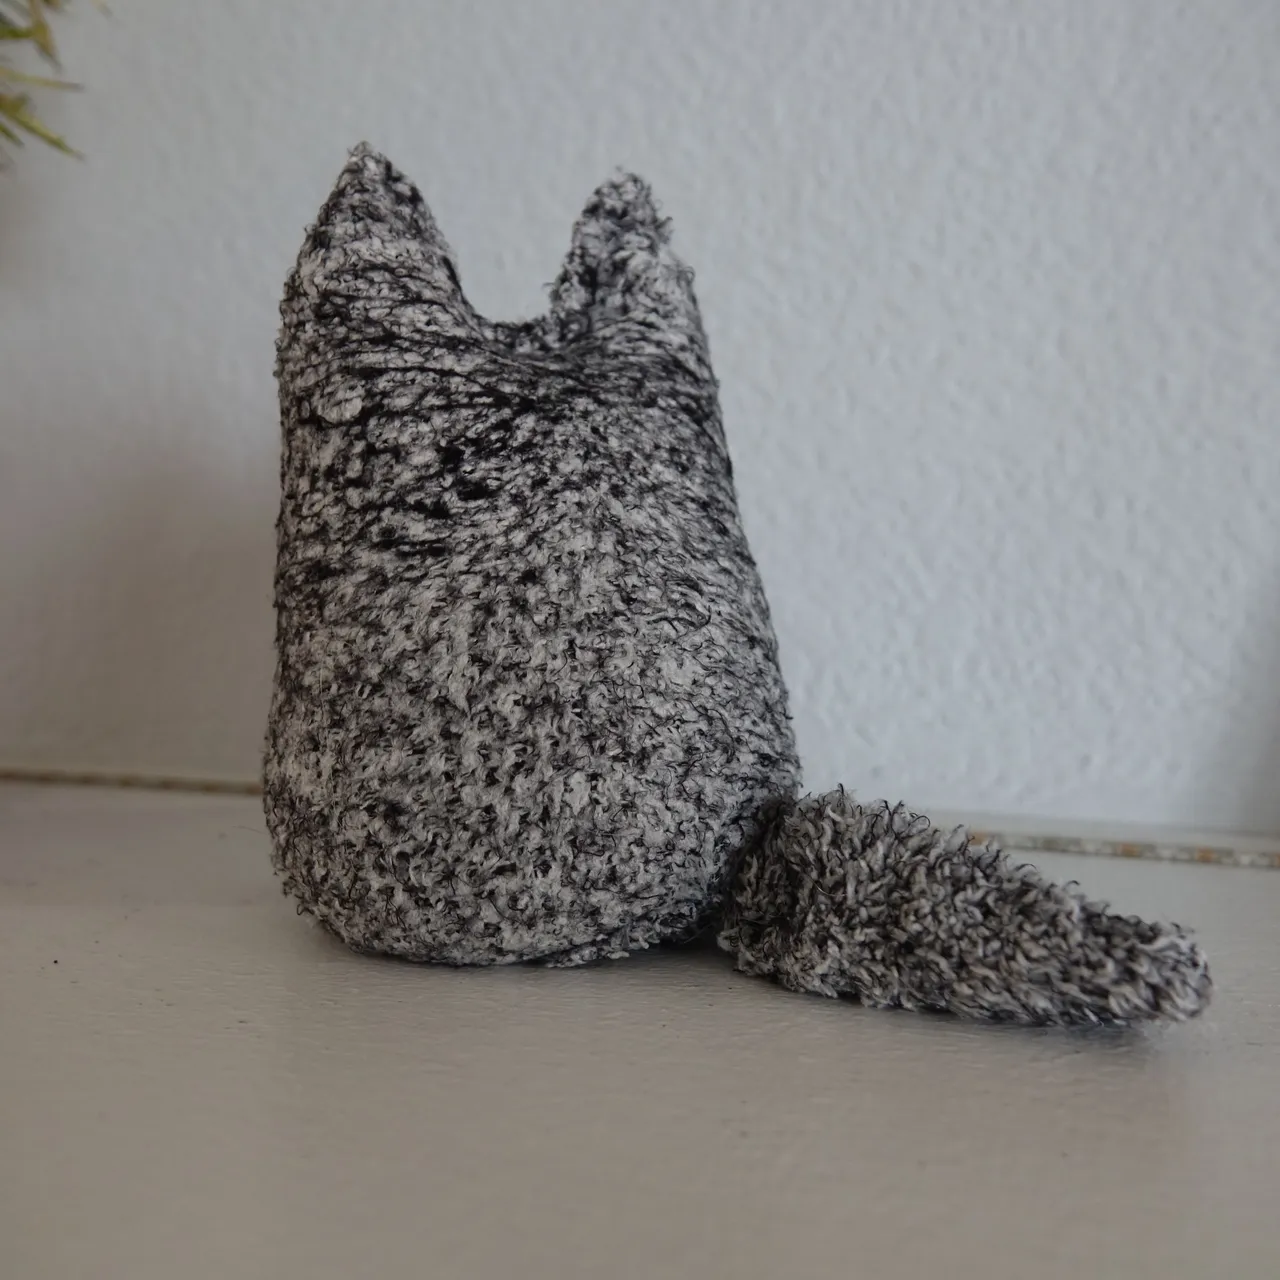
Fill it up with lentils until you're happy with the size. Originally, we wanted to add a tail afterwards but upon closing the bottom, I figured out that I could twist the bottom part tightly, then glue it together, I added a small patch of grey fabric which was waste from the cutting session before this part, and it closed really well.
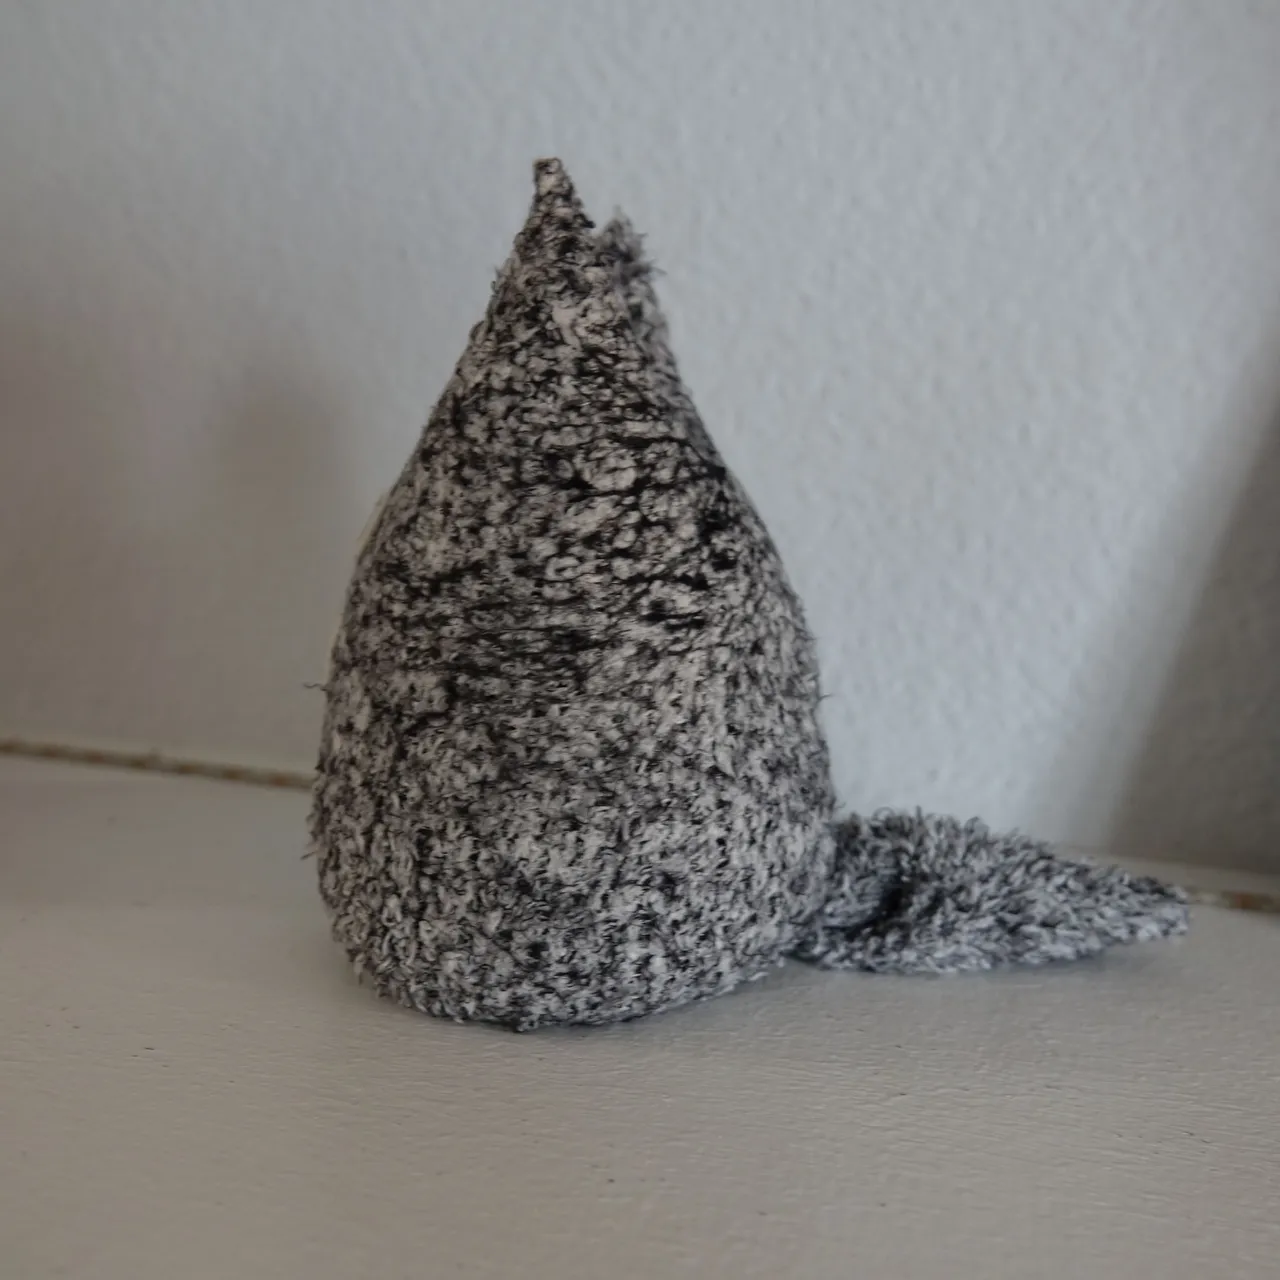
Here you can see the model of the cat better, we were inspired by our fat lady Luna, lol. I cut half of the fabric from the tail to make it look like a fluffy tail:
There's no filling there by the way, we tried but voted against it.
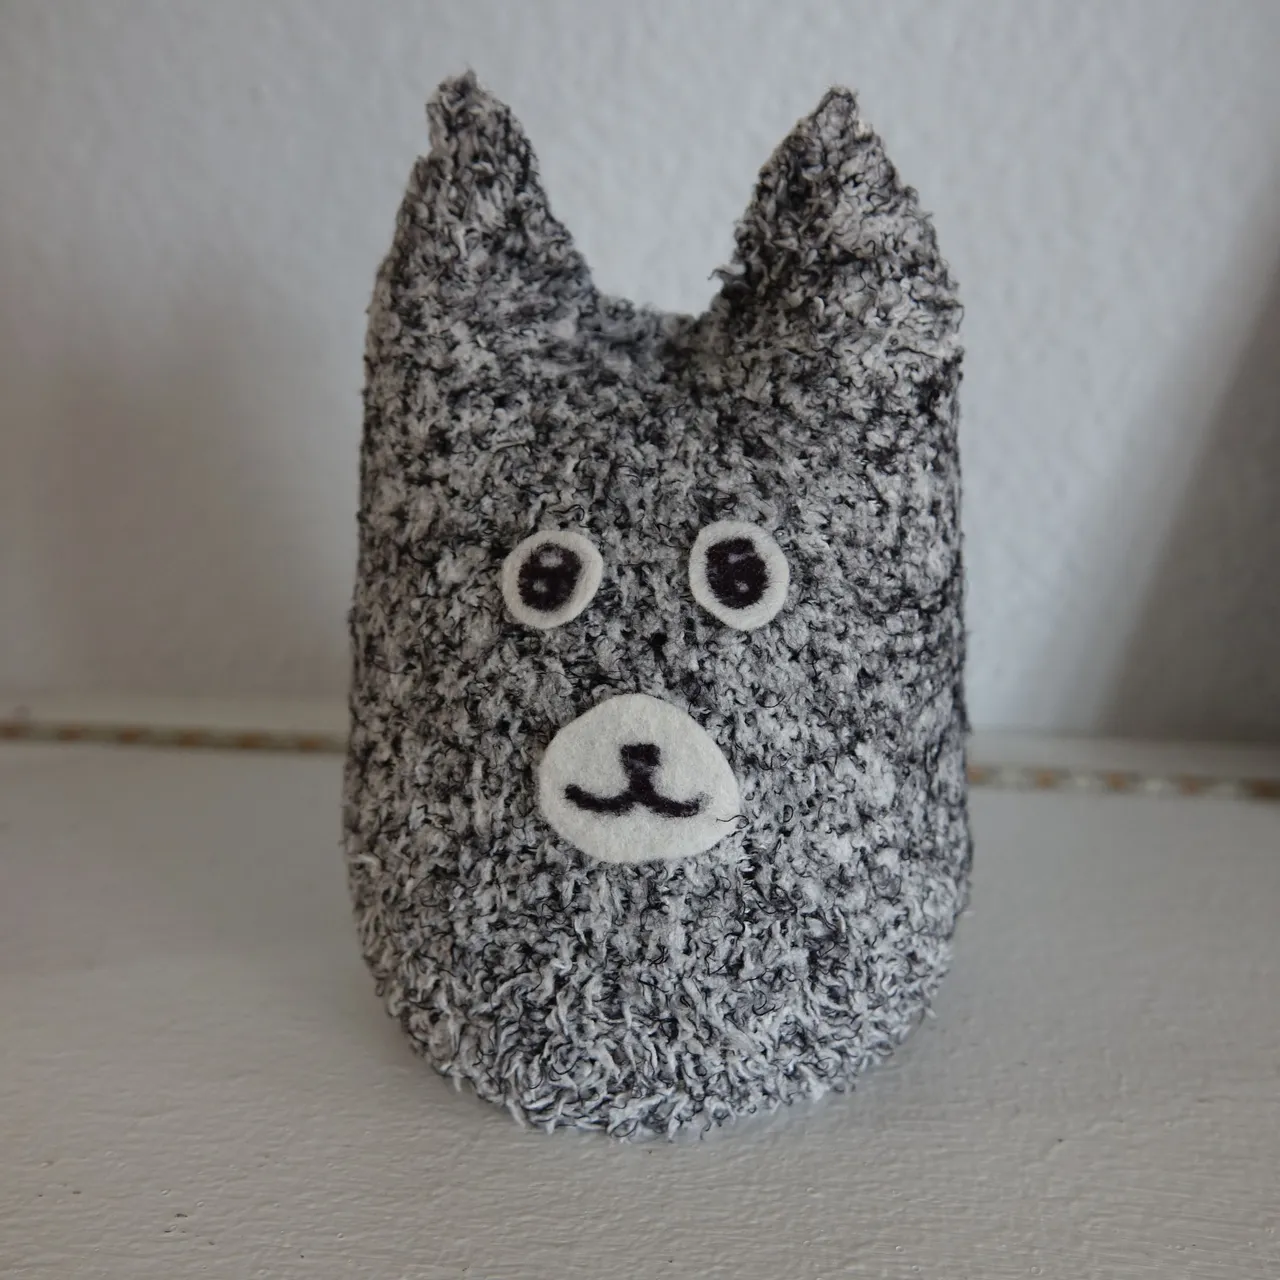
While I was making sure the back of the cat was closed properly, I double checked if the patch was doing it's job correctly.. My daughter cut some felt rounds to add a drawing of the sparkly eyes (as she calls them) and the mouth and nose.. She really loved them. She first requested googly eyes btw, we tried to add them but weren't impressed so she said I can draw them as sparkly eyes which is much better. Ok girl, go for it!
As you can see it turned out quite cool! I was surprised by the end result and it felt so nice to cuddle because of the lentils, haha. My daughter walked around with it the whole day. The cats loved it too because they were trying to capture it thinking it was some sort of prey, lol.
All that was left was to write the parts of the cat such as the ears, the eyes, the fur and tail. But also important was to mention normally they have legs and arms but this one doesn't lol. She did really well and said she had a 10 for the presentation. This was a very fun project to do together, we wouldn't mind to get more of these, lol.
All pictures above are taken with my Sony RX10 III camera..