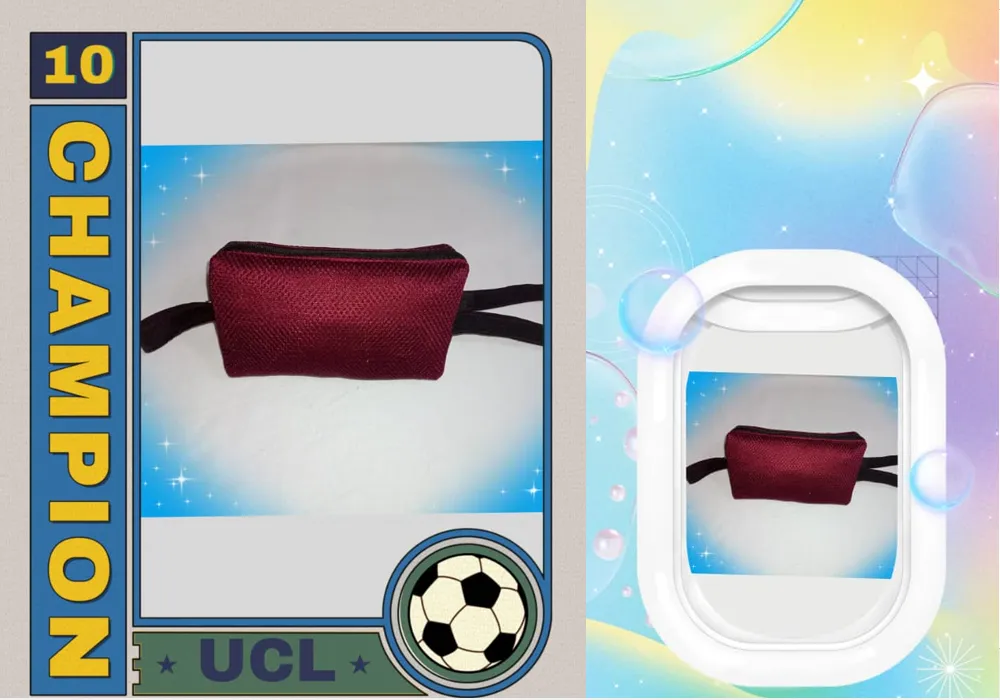

Hello friends of #Hive and the @mundo.autismo community, I hope you have a happy and blessed day with your loved ones. The third Sunday of July in Venezuela is Children's Day, a perfect occasion to celebrate children. It also coincides with school holidays, a special day to celebrate the achievements of the little ones in the house, go out and have fun in the park or mall. Welcome to another installment of the Creative Art column, this time with a sewing project to give to the pampered ones in the house.
With the holiday season and visits to parks, museums, and beaches in mind, I created a multipurpose toiletry bag that children can carry in their backpacks or use to store water and food. It's made of durable fabric and has a waterproof lining. It's a project that requires few materials and is easy to make. I invite you to join me in the creation process.

Hola amigos de #Hive y comunidad @mundo.autismo, deseo que tengan un feliz y bendecido día en unión de sus seres queridos, el tercer domingo del mes de julio en Venezuela, se celebra el Día del niño, una ocasión perfecta para agasajar a los niños, además coincide con las vacaciones escolares, un día especial para festejar los logros de los más pequeños de la casa, salir y divertirse en el parque o centro comercial. Sean bienvenidos a otra entrega de la columna Arte Creativo en esta ocasión con un trabajo de costura para obsequiar a los consentidos de la casa.
Pensando en el período de vacaciones y las visitas a los parques, museos y playas, elaboré un neceser multiuso que los niños pueden llevar en el morral o usar guadar el agua y comida, está hecho con una tela resistente y el forro es impermeable, es un proyecto que requiere pocos materiales y sencillo de hacer, les invito y me acompañen en el proceso de elaboración.

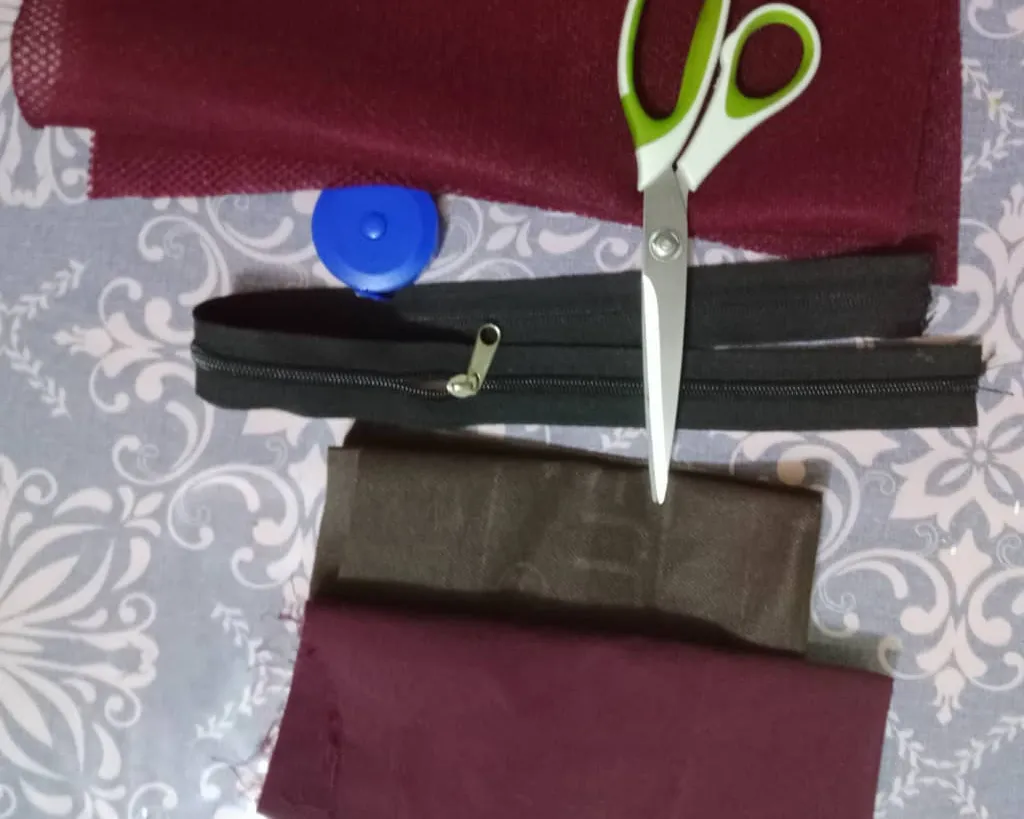
The materials used were:
Sandwich mesh fabric
Waterproof fabric
Scissors
Tape measure
Pins
Sewing machine
Los materiales usados fueron:
Tela malla sandwich
Tela impermeable
Tijera
Cinta métrica
Alfileres
Máquina de coser
Elaboration
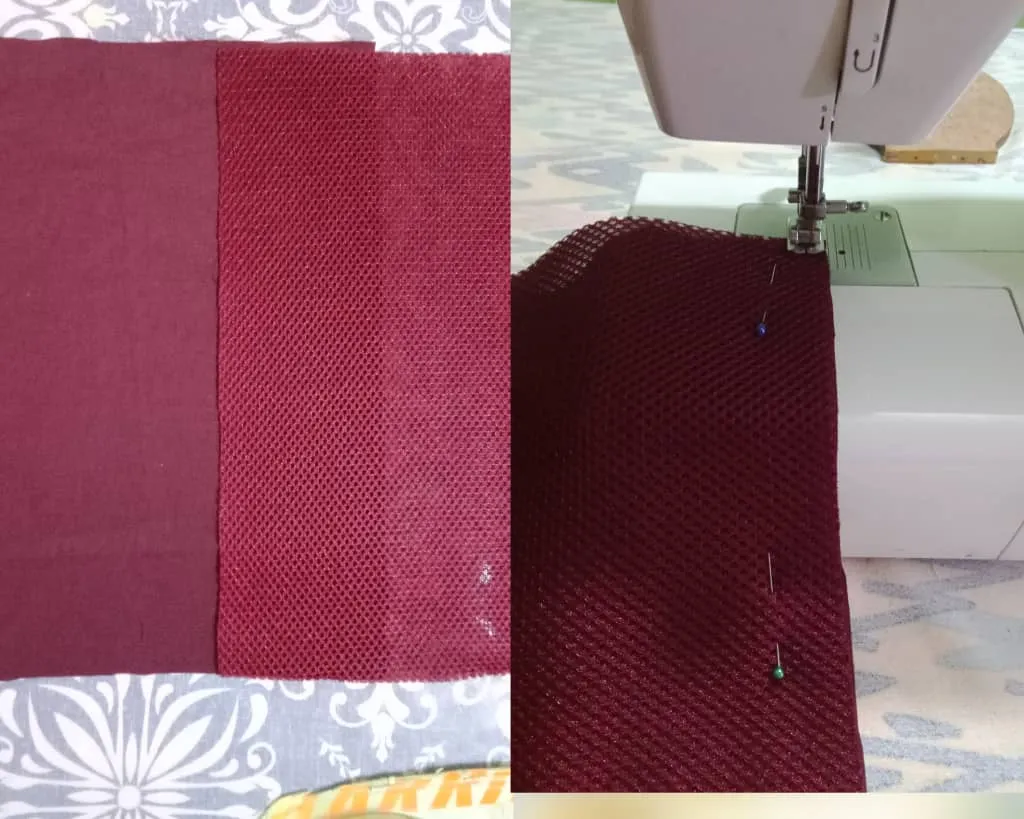
Once the materials were organized, the first step in making this beautiful toiletry bag was to cut two squares measuring 31 x 31 centimeters, one made of waterproof fabric, which will be the lining, and the other made of the main fabric. Then, I faced the fabrics together from the wrong side, pinned them, and sewed around the entire outline. This way, the closure is easier to attach since the fabrics do not move.
Elaboración
Organizados los materiales, el primer paso para elaborar este hermoso neceser, fue cortar dos cuadrados de 31 * 31 centímetros, uno en Tela impermeable, que será el forro y el otro en la tela principal, luego enfrenté las telas por el revés sujeté con alfileres y cosí por todo el contorno, de esta forma se pega el cierre más fácil, ya que las telas no se mueven.
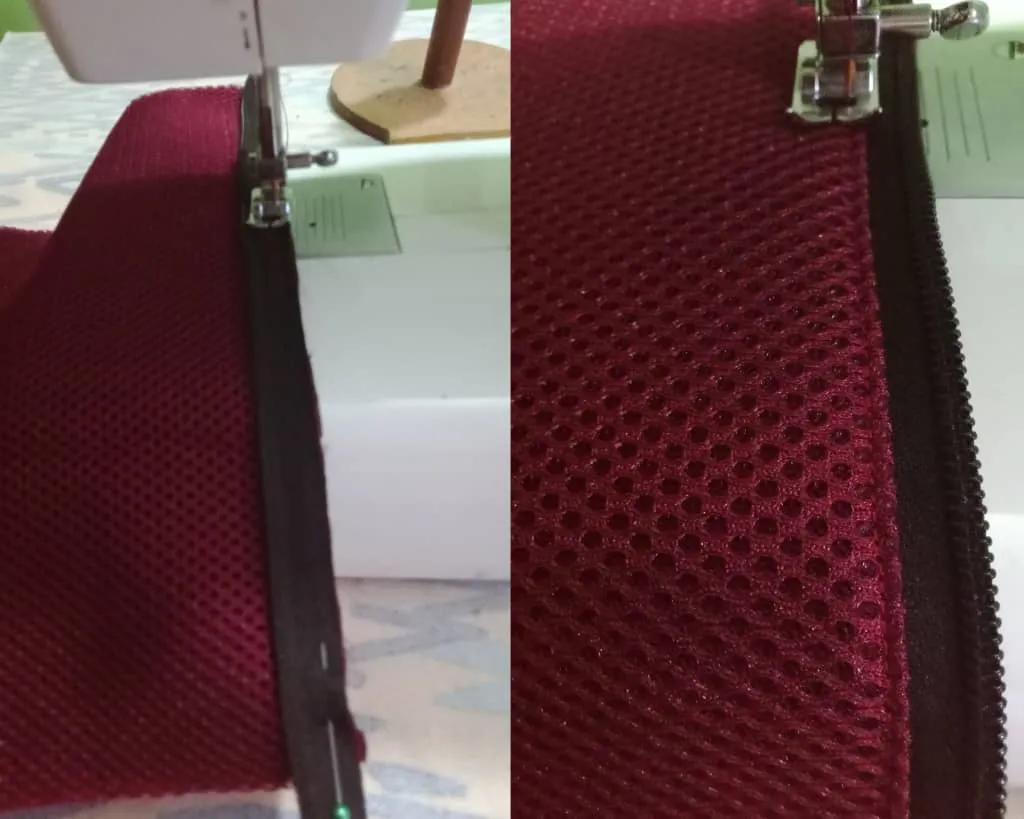
The next step was to attach the zipper. To do this, I removed the slider and placed the zipper on each side, facing right sides of the zipper and the fabric. I secured it with pins, sewed with a straight stitch, turned the zipper right side out, and sewed a seam to reinforce the previous seam and give it a better finish.
El siguiente paso fue pegar el cierre, para ello retiré el slider y coloqué la cremallera a cada uno de los laterales enfrentando derecho con derecho del cierre y la tela, sujeté con alfileres cosí con puntada recta, volteé el cierre por el derecho y pasé una costura para reforzar la anterior y dar un mejor acabado.
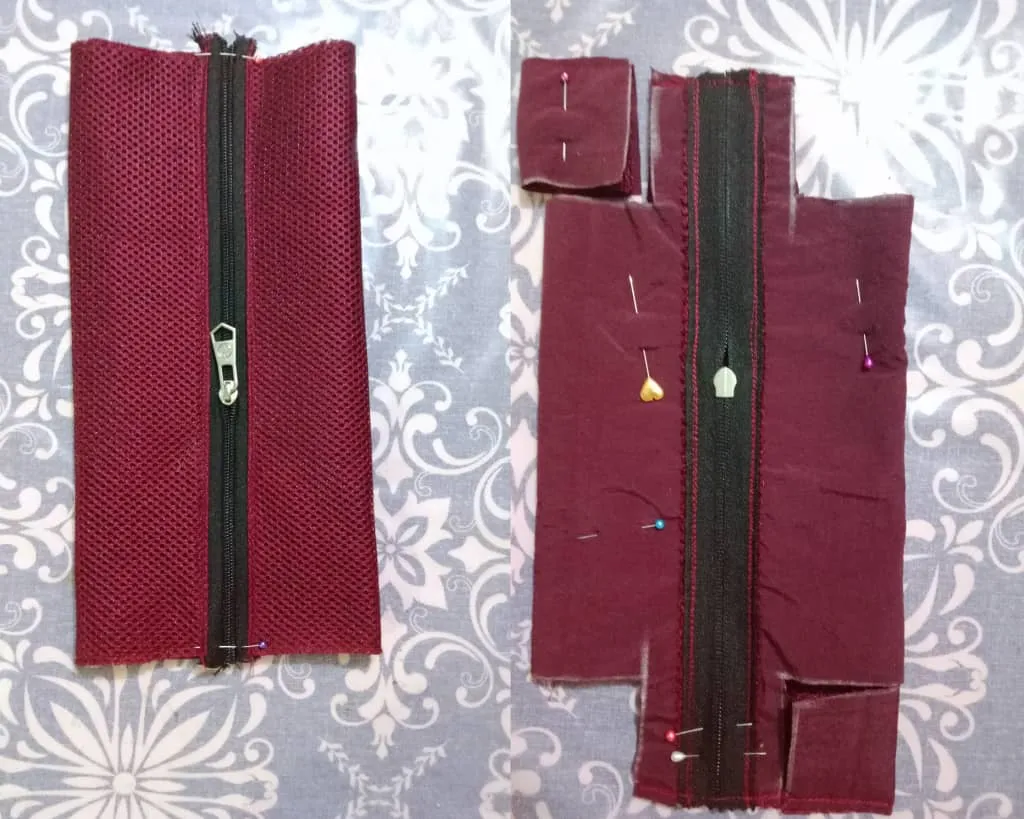
After gluing the zipper on both sides, I placed the slider and folded the bag so the zipper line met the center of the back. Then I turned the piece inside out and marked 5 x 5 cm squares on all the corners and cut very carefully, using the lines of the squares as a guide, so the cuts were symmetrical.
Pegado el cierre en ambos lados, coloqué el slider y doblé el neceser de tal forma que el cierre coincida con el centro posterior, luego volteé la pieza por el revés y marqué en todas las esquinas cuadrados de 5 * 5 centímetros y corté con mucho ciudado, tomando como guía las líneas de los cuadrados, así los cortes quedan simétricos.
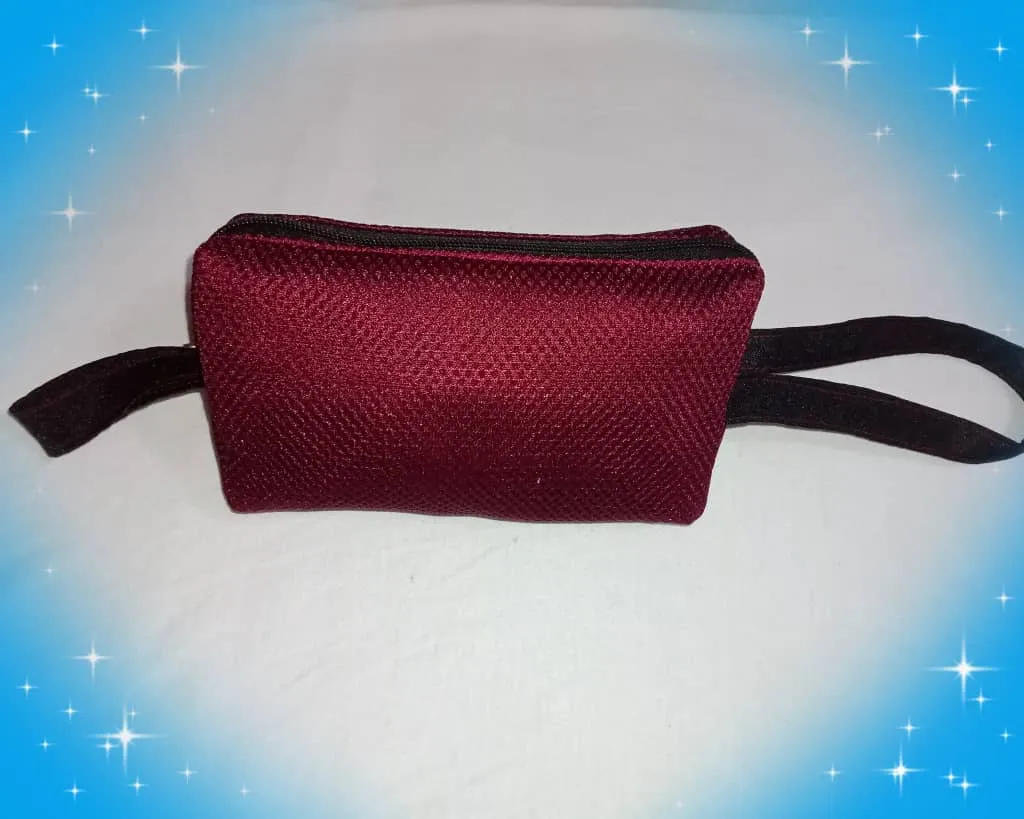
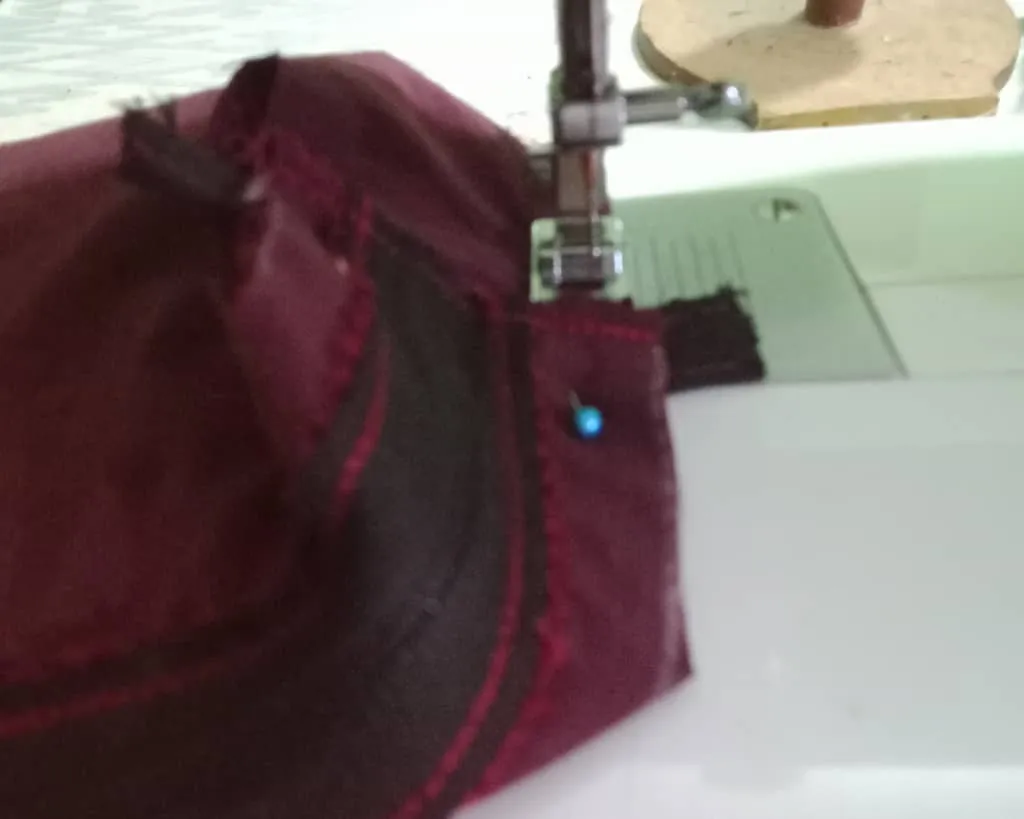
To finish, I joined the horizontal and vertical ends of the squares so that they form a straight line. I secured them with pins. At one end of the closure, I placed a ribbon that will serve as a support for opening and closing the zipper. At the other end, I placed a ribbon, which will be the hanger for carrying the toiletry bag in my hand or tying it to my purse.
I sewed with a straight stitch, overlaying the areas where the ribbons pass. Once the stitching was finished, I removed the excess fabric, and now a lovely gift is ready to give to the children on their special day.
Para finalizar uní los extremos horizontales y verticales de los cuadrados, de tal forma que al coincidir quede línea recta, sujeté con alfileres, en uno de los extremos del cierre coloqué una cinta que servirá de soporte para abrir y cerrar la cremallera, en el otro extremo coloqué una cinta, que será el colgadero para llevar el neceser en la mano o amarrarlo al bolso.
Cosí con puntada recta, repisando las partes por donde pasan las cintas, terminada la costura retiré el exceso de tela y así está listo un lindo detalle para obsequiar a los niños en su día especial.
Blessings!
Bendiciones!
Hasta luego!

Translated with https://www.deepl.com/translator
              All images are my own.


   Todas las imágenes son de mi autoría.