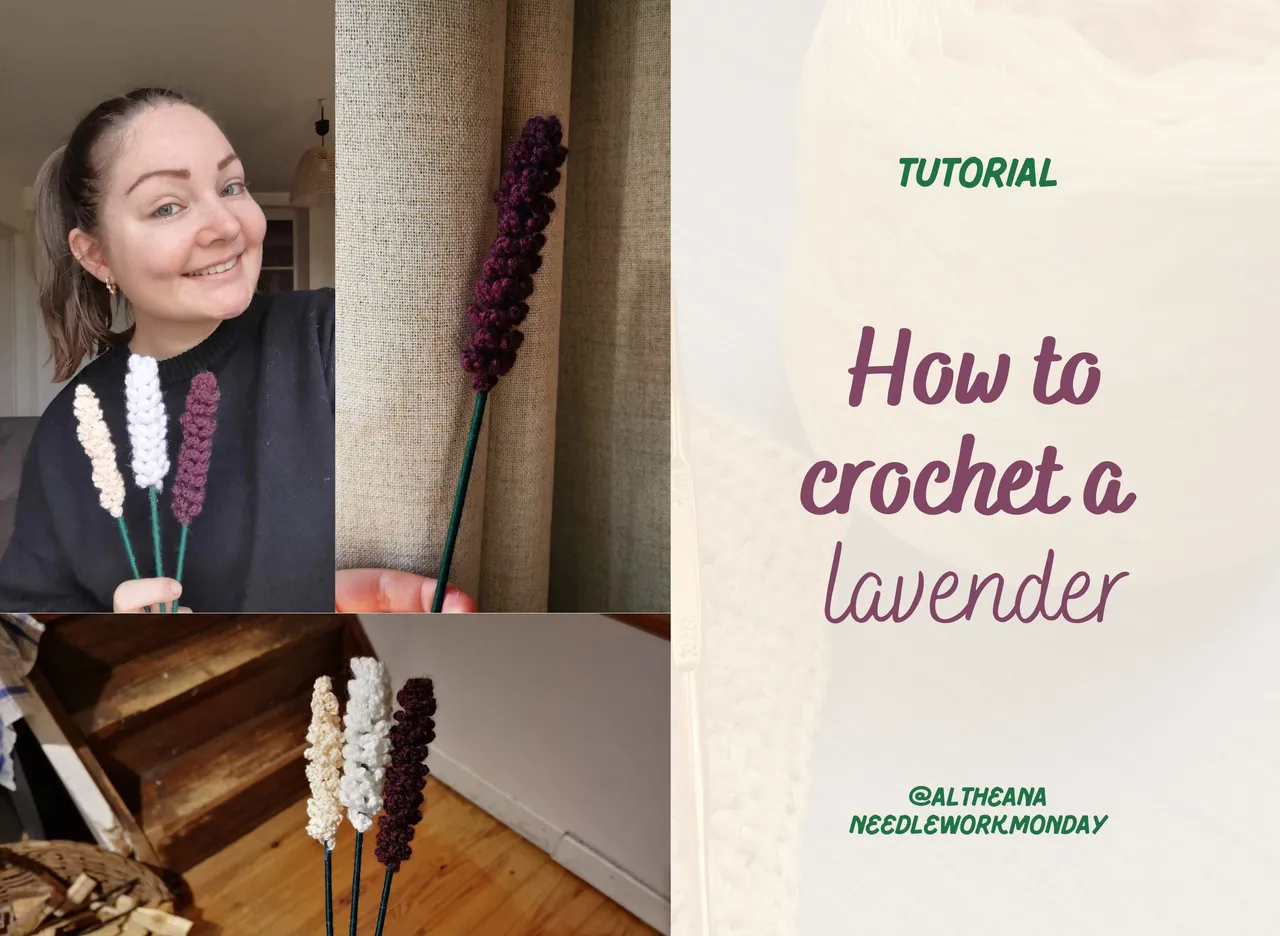
Hello friends and crochet lovers! I hope you are all doing very well at the beginning of this week. 😁
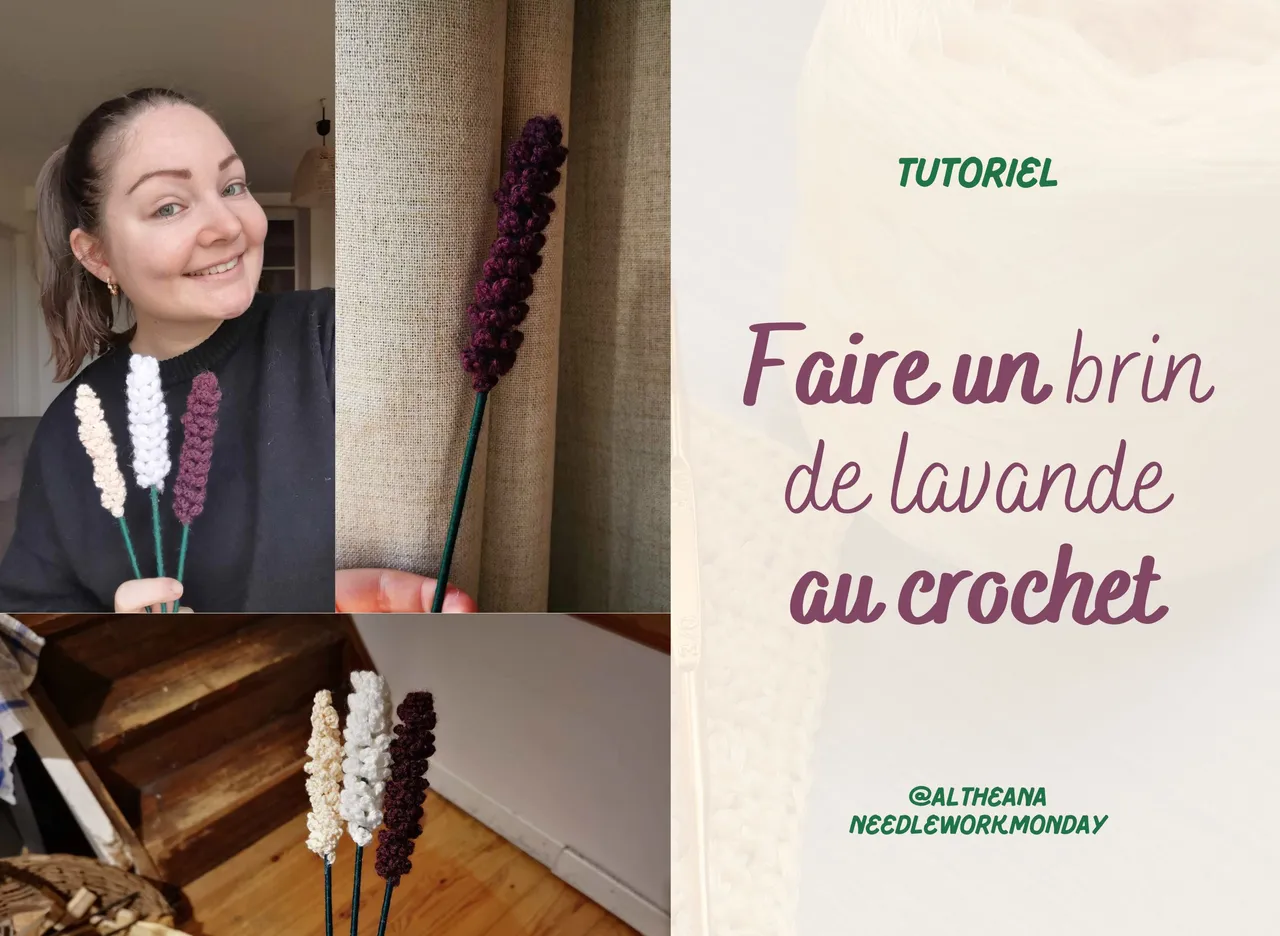
I continue to embellish my bouquet of crochet flowers every week, with one or more new creations. And this week, I added sprigs of lavender! 🪻
So like every Monday, I will share with you a little tutorial so that you too can reproduce this sprig of lavender! 😁
After testing several tutorials, I finally adapted the process so that the sprig of lavender really corresponds to my expectations!
You will see, it is one of the simplest flowers to make: you just need to know how to chain stitch, single crochet and slip stitch.
And what's more, it's quite quick! In 20 minutes, you can have your first sprig of lavender! 🪻
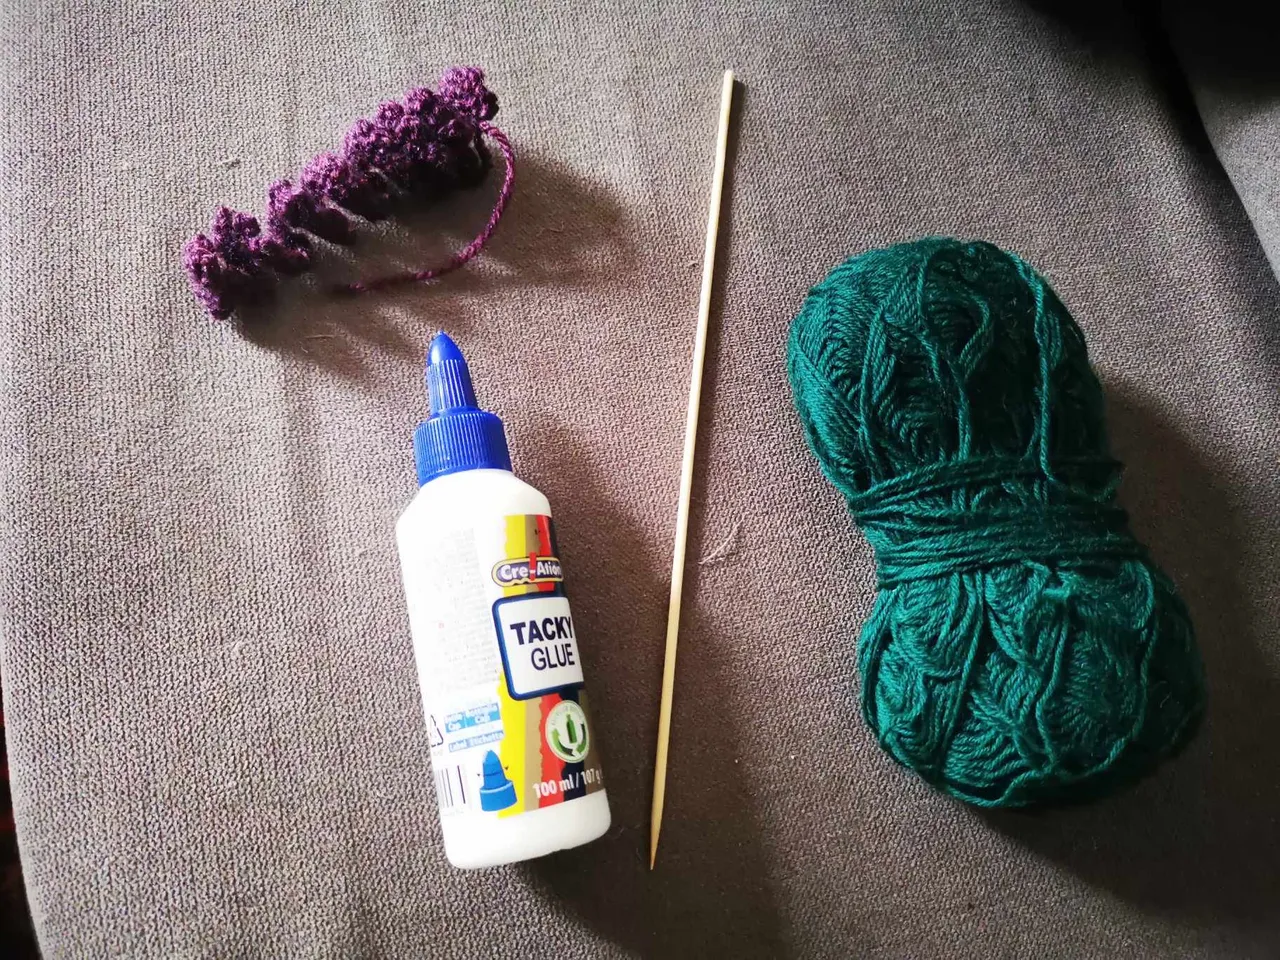
The material
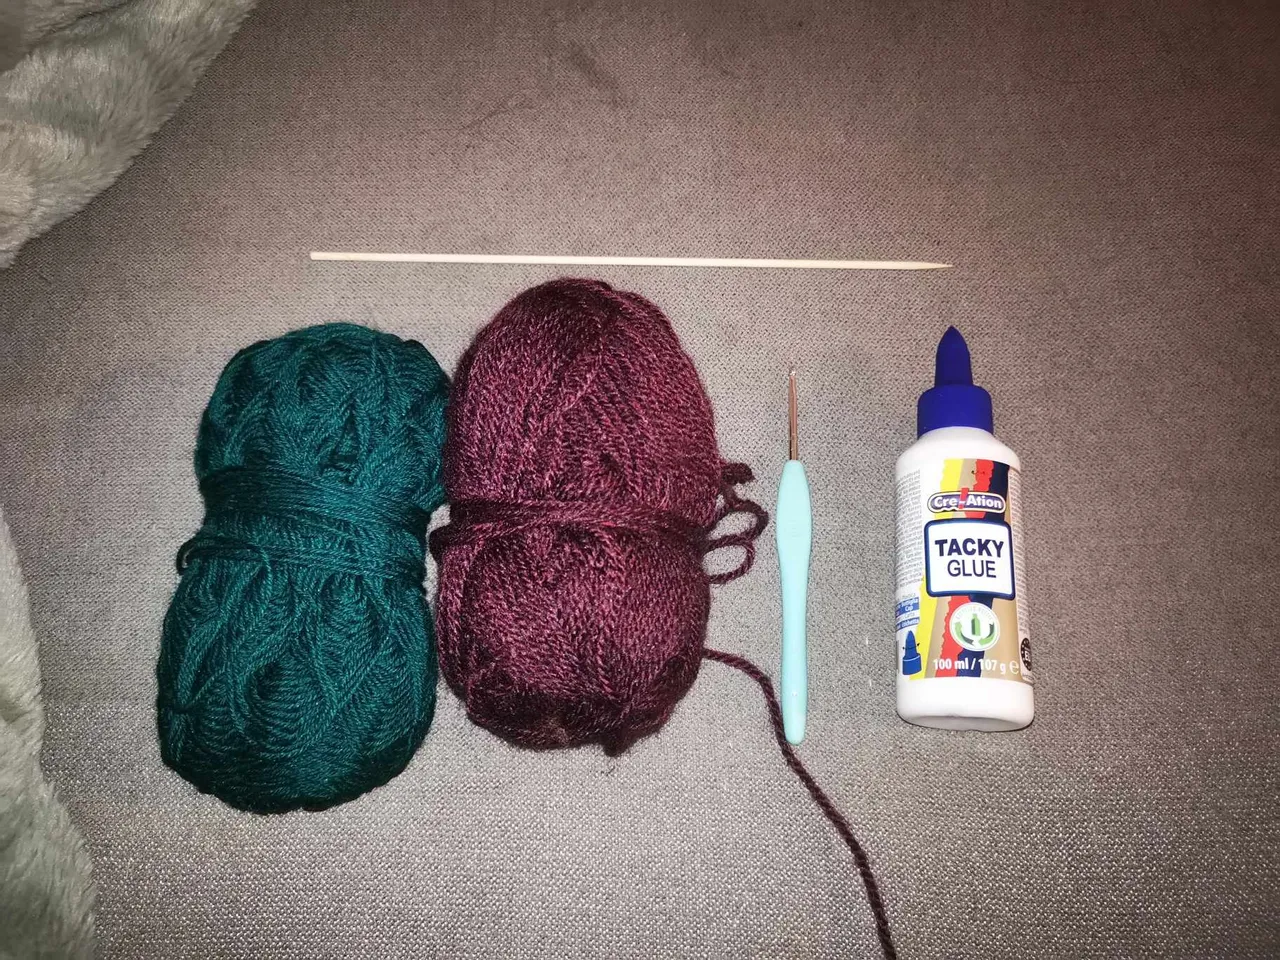
- Yarn in the color of your choice for the lavender (I chose a dark purple yarn);
- Wire for the stem (I chose dark green);
- A 3mm crochet hook;
- A skewer for the stem;
- Glue.
Steps
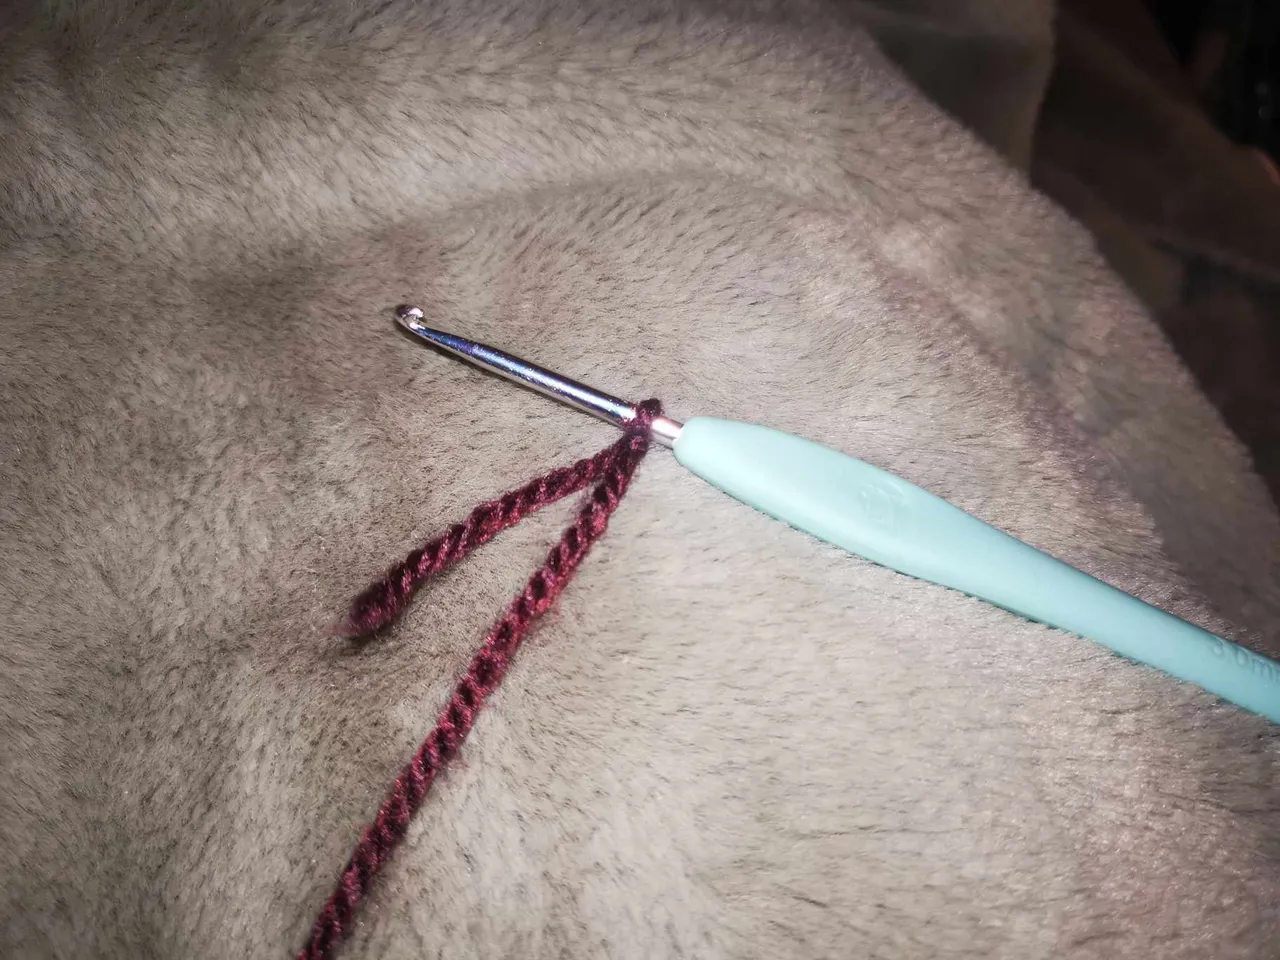
The sprig of lavender
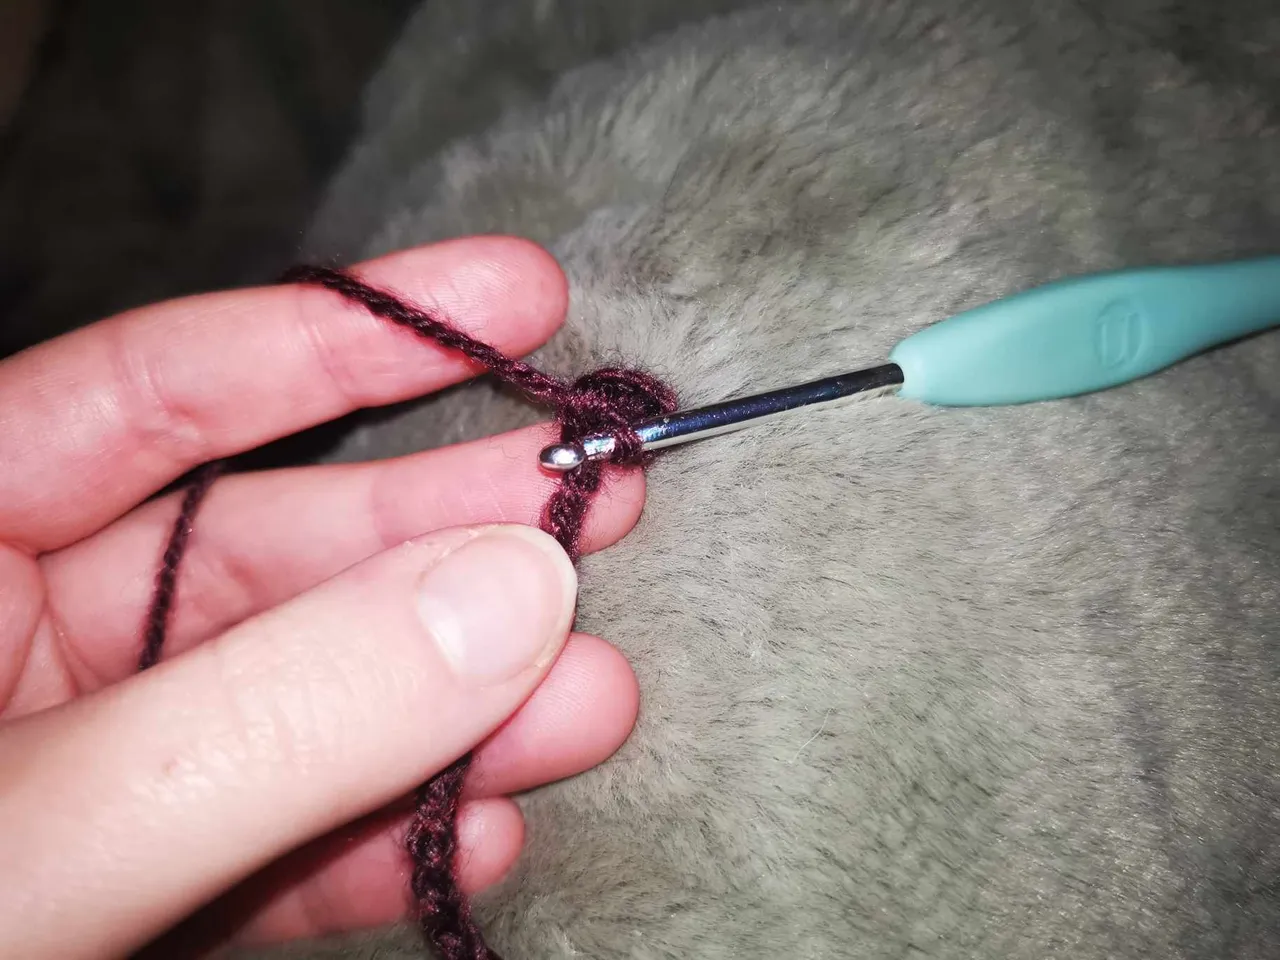
To start, you have to make a slip knot:
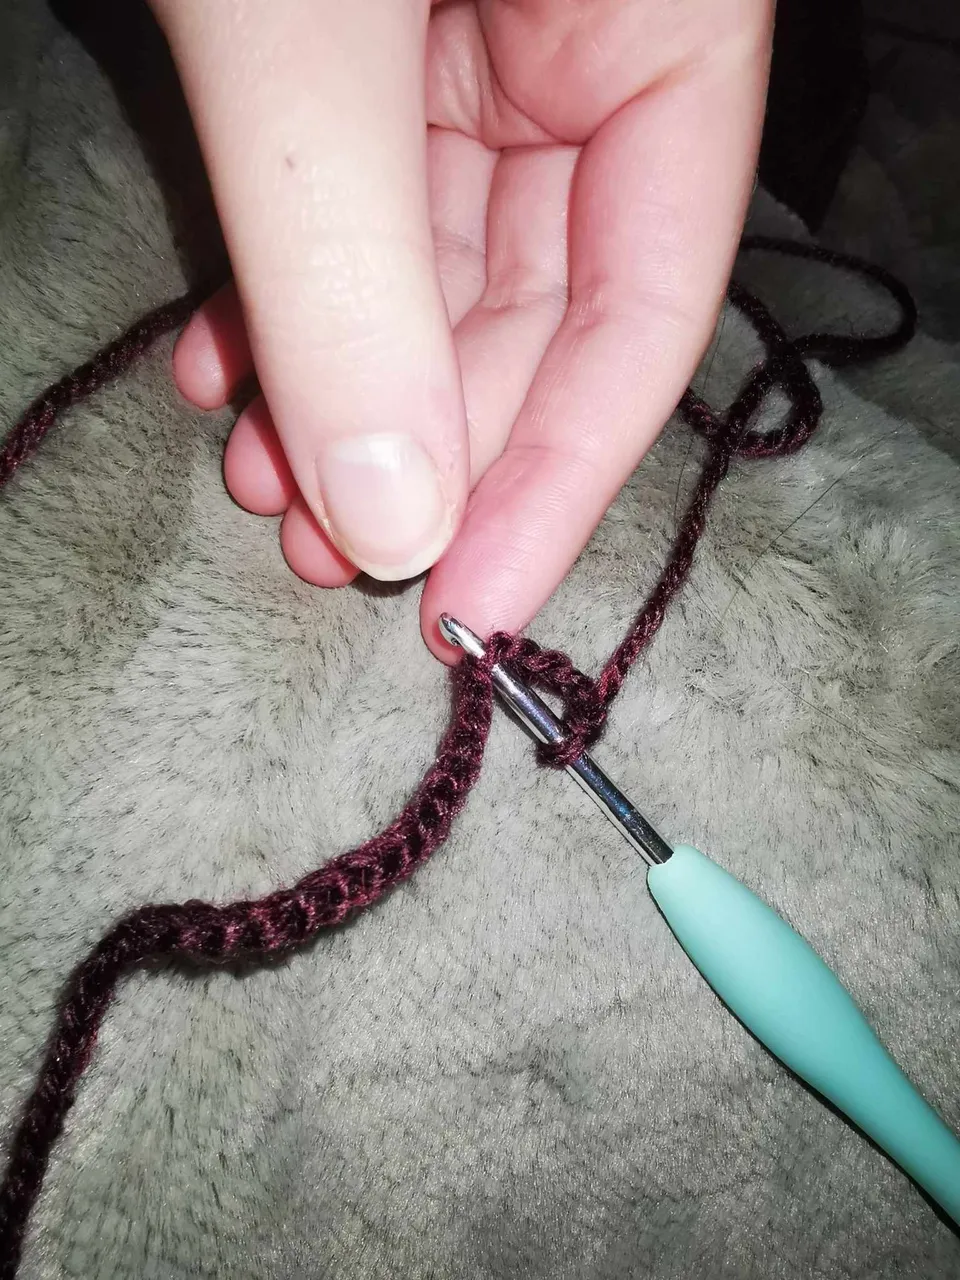
Then, you have to chain 60 stitches in the air:

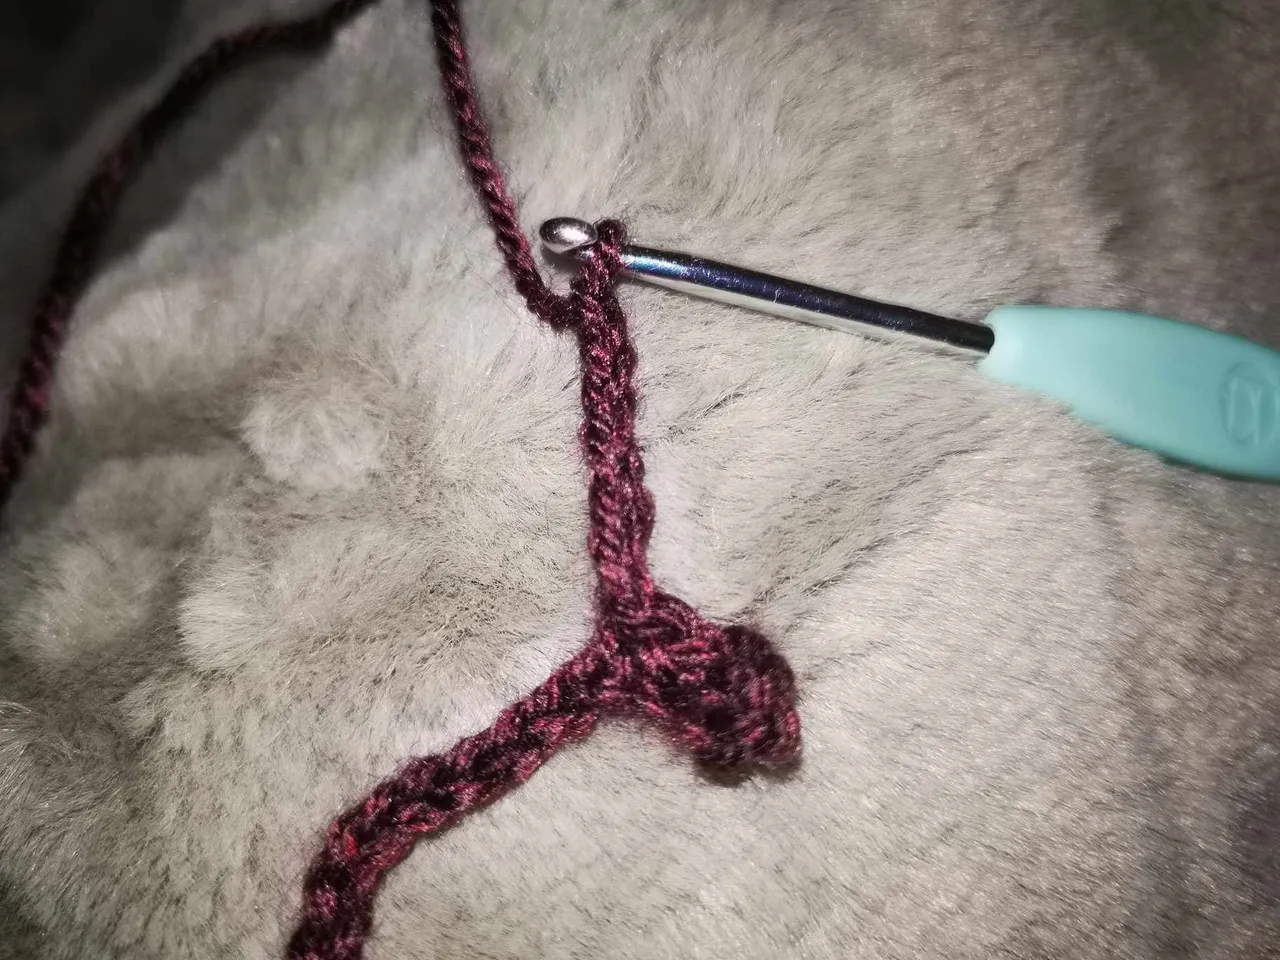
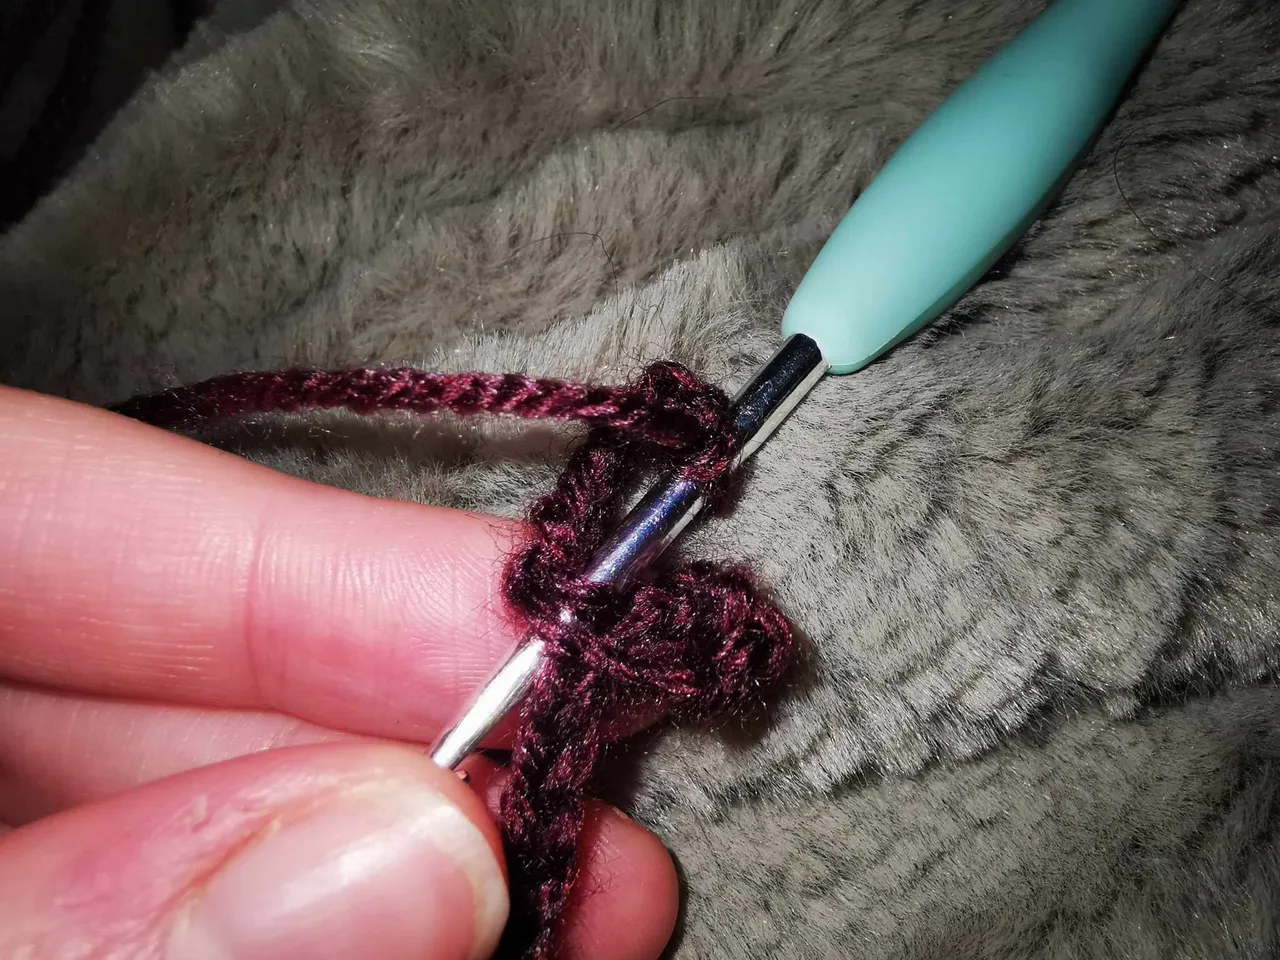
Then, you will have to insert into the 6th stitch from the hook and make a single crochet:

In the next stitch, you will make a slip stitch:

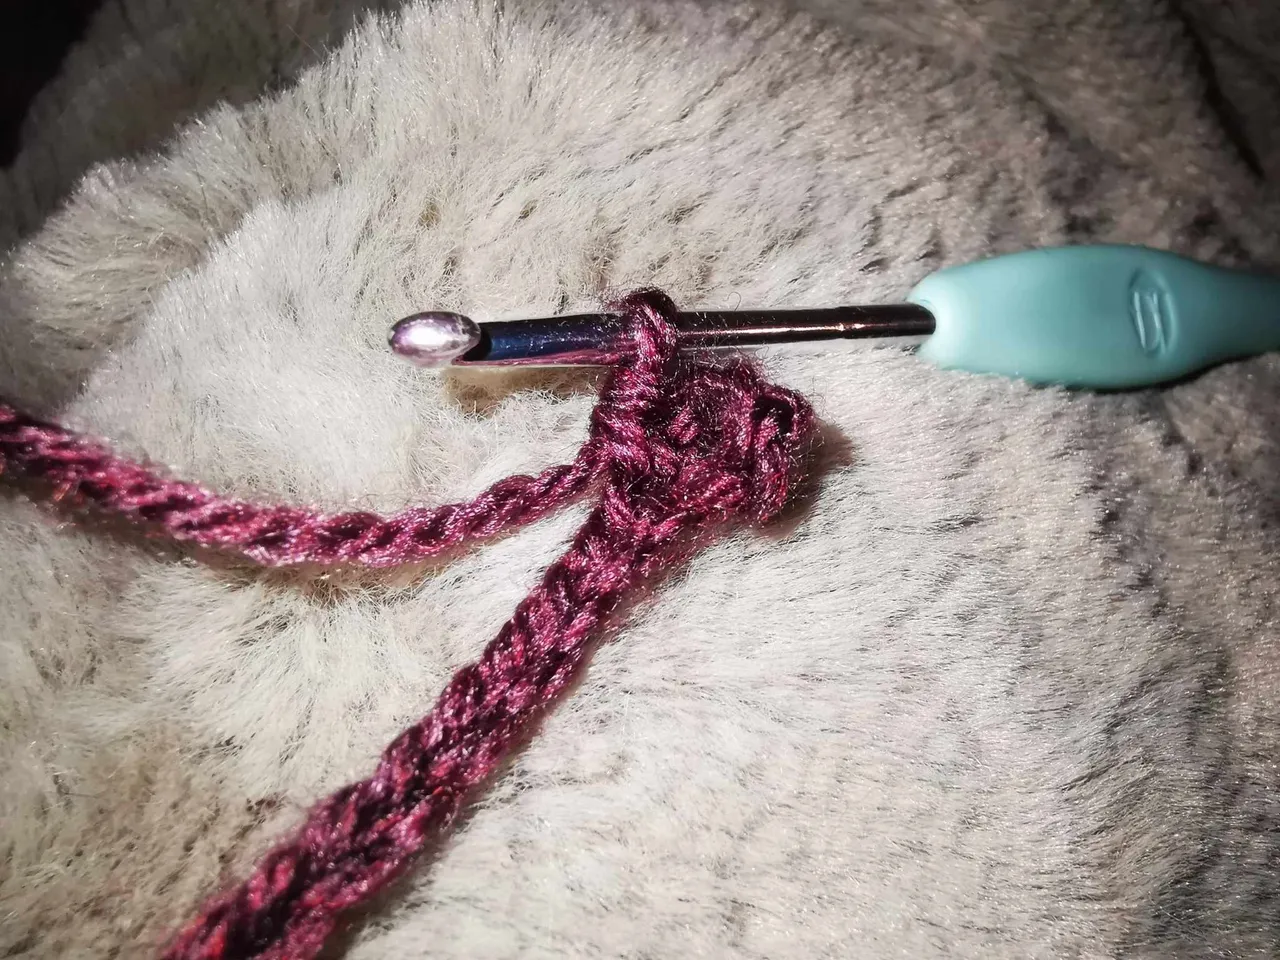
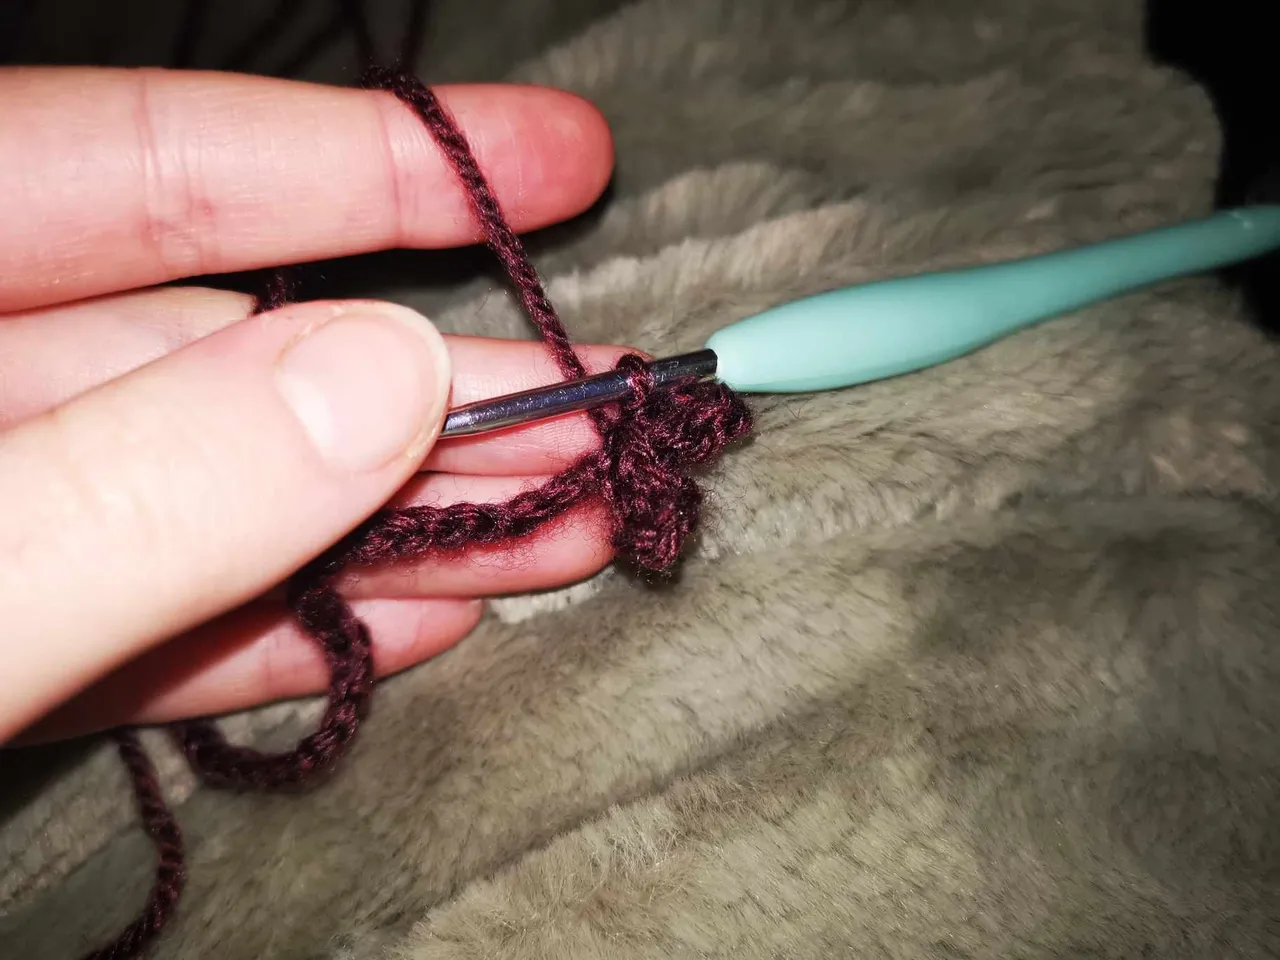
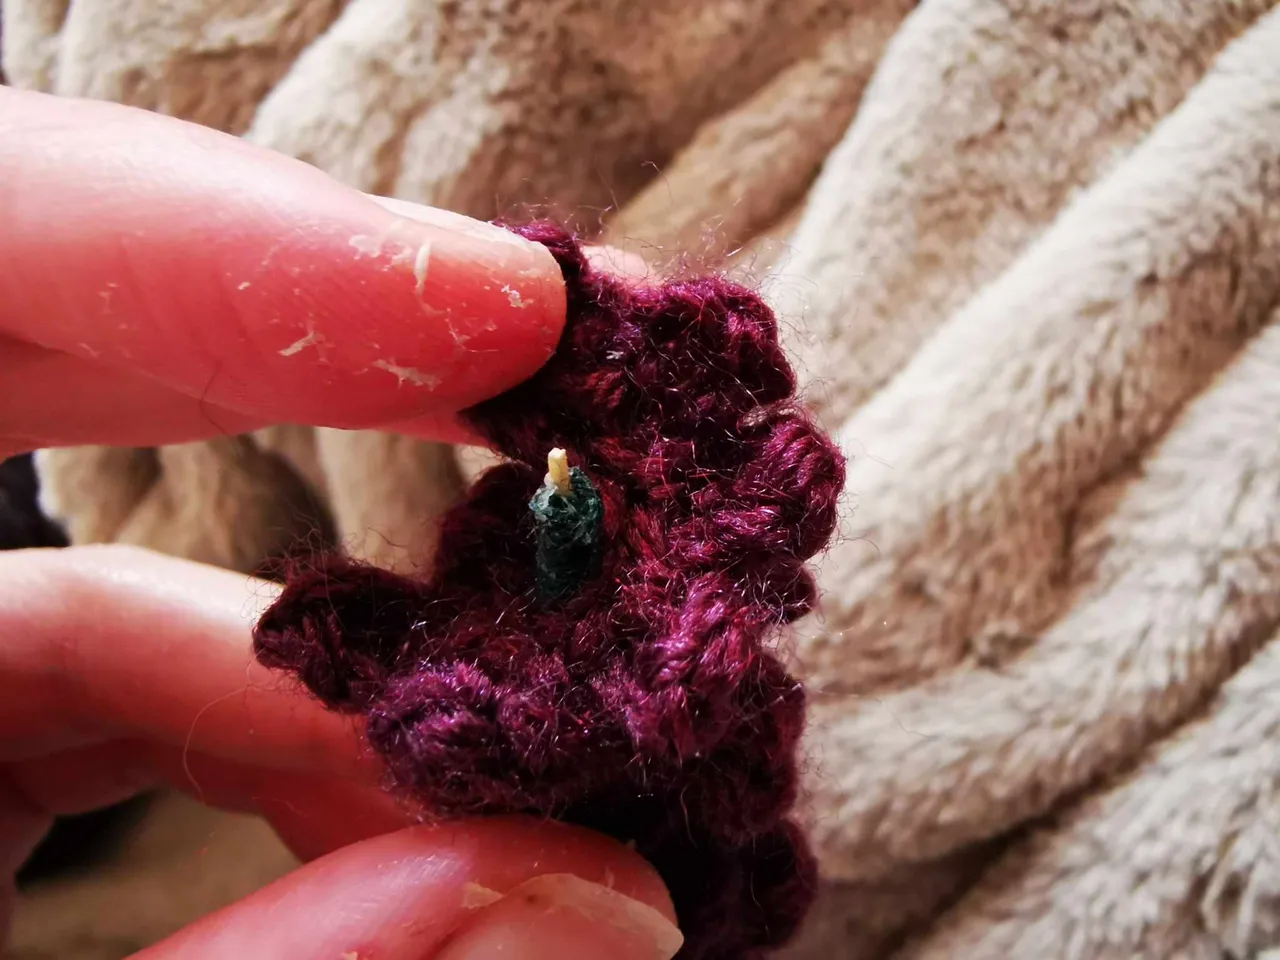
Then, you will chain 6 stitches:
And make a slip stitch in the V that I show you in the photo (the strand of the previous slip stitch and the strand of the current stitch) 👇
And in the next stitch, you will make a slip stitch.
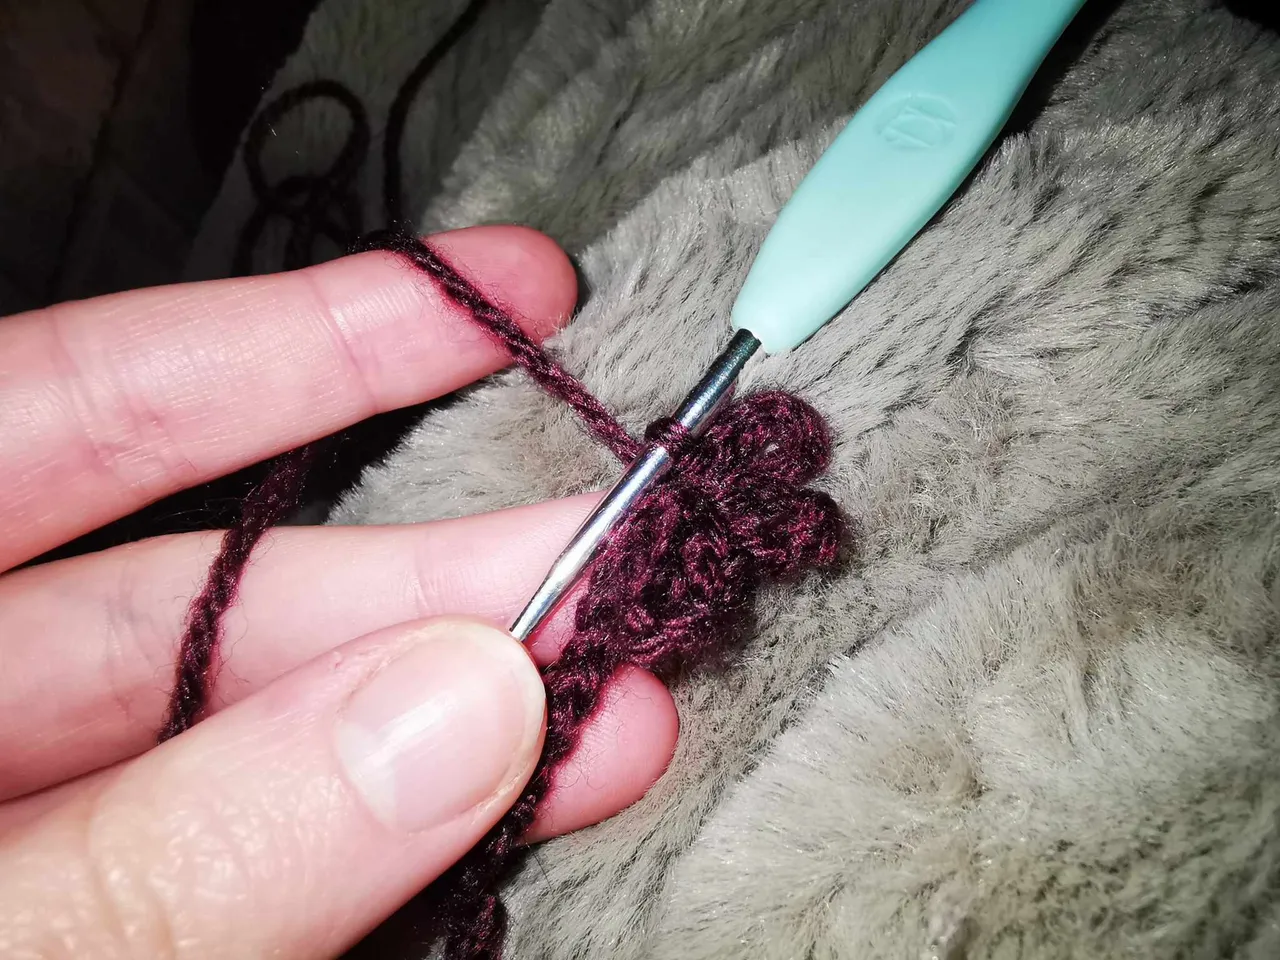
And then, the pattern repeats itself:
- Chain 6;
- 1 slip stitch in the V;
- 1 slip stitch in the next stitch;
- Chain 6;
- 1 slip stitch in the V;
- 1 slip stitch in the next stitch
- Etc…
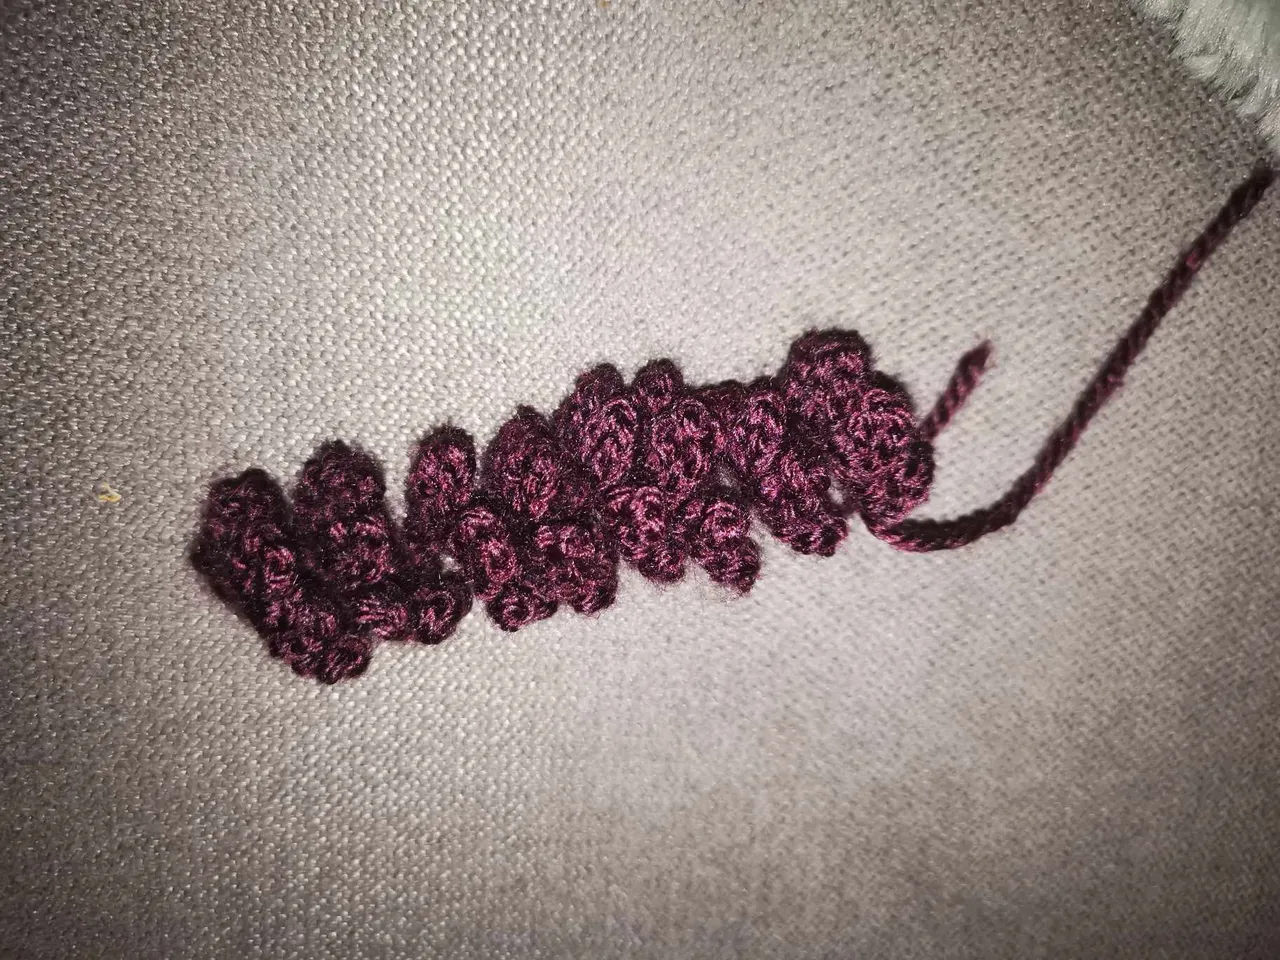
And you will continue like this until you reach the end of the starting chain.
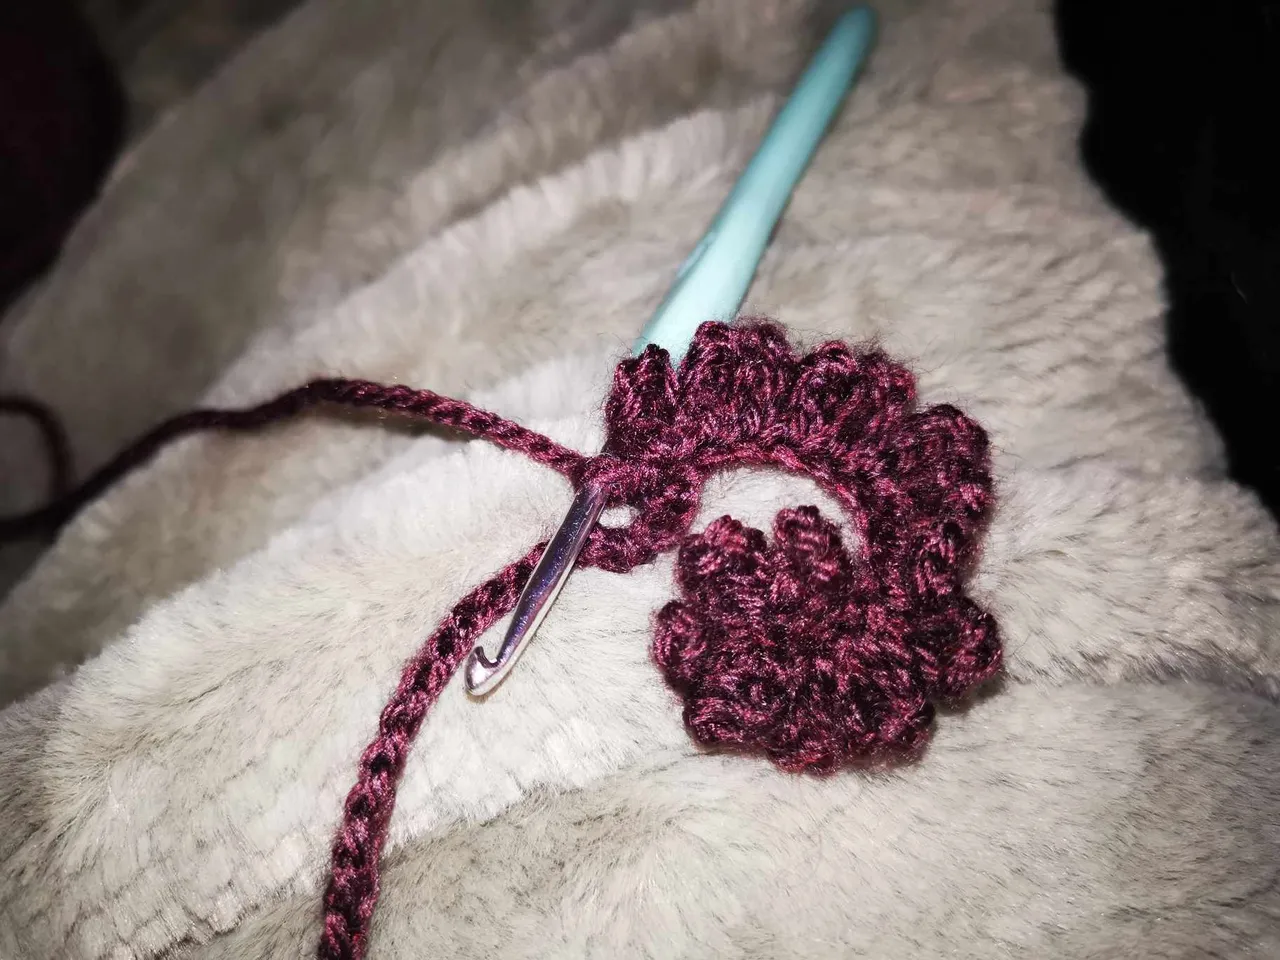
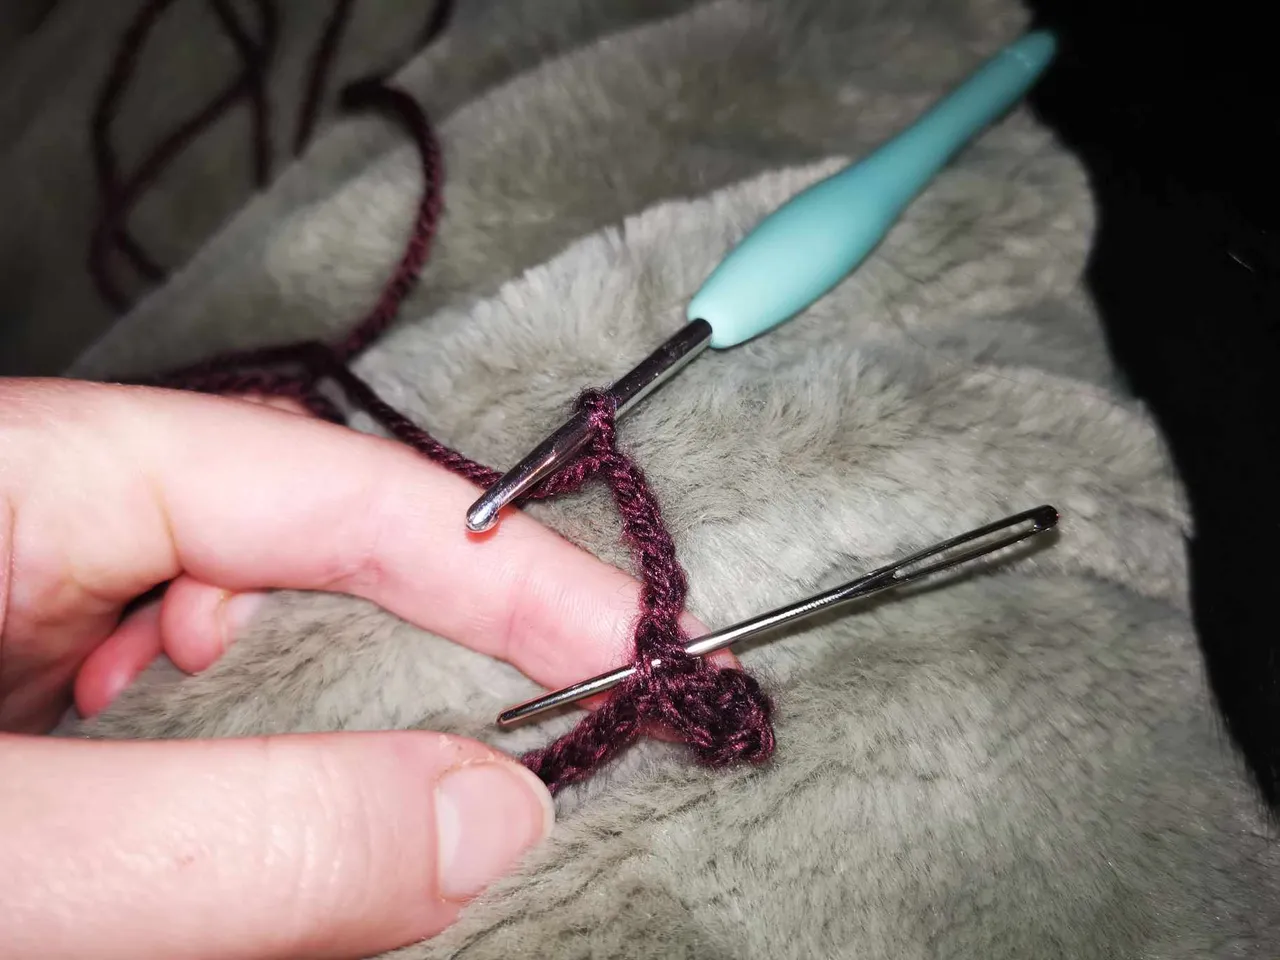
When you get to the end, you can cut the thread and make a knot to close the project.
Assembly
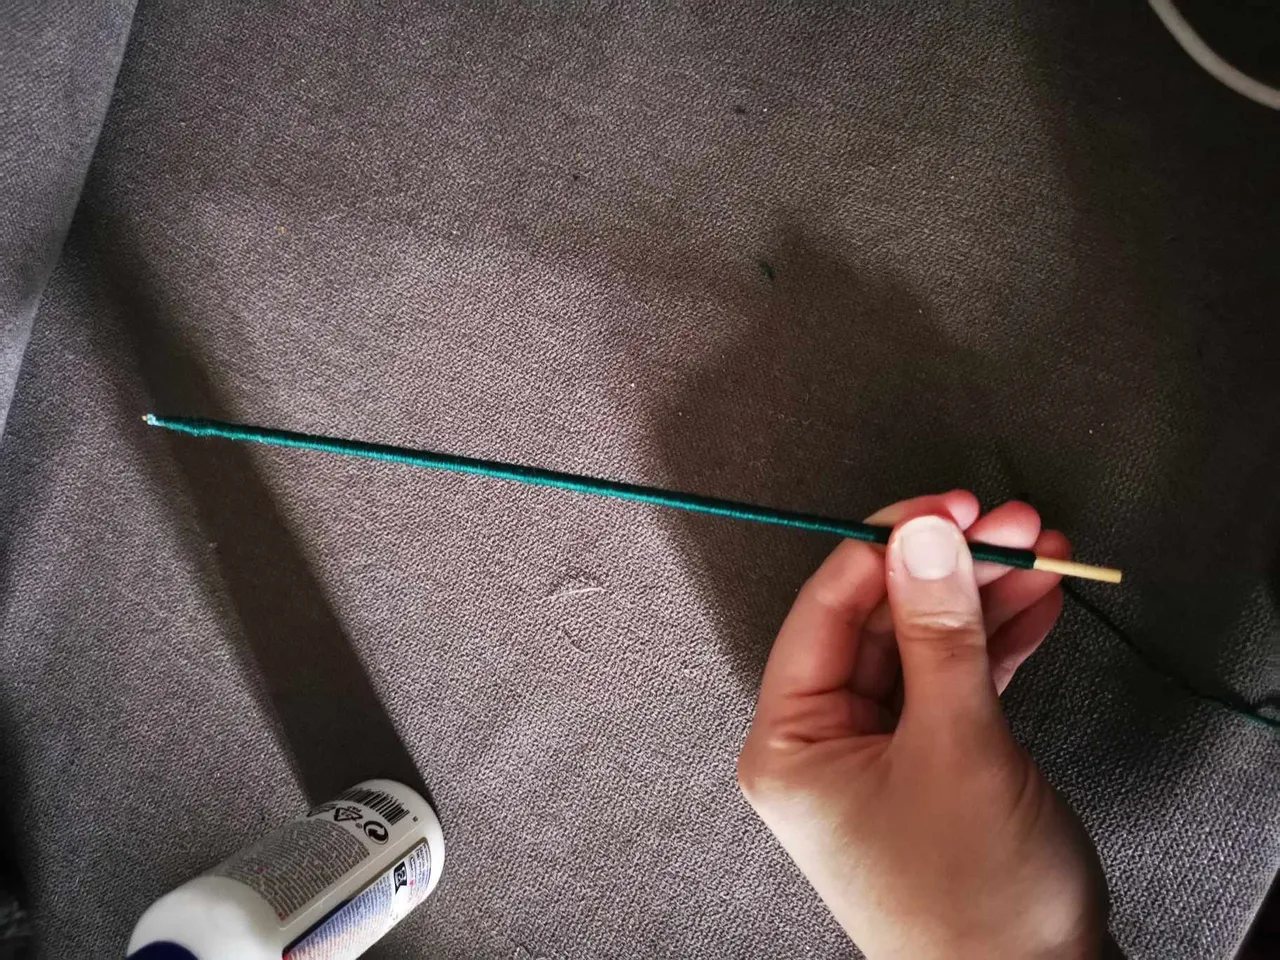
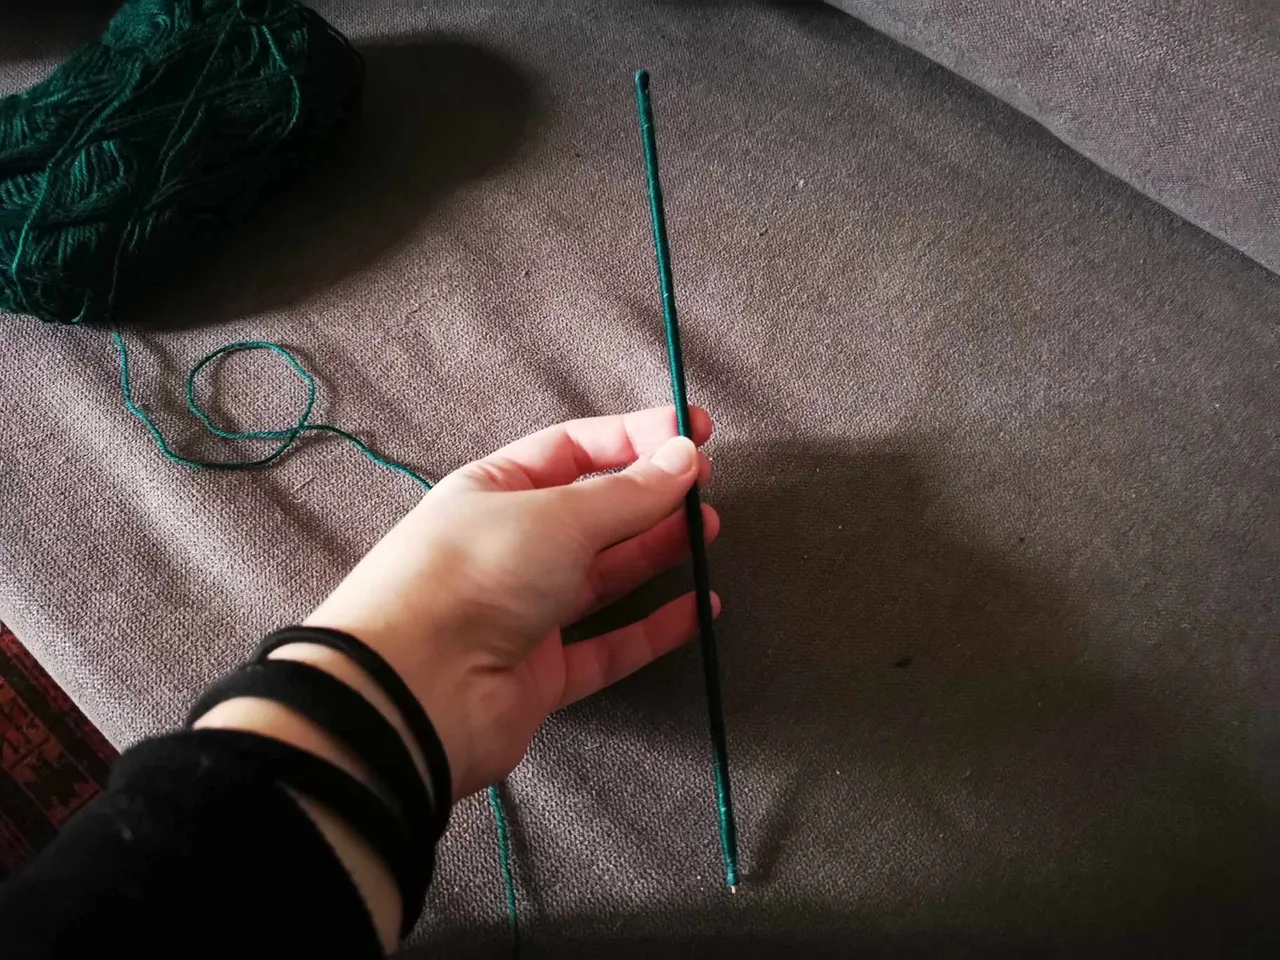
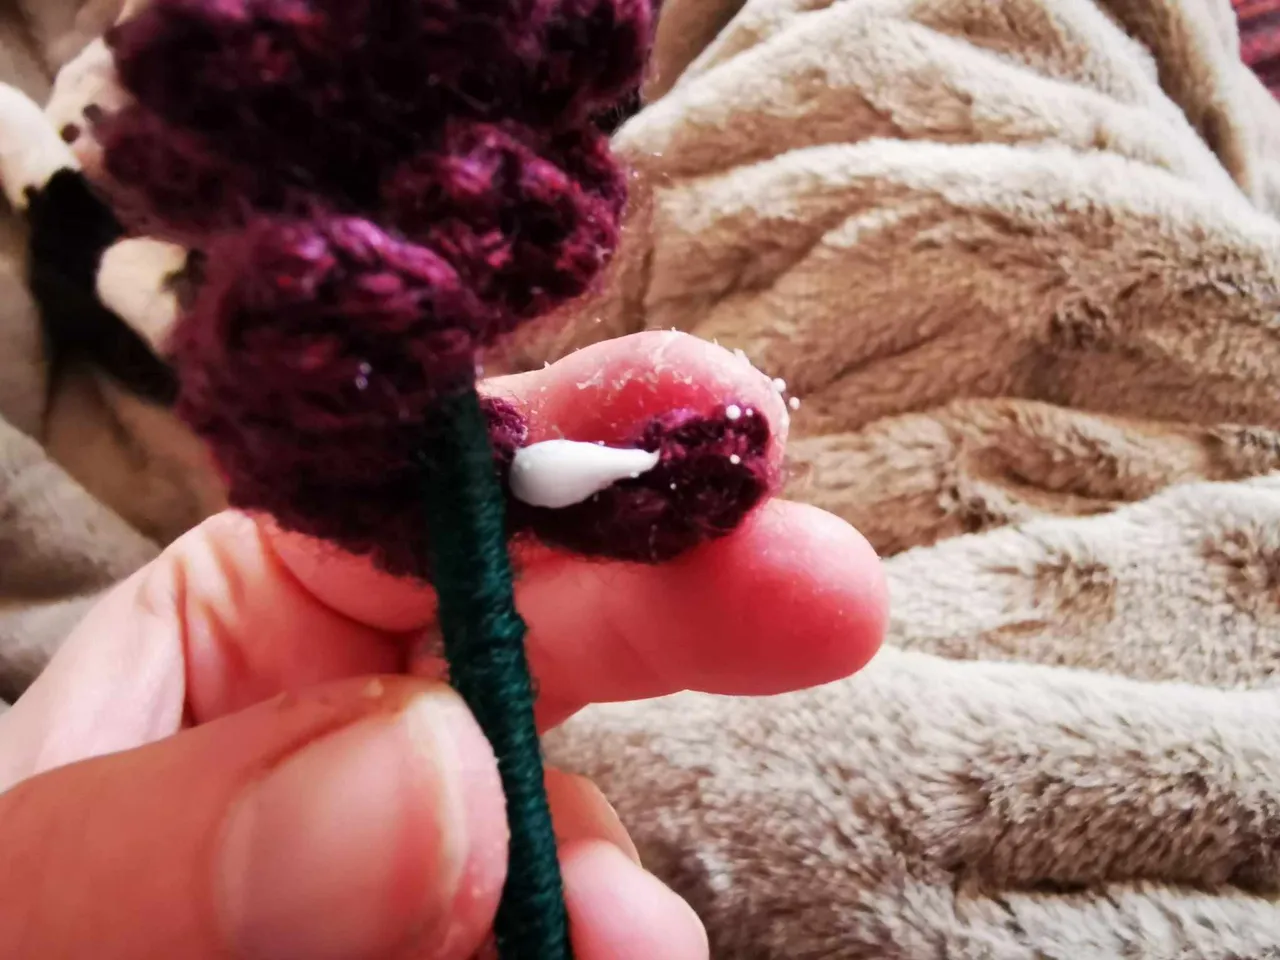
It is now time to move on to assembly. To do this, you need to take your skewer and your thread (the green thread for me).
You will put a little glue, then make a knot with your green thread around the skewer:

Then, you will wrap everything around the skewer to the bottom and put a dot of glue to hold the thread at the bottom.

Then, you will take your sprig of lavender and make another dot of glue at the top of the skewer. You need to place the beginning of your lavender sprig:
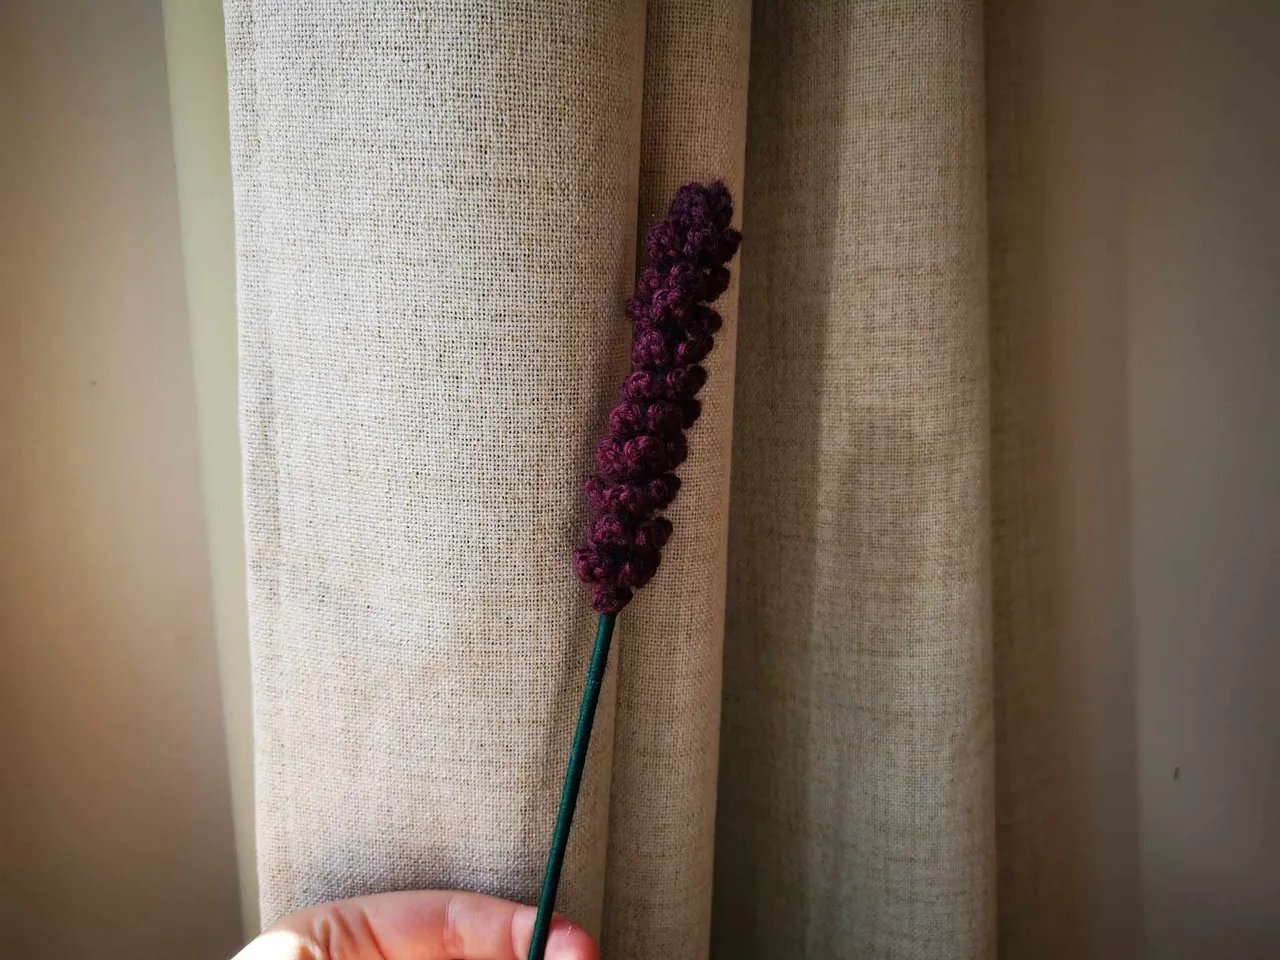
And then, you need to wrap the lavender sprig around the stem. You can tighten more or less, depending on the result you want to have.

When you reach the end of your sprig, you need to place another dot of glue.
If you want, you can also place glue all along the stem where you are going to place the lavender.
And there you have it, your lavender sprig is finished 👇


I hope you enjoyed this little tutorial and that it made you want to make your own crochet lavender sprigs! 🪻
And if you want to discover my other tutorials: making a rose, making a daisy and making a lucifer flower, I let you look at my previous posts! 💐
See you soon,
Johanna
PS: I used Google Translate to translate the part into English.
Hello les amis et les crochet lovers ! J’espère que vous allez tous très bien en ce début de semaine. 😁
Je continue d’agrémenter mon bouquet de fleurs en crochet chaque semaine, avec une ou plusieurs nouvelles créations. Et cette semaine, j’ai ajouté des brins de lavande ! 🪻
Alors comme chaque lundi, je vais vous partager un petit tutoriel pour que vous puissiez vous aussi reproduire ce brin de lavande ! 😁
Après avoir testé plusieurs tutoriels, j’ai finalement adapté le processus pour que le brin de lavande corresponde vraiment à mes attentes !
Vous allez voir, c’est une des fleurs les plus simples à réaliser : il vous suffit de savoir faire des mailles en l'air, des mailles serrées et des mailles coulées.
Et en plus, c’est assez rapide ! En 20 minutes, vous pouvez avoir votre premier brin de lavande ! 🪻
Le matériel
- Du fil de la couleur de votre choix pour la lavande (j’ai choisi un fil violet foncé) ;
- Du fil pour la tige (j’ai choisi du vert foncé) ;
- Un crochet 3mm ;
- Un pique à brochette pour la tige ;
- De la colle.
Les étapes
Le brin de lavande
Pour commencer, il faut faire un nœud coulant :
Ensuite, il faut monter une chaînette de 60 mailles en l’air :
Puis, vous allez devoir piquer dans la 6ème maille en partant du crochet et faire une maille serrée :
Dans la maille suivante, vous allez faire une maille coulée :
Puis, vous allez monter 6 mailles en l’air :
Et faire une maille coulée dans le V que je vous montre sur la photo (le brin de la maille coulée précédente et le brin de la maille actuelle) 👇
Et dans la maille suivante, vous allez faire une maille coulée.
Et ensuite, le schéma se répète :
- 6 mailles en l’air ;
- 1 maille coulée dans le V ;
- 1 maille coulée dans la maille suivante ;
- 6 mailles en l’air ;
- 1 maille coulée dans le V ;
- 1 maille coulée dans la maille suivante
- Etc…
Et vous allez continuer ainsi jusqu’à atteindre la fin de la chaînette de départ.
Arrivé au bout, vous pouvez couper le fil et faire un nœud pour fermer le projet.
L’assemblage
Il est maintenant temps de passer à l’assemblage. Pour cela, vous devez prendre votre pique à brochette et votre fil (le fil vert pour ma part).
Vous allez mettre un peu de colle, puis faire un nœud avec votre fil vert autour du pique à brochette :
Ensuite, vous allez enrouler tout autour du pique à brochette jusqu’en bas et mettre un point de colle pour faire tenir le fil en bas.
Puis, vous allez prendre votre brin de lavande et faire un autre point de colle au sommet du pique à brochette. Vous devez placer le début de votre brin de lavande :
Et ensuite, il faut enrouler le brin de lavande autour de la tige. Vous pouvez serrer plus ou moins, en fonction du rendu que vous souhaitez avoir.
Arrivé à la fin de votre brin, vous devez placer un autre point de colle.
Si vous le souhaitez, vous pouvez aussi placer de la colle tout le long de la tige à l’endroit où vous allez placer la lavande.
Et voilà, votre brin de la lavande est terminé 👇
J’espère que ce petit tutoriel vous a plu et qu’il vous a donné envie de réaliser vos propres brins de lavande au crochet ! 🪻
Et si vous souhaitez découvrir mes autres tutoriels : faire une rose, faire une marguerite et faire une lucifer flower, je vous laisse regarder mes posts précédents ! 💐
À bientôt,
Johanna
PS : J’ai utilisé Google Traduction pour traduire la partie en anglais.