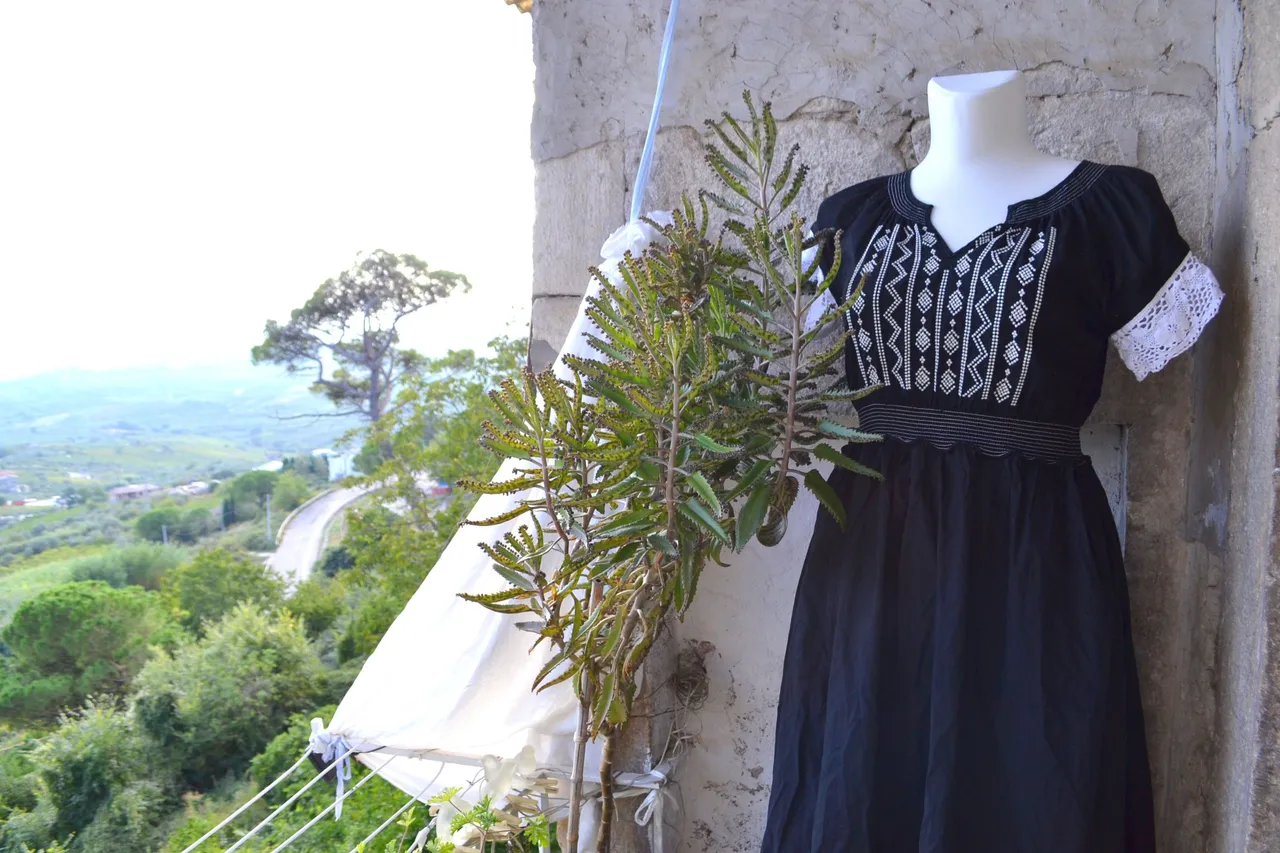
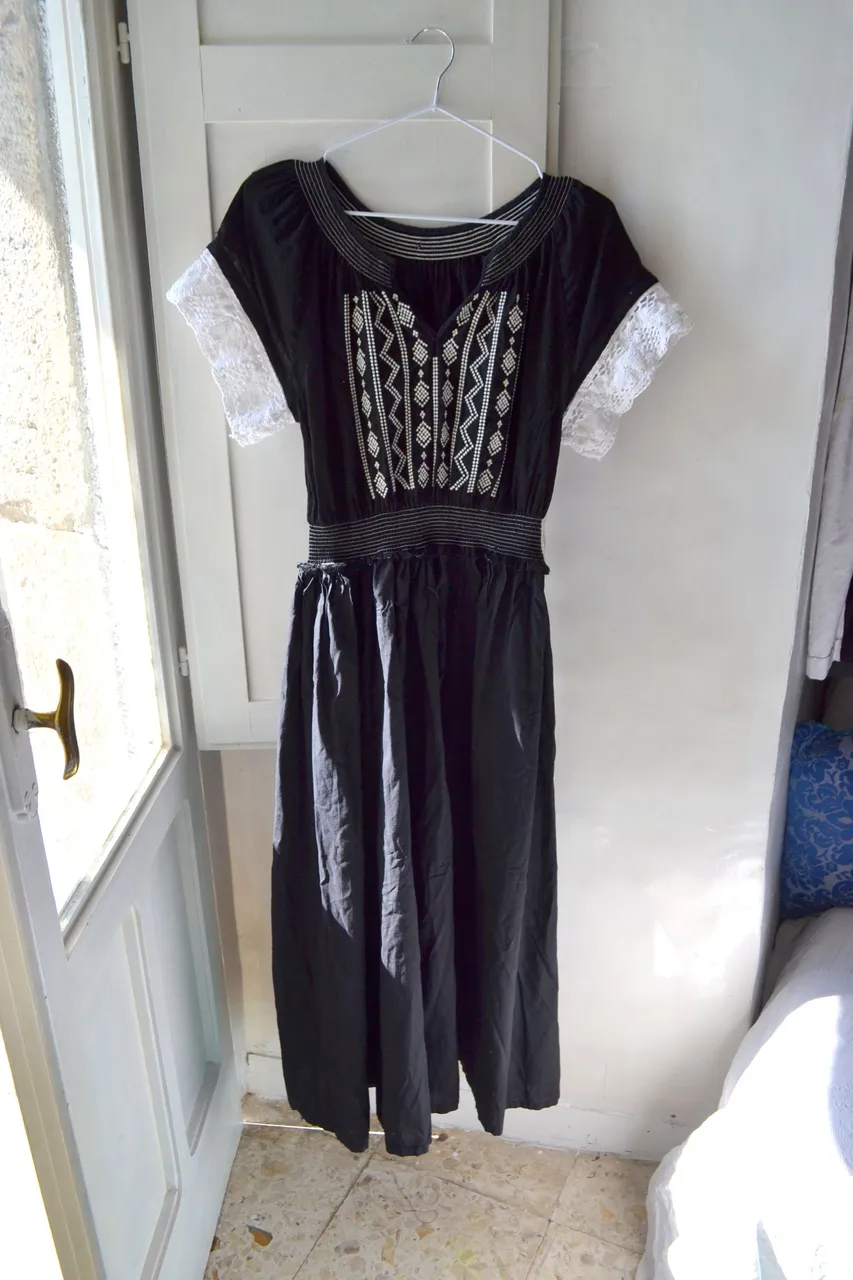
my beautiful finished dress, even though I thought I'd ruined it, right in the middle where the mistake would be most visible!
Ciao beautiful needleworking friends!

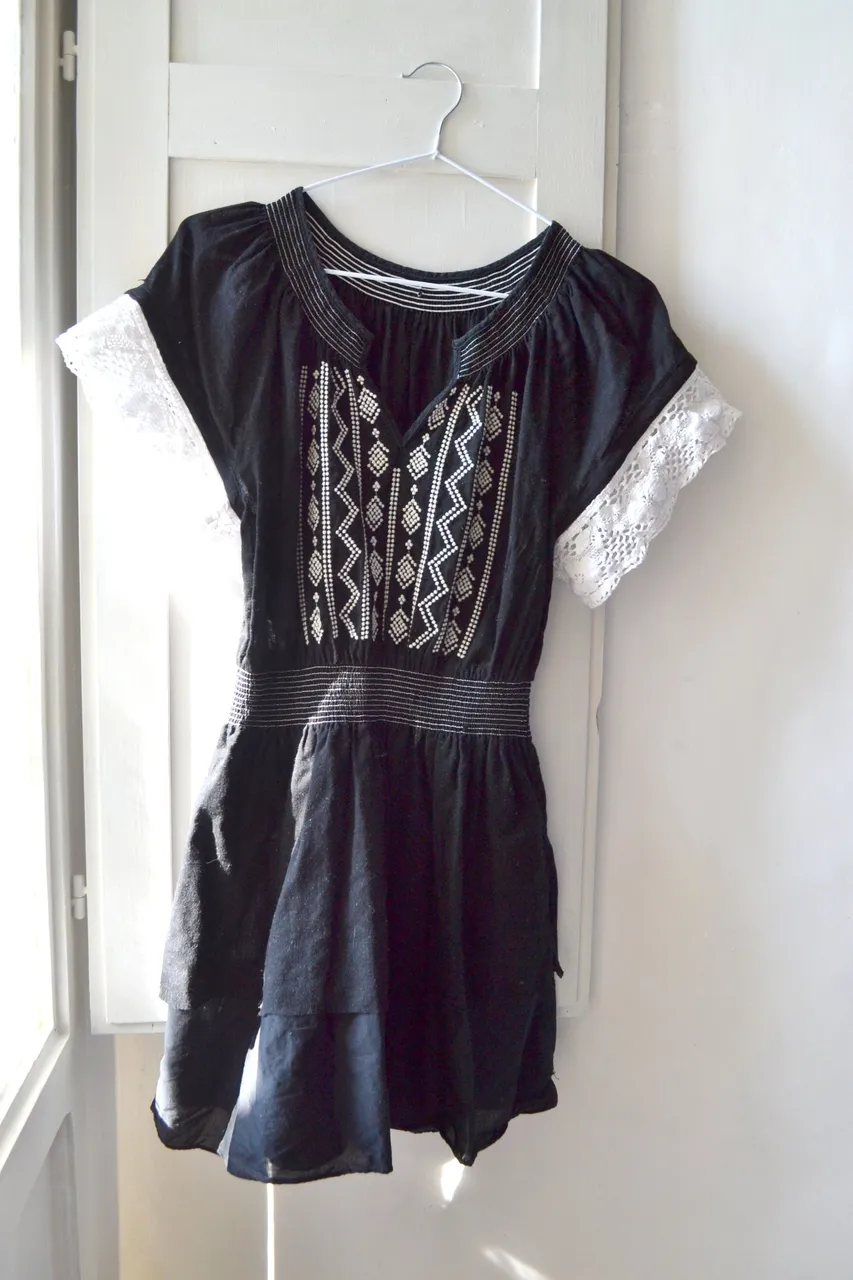
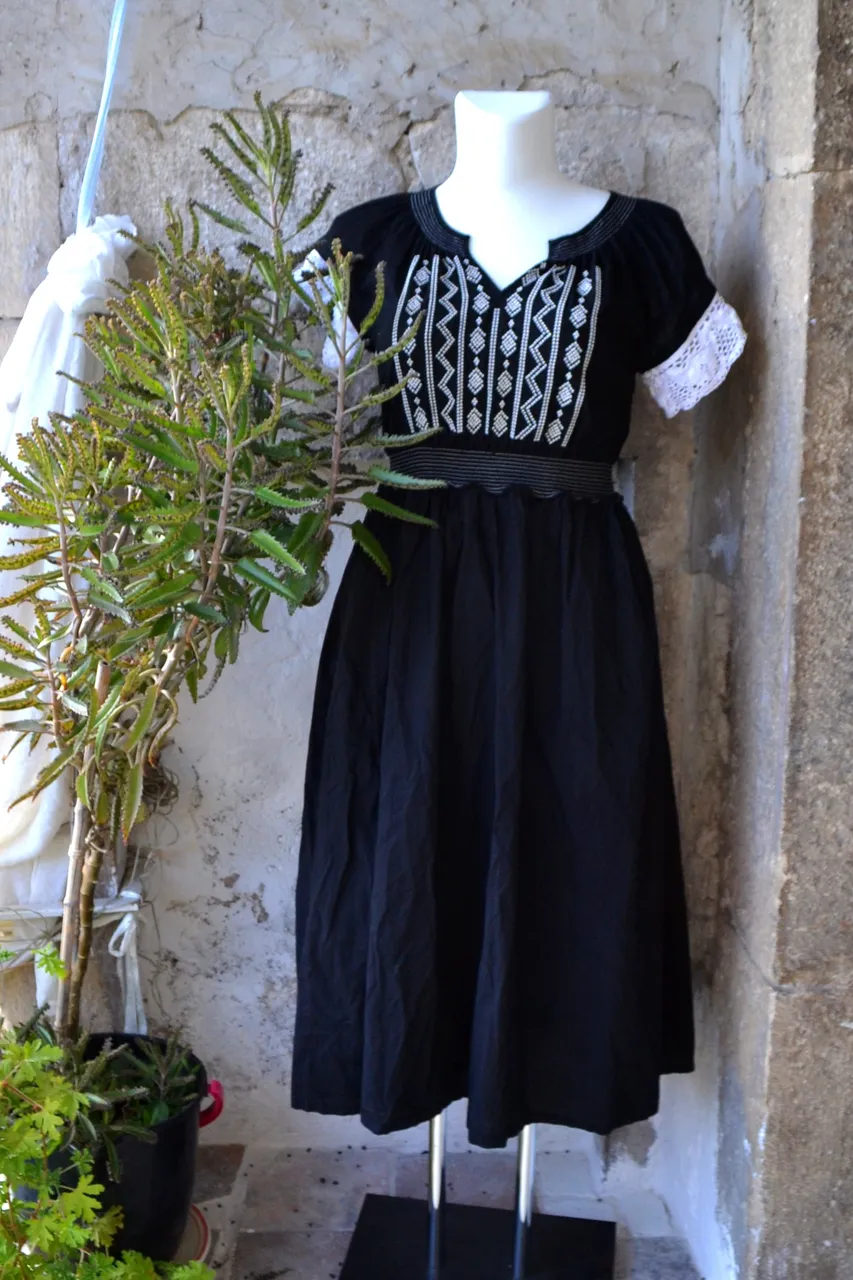
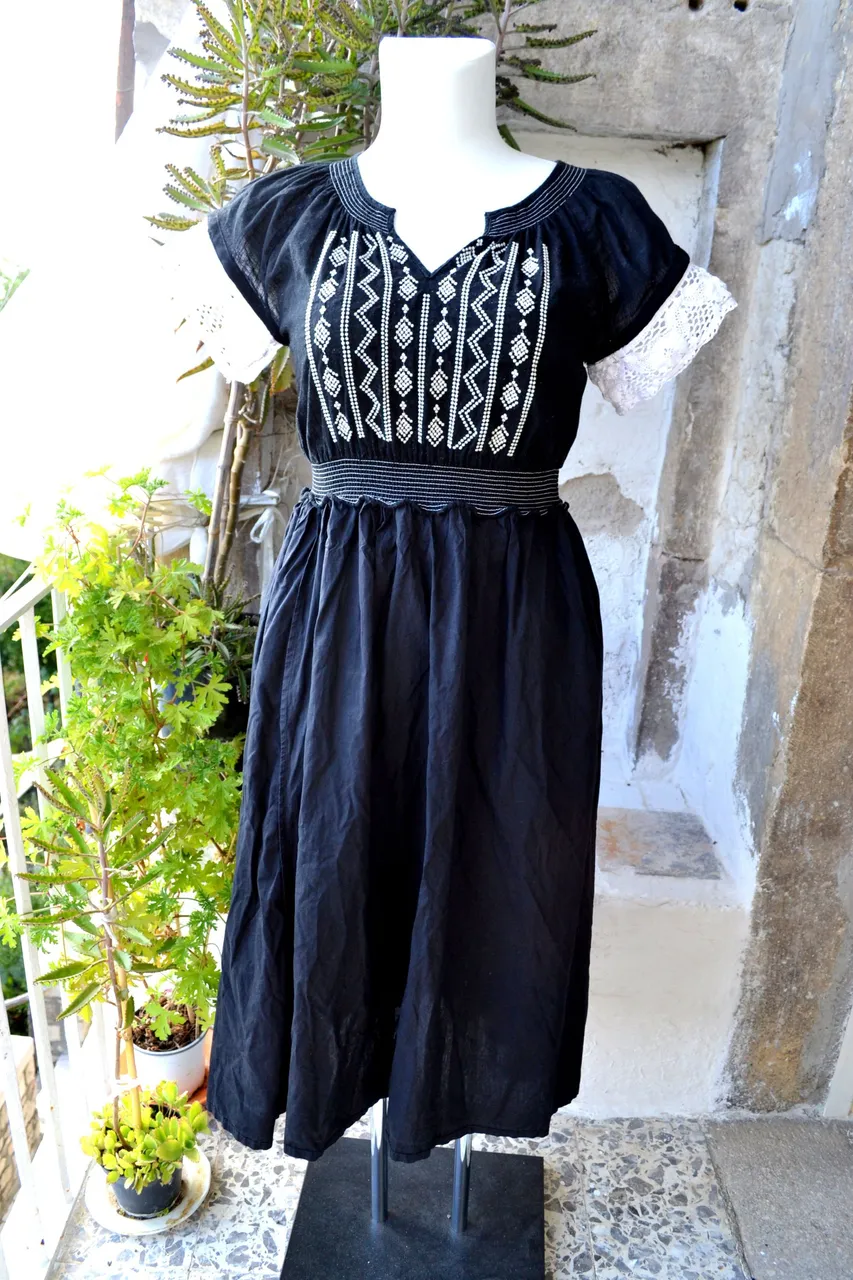
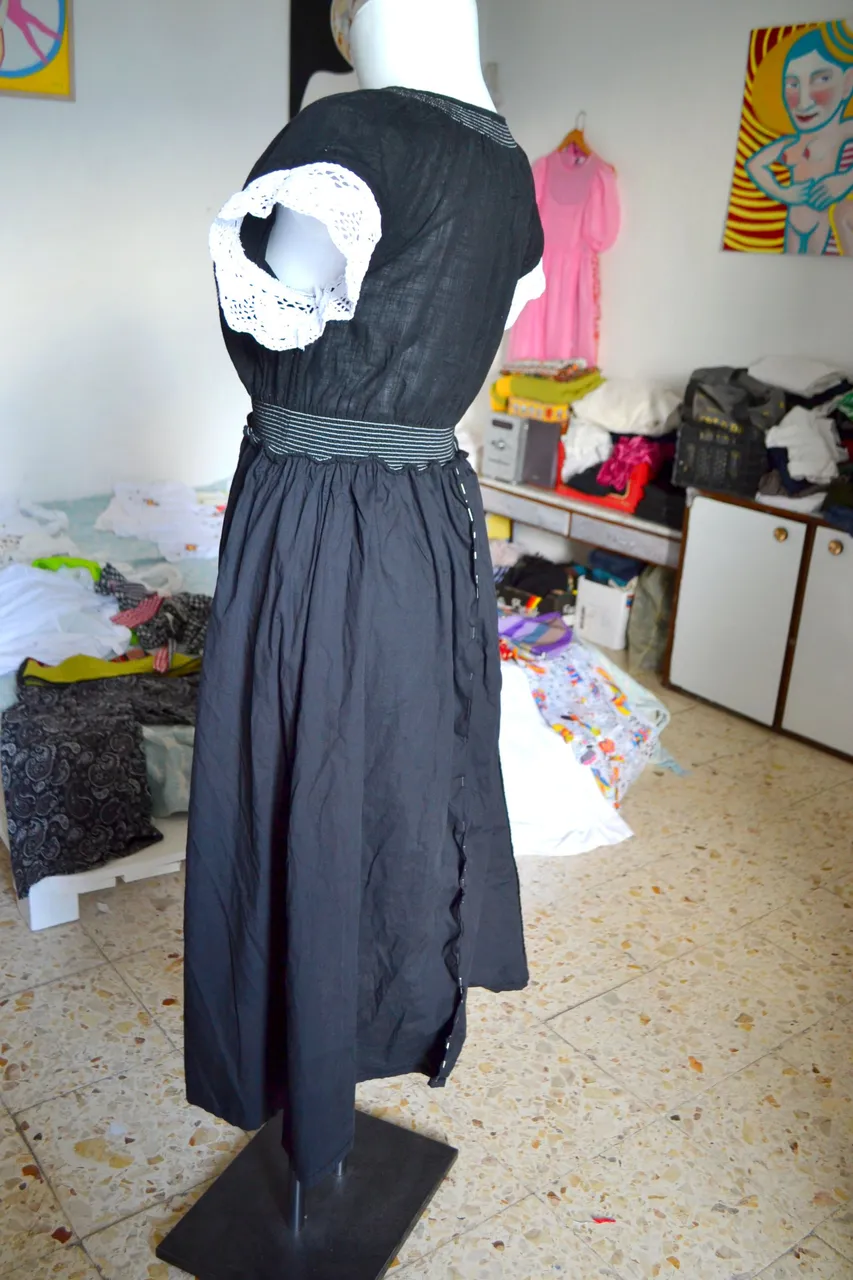
This is a favourite, extreeeemely well-worn short dress, which was very much past her best... I transformed her this week, into a much more beautiful, functional and expressive piece of clothing, which you see at the top of this post...
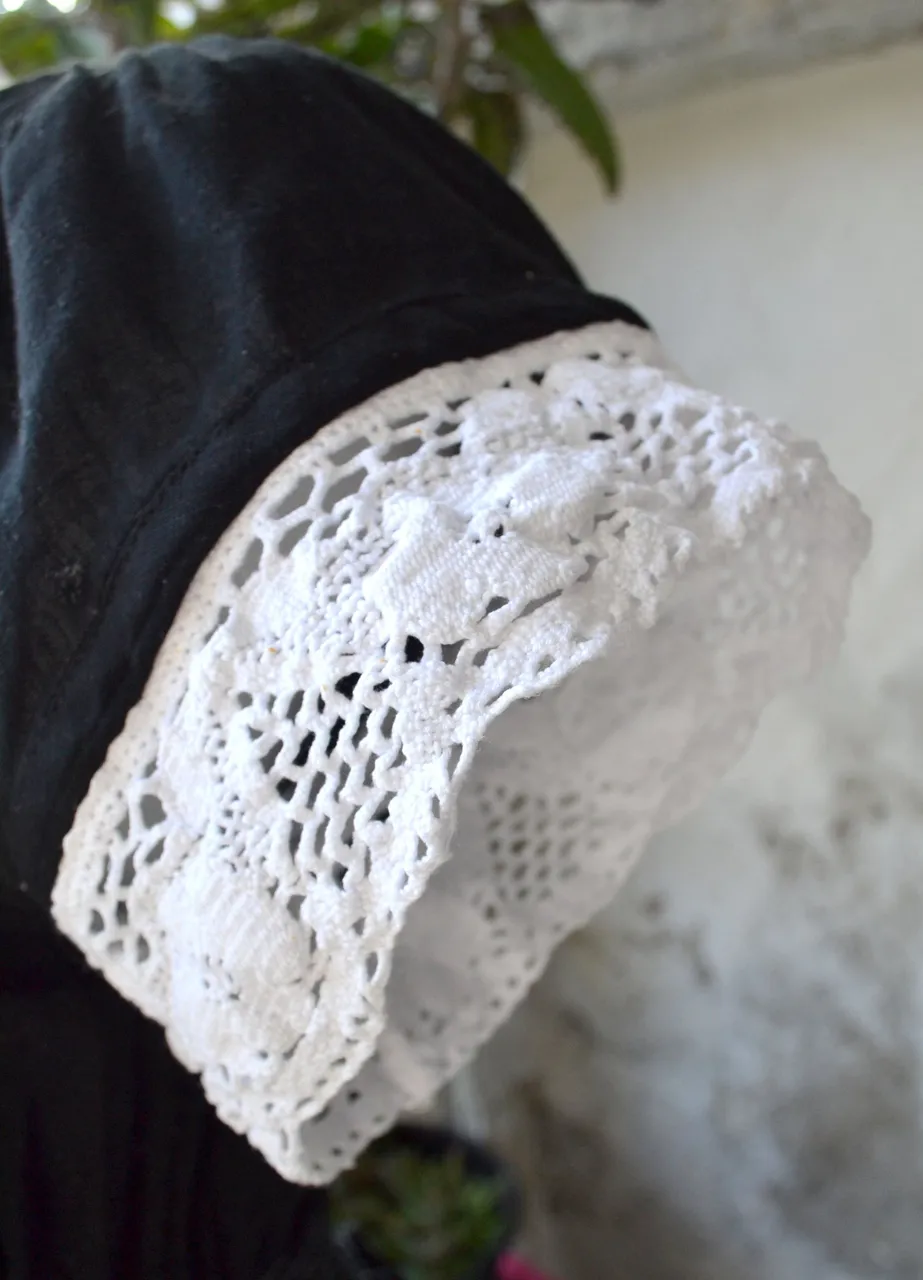
So this is the first part of the inspiration which got me thinking to change the dress so it was wearable again: two leggings borders from the bottoms of the legs, which I thought would make a lovely contrasting sleeve, like this, above.
With additional complete reworking of the skirt: I'd bought this gorgeous cotton billowing skirt, which had a too-small waist, from the reknowned 50c stall.
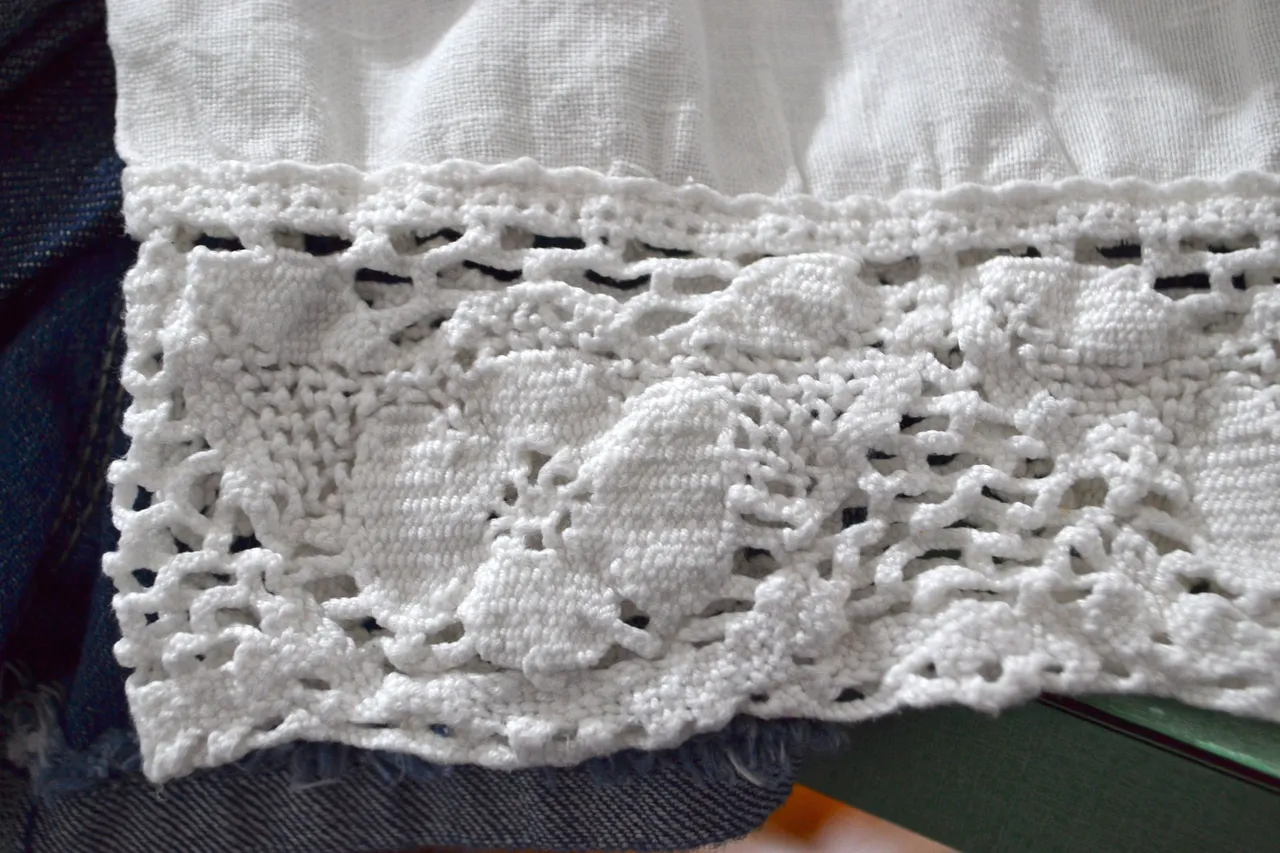
A close-up of the leg borders I was inspired by: they were not a nice pair of trousers, but the borders were particularly pretty, resembling the local needlework of old times, from this area of Italy that I live in.
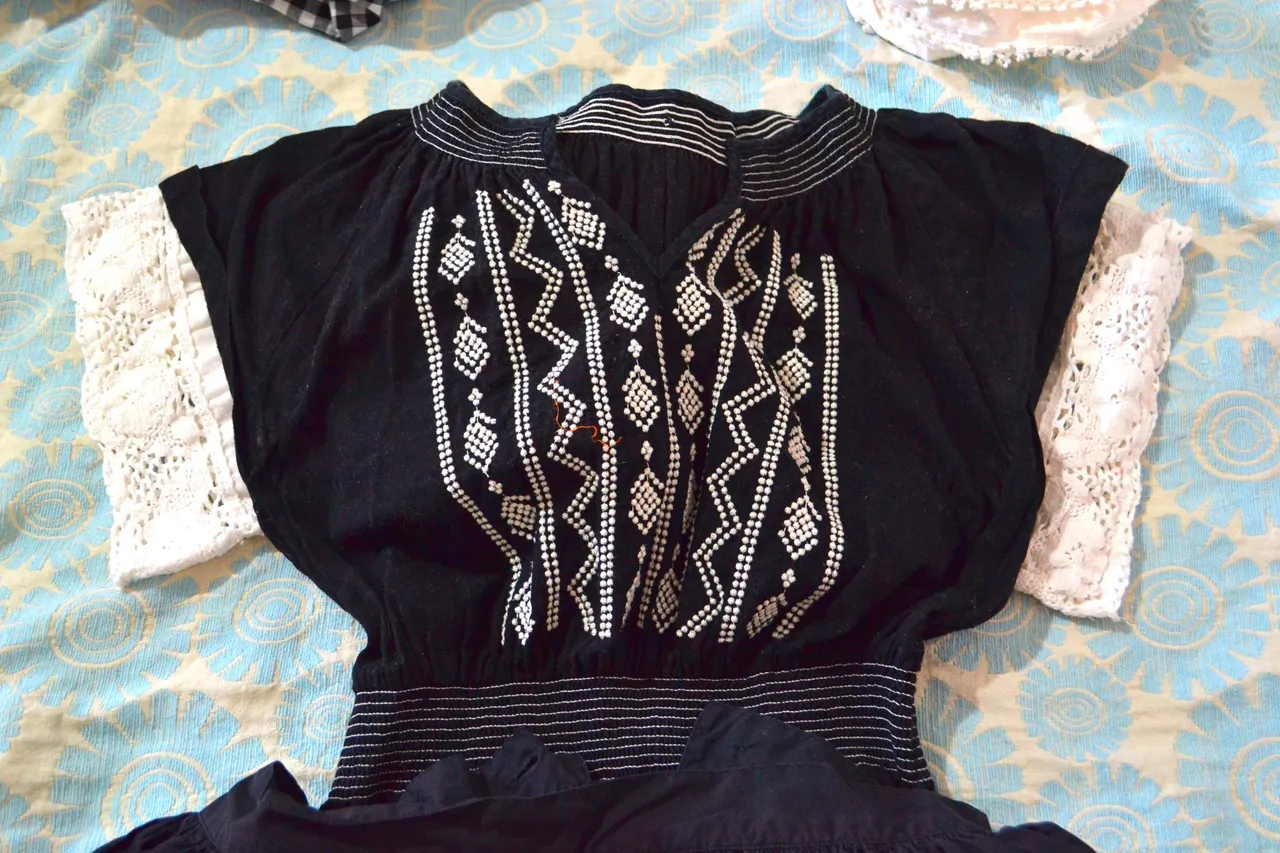
It looks like a very straightforward attachment-of-white-parts, but it actually took some quite concentrated hours of unpicking the old sleeve edge, which then ripped the sleeve a little, before getting this new edge positioned for pinning and machine-sewing.
Next thing was the skirt... I'd 'borrowed' some fabric from the old skirt, for another project - and the other embroidered bottom border of this dress was made into leg-extensions on the shorts of this favourite summer playsuit, a while back...
So the skirt essentially had to be completely replaced.
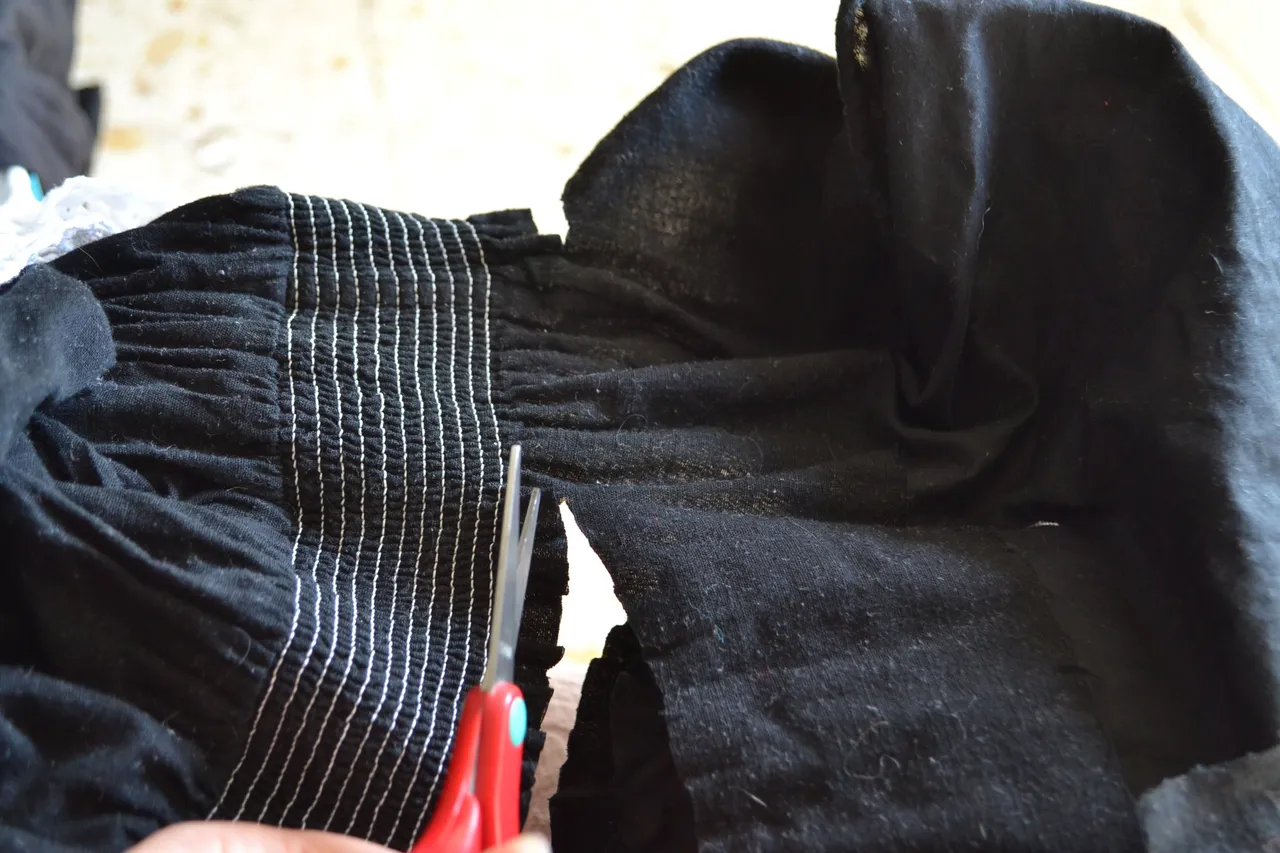
This meant first some fiddley work cutting off the waistband of the new skirt, then sewing a double thread along in a sufficiently small gather, so it can be adjusted to the size of the elasticated waist of the older dress.....
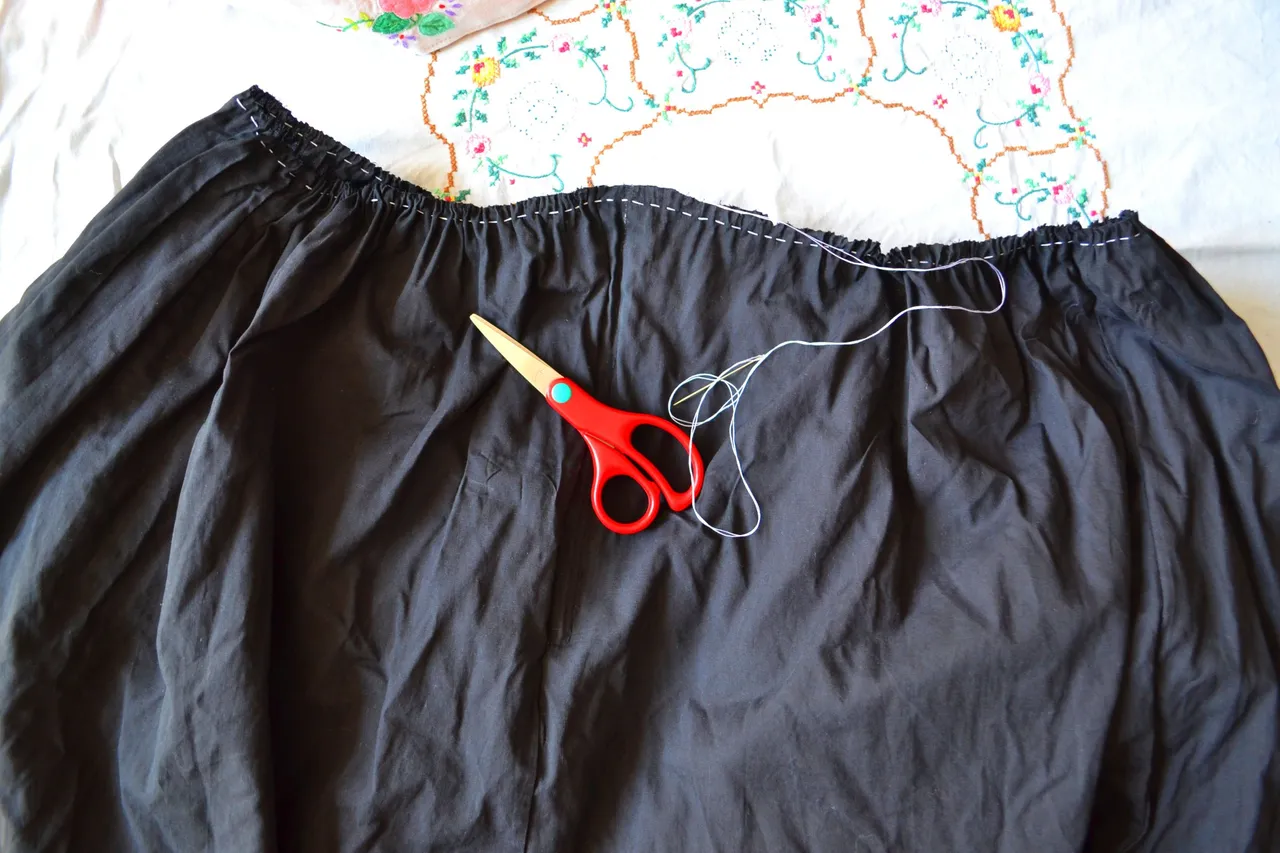
Lord above, this got complicated!
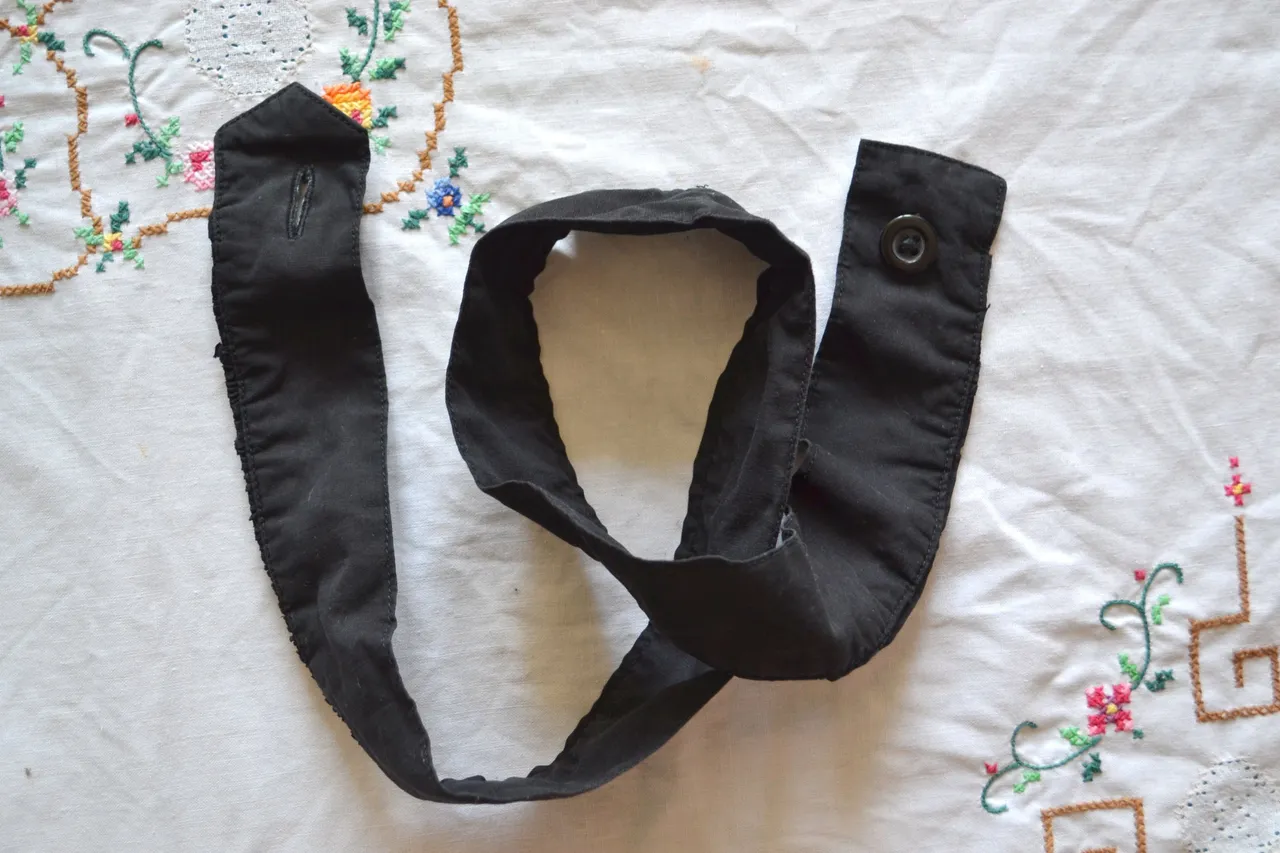
This was the easiest part: cutting off the waistband!
And cutting off the old skirt: quite thrilling whilst also being a bit nerve-racking, as ever - I hope I get used to these kinds of big cuts, over time!
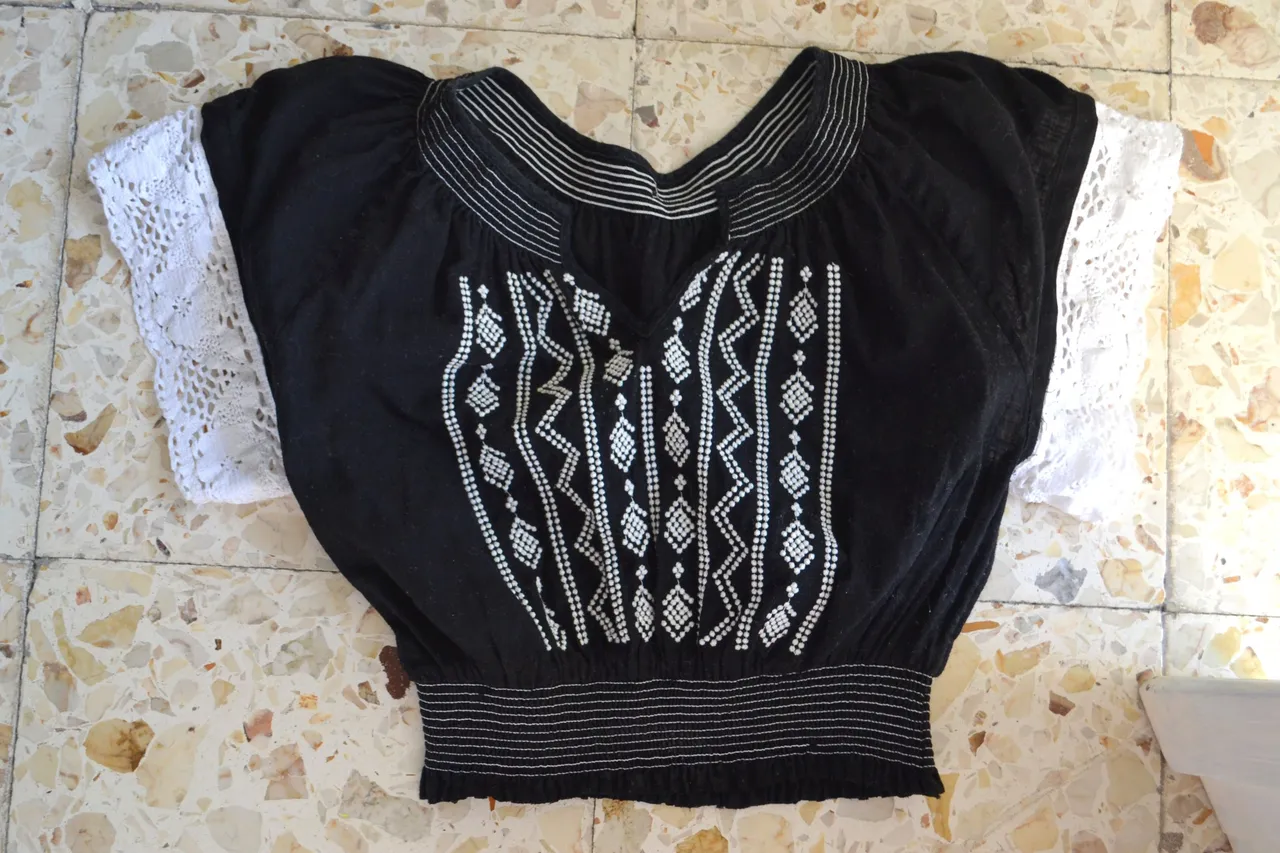
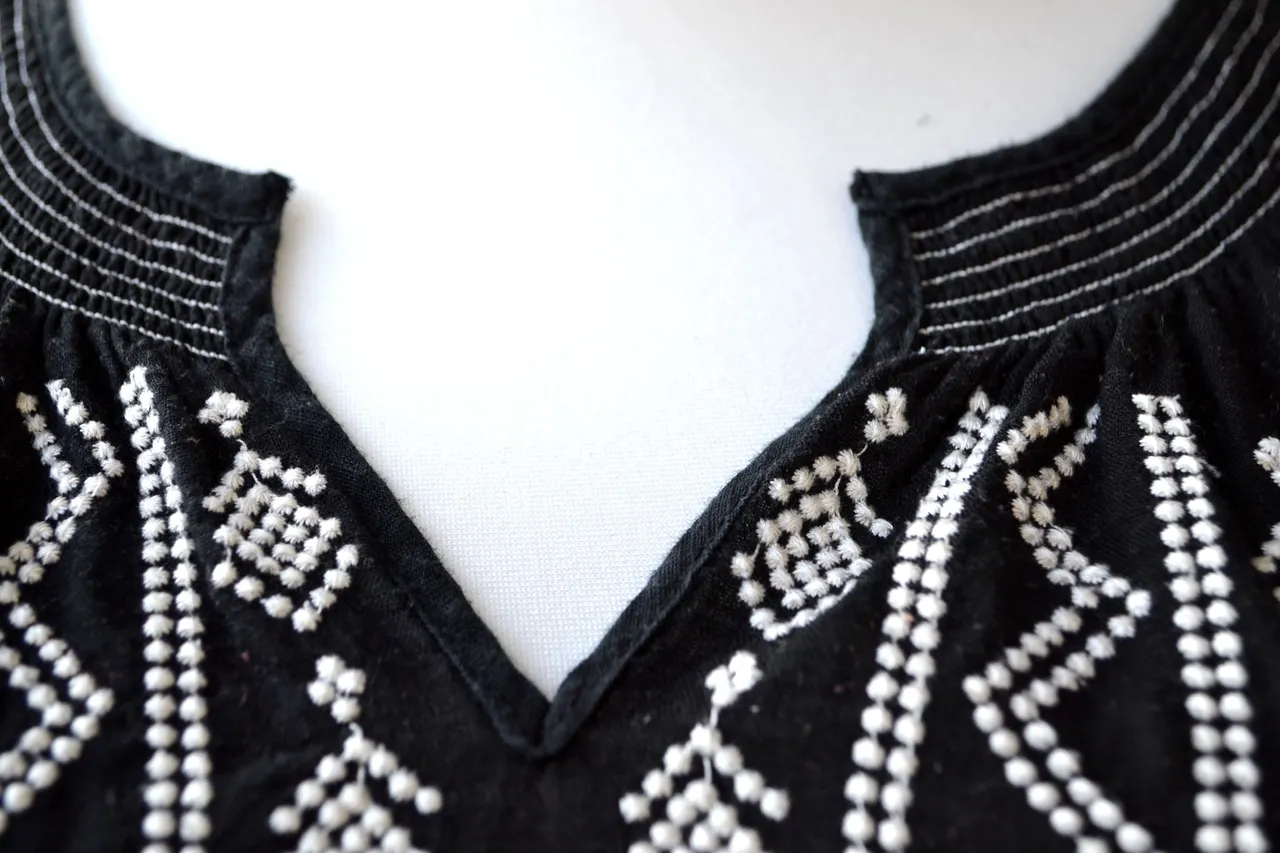
Now the top part was ready. 😍
And I pinned it:this is where it got confusing.

The original dress was notorious for being easy to put on inside-out. The back of the embroidery was not sufficiently'backside' looking, to clarify that it was the inside, and the skirt mostly looked like it had the correct - front to front - orientation, when I pinned it!
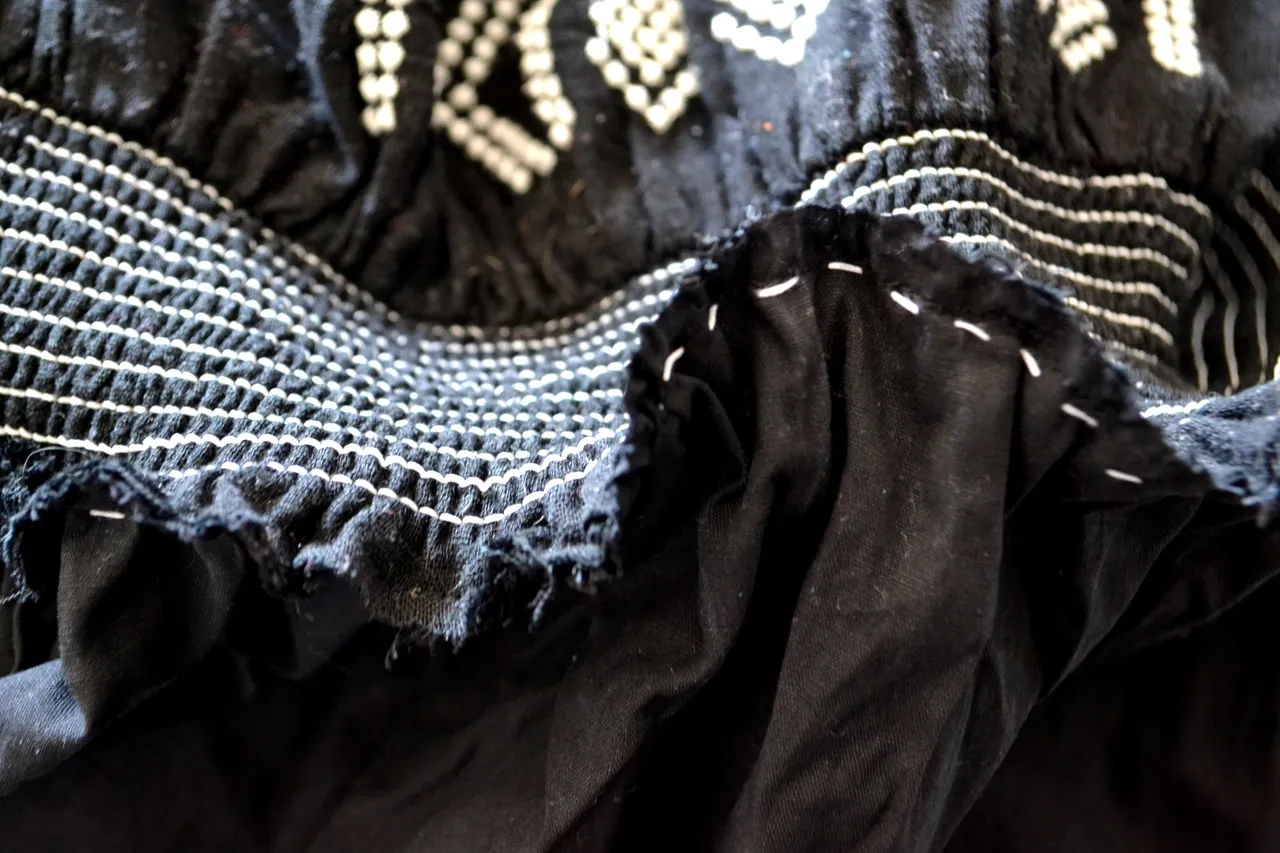
So I tacked it... sewed it... then saw that I had made the raw edge sticking out of the front of the dress, rather than hidden on the inside - wwaaaaaahh!!! The sewing of the new skirt along the elasticated-thread waistband of the old dress was difficult enough, but now it had a runkled raw edge on it!! I was really peeved - for a moment - then started playing around with it, folding it over and imagining a rolling edge, quite sculptural... I didn't document this part, as I was deeply immersed in problem solving and acquiring new manipulating-fabric skills!!
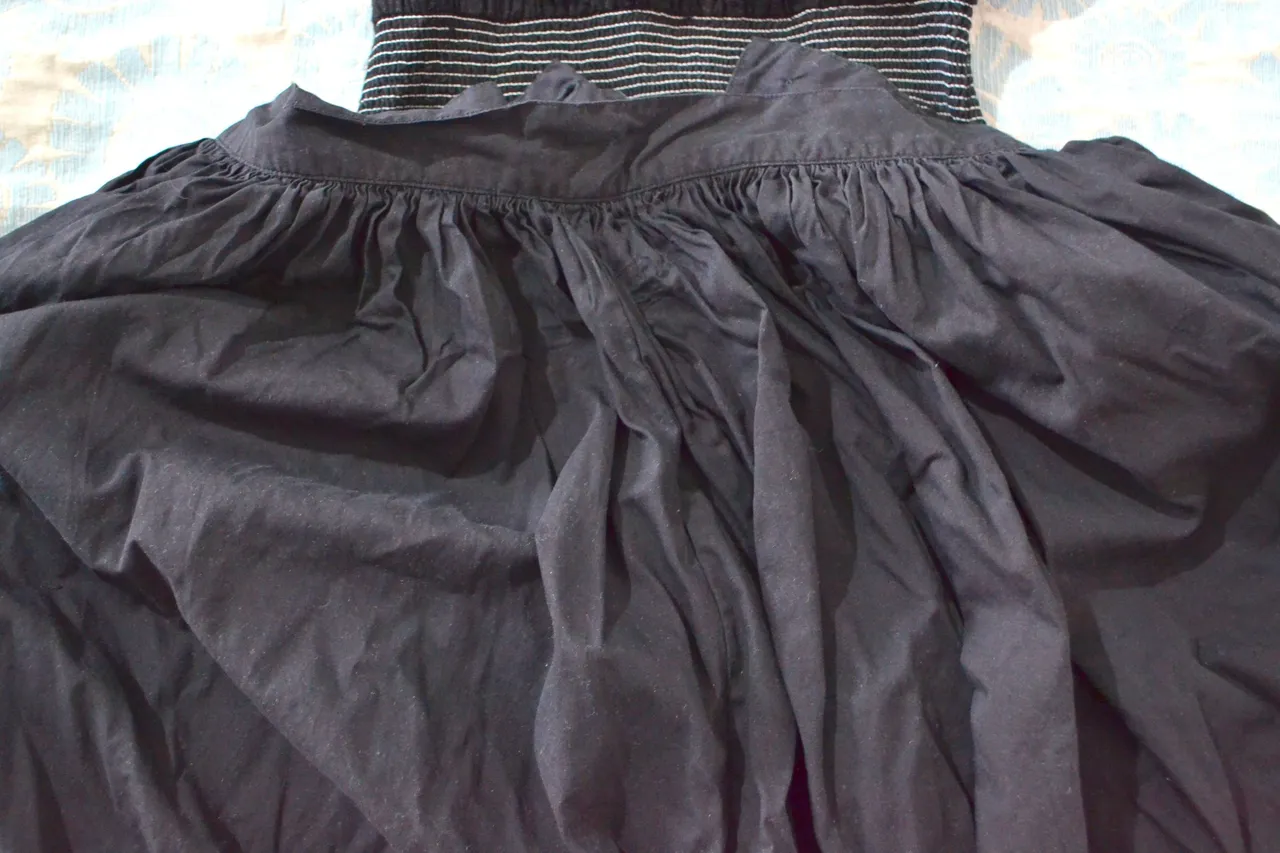
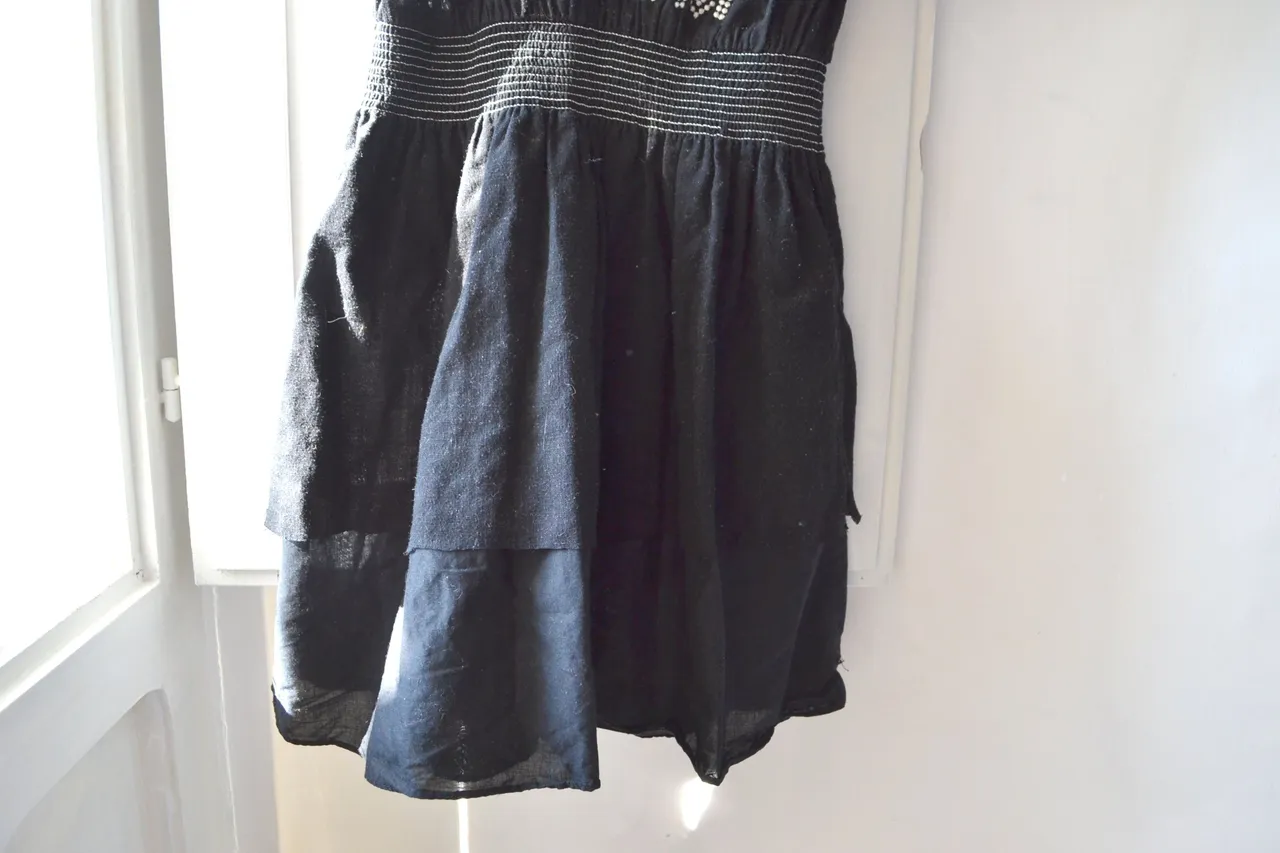
This is how it turned out: the waistband, you can see even from a distance, is particular and pretty funky!

It was a joy to come across this technique: I went and bought some bias-binding first, but then tried just turning over the raw edges a couple of times. As ever, I was working intuitively and spontaneously, so wasn't even sure if I would be able to turn the whole circumference over sufficiently, to give a uniform effect...
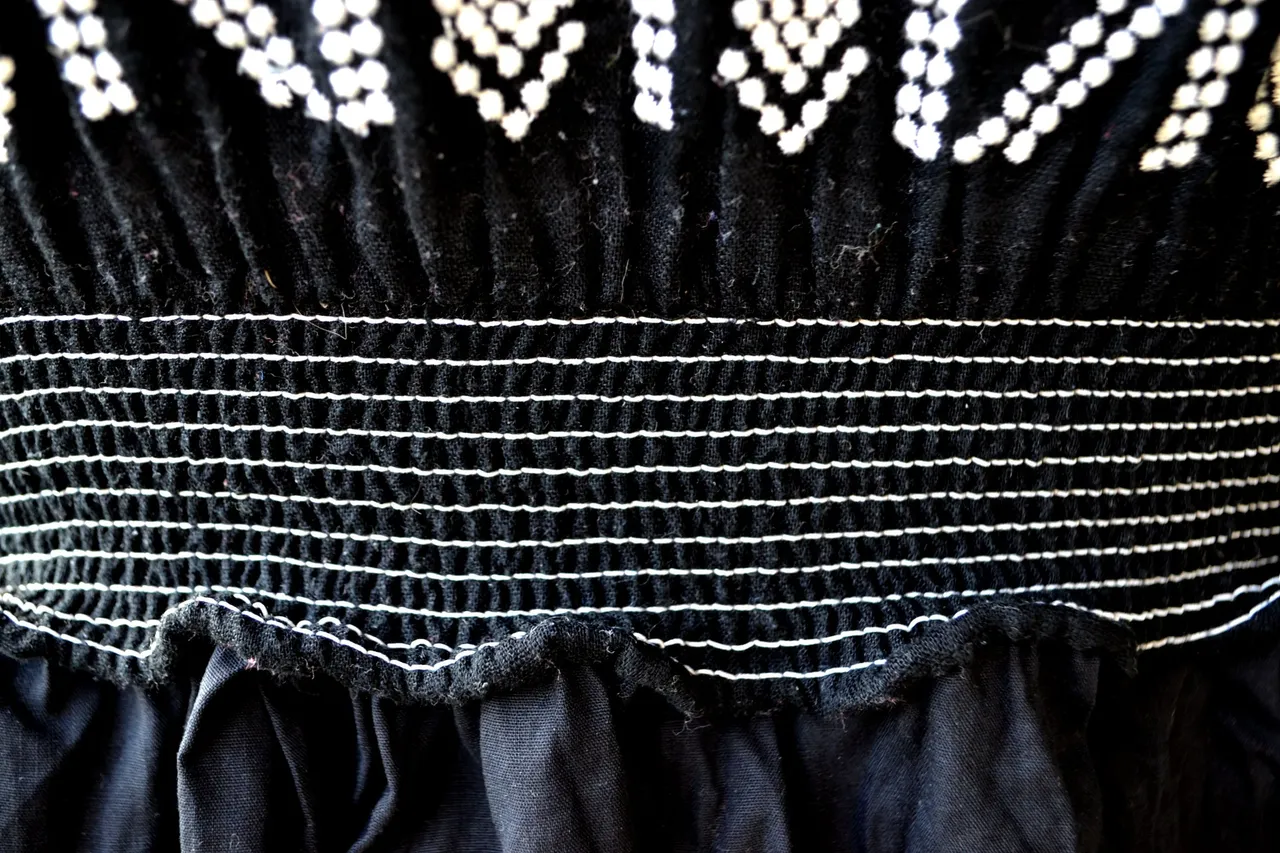
I found that mostly it could turn over good enough: the seams were more clunky, but I found a way of turning just those two parts over once instead of twice, and trimming a tiny bit of the excess, and it came together fine.
At least I got the sleeves on the right way around!! You can see above, where the edge of the needlework touches the black old sleeve, there was a need to get it very precise, which I couldn't see well enough to machine-sew from the inside... In the end I had to cut a bit of stitching and redo it. I am very pleased with the neat result, though!
This is the one details that I want to adjust still, but am awaiting a clear intuition about what would solve the every-so-slight imbalance here; there used to be two tassels on cords, hanging down, and tied in the middle. I might add either a black lace strip, or a white cord with pompom, or something different... Your ideas would be most welcome!
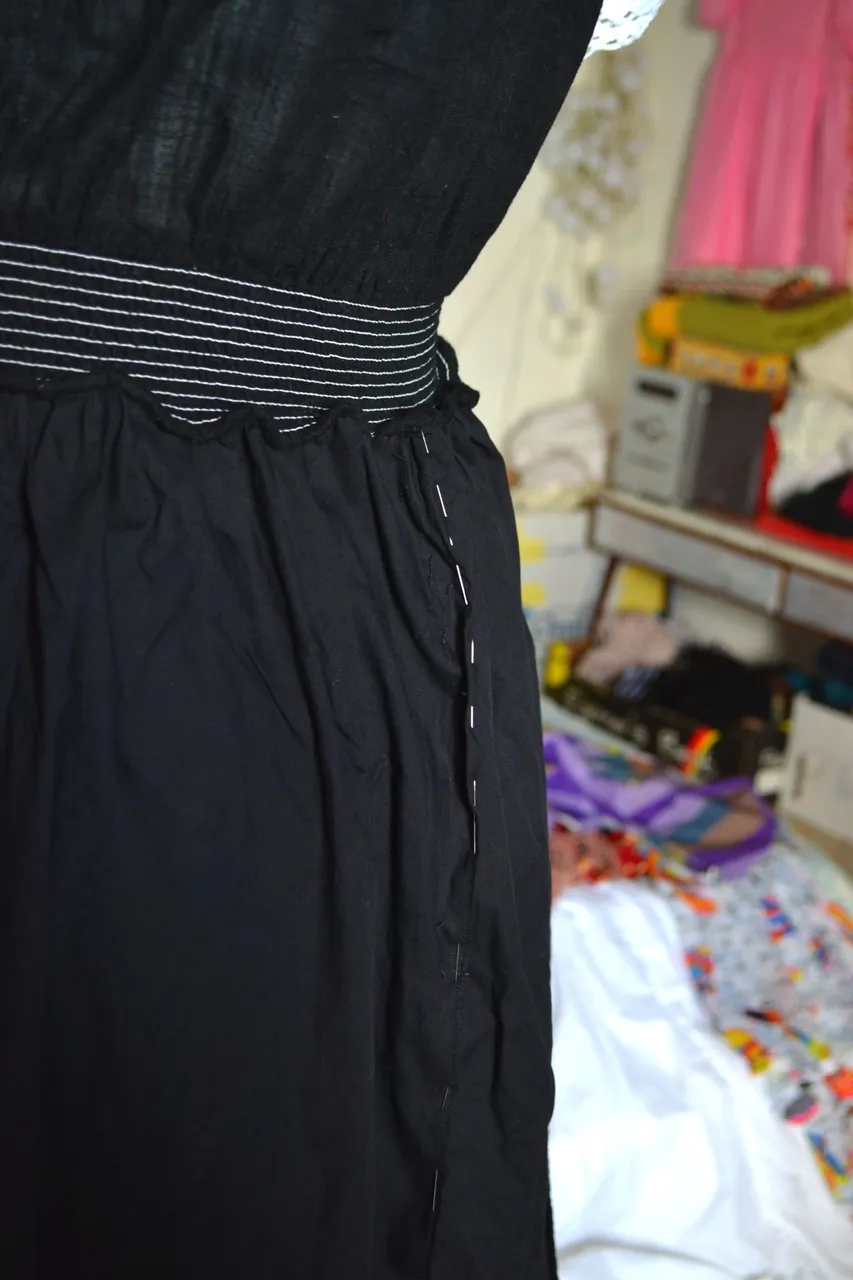
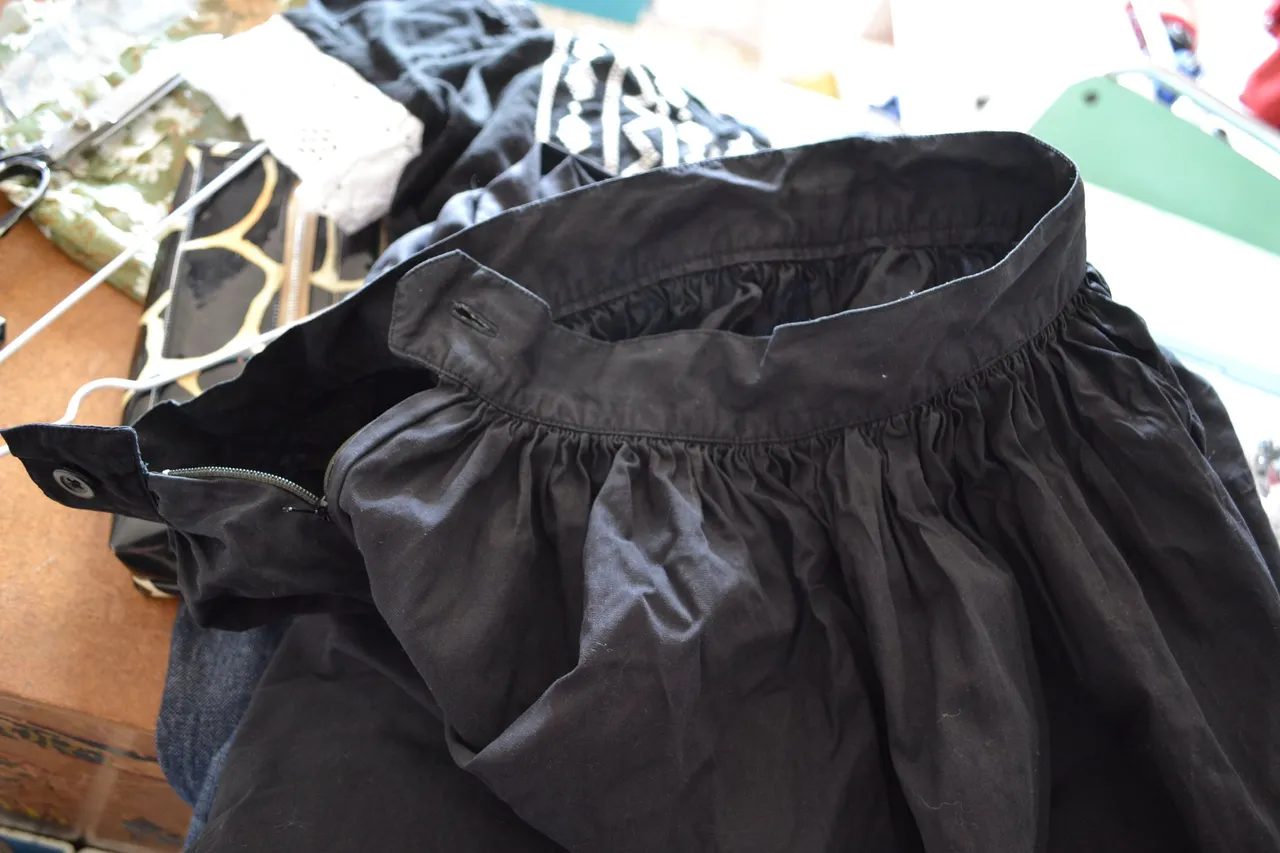
AND THEN! I realised that the skirt was inside-out of course, and that required taking apart the seam where the label and the old zip had been firmly ensconsed, then somehow finishing raw seam edges to make them appear like French seams, as one of the original seams was a French seam, and this fitted with the overall look.
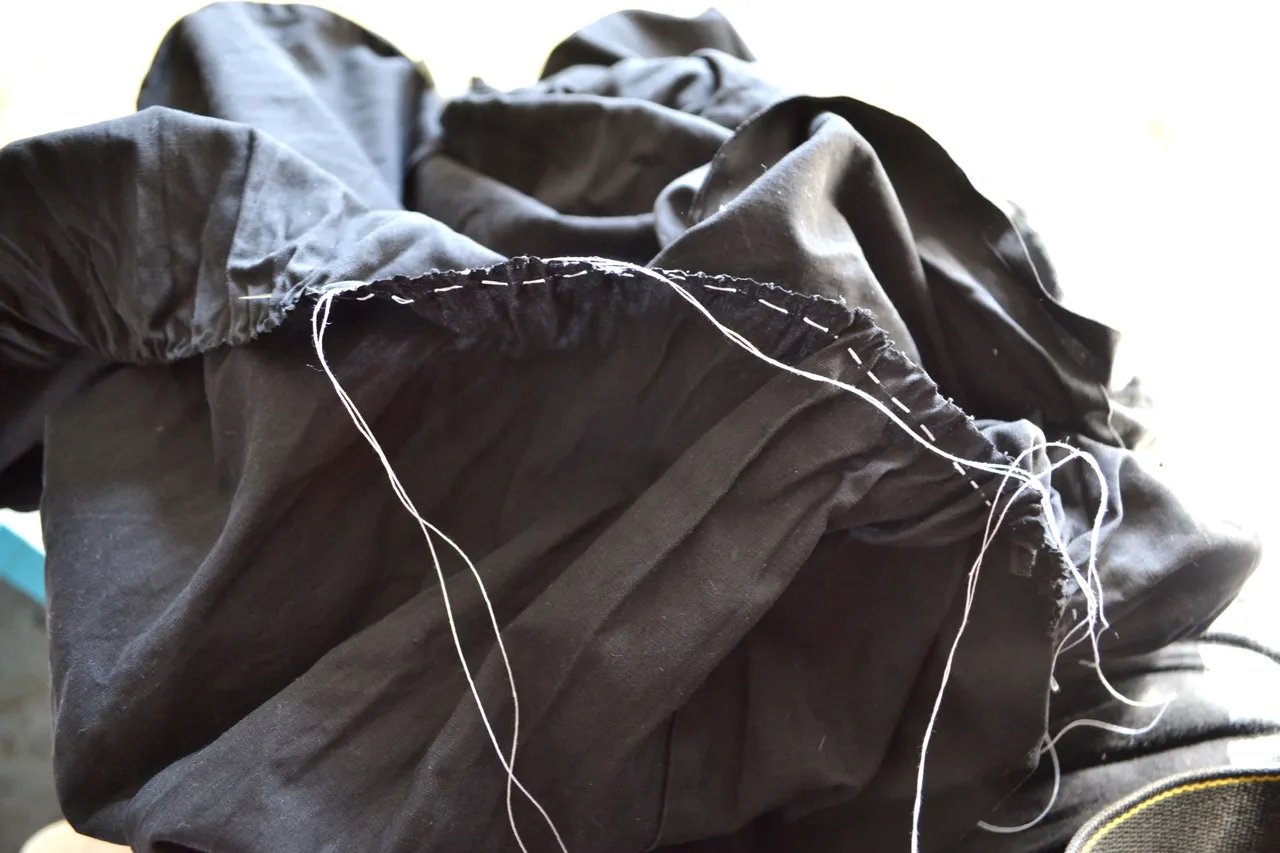
So again I got into the doubling over and handsewing of these further edges: you can see the pins, hopefully, here above.
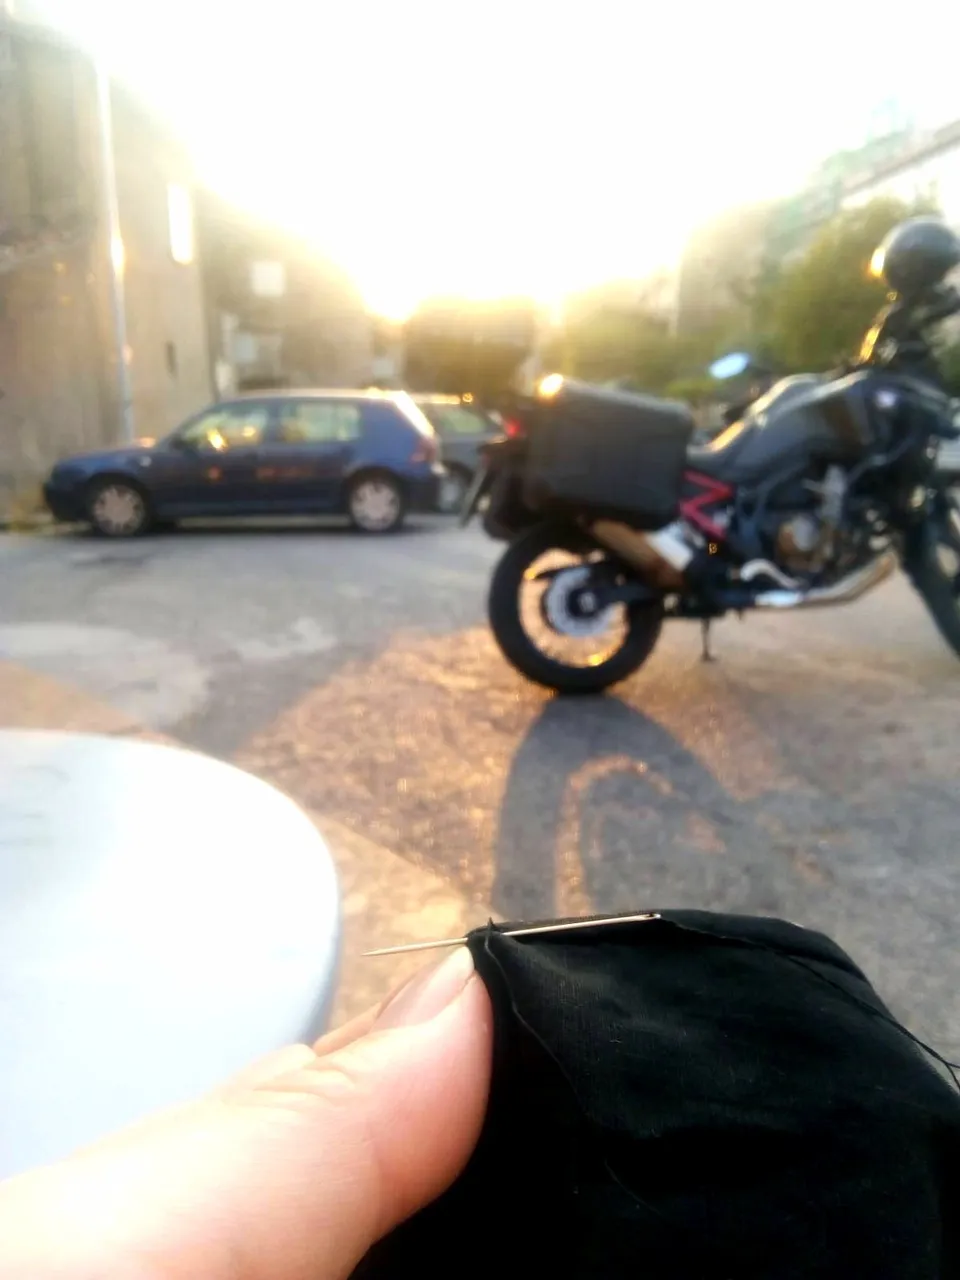
I took some much-needed unwinding-with-a-glass-of-wine time, to handsew these final seams...
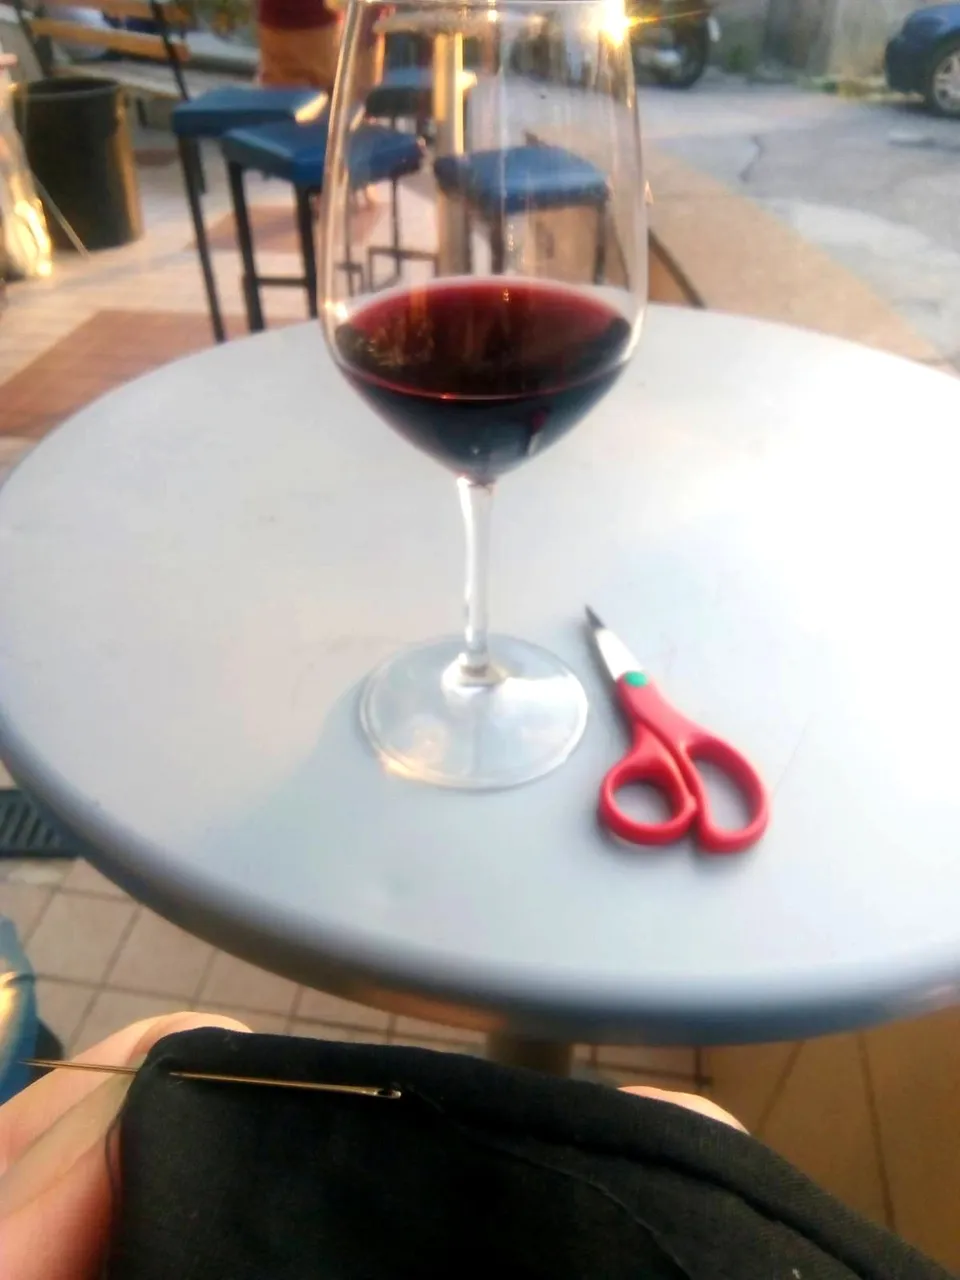
As I've spoken to before, this kind of sewing session is the equivalent for me of the old practise of women sitting on their doorsteps to sew in the evening light. No-one walks past my house much, so I like the bustle of the bar, and a glass of wine, whilst I ruminate on how the creative process has unfolded during the making of this garment.

As I think-feel-see-work, I have this beautiful recognition that - as in my painting practise - NOTHING is an 'accident': all things have particular reason for having come into being... I might have been self-critical about having 'made a massive mistake', BUT being open to spontaneous, unexpected happenings, I was able to adapt rather than having to take many steps backwards and try to force my will on the dress. I love going with the flow, and allowing the moment to give a new direction: this is such a vital part of Natural Law and Living In Gift: there is no reason to use excessive force, ever!
So much love to you all in your needlework dreams, and please do upvote, share and comment, if you feel called to!
www.claregaiasophia.com