Las falditas tutú son unas prendas muy versátiles para vestir a las niñas. Lo más común es el uso que se les da para las niñas que reciben clases de ballet, pero también para el uso corriente ya que es una prenda que realza mucho, y por lo general las niñas les gusta mucho su uso. También, se usa mucho para los disfraces, que esos casos se pueden realizar con diseños y colores muy particulares de acuerdo a la alusión.
El modelo que les voy a presentar es mayormente para uso general, es decir como falda de paseo, y también para una niña que asista a clases de ballet. Estas falditas normalmente se realizan con tul suave.
MATERIALES PARA FALDITA DE 40 CM LARGO
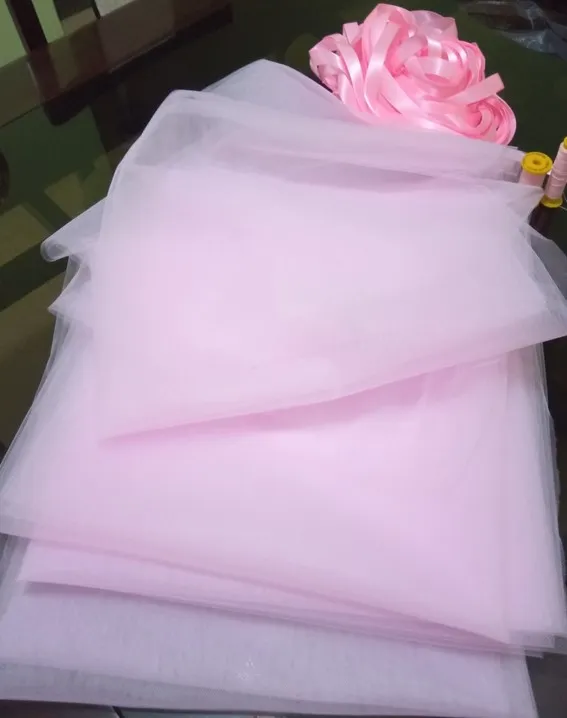
. Tul rosado, 3,50 m de 150 m de ancho.
. Hilo rosado.
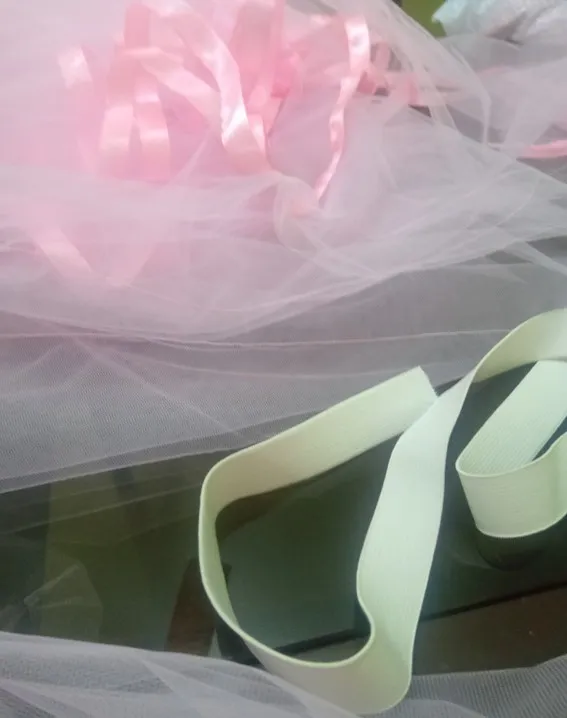
. Elástico de 2 cm de ancho, 50 cm.
. Cinta métrica.
. Tijeras.
. Imperdible.
. Máquina de coser
. Cinta de raso rosada de 1,5 cm de ancho, 24 metros.
PROCEDIMIENTO
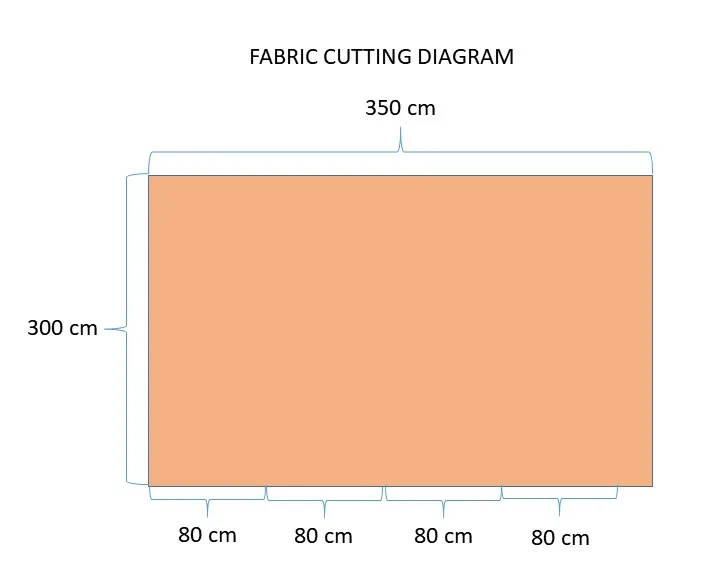
Comenzamos por seleccionar el color el color del tul con el cual vamos a realizar la prenda y compramos la cantidad de acuerdo a el tamaño de la niña. En mi caso la vamos a realizar para una niña que mida desde la cintura a la rodilla 40 cm y el color seleccionado es el rosado. Entonces en el comercio conseguí una tela de tul de 3 metros de ancho, lo cual me servía para realizar la confección que deseaba, por lo cual adquirí 3,50 metros (m) o lo que es lo mismo 350 centímetros (cm).
Para que una faldita Tutú quede bien armadita debe tener entre 8 metros y 12 metros de largo, para niñas entre Cero (0) y seis (6) años, que para este caso que vamos a realizar le puede servir a una niña entre 4 y 6 años; por supuesto eso va a variar porque depende de la altura de la niña.
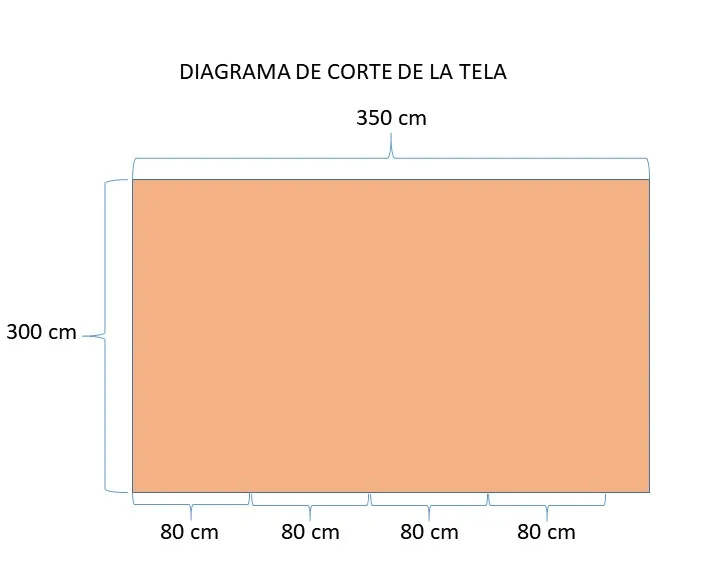
Una vez con la tela de tul, extendemos en una mesa o mesón y emparejamos el borde por donde vamos a iniciar los cortes, de esa manera todo el ancho de los paños que vamos a cortar serán iguales, que es muy importante en estos casos. Como la medida que estamos utilizando es de 40 cm desde la cintura a la rodilla vamos a cortar paños del doble del largo, es decir de 80 cm; y como en este caso necesitamos 12 m de largo, por lo cual vamos a cortar cuatro paños de 80 cm por los 300 cm que es el ancho de la tela. Por lo tanto, vamos a tener los 4 paños con dos lados de 80 cm y dos lados de 300 cm.
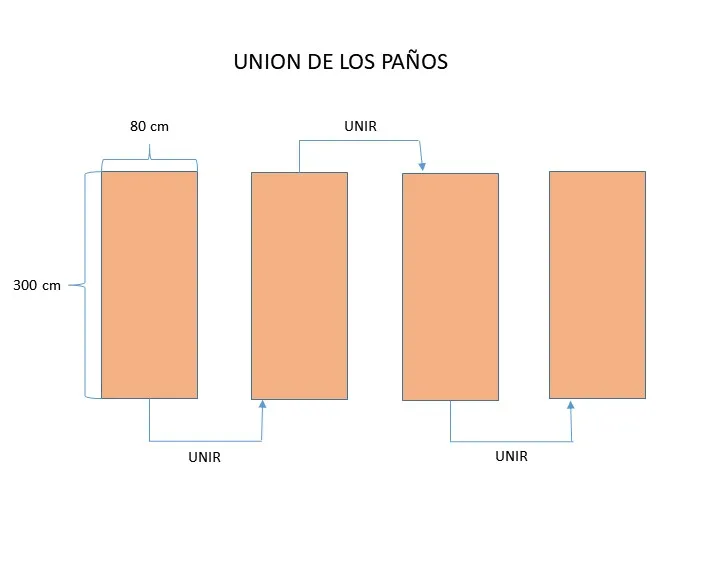
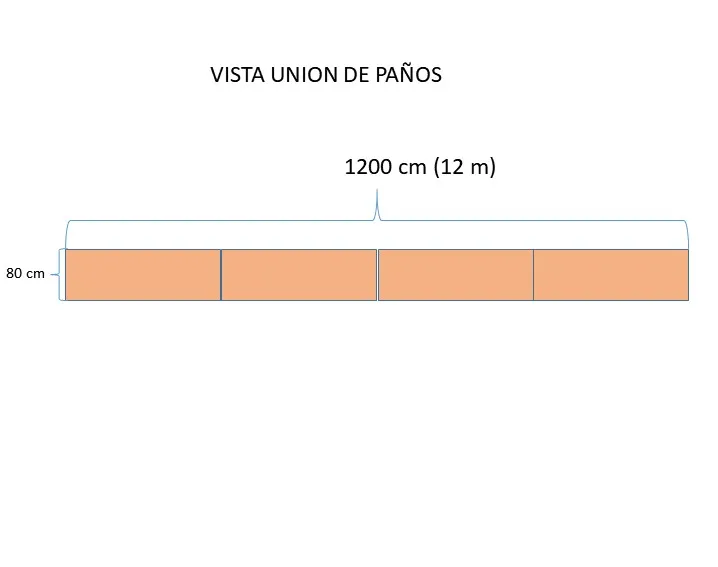
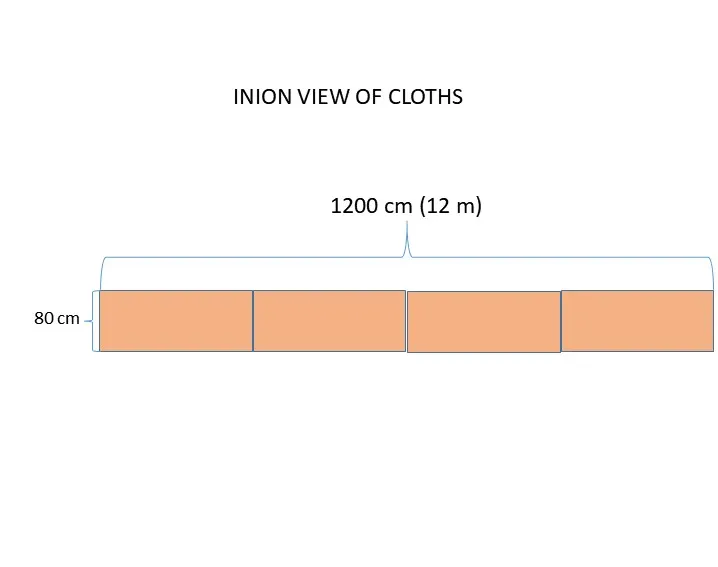
Con los cuatro paños cortados, de acuerdo a las medidas indicadas anteriormente, vamos a unir los paños entre sí por los lados de 80 cm, por lo cual me va a quedar un gran paño de 1200 cm o 12 m de largo por 80 cm de ancho.
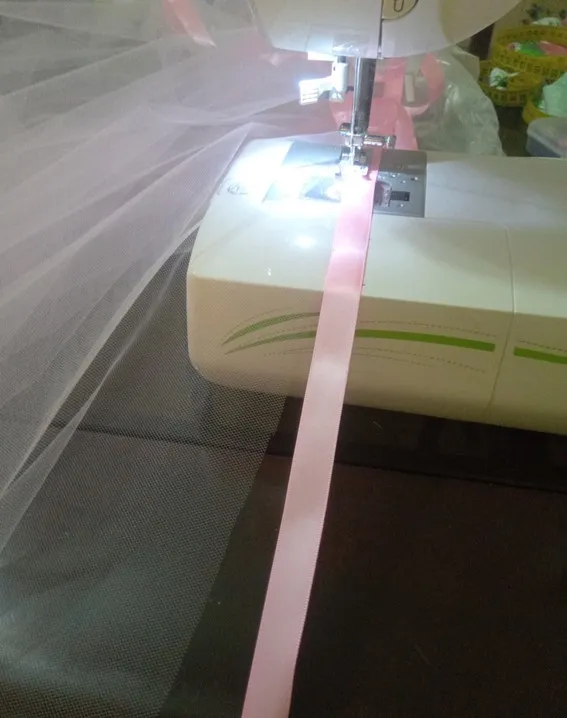
Seguidamente vamos coser con la máquina la cinta de raso rosado a uno de los bordes de 1200 cm, esto lo vamos a realizar con costura recta, y luego lo realizamos con el otro borde de tal forma que al doblar la tela casi a la mitad la cinta colocada en ambos bordes quede perfectamente del lado derecho, recuerden que estamos trabajando para un largo de falda de 40 cm. El doblez lo vamos a realizar de tal forma que se vean como sobrepuestas las cintas de raso en los bordes de la tela; que representaría la parte inferior de la faldita.
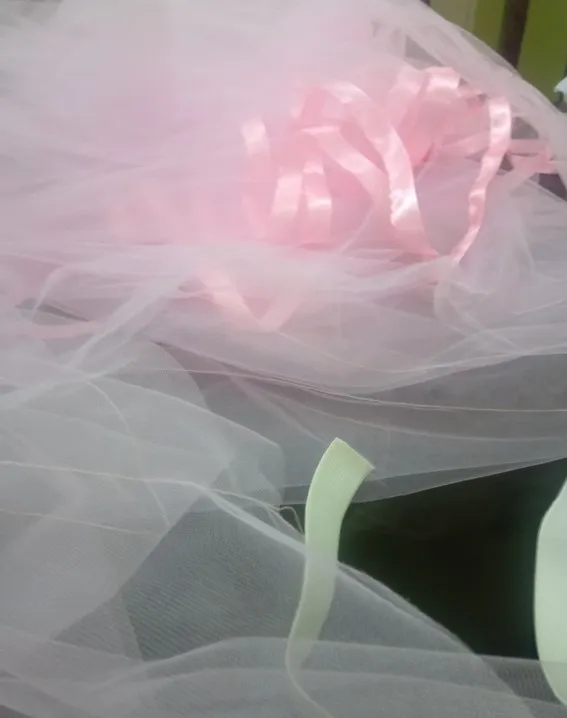
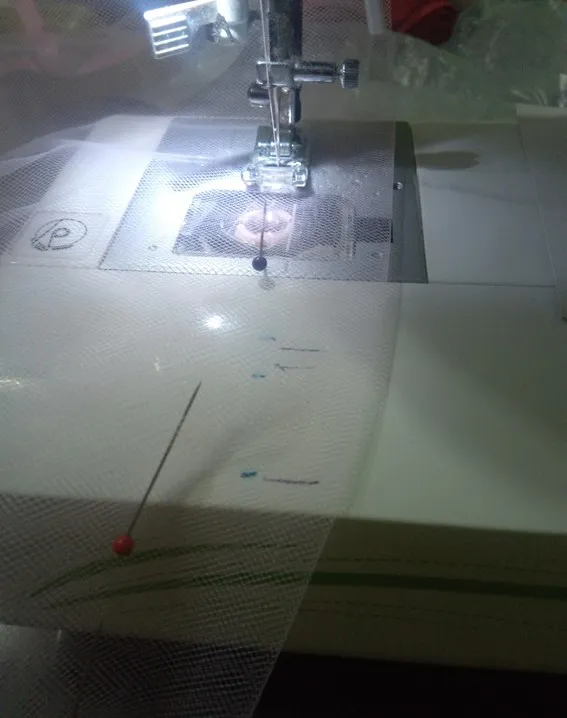
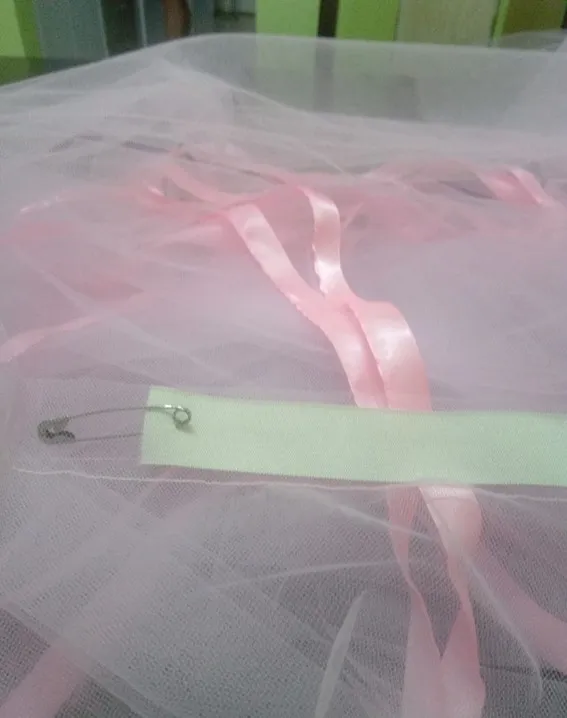
A continuación, por la parte donde realizamos el doblez, que sería la parte superior de la falda, vamos a coser a 2,5 cm de ese doblez, es importante que para que no se deslice la tela fijemos el doblez con alfileres, para luego insertar el elástico, ese procedimiento lo vamos a realizar con un imperdible, que es el que al final le va a dar la forma a la faldita. Cuando insertamos el elástico dejamos unos cuantos centímetros para realizar la unión de los dos extremos del elástico, esta unión lo realizamos con la maquina en punto zigzag medio.
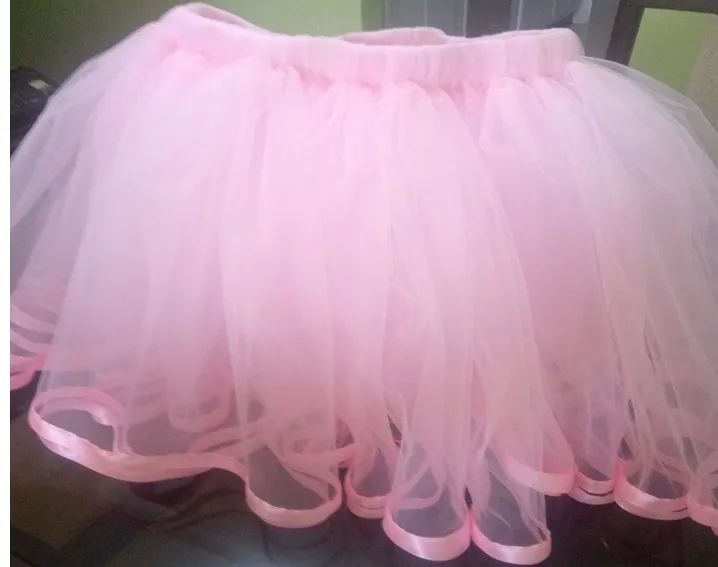
Luego, vamos a ir deslizando la tela de tal forma que la distribución en el elástico sea bien uniforma. Así mismo para seguir dándole buena forma a la faldita buscamos los dos extremos de la falda, tanto la inferior como la sobrepuesta y podemos coserla unos 20 cm en ambos casos. No se puede coser hasta el elástico porque entonces si se notaría la unión. También se puede dejar así, sin realizar esas uniones porque en verdad la amplitud de la falda lo oculta muy bien.
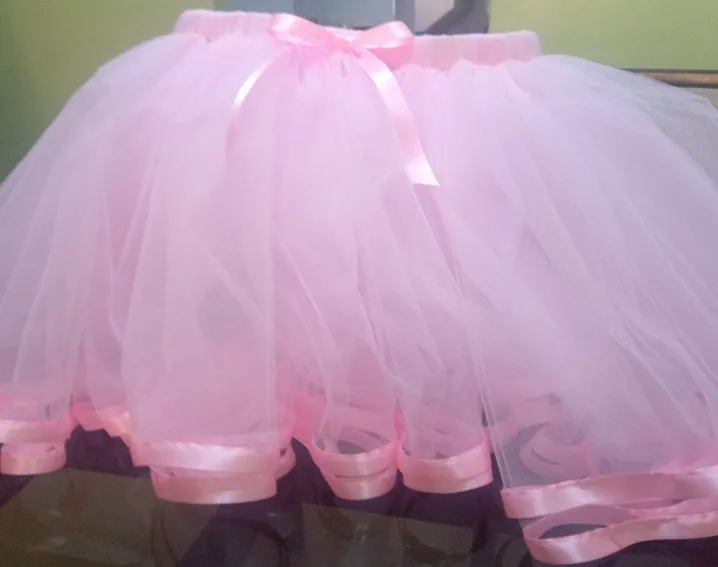
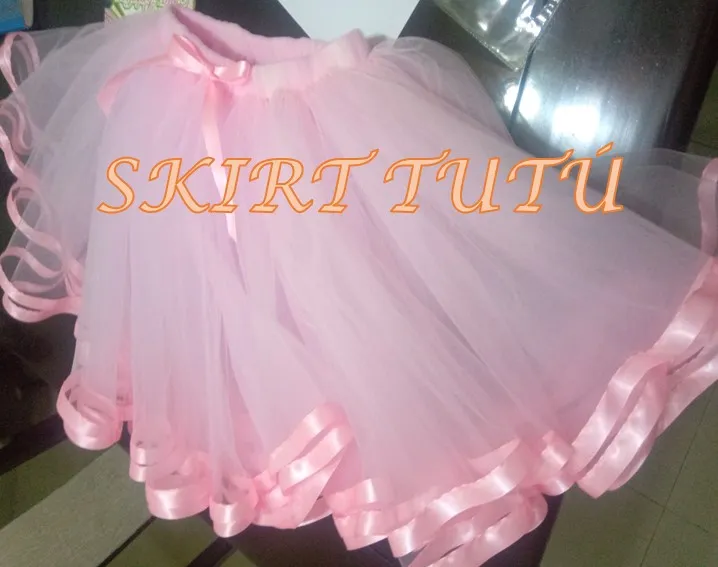
Para culminar la elaboración de la faldita, se le coloca un lazo o moño de acuerdo al gusto, que representaría la parte delantera de la faldita.
¡Bueno estimados amigas y amigos de esta maravillosa comunidad, anímense a los que les gusta la costura!
In English
The tutu skirts are very versatile garments to dress girls. The most common is the use that is given to girls who receive ballet classes, but also for everyday use as it is a garment that enhances a lot, and usually the girls like to use it. Also, it is used a lot for costumes, which in those cases can be made with very particular designs and colors according to the allusion.
The model that I am going to present is mostly for general use, that is to say, as a walking skirt, and also for a girl who attends ballet classes. These skirts are usually made with soft tulle.
MATERIALS FOR 40 CM LONG SKIRT
. Pink tulle, 3.50 m of 150 m wide.
. Pink thread.
. Elastic 2 cm wide, 50 cm.
. Measuring tape.
. Scissors.
. Safety pin.
. Sewing machine .
. 1.5 cm wide pink satin ribbon, 24 meters.
PROCEDURE
We start by selecting the color of the tulle with which we are going to make the garment and we buy the quantity according to the size of the girl. In my case we are going to make it for a girl that measures from waist to knee 40 cm and the selected color is pink. Then in the store I got a tulle fabric 3 meters wide, which served me to make the confection I wanted, so I bought 3.50 meters (m) or what is the same 350 centimeters (cm).
For a Tutu skirt to be well assembled it must be between 8 meters and 12 meters long, for girls between zero (0) and six (6) years, which for this case we are going to make it can serve a girl between 4 and 6 years; of course that will vary because it depends on the height of the girl.
Once we have the tulle fabric, we extend it on a table or counter and even out the edge where we are going to start the cuts, that way all the width of the cloths that we are going to cut will be the same, which is very important in these cases. As the measurement we are using is 40 cm from the waist to the knee, we are going to cut cloths twice the length, that is to say, 80 cm; and as in this case we need 12 m long, so we are going to cut four 80 cm cloths for the 300 cm that is the width of the fabric. Therefore, we will have 4 panels with two sides of 80 cm and two sides of 300 cm.
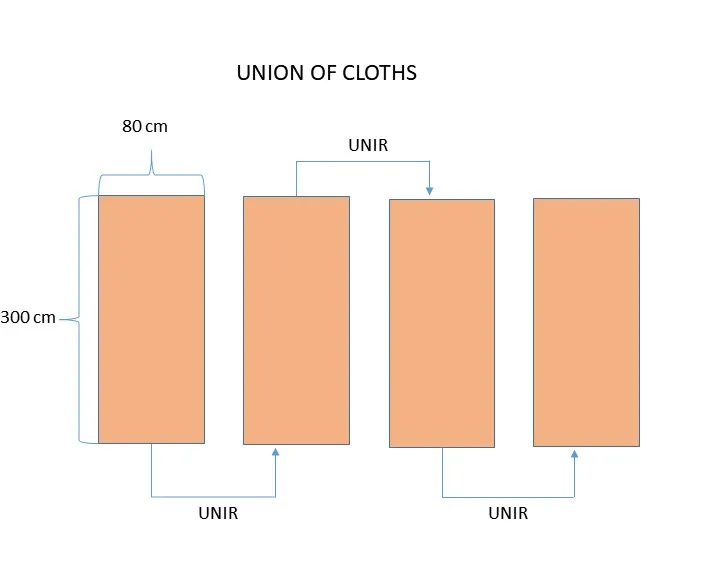
With the four cloths cut, according to the measurements indicated above, we are going to join the cloths together by the 80 cm sides, so I will have a large cloth of 1200 cm or 12 m long by 80 cm wide.
Next we are going to sew the pink satin ribbon with the machine to one of the 1200 cm edges, we are going to do this with a straight seam, and then we are going to do it with the other edge in such a way that when we fold the fabric almost in half the ribbon placed on both edges is perfectly on the right side, remember that we are working for a skirt length of 40 cm. We are going to make the fold in such a way that the satin ribbons are overlapped on the edges of the fabric, which would represent the bottom of the skirt.
Next, on the part where we made the fold, which would be the upper part of the skirt, we are going to sew 2.5 cm from that fold, it is important that so that the fabric does not slip we fix the fold with pins, to then insert the elastic, we are going to do this procedure with a safety pin, which is what will finally give the shape to the skirt. When we insert the elastic we leave a few centimeters to make the union of the two ends of the elastic, this union is made with the machine in medium zigzag stitch.
Then, we are going to slide the fabric in such a way that the distribution in the elastic is very uniform. Also to continue giving good shape to the skirt we look for the two ends of the skirt, both the bottom and the overlapping and we can sew about 20 cm in both cases. You can not sew up to the elastic because then you would notice the union. You can also leave it like this, without making these joints because the width of the skirt hides it very well.
To finish the elaboration of the skirt, place a bow or bow according to taste, which would represent the front of the skirt.
Well, dear friends of this wonderful community, cheer up those of you who like sewing!
Translated with www.DeepL.com/Translator (free version)
Fuente de imagenes: Archivo personal


MIS REDES SOCIALES