
Greetings to the community, hoping you are very well and with a new week of blessings and harmony for all with your new projects.
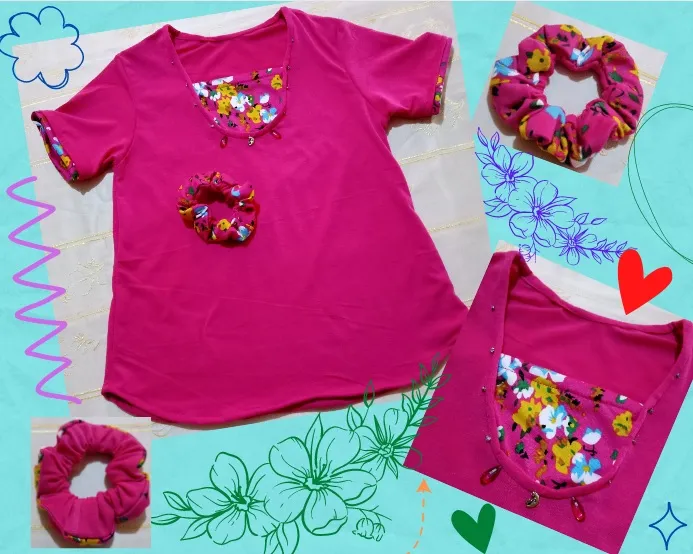
This time I made a simple but very fresh blouse, since it is made of pink flannel fabric and combined with another flower print fabric.
Although all sewing work looks very simple, it must be done very well, especially when each piece is cut, so that each piece can be according to the desired pattern or design.
Now, I show you the steps taken in this flannel fabric blouse, each type of fabric in the sewing machine, is done with their respective needles so that the stitches are good.
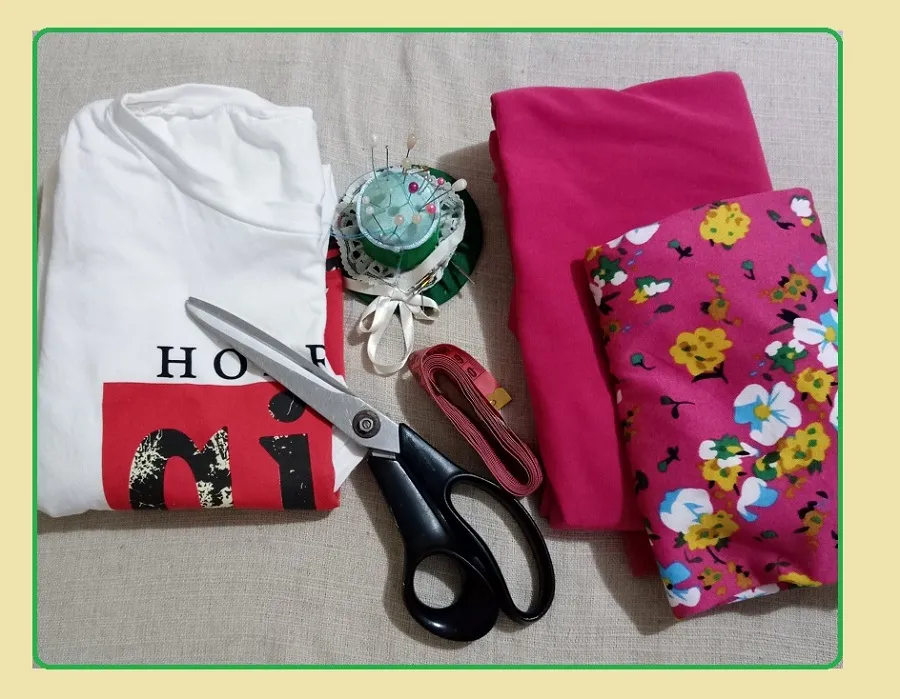
✂️My materials:
⭐ Unicolor and printed flannel fabric.
⭐ A flannel or blouse pattern.
⭐Thread, needles, scissors, tape measure, sewing machine.
⭐Adornments.
⭐ Elastic.
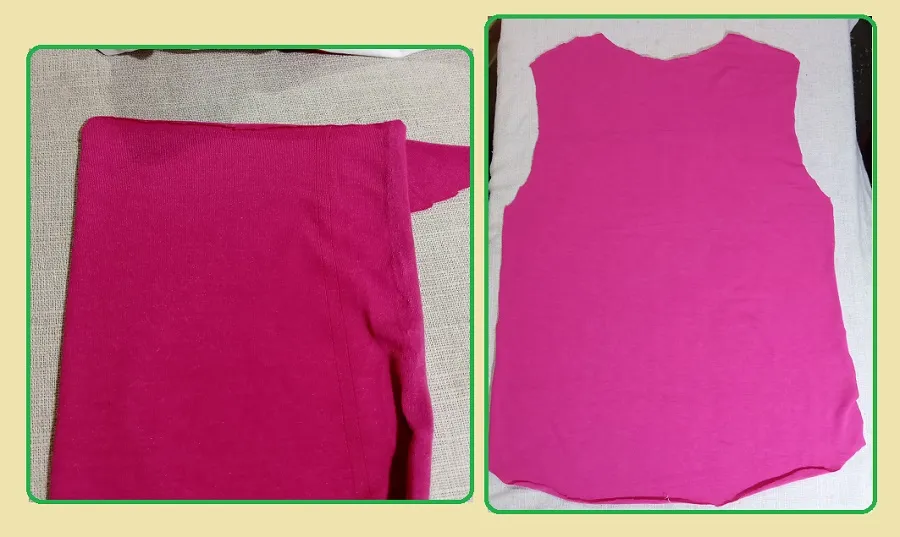
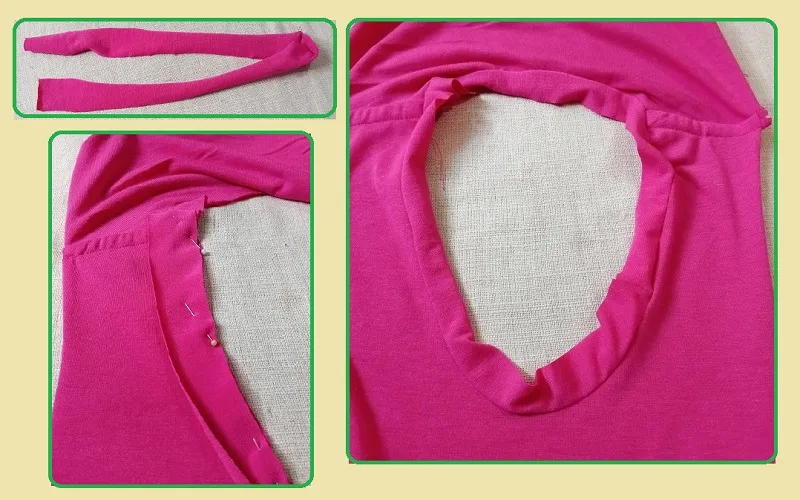
First I fold the fabric so I can cut the front and back.
I place the flannel on top so I can cut it to the desired length and width.
The bottom part is cut with a wave from the sides or sides.
I made the front part of the round neck a little lower than normal, to be able to place the other patterned fabric inside.
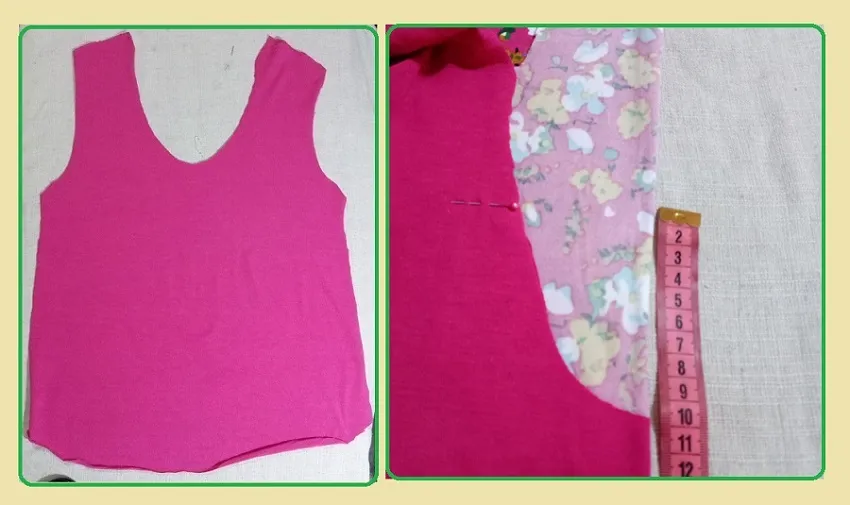
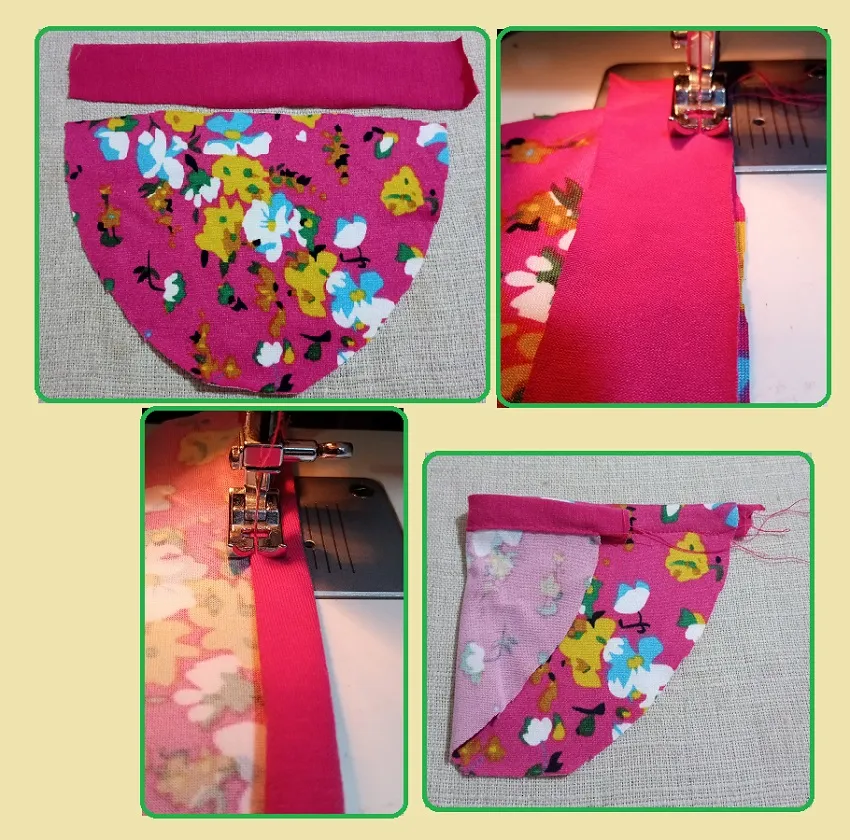
I took this printed fabric to measure in the same way as the neck about 12cm long by the width of the neck.
I sewed a strip all over this edge and then I wove it.
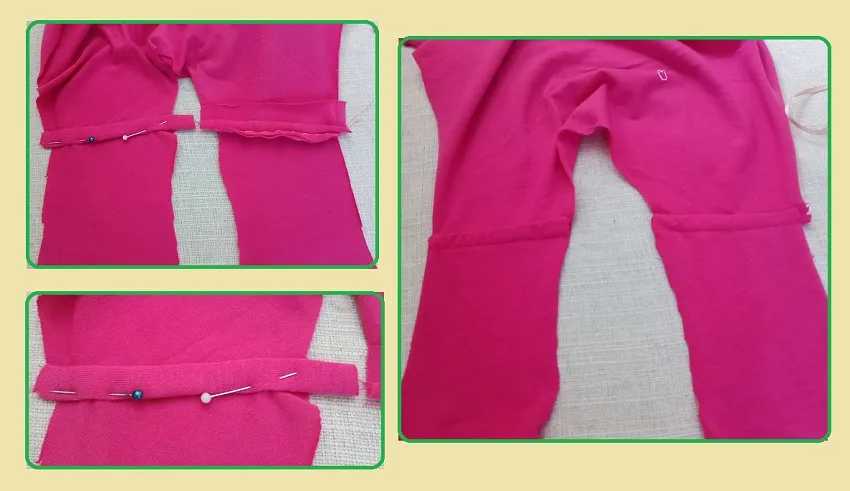
Unite the parts of the shoulders, placing a strip on each side on the contrary that it does not stretch, this is placed so that the fabric does not stretch on the shoulders, with its use, or washed.
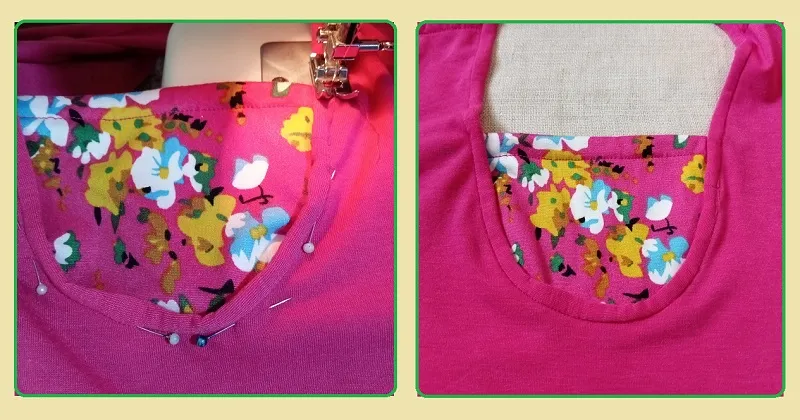
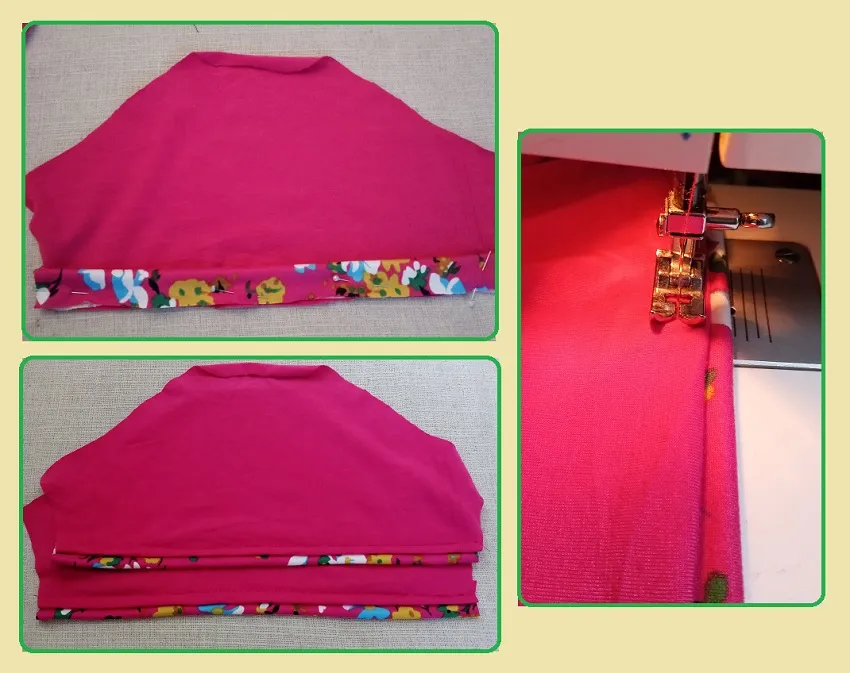
With another long strip that covers the entire neck, I cut it 3cm wide, then I started to stick it on the neck and made its fold. With the printed fabric I put it well in the front, and I press it with the pins so that it does not roll, and then I pass the seam.
I cut the sleeves and each one I cut a 4cm wide strip that goes in the hem of the printed fabric, I sewed it and then I made an overseam.
Having the sleeves ready, I proceed to stick it on the blouse, and then close the entire blouse. When closing the blouse with its straight seam and then with the zig-zag-at the edge of the fabric.
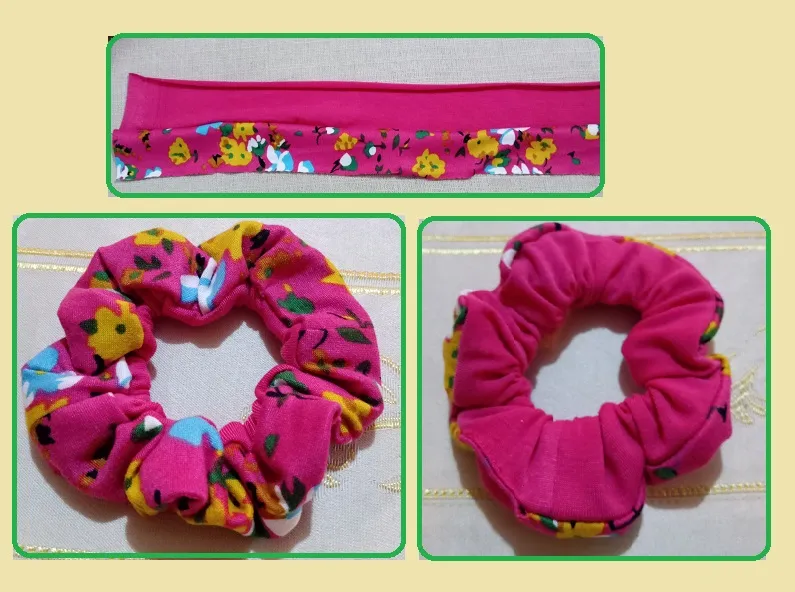
Finally I made his ring and that's it. And as an ornament I glued some pebbles that I had and I put it around his neck.
I glue these with hot silicone.
Now yes, friends of the community as I always tell you, I hope you liked it and continue having a great time, until the next presentation to show something again and share, thanks for your visit to my blog, bye!

Saludos a la comunidad esperando se encuentren muy bien y con nueva semana de bendiciones y armonia para todos con sus nuevos proyectos.
En esta oportunidad hice una blusa sencilla pero muy fresca, ya que es de tela de franela en color rosada y combinada con otra tela en estampado de flores.
A pesar de que se vea muy sencilla todo trabajo de costura, hay que realizarlo muy bien, sobre todo cuando se corta cada pieza, para que cada pieza pueda estar acorde al patron o diseño deseado.
Ahora bien, les muestro los pasos realizados en esta blusa en tela de franela, cada tipo de tela en la maquina de coser, se hace con sus agujas respectivas para que quede bien las puntadas.
✂️Mis materiales:
⭐Tela de franela unicolor y estampada.
⭐Un patron de franela o blusa.
⭐Hilo, agujas, tijera, cinta métrica, máquina de coser.
⭐Adornos.
⭐Elastica.
Primero doblo la tela para poder cortar las partes delantera y de espalda.
Coloco la franela encima y asi poder cortar, al largo y ancho deseado.
La parte de abajo la corte con una onda de los lados o costados.
La parte del frente en el cuello redondo lo hice un poco más abajo de lo normal, para poder colocarle la otra tela estampada por dentro.
Esta tela estampada la saque a la medida de la misma forma del cuello a unos 12cm de largo por el ancho del cuello.
Le cosi una tira por todo esta orilla y luego la boble.
Uni las partes de los hombros, colocando en cada lado una tira al contrario de que no estire, esta se coloca es para que en los hombros no se estire la tela, con su uso, o lavadas.
Con otra tira largar que cubra todo el cuello, la corte de 3cm de ancho, luego empece a pegarla en el cuello y le hice su doblez. Con la tela estampa la hubico bien en el frente, y voy prensando con los alfileres para que no se ruede, y luego paso la costura.
Corte las mangas y a cada una le corte una tira de 4cm de ancho que va en el ruedo de la tela estampada, la cosi y despues le hice una sobre costura.
Teniendo las mangas listas, procedo a pegarla en la blusa, para luego cerrarla toda la blusa. Al cerrar la blusa con su costura recta y despues con el zig-zag- en la orilla de la tela.
Por ultimo le hice su ruedo y listo. Y como adorno le pegue unas piedritas que tenia y le la puse al rededor del cuello.
Estas las pegue con silicon caliente.
Para completar tambien hice una colita combinada tanto con el estampado como unicolor, la cual quedó muy bien.
Ahora si, amigos de la comunidad como siempre les digo, espero les haya gustado y la sigan pasando muy bien, hasta la proxima presentación en mostrar algo nuevamente y compartir, gracias por tu visita a mi blog, chau!
Las fotos son de mi autoria, con mi celular Tecno Spark go.
Traductor deepl.
Diseño canva.
The photos are my own, with my Tecno Spark go cell phone.
Translator deepl.
Canvas design.