Bienvenidos a mi blog/Welcome to my blog
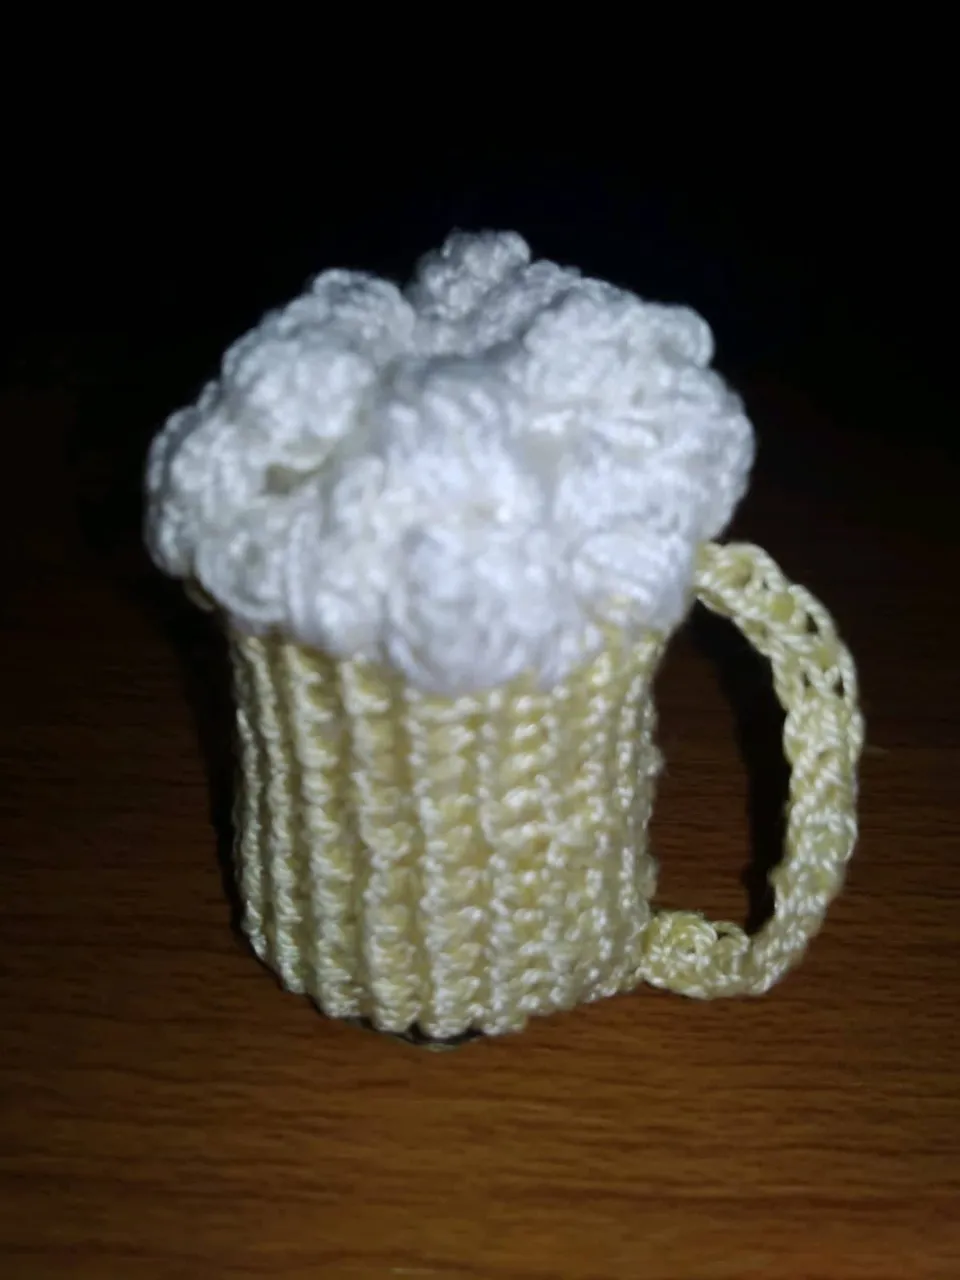
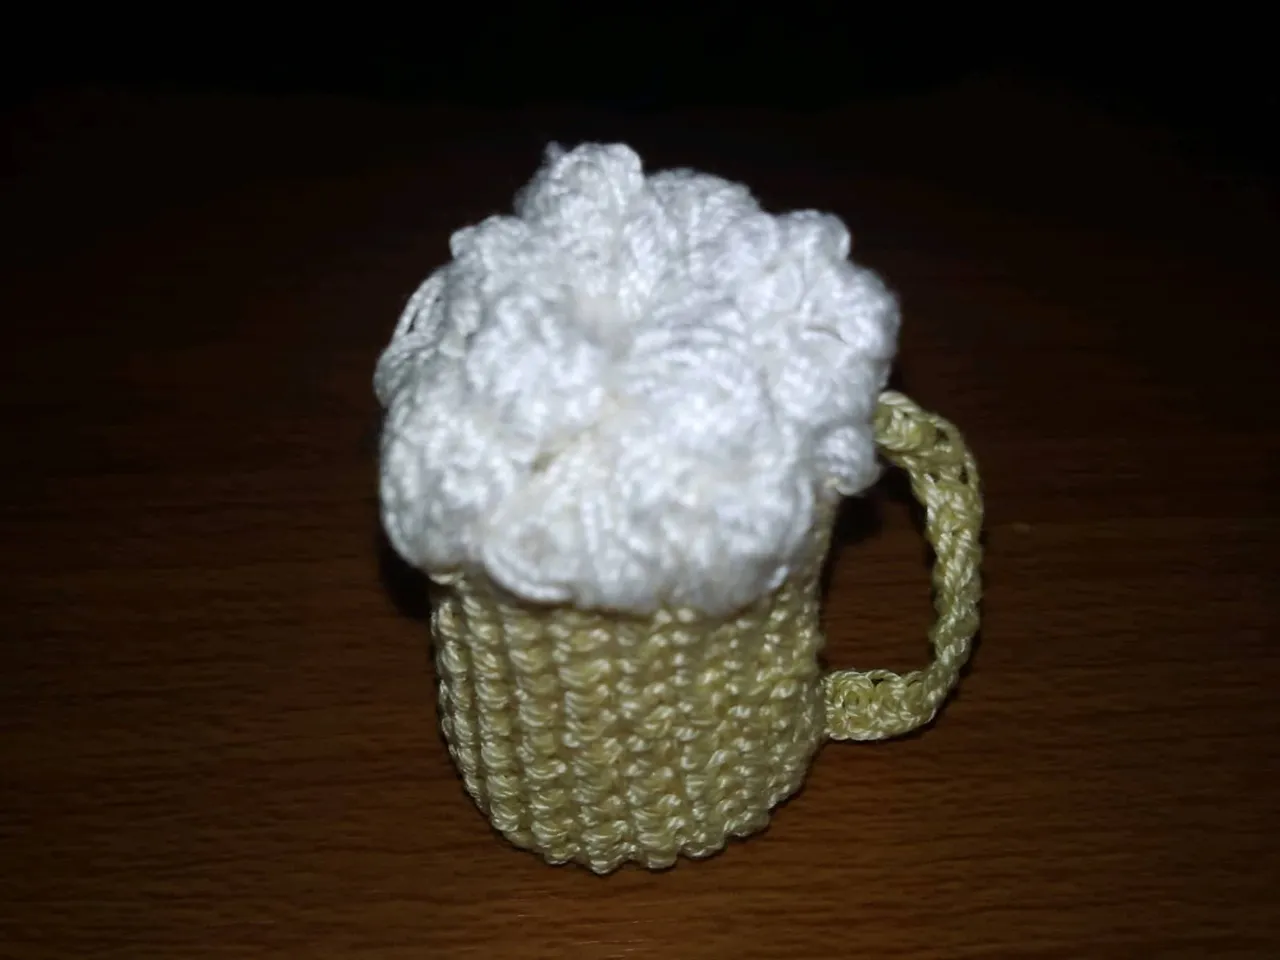
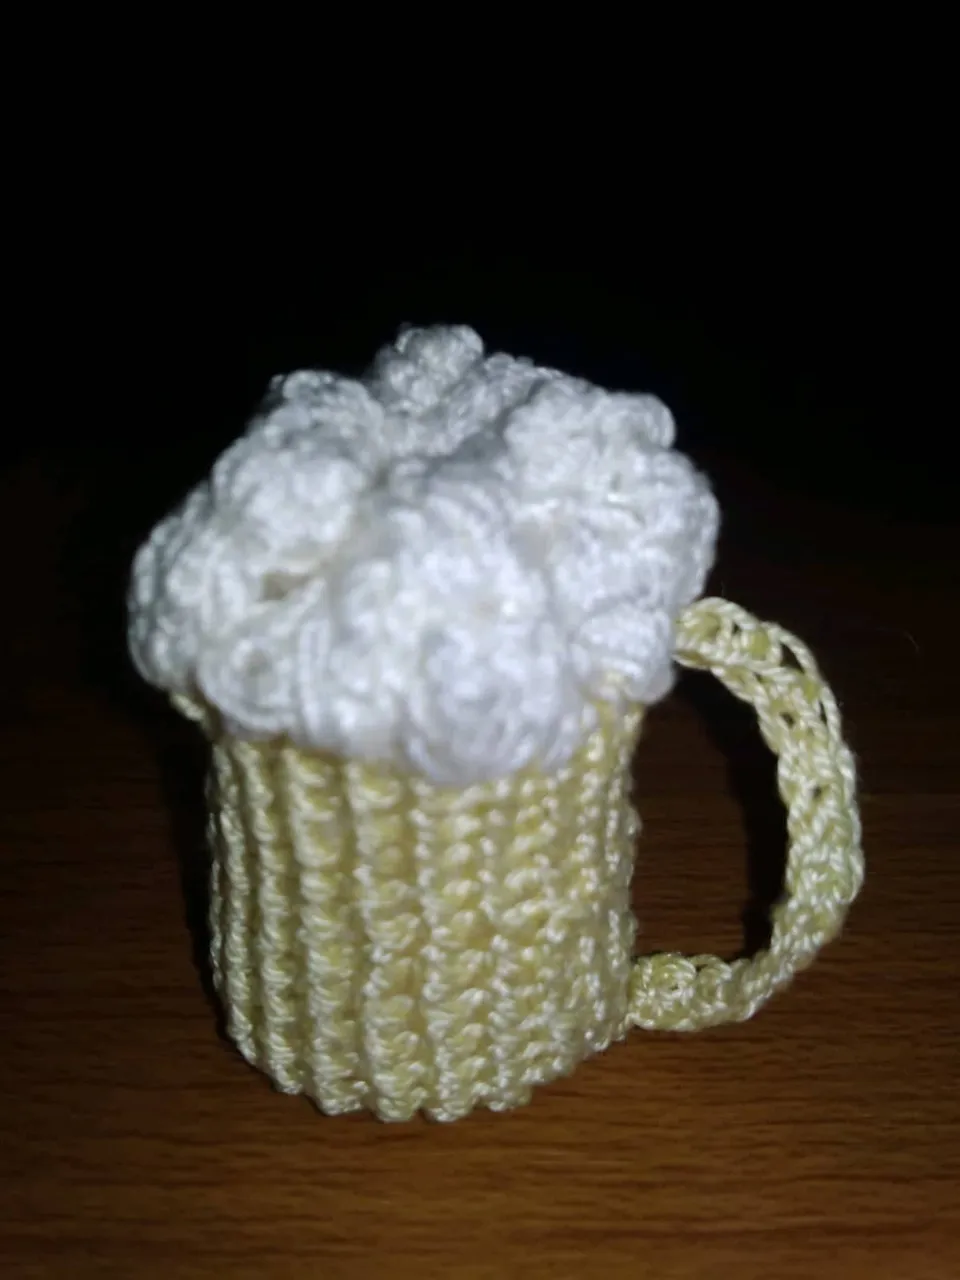
Saludos mis amores, feliz de poder compartir con ustedes una nueva creación de tejido con la técnica del amigurumi aprovechando la ocasión del día del padre el cual se celebra justo hoy en mi país y en muchos otros donde se festeja este día tan especial; por ello, elaboré una jarra de cerveza lo que caracteriza a los hombres por su atracción por dicha bebida.
Greetings my loves, happy to share with you a new amigurumi knitting creation taking advantage of the occasion of Father's Day which is celebrated today in my country and in many others where this special day is celebrated; therefore, I made a beer mug which characterizes men for their attraction to this drink.
Necesitamos:
Hilo de crochet color amarillo claro y blanco
Aguja de tejer
Relleno
Tijera
Aguja de coser
We need:
Light yellow and white crochet thread
Knitting needle
Stuffing
Scissors
Sewing needle
Paso a paso/Step by step
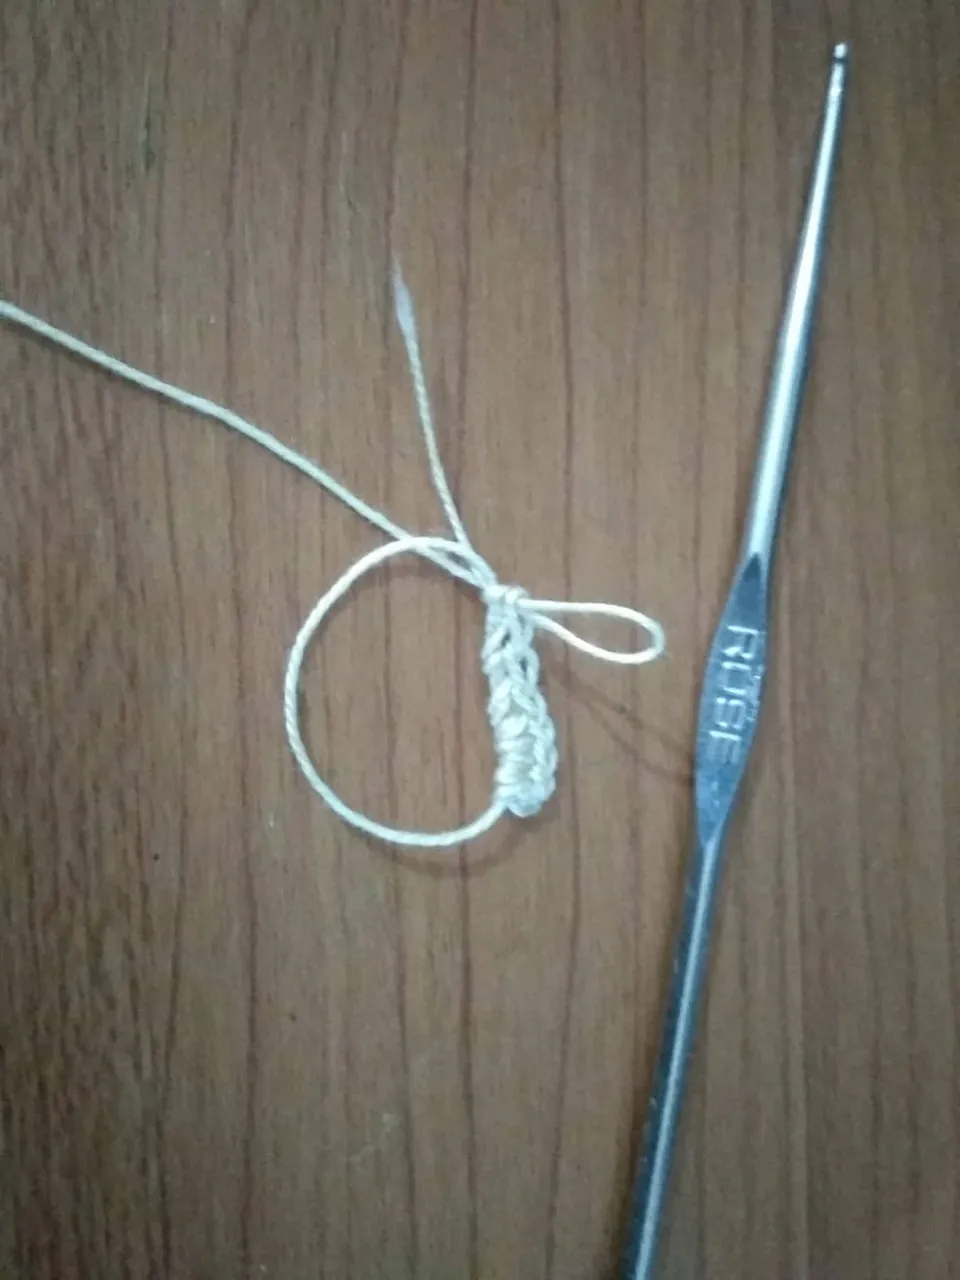
Lo primero en realizar es nuestro anillo mágico en el cual luego haremos seis puntos bajos y halamos el hilo sobrante para que el anillo se reduzca quedando visibles los puntos bajos.
The first thing to do is to make our magic ring in which we then make six low stitches and pull the excess yarn so that the ring is reduced, leaving the low stitches visible.
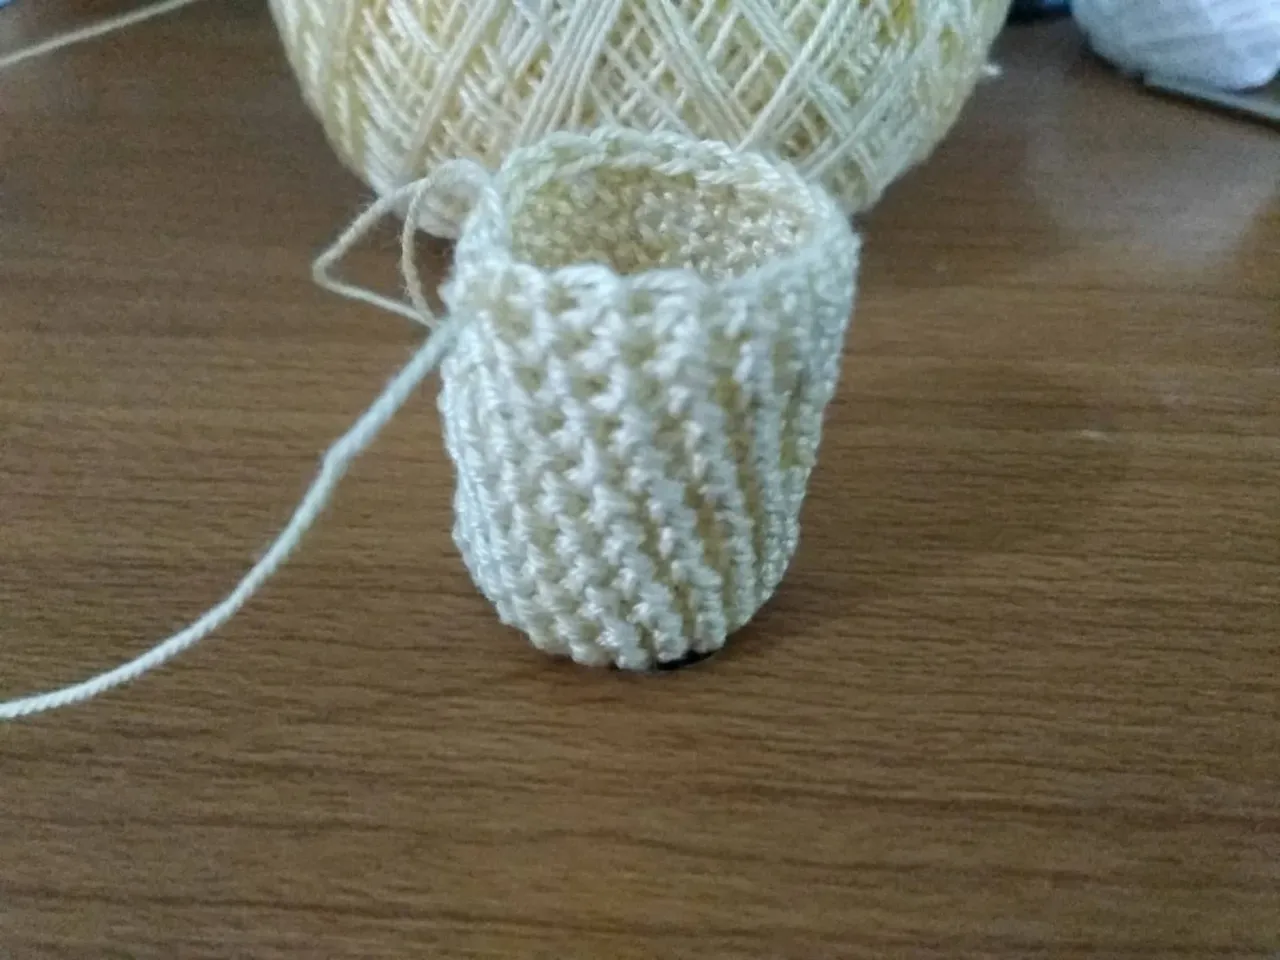
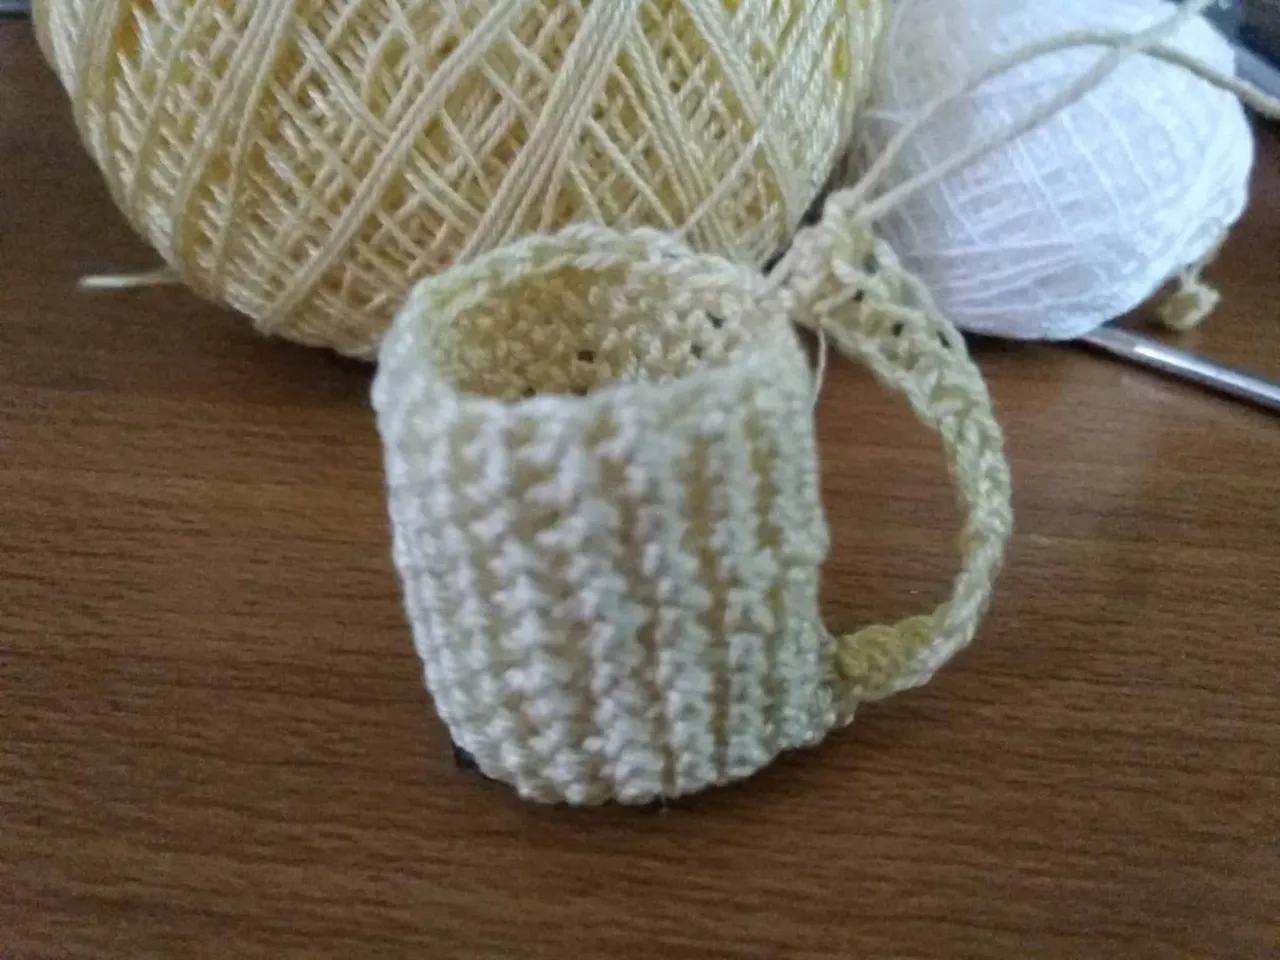
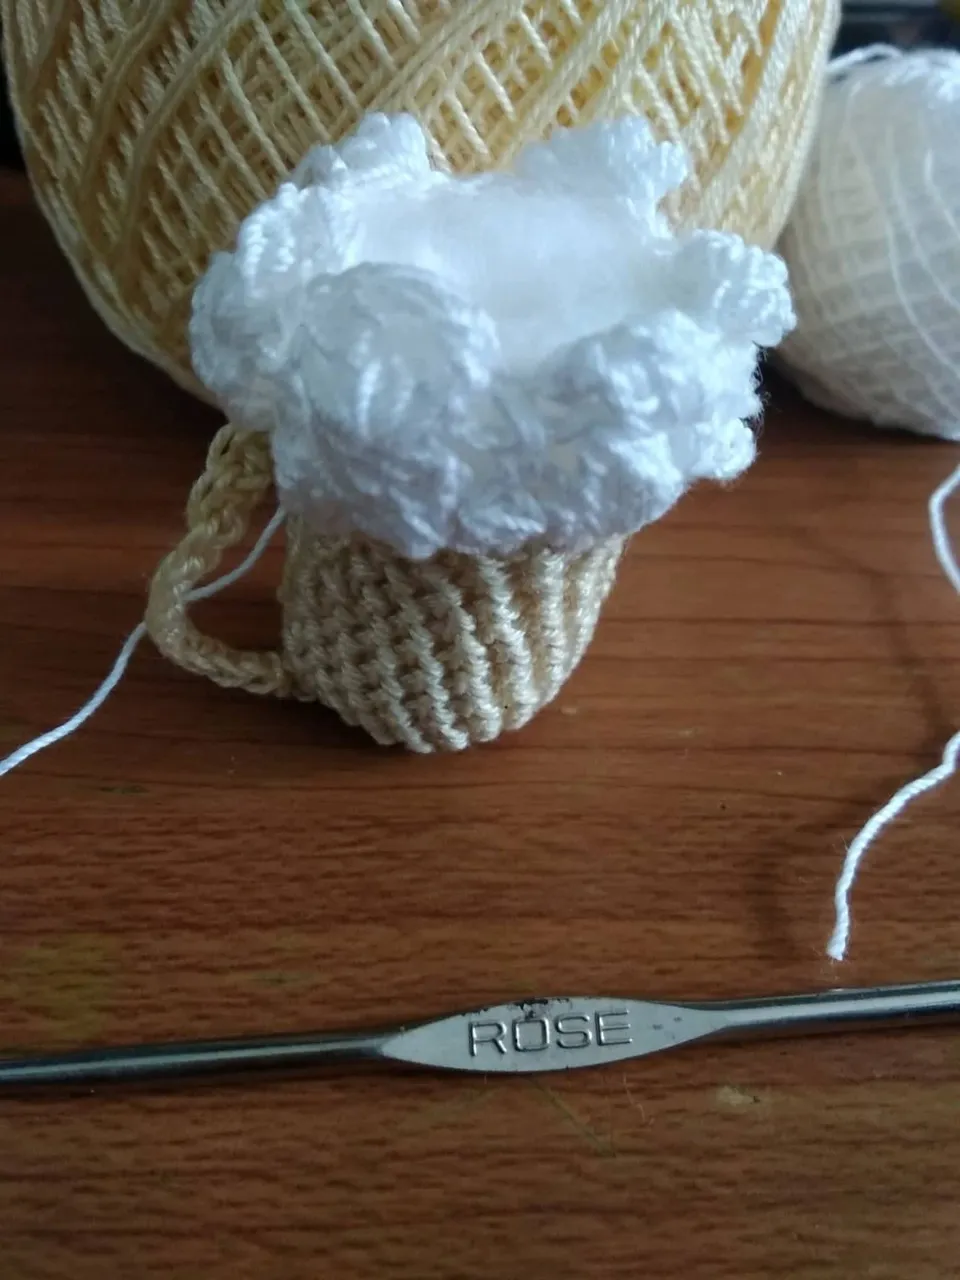
Luego realizamos una vuelta de puntos bajos duplicados para terminar con doce puntos bajos, seguidamente creamos dos vueltas levantando una cadeneta, luego un punto bajo, dos puntos bajos en un mismo punto, continuamos con un punto bajo y así hasta completar una vuelta, luego en la otra se repite el mismo proceso, cerrando siempre con un punto deslizado y así formamos la base. Para el cuerpo de la jarra levantamos una cadeneta e introducimos en el punto siguiente asegurándonos de agarrar solo una hebra para realizar el punto bajo en toda esa vuelta hasta finalizar con un punto deslizado; en las siguientes nueve vueltas levantamos una cadeneta para realizar posterior a ello puntos bajos pata finalizar cada vuelta dejamos un punto de por medio libre y cerramos la vuelta, en la vuelta numero nueve cerramos y levantamos doce cadenetas y tomamos un punto por la misma dirección donde estamos trabajando, en la primera vuelta que iniciamos, aseguramos con un punto deslizado y comenzamos con puntos bajos por toda la cadeneta hasta llegar al borde de la taza donde cerramos con un punto deslizado.
Then we make a row of double single crochet to finish with twelve single crochet stitches, then we create two rows by lifting a chain stitch, then a single crochet, two single crochets in the same stitch, we continue with a single crochet and so on until completing one row, then in the other row we repeat the same process, always closing with a slip stitch and thus we form the base. For the body of the pitcher we pick up a chain and introduce it in the next stitch, making sure to grab only one strand to make the single crochet in all that round until we finish with a slip stitch; in the following nine rows we pick up a chain to knit a single crochet to make the single crochet after that, at the end of each row we leave a stitch in between and close the row, in row number nine we close and pick up twelve chains and pick up a stitch in the same direction where we are working, in the first row we start, we secure with a slip stitch and start with single crochet all along the chain until we get to the edge of the cup where we close with a slip stitch.
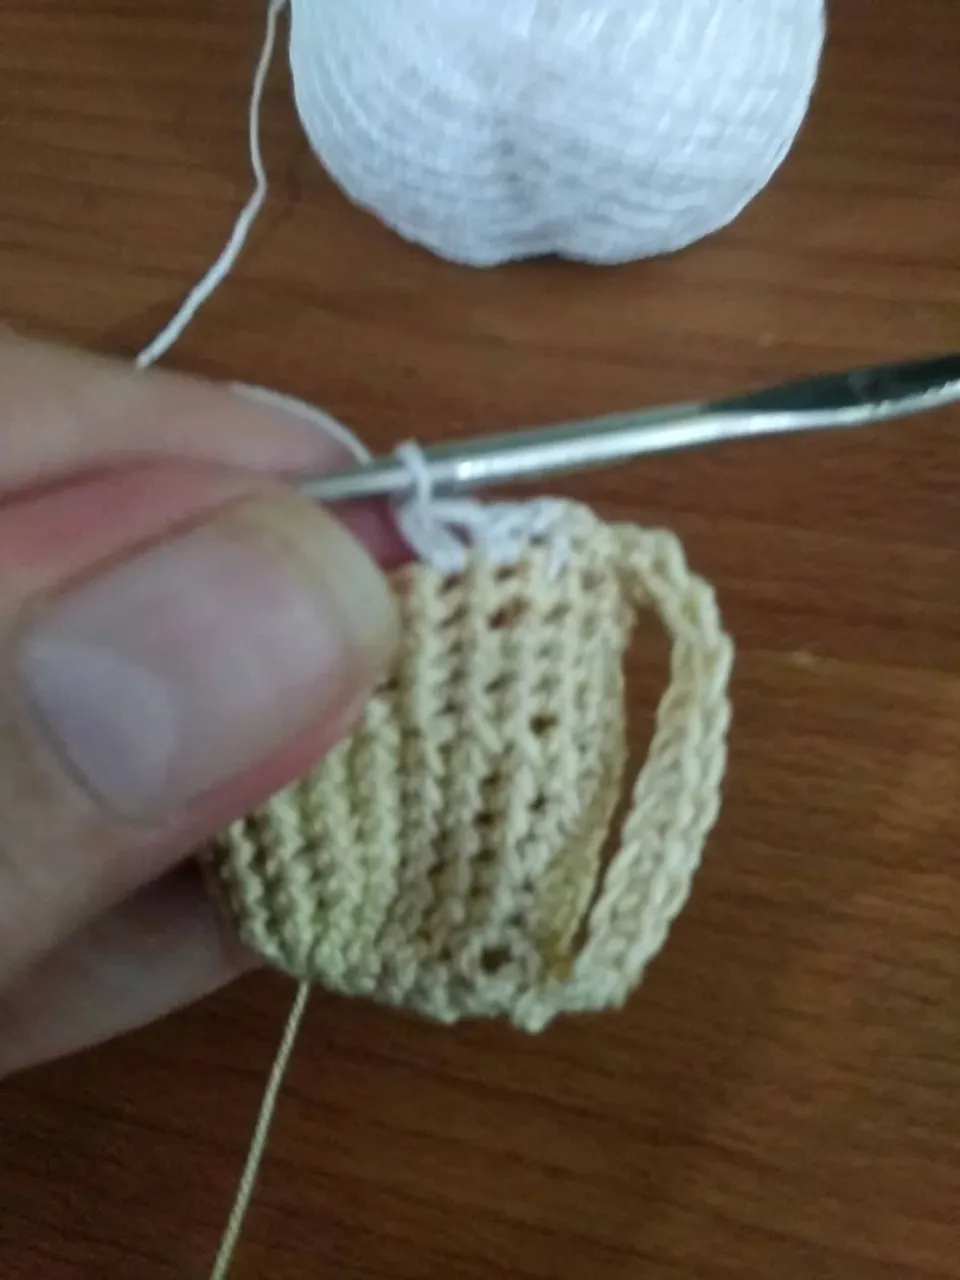
Tomamos el hilo blanco y comenzamos a realizar dos puntos bajos, seguidamente en un solo punto trabajamos cinco puntos altos dobles, cerrando con un punto deslizado.
We take the white yarn and start knitting two single crochet stitches, then in a single stitch we work five double crochet stitches, closing with a slip stitch.
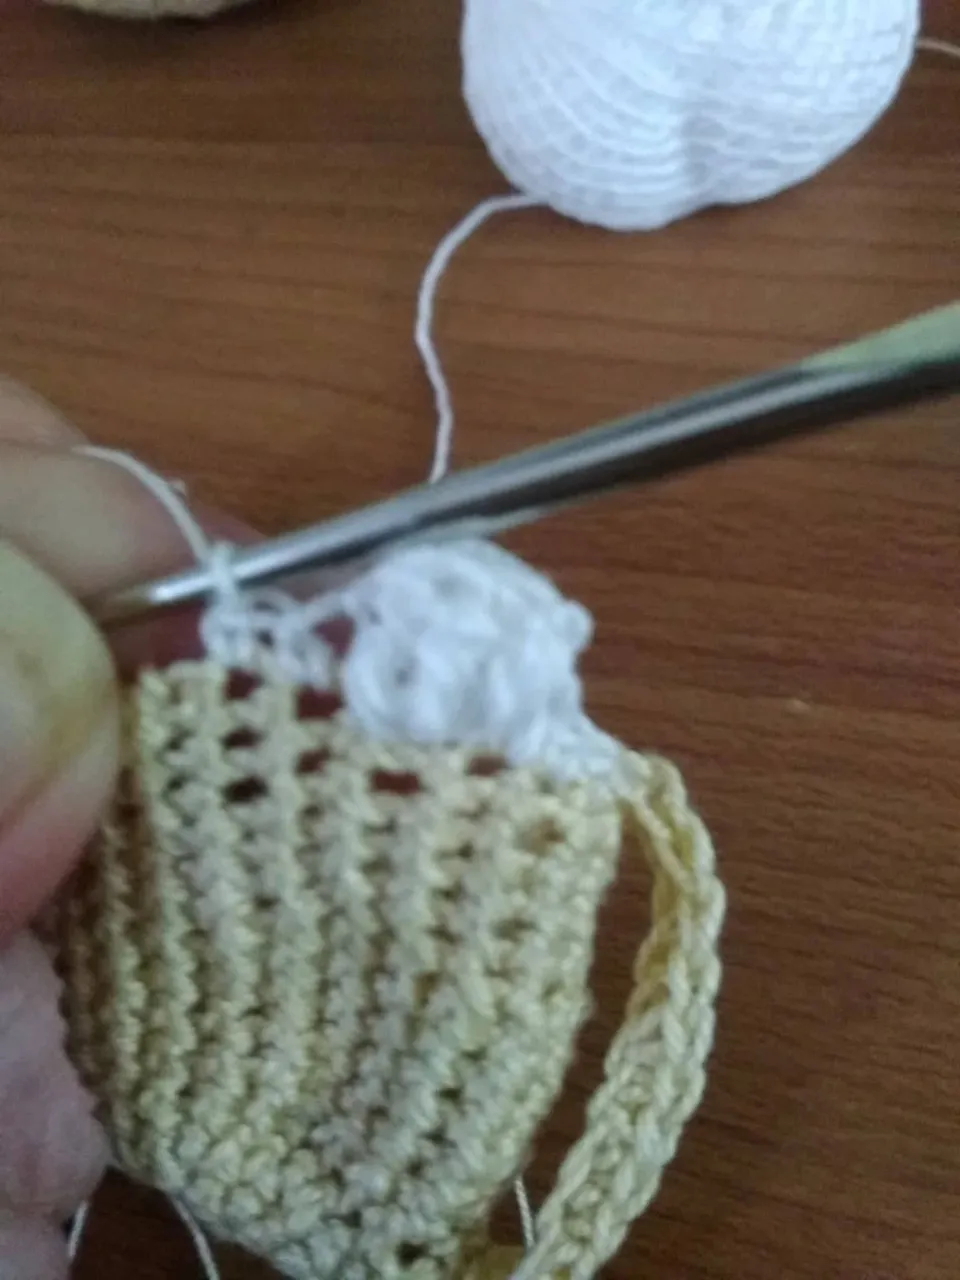
Continuamos haciendo una cadeneta luego dos puntos bajos separados y en un solo punto los cinco puntos altos dobles y así hasta culminar la vuelta.
We continue making one chain, then two separate single crochet stitches and in one stitch the five double double crochet stitches and so on until the end of the row.
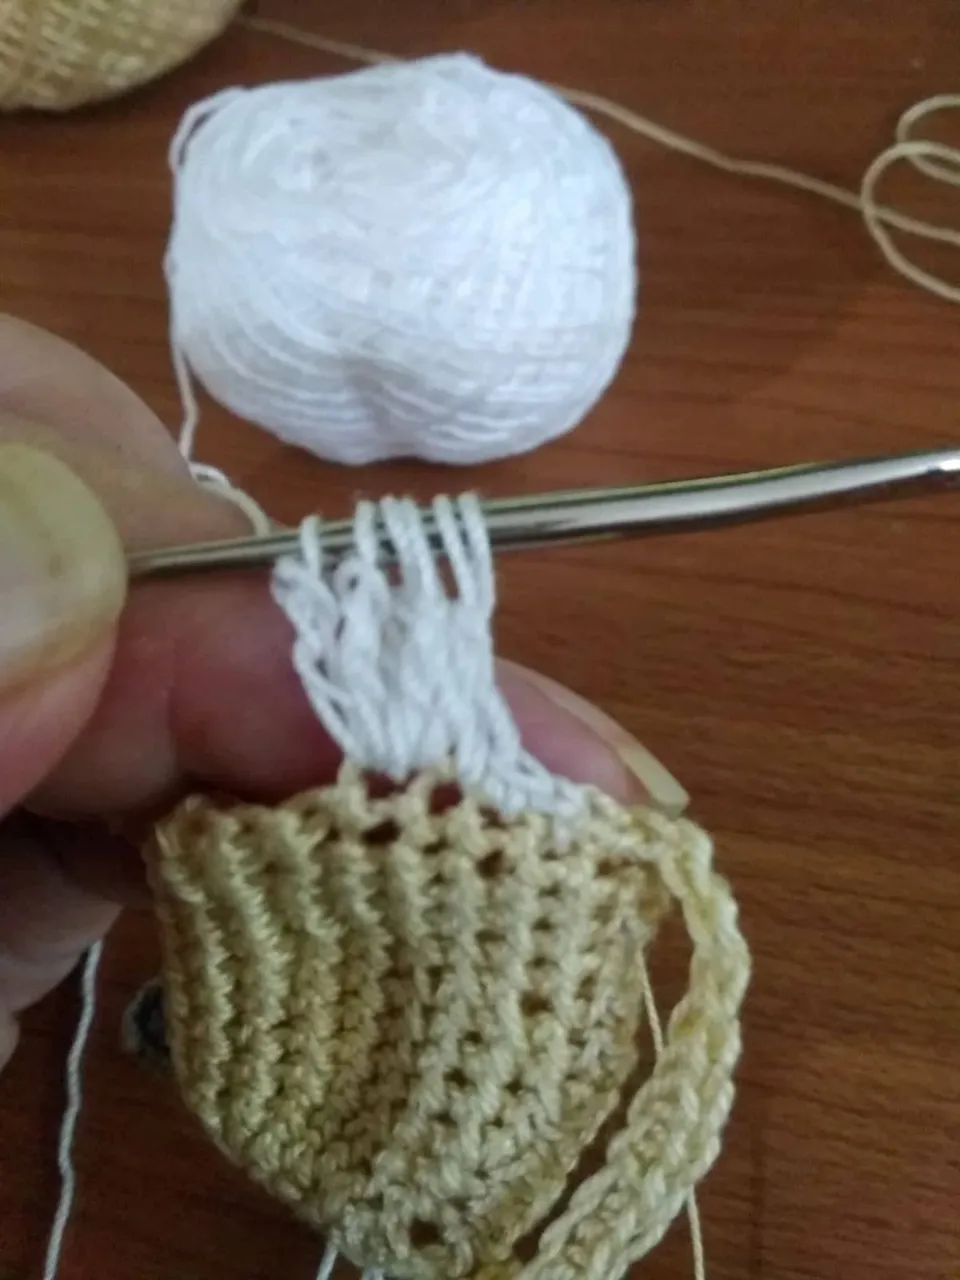
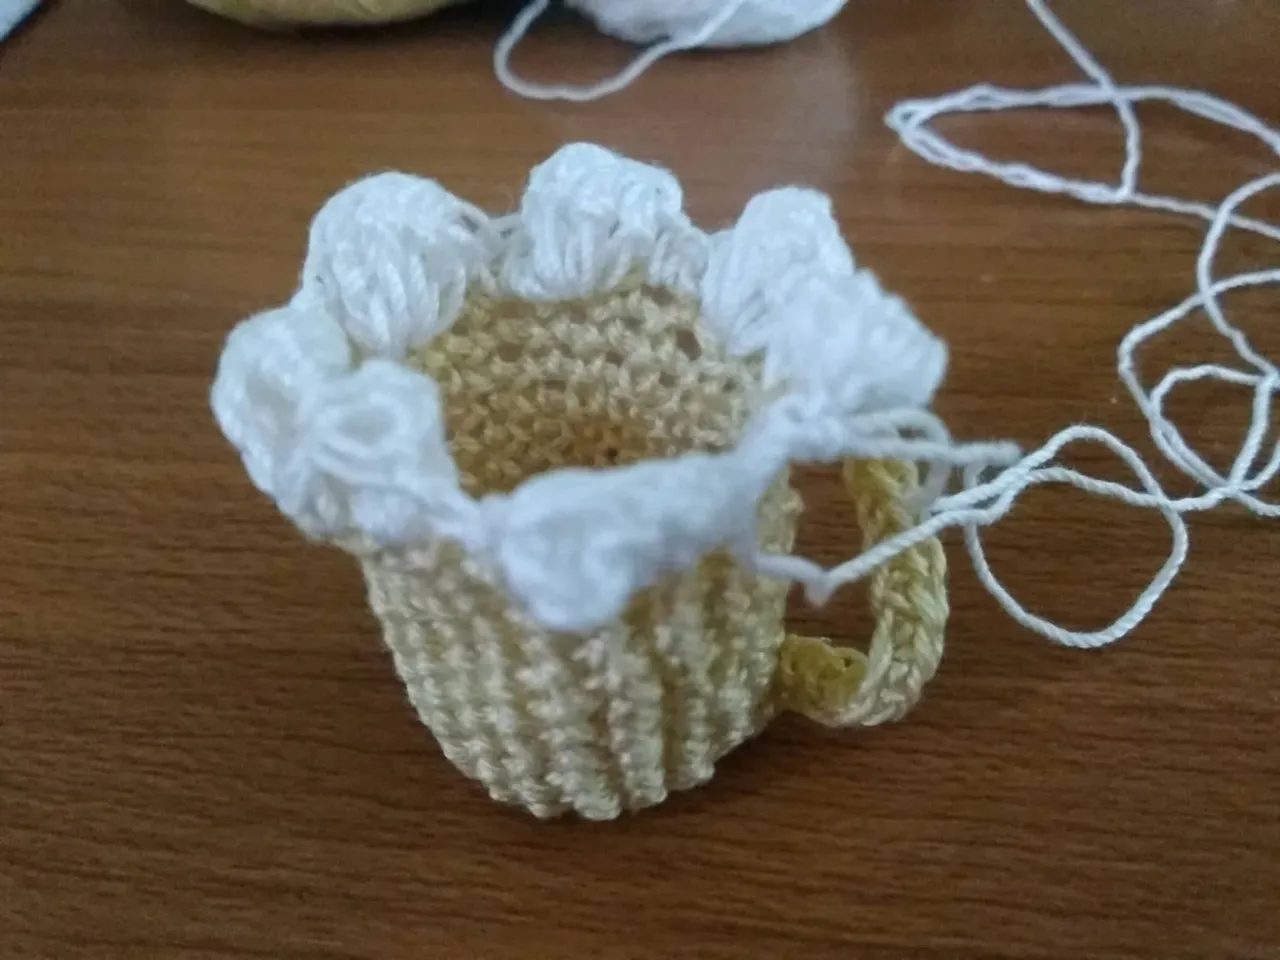
Luego creamos una nueva vuelta la cual nos permitirá ir cerrando el circulo superior y cuando terminemos esa vuelta entonces rematamos con un punto deslizado dejando suficiente hilo para colocarlo en la aguja y coser el borde que vamos a cerrar pero antes de cerrar colocamos el relleno en el interior de la taza, cerramos y trabajo culminado.
Then we create a new round which will allow us to close the upper circle and when we finish that round then we finish with a slipped stitch leaving enough yarn to place it on the needle and sew the edge that we are going to close but before closing we place the filling inside the cup, close and the work is finished.