 Edited on Canva
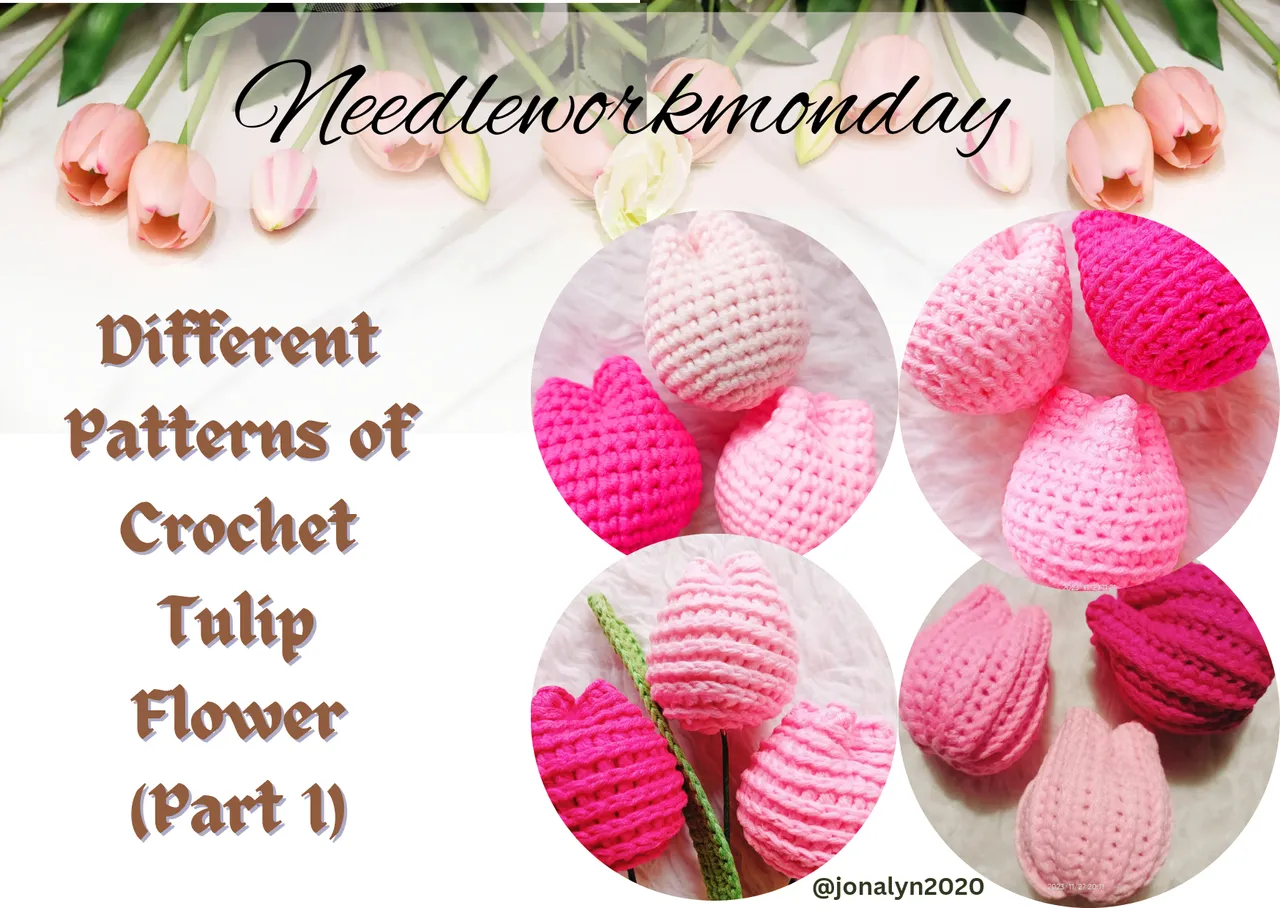
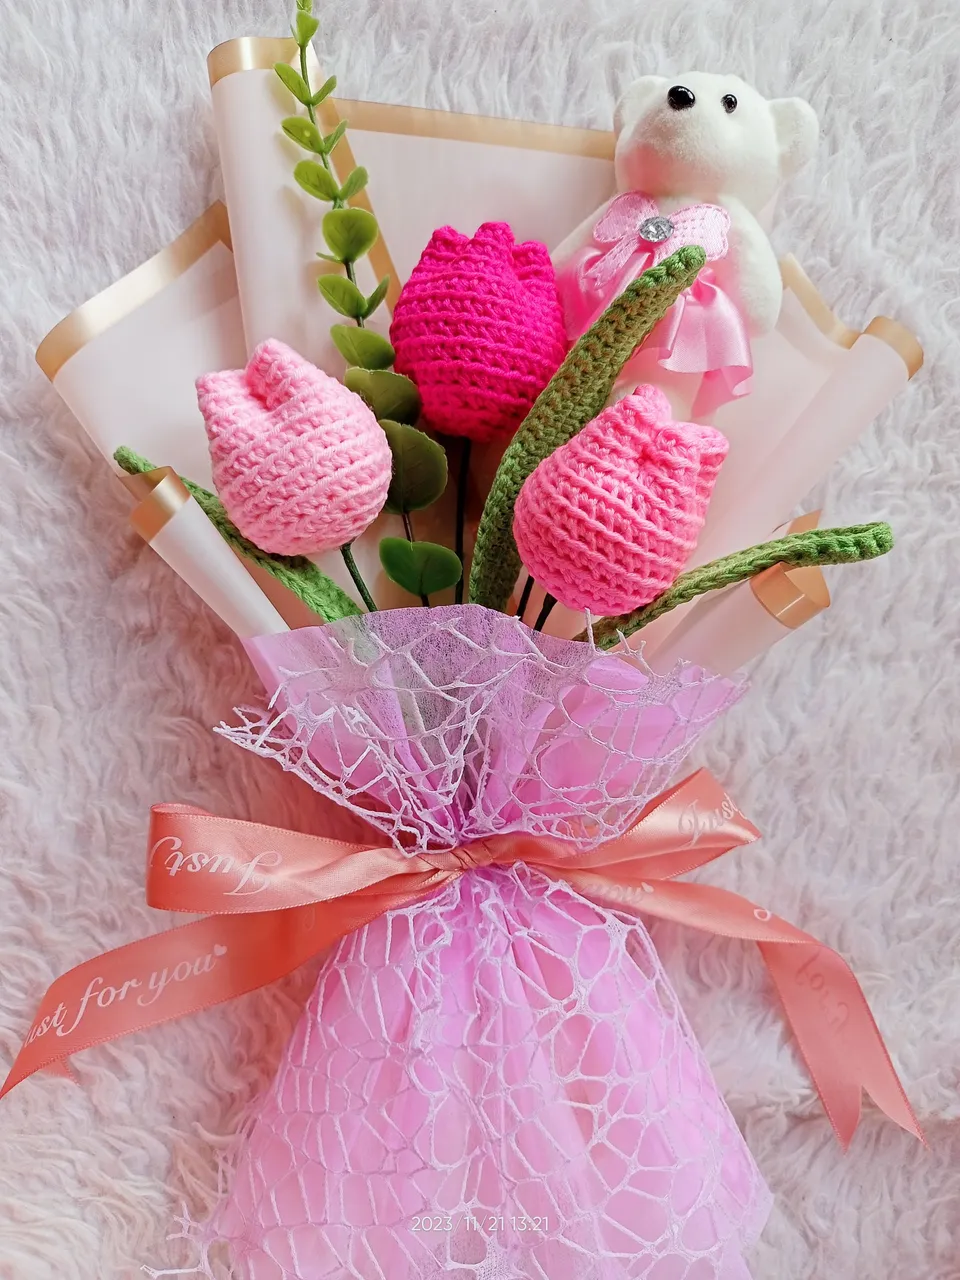
For almost a year of making crochet tulip flowers for my flower bouquet, it never occurred to me to make a crochet tulip in different patterns, as I was contented with the usual pattern I used.
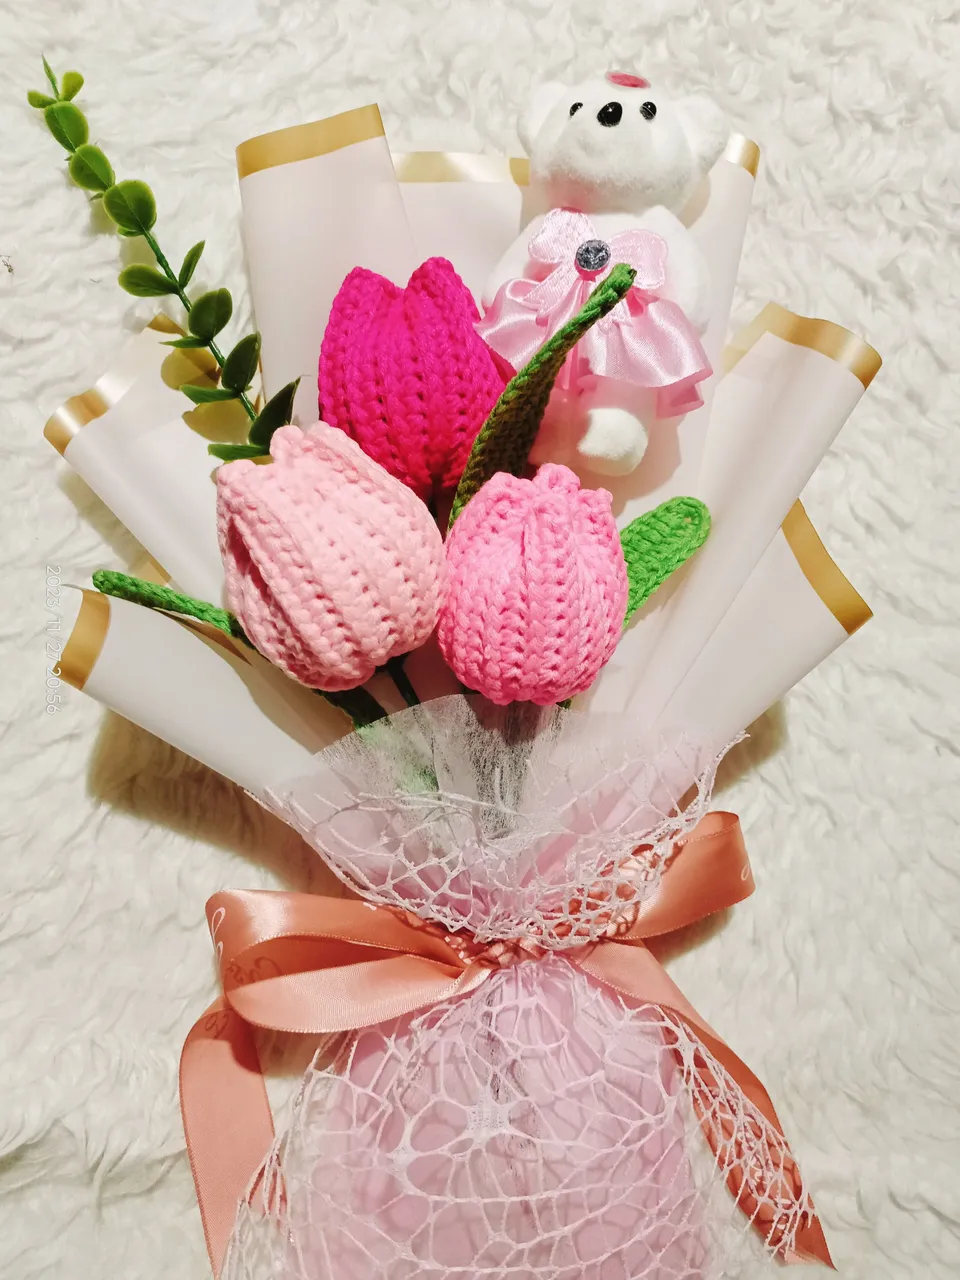
I'm enjoying making crochet tulips in different colors using this common pattern that all the crocheters I know, had used. I even made lots of tulip heads in preparation for Valentine's Day next year.
But when I saw this pretty crochet tulip on Facebook (being shared with my fellow crocheter), using another type of pattern, I got so curious as to how it was done.
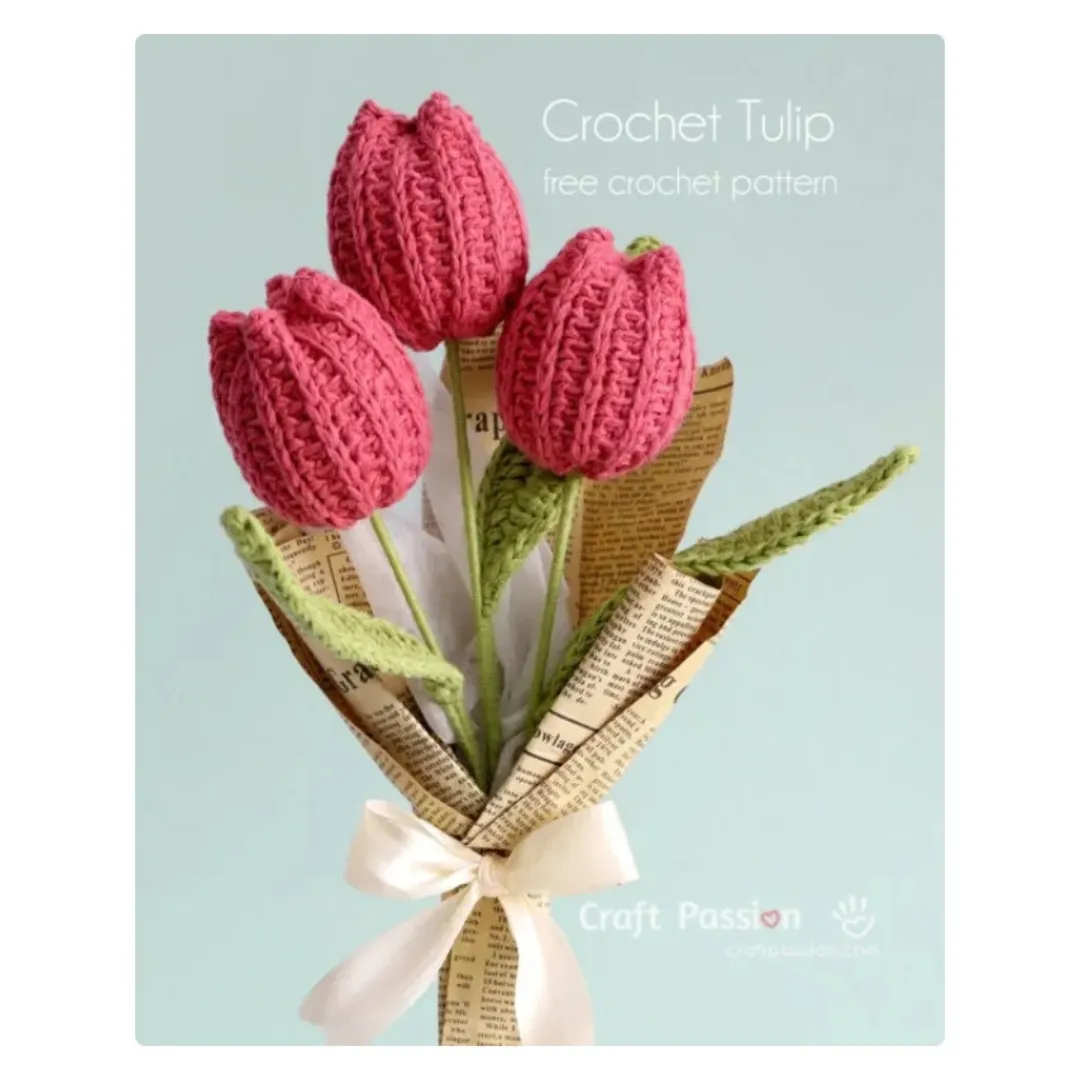 Source: Craft Passion
Many crochet crafters (including me and @romeskie 😅) have expressed our interest in the new pattern and are planning to make our version.
I was inspired and got so excited to try it and wanted to share my experience here in NeedleworkMonday as I've been inactive here for 4 months now and I did miss it ☺️.
I even made some experiments using other crochet stitches which I will also show you and might as well get your feedback about it.
I decided to divide this post into two as I was not yet finished with my experiments in trying some different stitches of crocheted tulip flowers due to some orders that should have been finished ahead of time.
So now, I would like to show a pattern with pictures of the common tulip pattern I've been using for several months now. I hope it would be a great help for crochet beginners who want to try making tulip flowers.
I would also appreciate it if anyone could correct my way of expressing my pattern as I was having difficulty in writing them. ✌️😅
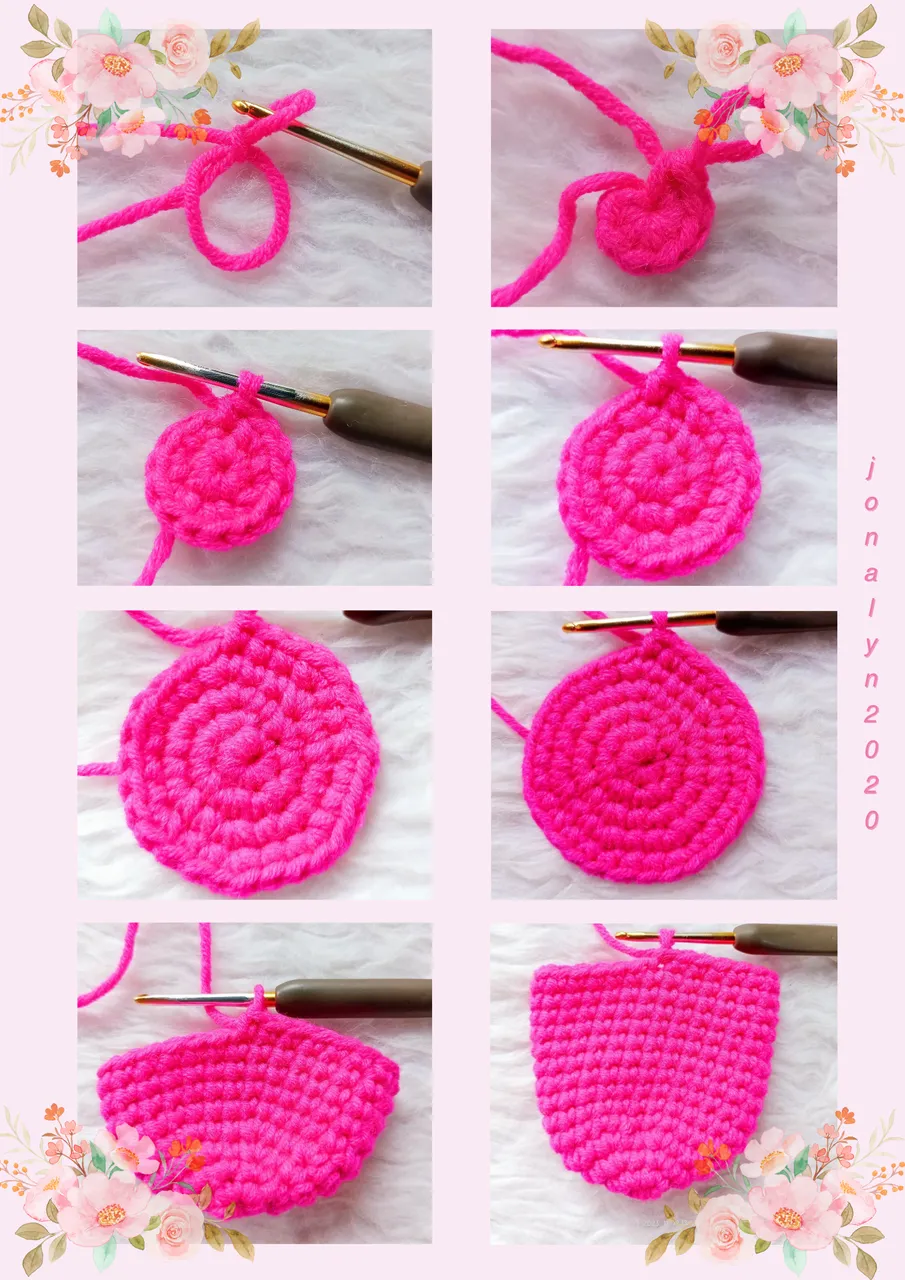
Pattern 1 - Single Crochet Pattern
 Edited on Canva
NOTE: Continuous pattern
- Magic ring
- R1 - chain 1, SC 7
- R2 - SC 2 ( in every stitch - 7x ), SC 1
- R3 -
SC2, SC1,
SC2, SC1,
SC2, SC1,
SC2, SC1,
SC2, SC1,
SC2, SC1,
SC2, SC1, SC1 - R4 -
SC2, SC1, SC1,
SC2, SC1, SC1,
SC2, SC1, SC1,
SC2, SC1, SC1,
SC2, SC1, SC1,
SC2, SC1, SC1,
SC2, SC1, SC1, SC1 - R5 - R14 - SC1 in all stitches, then slip stitch and lock.
**Output of Pattern 1
 IMG20231121065943
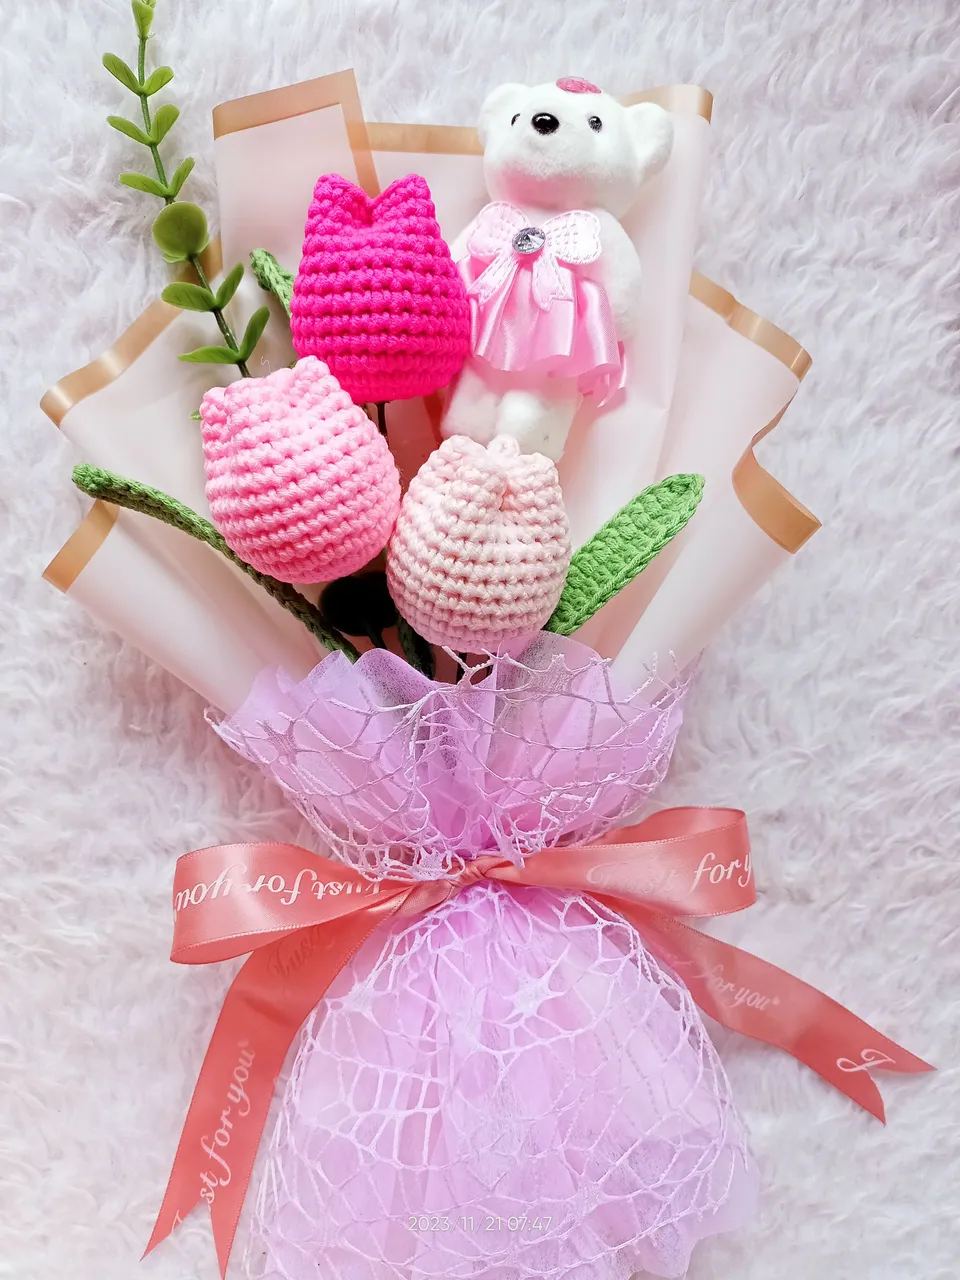 IMG20231121074758_01
I was truly satisfied before with this kind of pattern and how pleasing it looked that I didn't think of making different kinds of tulip patterns.
The next two patterns I made were just a part of the experiment I made and only thought of the possible stitches that could be used.
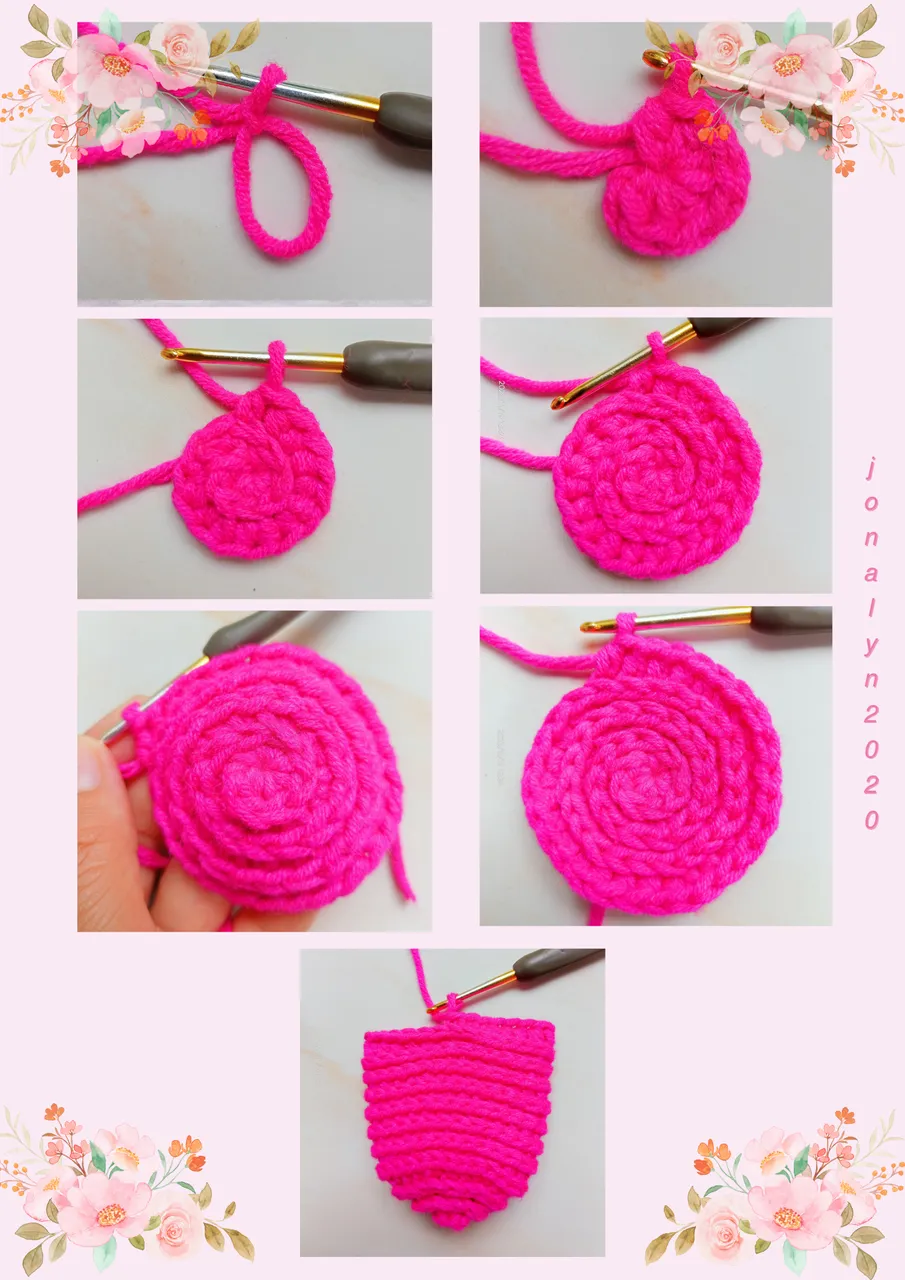
Pattern 2 - Half Double Crochet Back Loop
 Edited on Canva
NOTE: Continuous pattern, HDC Back Loop
- Magic ring
- R1 - chain 1, HDC 7
- R2 - HDC 2 (in every stitch - 7x), HDC 1
- R3 -
HDC2, HDC1,
HDC2, HDC1,
HDC2, HDC1,
HDC2, HDC1,
HDC2, HDC1,
HDC2, HDC1,
HDC2, HDC1, HDC1 - R4 -
HDC2, HDC1, HDC1,
HDC2, HDC1, HDC1,
HDC2, HDC1, HDC1,
HDC2, HDC1, HDC1,
HDC2, HDC1, HDC1,
HDC2, HDC1, HDC1, HDC1 - R5 - R11 - HDC1 in all stitches, then slip stitch and lock.
**Output of Pattern 2
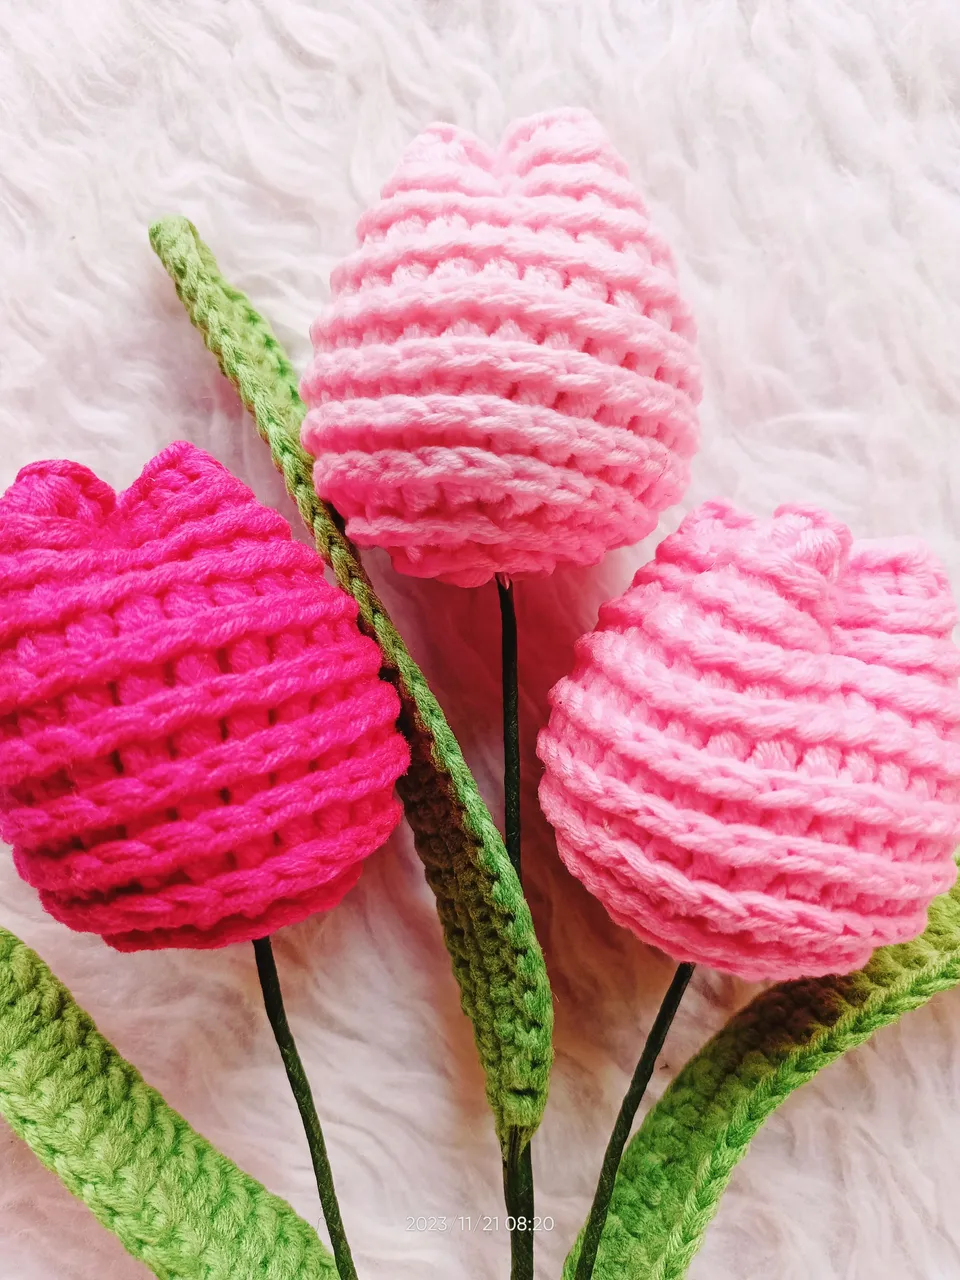 IMG20231121082008
I liked the effect of this pattern and would love to make more of these in the future. 🥰
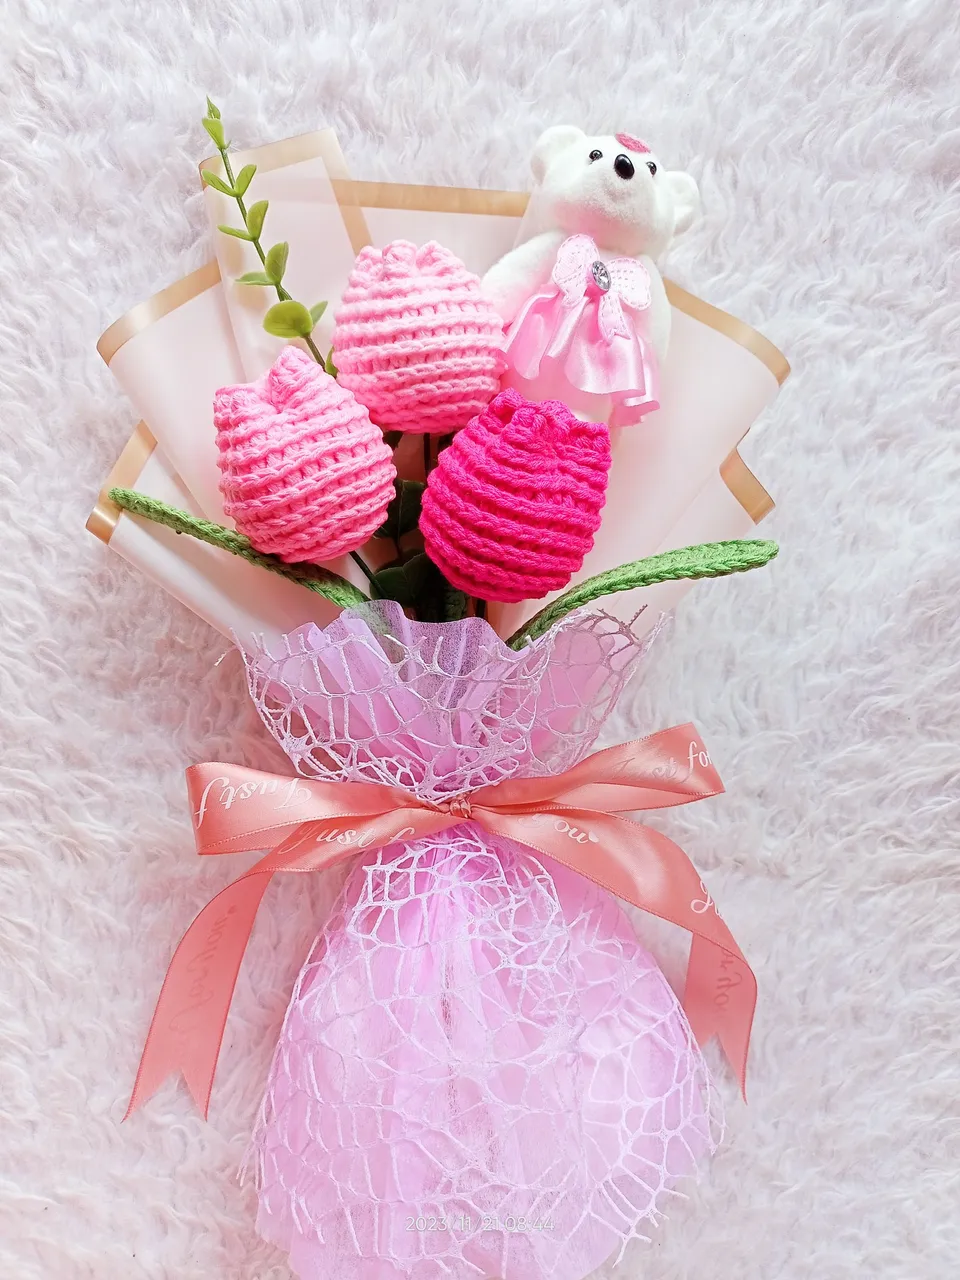 IMG20231121084401
The next pattern is similar to the last one but instead of HDC back loop, I used the SC back loop.
Pattern 3 - Single Crochet Back Loop
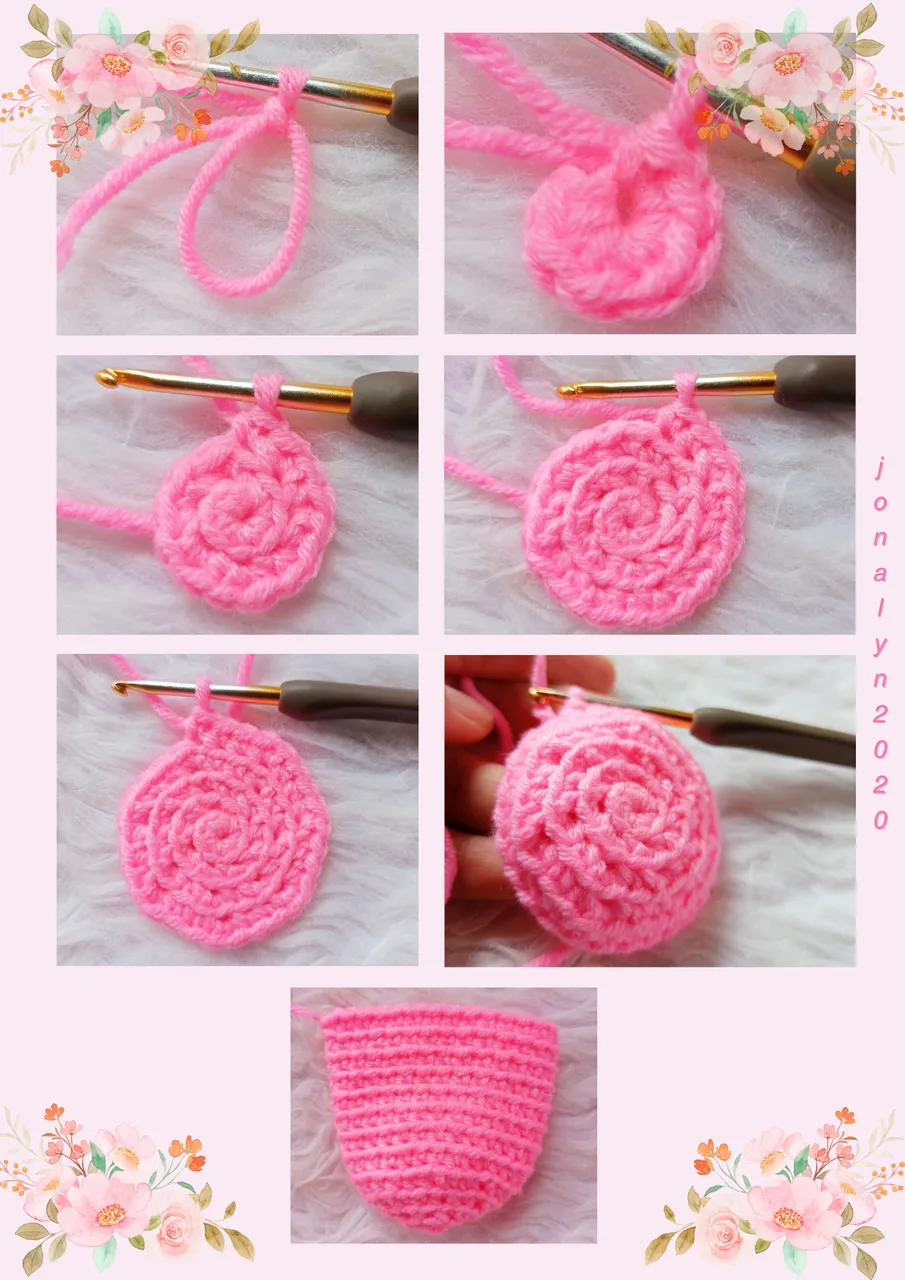 Edited on Canva
NOTE: Continuous pattern, SC Back Loop
- Magic ring
- R1 - chain 1, sc 7
- R2 - sc 2 (in every stitch - 7x), sc 1
- R3 -
sc2, sc1,
sc2, sc1,
sc2, sc1,
sc2, sc1,
sc2, sc1,
sc2, sc1,
sc2, sc1, sc1 - R4 -
Sc2, sc1, sc1,
Sc2, sc1, sc1,
Sc2, sc1, sc1,
Sc2, sc1, sc1,
Sc2, sc1, sc1,
Sc2, sc1, sc1,
Sc2, sc1, sc1, sc1 - R5 - R11 - Sc1 in all stitches
**Output of Pattern 3
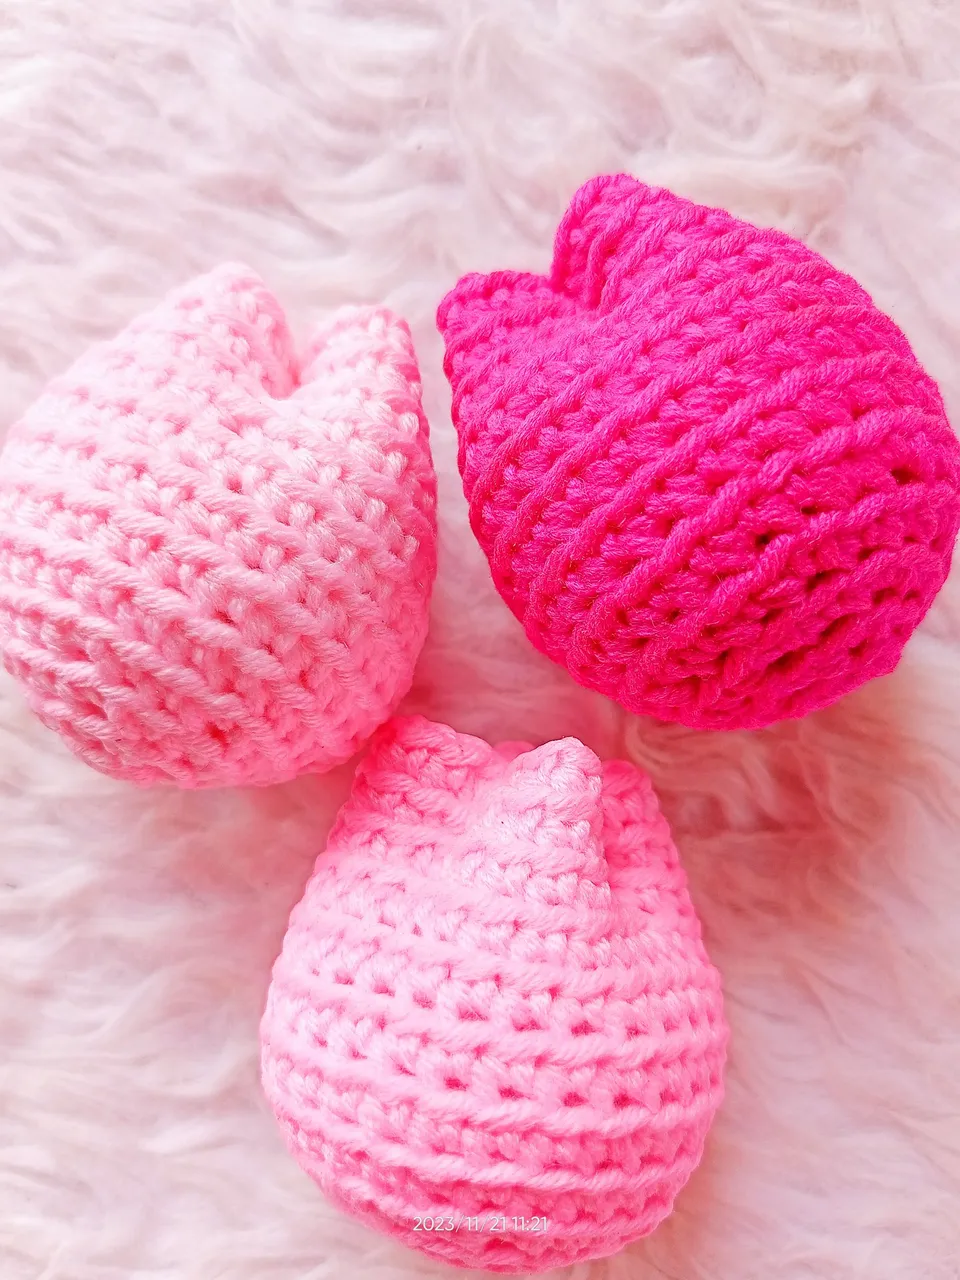 IMG20231121112124_01
This pattern looks so simple. But as they said, simplicity is beauty. And yes, I like it too. 🥰
 IMG20231121132131_01
The next pattern I made was similar to the picture shared by Craftpassion. I had made this pattern as I thought it was the exact pattern they were using since I just scanned the pictures they shared on their post, not minding the whole context. Right after I made this one, I realized that it was different and I was just too excited to try it.
But the positive side was that I was able to make my version. And I was delighted. 🥰
Pattern 4 - Single Crochet Back Loop
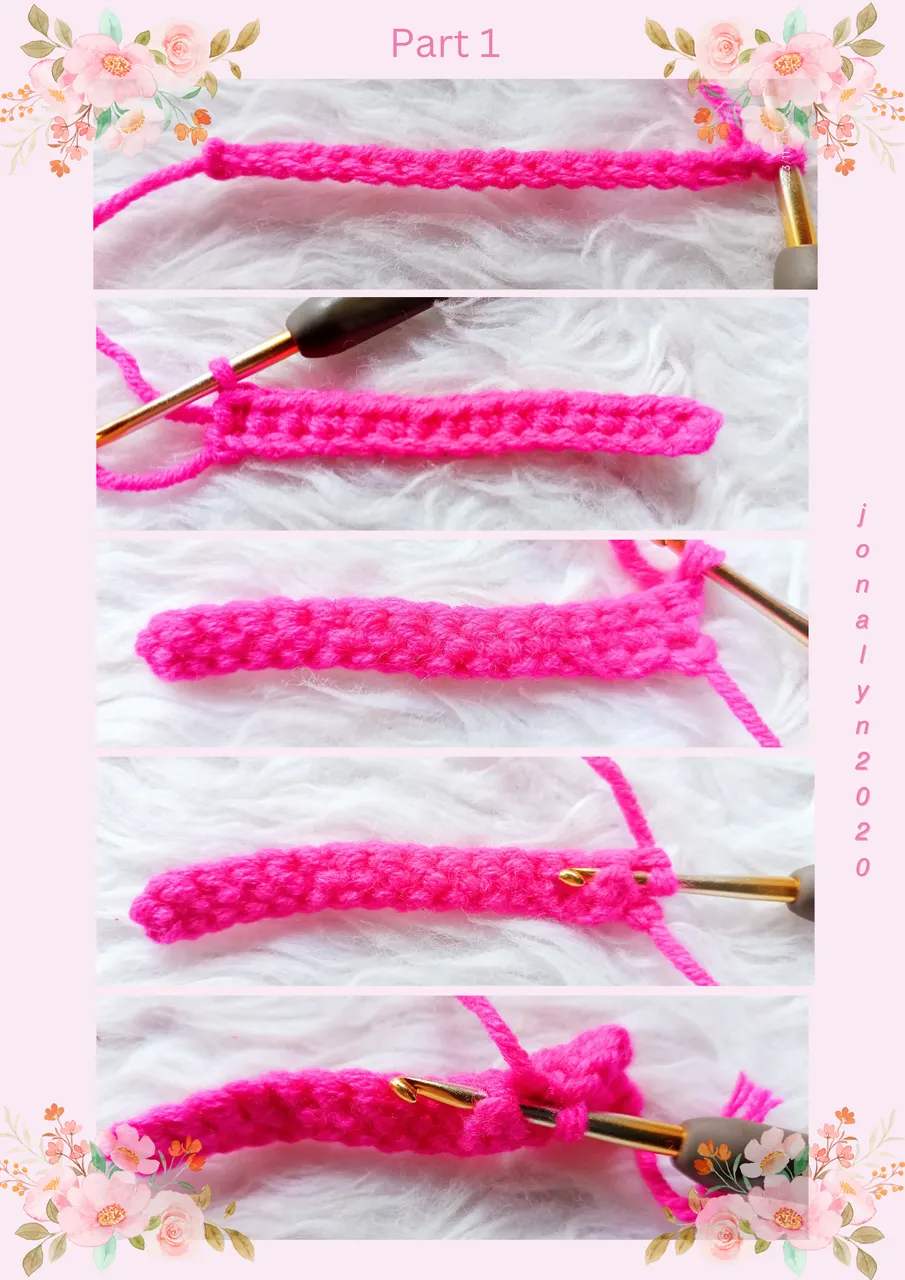 Edited on Canva
- chain 17
- sc on the 15th chain to the 1st chain
- 1st row - chain 1 and flip. Make
15 single crochet front post stitch - 2nd row - chain 1, sc15
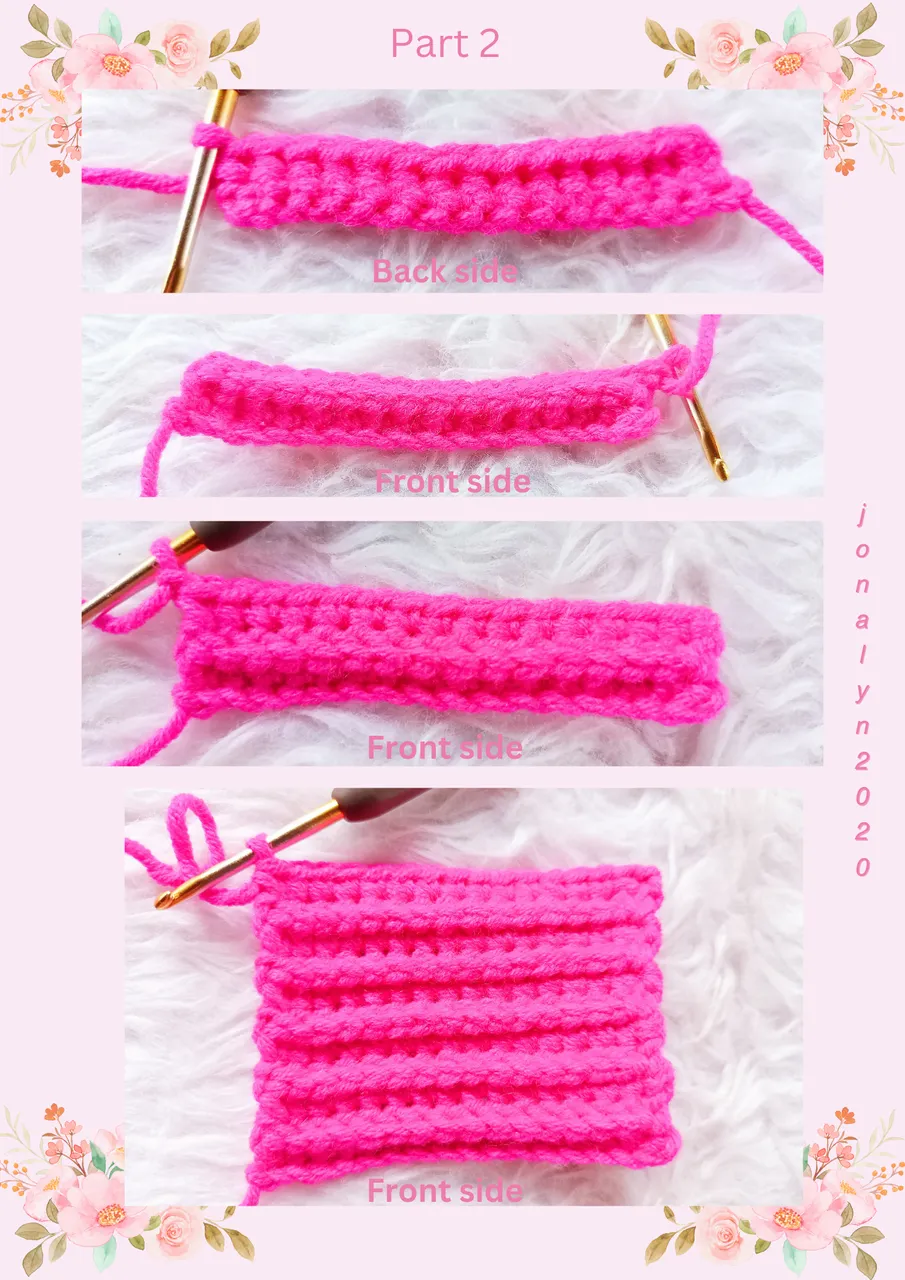 Edited on Canva
- 3rd, 5th, 7th, 9th, 11th, 13th, 15th, 17th, 19th, 21st, and 23rd row - repeat 1st-row pattern
- 4th, 6th, 8th, 10th, 12th, 14th, 16th, 18th, 20th, 22nd, and 24th row - repeat 2nd-row pattern
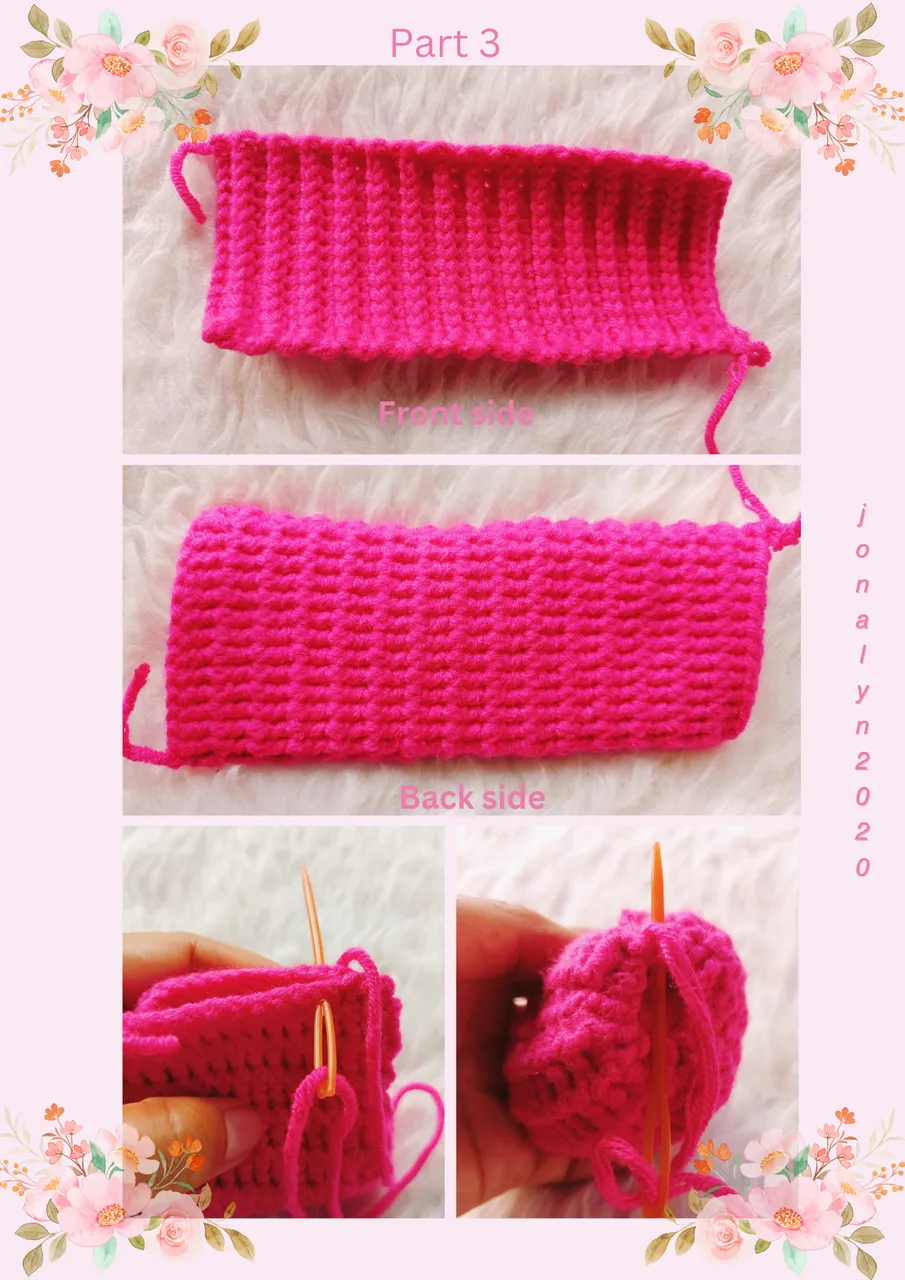 Edited on Canva
After the last row (24th), lock and cut the yarn, leaving at least 7-8 inches long.
Using the tapestry needle, connect and sew both ends. Then cinch the bottom part, lock, and cut the yarn.
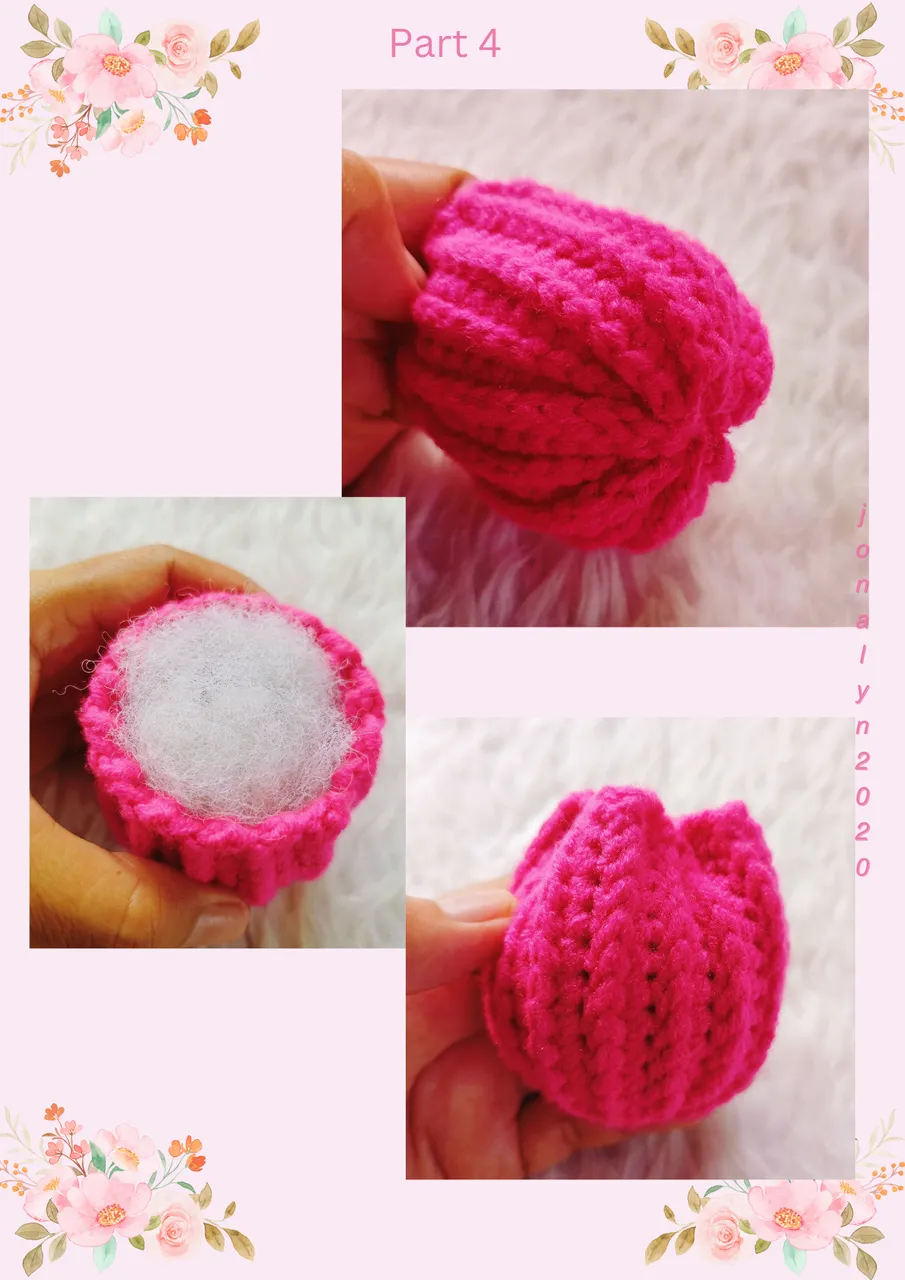 Edited on Canva
Then add some fiberfill inside your tulip head and sew the top.
**Output of Pattern 4
 IMG20231127201159
It may look different from the tulip of craftpassion, but it doesn't look bad either, isn't it? In fact, I love it also. 🥰 And I will make more of these on my future flower bouquets.
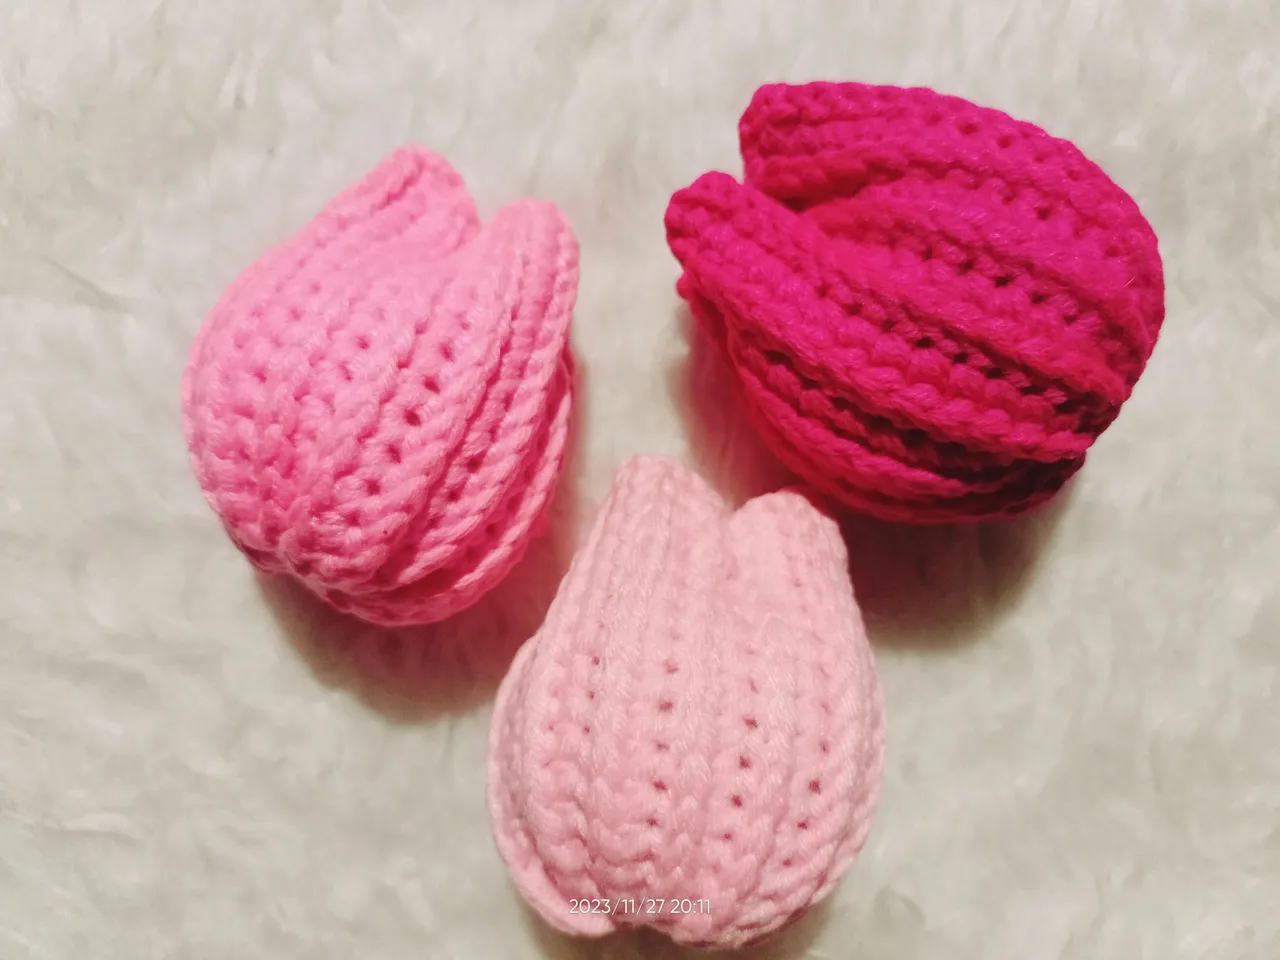
 IMG20231127205653_01
Out of the 4 patterns I presented to you today, can you comment below on what pattern you like most? Then why?
Next week, I will share to you the 2nd part of this post, and I hope that everyone will look forward to it.
@jonalyn2020 😘😘😘
Kung nagustuhan mo ang aking sinulat ngayon, Pakistan mo naman. 😍😉

For orders, please message me or visit these links.
To God Be The Glory