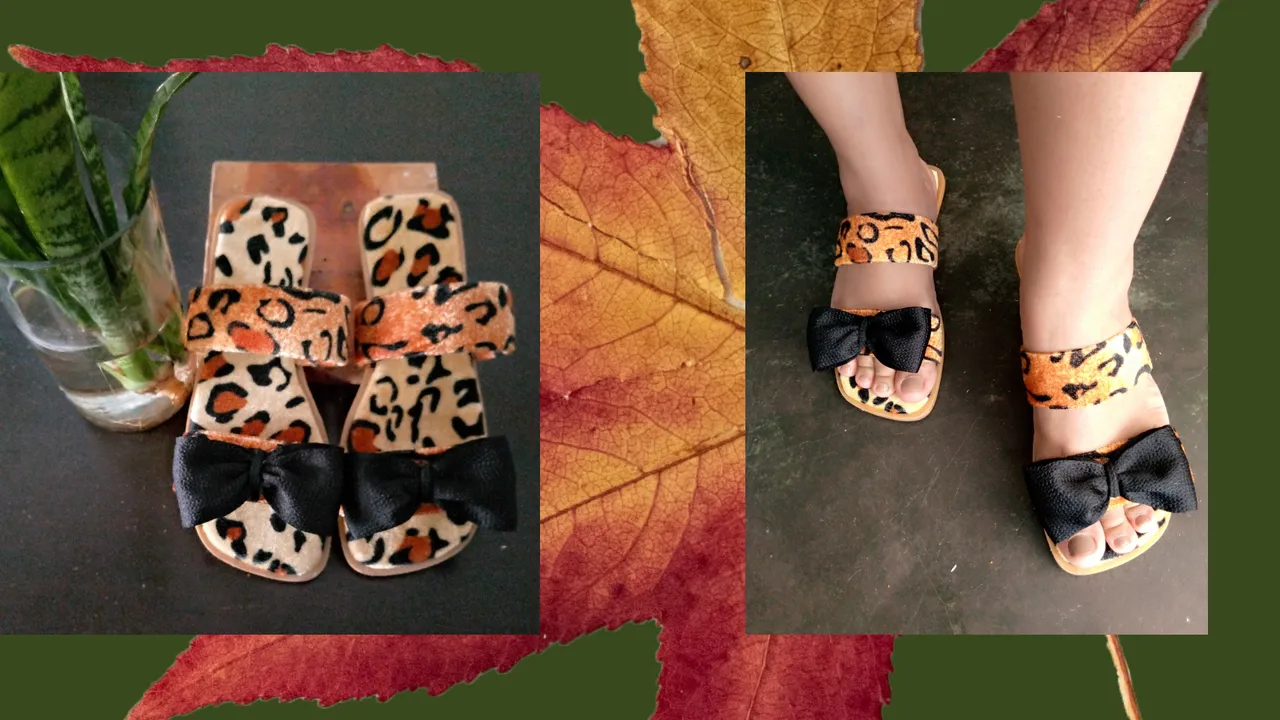

Saludos, mis queridos amigos de esta linda comunidad, que así como yo, estamos siempre innovando ideas para crear con hilos y agujas todo lo que nos propongamos hacer, después de unos cuantos días sin poder realizar mis proyectos debido algunos malestares que he estado pasando, hoy he vuelto y espero seguir así y con todo el ánimo, es un honor y una felicidad poder volver hacer lo que me gusta y compartirlo con ustedes, hoy les quiero mostrar unas lindas sandalias que hice con una tela cómoda y agradable.
Además de darle una segunda oportunidad a esas sandalias que se nos dañó, o que no nos gustó después de un tiempo, pero decidimos dejar la suela en un lugar para inventarnos algo mejor y hasta más lindo y adaptarlo a nuestro estilo.
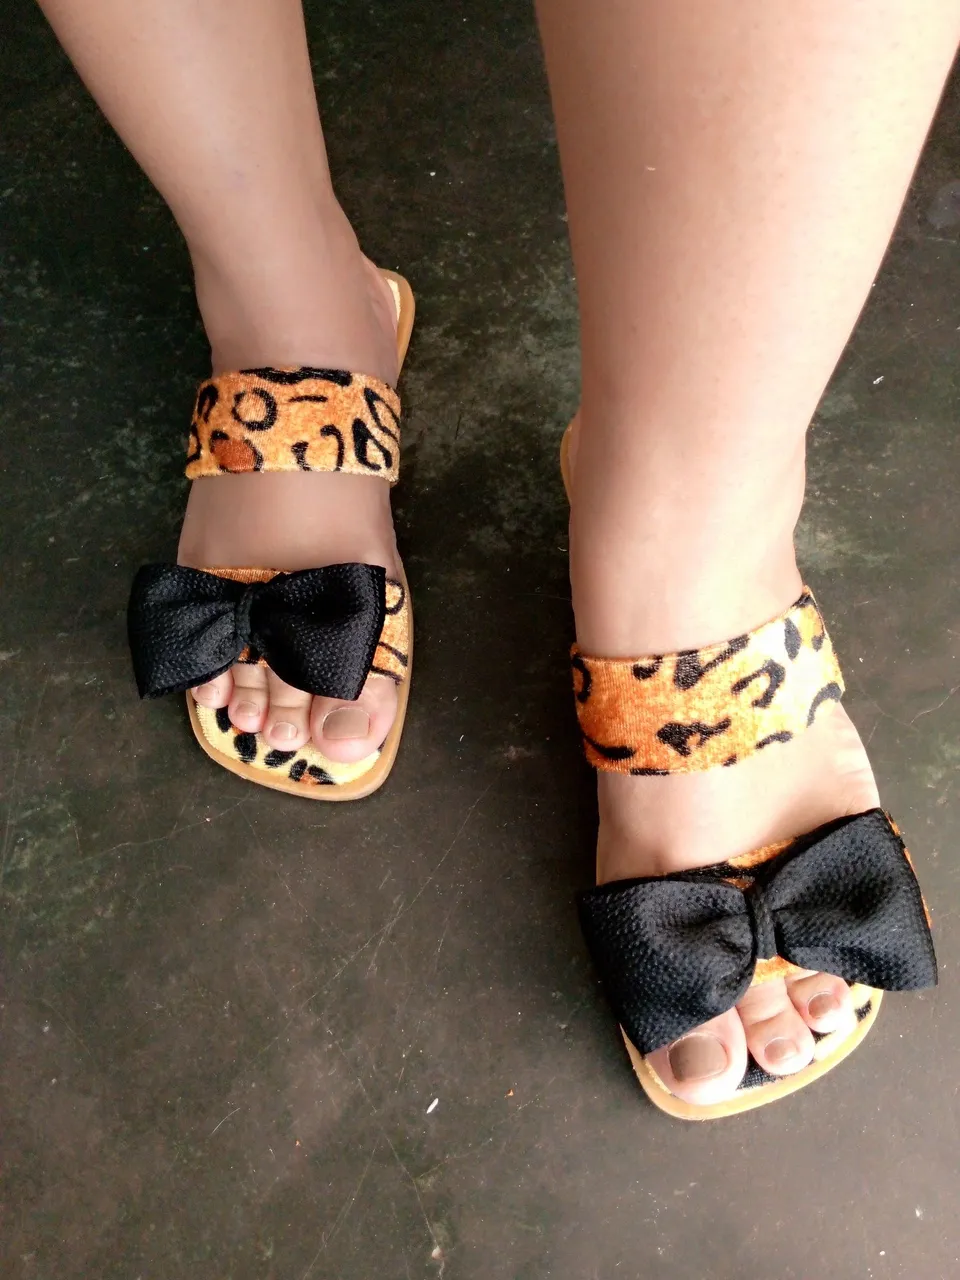
Las fotografías que verán a continuación, fueron tomadas con mi teléfono modelo TECNO SPARK GO 2023.

Greetings, my dear friends of this beautiful community, that like me, we are always innovating ideas to create with threads and needles everything we propose to do, after a few days without being able to do my projects due to some discomfort that I have been going through, today I'm back and I hope to continue like this and with all the spirit, it is an honor and a happiness to return to do what I like and share it with you, today I want to show you some nice sandals I made with a nice and comfortable fabric.
In addition to giving a second chance to those sandals that we damaged, or that we did not like after a while, but we decided to leave the sole in a place to invent something better and even nicer and adapt it to our style.
The pictures you will see below were taken with my phone model TECNO SPARK GO 2023.

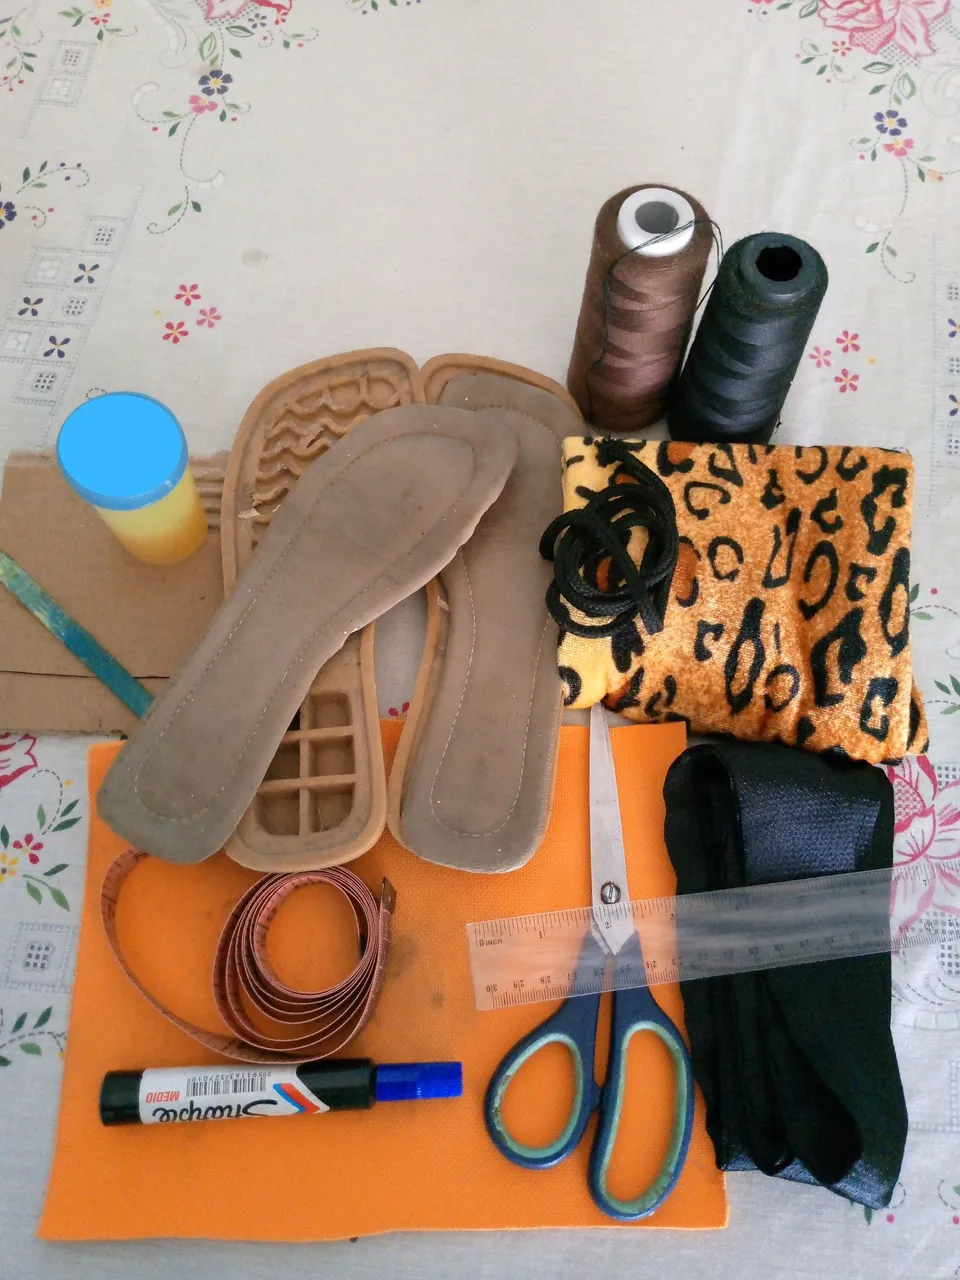
Los materiales que utilice para poder lograr mi trabajo son los siguientes.
- Un par de suela de sandalias
- Pega de contacto para pegar zapatos
- Cuero sintético
- Tela de gamuza animal print
- Cinta doble de tela negra
- Trenza de zapato negra
- Tijera
- Regla
- Cinta métrica
- Marcador
- Paleta
- aguja
- Hilos
The materials I used to achieve my work are the following.
- A pair of sandal soles
- Contact glue for gluing shoes
- Synthetic leather
- Animal print suede fabric
- Black double-sided fabric tape
- Black shoe lace
- Scissors
- Ruler
- Tape measure
- Marker
- Trowel
- Needle
- Threads
 |  |  |
|---|
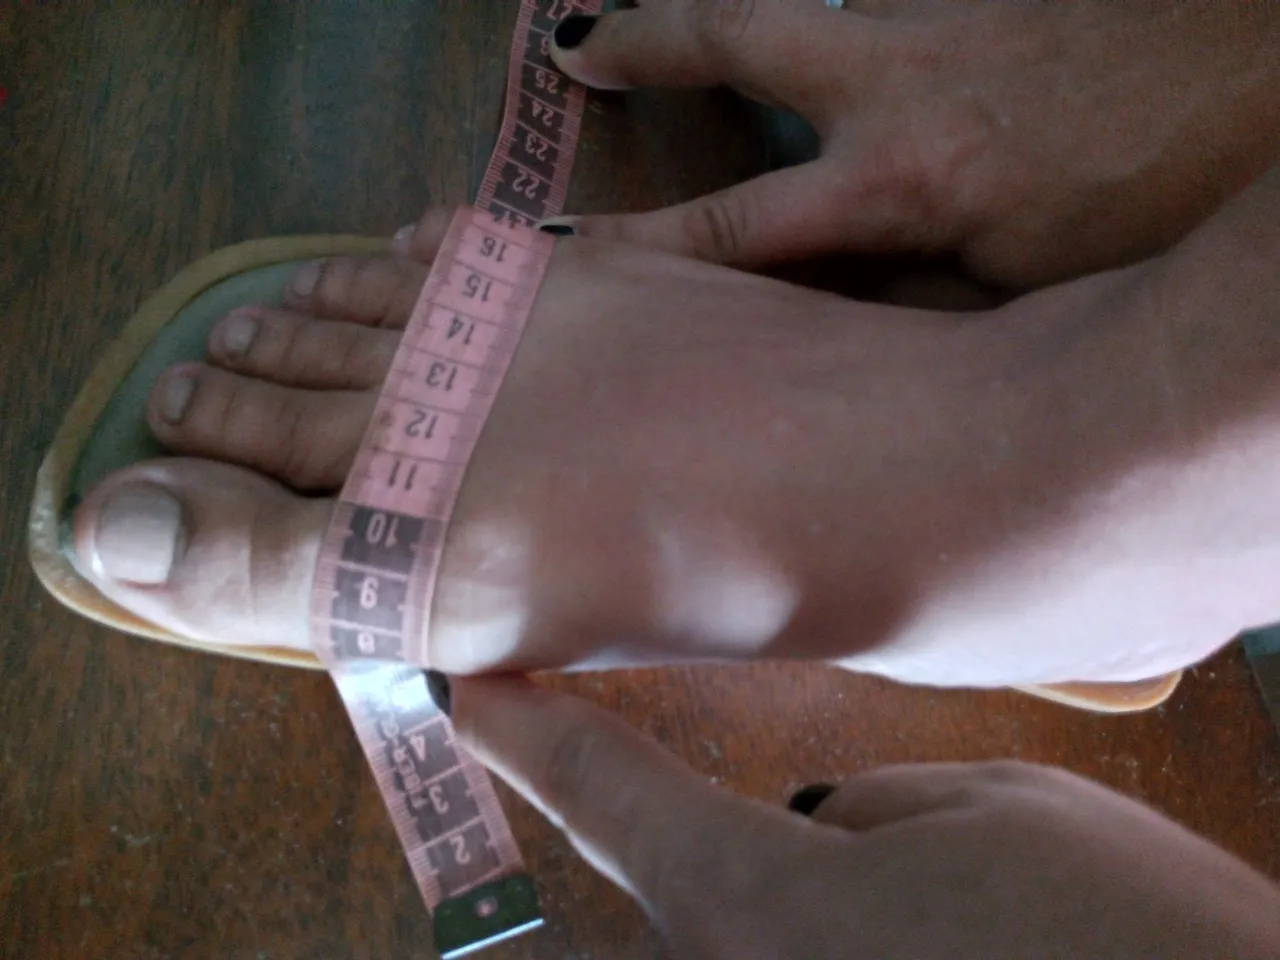
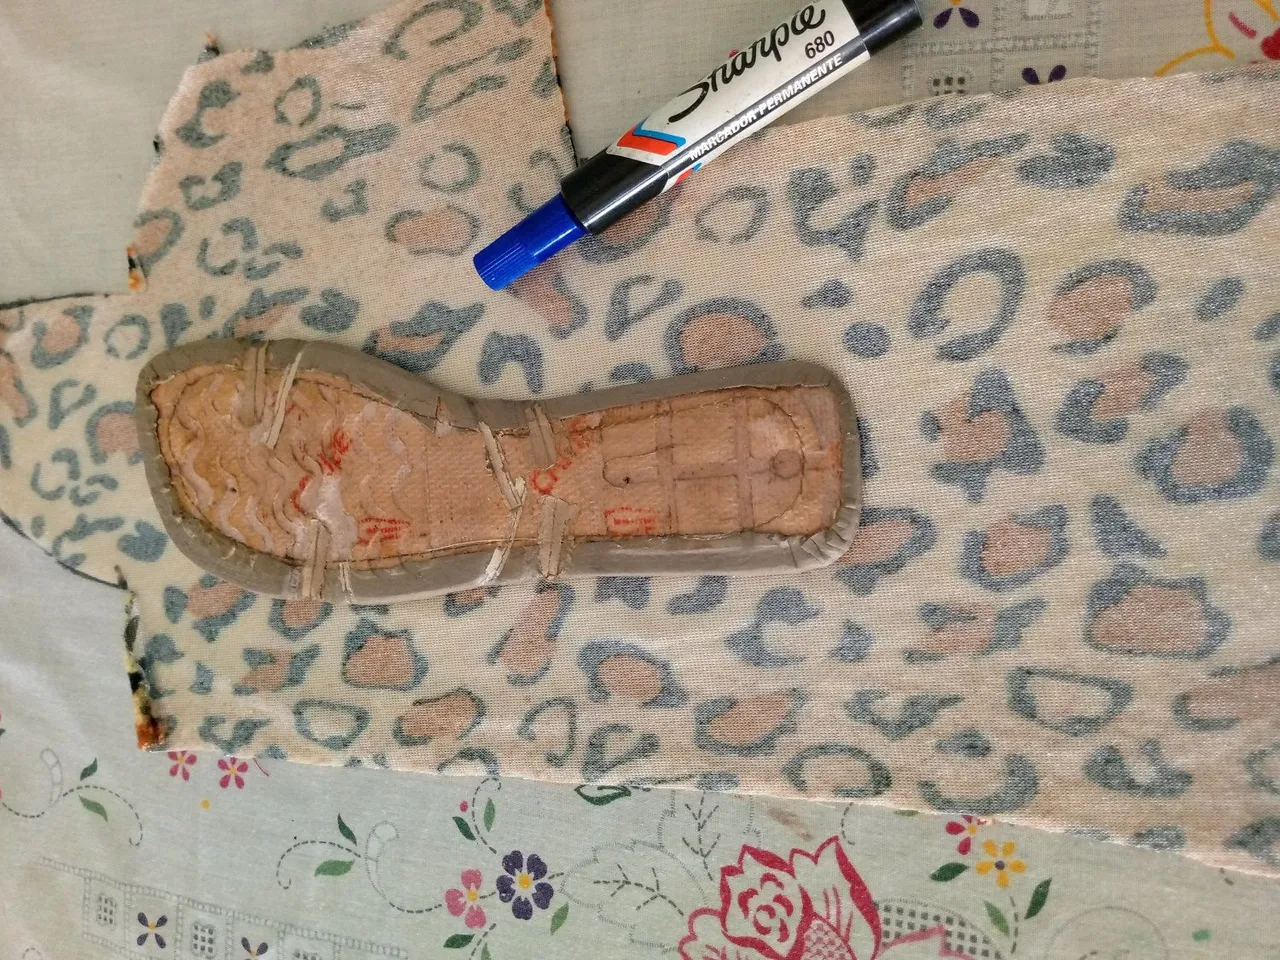
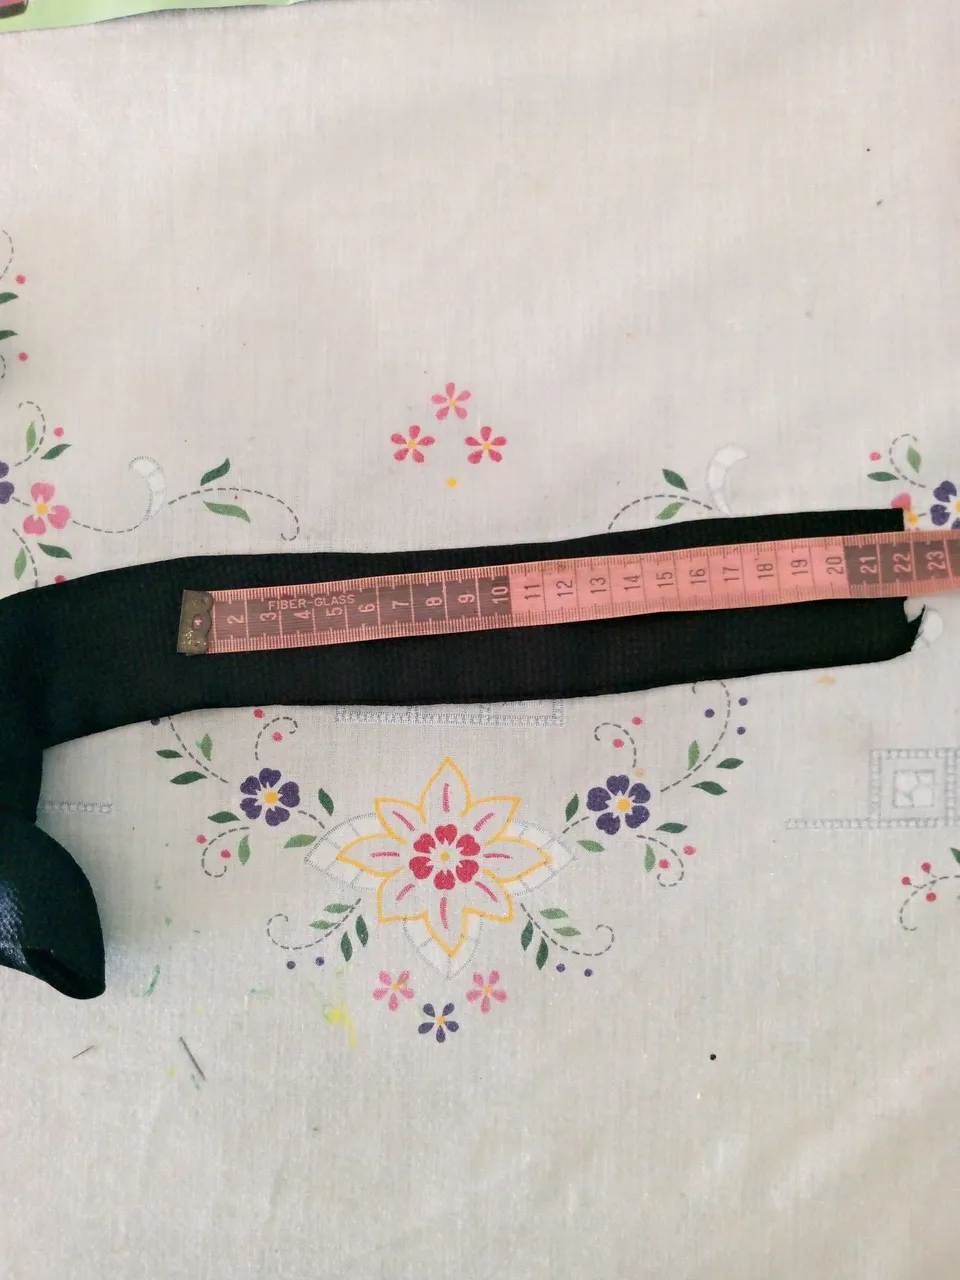
Para comenzar a realizar mi sandalia lo primero que hice fue medirme el ancho del pie con una cinta métrica para así calcular cuanto dejar de los lados para pegar, las medidas van a depender de la talla de nuestro pie, y de la cantidad de material que dispongamos en mi caso deje 5 cm de cada lado, también se puede dejar menos.
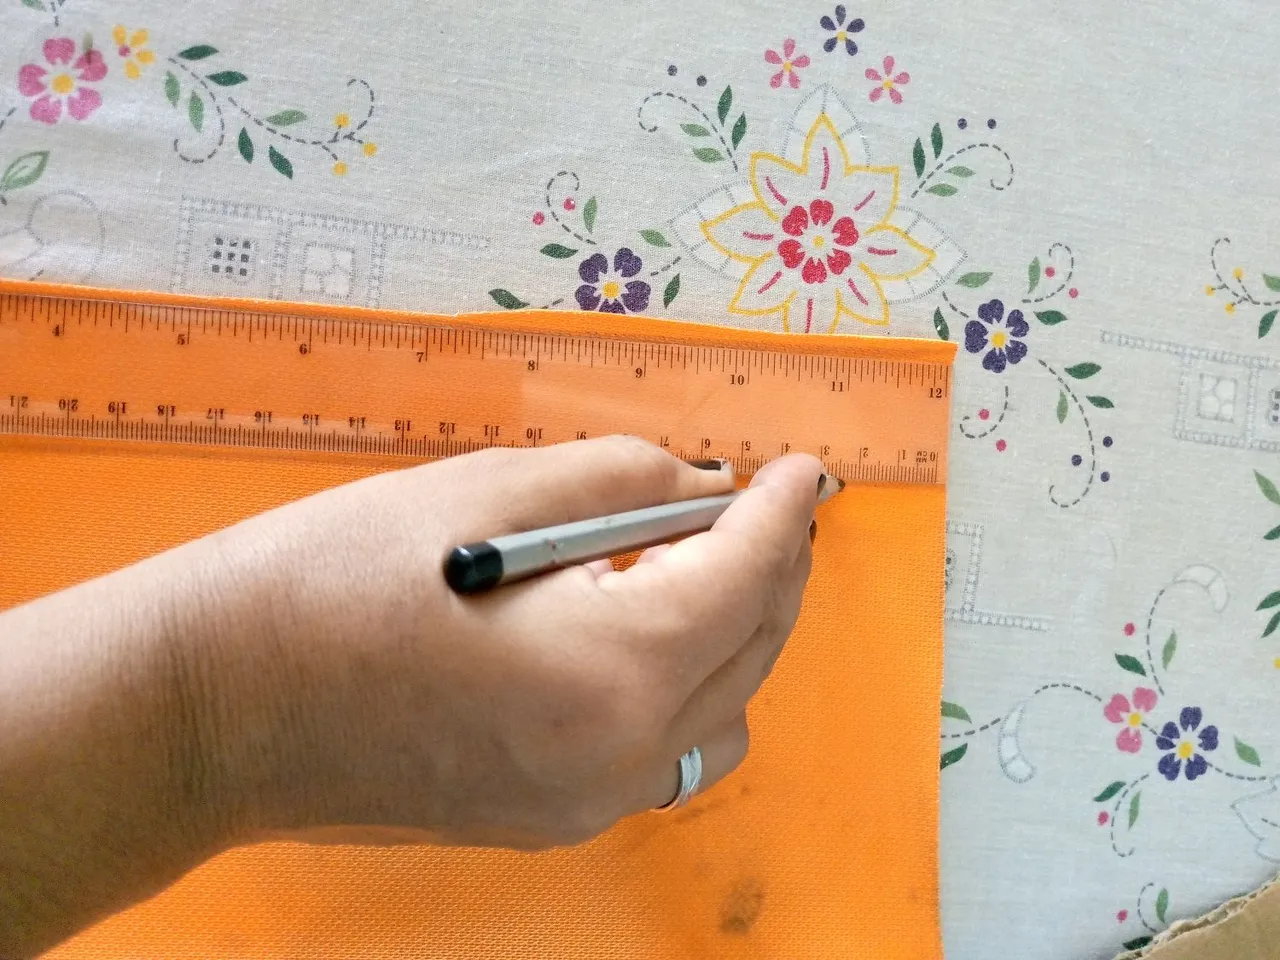
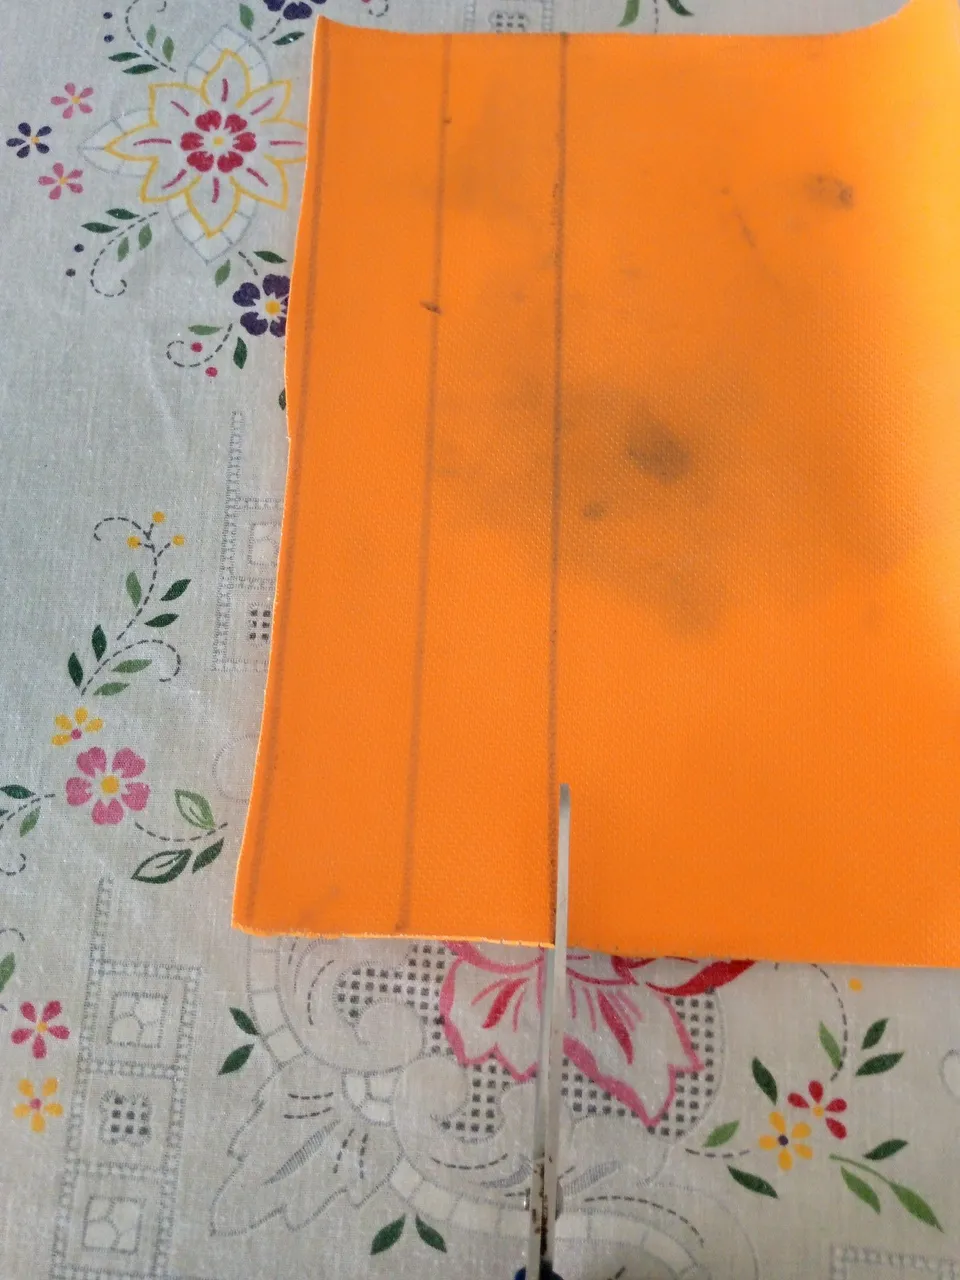
Luego de tener la medida deseada coloque sobre el material sintético una regla para marcar las tiras que utilice, las mismas son 4, yo las deje del mismo ancho que tiene la regla, aquí es cuestión de gustos, yo no las quería tan anchas, pero igual se ven lindas, una más ancha y una más delgada o así como yo las diseñe.
Pueden notar que mi material está un poco manchado, pero como va a cubrirse con la tela, lo aproveche al máximo, debido a mis ganas de hacer mis sandalias rápido, iba marcando tiras y cortando jajaja, puede marcar las 4 tiras de una vez y luego recortarlas, pero yo quería ver los resultados lo más rápido posible, creo que a mis amigas también les ha pasado eso, más cuando tienen tiempo sin poder hacer sus proyectos.
To start making my sandal the first thing I did was to measure the width of my foot with a tape measure to calculate how much to leave on the sides to glue, the measures will depend on the size of our foot, and the amount of material that we have, in my case I left 5 cm on each side, you can also leave less.
After having the desired size I put on the synthetic material a ruler to mark the strips I use, there are 4, I left them the same width as the ruler, here is a matter of taste, I did not want them so wide, but they still look nice, one wider and one thinner or as I designed them.
You can notice that my material is a little stained, but as it will be covered with the fabric, I made the most of it, due to my desire to make my sandals fast, I was marking strips and cutting hahaha, you can mark the 4 strips at once and then cut them, but I wanted to see the results as fast as possible, I think my friends have also had that happen to them, especially when they have time without being able to do their projects.
 |  |  |
|---|
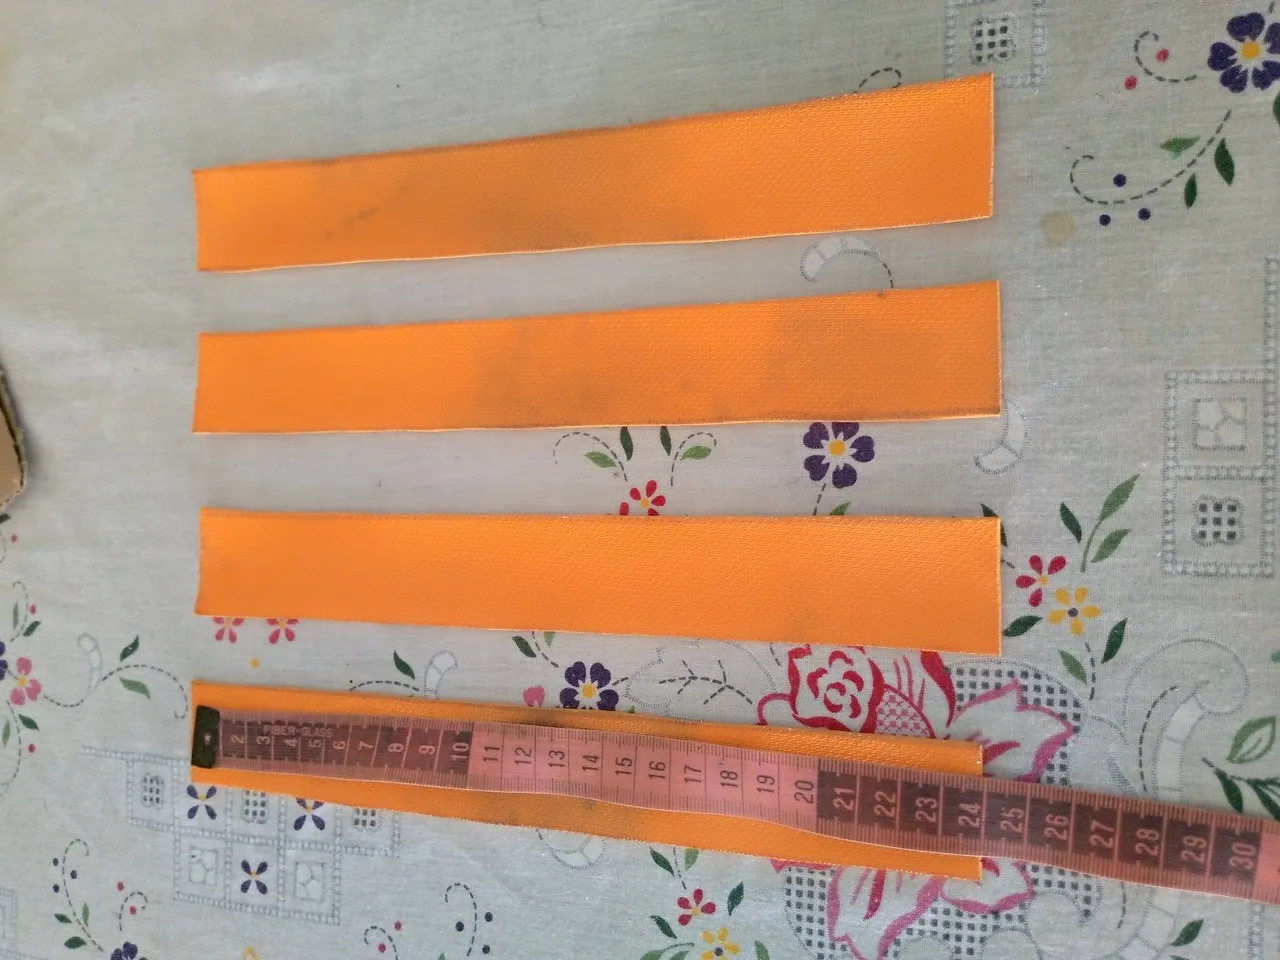
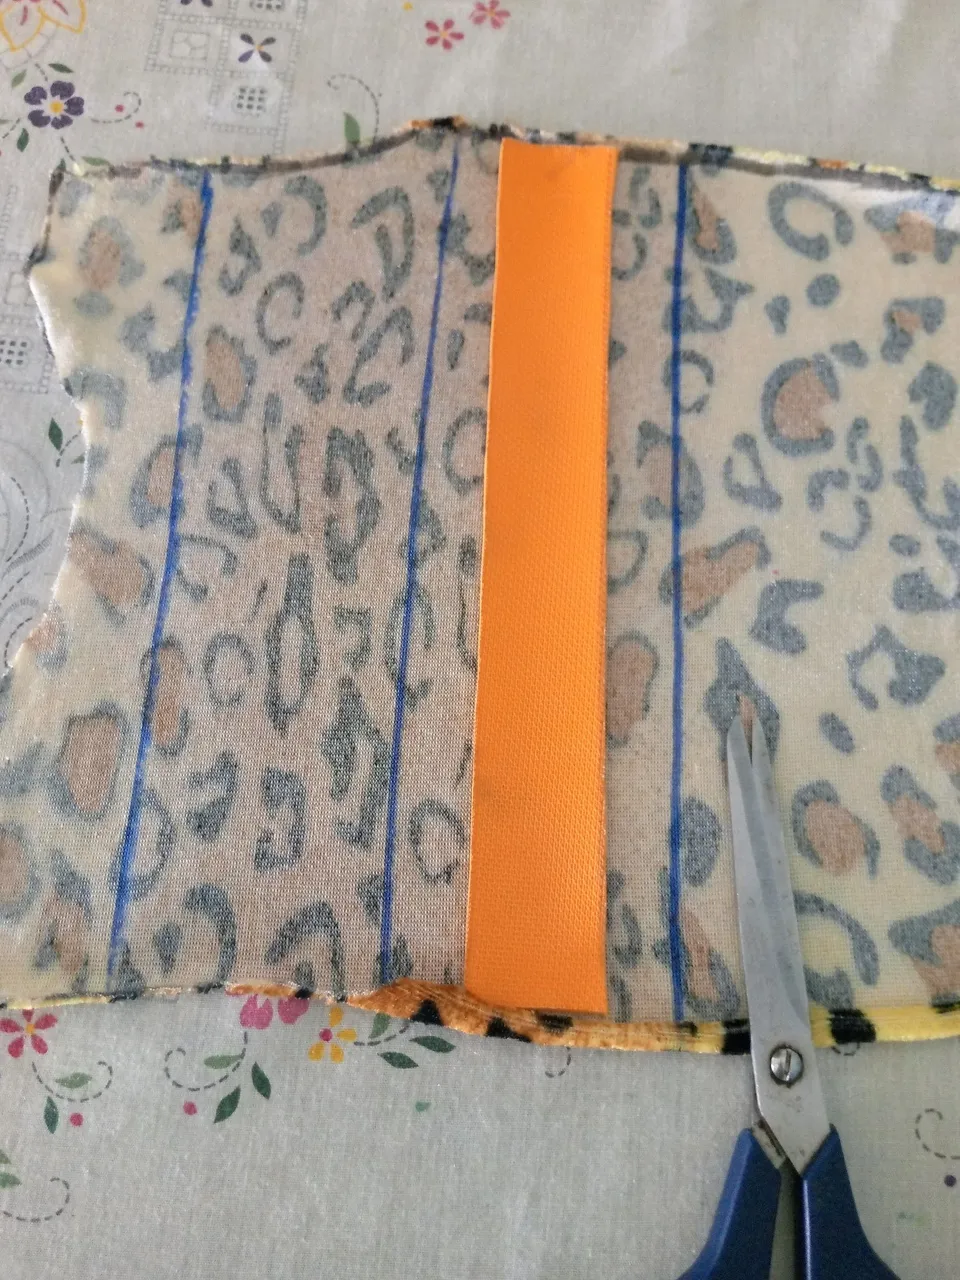
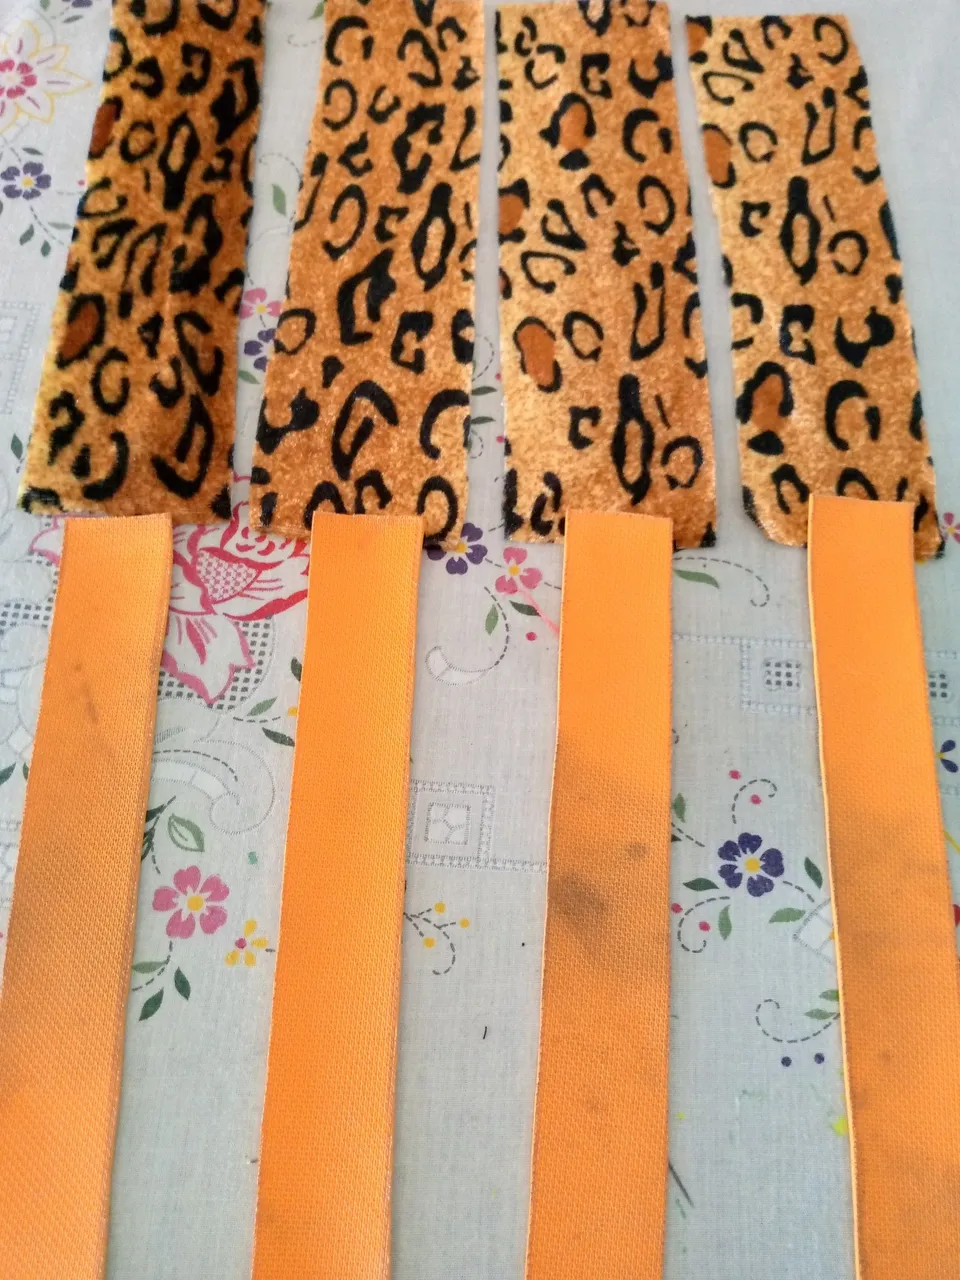
Después de cortar las tiras, verifique la medida con la cinta métrica, luego coloque una de las tiras sobre la tela y la marque con el marcador dejando 2 cm de cada lado para coser, ya con todas estas piezas listas las aparte y comencé a realizar los próximos paso.
After cutting the strips, check the measurement with the tape measure, then place one of the strips on the fabric and mark it with the marker leaving 2 cm on each side to sew, and with all these pieces ready I put them aside and started the next steps.
 |  |  |
|---|
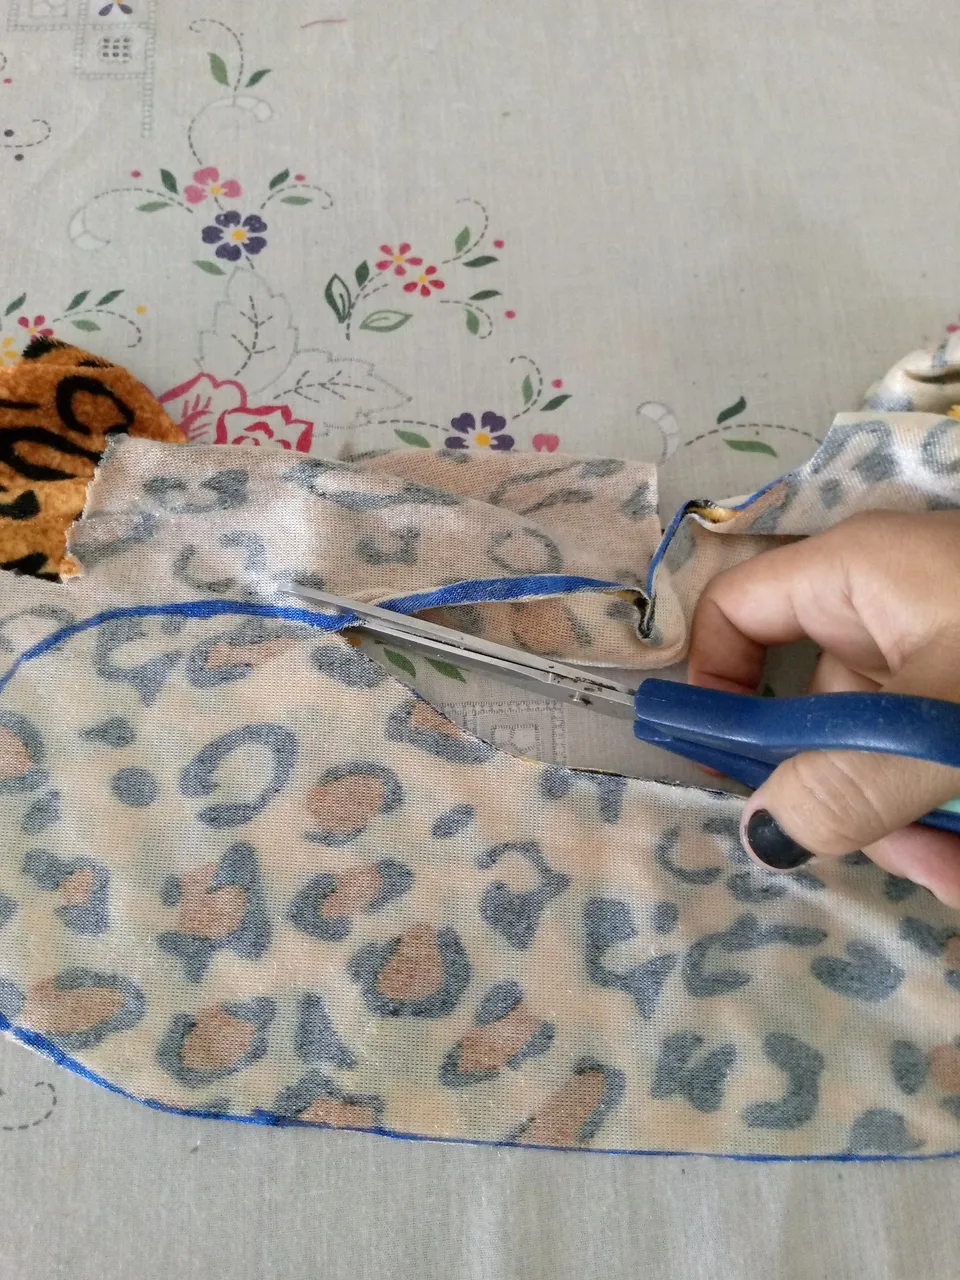
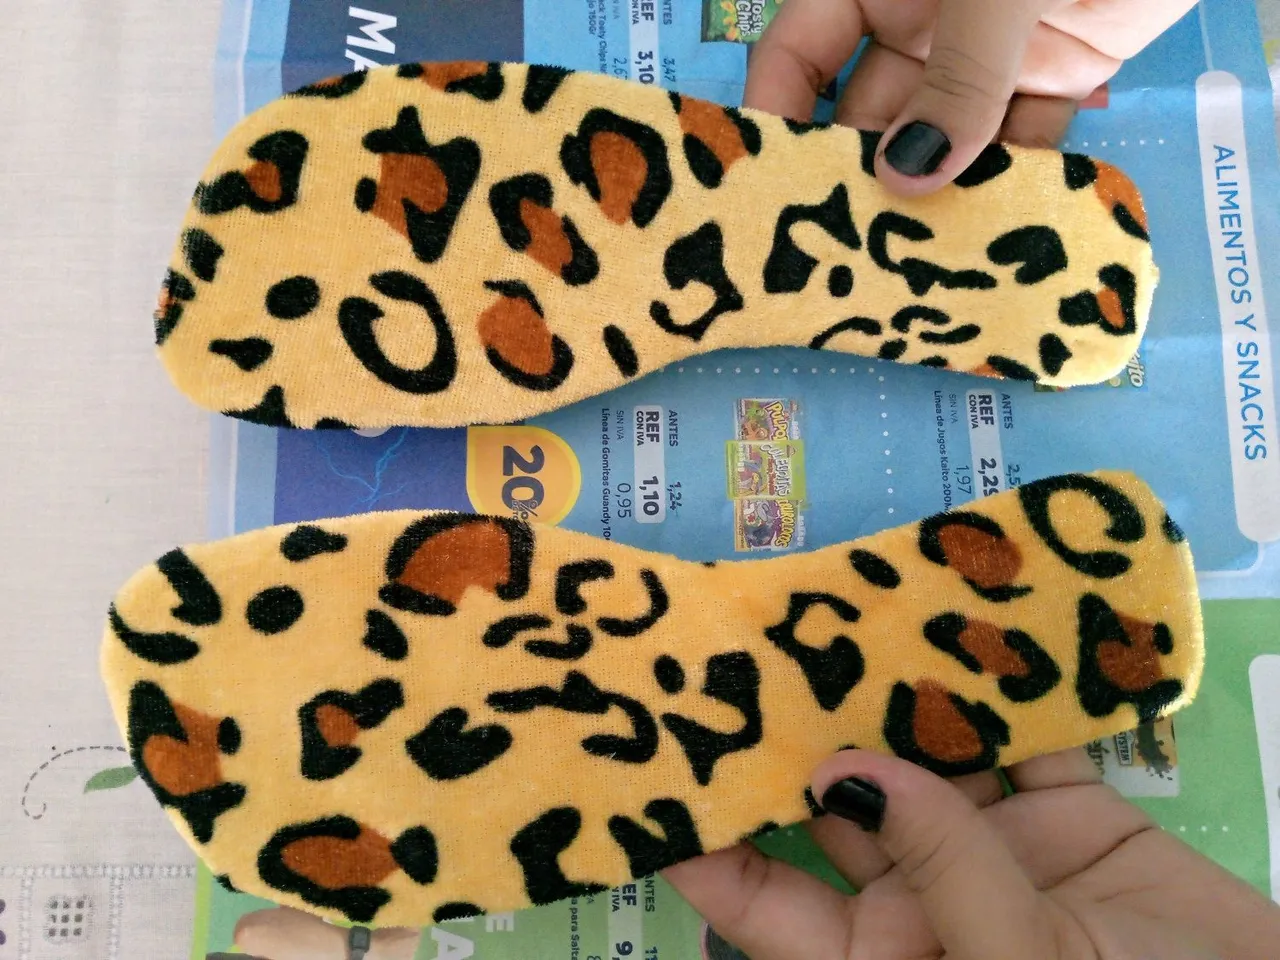
Seguidamente, comencé a marcar la tela para realizar el cubrimiento o forro de la sandalia, para esto necesite colocar la plantilla de la sandalia por el revés de la tela y con el marcador remarque toda forma de la plantilla dejando 2 cm de sobrante por todo el borde de la plantilla, de modo que al momento de pegar cubra el área necesaria, aquí no se necesita hacer cortes al borde de la tela, ya que estoy utilizando una tela muy flexible ideal para adaptar en estos trabajos.
En caso de utilizar otro tipo de telas no flexibles, si sería útil hacer los cortes o piquetes por los bordes para adaptarla mejor a lo que necesitemos cubrir.
Next, I began to mark the fabric to make the covering or lining of the sandal, for this I need to place the template of the sandal on the back of the fabric and with the marker mark all the shape of the template leaving 2 cm of excess around the edge of the template, so that when gluing it covers the necessary area, here it is not necessary to make cuts to the edge of the fabric, since I am using a very flexible fabric ideal to adapt in these works.
In case of using other non-flexible fabrics, it would be useful to make cuts or picks along the edges to better adapt it to what we need to cover.
 |  |  |
|---|
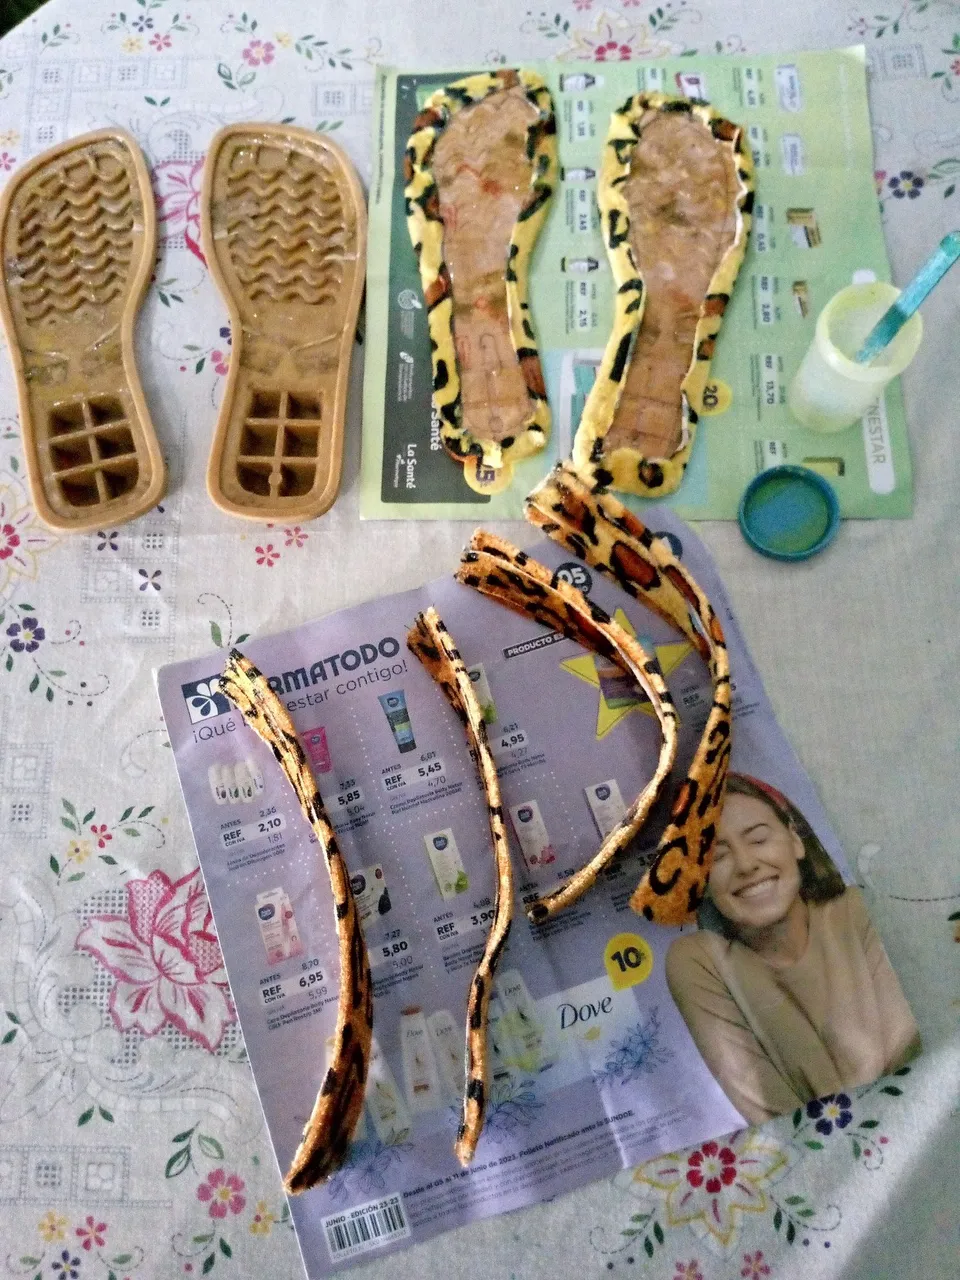
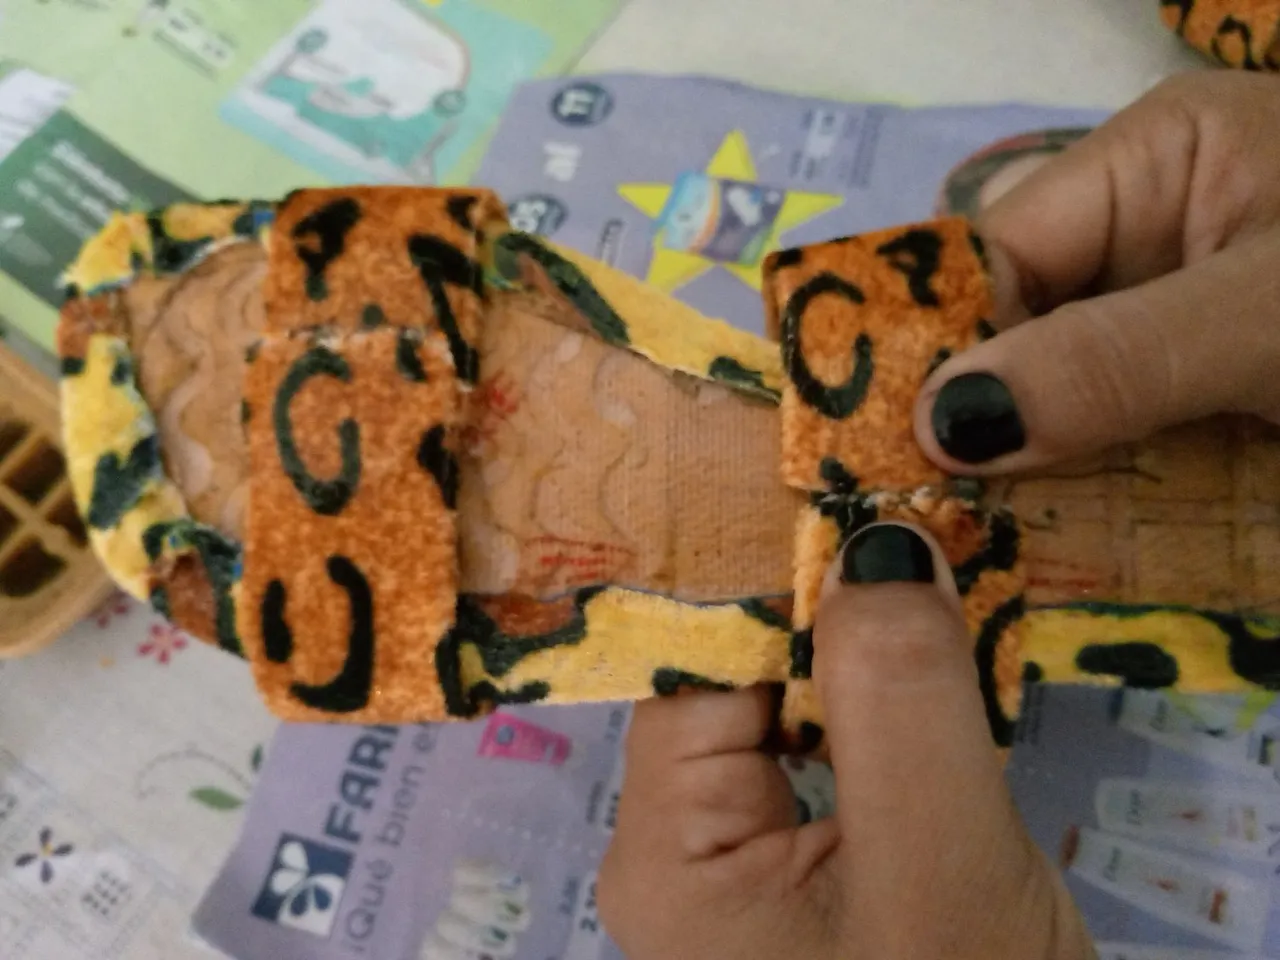
En este paso comencé a colocar el forrado de las tiras cociendo la tela tanto en el centro como las puntas para cerrar y evitar que la tela se pueda mover.
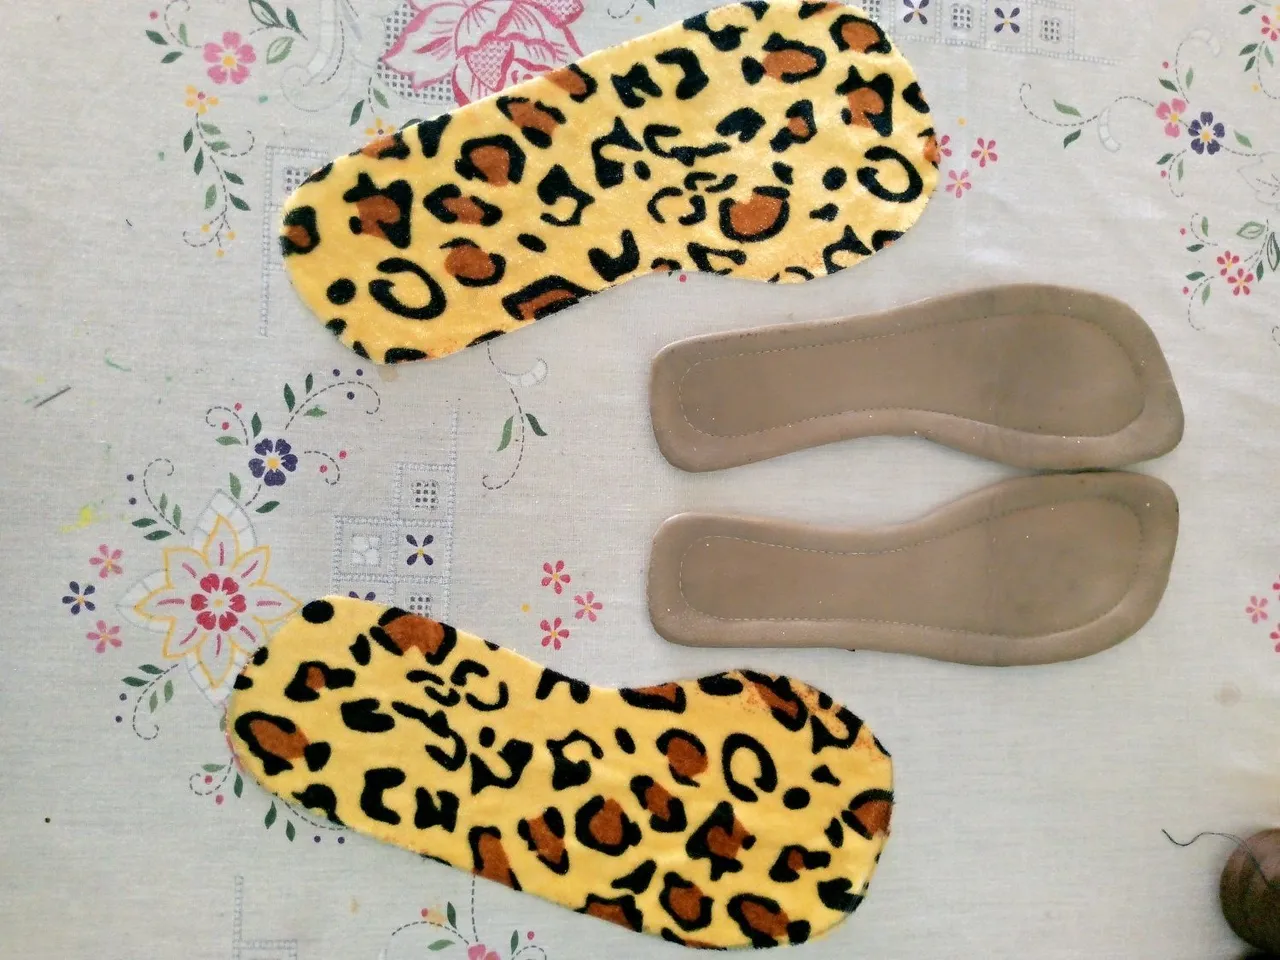
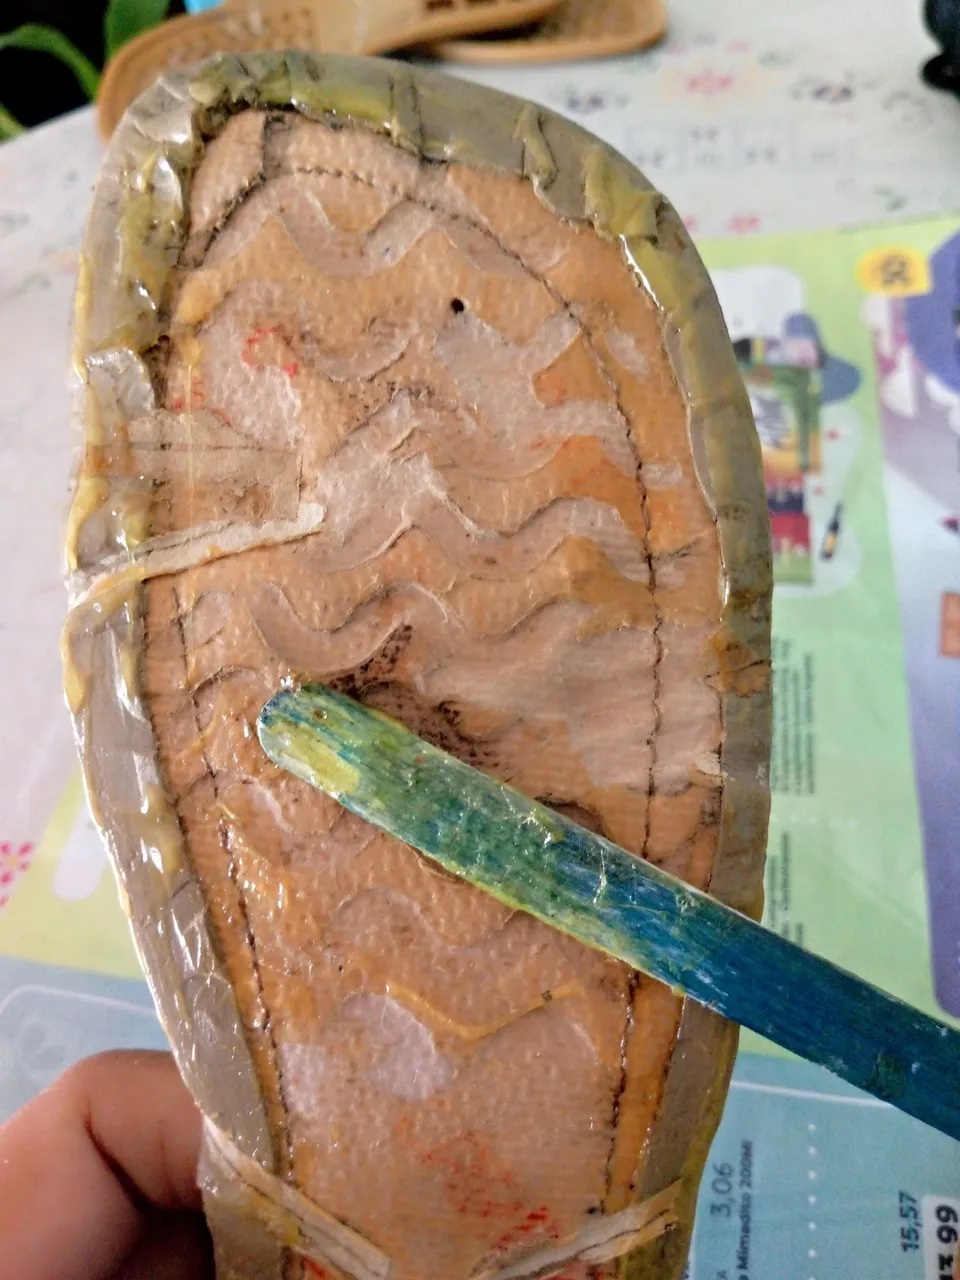
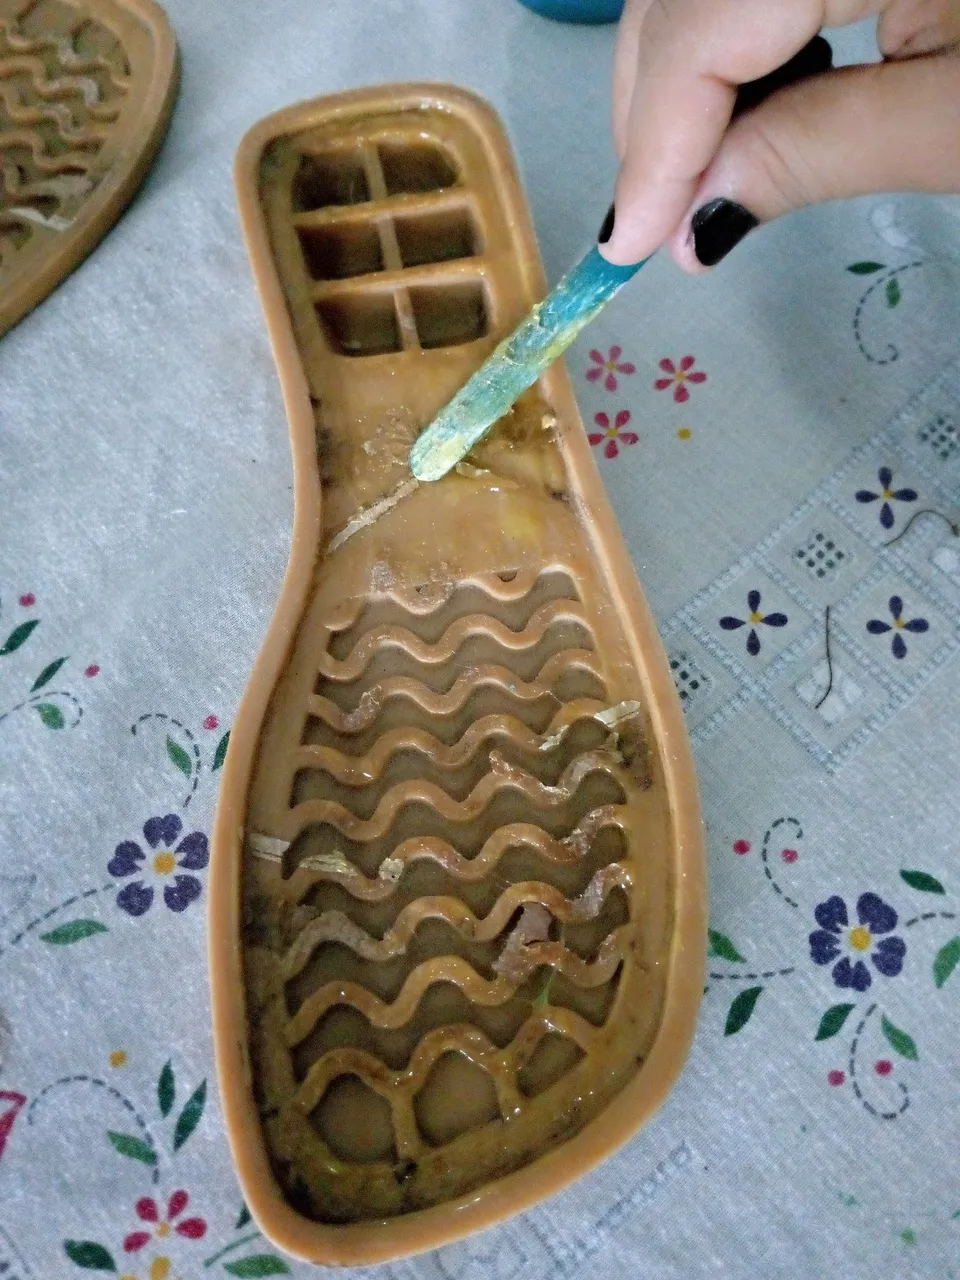
Dejando estas tiras para otro paso, comencé a colocar la pega a las plantillas de la sandalia para luego forrar con la tela que anteriormente había cortado, esta pega debe aplicarse y dejar que seque por unos 15 minutos.
In this step, I began to place the lining of the strips by sewing the fabric both in the center and at the ends to close and prevent the fabric from moving.
Leaving these strips for another step, I began to apply the glue to the sandal's insoles to then line with the fabric that I had previously cut, this glue should be applied and left to dry for about 15 minutes.
 |  |  |
|---|
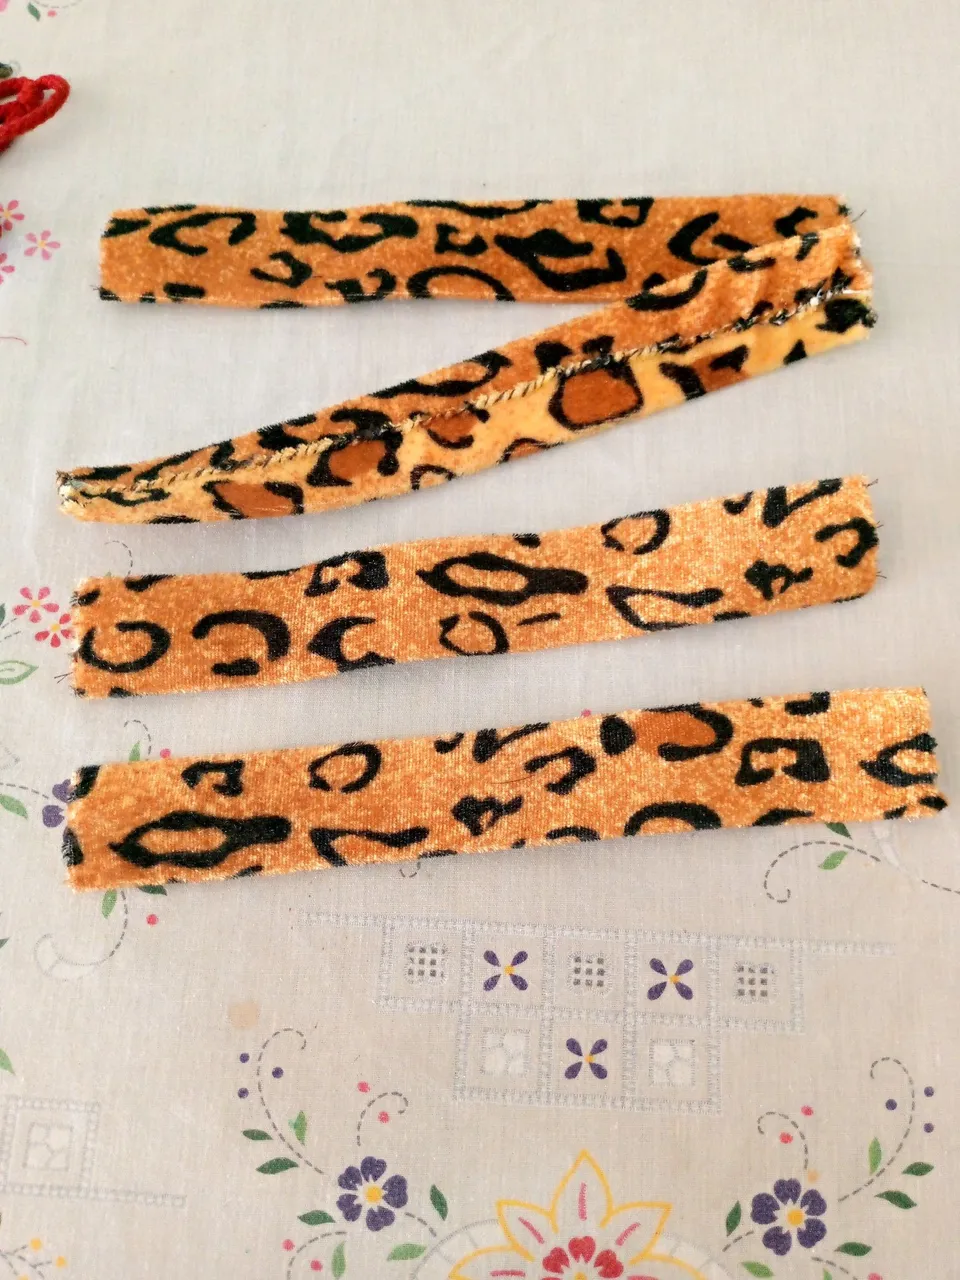
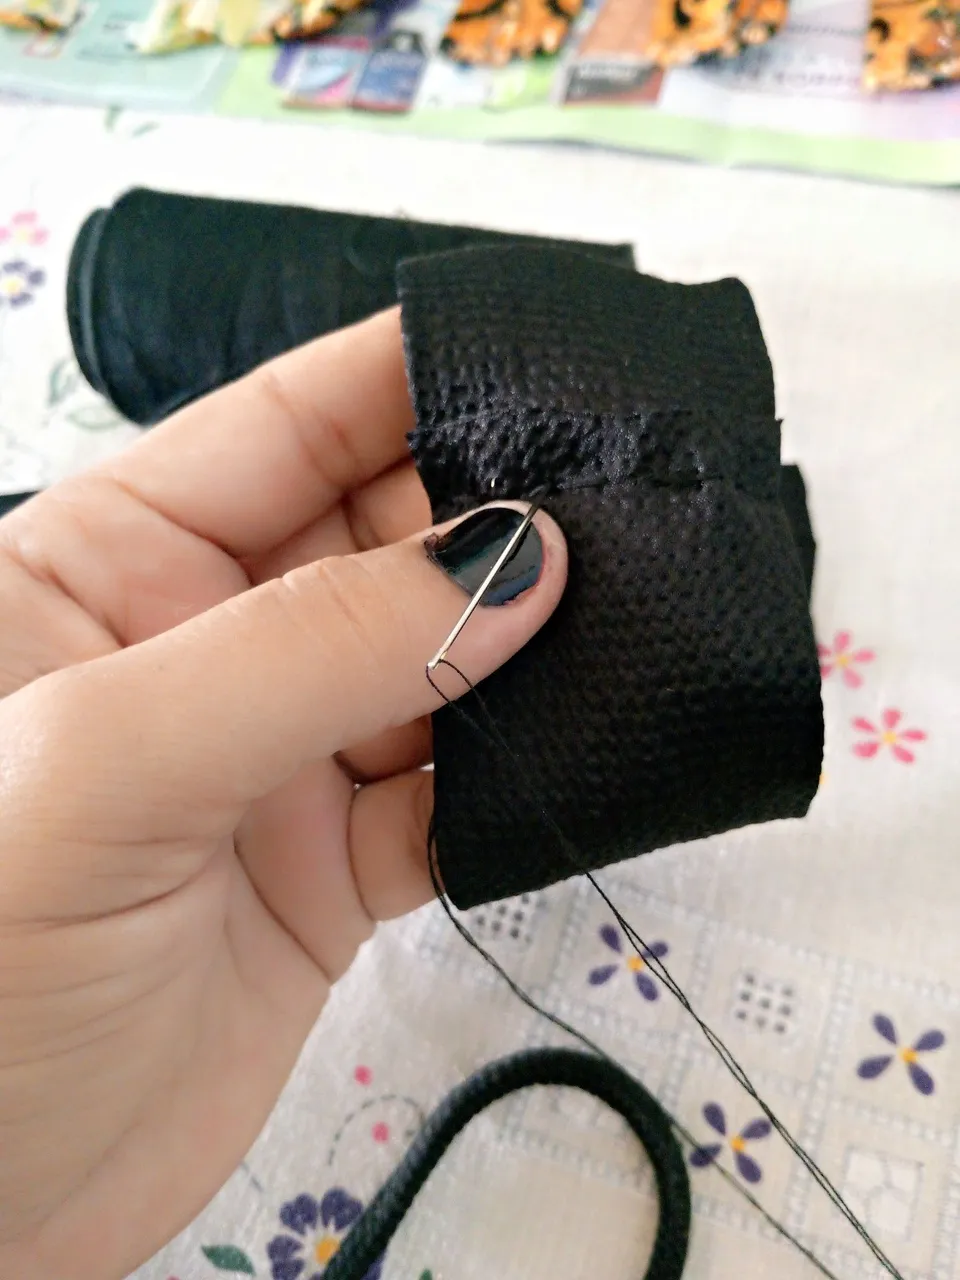
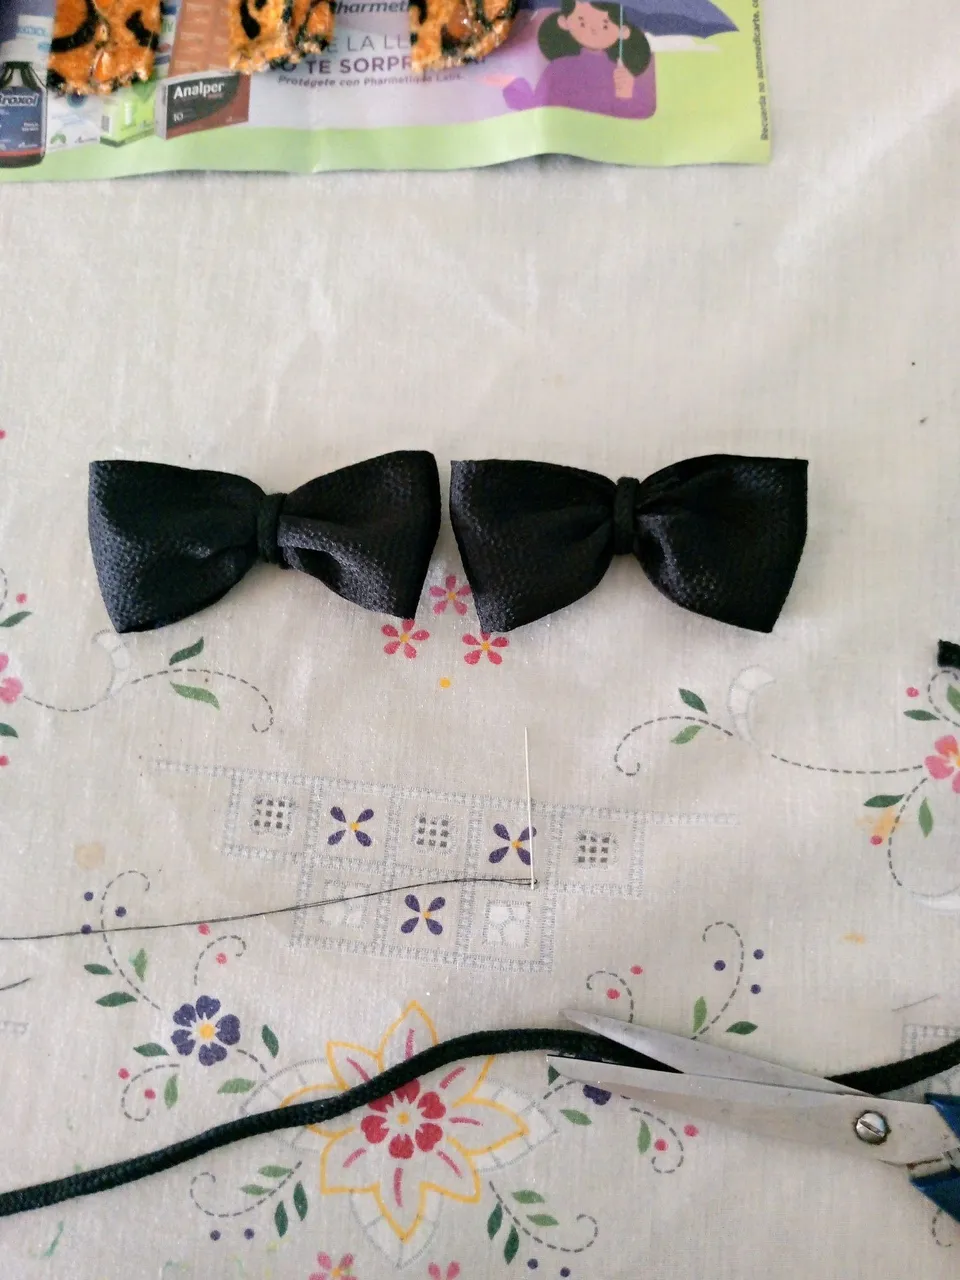
Mientras esperaba que el tiempo de secado de la pega pasara, me dispuse a hacer los lazos para adornar las sandalias, para ello corte 22 cm de la cinta de tela negra, doble a la mitad cocí con hilo negro, luego arruche por la mitad y asegure con hilo, también corte una parte de la trenza y la coloque al centro del lazo para cubrir el detalle del hilo quedando listos estos lazos.
While waiting for the glue to dry, I started to make the bows to decorate the sandals, for this I cut 22 cm of the black fabric ribbon, folded in half with black thread, then I folded in half and secured with thread, I also cut a part of the braid and placed it in the center of the bow to cover the detail of the thread being ready these bows.
 |  |  |
|---|
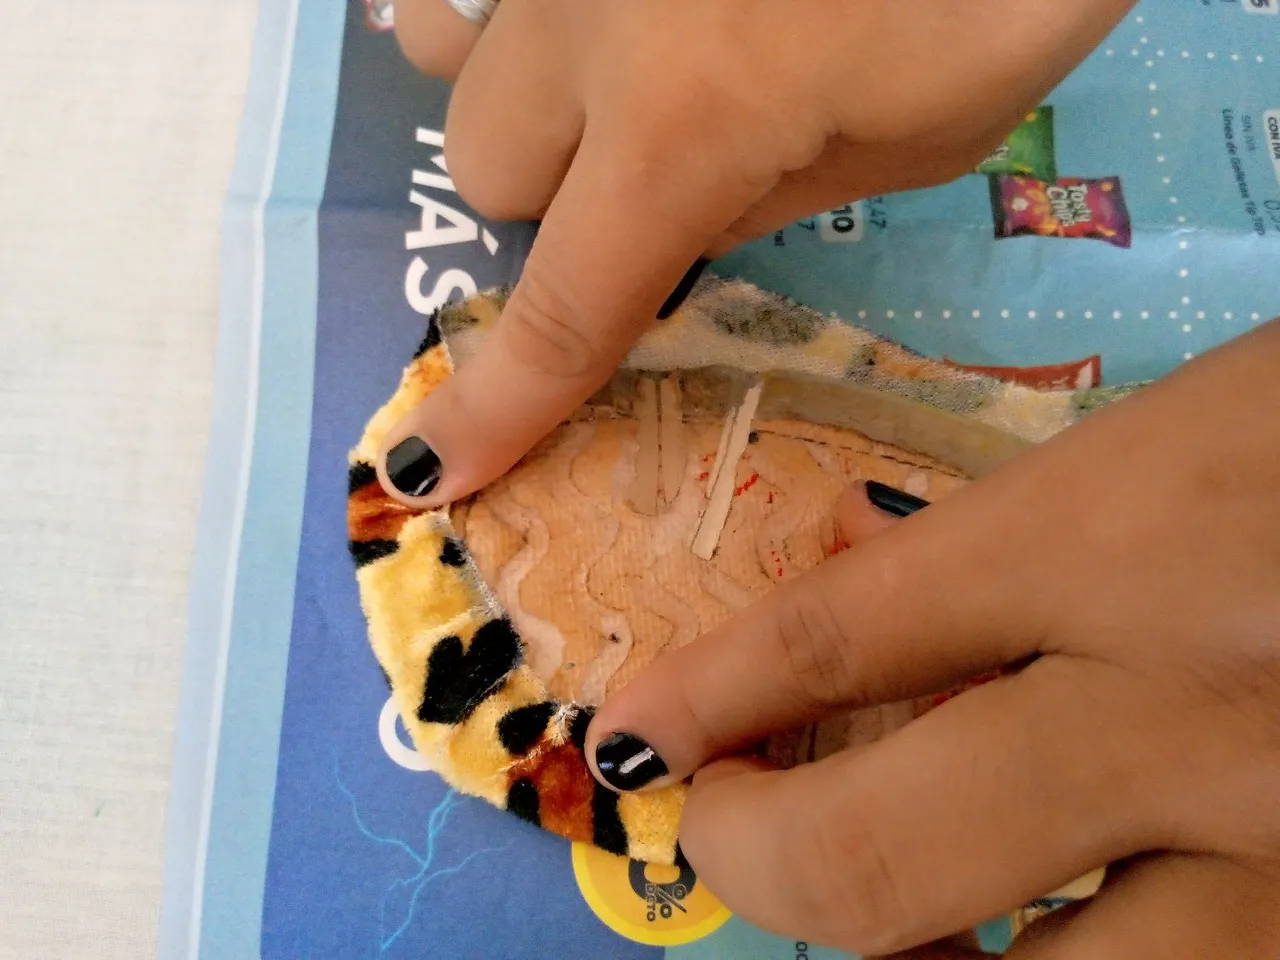
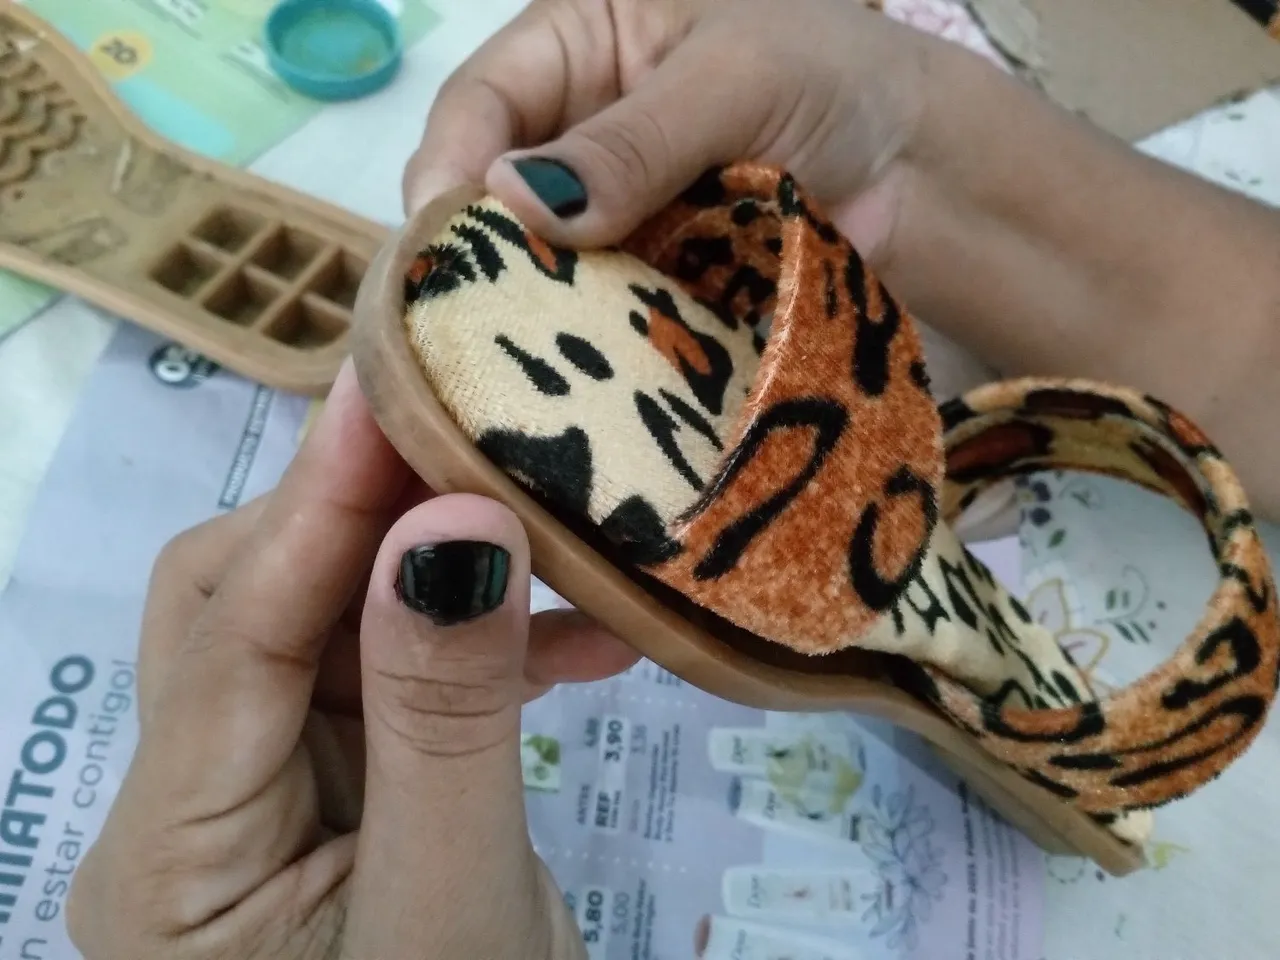
Habido transcurrido el tiempo comencé a pegar el forro sobre las plantillas, quedando listas para utilizarlas en el momento apropiado, luego también coloque pega en la parte interna de la suela y las tiras que van pegadas a esta suela, dejando pasar otros 15 minutos para finalmente comenzar a armar las sandalias.
After the time elapsed I started to glue the lining over the insoles, being ready to use them at the appropriate time, then I also put glue on the inner part of the sole and the strips that are glued to the sole, leaving another 15 minutes to finally start assembling the sandals.
 |  |  |
|---|
Con todas las piezas listas y con el tiempo de secado pegue cada una de las tiras a 5 cm por debajo de la plantilla, las uní y fije, después las coloque sobre la suela y presione fuerte para lograr fijar la pega a cada pieza, también es importante colocar un objeto pesado sobre las sandalias ya pegadas para lograr que la pega se fije totalmente, esto se puede dejar unas cuantas horas o de un día para el otro para estar seguros de que la pega quedo totalmente adherida.
With all the pieces ready and with the drying time, glue each of the strips 5 cm below the insole, join them and fix them, then place them on the sole and press hard to fix the glue to each piece, it is also important to place a heavy object on the sandals already glued to ensure that the glue is fully fixed, this can be left for a few hours or overnight to be sure that the glue is fully adhered.
 |  |  |
|---|
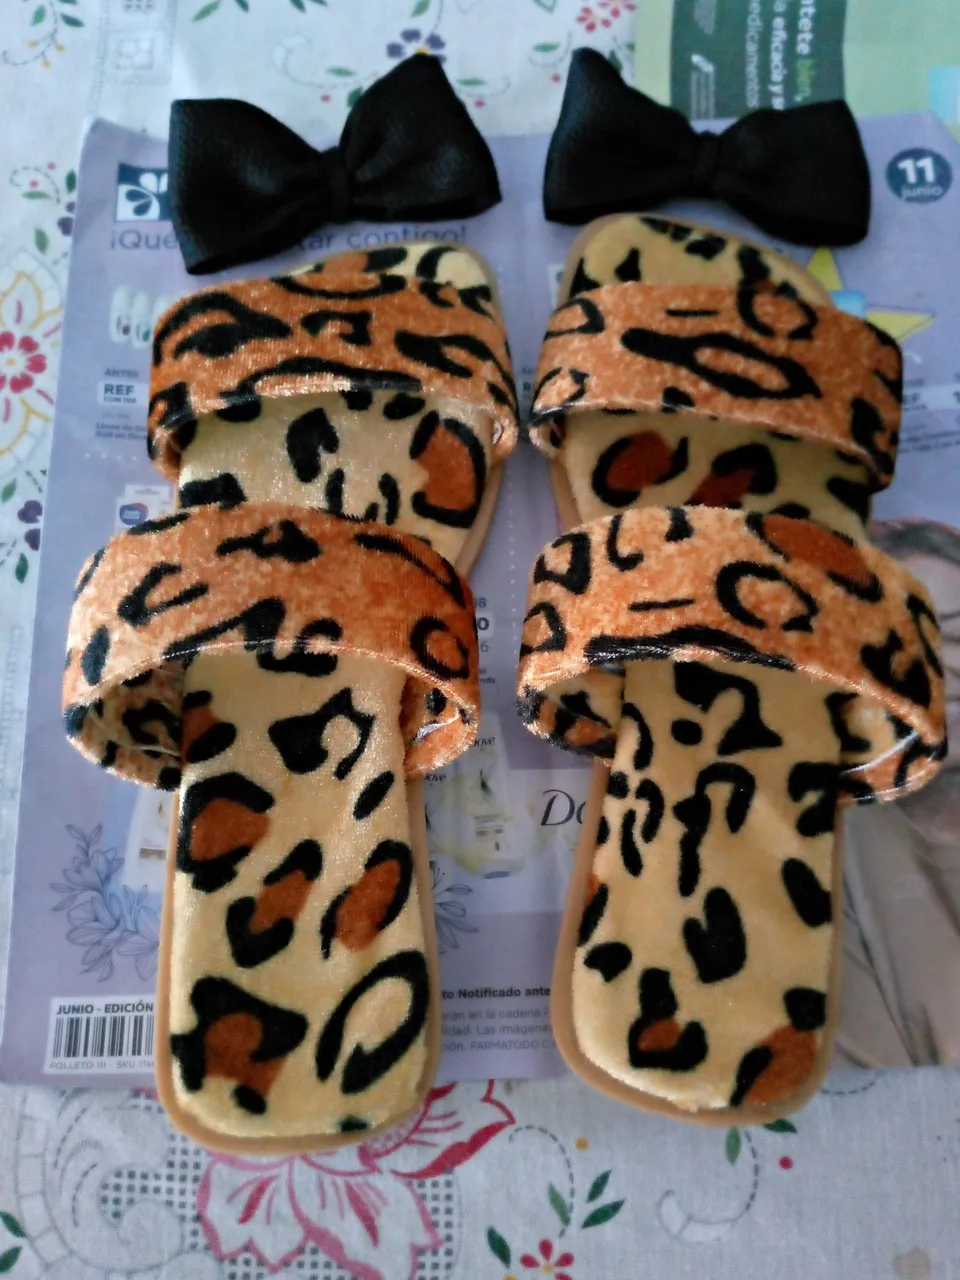
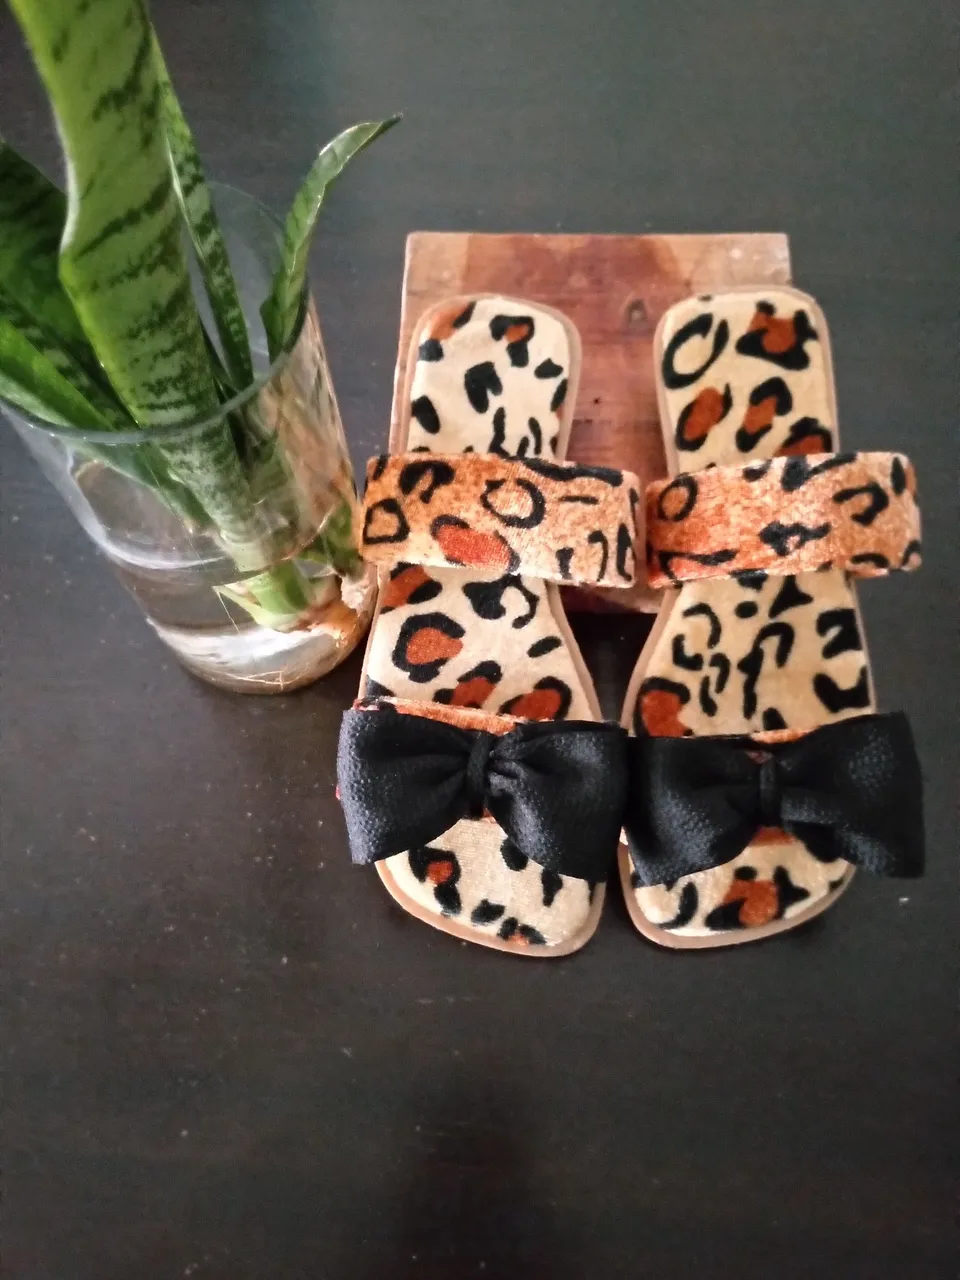
Para finalizar mi proyecto de sandalia pegue los lazos con la misma pega que utilice para todo el proceso.
Con esto finalizo mi publicación del día, esperando sea de su agrado y se animen hacer unas sandalias aún más lindas e ideales para lucirlas en cualquier momento y lugar, y para las niñas y abuelitas de la casa les aseguro que les gustaran mucho además por la comodidad y facilidad de uso sería un bonito regalo.
Gracias por visitar mi publicación, espero vernos en otra de mis publicaciones, abrazos y bendiciones para todos.
To finish my sandal project, I glued the bows with the same glue I used for the whole process.
With this I end my publication of the day, I hope you like it and encourage you to make even more beautiful and ideal sandals to wear them at any time and place, and for the girls and grandmothers of the house I assure you that they will like them very much in addition to the comfort and ease of use would be a nice gift.
Thank you for visiting my publication, I hope to see you in another of my publications, hugs and blessings to all.
social networks / redes sociales
![]()
![]()
Traductor Deepl
Translated Deepl
Ediciones Canva
Editions Canva