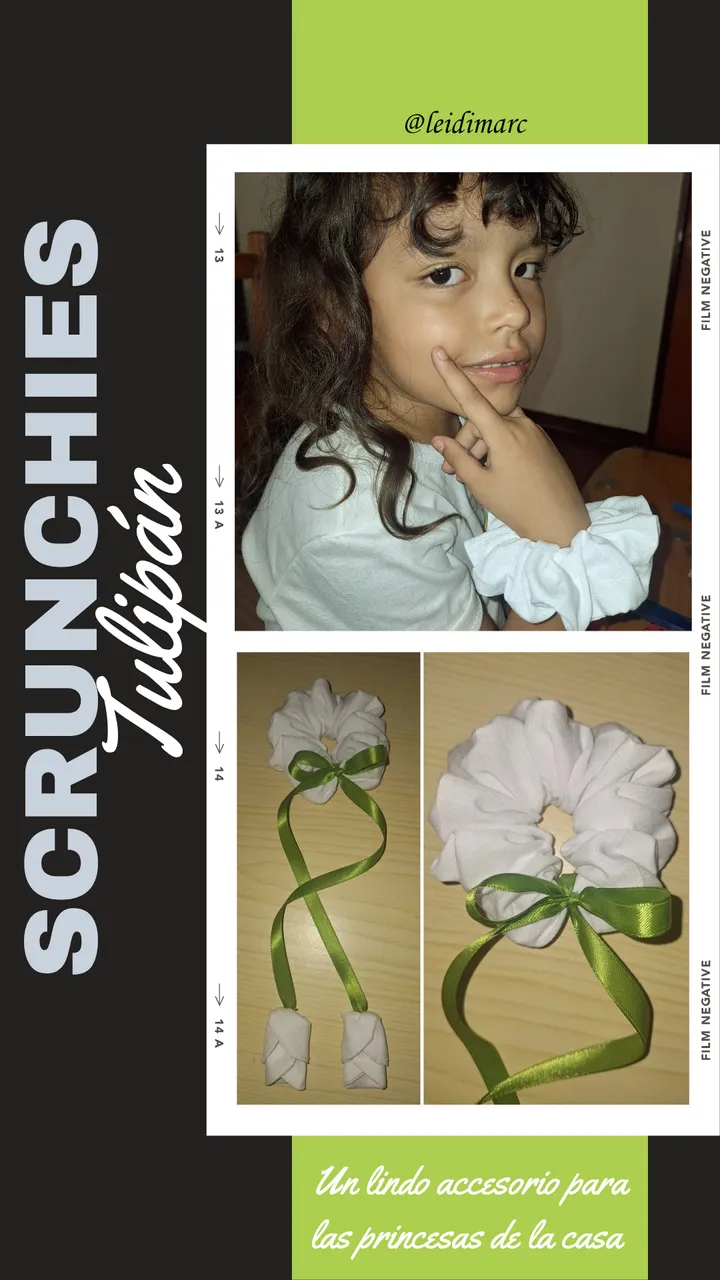
Saludos y bendiciones, mis queridos amigos de @needleworkmonday, un gusto visitarlos nuevamente. Espero que pasen una linda semana, productiva, creativa y llena de alegrías. En esta oportunidad les traigo una bonita creación para regalar a una bella princesa.
Hace días cumplió años mi sobrina y quería hacerle algo bonito y aprovechar algunos recortes de telas de las que usé para el vestido de mi princesa Arianna para su bautizo.
Ya había visto varias publicaciones en línea sobre estos adornos adicionales que le están poniendo a las moñeras o scrunchies como mejor se conocen en estos tiempos. Se trata de unos lindos tulipanes hechos en tela.
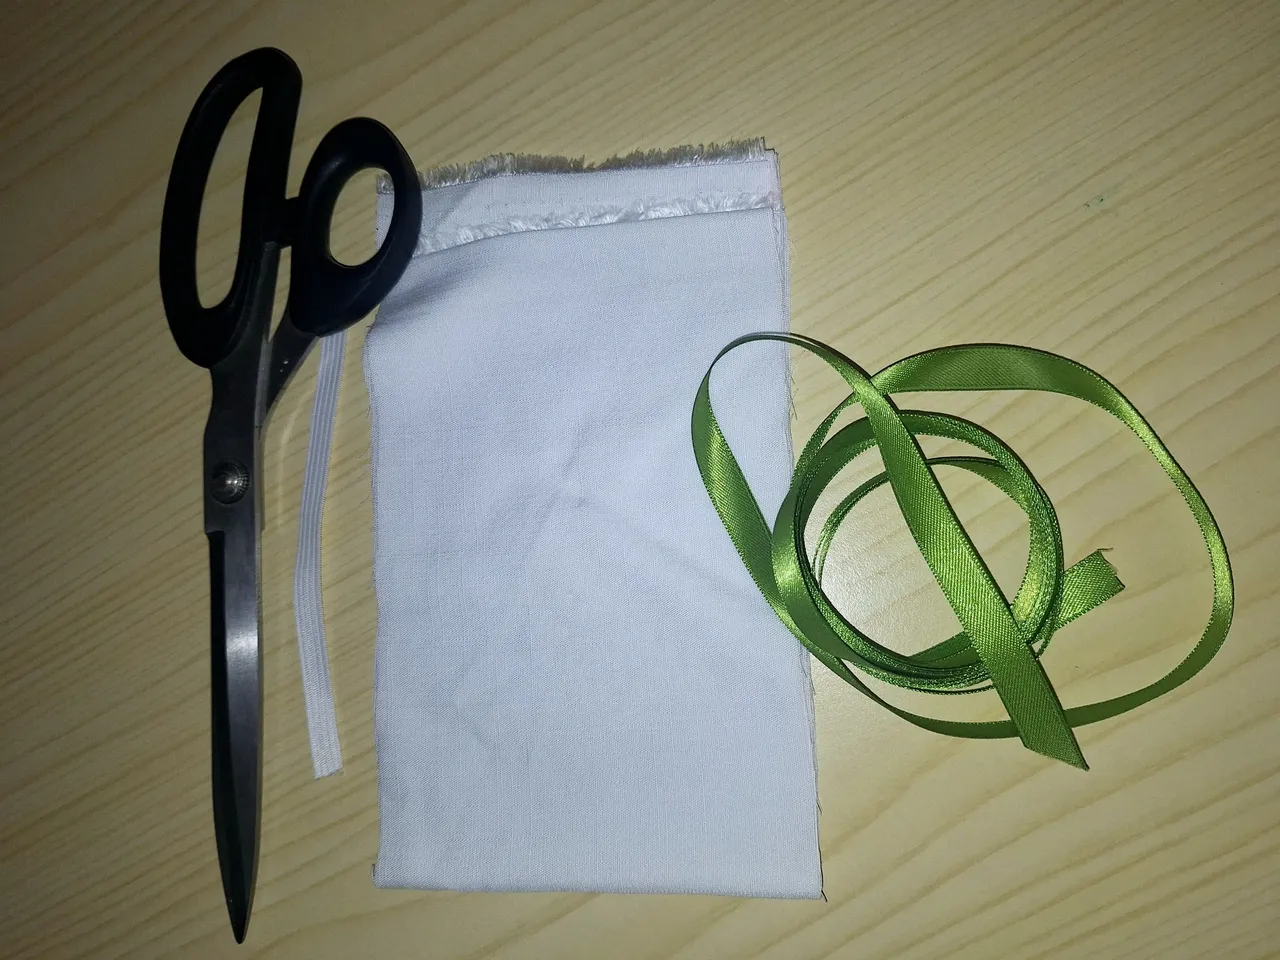
Si me siguen en la lectura, les mostraré cómo la estuve realizando. Como les estaba diciendo, usé unos retazos de tela blanca, tipo lino, elástico y cinta de raso de color verde de las más delgadas.
Corte un trozo de tela de 75 cm de largo por 12 cm de ancho, para las scrunchies y para los Tulipanes 4 círculos de unos 7 cm de diámetro.
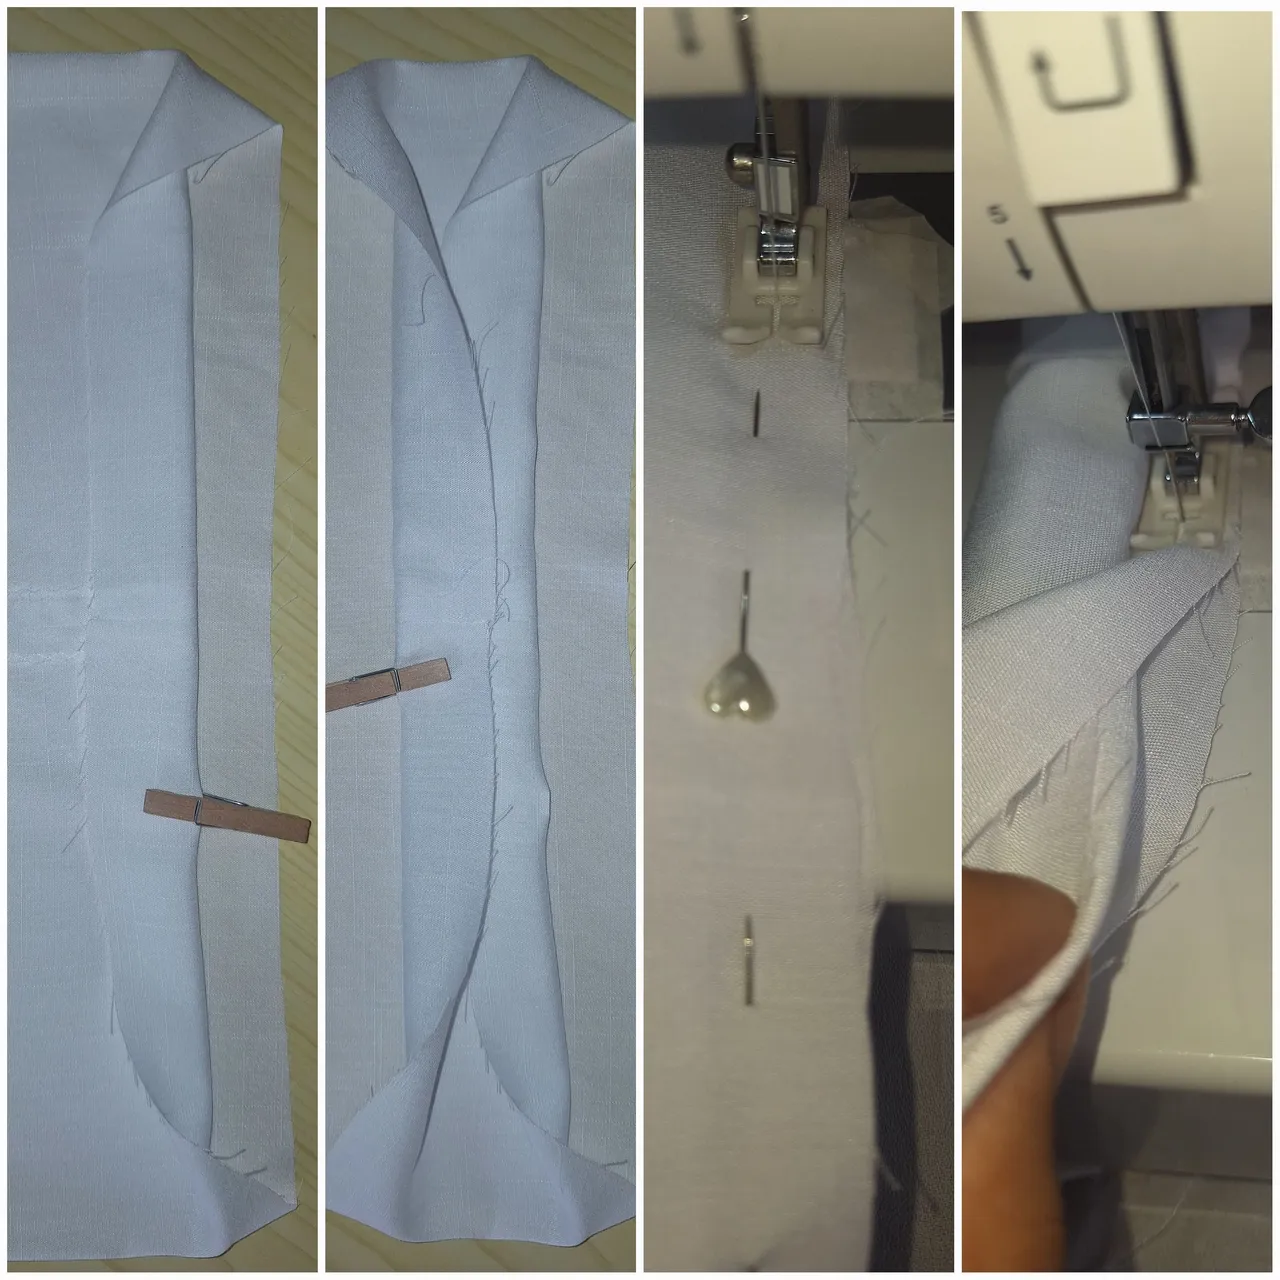
La tela la cosí por los extremos, planché las costuras. Luego, como se ve en la imagen doble, los extremos hacia el centro y luego los extremos que quedaban sobrantes, los doble y fui pasando costuras. Por un lado, iba sacando la tela que ya se iba cociendo.
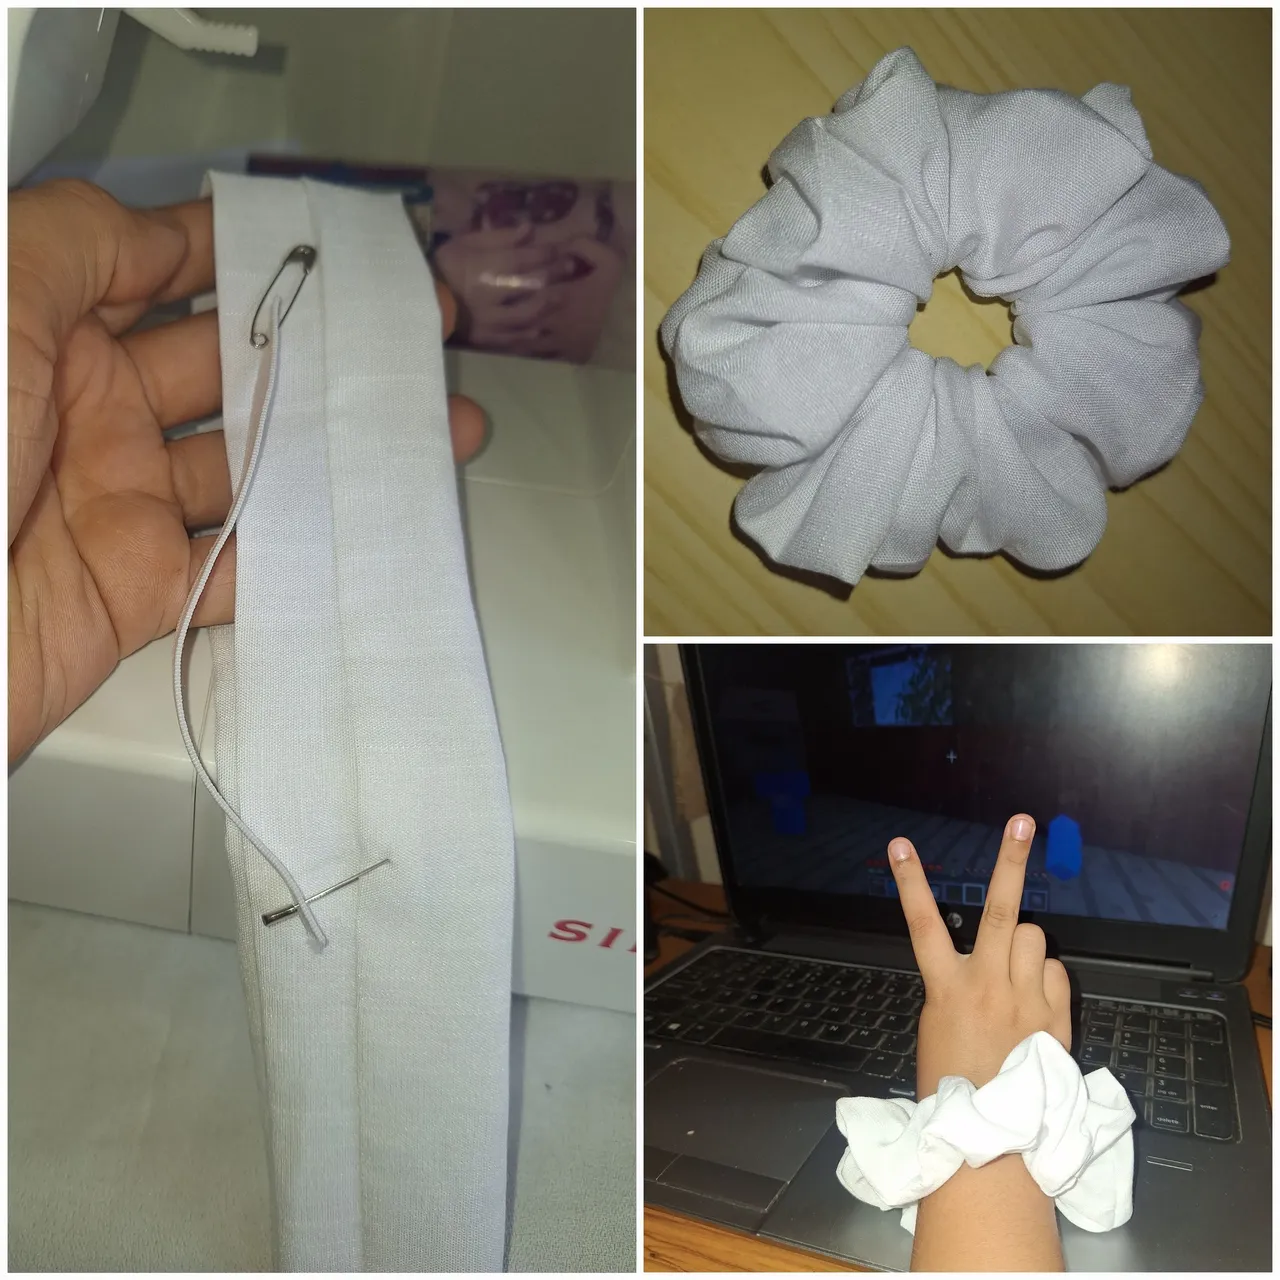
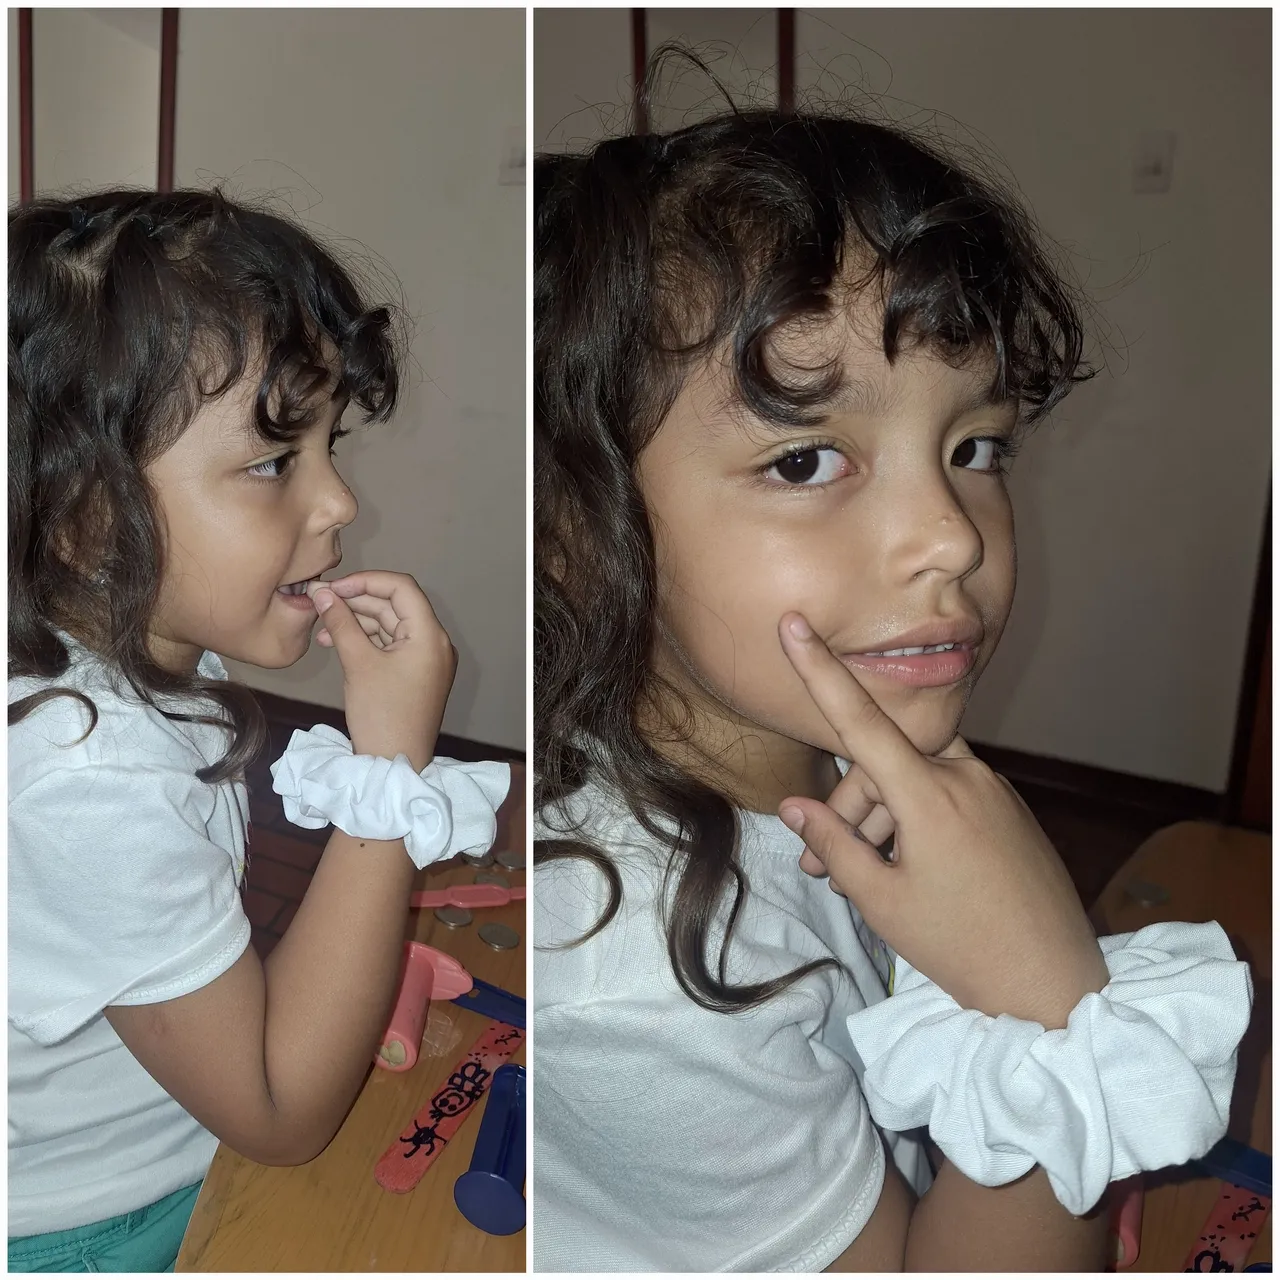
Una vez cocida, le dejé un pequeño espacio sin pasar costura, por ahí le metí el elástico y luego con costura invisible lo selle. Así ya se veía muy linda esta scrunchies. Mi bella modelo Ámbar se la midió en su mano, ya que así también se usa, a pesar de que es un accesorio para el cabello.
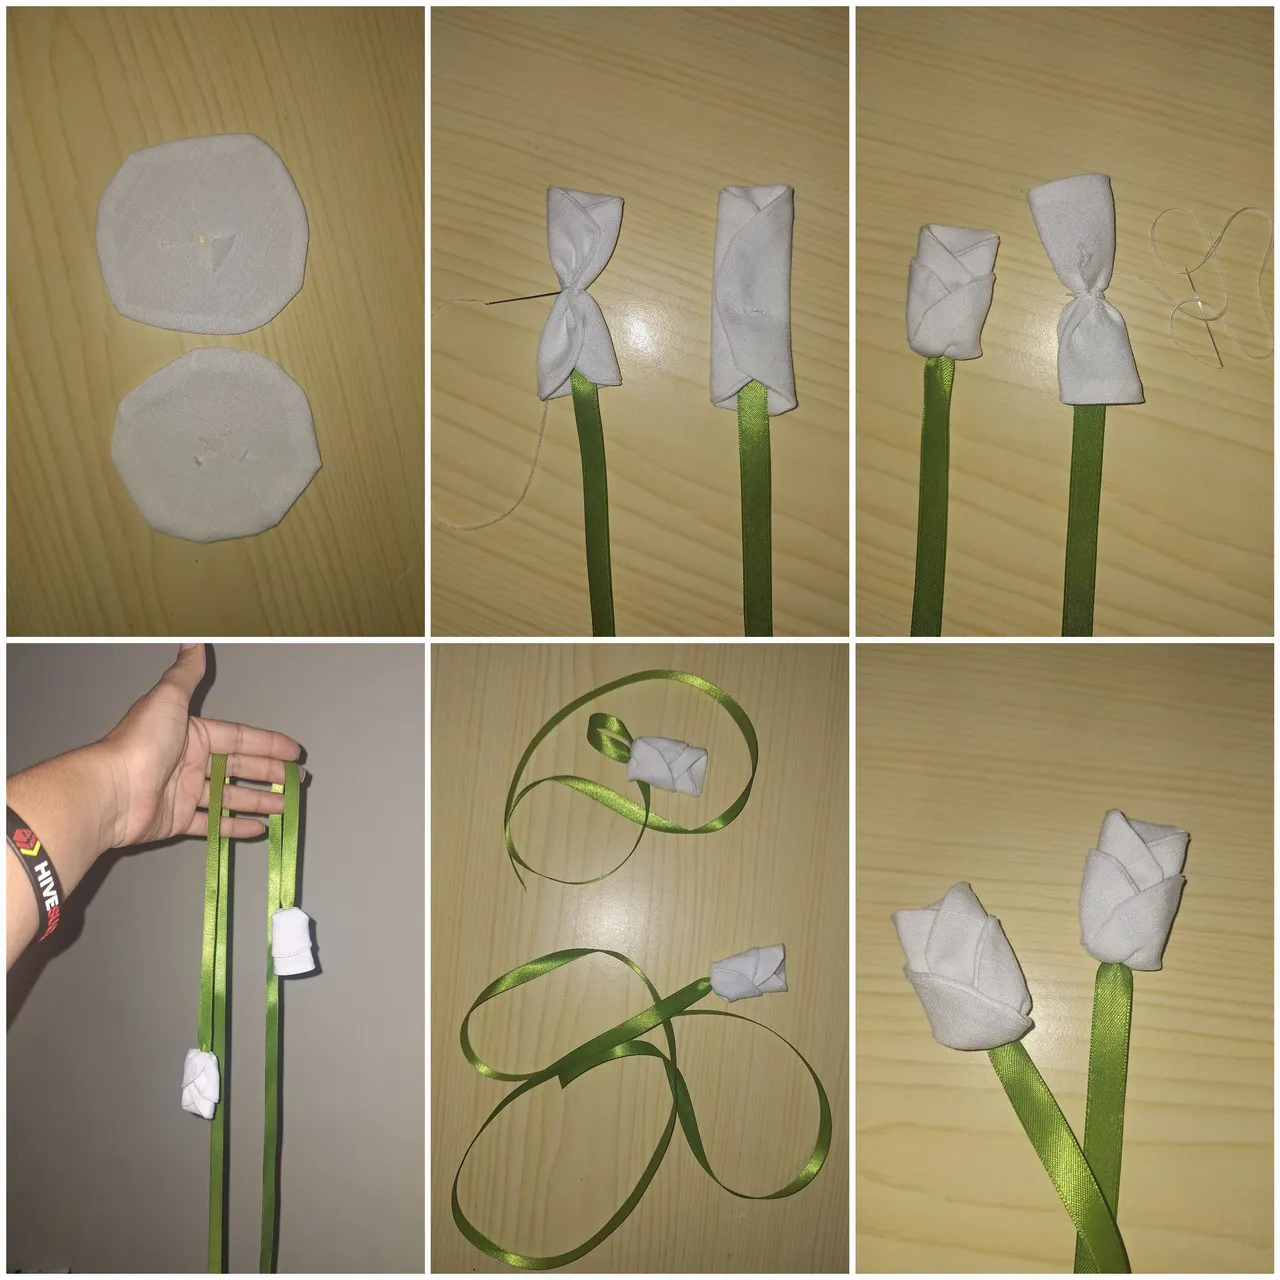
Luego, para hacer los tulipanes, corte los círculos y pase costuras. Este paso no me quedó tan bien. Primera vez que coso en círculos, me hace falta practicar.
Para completar había que hacerle un orificio por el medio para voltear la tela, y en uno de los tulipanes le hice el orificio en las dos capas de tela y era en una sola.
Son inconvenientes que nunca faltan en las costuras de esta aprendiz, je, je, je. Para la próxima será mejor. Aunque los círculos parecían arepas mal hechas, al coserlo por el medio, fruncir y luego doblar, abrazando la cinta, quedaron bonitos.
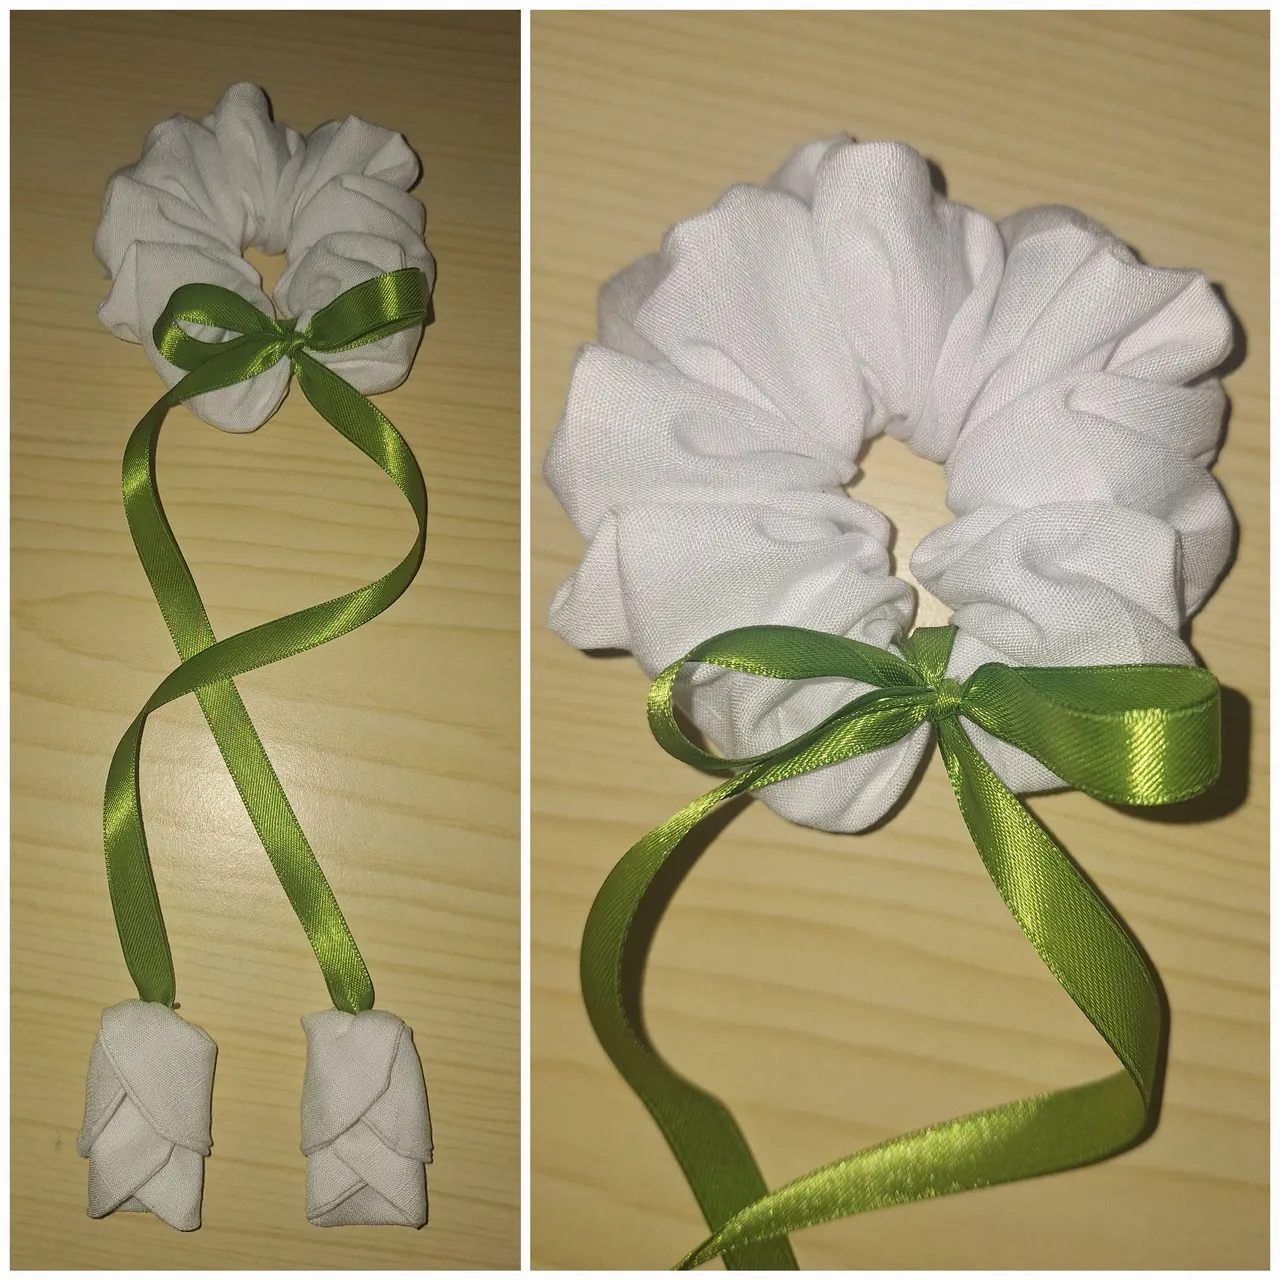
Luego con la cinta envolví las scrunchies, amarré e hice un lazo y así de bonito se ve este accesorio para las princesas de la casa, está en especial es para mi sobrina Asley por sus 8 años, también le hice otros accesorios, que luego les muestro.
Espero que les haya gustado mi proyecto de hoy. Muchas gracias por su visita.

Tulip Scrunchies
Greetings and blessings, my dear friends from @needleworkmonday, nice to visit you again. I hope you have a nice week, productive, creative and full of joy. This time I bring you a beautiful creation to give to a beautiful princess.
A few days ago my niece had her birthday and I wanted to make her something nice and take advantage of some fabric cuttings from the ones I used for my princess Arianna's dress for her christening.
I had already seen several posts online about these additional decorations that are being added to the scrunchies or scrunchies as they are better known these days. These are cute little tulips made out of fabric.
If you follow me in the reading, I will show you how I have been making them. As I was telling you, I used some scraps of white linen-type fabric, elastic and the thinnest green satin ribbon.
I cut a piece of fabric 75 cm long by 12 cm wide, for the scrunchies and for the tulips 4 circles of about 7 cm in diameter.
I sewed the fabric at the ends, ironed the seams. Then, as you can see in the picture, I folded the ends towards the center and then the ends that were left over, I folded them and went over the seams. On one side, I was taking out the fabric that was already baking.
Once it was cooked, I left a small space without seams, I put the elastic in there and then I sealed it with invisible stitching. That's how pretty this scrunchie looked. My beautiful model Ámbar measured it in her hand, since that's how it's also used, even though it's a hair accessory.
Next, to make the tulips, I cut out the circles and pass seams. This step didn't turn out so well for me. First time sewing in circles, I need to practice.
To complete, I had to make a hole in the middle to turn the fabric over, and in one of the tulips I made the hole in the two layers of fabric and it was in only one.
These are inconveniences that are never missing in the sewing of this apprentice, heh, heh, heh, heh. Next time it will be better. Although the circles looked like poorly made arepas, when I sewed it in the middle, gathered and then folded, hugging the ribbon, they looked nice.
Then with the ribbon I wrapped the scrunchies, tied and made a bow and this is how pretty this accessory looks for the princesses of the house, this one is especially for my niece Asley for her 8 years, I also made other accessories, which I will show you later.
I hope you liked my project today. Thank you very much for your visit.
Mi blog es familiar, de mi día a día, en donde puedo subir fotos de niños u otras personas de mi entorno, NO autorizo a usar mis fotografías sin mi autorización.
My blog is a family blog, of my daily life, where I can upload photos of children or other people around me, I do NOT authorize you to use my photos without my authorization.
Dispositivo | Device | Samsung Galaxy A54
Fotos editadas en: |Photos edited in | CC Express for Picsart / Canva
Separadores hechos en | Separators made in | CC Express for Samsung
Traducción con | Translation with| DeepL