Saludos queridos amigos de NEEDLEWORKMONDAY, espero estéis disfrutando de un lindo día 😊❤️
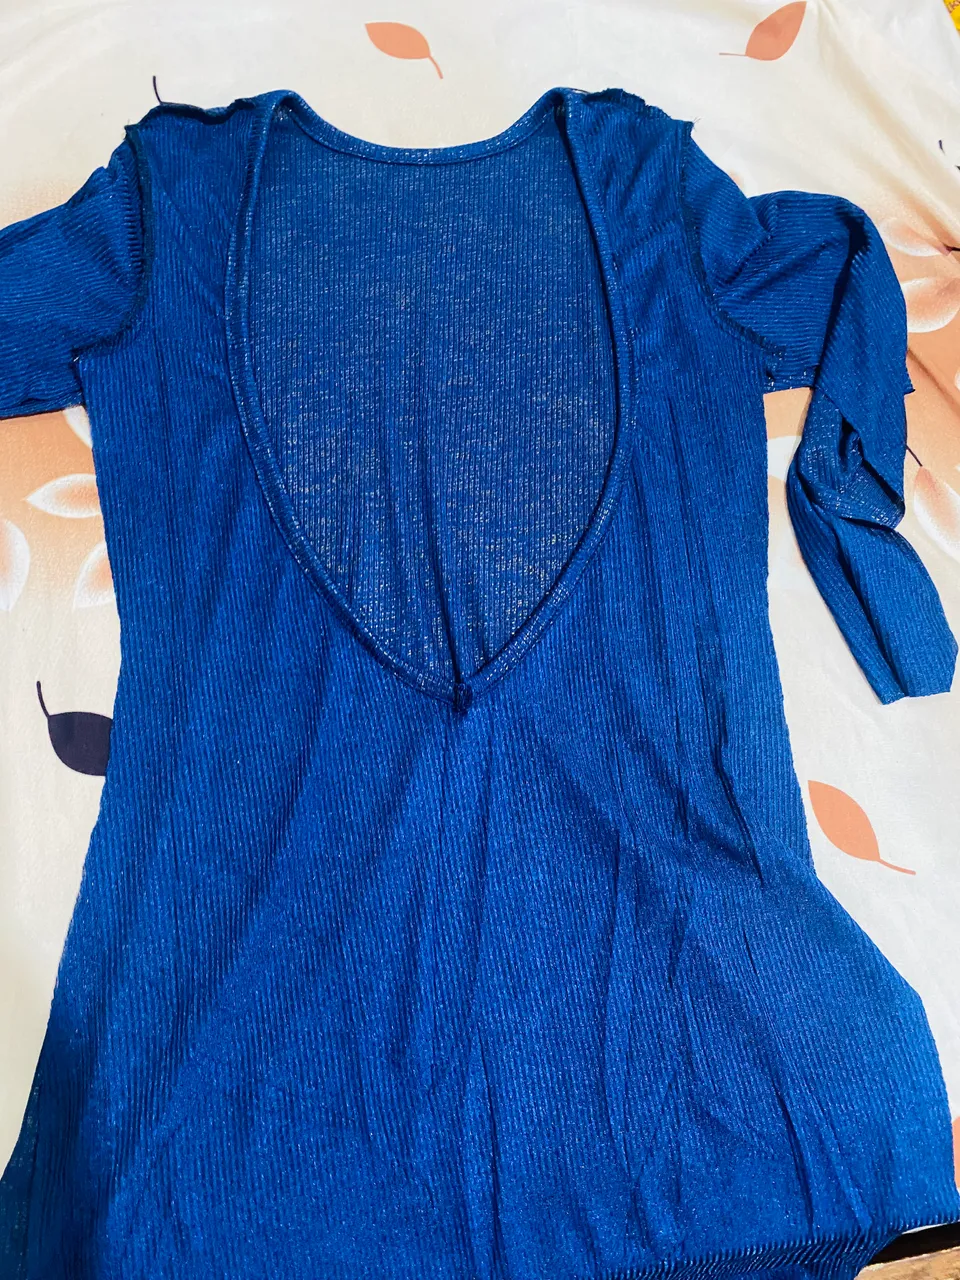
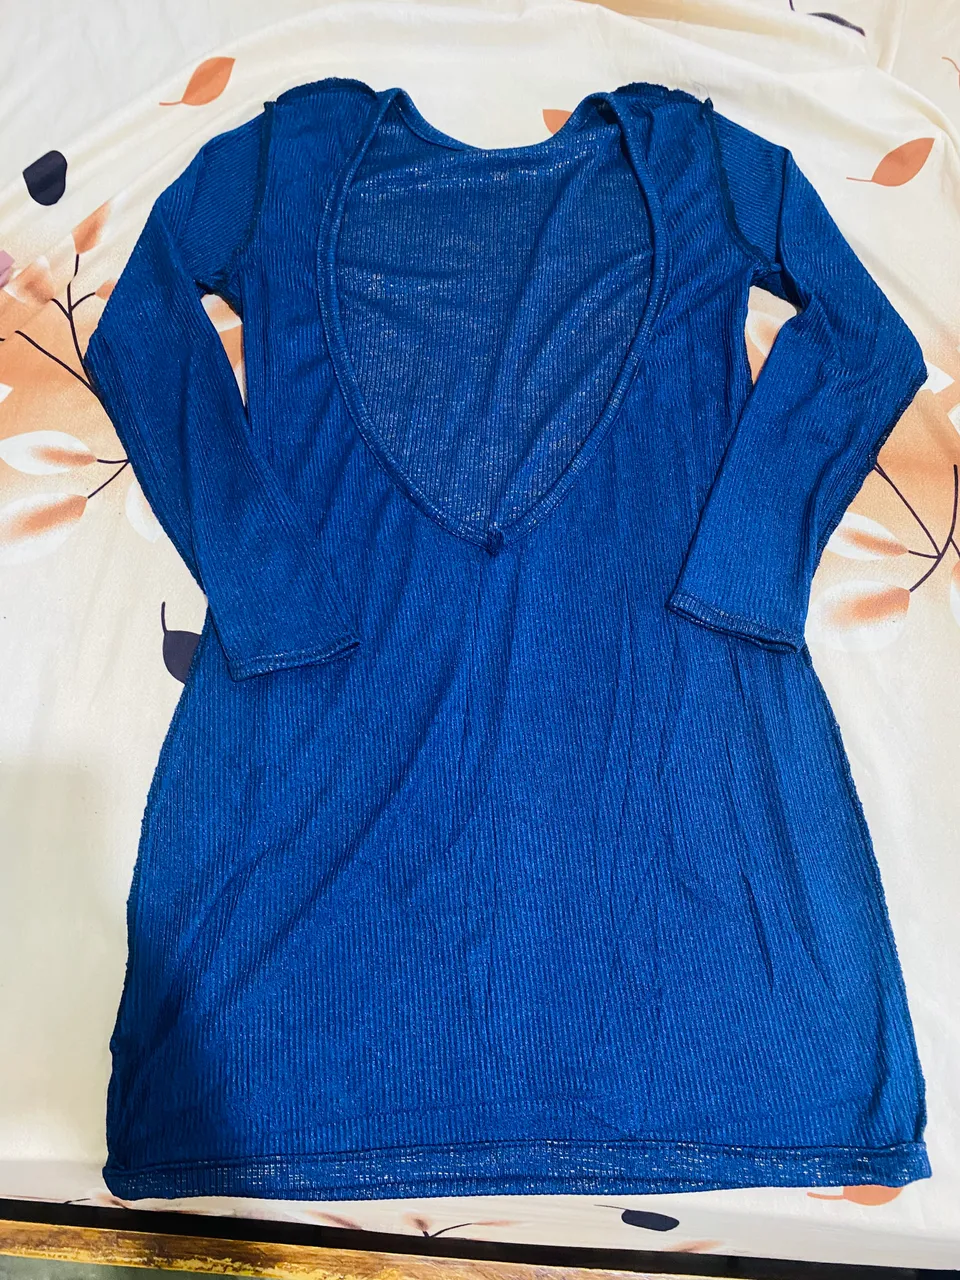
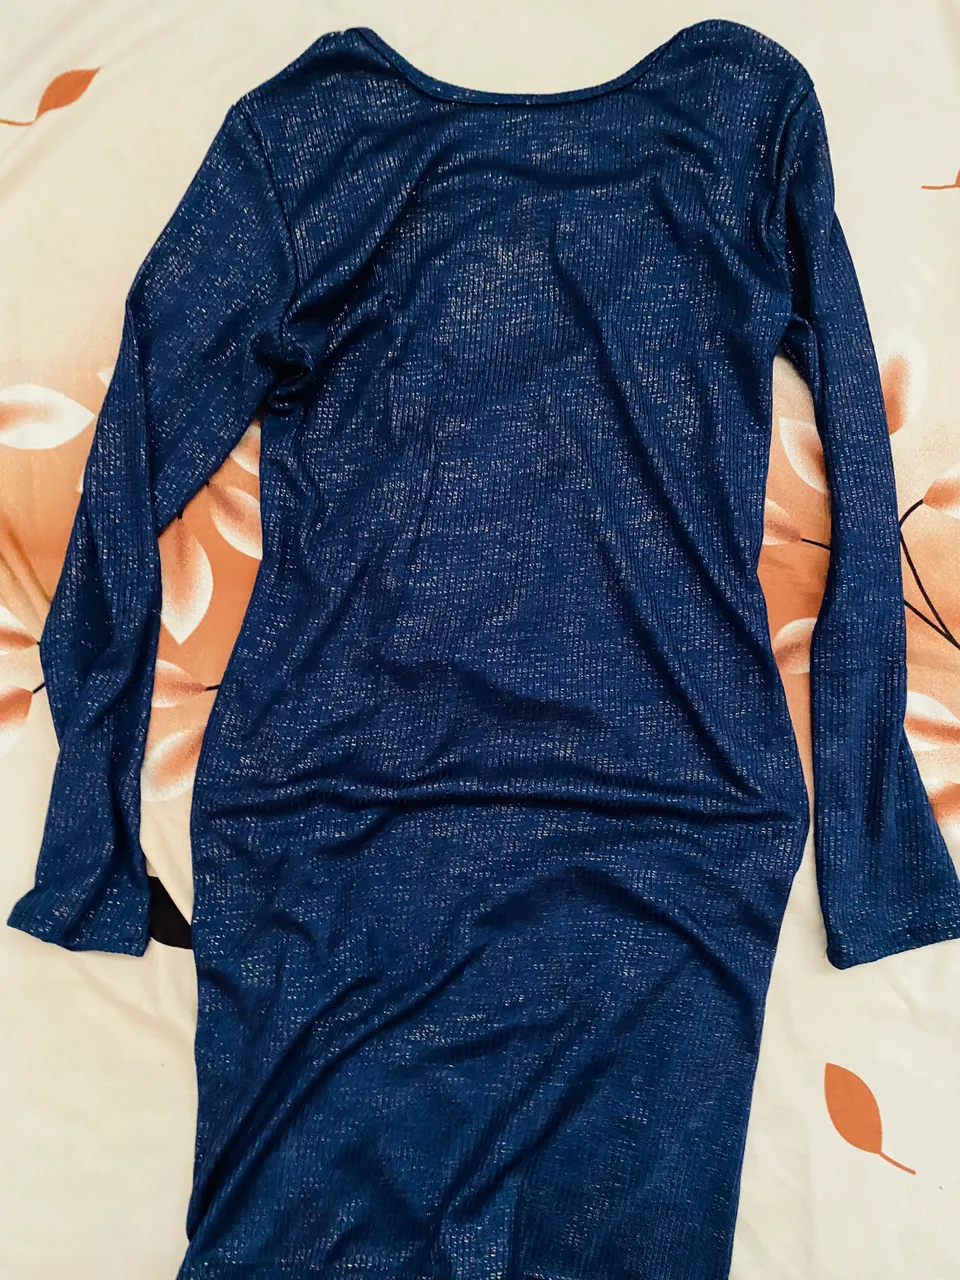
Hoy quiero compartir con ustedes la idea para copiar el modelo de un vestido pegado con escote en la espalda, pero a este le voy a hacer el agrandamiento para ajustarlo a la talla de la persona, acompáñame y te comparto el paso a paso:
Greetings, dear friends of NEEDLEWORKMONDAY, I hope you're enjoying a lovely day 😊❤️
Today I want to share with you the idea for copying a fitted dress with a low back. I'm going to enlarge this one to fit your size. Join me as I share the step-by-step instructions:

MATERIALES
MATERIALS
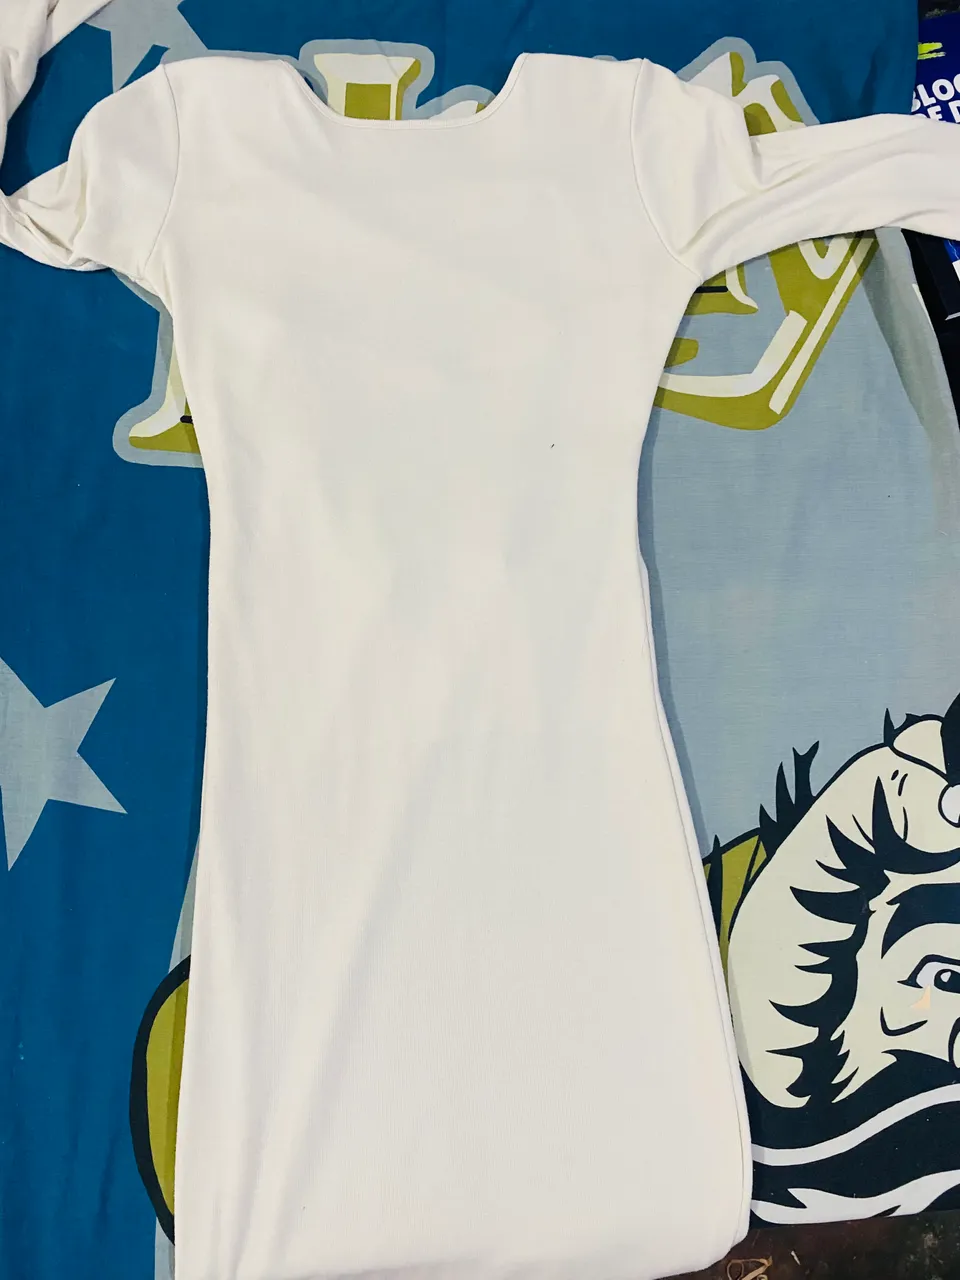
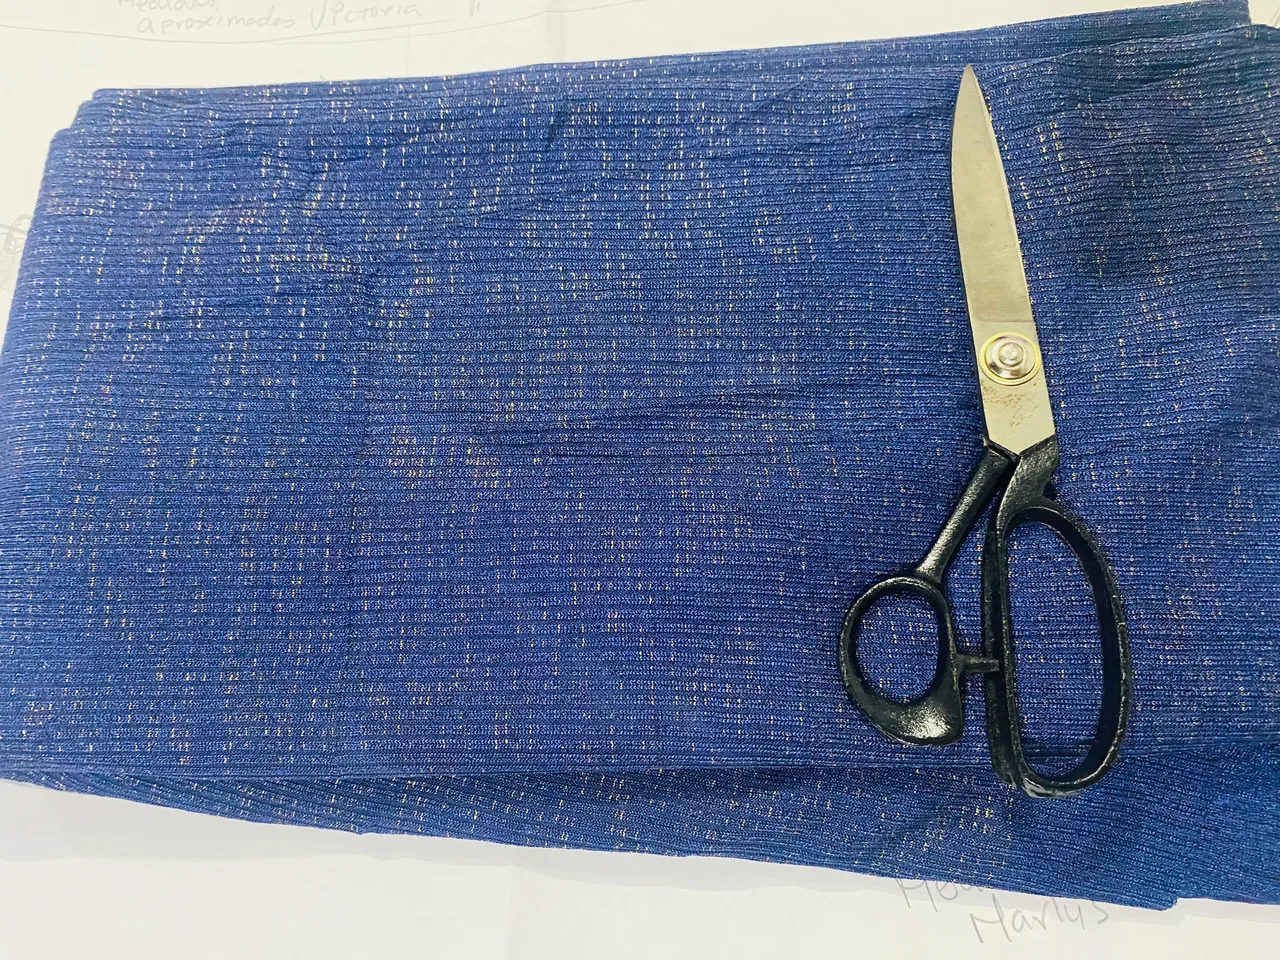
El vestido modelo que voy a utilizar es de talla S y tiene modificación para hacerlo más pequeño así que vendría siendo como una talla doble S y la chica que me pidió el vestido es aproximadamente talla M, su cintura es bastante delgada así que trataré de llevar las medidas un poco más grandes de la del vestido original, haciendo un cálculo ya que la chica que me lo pidió está lejos y no pude tomarle medidas exactas, bueno ahora si, manos a la obra, aquí les dejo la lista de materiales a utilizar:
- 1,5 m de tela Rib
- tijeras
- Vestido modelo
- Cinta métrica
- Máquina de coser
The dress model I'm going to use is a size S and has been altered to make it smaller, so it would be about a double S. The girl who ordered the dress is approximately a size M. Her waist is quite slim, so I'll try to get the measurements a little larger than the original dress, making a calculation since the girl who ordered it is far away and I couldn't take exact measurements. Now, let's get to work. Here's the list of materials to use:
- 1.5 m of ribbed fabric
- Scissors
- Dress model
- Measuring tape
- Sewing machine
 |  |
|---|---|
 |  |
PASO A PASO
STEP BY STEP
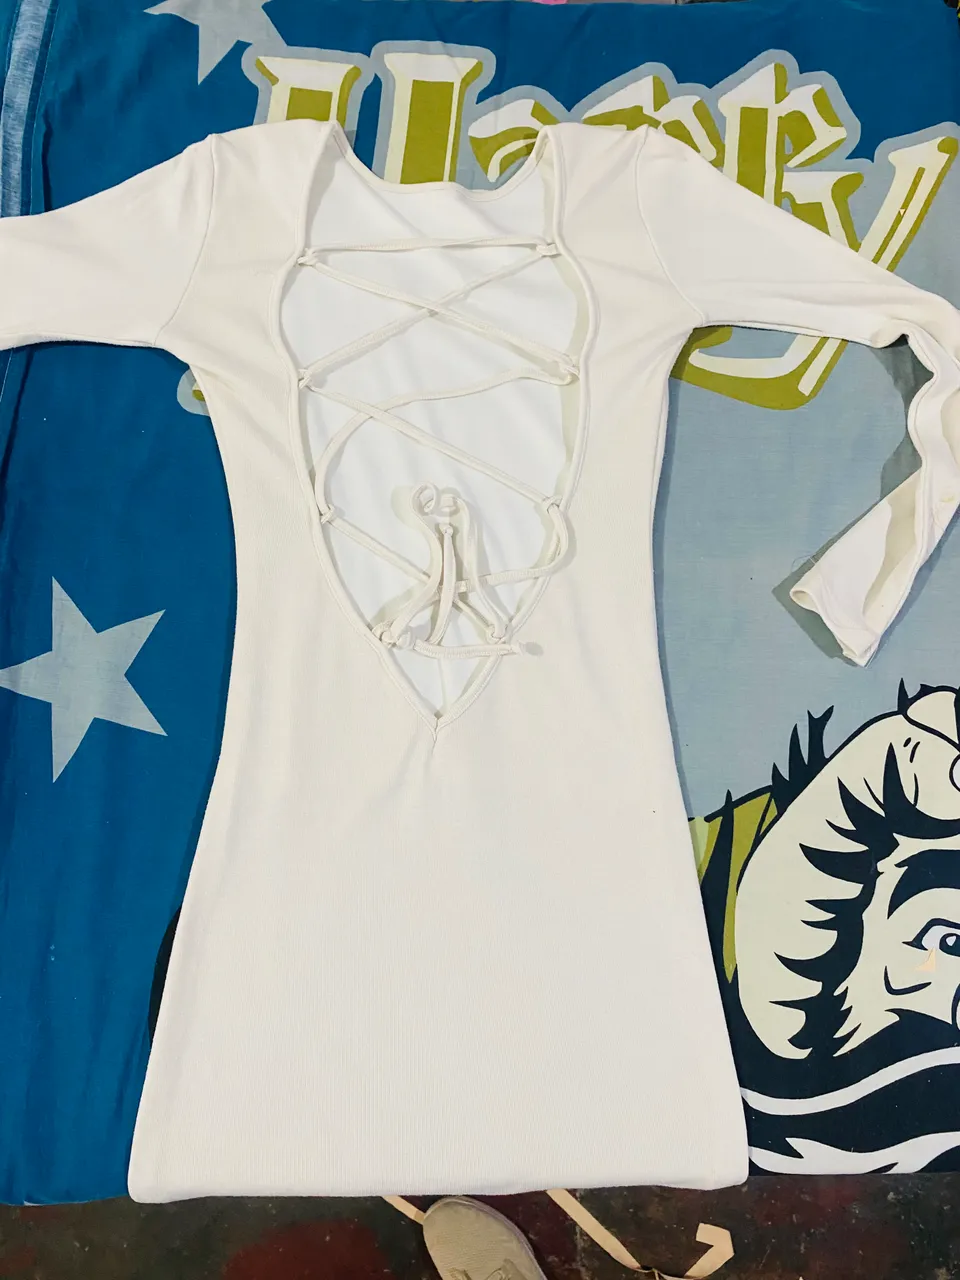
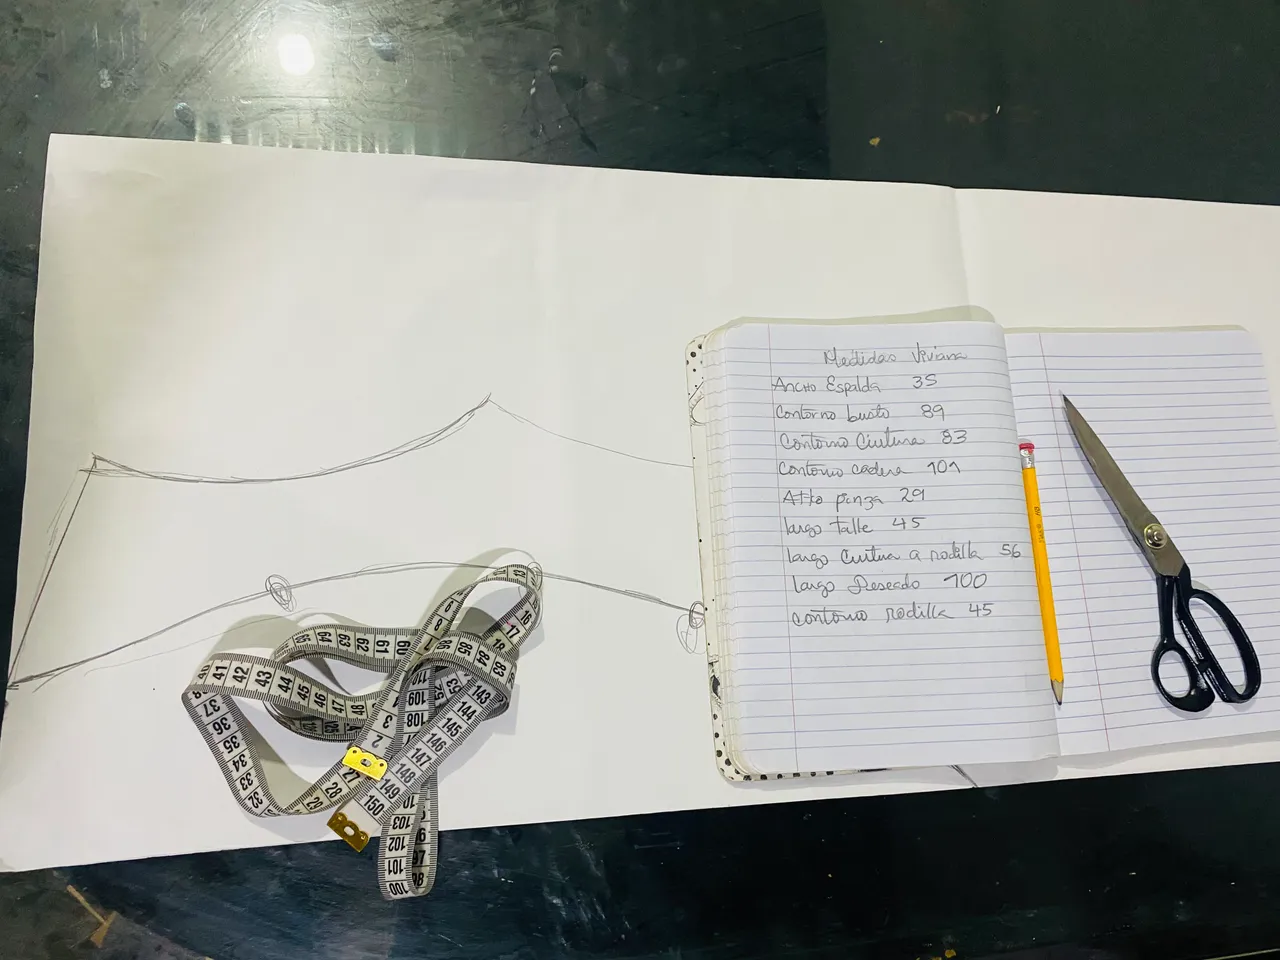
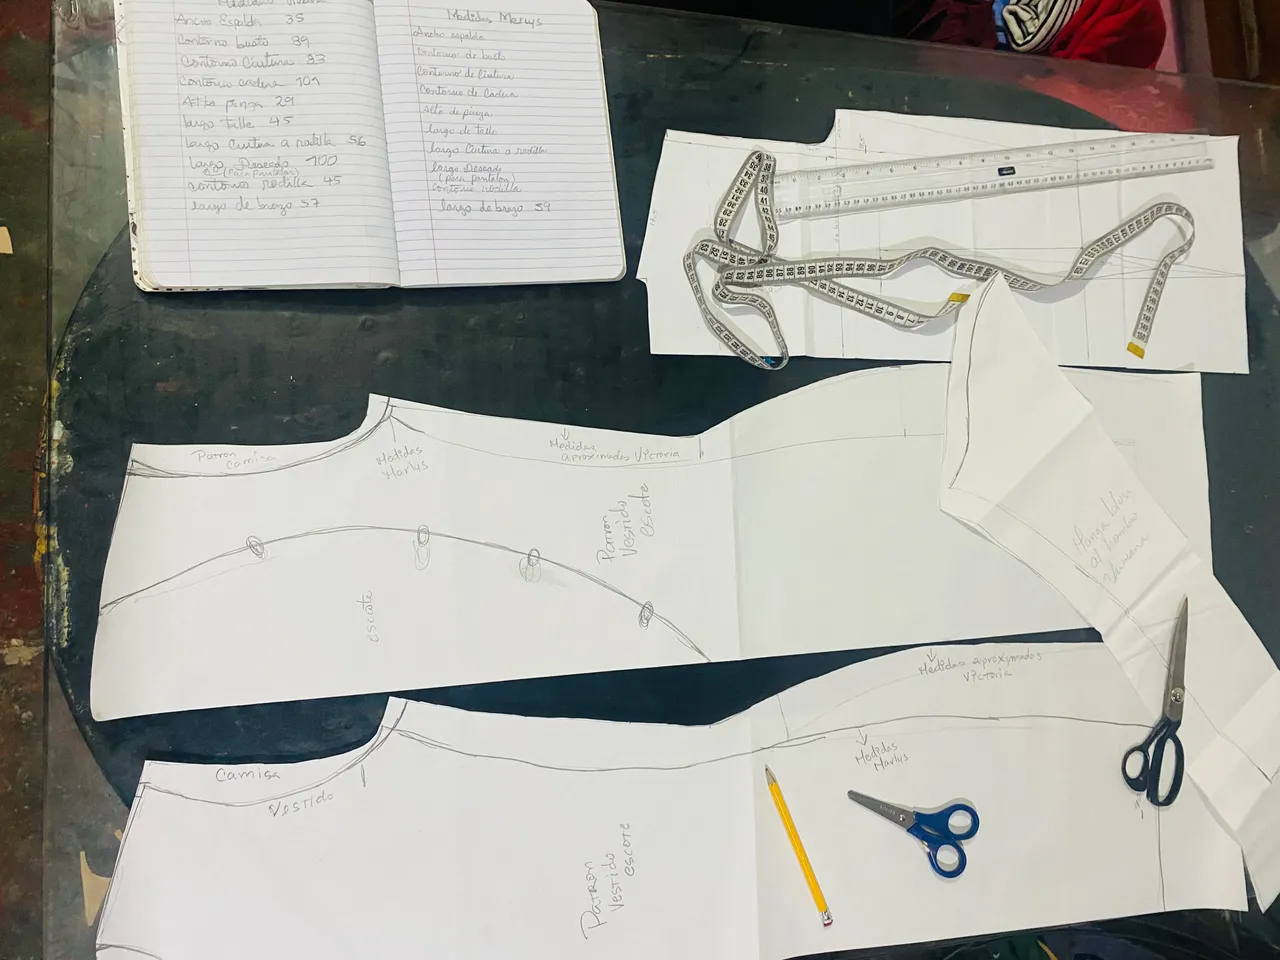
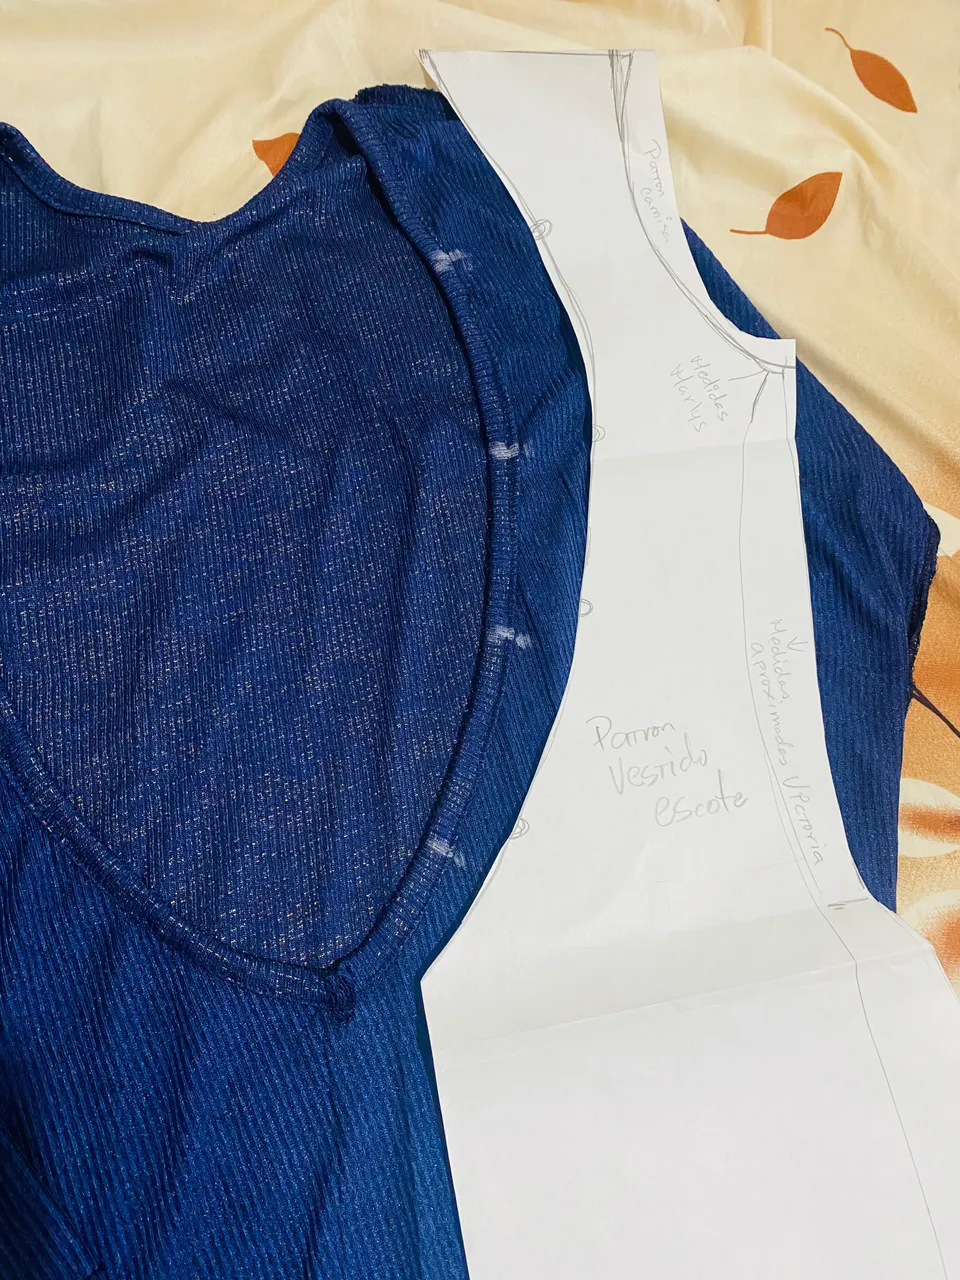
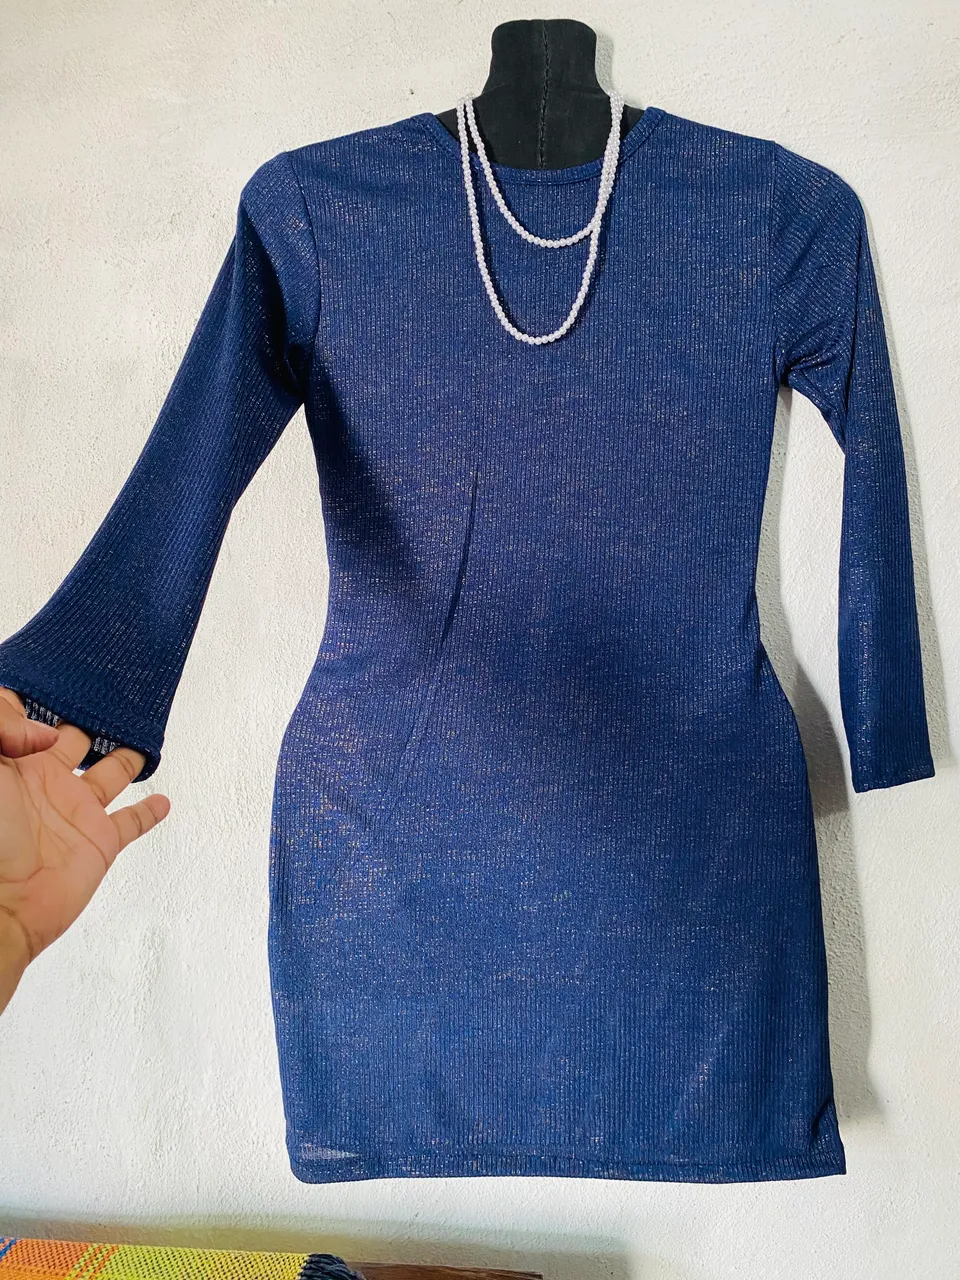
El vestido que me prestaron para guiarme lo copié sobre un papel bond doblado a la mitad por un lado copié la parte delantera y por el otro lado copié la parte de atrás, para hacer el ajuste de medidas voy a guiarme por las medidas de mi hija ya que la chica es un aproximado de sus medidas sólo que un poco más alta, corregiré la medida del contorno de cuello, contorno de busto, contorno de cintura y contorno de cadera, el escote de la espalda está perfecto lo haré de la misma medida del vestido original, también comparé con el patrón de camisa Basico de mi hija y es muy parecido, sólo le hice los ajustes en los laterales.
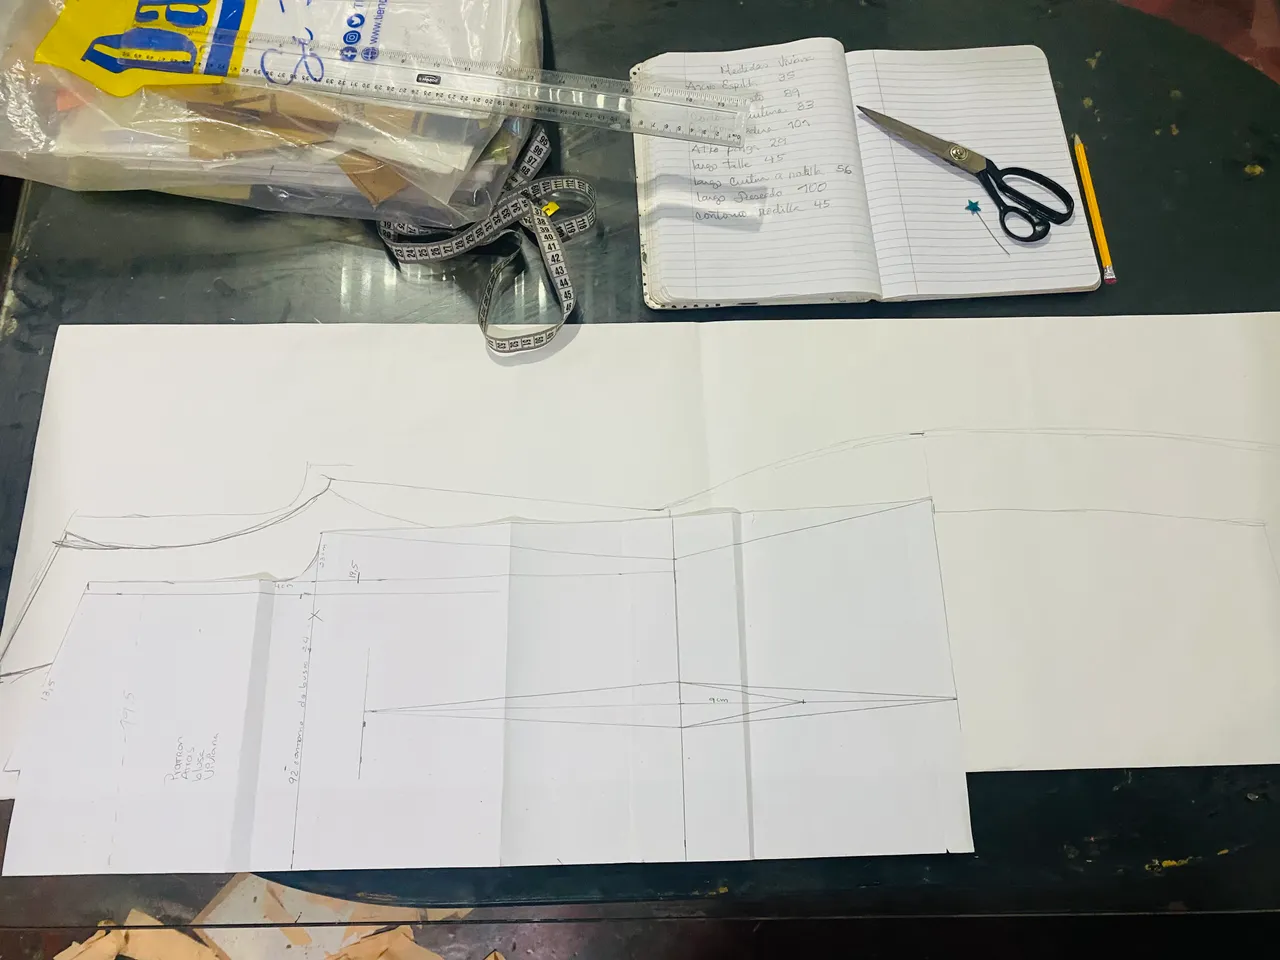
Para la manga hice el patrón, utilice la misma medida de la manga del vestido original, le hice fue un poco de modificación en el largo y ancho aumentándole 1 cm para cada lado.
The dress that they lent me to guide me, I copied onto a piece of bond paper folded in half. On one side I copied the front and on the other side I copied the back. To make the measurement adjustments, I will use my daughter's measurements as she is an approximation of her measurements, only a little taller. I will correct the measurements of the neckline, bust, waist and hips. The back neckline is perfect. I will make it the same size as the original dress. I also compared it to my daughter's Basico shirt pattern and it is very similar. I only made adjustments on the sides.
For the sleeve I made the pattern, using the same measurement as the original dress sleeve, I made a little modification in the length and width increasing it 1 cm for each side.
 |  |
|---|
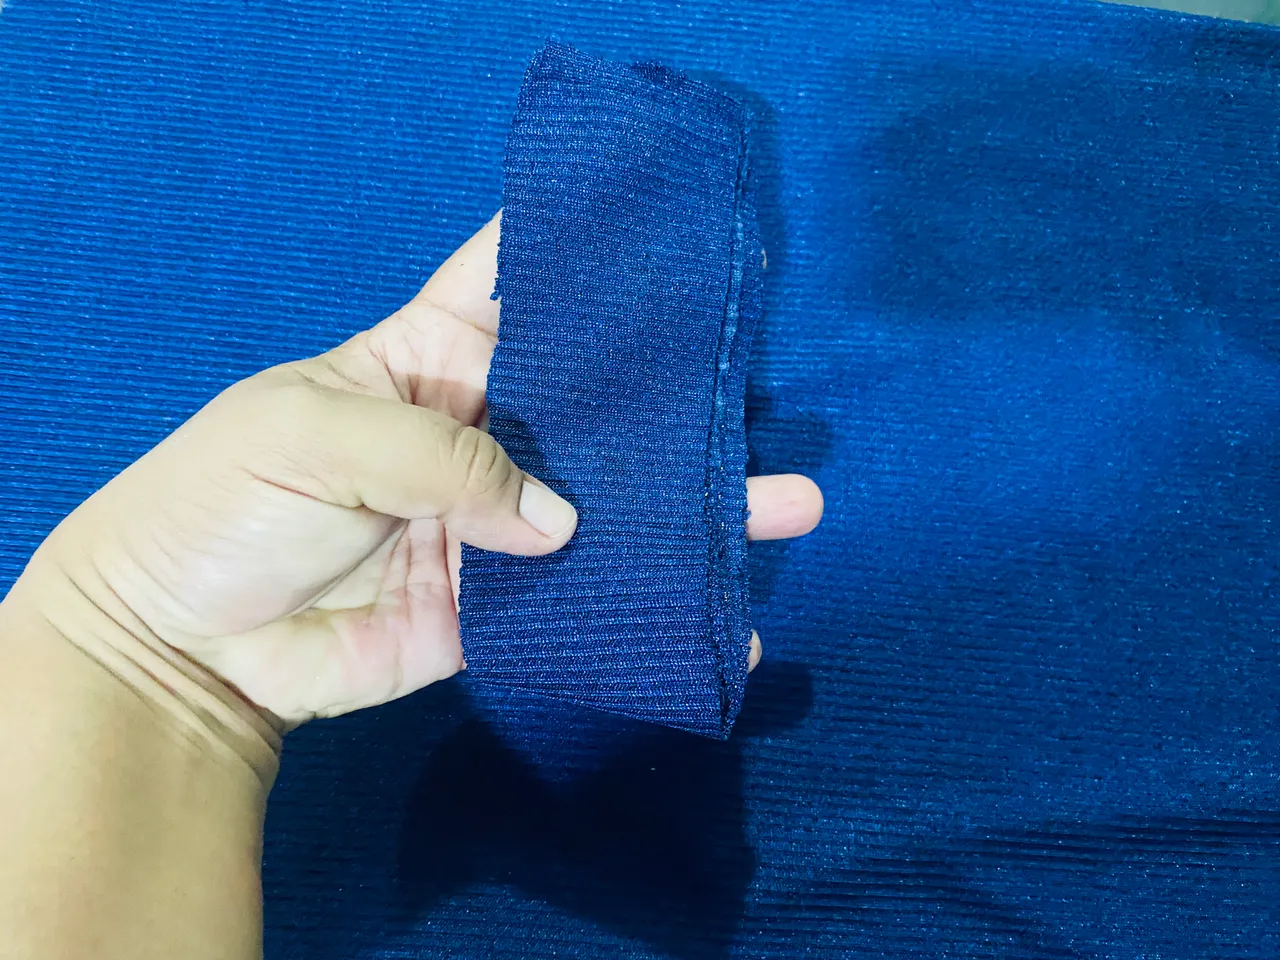
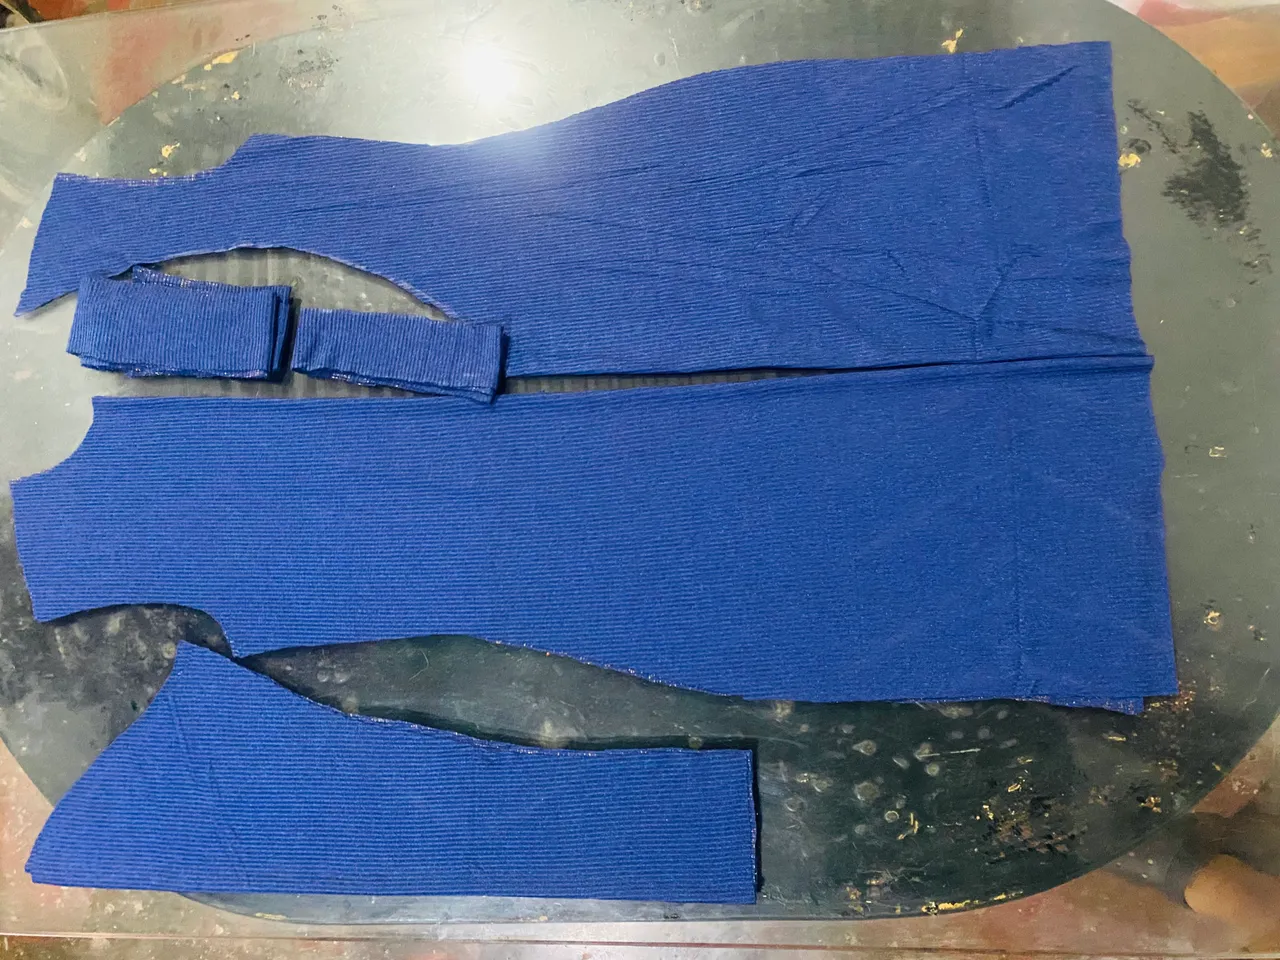
En este paso vamos a comenzar a cortar la tela, yo estoy utilizando tela Rib en color azul marino con destellos dorados, Siempre que vayamos a hacer alguna prenda que lleve sesgo en las orillas de la misma tela, es bueno que cortemos principalmente las tiras necesarias para este sesgo, lo ideal es cortar tiras de aproximadamente 5 o 6 cm, con esto es suficiente para el sesgo, para este vestido cortaré 2 tiras, una para todo el escote de la espalda y contorno de cuello y la otra será para el trenzado del escote.
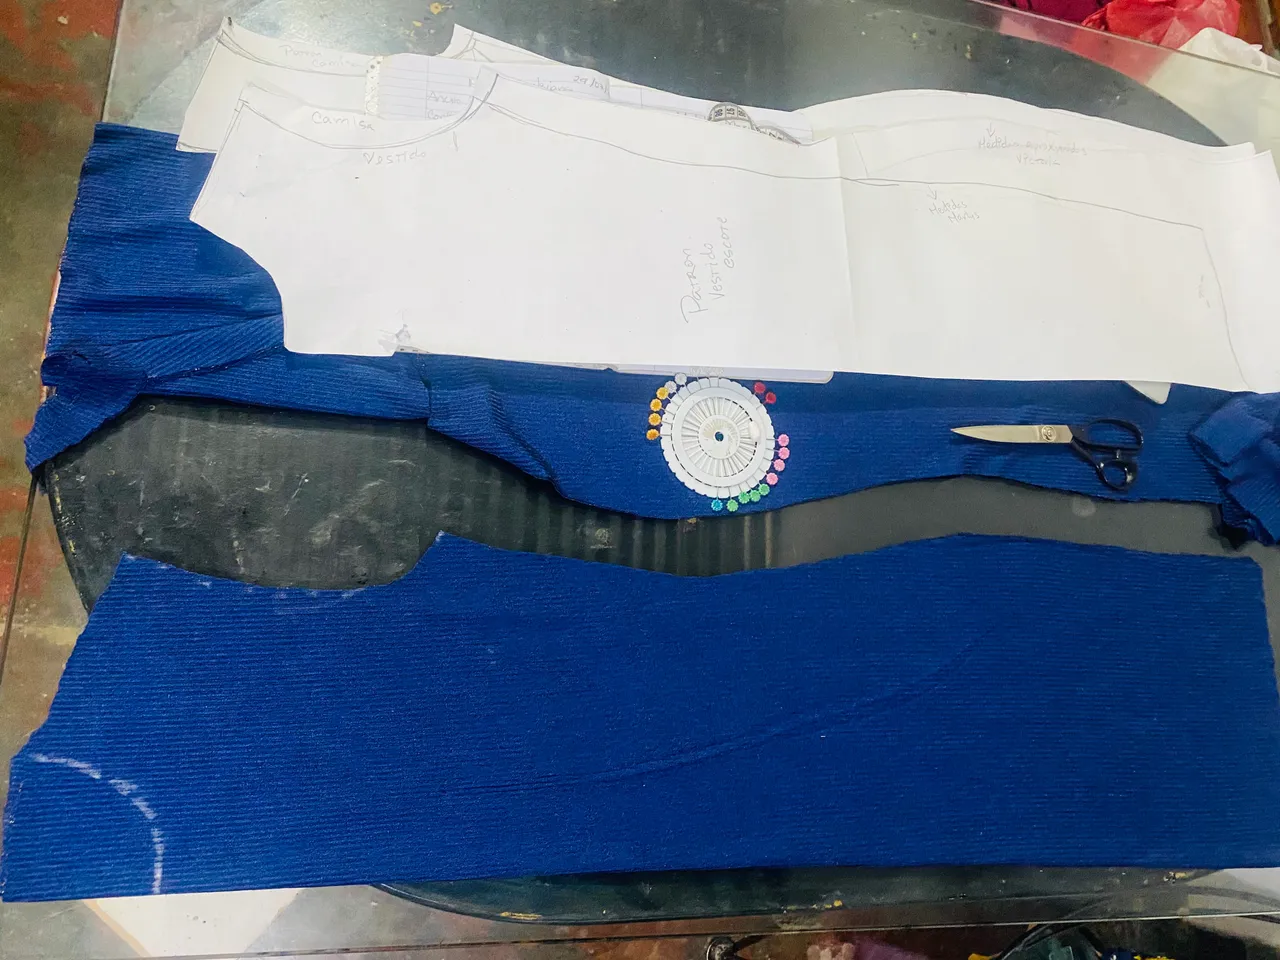
Luego con el patrón vamos a doblar la tela a la mitad calculando el ancho del vestido y colocamos el patrón sobre la misma, podemos cortar la parte delantera y la parte de atrás al mismo tiempo y luego le hacemos las modificaciones, la parte de atrás le hacemos la figura del escote y en la parte delantera le hacemos la figura del escote del cuello.
Luego con el patrón de la manga colocamos sobre la tela doblada a la mitad y cortamos dos piezas, estas tienen de largo 62 cm
In this step, we'll begin cutting the fabric. I'm using a navy blue ribbed fabric with gold sparkles. Whenever we're making a garment that has a bias cut on the edges, it's a good idea to cut the necessary strips for this bias cut. Ideally, cut strips approximately 5 or 6 cm long. This is enough for the bias cut. For this dress, I'll cut two strips: one for the entire back neckline and neckline, and the other for the neckline braiding.
Then, using the pattern, we'll fold the fabric in half, calculating the width of the dress, and place the pattern on it. We can cut the front and back at the same time, and then make the alterations. On the back, we'll make the neckline shape, and on the front, we'll make the neckline shape.
Then, using the sleeve pattern, we place the fabric folded in half on top of the fabric and cut two pieces. These are 62 cm long.
 |  |
|---|---|
 |  |
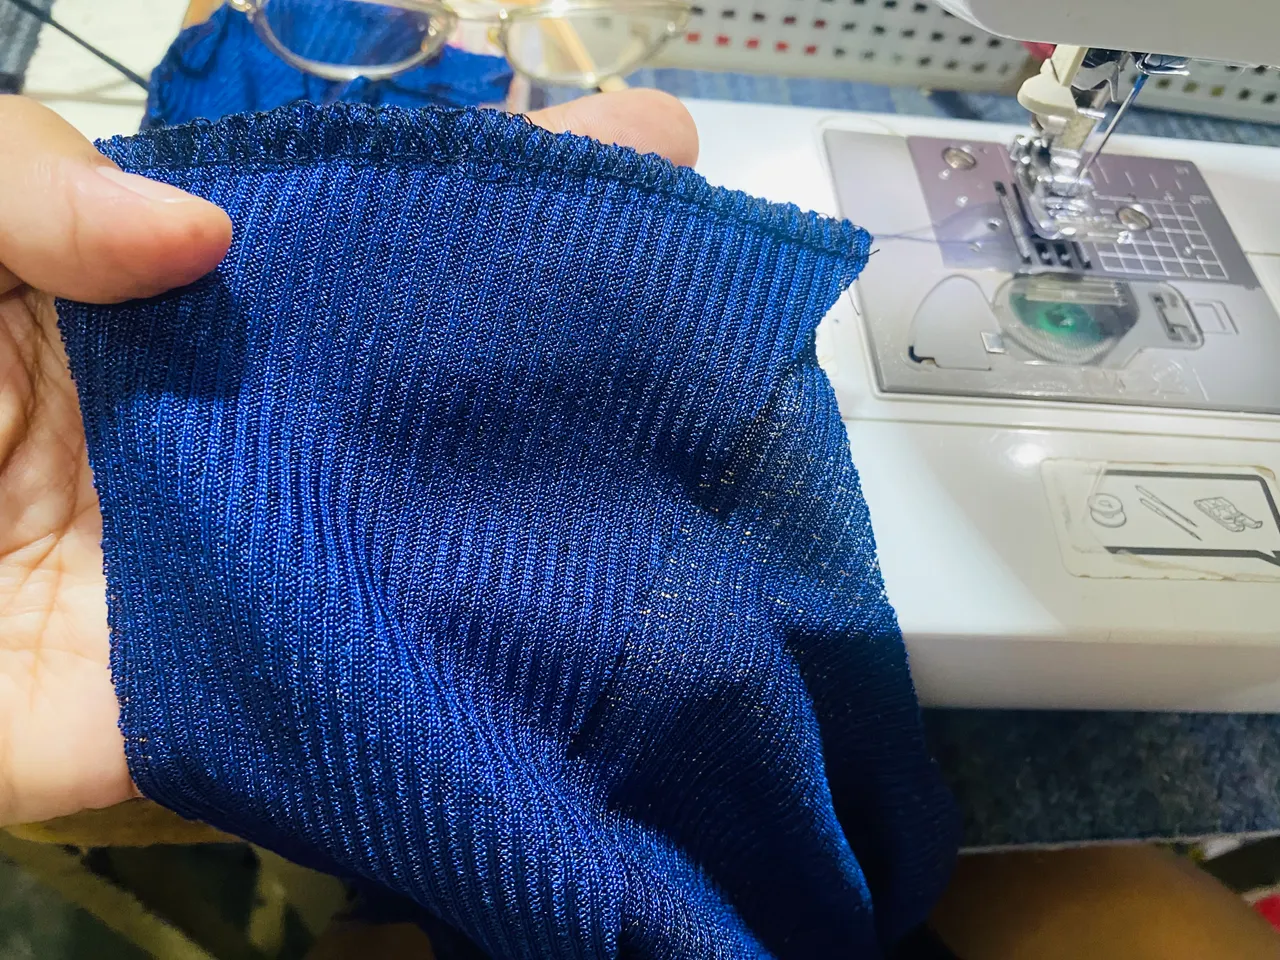
Para el siguiente paso vamos a comenzar con las costuras, comenzaremos uniendo por el área de hombros, luego vamos a coser el sesgo por toda la orilla del contorno de cuello y el escote de espalda todo esto va unido estiramos el sesgo my poco para que no quede tan fruncido, en la parte de atrás le vamos a hacer la forma de V uniendo ambas orillas de sesgo con costura.
Luego le vamos a unir con costura las mangas, yo uno con Overlook y luego le paso costura recta para reforzar
For the next step, we'll start with the seams. We'll start by joining them at the shoulder area. Then, we'll sew the bias tape along the entire edge of the neckline and the back neckline. All of this will be joined together. We'll stretch the bias tape very slightly so it doesn't bunch up too much. On the back, we'll make a V shape by joining both bias tape edges with a seam.
Next, we'll sew the sleeves together. I sew them with an Overlook seam and then use a straight seam to reinforce them.
 |  |
|---|---|
 |  |
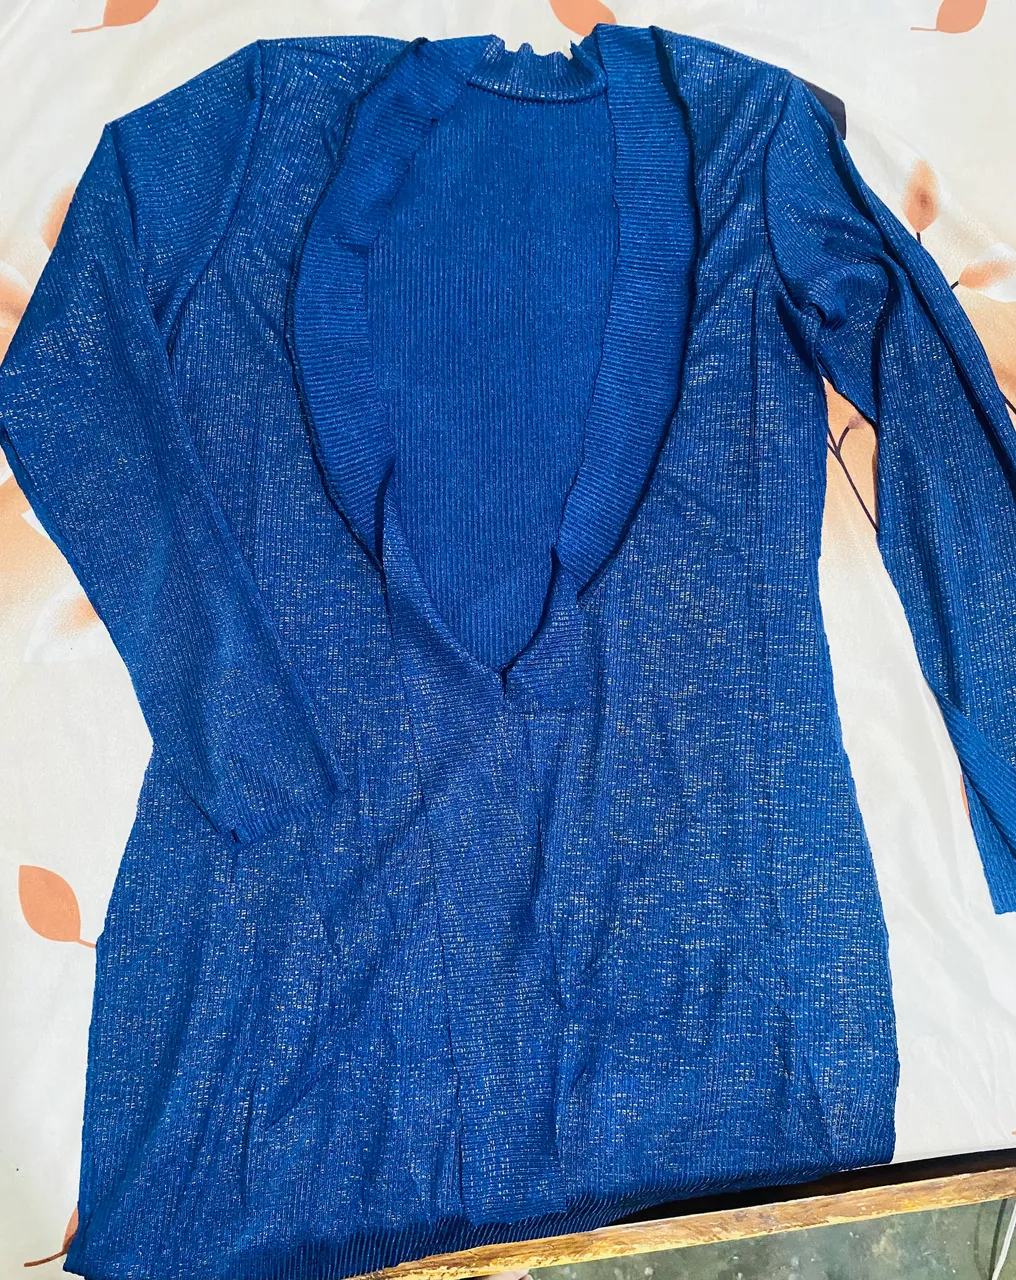
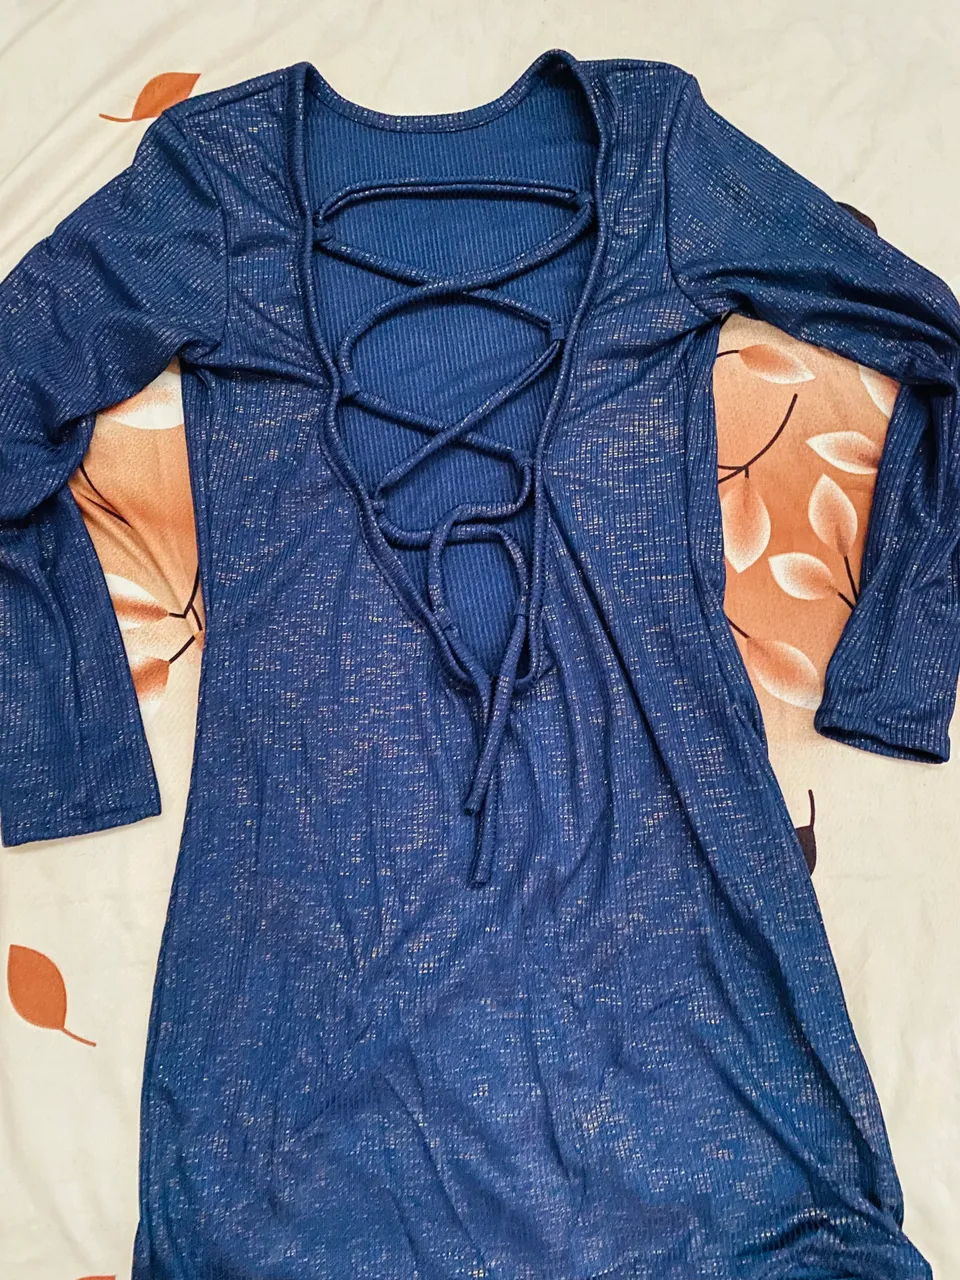
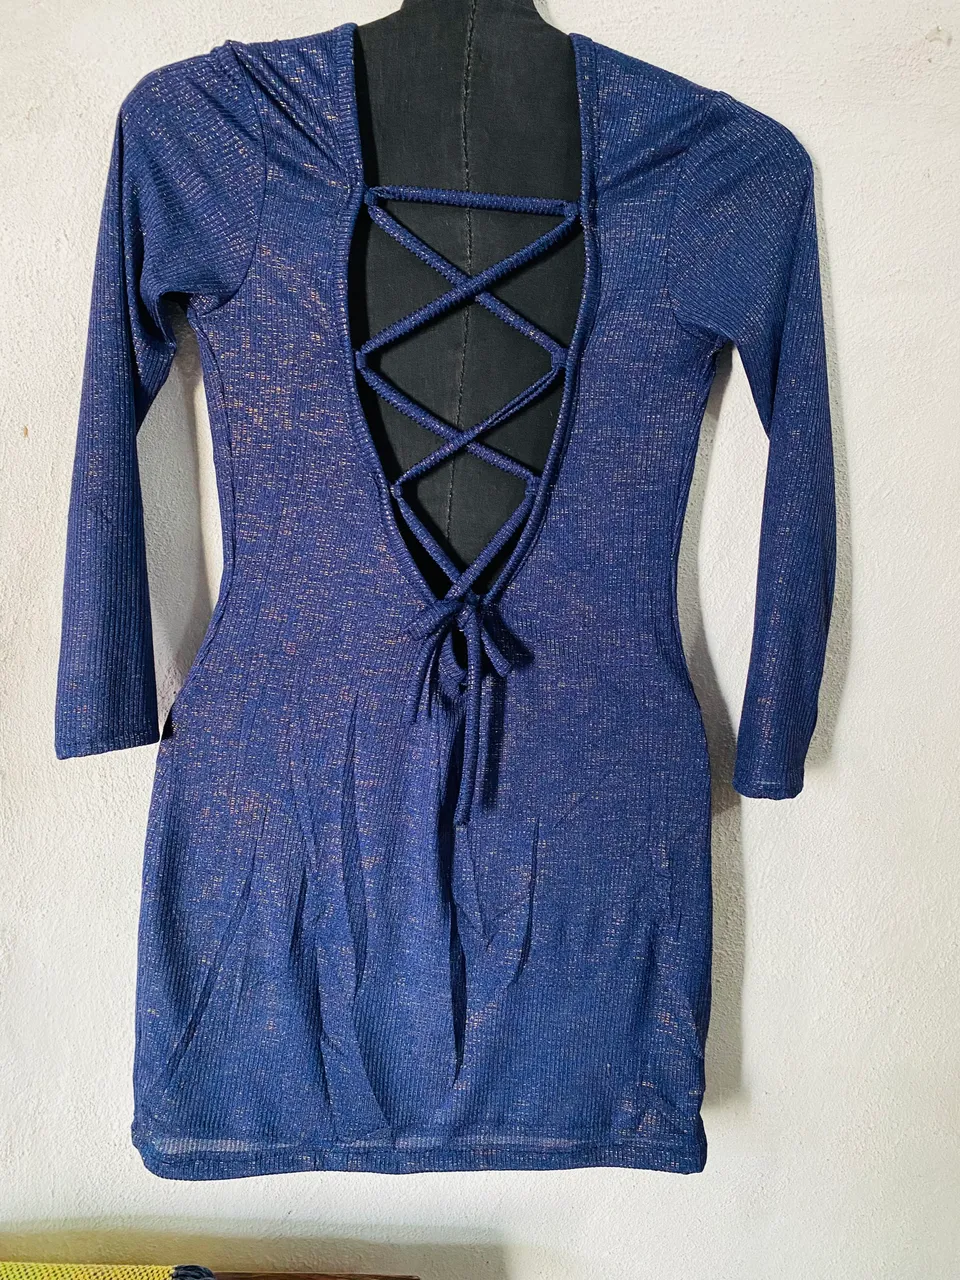
Para hacer la tira del trenzado podemos cortar esta de 5 cm de ancha, dóblanos a la mitad y cosemos por toda la orilla, luego volteamos, hacemos una tira más pequeña para hacer los ojales en el escote, marco con tiza en donde va cada ojal y luego los voy uniendo al vestido con costura, luego uno el vestido por todas las orillas de los laterales y para finalizar hago ruedo en las mangas y en la parte inferior del vestido, le introduzco la tira en los ojales para hacer el trenado en la parte de atrás y así ya está listo este lindo vestido.
To make the braid strip we can cut this one 5 cm wide, fold it in half and sew along the entire edge, then turn it over, make a smaller strip to make the buttonholes in the neckline, mark with chalk where each buttonhole goes and then I join them to the dress with sewing, then I join the dress along all the edges of the sides and to finish I hem the sleeves and the bottom of the dress, I insert the strip into the buttonholes to make the braiding in the back and that's how this cute dress is ready.
 |  |
|---|---|
 |  |
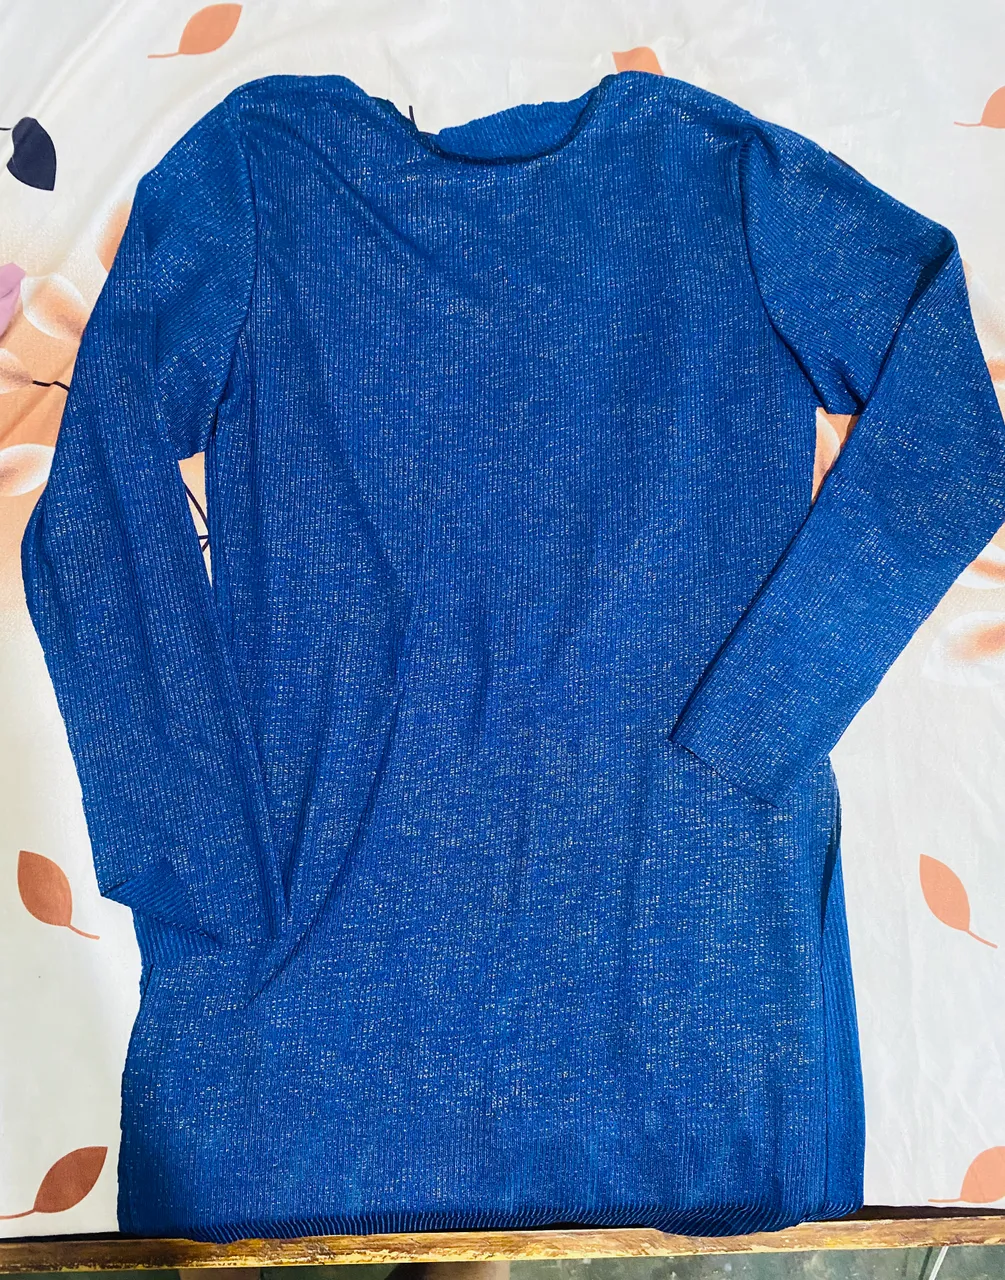
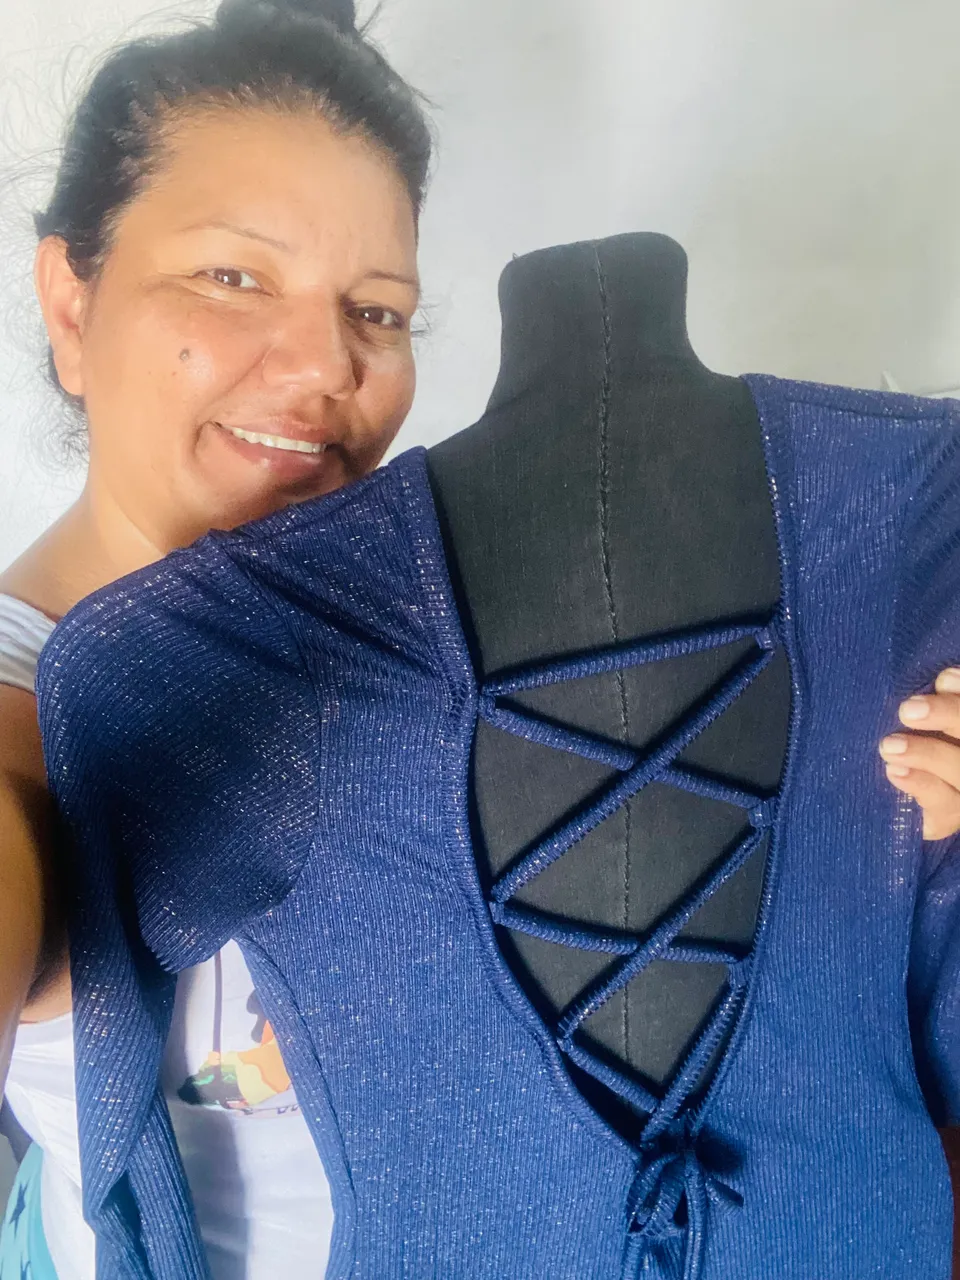
Me gustó mucho la confección de este vestido, me pareció bastante sencillo el copiar y ajustar la talla, el modelo es juvenil y muy bonito, me ha encantado el resultado, espero les guste también, me despido por hoy deseándoles muchos éxitos y bendiciones, hasta otra oportunidad
I really liked making this dress, I found it quite easy to copy and adjust the size, the model is youthful and very pretty, I loved the result, I hope you like it too, I say goodbye for today wishing you much success and blessings, until another opportunity

las fotos aquí compartidas son de mi propiedad tomadas con mi teléfono iPhone 11, la edición fue hecha en Canva, para la traducción del inglés utilice el traductor de Google