Feliz y bendecido noche para ustedes! Espero que todos se encuentren muy bien llenos de mucha alegría y paz ! Déjenme decirles que los extrañé muchísimo y es que bueno hace unos días cambié de hogar y el estrés de esos días hacía que se me hiciera muy difícil tomarme un tiempo para coser, sin embargo ya me encuentro estable y con una nueva idea de costura a mano para mostrarles...
Happy and blessed night to you! I hope everyone is very well filled with much joy and peace! Let me tell you that I missed you very much and it's just that a few days ago I changed homes and the stress of those days made it very difficult for me to take time to sew, however I already feel stable and with a new idea of sewing by hand to show you...
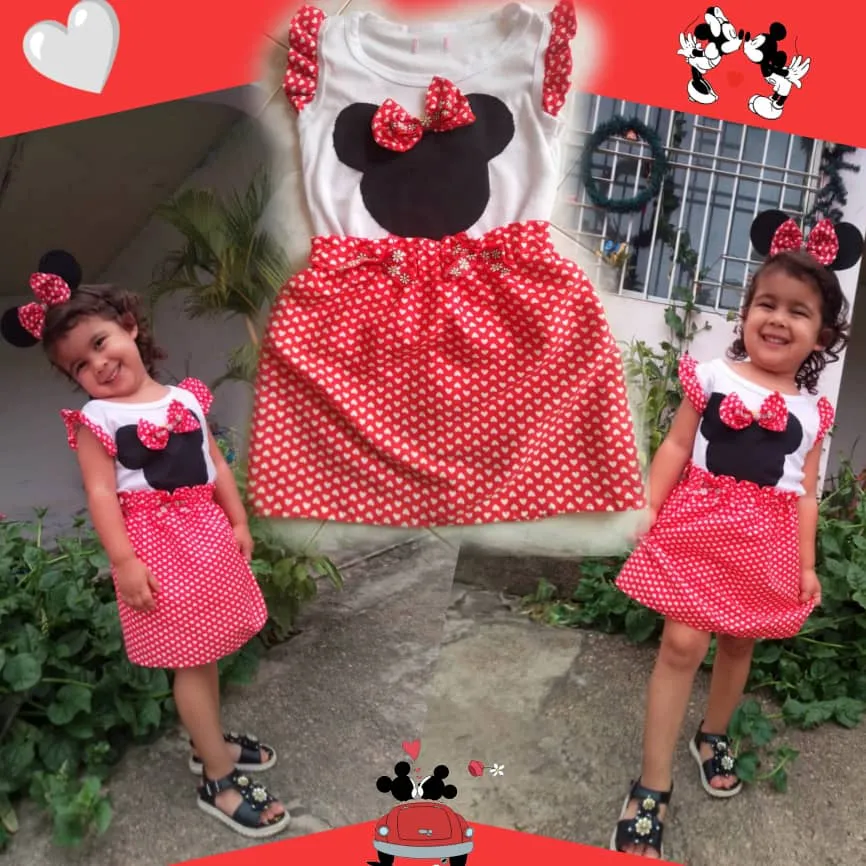
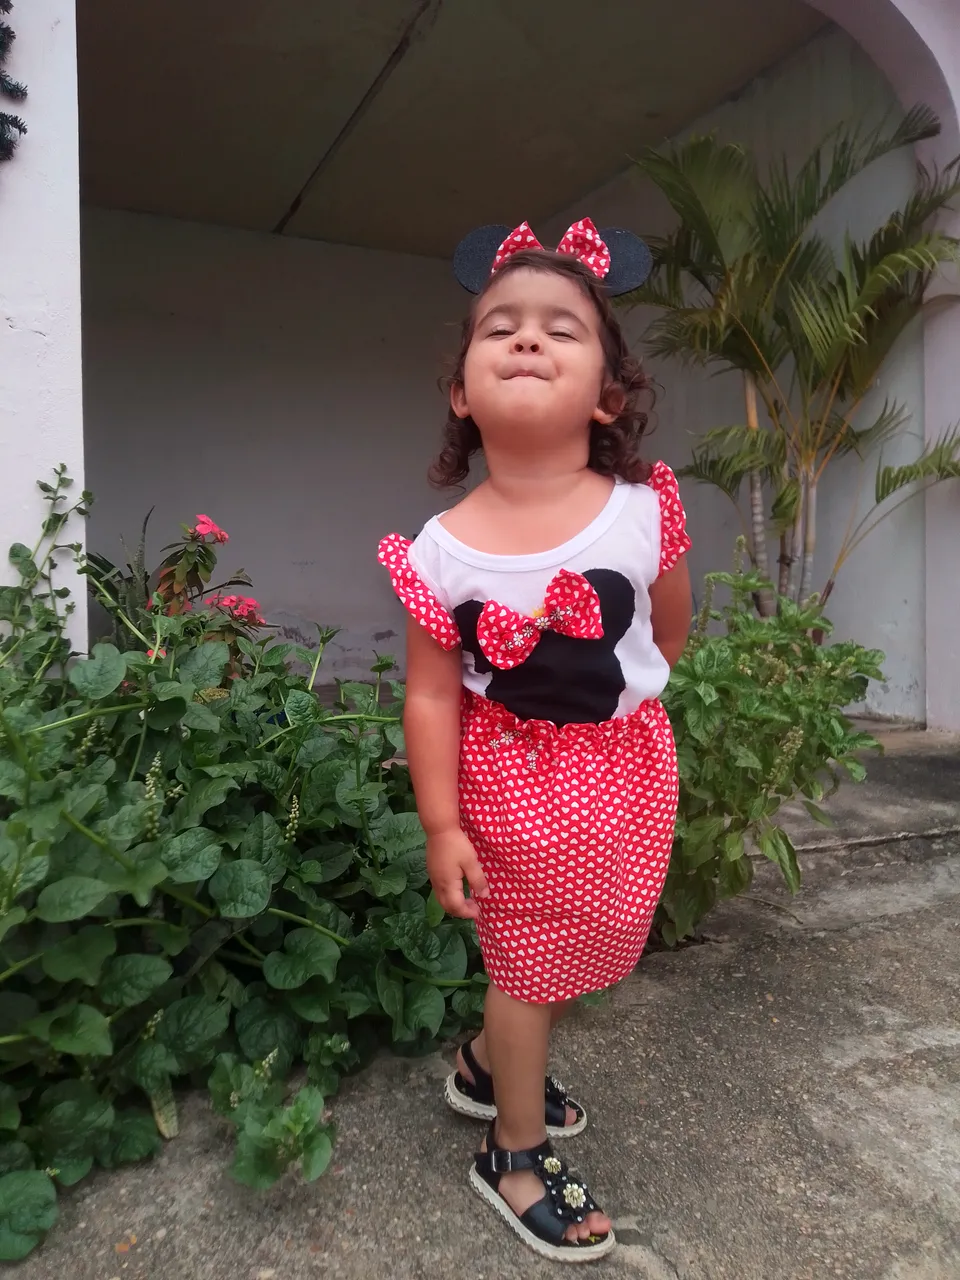
Está vez tengo un motivo muy especial para querer hacer algo en específico; mi pequeña hija está cumpliendo 3 añitos y su amor por la coqueta ratoncita Minnie Mouse ha hecho que por cuenta quiera que su celebración sea de este divertido personaje, insistentemente me pregunta a cada rato que cuando será su cumpleaños de Minnie jajaja, pero puedo calmarla y decirle que falta poco y que ya le estoy haciendo la ropita que usará.
This time I have a very special reason for wanting to do something specific; my little daughter is turning 3 years old and her love for the flirtatious little mouse Minnie Mouse has made her want her celebration to be of this funny character, she insistently asks me every so often when her Minnie birthday will be hahaha; but I can calm her down by telling her that it won't be long and that I'm already making her the clothes she'll wear.
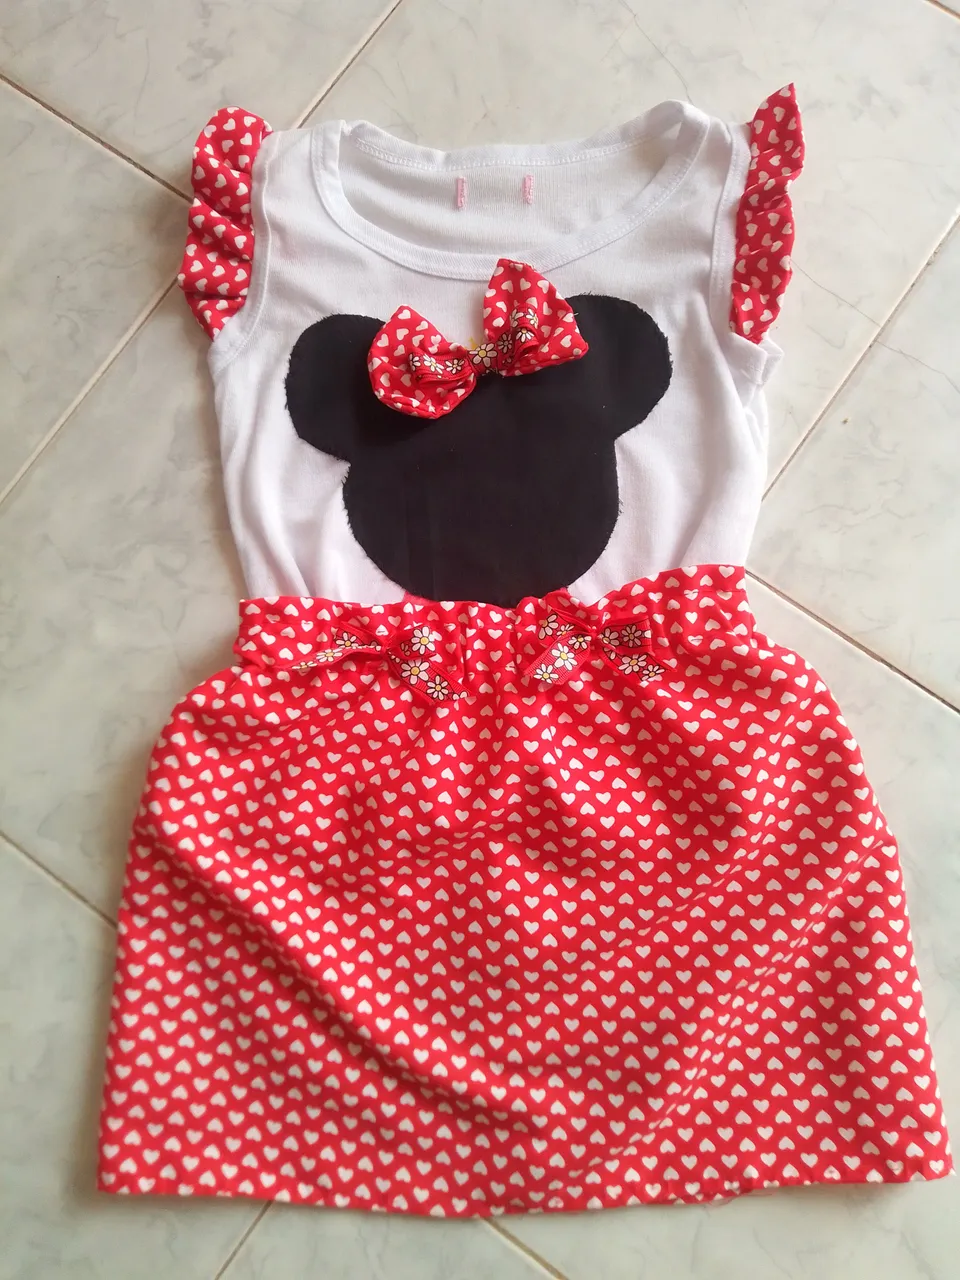
Por esta razón realicé un hermoso conjunto compuesto por un linda falda de corazones sencilla de hacer y una increíble transformación utilizando de una camisa de su uso diario bordado con la silueta de la linda ratoncita. No te pierdas este tutorial el cual contiene lindísimas imágenes que te gustarán. Te invito a leer hasta el final! Vamos!
For this reason, I made a beautiful set consisting of a beautiful skirt with hearts, easy to make, and an incredible transformation using a shirt for daily use embroidered with the silhouette of the cute little mouse. Do not miss this tutorial which contains beautiful images that you will like. I invite you to read until the end! Come on!
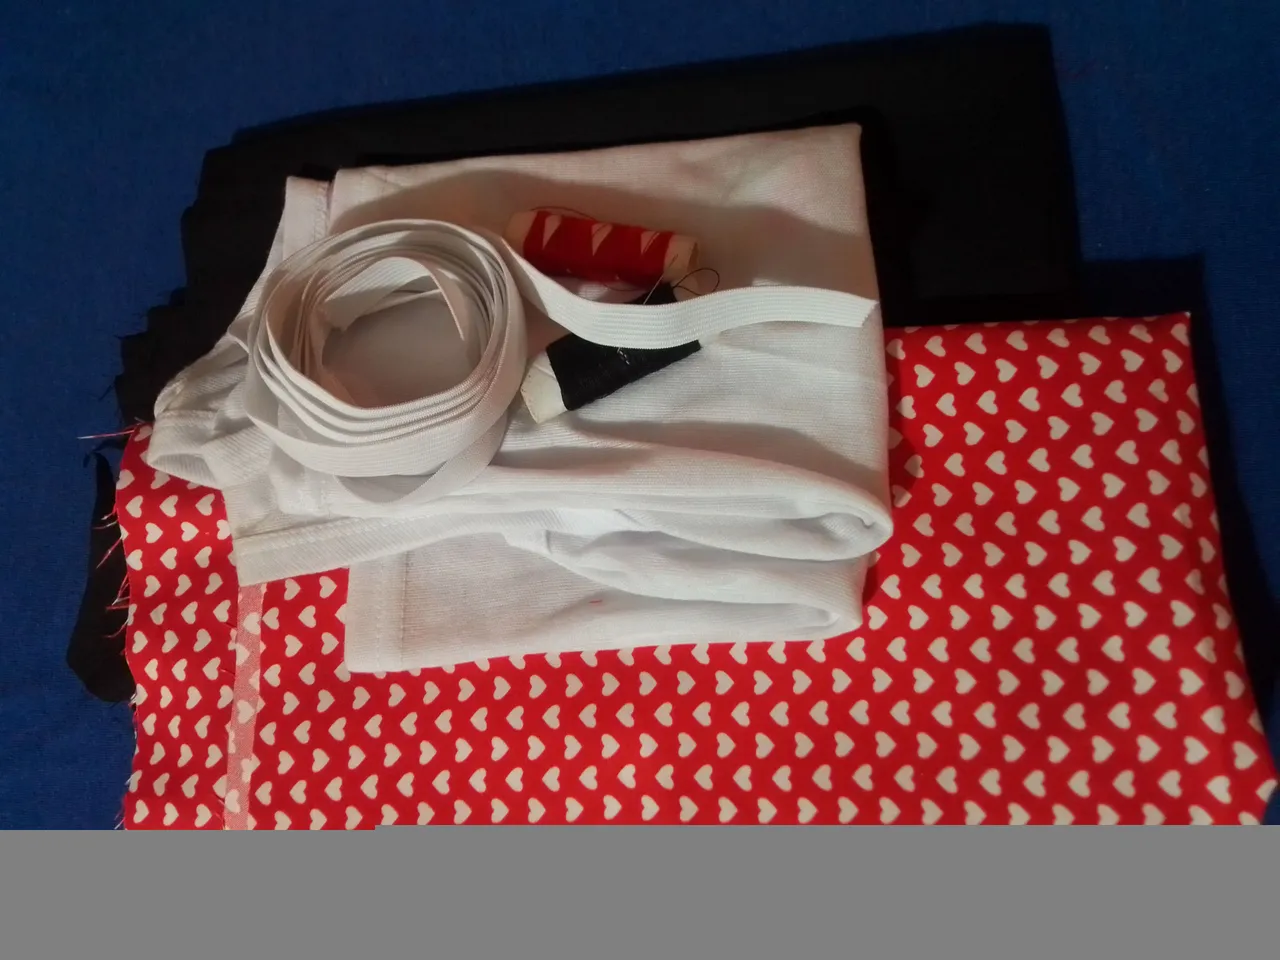
Materiales que necesitas:
- Tela estampada.
- Tela negra.
- Camiseta blanca.
- Goma elástica.
- Tijera.
- Hilo negro, rojo y aguja.
- Cinta.
Materials you need:
- Printed cloth.
- Black cloth.
- White T-shirt.
- Elastic rubber.
- Scissors.
- Black, red thread and needle.
- Ribbon.
(PROCEDIMIENTO)
Paso 01
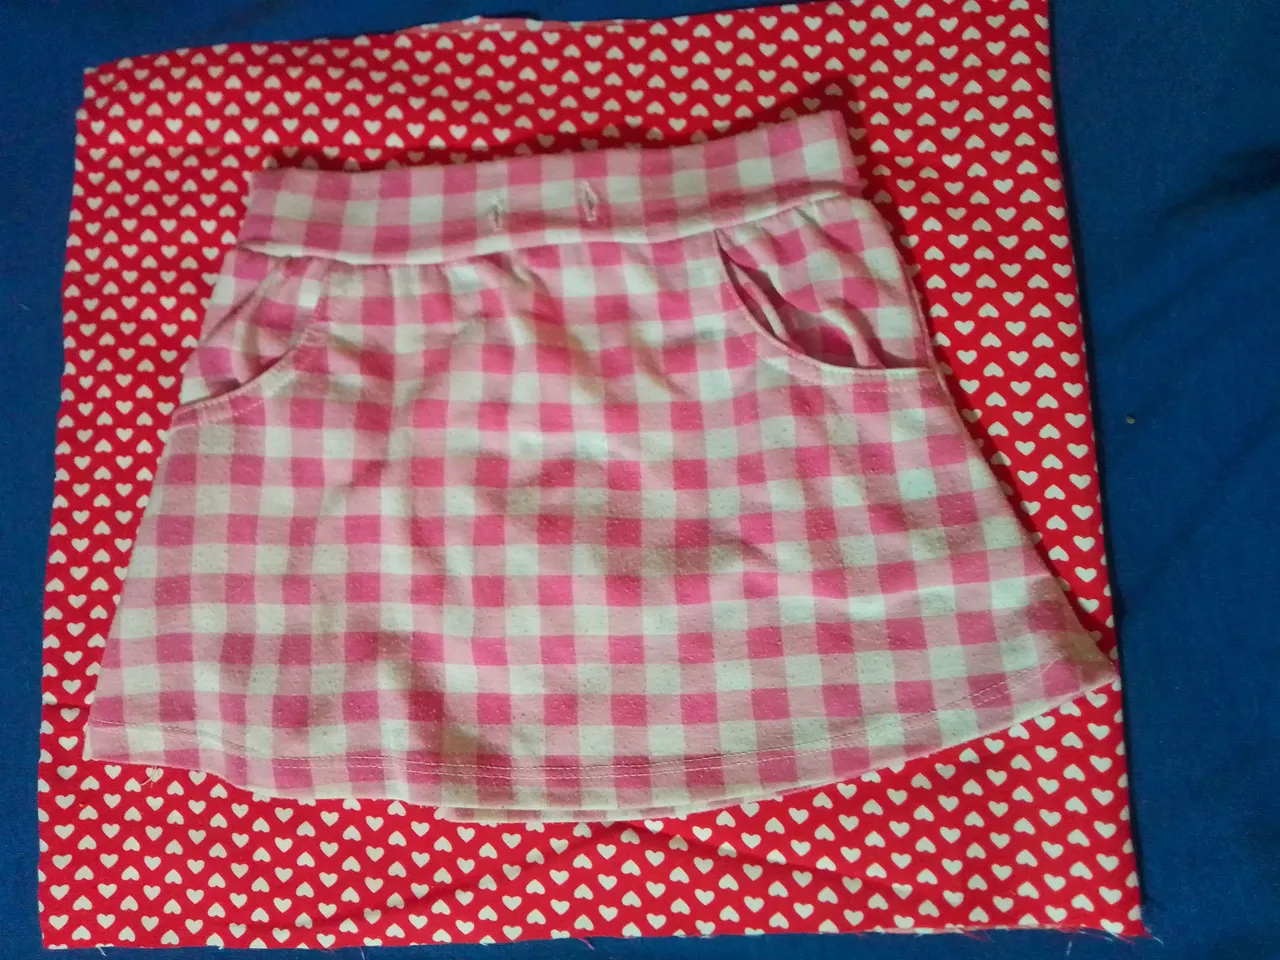
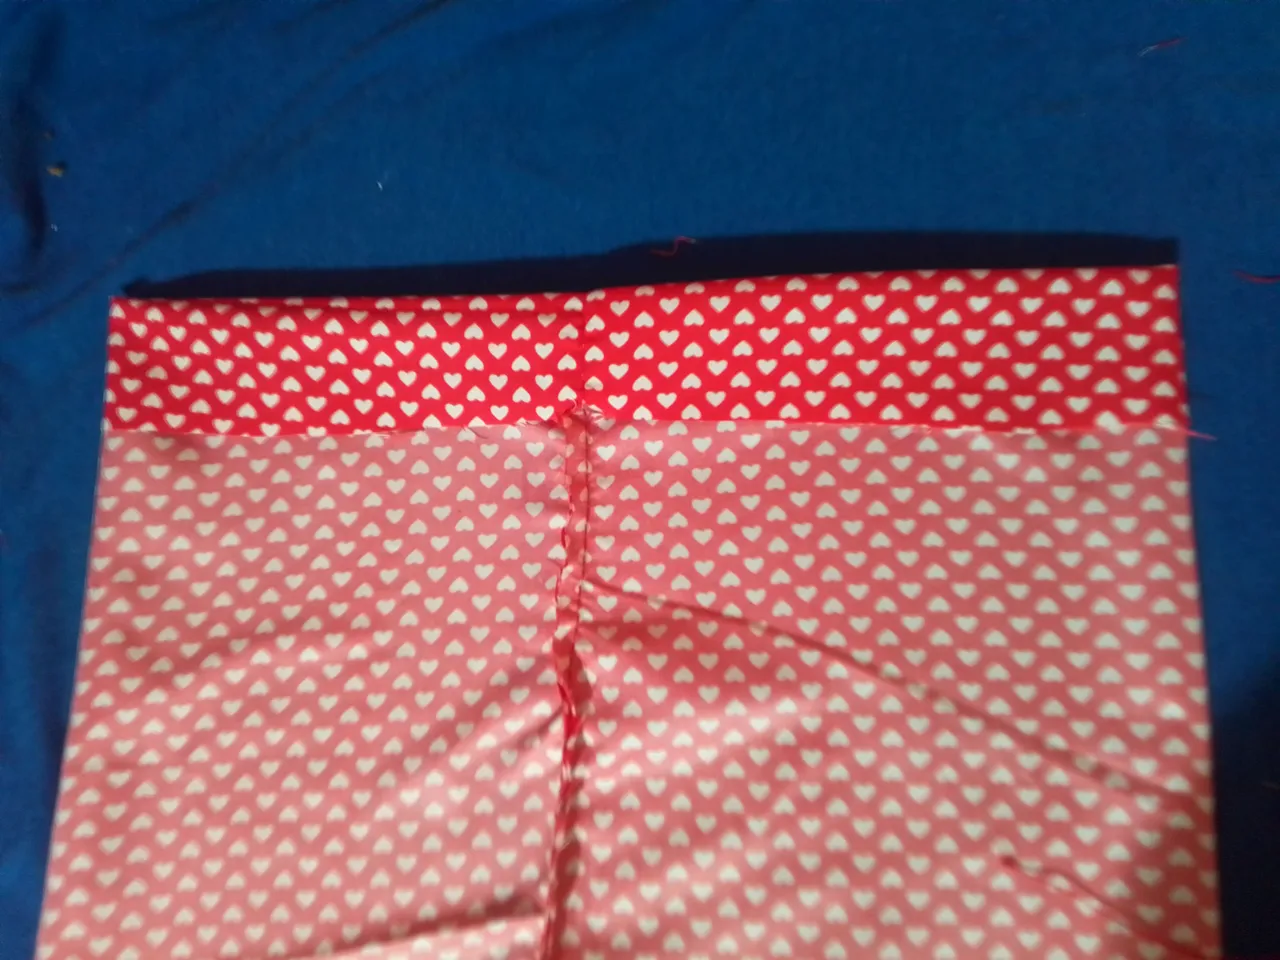
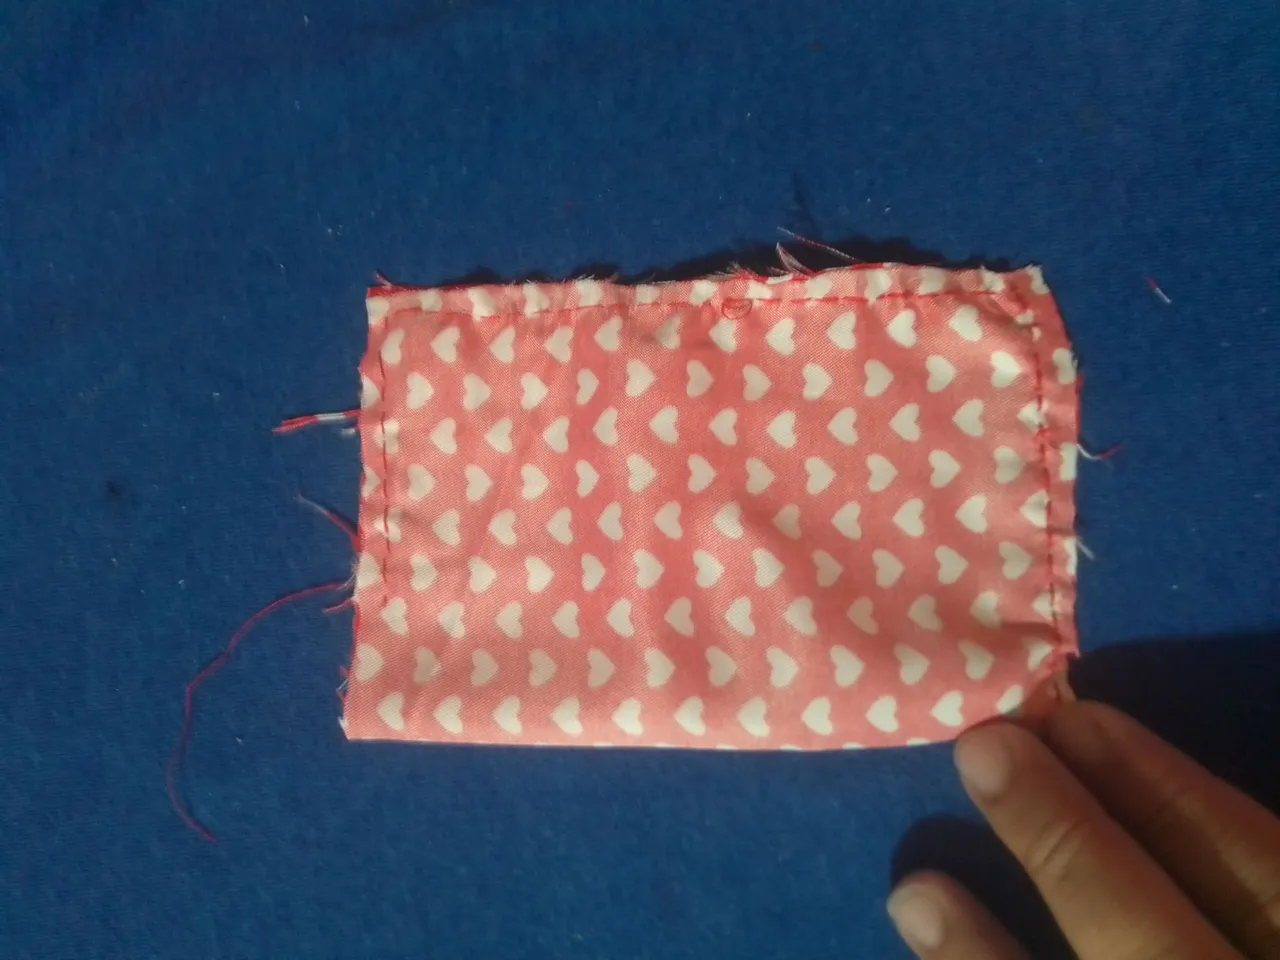
Bien amigos iniciamos haciendo la falda que considero es la prende más sencilla de hacer; por lo que tomamos la tela estampada y la doblamos, sobre ella colocamos una faldita de uso diario de la pequeña y cortamos un cuadrado alrededor. Hecho esto cosemos con el hilo rojo el extremo a abierto del corte.
Step 01
Well friends, let's start by making the skirt that I consider to be the easiest garment to make; so we take the patterned fabric and fold it, over it we place a small skirt for daily use and cut a square around it. Once this is done, sew the open end of the cut with the red thread.
Paso 02
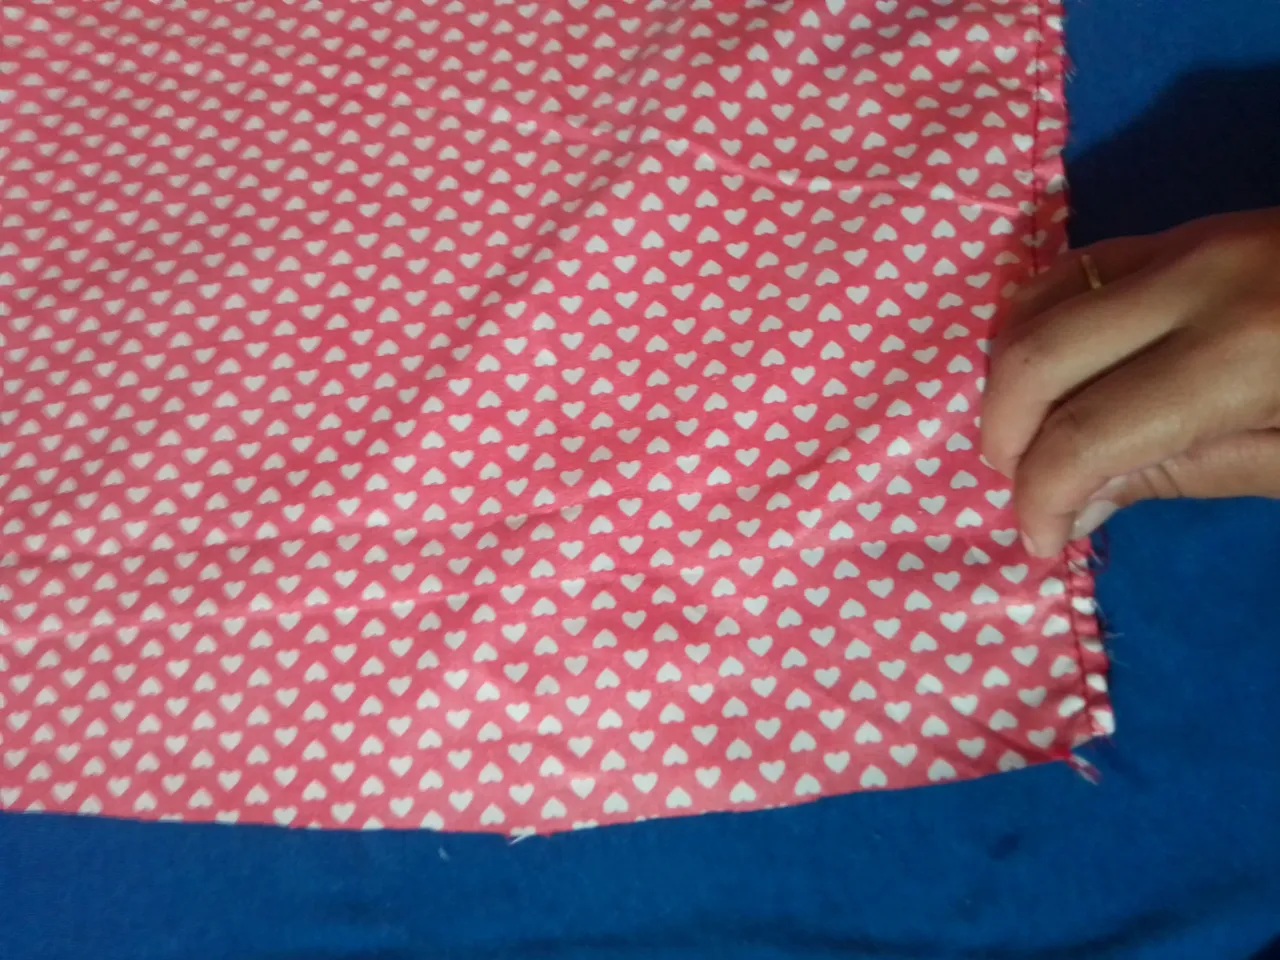
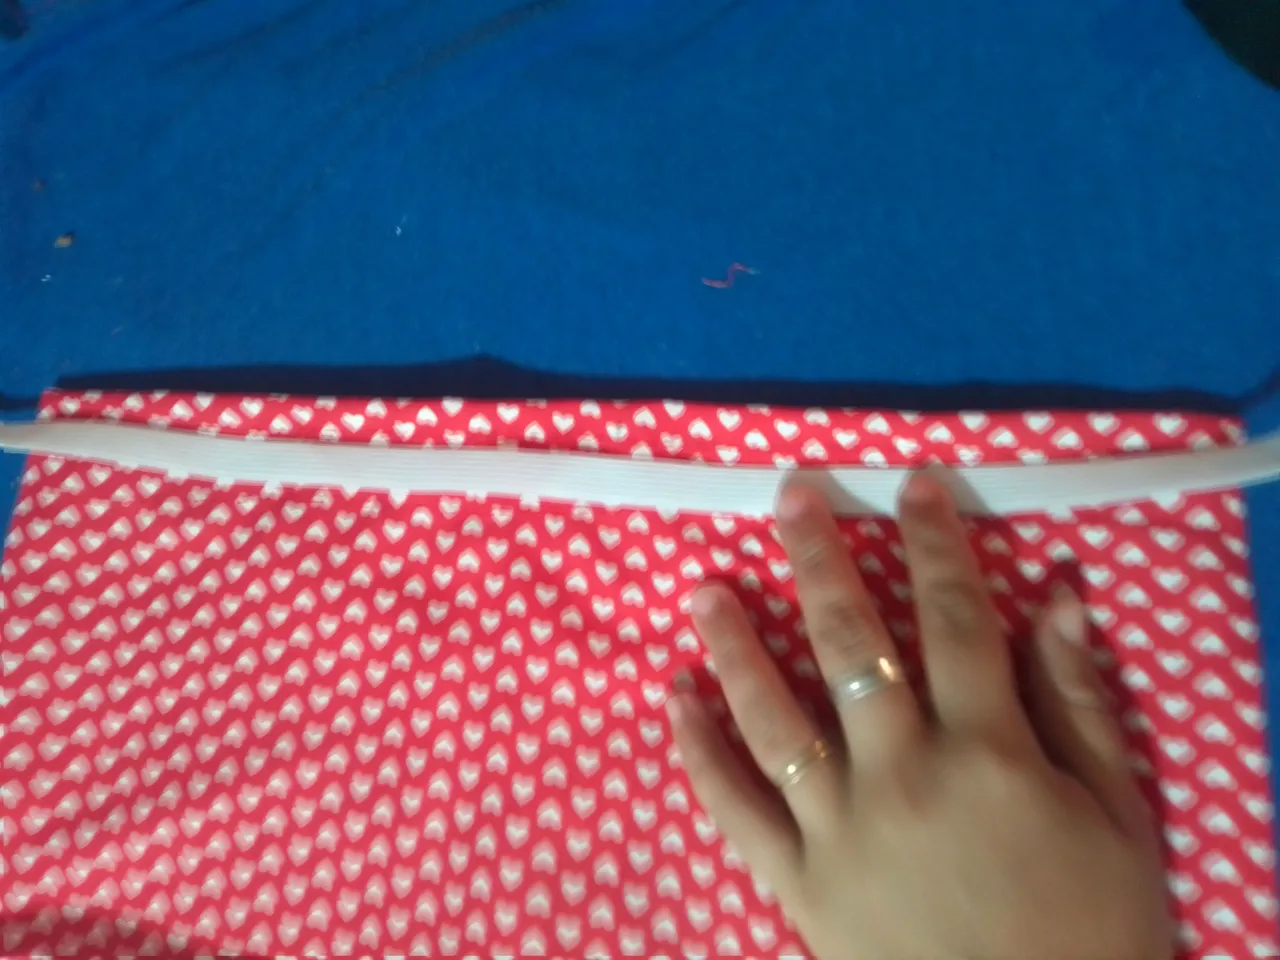
Abrimos está pieza para colocar la costura por el lado trasero y doblamos aproximadamente 3cm de pretina dependiendo el grosor de nuestra goma elástica. En mi caso la hice más grande y utilicé una elástico de 1cm pues querían que quedarán flecos tanto en la parte de arriba como en la de abajo. Lo que haremos será coser el borde primeramente uniendo la pretina y luego hacemos otra costura en el contorno dejando un pequeño espacio por donde introducimos la goma.
Step 02
We open this piece to place the seam on the back side and fold approximately 3cm of waistband depending on the thickness of our elastic band. In my case I made it bigger and used a 1cm elastic because they wanted fringes to be left on both the top and the bottom. What we will do is sew the edge first, joining the waistband and then we make another seam around the edge, leaving a small space where we insert the elastic.
Paso 03
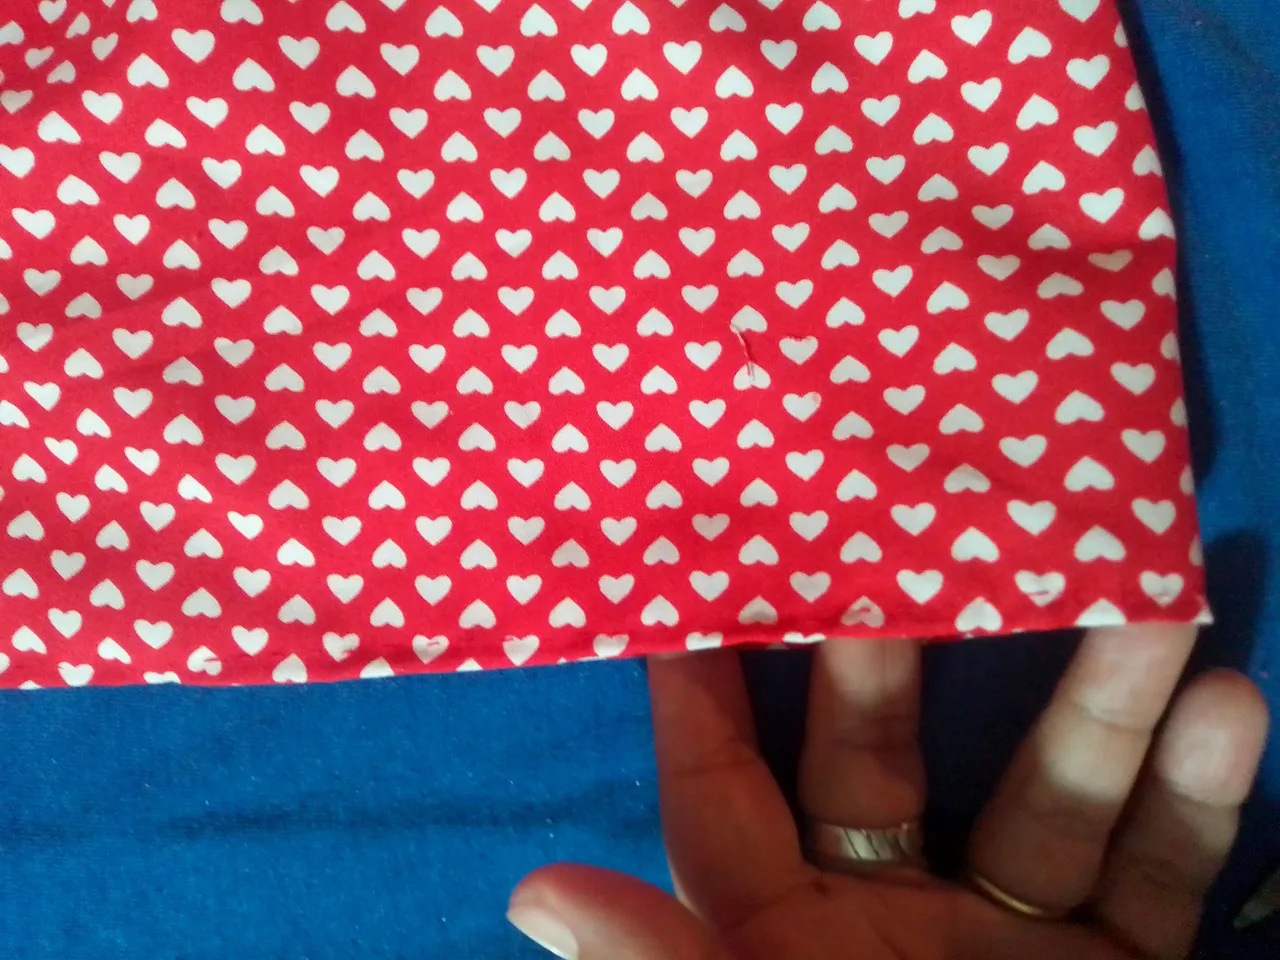
Ahora es momento de coser el dobladillo de parte inferior y colocar algún detalle para adornar la pequeña falda e identificar la parte delantera.
Step 03
Now it's time to sew the bottom hem and add some detail to embellish the little skirt and identify the front.

Paso 04
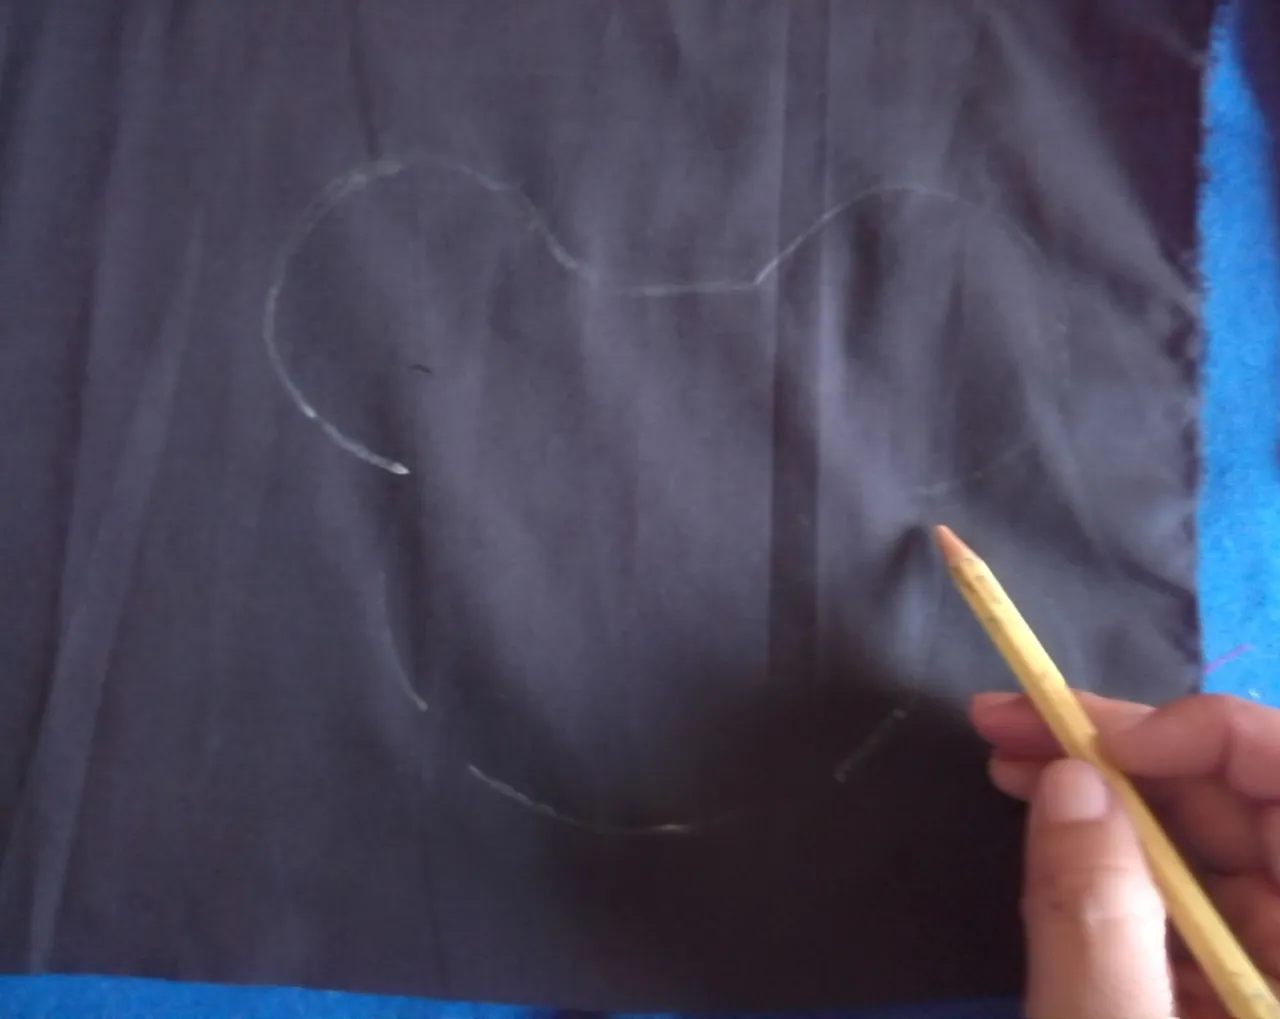
Inmediatamente empezamos con segunda pieza que es nuestra camiseta. Para ser sincera no tenía un tela completamente blanca para hacer una por ese motivo tuve que transformar una que tenía guardada sin usar, entonces lo que hice fué dibujar sobre la tela negra la silueta de Minnie y corto todo este diseño.
Step 04
Immediately we start with the second piece which is our shirt. To be honest I didn't have a completely white fabric to make one for that reason I had to transform one that I had saved unused, so what I did was draw Minnie's silhouette on the black fabric and cut out this entire design.

Paso 05
Con mi molde cortado en tela, lo coloco el centro de la camiseta y con mucho cuidado en un sola dirección cosemos el contorno con hilo negro.
Step 05
With my template cut out of fabric, I place it in the center of the shirt and very carefully in one direction we sew the outline with black thread.
Paso 06
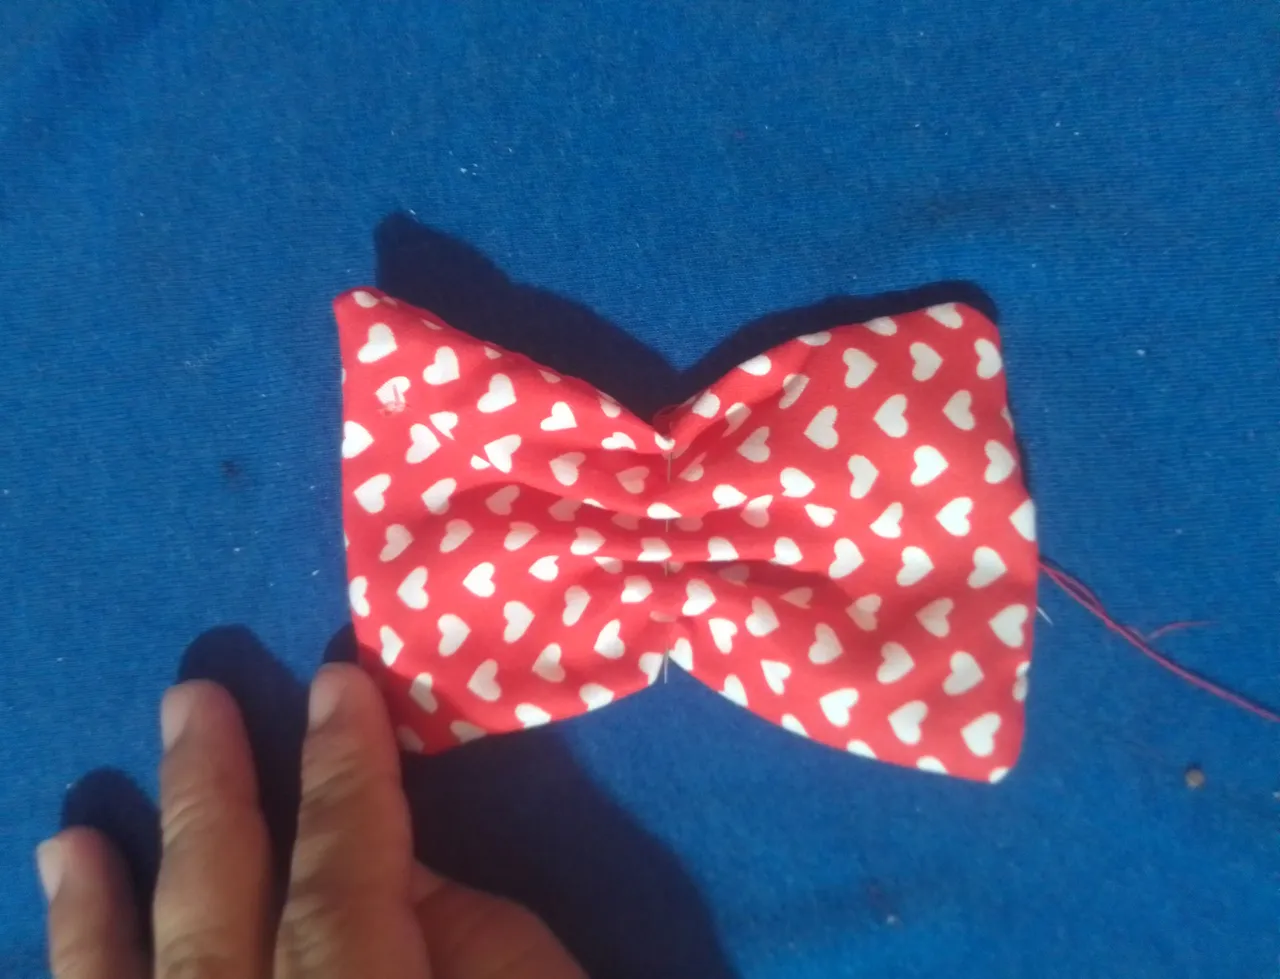
Algo que caracteriza mucho a este personaje es su gran lazo, por lo cual haremos uno cortando un pequeño cuadrado de la tela que utilizamos para la falda y cosemos alrededor por el reverso de la tela. Volteamos esta pieza y arruchamos el centro.
Step 06
Something that characterizes this character a lot is its big bow, for which we will make one by cutting a small square of the fabric that we use for the skirt and sewing around it on the back of the patterned fabric. We turn this piece over and crinkle up the center.
Paso 07
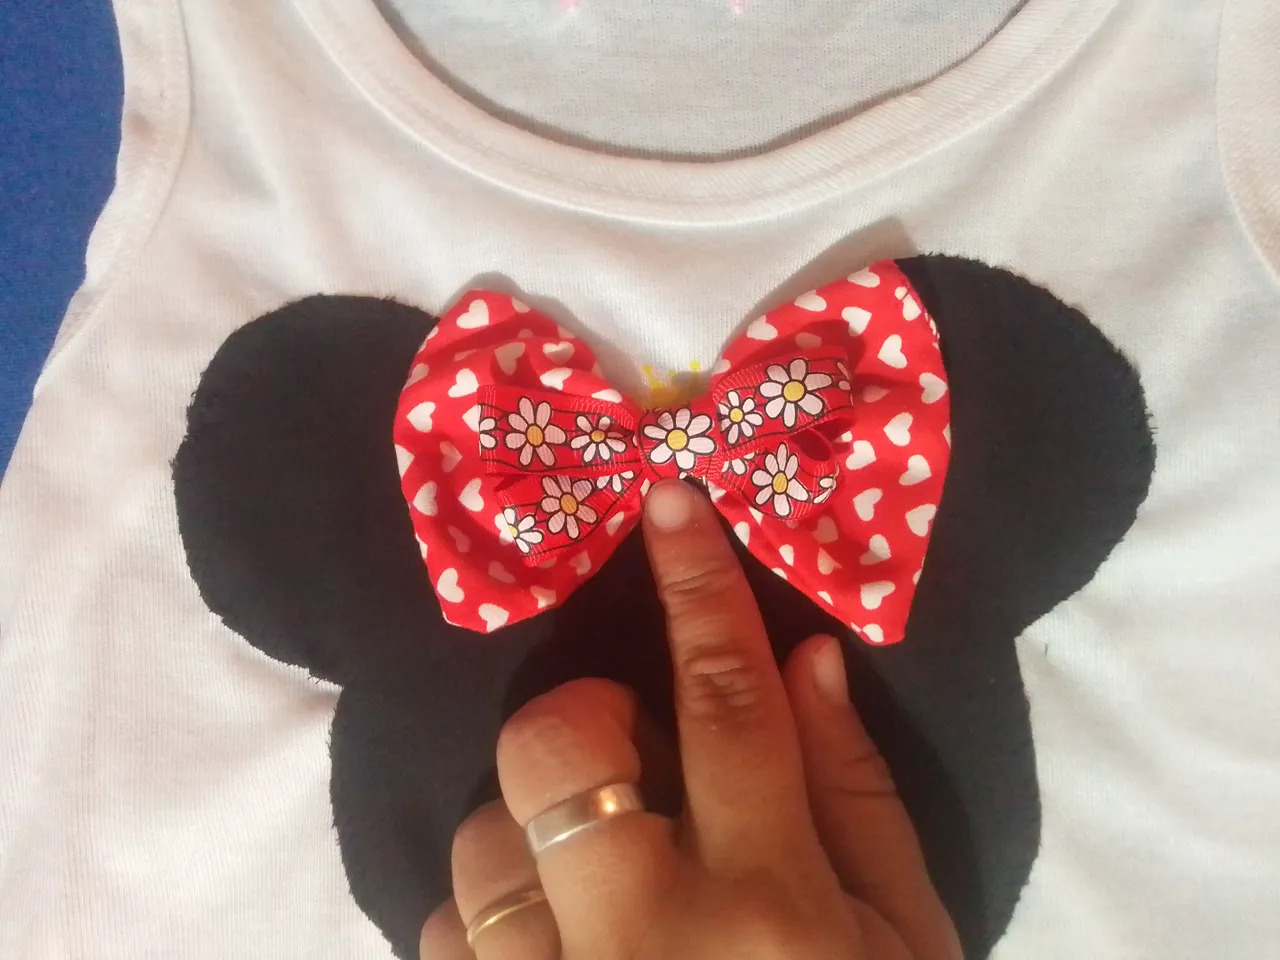
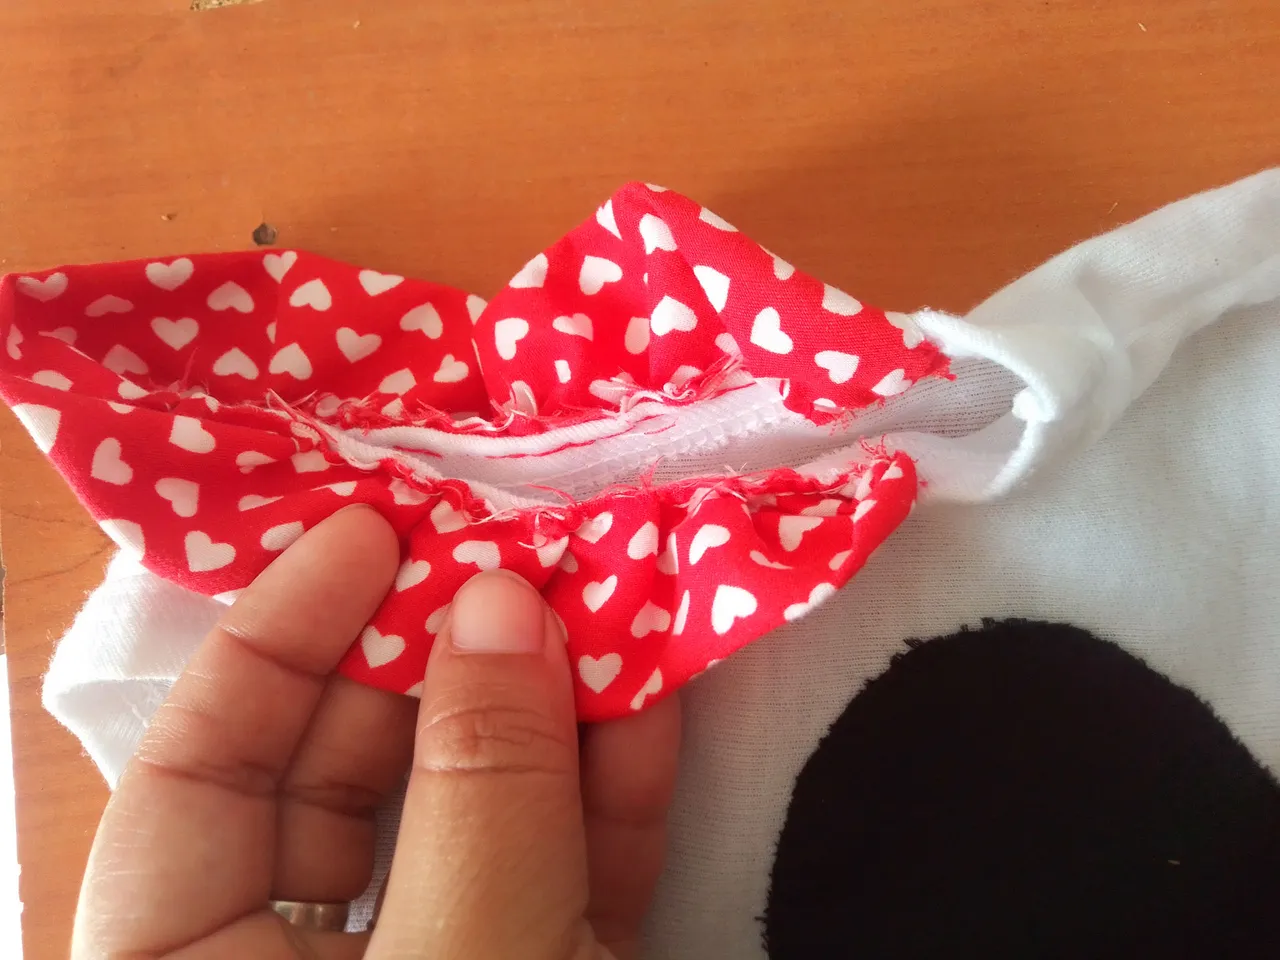
Luego lo pegamos en el centro de la orejas de Minnie junto a una cinta para decorar. Finalmente cortamos una tira y las cosemos con pequeños alrededor de las mangas de la camiseta.
Step 07
Then we stick it in the center of Minnie's ears along with a ribbon to decorate. Finally we cut a strip and sew it with little ones around the sleeves of the shirt.
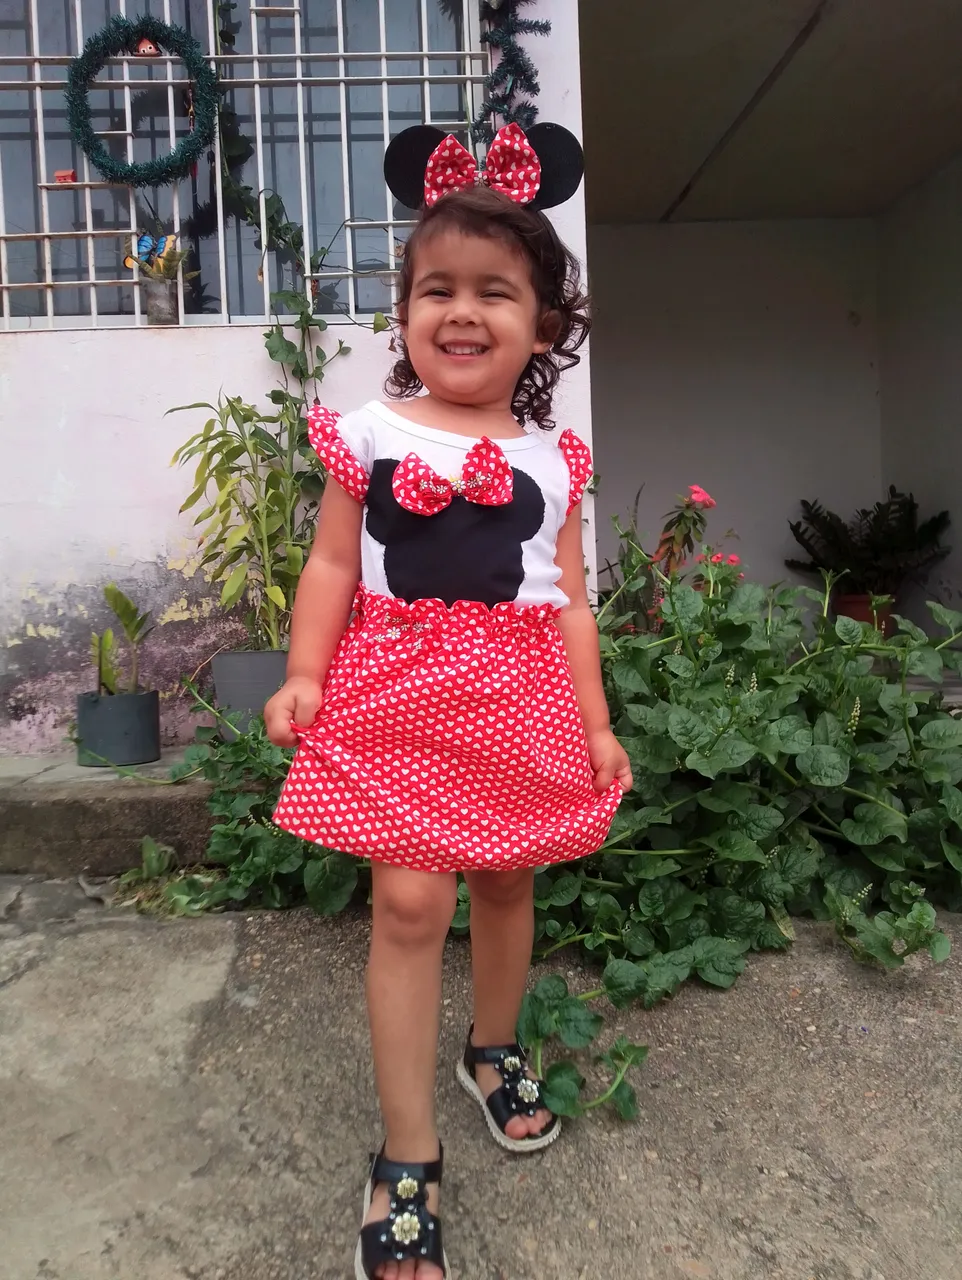
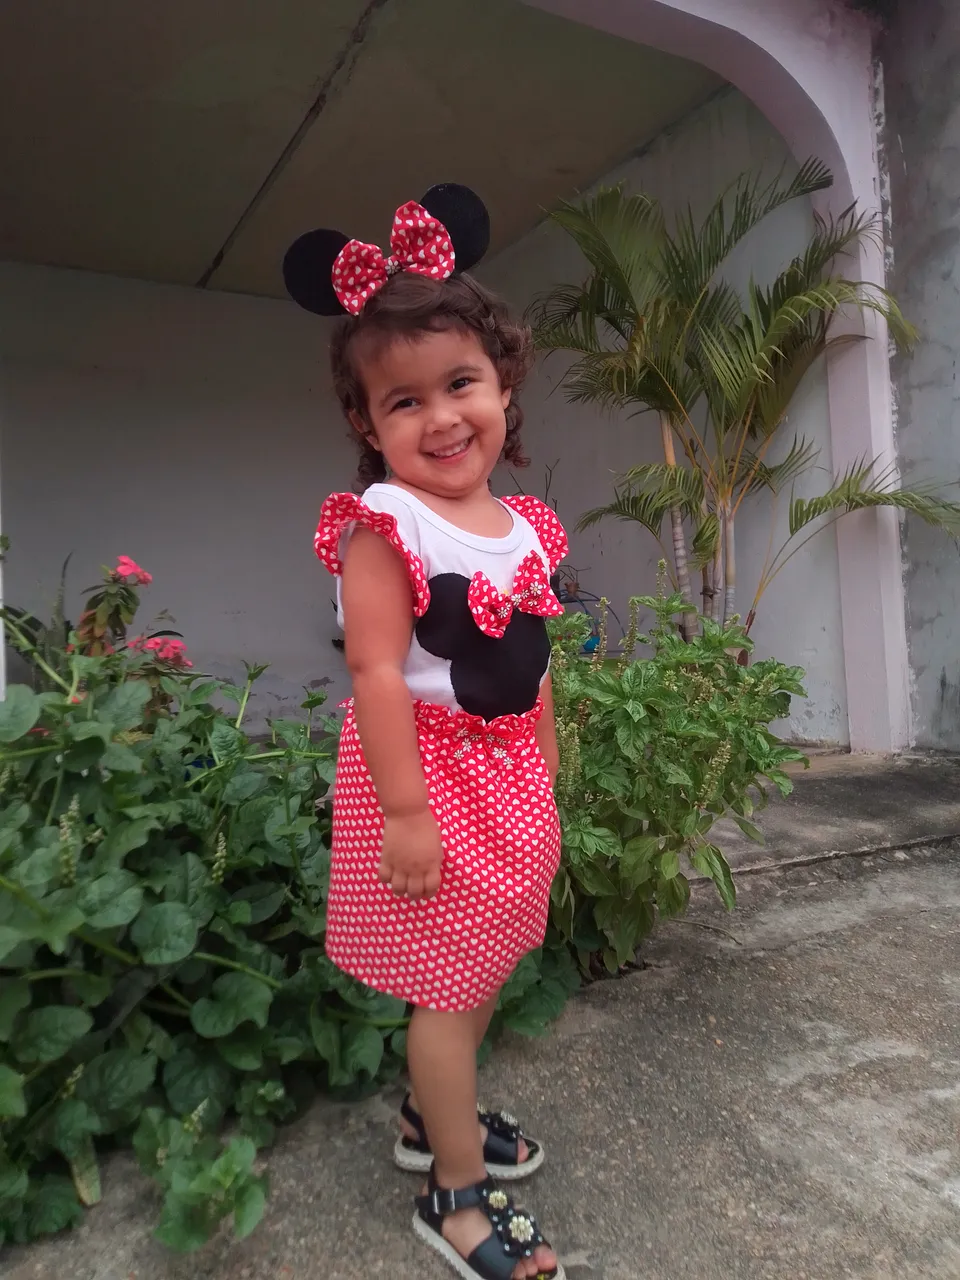
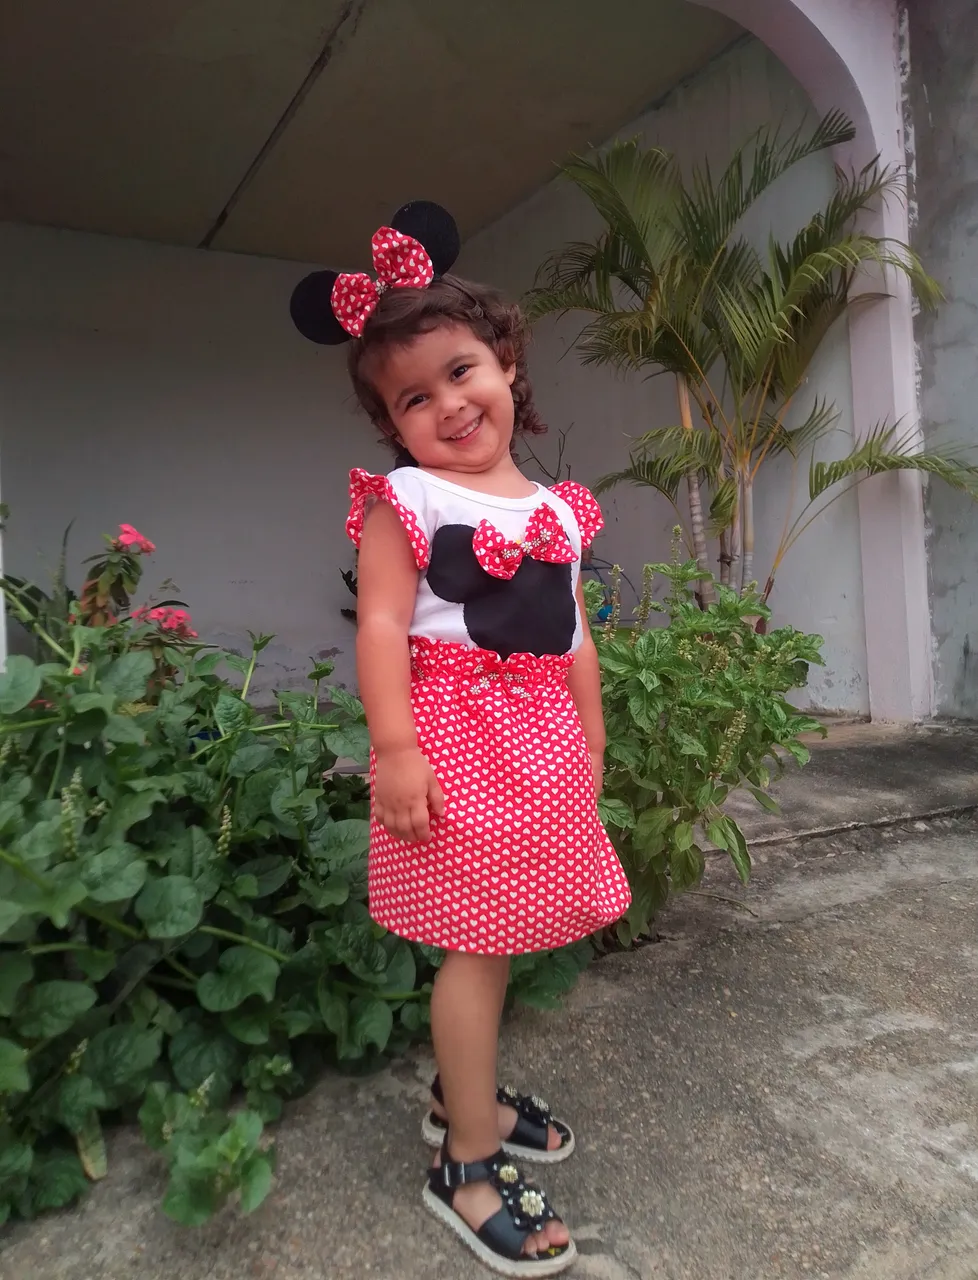
🎀❣️ Resultado! ❣️🎀
Listo mis bellos amigos! Aquí les muestro este hermoso resultado. Un conjunto muy lindo que realice para que mi niña luzca el día de su cumpleaños. Espero te haya gustado mi trabajo el día de hoy!.
Ready my beautiful friends! Here I show you this beautiful result. A very cute set that I made for my girl to wear on her birthday. I hope you liked my work today!.
☺ Gracias por tu linda visita a mi post! ☺
Dios te bendiga de una manera grandee y especial! Cuéntame qué te pareció esta idea a través de tus comentarios, agradezco todo el apoyo de una u otra mane me ofrecen...Cuídate mucho! Te mando un fuerte abrazo desde la distancia. Nos leemos en el próximo post.!!
God bless you in a big and special way! Tell me what you thought of this idea through your comments, I appreciate all the support in one way or another they offer me...Take care of yourself! I send you a big hug from a distance. We read in the next post.!!