ESPAÑOL
Saludos comunidad de @needleworkmonday, hoy les quiero compartir el proceso que me llevo al momento de elaborar una almohadita para un bebe en camino. En post anterior, les mostré cual fue el proceso que me llevo hacer una mantita, donde les comenté que una amiga está embarazada y le he ido haciendo varias cosas a mano, para regalárselas, y bueno, esta almohadita es uno de ellos.


- Tela de algodón o semi-algodón, color azul y blanca.
- Tira de encaje, aproximadamente 1 mt.
- Hilo para máquina de coser.
- Aguja para bordar.
- Hilos para bordar.
- Tijera.

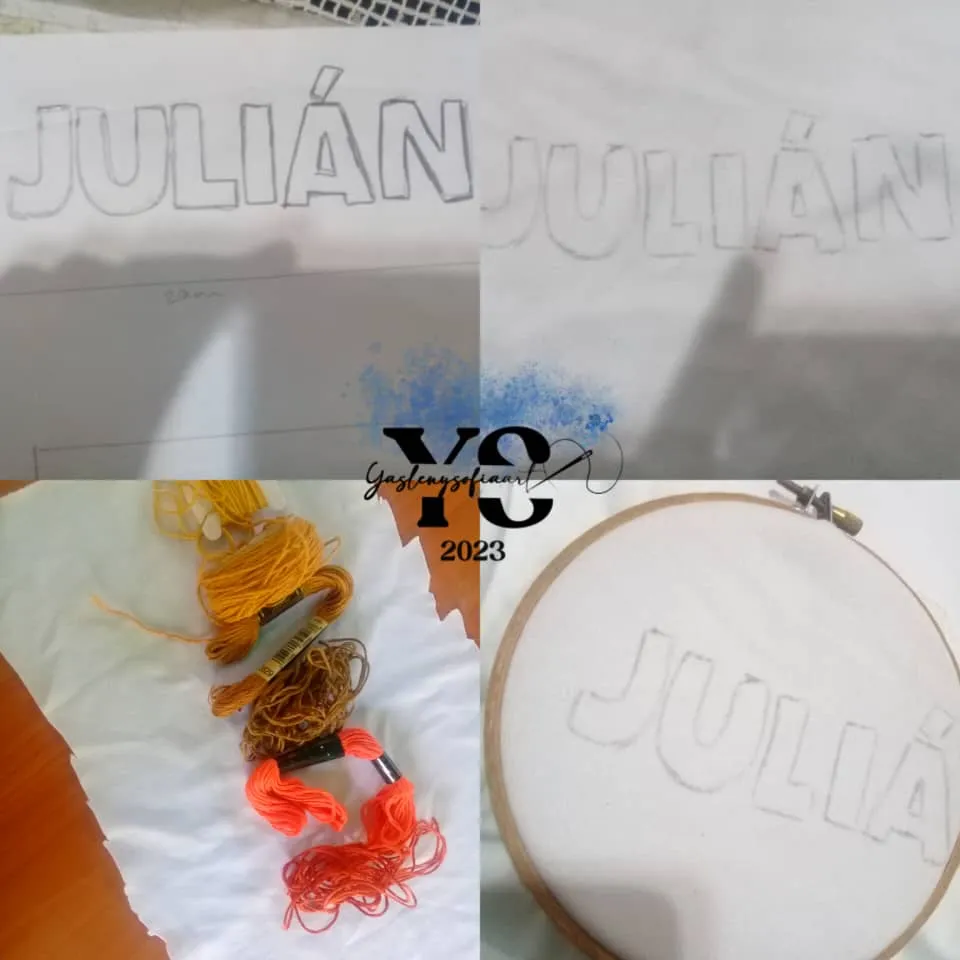
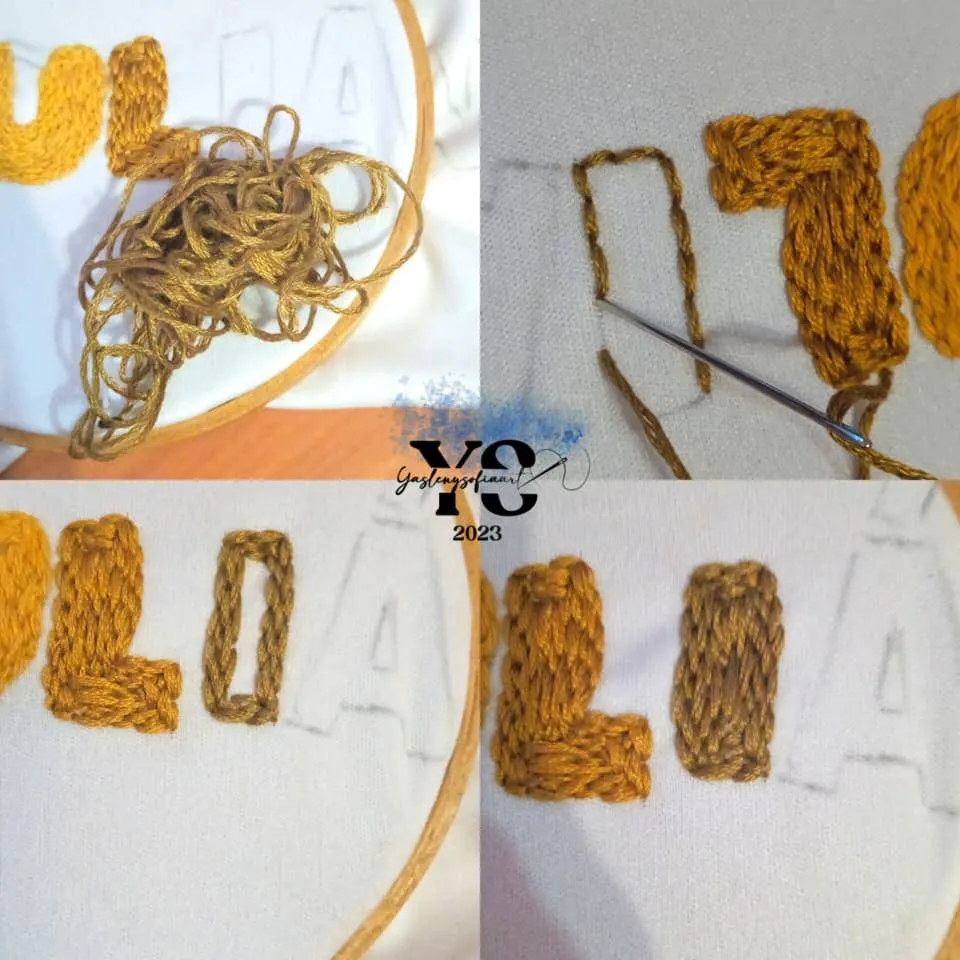
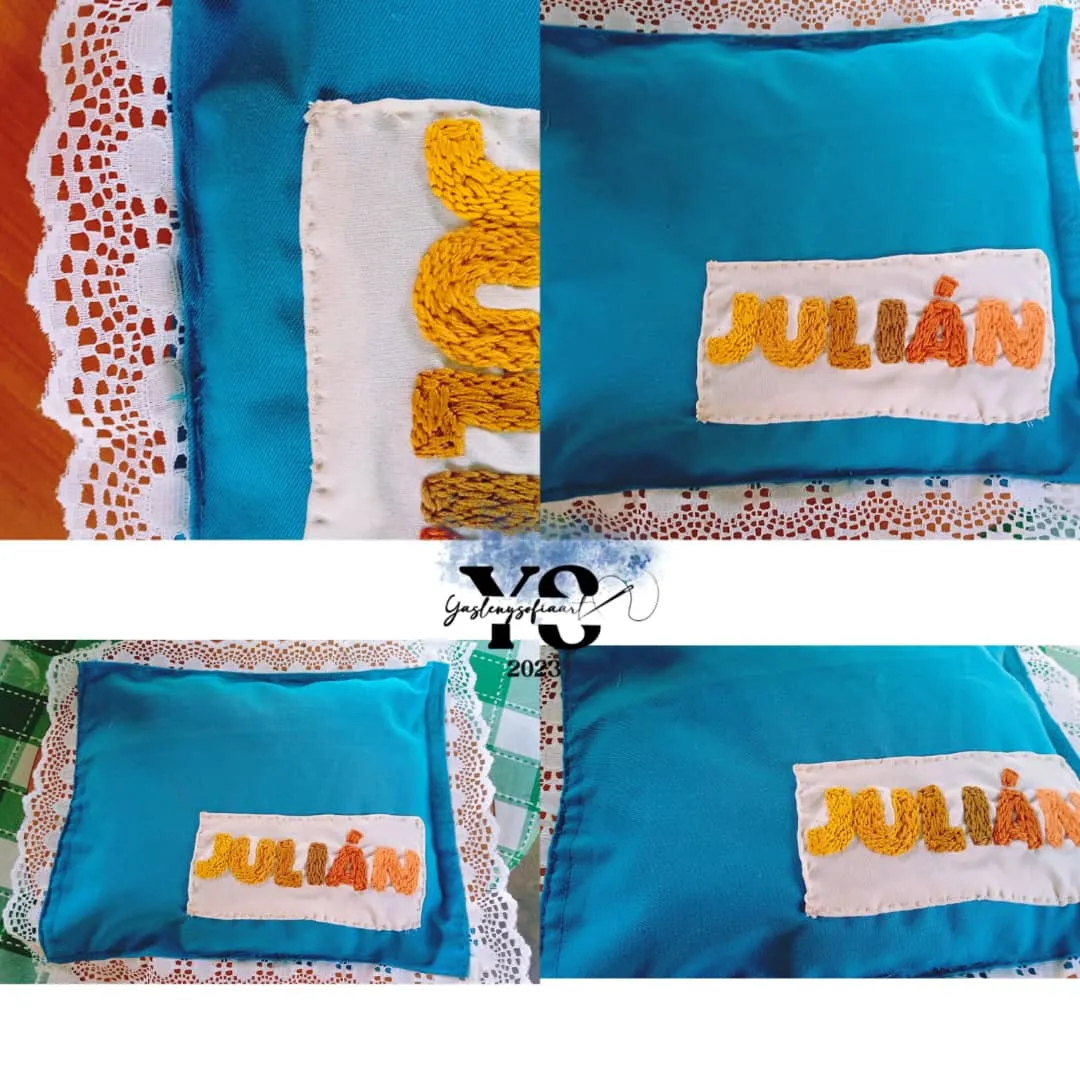
Lo primero que hice, fue buscar el tipo de letras con que haría el nombre bordado, terminando por seleccionar la que se llama “Kalimar”; debo admitir que me encanta muchas las tipografías que son sans serif, sus estilos redondeados, permite que las tramas se realcen de mejor manera. En fin, ya con la letra seleccionada, las calque a la tela de algodón blanca, que mide unos 15 cm de largo por 10 cm de ancho, aproximadamente.

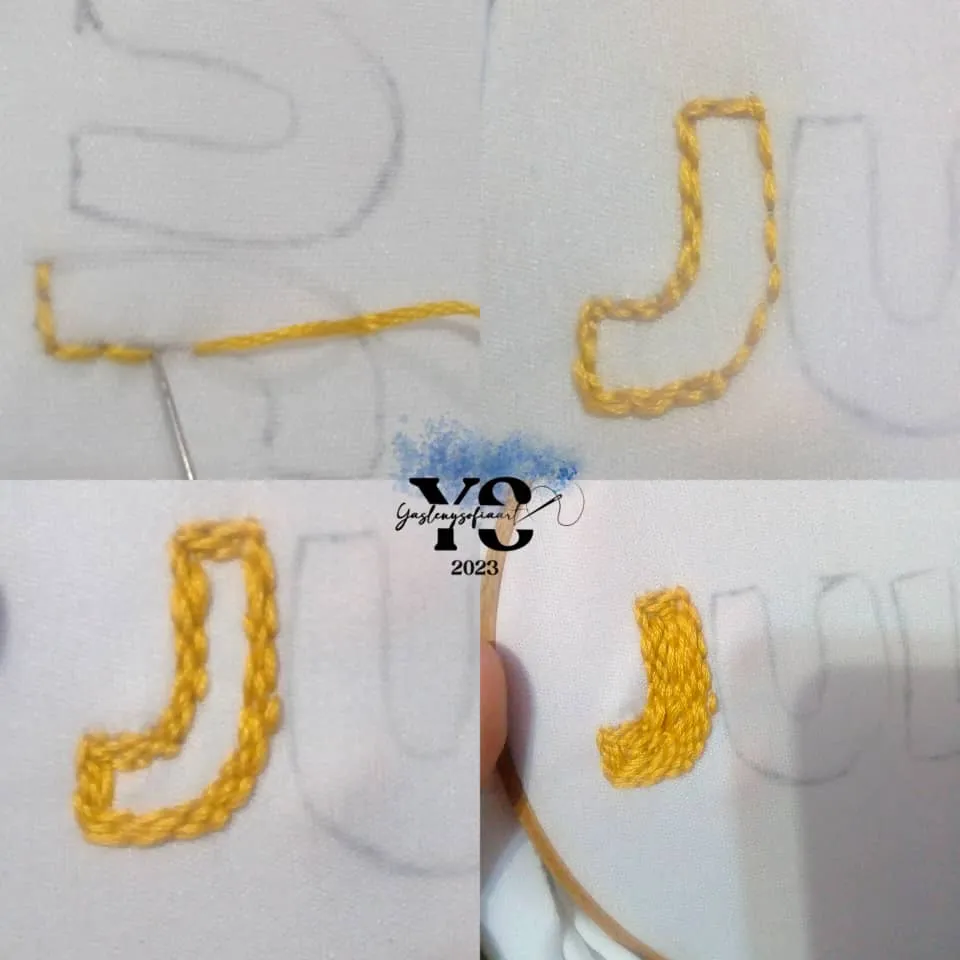
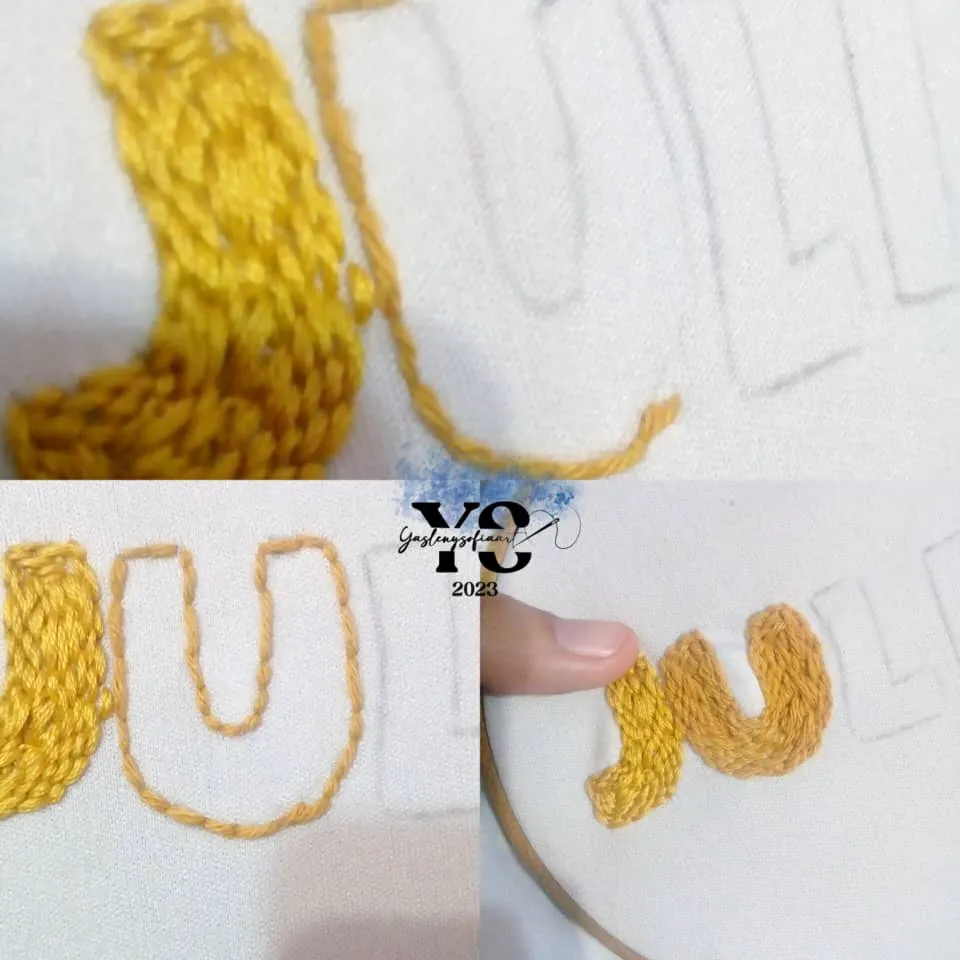
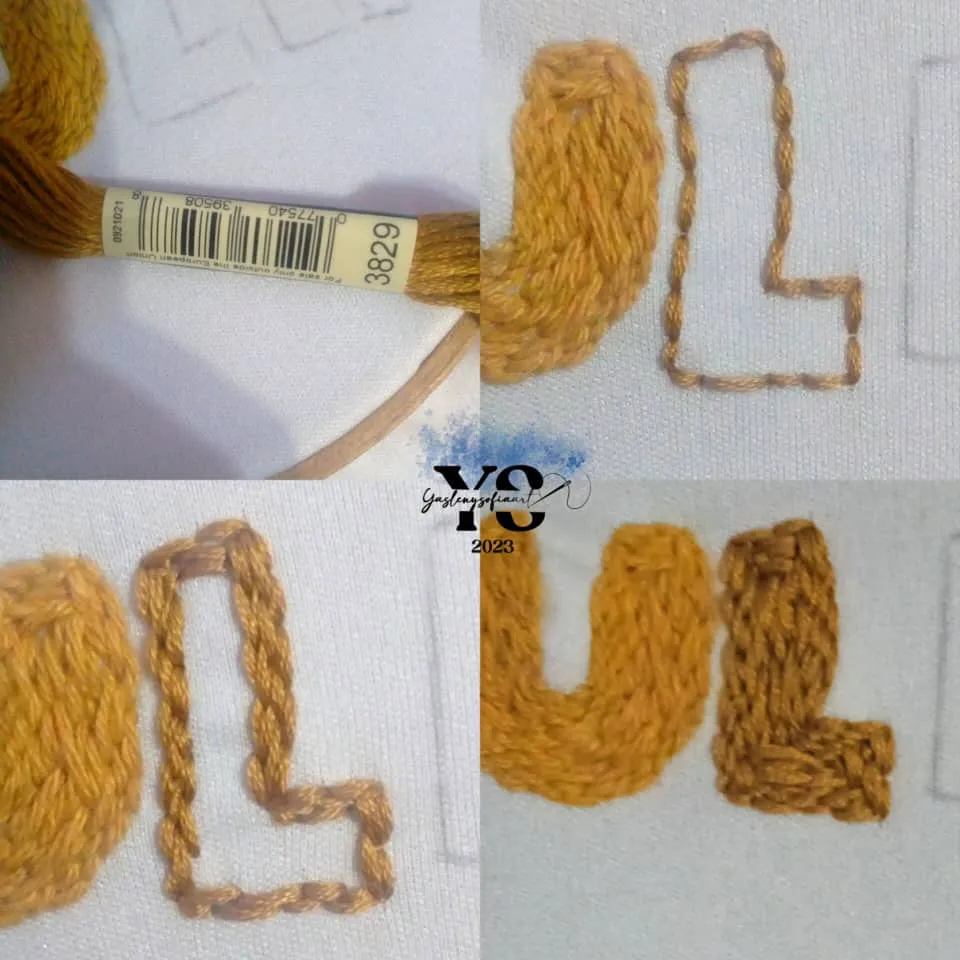
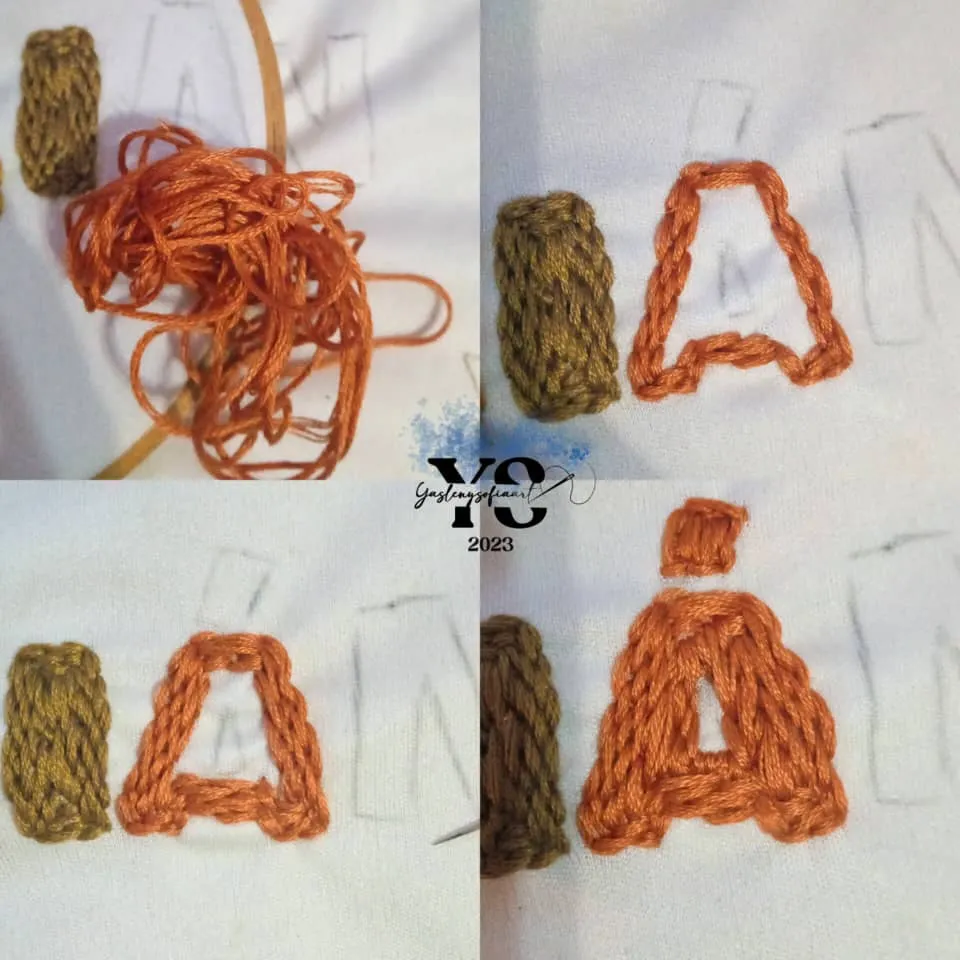
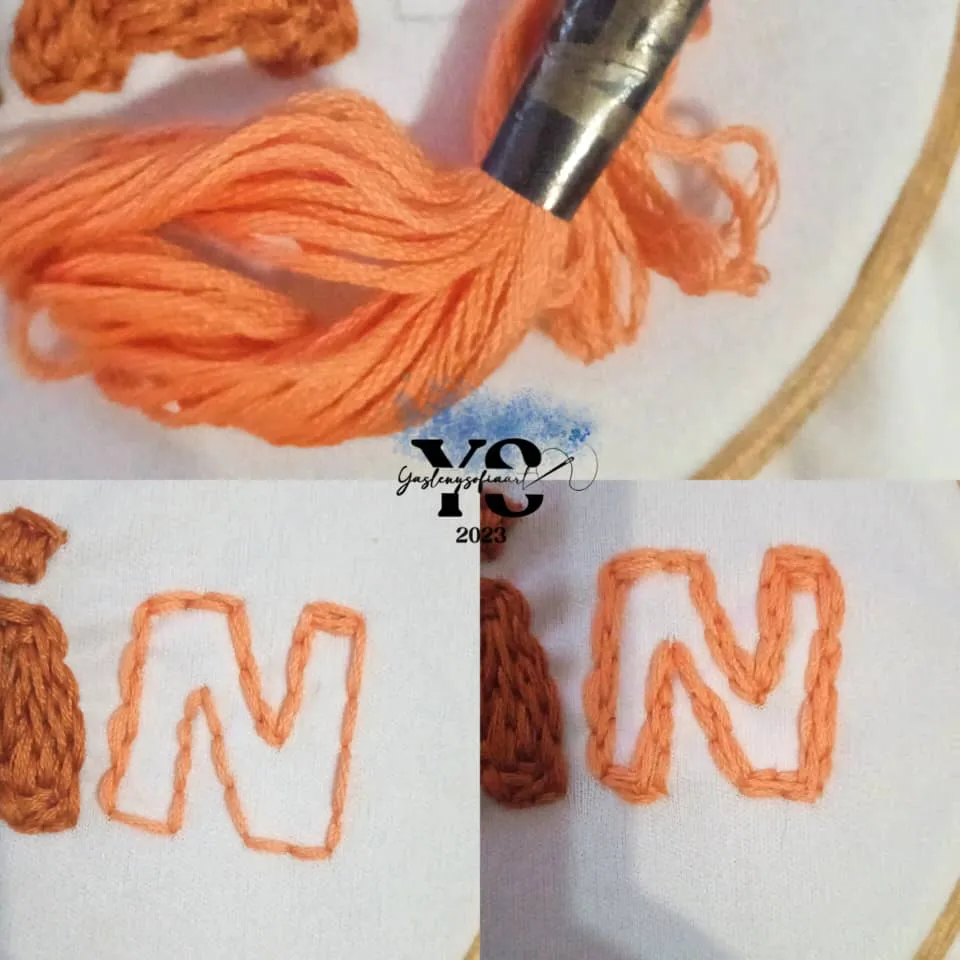
Tomé los aros de madera, una aguja con hilo para bordar de 6 hebras y empecé a rellenar cada una de las letras; las tramas fueron uniformes y siguiendo el contorno que define a cada una, es un trabajo un poco laborioso, pero, al mi parecer, queda muy hermoso.
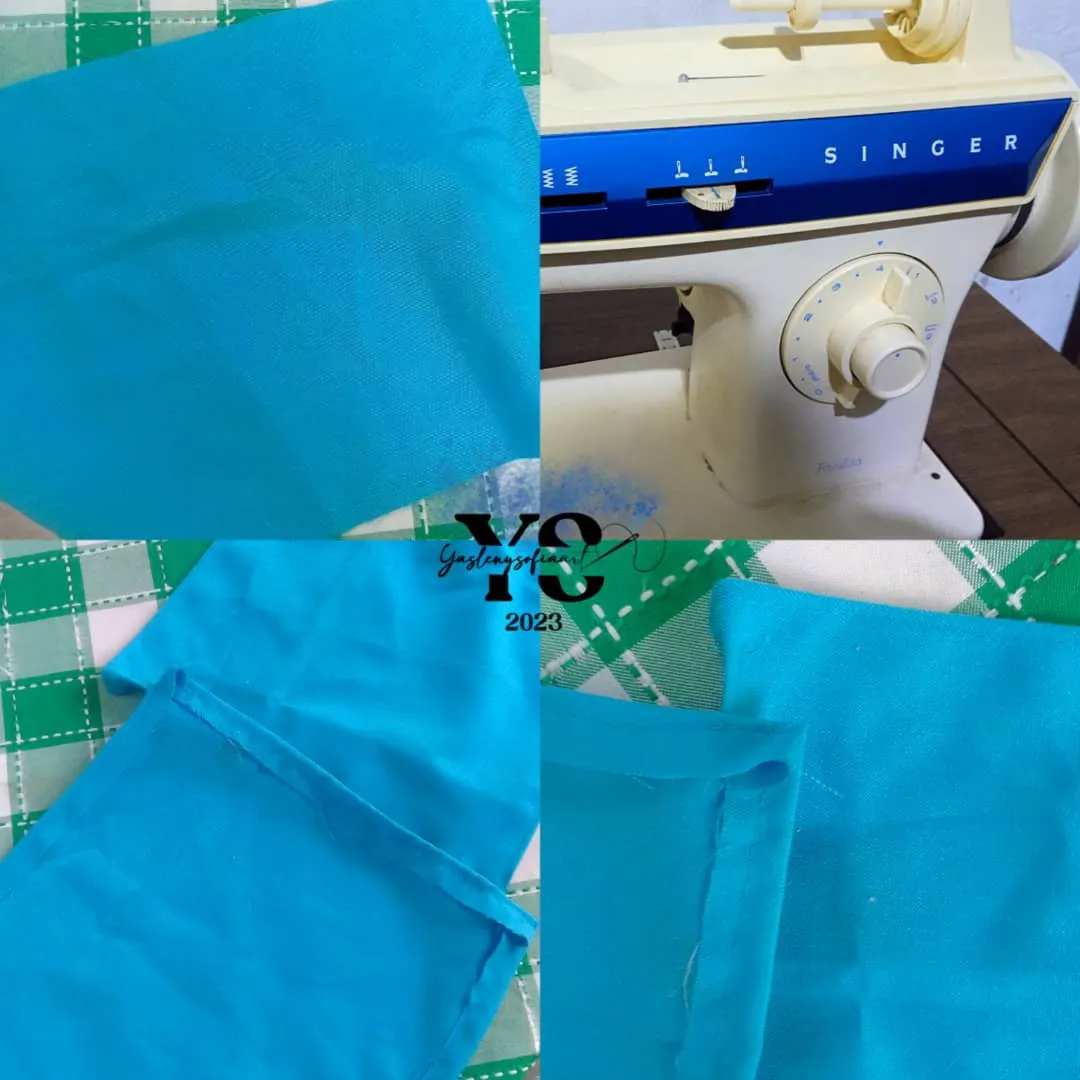
Con el bordado listo, busqué una tela para hacer la almohada, aunque no se aprecia mucho en la foto, esta tela es como semi-algodón y el color me pareció muy bonito, contrastando muy bien con el color de las letras bordadas.
Continuando, hice dos piezas rectangulares de aproximadamente unos 30 cm de ancho por unos 15 cm de largo. En eso, fui a la máquina de coser, la cual a veces me quiere y otras no, es una Singer bastante viejita, era de mi abuela, que se las pasó a mis padres, durando casi 30 años parada, se le hizo su mantenimiento, aun así, presenta ciertas fallas.
Con la máquina, cosí los bordes de ambas piezas rectangulares, para que el acabado se viera más pulcro. Por cierto, esta era la segunda vez que, hacia esta almohada, pues la maquina me enredaba el hilo de abajo, cambiando el hilo por otro, ahí medio funciono. ¿Alguien me podría explicar el por qué pasa eso? Tal vez, porque los hilos estén un poco viejos, pero no estoy segura tampoco de que la máquina este al 100%.
Al tener los contornos más definidos, uní hacia una de las piezas, la tira del encaje, aquí sufrí un montón, a veces se trababa la costura, pero con paciencia lo logré. Con esta parte lista, procedí a finalmente a unir ambas piezas, al reverso de cada una, dejando sin coser uno de sus lados, pues más adelante le introduciría el relleno o la guata. También, con una puntada invisible, le uní el nombre bordado, acomodando un poco el tamaño de la tela.

En este punto, como el grosor de las telas era mayor, se me complico la costura, algunas partes falló y no salió tan bien que se diga, incluso, al final, tuve que hacer la técnica de paso atrás, para cerrarla por completa. Sin embargo, no me decepcionó el trabajo, más bien estoy animada a querer hacer otros.

Gracias por leer mi post. Espero que les haya gustado. Estaré atenta a responder sus comentarios. Pueden visitar mi blog, seguir mis contenidos y redes sociales
ENGLISH
Greetings @needleworkmonday community, today I want to share with you the process it took me to make a pillow for a baby on the way. In a previous post, I showed you the process that it took me to make a blanket, where I told you that a friend of mine is pregnant and I have been making several things by hand, to give them as gifts, and well, this pillow is one of them.
- Cotton or semi-cotton fabric, blue and white.
- Lace strip, approximately 1 mt.
- Thread for sewing machine.
- Embroidery needle.
- Embroidery thread.
- Scissors.
The first thing I did was to look for the type of letters I would use for the embroidered name, ending up selecting the one called "Kalimar"; I must admit that I love sans serif typefaces, their rounded styles allow the wefts to be enhanced in a better way. Finally, with the font selected, I traced them on the white cotton fabric, which measures about 15 cm long by 10 cm wide, approximately.
I took the wooden hoops, a needle with 6-strand embroidery thread and began to fill each of the letters; the wefts were uniform and following the outline that defines each one, it is a little laborious work, but, in my opinion, it looks very beautiful.
With the embroidery ready, I looked for a fabric to make the pillow, although it is not very visible in the photo, this fabric is like semi-cotton and the color seemed very nice, contrasting very well with the color of the embroidered letters.
Continuing, I made two rectangular pieces of approximately 30 cm wide by 15 cm long. At that, I went to the sewing machine, which sometimes loves me and sometimes doesn't, it's an old Singer, it belonged to my grandmother, who passed it to my parents, it has been stopped for almost 30 years, it has been maintained, even so, it has some faults.
With the machine, I sewed the edges of both rectangular pieces, so that the finish would look neater. By the way, this was the second time I made this pillow, because the machine was tangling the thread at the bottom, changing the thread for another one, it worked halfway. Could someone explain to me why that happens? Maybe because the threads are a little old, but I'm not sure if the machine is 100%.
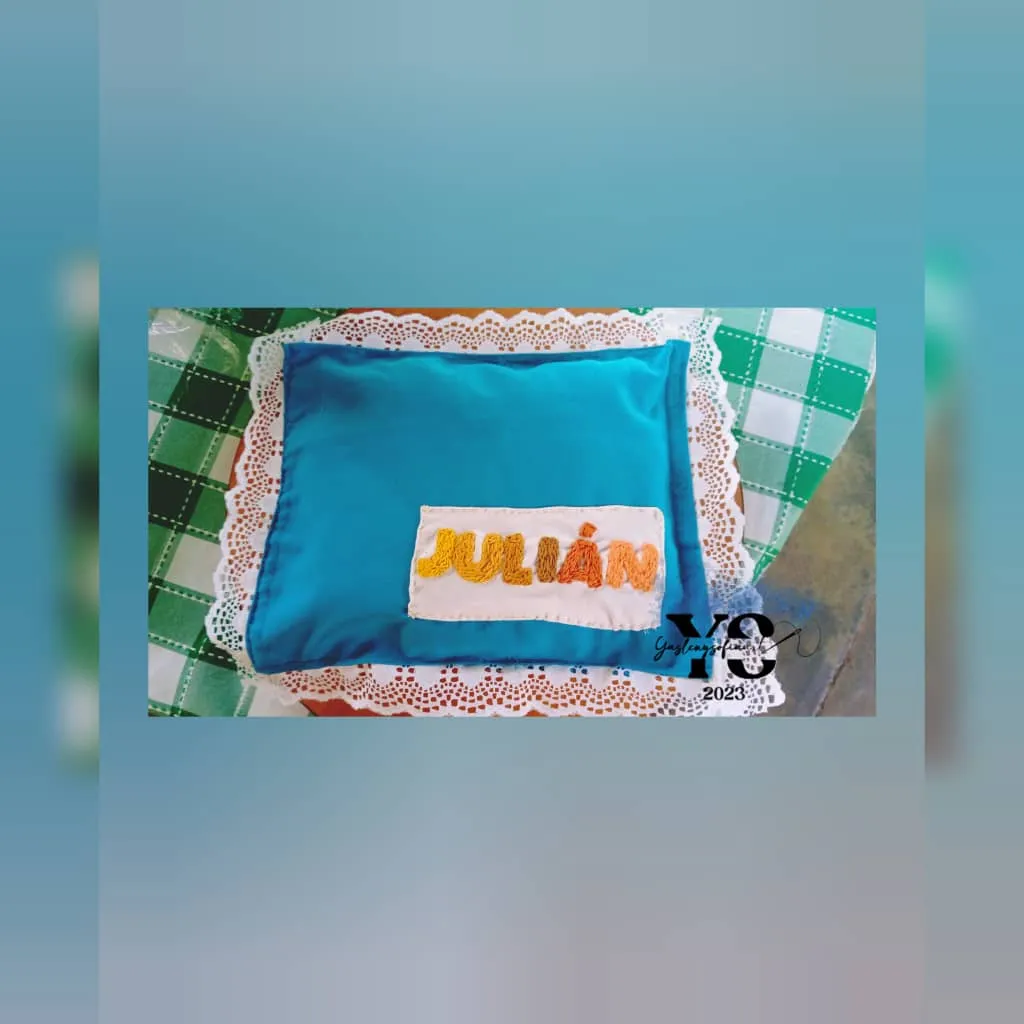
When I had the contours more defined, I joined the lace strip to one of the pieces, here I suffered a lot, sometimes the seam got stuck, but with patience I made it. With this part ready, I proceeded to finally join both pieces, on the back of each one, leaving one of its sides unstitched, because later I would introduce the stuffing or the wadding. Also, with an invisible stitch, I joined the embroidered name, accommodating a little the size of the fabric.
At this point, as the thickness of the fabrics was greater, the sewing was complicated, some parts failed and did not come out so well, even at the end, I had to do the back step technique, to close it completely. However, I was not disappointed with the work, rather I am encouraged to want to make others.
Translated using DeepL
Thank you for reading my post. I hope you liked it. I will be attentive to answer your comments. You can visit my blog, follow my content and social networks.