This project needs some explaining.
After I was unable to leave the country last year, I needed a new place to stay temporarily. Uruguay qualifies for the top ten charts of supremely neo-liberal countries. One side effect of this fact is the housing market. In order to qualify as a renter, one must prove an income three times as high as the place one wants to rent. Only few people can afford that. The average income is about $ 600.
The majority of house owners demand "seguro", which is not a deposit, but a guarantee for rent. Only people with a job can get such a "seguro". Not only do I not have a job - I am a foreigner and those do not qualify for seguro. Seguro is only for citizens with a job. Which leaves only the worst housing to choose from.
Housing that is below most modest standards of living. Usually in need of lots of work - work that will be the renters problem. The owners need to make sure the roof is not leaking. There must be electricity and water. That's practically it. Heating is not mandatory, although the winter here is absolutely murderous.
Based on these facts, I considered myself lucky to get a place at all. The hotel was too expensive to take up temporary residence, although right now, I have lost more money due to housing problems than the hotel would have cost me. It was at the beginning of spring, when I found this place. It had been vandalized and the doors were boarded up. The real estate office had reassured me that the required repairs would be done swiftly. Which they of course weren't. There was one open fire place in the house - actually a BBQ, as the people here are meat eaters, every house has a BBQ, but no heating. Where we are, houses are built for the summer. So, no heating. The river La Plata is 100 yards away. It did not occur to me that this would be a problem later on. The important part was to be out of the hotel and with some yard for the Felines to enjoy. They got a big back yard - although heavily trashed.
As time goes by, I realize that it is a one way street. Pay rent and none of the repairs are done. Always excuses and nothing proper manifests. You need to do what needs to be done by yourself. Little by little, I did what I could. Arriving at the point where the heating needed to be addressed. Someone offered me to help with the installation of an oven. It turned out it was not really what I knew to be an oven and very junky. The fact that it was considered "cheap" did not help. I ended up not having it installed.
I was talked into installing a rocket stove into the open fire place. The open fire place did never work to heat the house, but smoke to enter the house. As a person with asthma, this was a big problem, so I agreed to a conversion into a rocket stove. Unfortunately, like all the times before, the outcome did not match the promise of a warm place free of smoke. The opposite was true. Now there was more smoke than before. I was told that the solution would be to install an old steel tank on top of the chimney - higher chimney, no more smoke. After the tank was put on the chimney, I had bought a rotating chimney cap. In my despair, I acquired what was available. A low quality rotating cap that did not work well. Smoke still came into the house. The nights got colder and we still had no heating but a small infrared heater - the kind that crank up the power bill. The gas stove broke, too. Thermocouple problem - I can't get the correct part, the place I bought it two years ago does not sell them anymore.
A solution to the life threatening problem was urgently needed. Therefore I looked up the internet to see what solutions existed. The problem is that I can not go and just buy an oven. The whole corona nonsense has left me struggling, expecially since my father died in April.
The I found something that was lauded and looked great:
https://www.famcomfg.com/product/wind-directional-chimney-cap-stainless-steel/
This is what I wanted, but of course did I have neither the financial means, nor the time for it to be shipped here. It would take until spring for it to arrive. After studying the design, the thought crossed my mind that I could use the sheet metal I had bought two years ago to make molds for ant-proof garden pots made of aerated cement (that's why I built the foam generator). Since I left Hawai'i, I have only few tools, the most basic ones, but the chimney needs a functioning cap and comes fire and brimstone, this could be done with what I have.
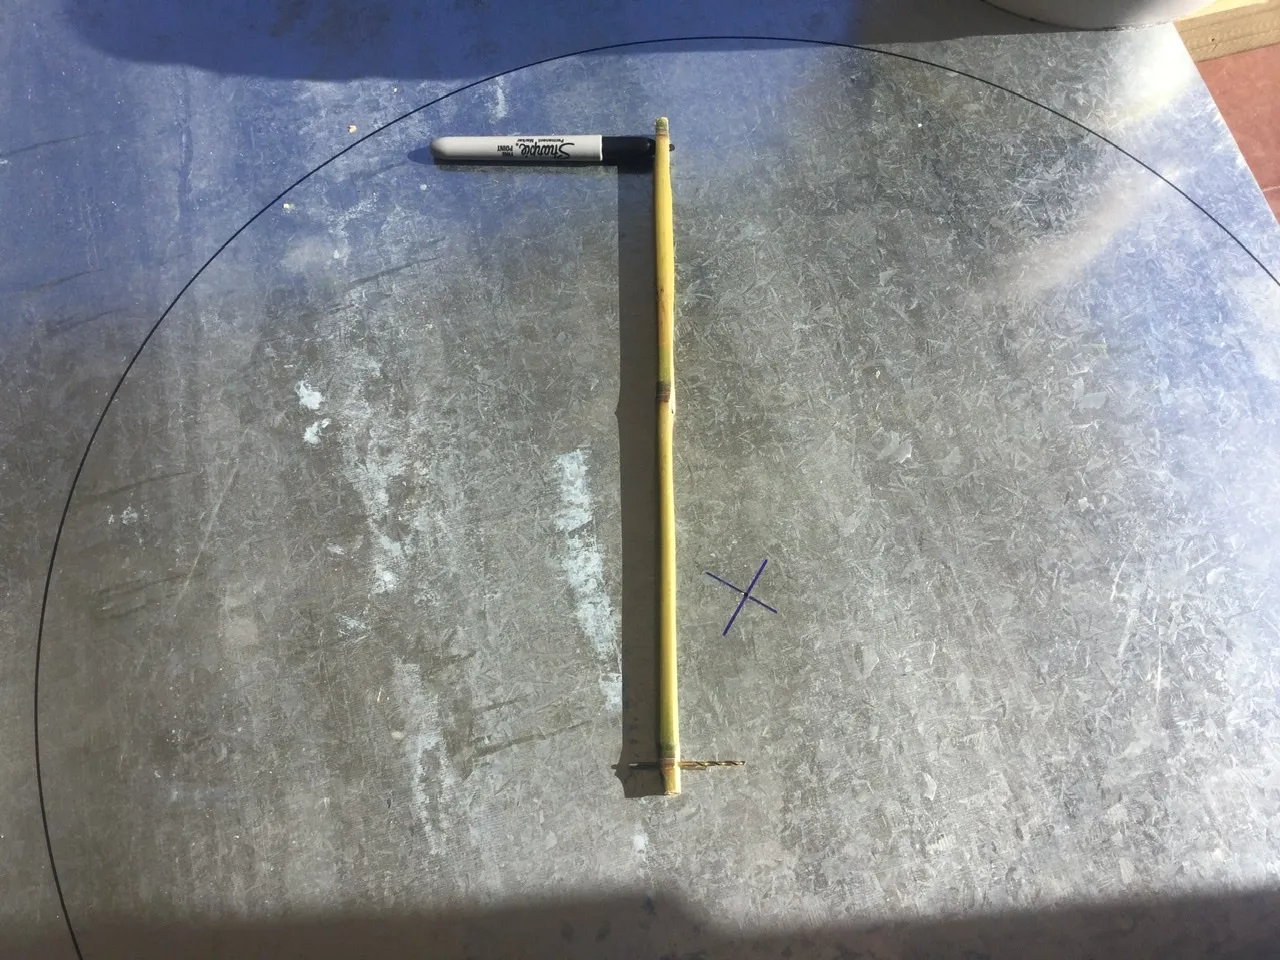
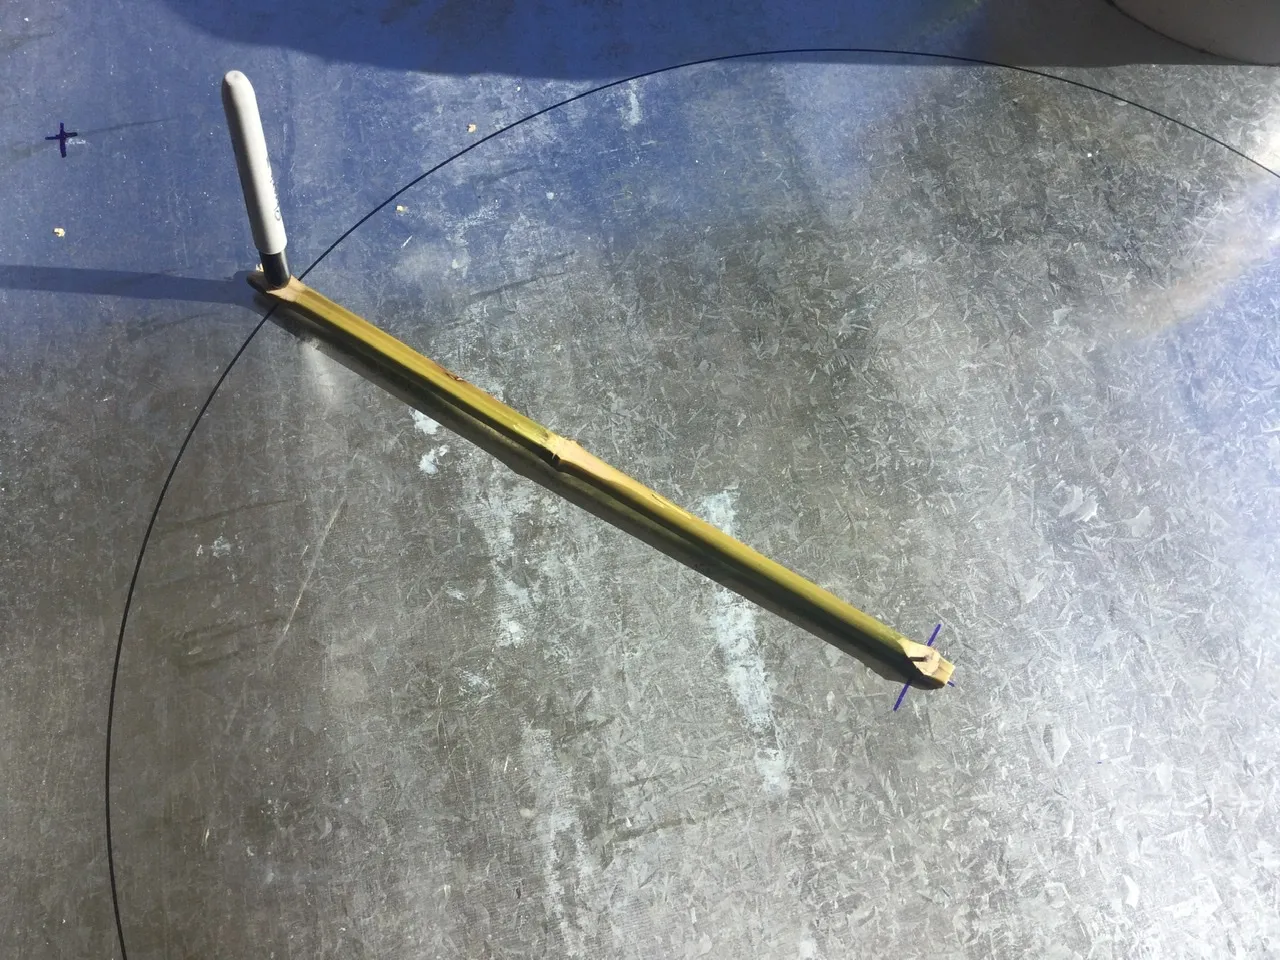
First I needed to make a compass from bamboo. You can see it in the image above. With the bamboo compass, I was able to make a circle of the size that would likely work. Then, cutting out the circle by hand - ending up buying a cutting wheel for the angle grinder and cutting close to the line to be able to cut by hand. After that, deburring of the edges and there was a circle of sheet metal - leaving me guessing about how to proceed. The most important item for sheet metal work is the anvil. Without anvil, there is nothing to hold the metal against to bend and hammer it. What I did have though, was a chunk of steel from the yard. There was the same piece in San Carlos laying around the base of a power mast, so I figured it would be something discarded by the power company. A few thoughts about it created a vertical mini anvil. Then, I just started to mark the lines of where I presumed the folds to be. It was really challenging to get it to fold where it should - based on the original design. To my sheer excitement the sheet started to respond the way I hoped it to and at one point it popped into the desired shape.
Hammering away some more, it turned out quite well. Leaving the one main issue now: to attach the upright pipe in the correct angle for it to cover the chimney opening and spin freely in the wind. The problem was now to use the correct pipe size. The steel tank on the chimney had already the bottom part of the crappy cap incorporated. Therefore, the pipe would have to have the size of the pipe on the crappy cap. My visit to the hardware store did not succeed. They did not have the correct size pipe. But helpful as they are, they gave me a sample of what they got. A small piece aluminum pipe of larger diameter. And they were quite excited looking at what I had bent and hammered into shape.
Now it is another story altogether tgat the real estate office never cleared the garage as promised. It is full of junk since October and I paid for it without being able to use it as a workshop. However, intuition told me to climb in there and look if there was anything that I could use. After all, I am improving the house. To my excitement and in quite some disbelief, I find a metal pipe of the same inside diameter as the small sample piece I had. The wall was even thicker and that is great, as there are hefty gusts here at the river. The other day we had 80km/h winds and the cap blowing away is not an option. The tricky part now was to affix the pipe both at the correct position and in the correct angle to the cap. As you can see with the original cap, the pipe is mounted via a flat bar steel bent into a bracket to securely attach it. Of course I could not get the appropriate flat bar steel, but a bigger one that might be too thick to bend it where and how it should be. With time being of the essence, I utilized the sheet metal of which there still is enough around. Cutting strips and bending them into the correct angles to attach them to the cap. Into the strips I drilled holes with a step drill that had various sizes, but of course not the diameter that was needed. Two years ago I had bought a set of grinding stones and it was only now that it turned out they were absolutely shitty quality. Even with rather soft sheet metal, they barely lived long enough to widen the holes to the diameter needed for the pipe to fit in.
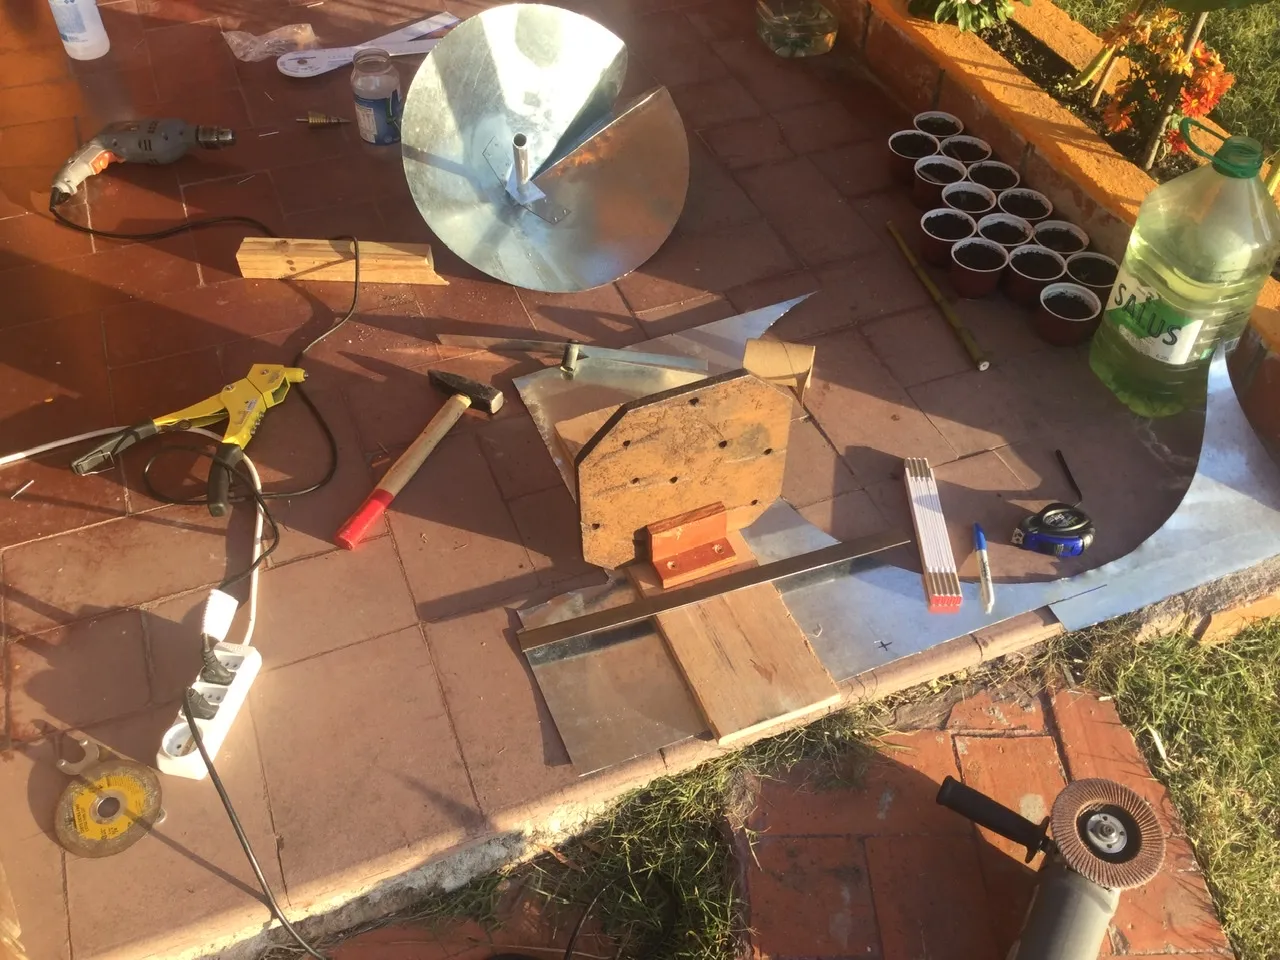
Here You can see my little entrance terrace workshop with the mini anvil and the first holding bracket riveted into place, holding the pipe. Last night I attached the second bracket and the position of the pipe is now fixed in place.
This concludes part one of the cap build and I would like to thank the folks that sell (and likely designed) the original cap. Although my copy is nowhere as pretty and from sheet metal where theirs is from stainless steel, I am excited that I got this close with my build as You can already see in the next part. Coming very soon, as it is freezing cold in the house. Then, I will also show you the stoneage stove in the old open fire place.
Thank You for reading. A detailed material list will be attached to part two.