


Greetings dear lovers of handicrafts.
Today I am participating in this nice initiative of the Build-it community, where we can present our works that have to do with DIY, How-to or life-hacks.
I invite you to see the rules of this contest by clicking HERE.
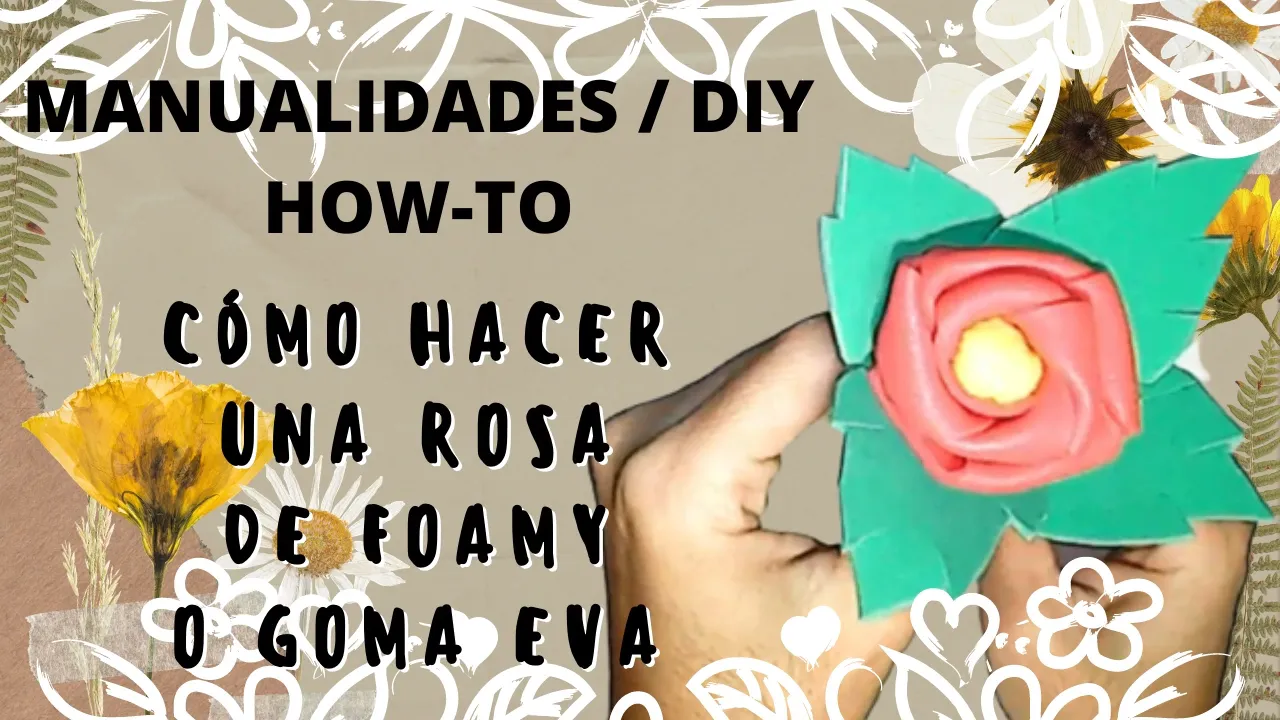
I will show you how to make an eva rubber or foamy rose without using heat, because there are many ways to make roses, one of them is molding the foami applying heat from an iron but it can be very dangerous, you can get burned.
I present an alternative to decorate and make roses in a very simple way that you will certainly love.

Saludos queridos amantes de las artes manuales.
Hoy estoy participando en esta linda iniciativa de la comunidad Build-it, donde podemos presentar nuestros trabajos que tengan que ver con DIY, How-to or life-hacks.
Te invito a ver las bases de este concurso, haciendo clic AQUÍ.
Te mostraré cómo hacer una rosa de goma eva o foamy sin necesidad de usar calor, pues hay muchas formas de hacer rosas, una de ellas es moldeando el foami aplicando calor de una plancha pero puede ser muy peligroso, te puedes quemar.
Presento una alternativa para decorar y elaborar rosas de forma muy sencilla que seguro te encantará.
PASO A PASO / STEP BY STEP

Materials:
- Foami or eva rubber.
- Yellow felt.
- Thread or yarn.
- Scissors.
- Hot silicone.
- Sticks of height.
- Foam rubber.
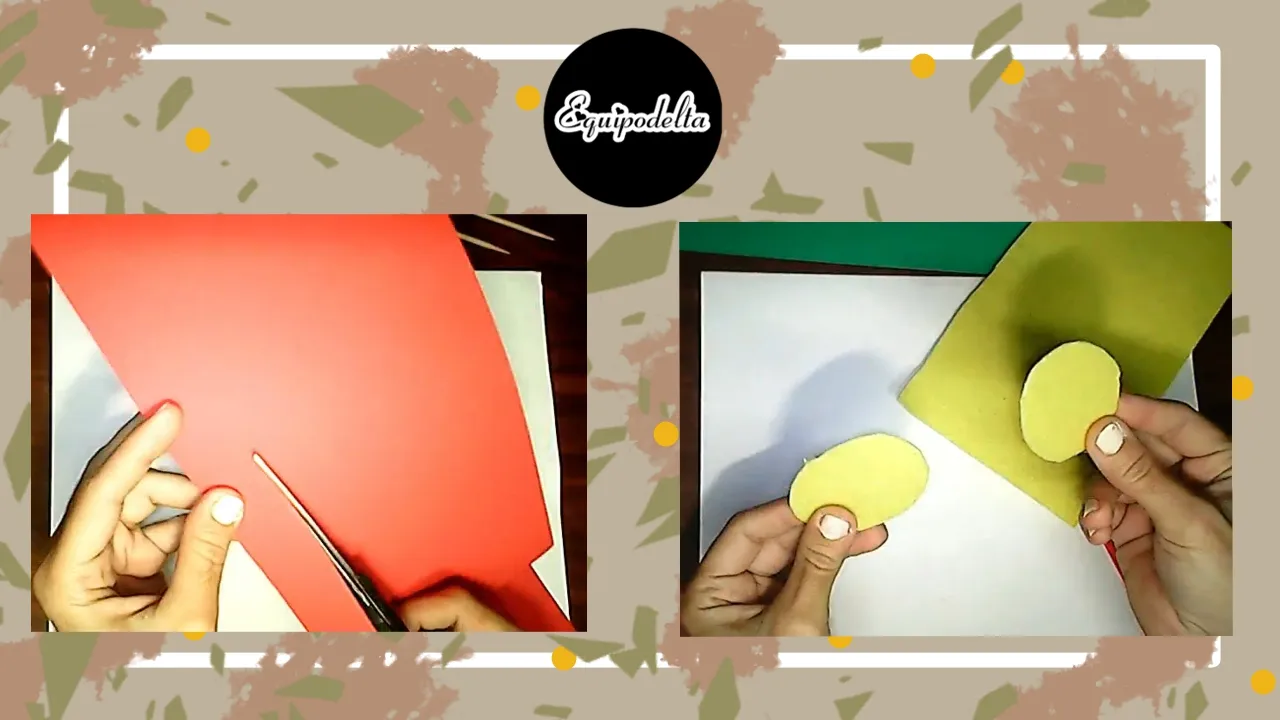
Step 1: For each rose, you need a strip of foamy about 4 centimeters wide by the length of a letter size foamy, I will make three roses, so I need three strips.
Next, cut out a circle of 5 centimeters in diameter from yellow felt.
Paso 1: Para cada rosa, necesitas una tira de foamy de aproximadamente 4 centímetros de ancho por el largo de un foamy tamaño carta, yo haré tres rosas, por lo tanto necesito tres tiras.
Seguidamente recortamos un círculo de 5 centímetros de diámetro de fieltro amarillo.
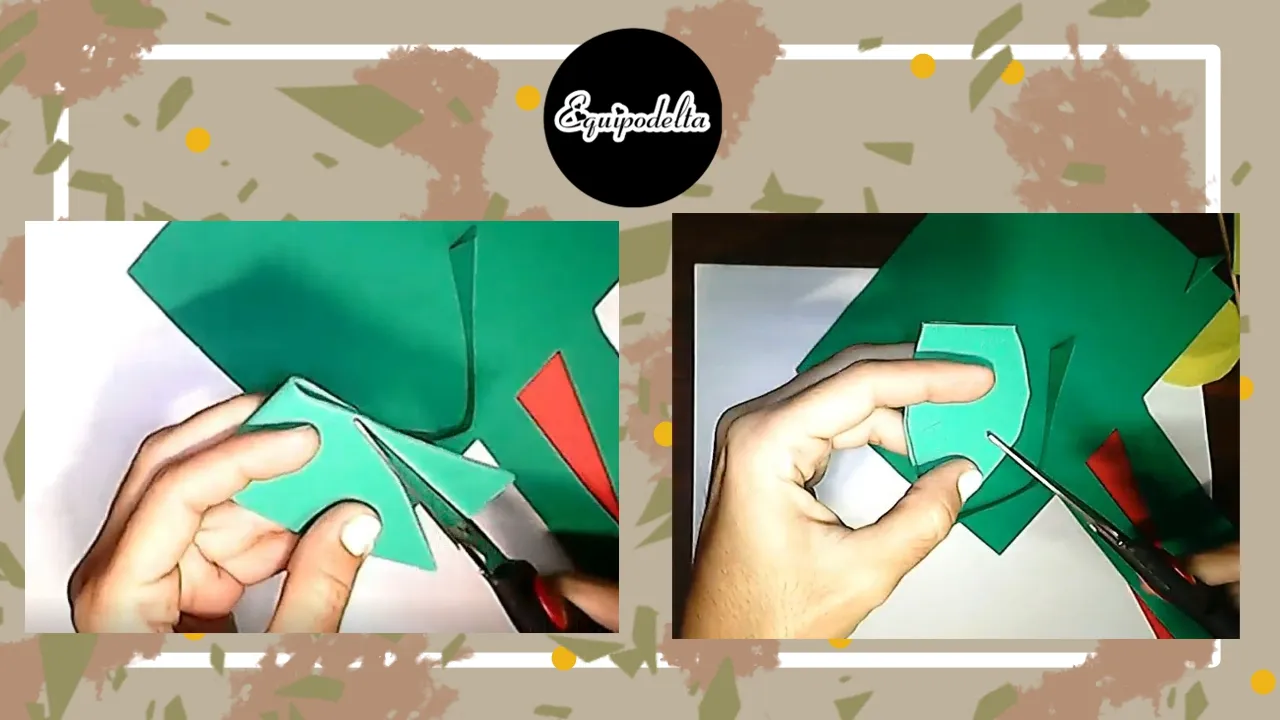
Step 2: Cut out leaf shapes of the same size, for each rose we need four leaves. Then make three small diagonal cuts on each leaf and at the tip you cut a little bit to make it look asymmetrical.
Paso 2: Recortamos formas de hojas del mismo tamaño, para cada rosa necesitamos cuatro hojas. Luego realiza tres pequeños cortes en diagonal en cada hoja y en la punta recortas un poco para que se vea asimétrica.
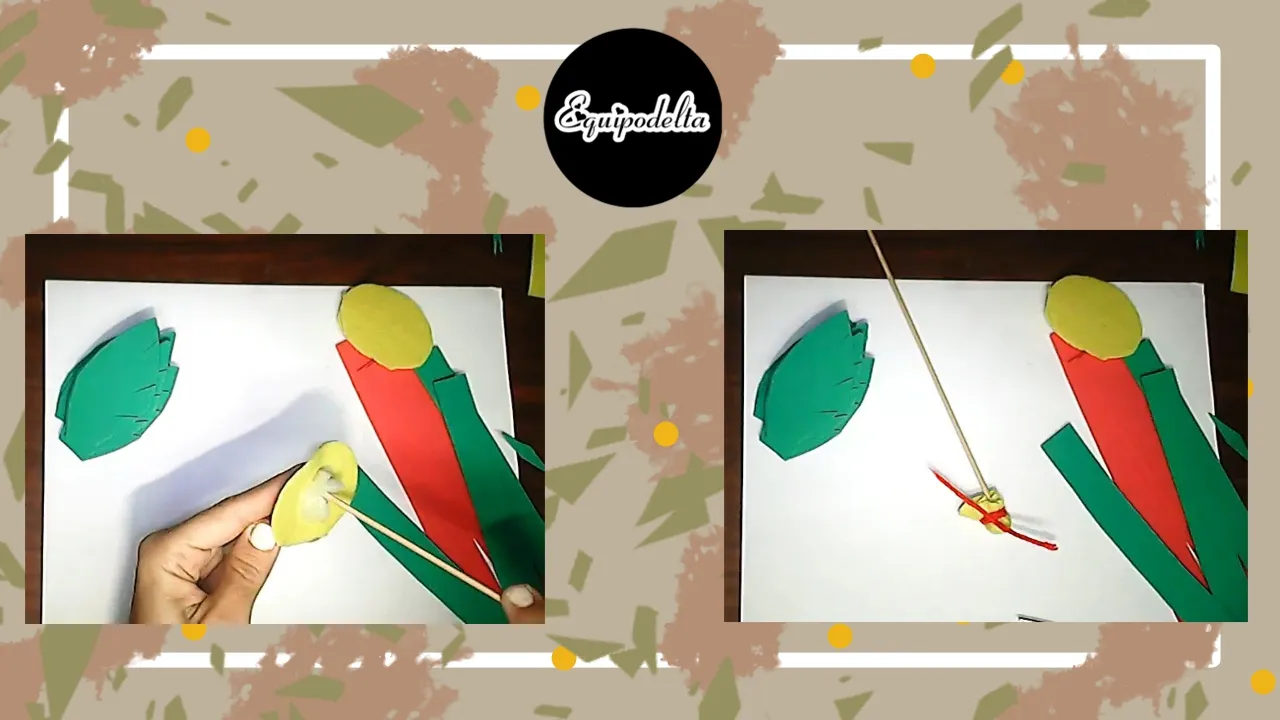
Step 3: Place some stuffing in the center of the felt and then press it with the height stick, then cover the tip of the height stick and tie with thread, yarn, yarn or string, whatever you have available, tie a strong knot.
Paso 3: Coloca un poco de relleno en el centro del fieltro y luego presionas el mismo con el palito de altura, seguidamente cubre la punta del palito de altura y amarra con hilo, estambre o cordón, lo que tengas disponible, haz un nudo fuerte.
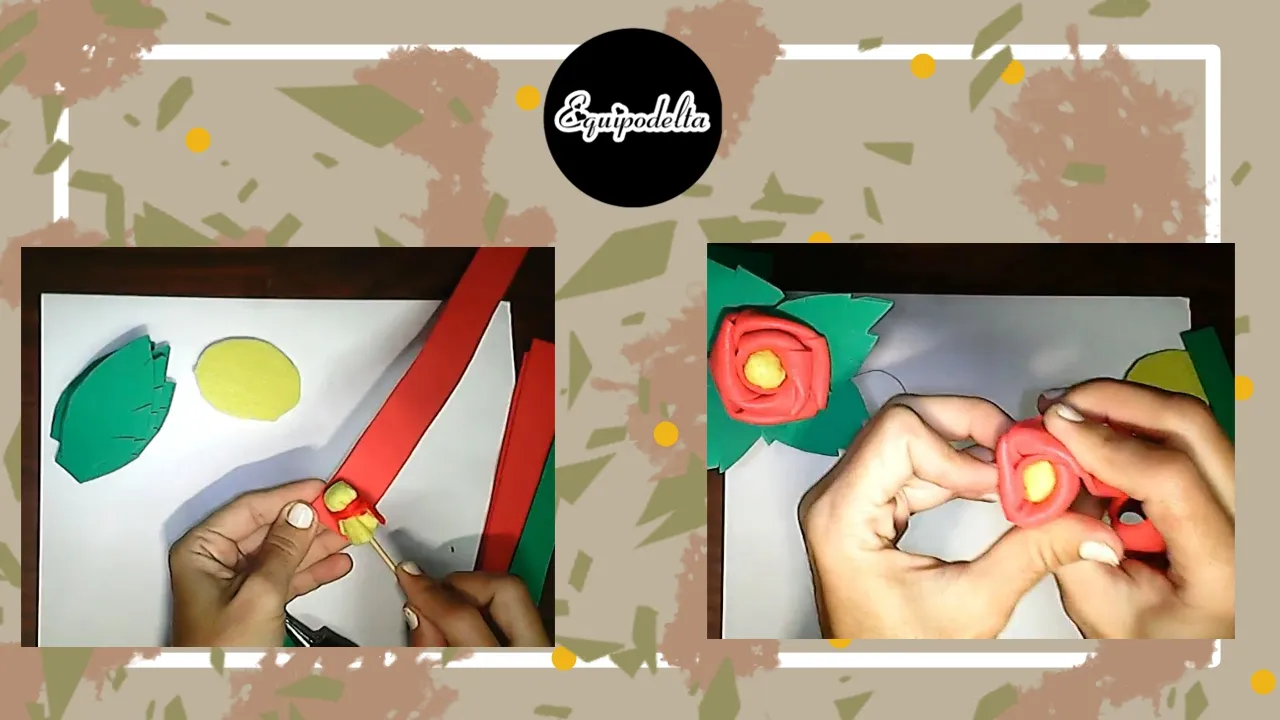
Step 4: place a dot of hot silicone on the foamy strip and glue our pistil (high stick), now we will begin to make the petals, with patience, once you get the hang of it, it will be a piece of cake, each petal consists of just turning the foamy strip outwards. On each petal make sure that you put pressure on it and make sure that it is assembled.
Paso 4: colocamos un punto de silicón caliente en la tira de foamy y pegamos nuestro pistilo (palito de altura), ahora comenzaremos a realizar los pétalos, con paciencia, una vez agarres el truco, será pan comido, cada pétalo consiste en tan solo dar vuelta hacia afuera la tira de foamy. En cada pétalo asegúrate que hagas presión y quede armado.
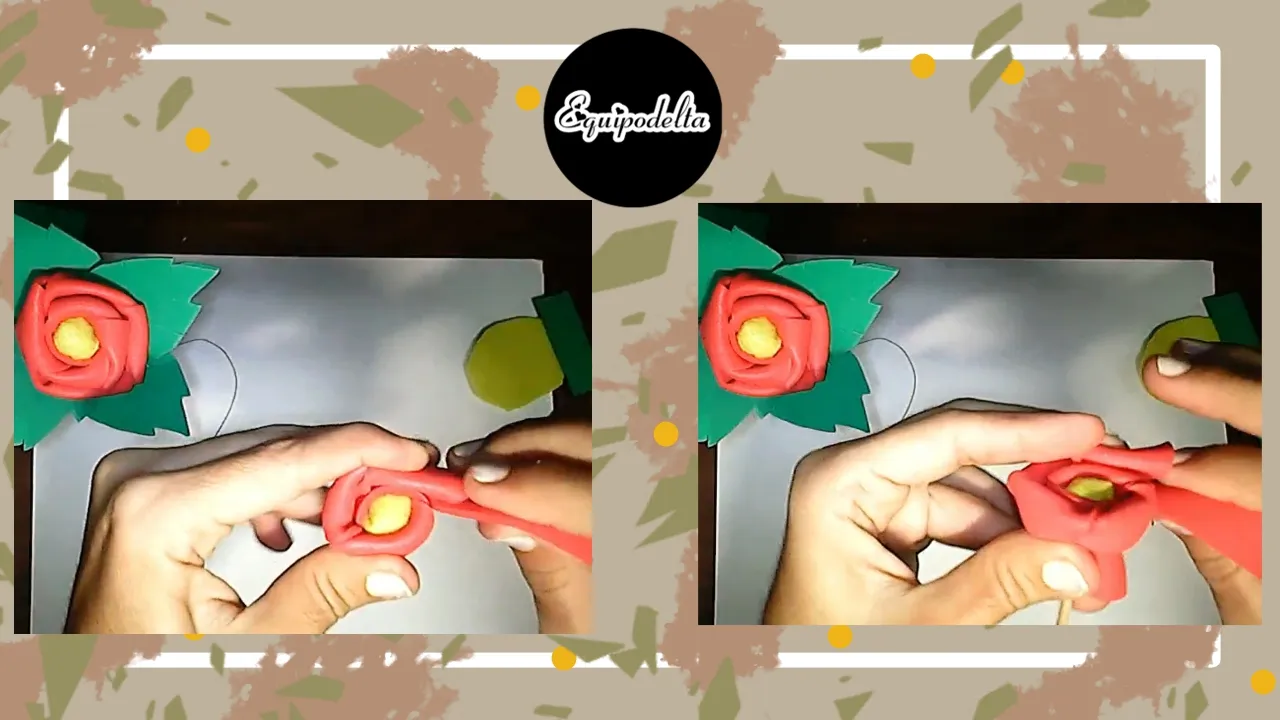
Step 5: Continue assembling the petals, remember: always folding outwards, when you finish with the foamy strip, glue the remaining end with hot silicone. If you get stuck in this step, remember that you have my video as a guide, I invite you to watch it, it's great.
Paso 5: Continúa armando los pétalos, recuerda: doblando siempre hacia afuera, cuando acabes con la tira de foamy, pega con silicón caliente el extremo sobrante. Si te estancas en este paso, recuerda que tienes mi vídeo como guía, te invito a verlo, está genial.

Step 6: To finish, we glue the leaves of our rose, as I said at the beginning, we need four, so you will glue one at each end covering the spaces and imperfections.
Ready, we have our first rose created, let's repeat all these steps to create the next one, I'm sure it will look much better.
Paso 6: Para finalizar, pegamos las hojas de nuestra rosa, como dije al principio, necesitamos cuatro, por lo tanto pegarás una en cada extremo cubriendo los espacios e imperfecciones.
Listo, ya tenemos nuestra primera rosa creada, repitamos todos estos pasos para crear la siguiente, estoy segura que te quedará mucho mejor.
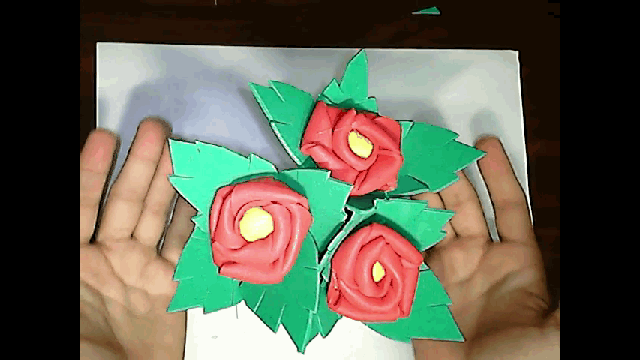
I hope you like this nice project and I encourage you to recreate it and improve it to your style.
Espero te guste este lindo proyecto y te animes a recrearlo y mejorarlo a tu estilo.
Detalles Técnicos / Technical Details
Program: MediBang Paint Pro.
Graphics tablet: Huion (Usb Pen Tablet).
Pictures and vídeo of my own. Web Cam Omega.
Designs and images courtesy of Canva
Music Vídeo:
––––––––––––––––––––––––––––––
Sunray valley by Scandinavianz
Creative Commons — Attribution 3.0 Unported — CC BY 3.0
Music promoted by Audio Library
––––––––––––––––––––––––––––––
My Youtube Channel
Mi canal Youtube, tiene un montón de tutoriales muy útiles para ti.
My Youtube channel, has a lot of very useful tutorials for you.
![]() 👉
👉 ![]() 👉
👉 ![]() 👉
👉  👉
👉 ![]() 👉
👉 
