A good few weeks have passed since my last (and also first) post about learning the skills needed for designing buildings with SketchUp. But just because I didn't post about it doesn't mean that I did not keep exposing myself to this program. At least an hour a day is the goal I set for myself, but in practice, once I'm on the roll I can stay on for several hours, if I don't have anything else to do. And boy is it important to do so! Though I kinda assumed I would needed lots of practice, I had no idea how much really.
My First Building: A Composter
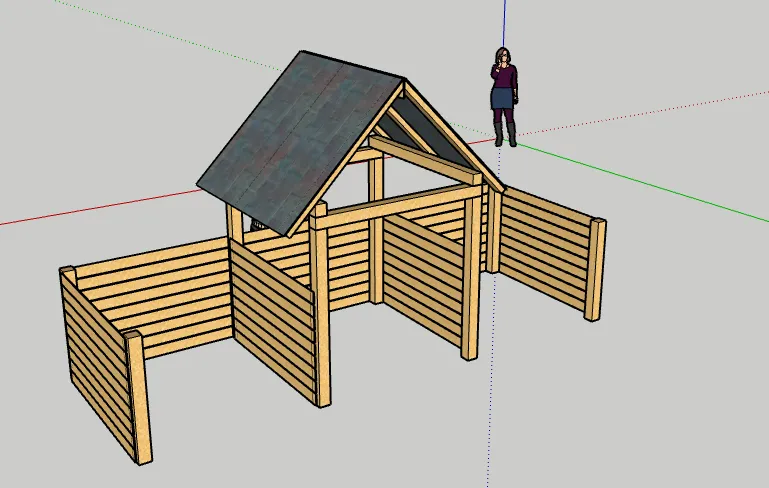
After being satisfied with my spiral staircase and sky bed, I made a few more simple drawings of a "Humanure Hacienda", a three-compartment structure for composting the contents of a bucket-style dry toilet. I actually had some experience building such a thing myself once, following the design of Joseph Jenkins' Humanure Handbook. I even found a photo of it, which was useful for estimating dimensions.
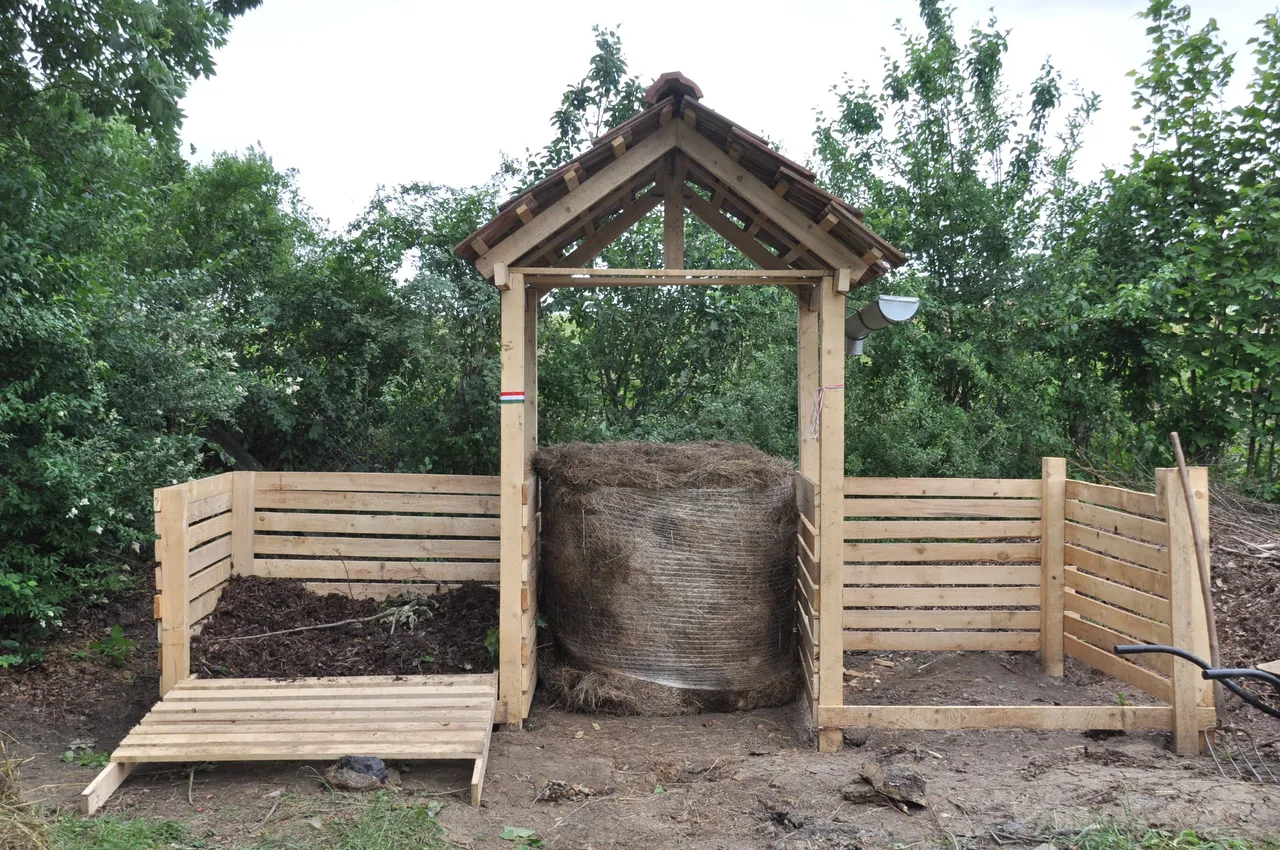
I think the the real and the virtual structures look nice together. Looking back at it now, I'm realizing all its shortcomings. The roof is pretty makeshift, to be honest, and when I tried to import the gutters and the barrel from SketchUp's 3D Warehouse, it all just became a frustrating mess. So clearly, I am still not ready for them. But that's okay, I'll get there eventually. But before playing around with other people's designs, I want to be good at making my own.
Next Step Up: A Tiny House
I've always loved the concept of a tiny home: building a proper home on a trailer, that's not a mere camper, but a proper house, albeit at the dimensions that could be hauled to another location without all the hassle an oversized load would take. So I jumped right in, and started following the first tutorial I came across. Maybe it was a mistake, but since I've come this far, I want to complete it.
Granted, the instructor in this video, Michael Janzen from TinyHouseDesign is a competent authority on designing tiny homes, much more so than being a good SketchUp teacher. In his videos he likes to run a recording of his SketchUp work at high speed, while he explains the steps he's taking. Honestly, had I not covered the videos I mentioned in my first post, I probably wouldn't have had a clue about how to proceed. Even with this much experience it was still pretty challenging.
Starting With the Right Sized Trailer
What bothered me most of all was how he doesn't mention any dimensions. Occasionally I would get a glimpse at it if I paused the video at the right moment, or I could guesstimate them, compared to the rest of the structure. But this little problem turned out to be an extra round of practice (meaning having to go back to the beginning) when I picked the wrong trailer!
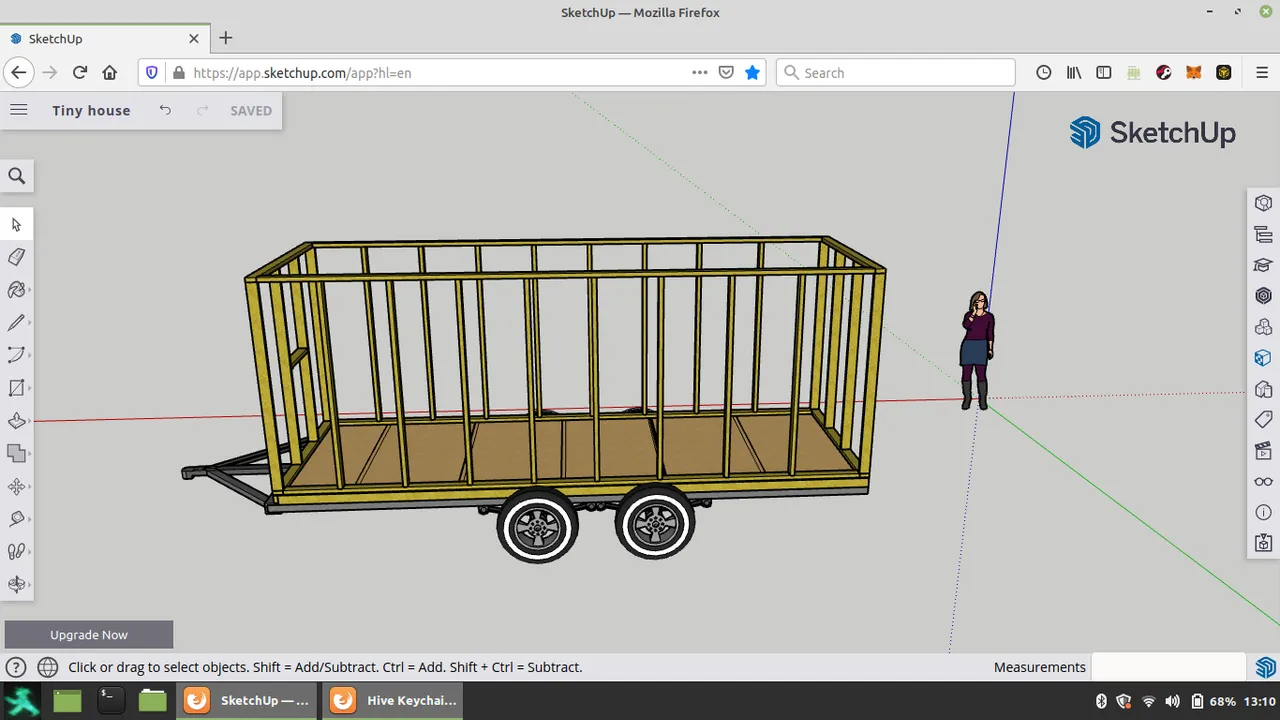
Most states in US consider 8.5 feet as the maximum width for trailer to be taken on public roads without special requirements. However, the first trailer I got from the 3D Warehouse with its six-foot width was considerably narrower. At 17 1/2 feet, even its length was rather modest, but I didn't care. I dutifully finished the floor joists, covered them with plywood, then continued framing the walls with perfectly spaced 2x4 studs. Only then did I decide that I probably was not going to be able to follow the entire tutorial with a building house this tiny.
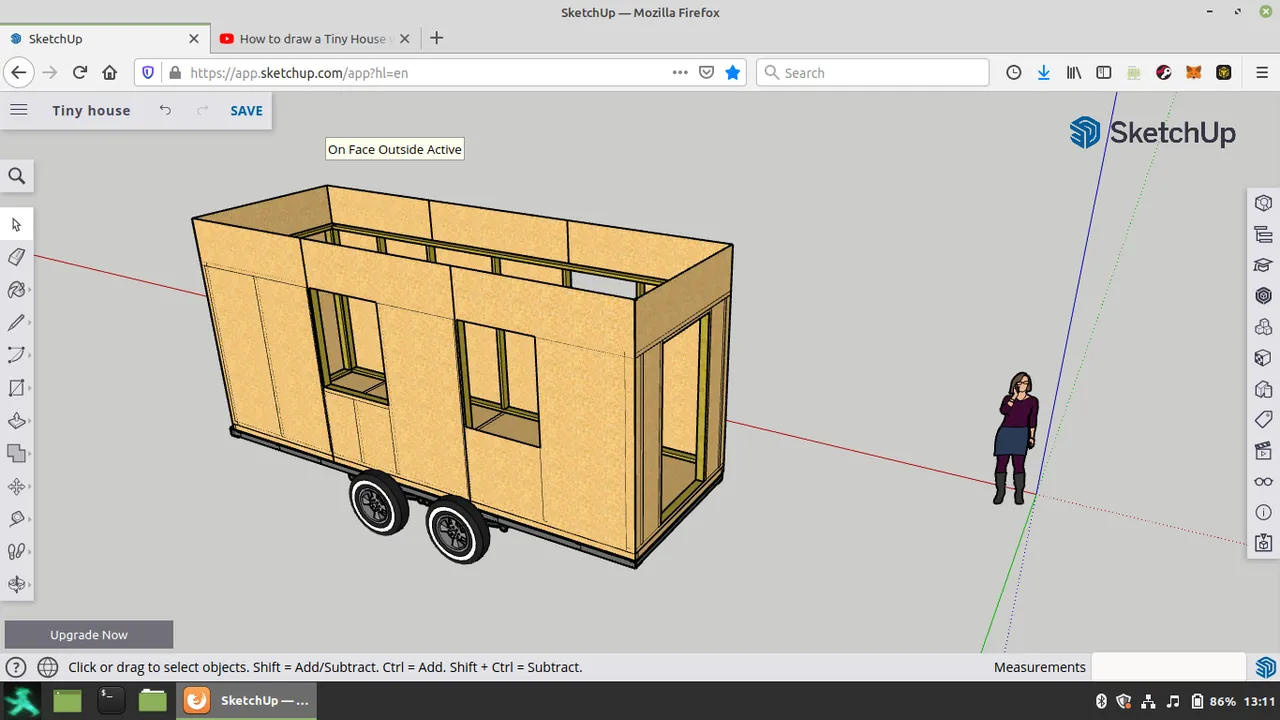
So I went back to the 3D Warehouse, and looked for a bigger trailer. The one I found was a decent 24 feet long, and 8 feet wide. This proved to be ideal for covering the walls in complete plywood sheets, which come in 8x4 feet, something I didn't even consider in my first attempt. Contrary to expectations, including my own, I didn't mind repeating the whole process. It gave me a chance to practice what I'd learned, and thus get more confident at it, which translates to spending less time thinking and more time doing.
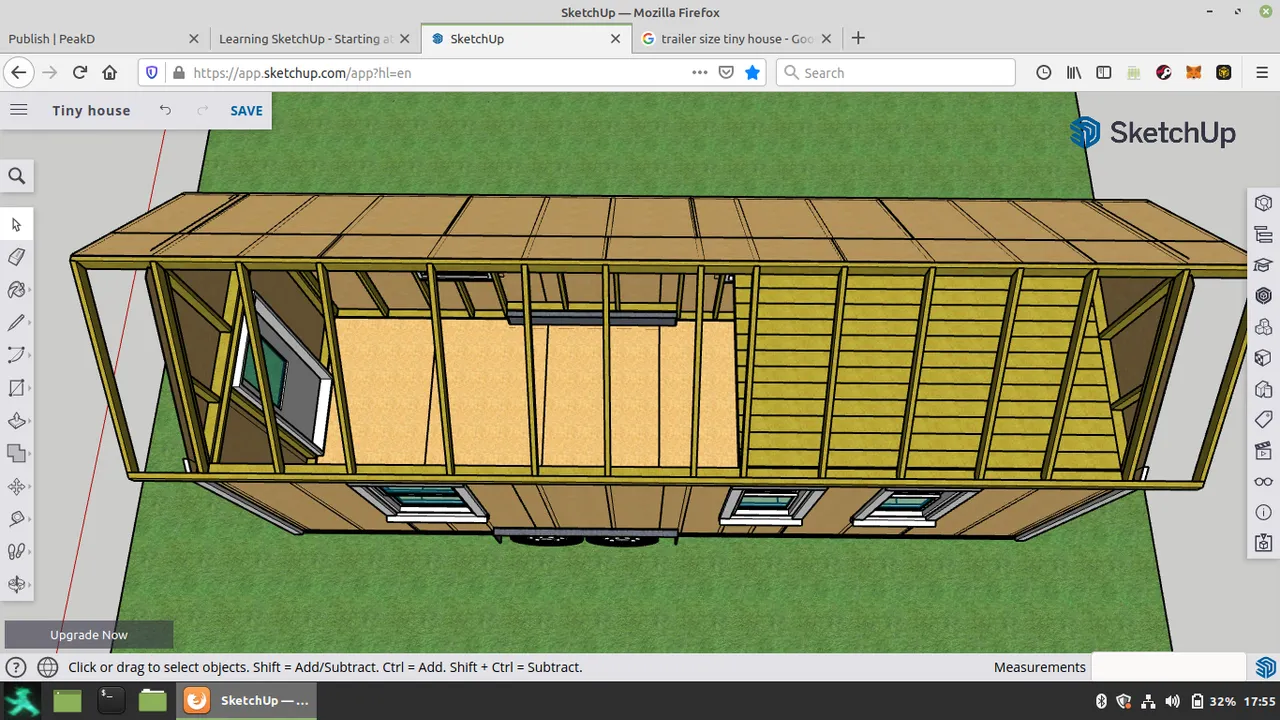
From the Walls to the Roof
The second time around the entire framing job turned out to be much more precise. While the studs were not evenly spaced, they took into consideration the wheel-wells of the trailer. But once I got to the rafters, I placed them perfectly on top of each stud. I even gave each one a nice bird-mouth without compromising their structural integrity. Then I covered all the sides by plywood, never exceeding the 8x4 limits, always placing their edges on the 2x4s, and staggering them properly on the roof.
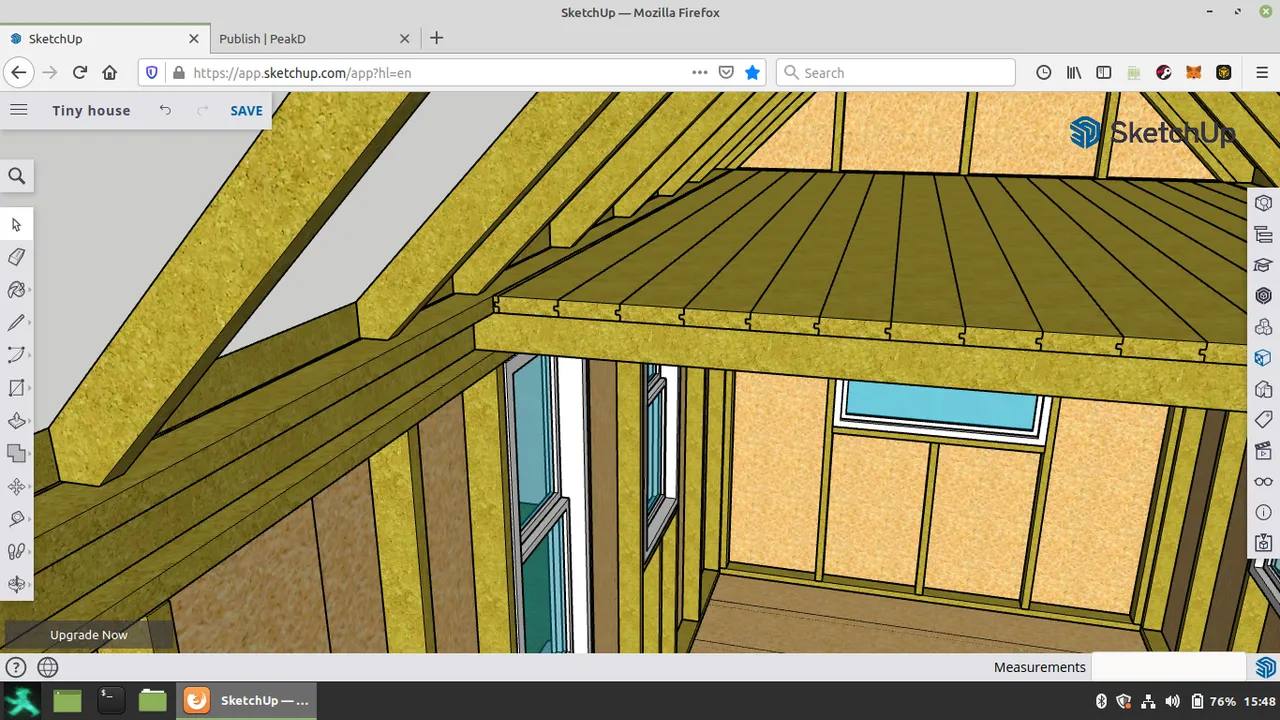
Inside, I followed the steps making the loft. Though Michael suggested to leave the tongue-and-groove detail, I did undertake it, and in fact it was much easier than I expected. And the result looks phenomenal, so I wanted to include a screenshot of it here:
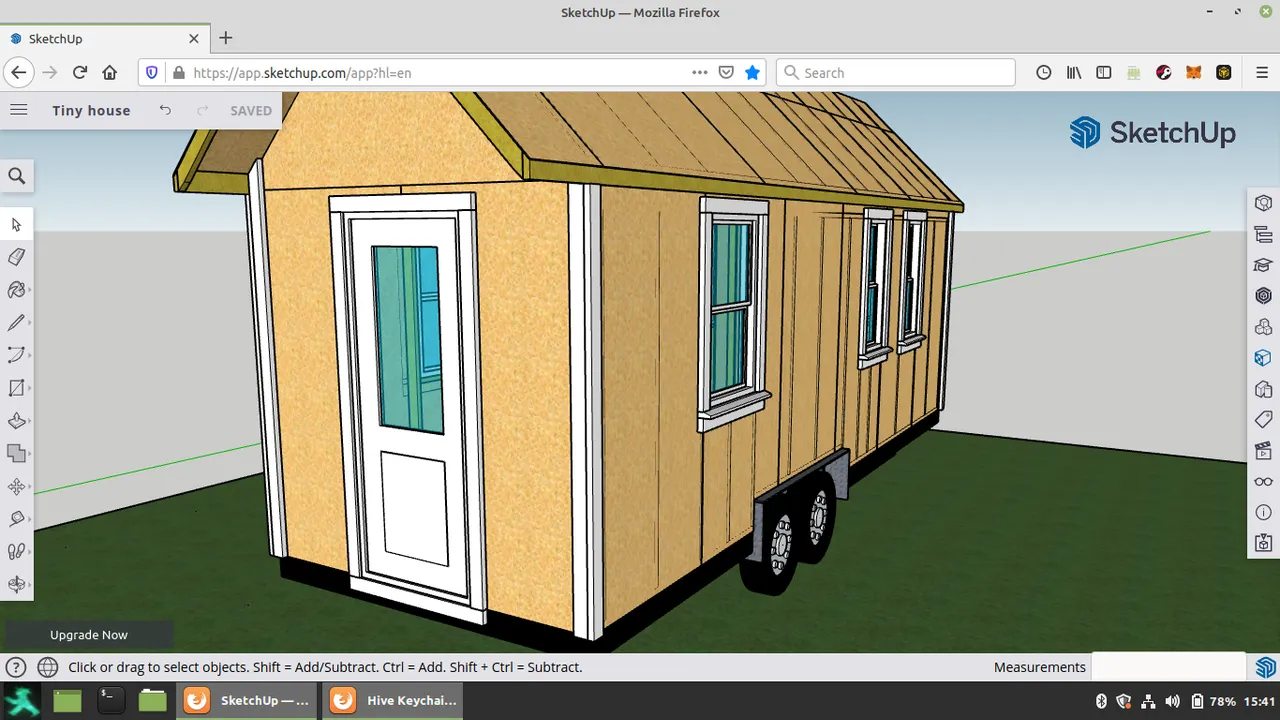
Doors, Windows, and Trimming
The second time round I also made sure to include a stud under each window, so filling in the empty holes with a pretty window frame, and two framed glass panes inside, was quite straight forward. While doing so I got comfortable at using the offset tool, something I've been slightly familiar with, but not confident. Sure, the 3D Warehouse has plenty of doors and windows to choose from. But making my own wasn't that difficult, and this way my design won't eat up unnecessary memory, as I remember from the gutters for the composter. Finally, I added some trimming around the door and the windows, which by now went easy-peasy. All in all, I'm quite satisfied with how my tiny home is coming along.
Next Step: Installing the Pro Version
While I am enjoying the learning process, and getting more and more competent at using SketchUp, I also realize that I'm reaching my limits with the free online version. One major shortcoming I keep running into is the lack of the Outliner tool, where you can organize each group or component into layer, activating or deactivating them to get access to whatever may have gotten hidden under everything you built on top of it.
The other reason is the memory required for accessing and modifying all the things assembled. It makes sense: the more complex your design, the more time / bandwith it will take to display everything properly, if everything is online. Fortunately I've managed to get my hands on a number of SketchUp versions. But before I can install them, I need to get Wine. This will be the first time to install a Windows program on my Linux system, which requires this emulator. So stay tuned for my next update... the way things have been going, I should have made some some interesting progress within a month or so.