Greetings!
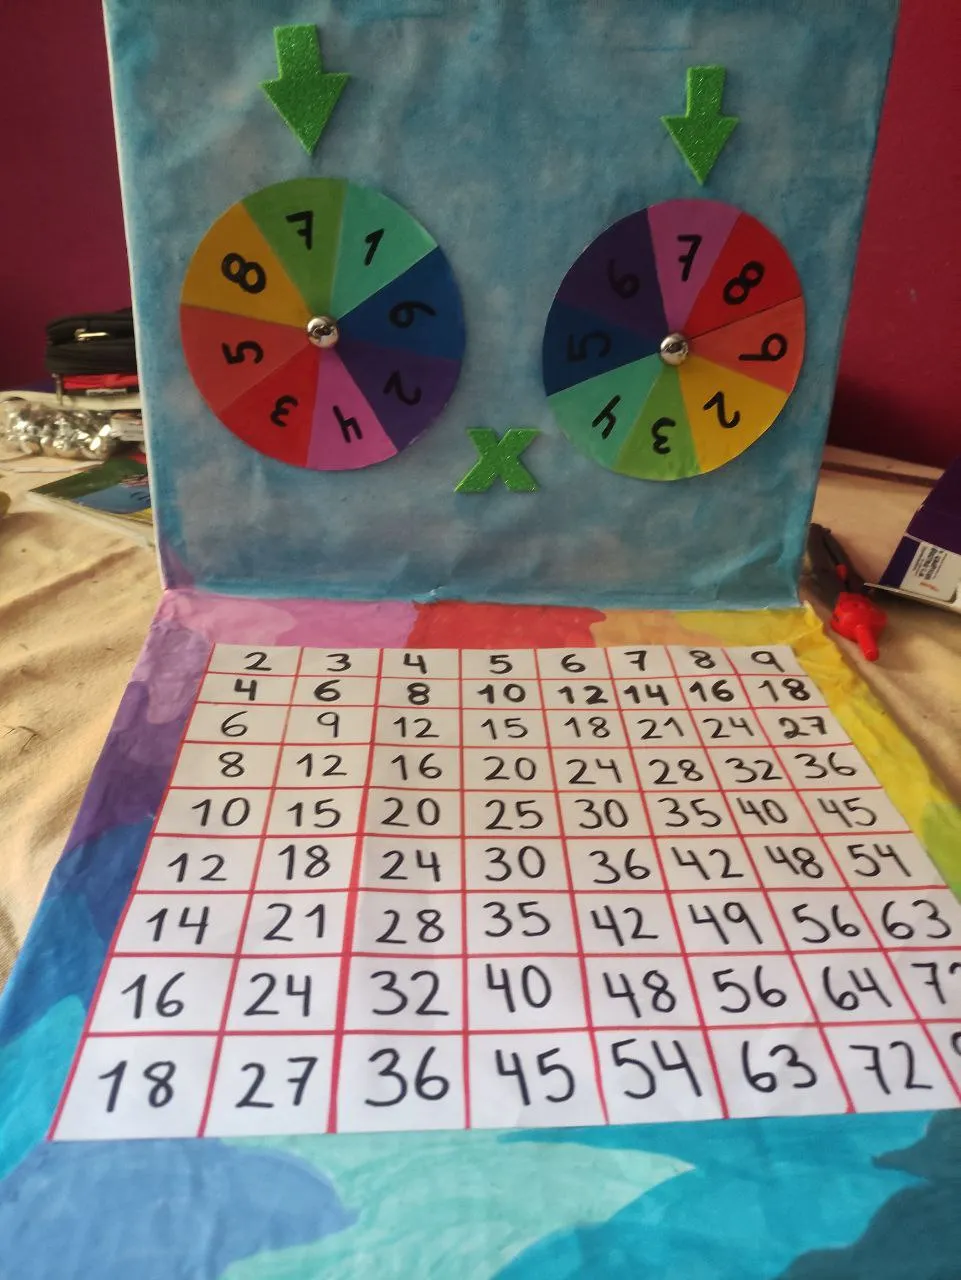
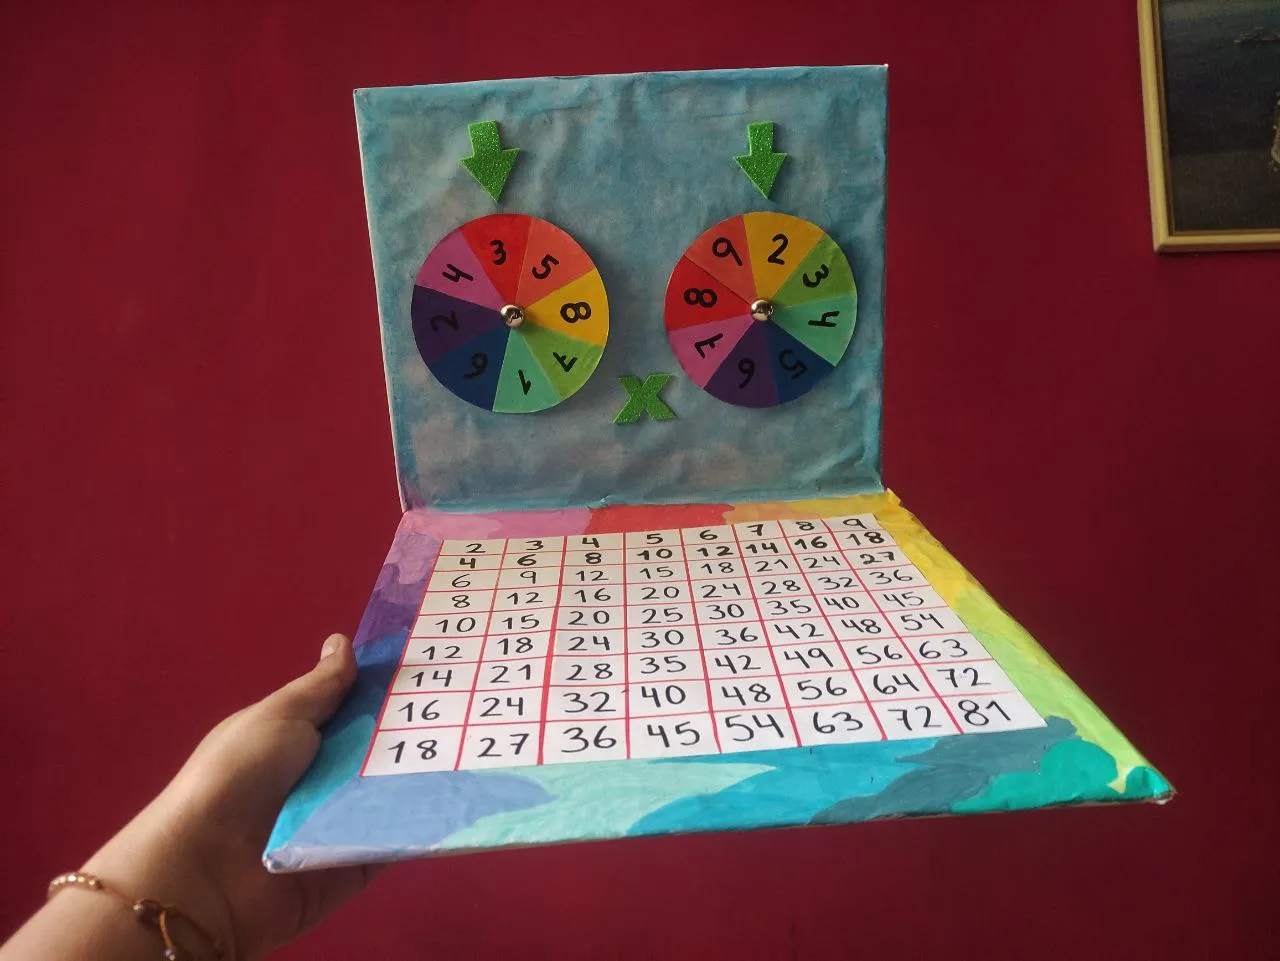
Although this school year has been difficult for all of us, we always completed the assigned tasks, one of which was to make this educational multiplication game. My son was very excited when I taught him how to play, since he really hates math, and with this type of game we can stimulate them and get them a little more interested in learning. Although I had some difficulty making this game, it wasn't as complicated as other activities I've done before. I think the hardest part was understanding the game, since I found the idea on Pinterest and only saw images without any explanation, ha ha ha.
2 Trozos de cartpon del tamaño que prefieras
Tijeras
Papel
Marcadores acrilicos
Tiza
Ganchos mariposa
Foami
Silicon caliente
2 pieces of cardboard in the size of your choice
Scissors
Paper
Acrylic markers
Chalk
Butterfly hooks
Foam
Hot glue

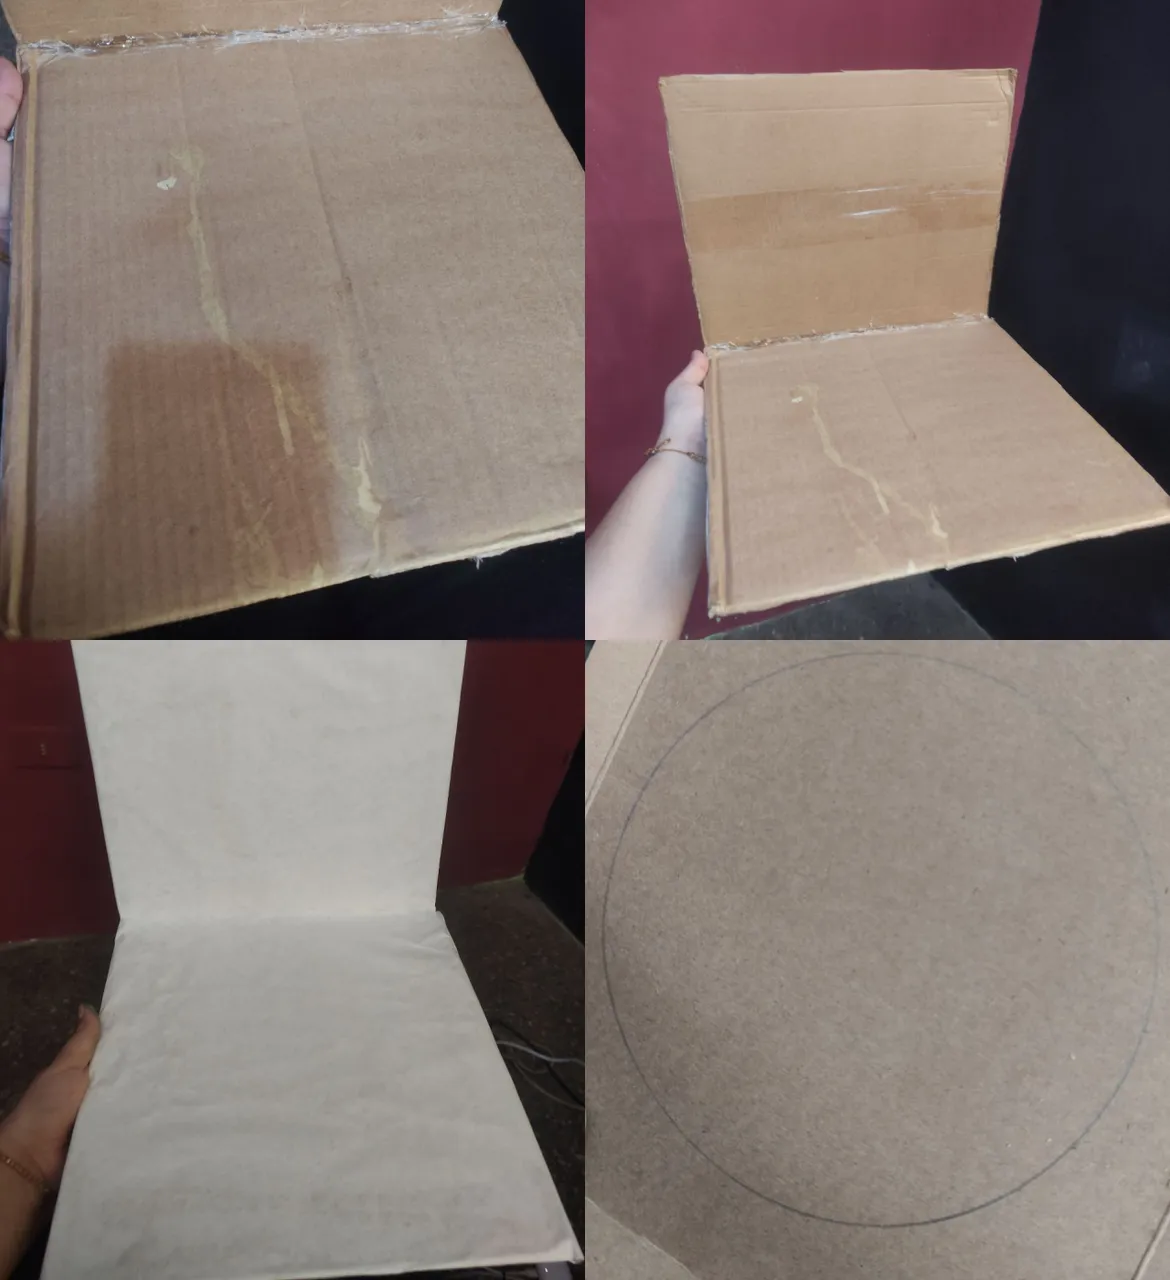
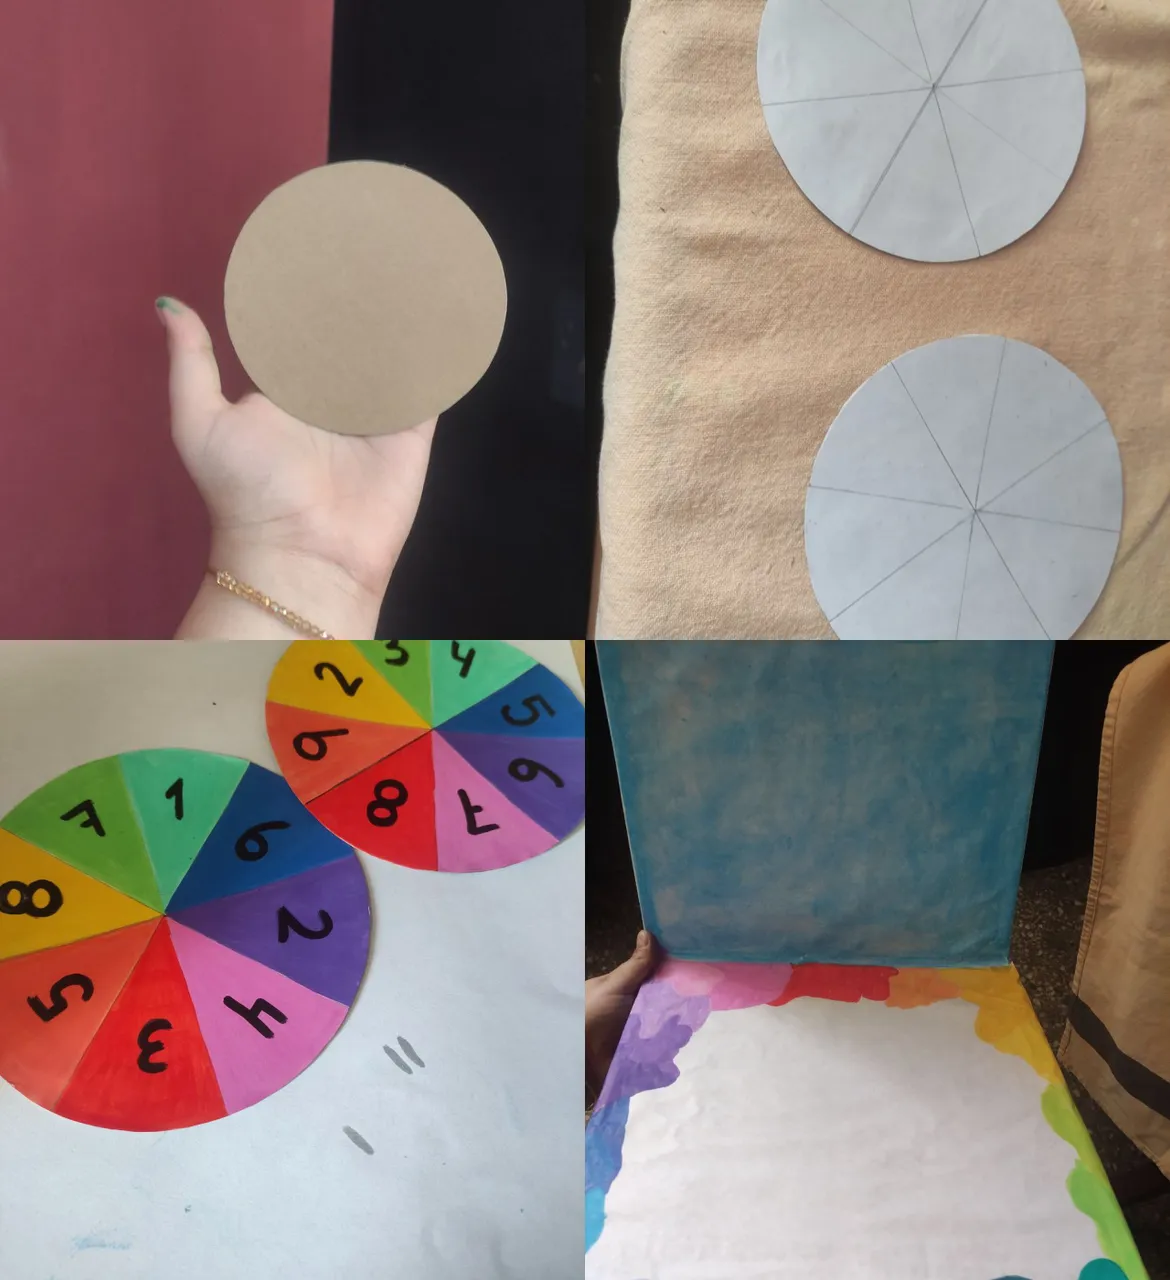
Take two pieces of cardboard that i cut out of a small box i had and glue them together with silicone. I didn't measure this cardboard because I simply cut out two sides of the box and they fit perfectly. Then I covered the entire cardboard with white cardstock. It ended up a little wrinkled, but the hot silicone didn't help much with that. Next, I took a cereal box and drew two large circles, which I cut out.
After cutting out both circles, I covered them with white paper and then divided them into 8 parts, which I then painted different colors using acrylic markers. I then placed the numbers 2 to 9 on one and 1 to 8 on the other. Meanwhile, I began to decorate the cardboard I had covered so that it wouldn't look so plain in white. I didn't really have any other colored paper to cover it with, so I had to improvise. I decided to fill the top part with blue chalk, which I scraped with scissors and spread with my fingers. On the bottom part, I drew figures in different colors using the acrylic markers again.
I had been waiting for the right moment to use these butterfly clips I bought a while ago on Aliexpress, and today was the day. They were essential for the wheel to work properly, so I made a hole in the center of each circle and also a hole in the top of the cardboard where I wanted to place it. I threaded the clip through and opened them from the back to keep the circles movable. After making sure the roulette wheels were spinning properly, I started adding the other details in green glitter foam, where I made the multiplication X and two arrows that would indicate the number that comes up when you spin the wheel.
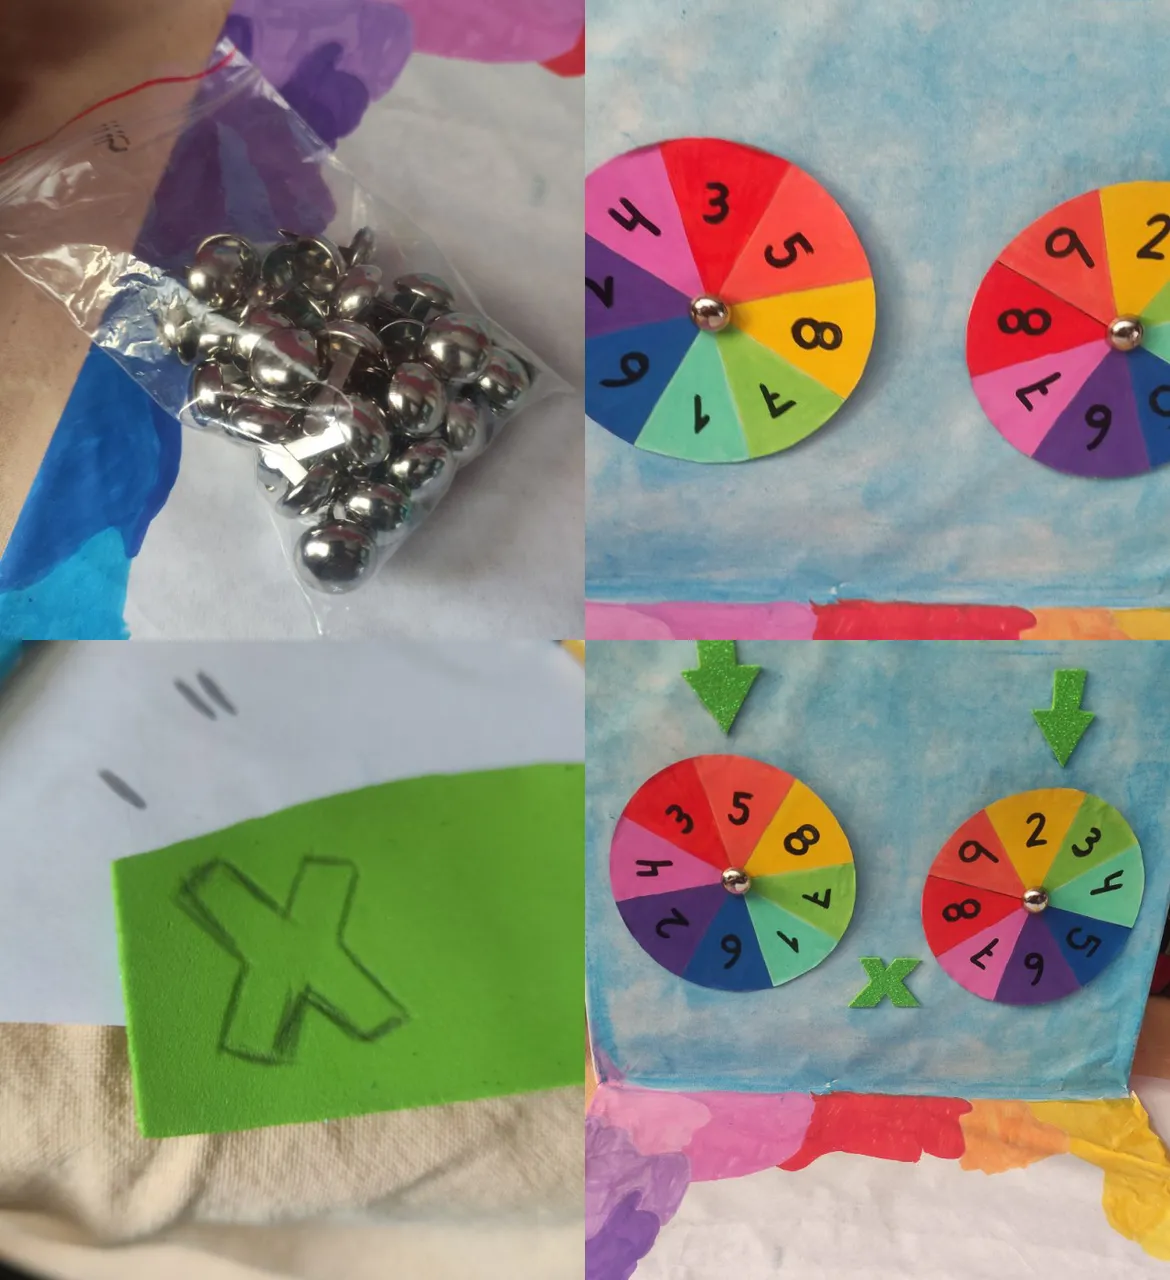
Finally, take a blank sheet of paper and draw 8 horizontal and 9 vertical lines, then start filling in each box with the result of each multiplication.