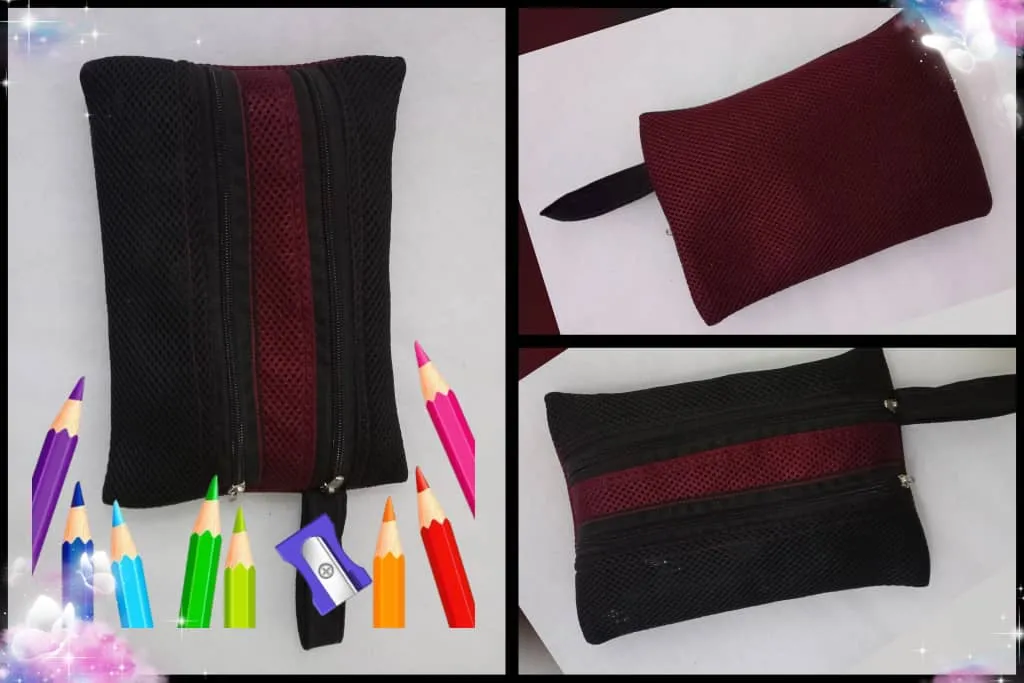

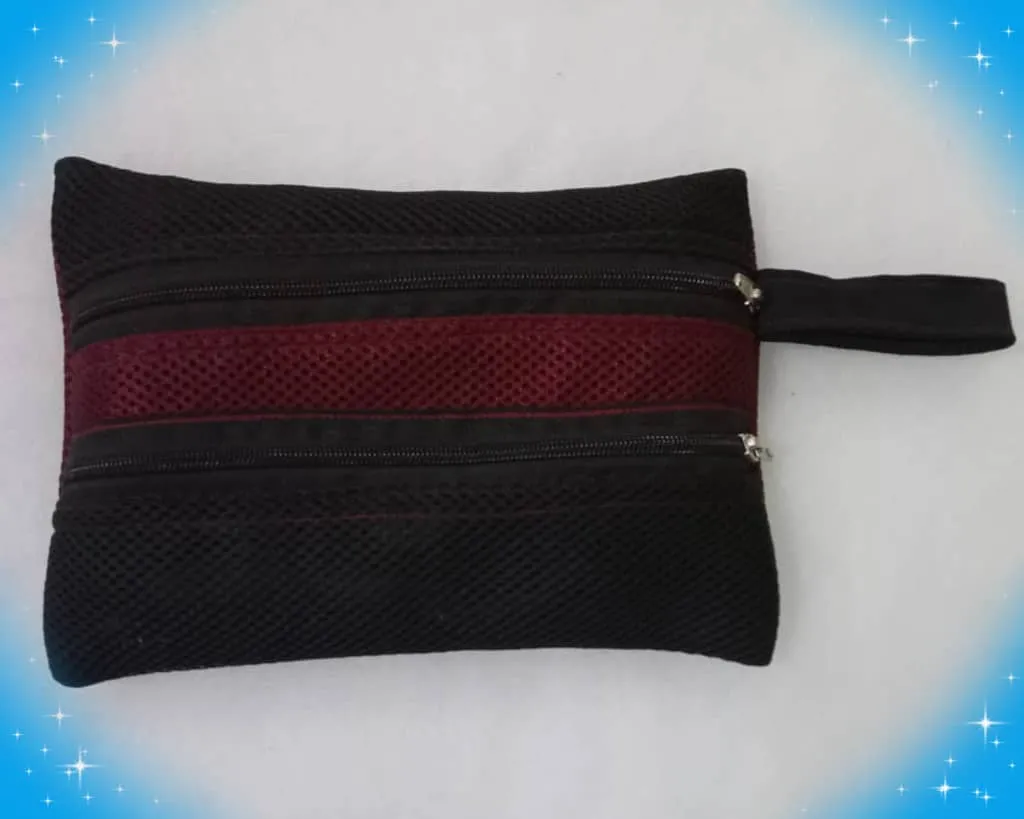
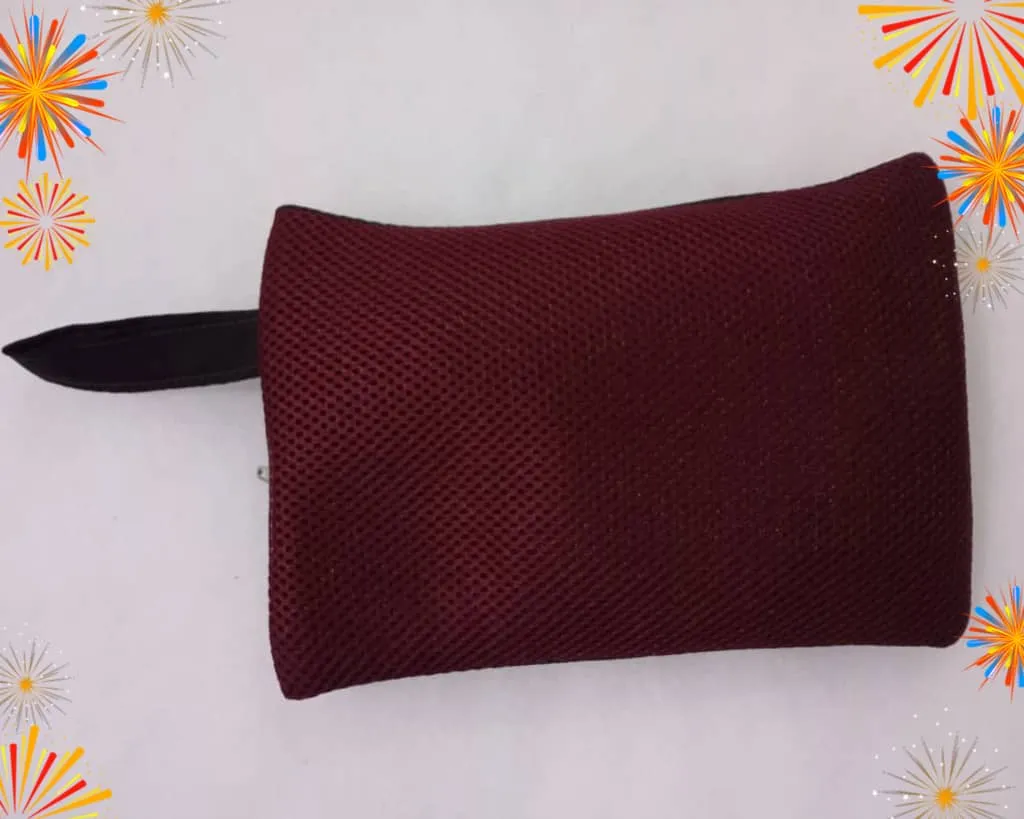
Hello crafting friends and community @Hivediy, I hope you have an excellent and blessed weekend spent with your loved ones. July is almost over and school vacation is about to begin. During this time, I have several projects planned, such as my son's backpack and pencil case, among others, that he needs to carry his school supplies. This time, I'm sharing with you how to make a pencil case with a front pocket. It's relatively large compared to standard ones, and, as I mentioned at the beginning, it also has a front pocket. The idea of this pocket is to have a space to store the eraser, since it tends to stain when in contact with pencils and crayons.
The purpose of this pocket is to protect the eraser and keep it clean, it can also be used to place the pencil sharpener or supplies that do not stain the eraser, to make it I used Sandwich Mesh fabric, it is a very versatile and strong fabric to make this type of projects, it is also durable, I have used it previously and it is of very good quality and most importantly, to sew it is simple and manageable, I invite you to join me in the process of making it.

Hola amigos artesanos y comunidad @Hivediy, deseo que tengan un excelente y bendecido fin de semana en unión de sus seres queridos, ya está por finalizar el mes de julio e iniciar las vacaciones escolares, para este período tengo planeado realizar algunos proyectos como; el morral de mi hijo, la cartuchera entre otros, que necesita para llevar sus útiles escolares, en esta ocasión les comparto la elaboración de una cartuchera con bolsillo delantero, su tamaño es relativamente grande en comparación con las estándar y adicional como lo mencioné al principio, un bolsillo delantero, la idea de este bolsillo es disponer de un espacio para colocar el borrador; ya que, al estar en contacto con los lápices y creyones tiende a mancharse.
La finalidad de este bolsillo es proteger el borrador y que se mantenga limpio, también se puede usar para colocar el sacapuntas o útiles que no manchen el borrador, para elaborarla utilicé tela Malla sándwich, es una tela muy versátil y fuerte para realizar este tipo de proyectos, además es duradera, anteriormente la he utilizado y es de muy buena calidad y lo más importante que para coserla es sencilla y manejable, les invito me acompañen en el proceso de elaboración.

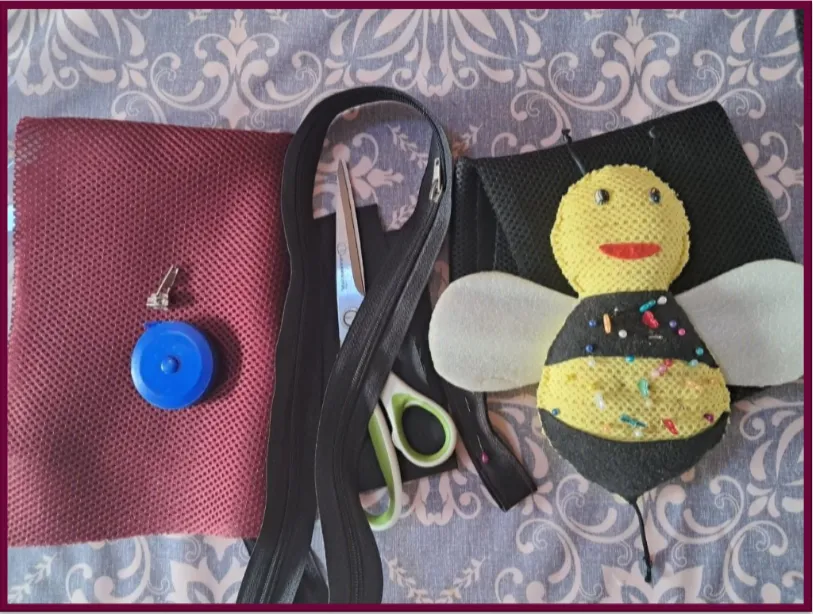
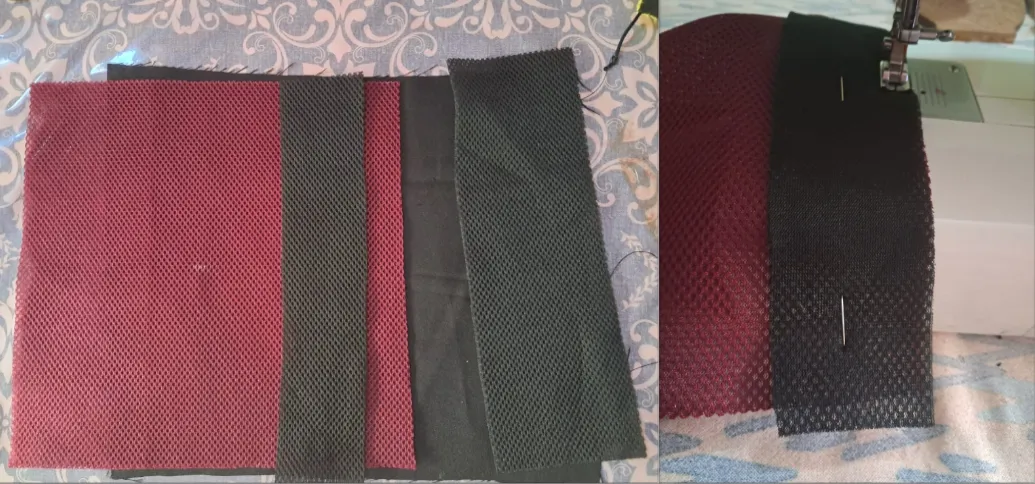
The materials used were:
Sandwich mesh fabric (wine and black)
Scissors
Slider
Zipper
Gabardine fabric (black)
Chalk
Ruler
Sewing machine
Pins
Tape measure
Los materiales usados fueron:
Tela malla sándwich (vino y negro)
Tijera
Slider
Cierre
Tela gabardina (negra)
Tiza
Regla
Máquina de coser Alfileres
Cinta métrica
Elaboration
The first step in making the pencil case was to cut the pieces; a rectangle measuring thirty (30) by forty (40) centimeters, two black rectangles measuring ten (10) by thirty (30) centimeters and the other measuring seven (7) by thirty (30), these rectangles are to be placed one on top and the other will be the front pocket.
Elaboración
El primer paso para la elaboración de la cartuchera, fue cortar las piezas; un rectángulo de treinta (30) por cuarenta (40) centímetros, dos rectángulos en color negro de diez (10) por treinta (30) centímetros y el otro de siete (7) por treinta (30), estos rectángulos son para colocar uno en la parte superior y el otro será el bolsillo delantero.
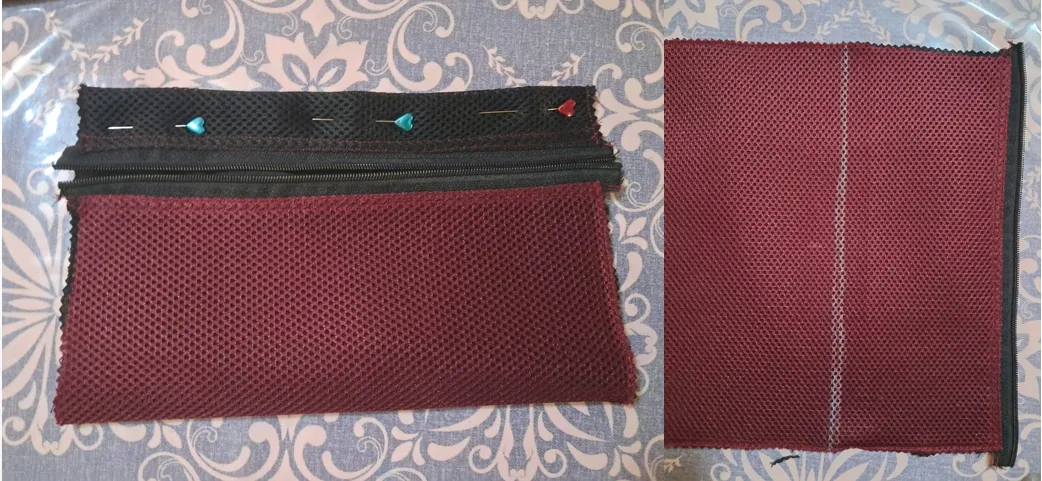
Once the pieces were cut, I placed the small rectangle right sides together and placed it on top of the wine-colored rectangle. I pinned it and sewed it with a straight stitch.
Once I joined both pieces, I now have the size of the pencil case. Then I added the lining, placed the fabrics facing each other on the wrong side, secured them with pins to prevent the fabric from moving, and sewed all the way around, using a straight stitch.
Cortadas las piezas enfrenté por el derecho el rectángulo pequeño y lo coloqué en la parte superior del rectángulo color vino, sujeté con alfileres y cosí con puntada recta.
Unidas ambas piezas ya tengo el tamaño de la cartuchera, luego agregué el forro, enfrenté las telas por el revés fijé con alfileres para evitar que se muevan las telas y cosí por todo el contorno, usando puntada recta.

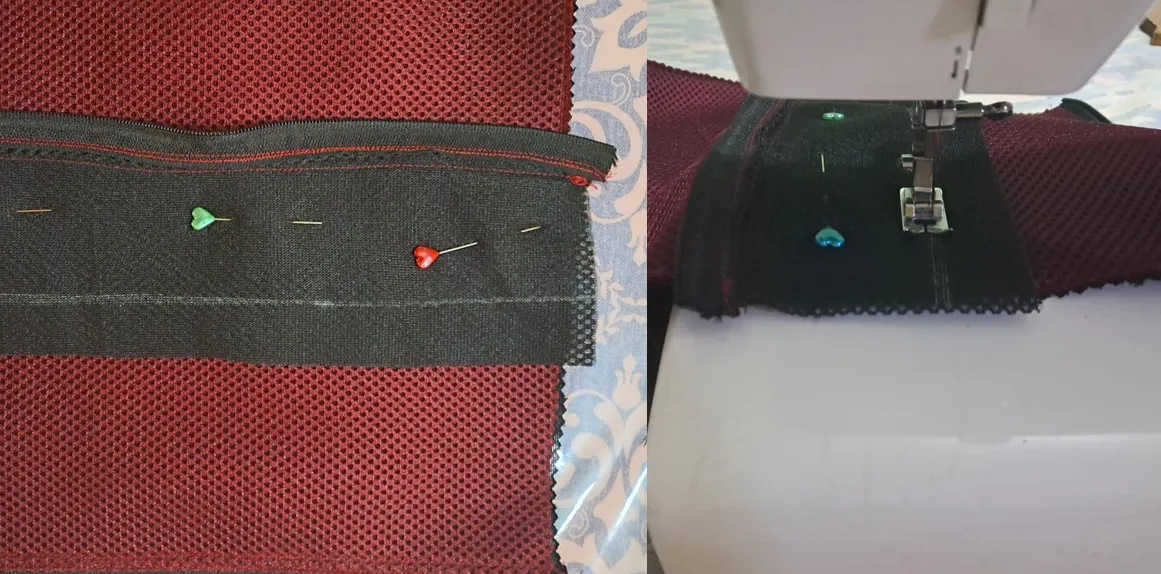
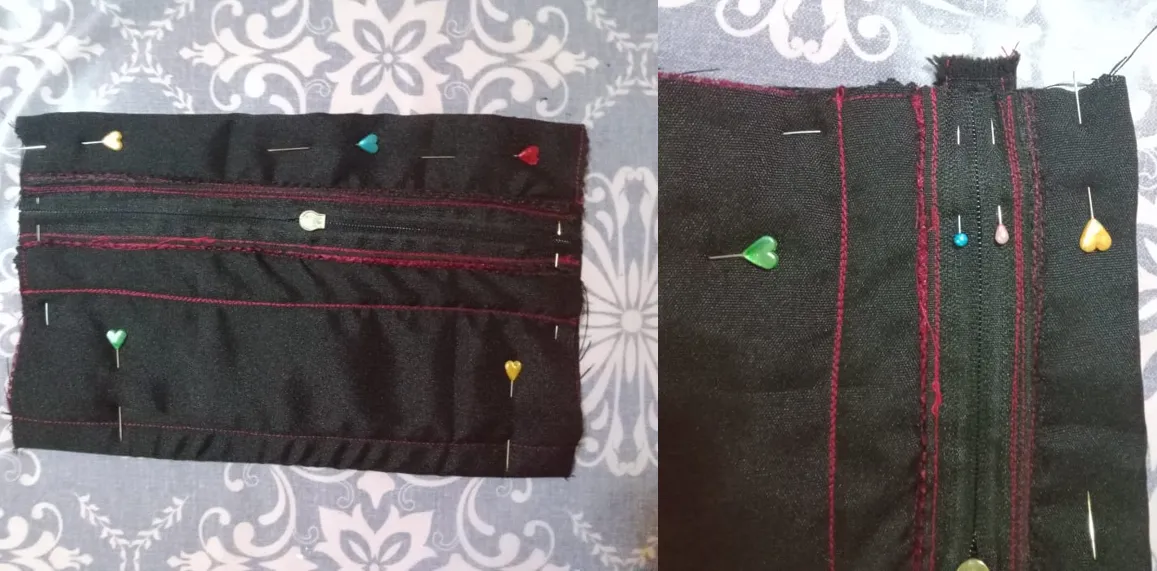
The next step was to glue the closure to the top and bottom ends of the pencil case. To do this, I removed the slider, placed the fabric and the closure right sides together, sewed with a straight stitch, turned it over, and re-edged it. The re-edging process gives the pencil case and closure more strength, as it constantly opens to store or remove pencils.
El siguiente paso fue pegar el cierre en los extremos superior e inferior de la cartuchera, para ello retiré el slider, enfrenté derecho con derecho de la tela y el cierre, cosí con puntada recta, volteé y repisé, el repisado permite darle más fuerza a la cartuchera y al cierre, ya que constantemente se abre para guardar o sacar los lápices.

Then I glued the closure to the outside pocket and just like in the previous step, I faced it on the right side, sewed it with a straight stitch and also overlocked it.
Luego pegué el cierre al bolsillo exterior y al igual que en el paso anterior, enfrenté por el derecho cosí con puntada recta y también repisé.

Once the closures were attached, I folded the pencil case to calculate the measurements and place the front pocket. At the bottom, I drew a line where it will go.
Pegados los cierres doblé la cartuchera para calcular las medidas y colocar el bolsillo delantero, en la parte inferior tracé una línea en la cual irá este.
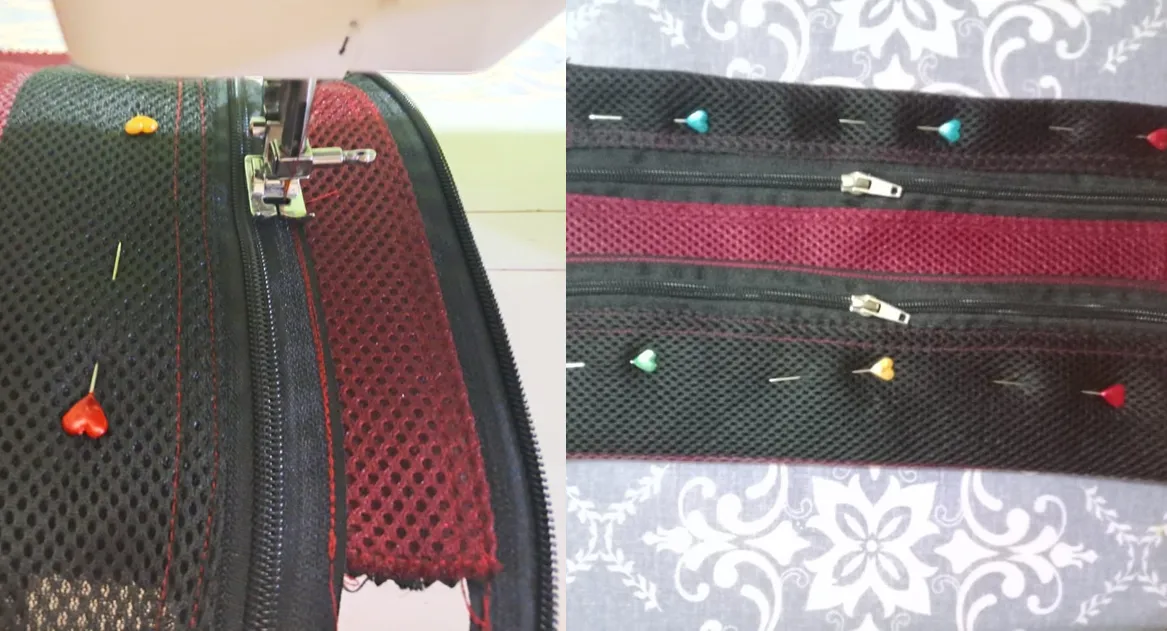
I pinned the pocket to the pouch, using the previous line as a reference. In this step, I double-stitched it to secure the pocket. Then, I turned it so the wrong side of the pocket was facing the right side of the pouch. I also checked the measurements and marked the spot where the other part of the pocket closure would go.
Con alfileres fijé el bolsillo a la cartuchera tomando como referencia la línea anterior, en este paso utilicé doble costura para darle firmeza al bolsillo, luego volteé de tal forma que quedara revés del bolsillo con derecho de la cartuchera, también verifiqué las medidas y marqué el punto donde va la otra parte del cierre del bolsillo.
Once the measurements were verified, I glued the other side of the zipper using a straight stitch, but with the wrong side of the zipper facing the right side of the fabric. Then I placed the sliders. Using pins, I marked the guide lines for folding the pencil case.
Verificadas las medidas pegué el otro lado del cierre, usando puntada recta, pero enfrentando revés del cierre con derecho de la tela, luego coloqué los sliders, con ayuda de los alfileres marqué las líneas guías para doblar la cartuchera.
Next, I turned the pencil case inside out, taking care with the measurements. I put in pins again, and at one end of the main closure, I placed a ribbon. This will help to easily open the closure.
A continuación volteé la cartuchera por el revés cuidando las medidas, puse nuevamente alfileres y en uno de los extremos del cierre principal coloqué una cinta, está servirá para abrir con facilidad el cierre.
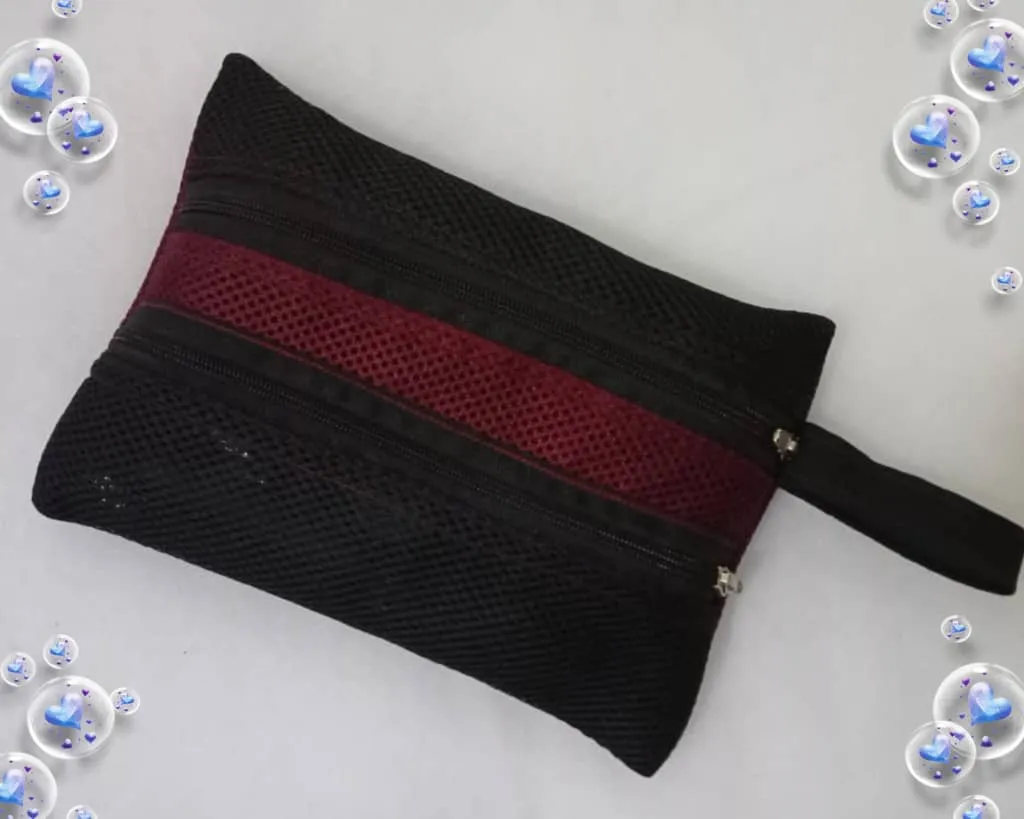
The last step was to close the sides of the pencil case. At this point, sew slowly because the fabric is thick with three layers and the needle can break. I double-stitched then zigzag stitched and with scissors removed the excess fabric. Then, turn it over and with the help of tweezers, remove the tips. This is how a nice pencil case is ready to keep your pencils organized.
El último paso fue cerrar los laterales de la cartuchera, en este punto se cose lentamente, porque la tela está gruesa al tener tres capas y se puede romper la aguja, pasé doble costura luego puntada de zigzag y con una tijera retiré el sobrante de tela, luego volteé y con ayuda de una pinza saqué las puntas, así está lista una linda cartuchera, para mantener los lápices organizados.

Blessings!
Bendiciones!
Hasta luego!
Translated with https://www.deepl.com/translator
              All images are my own.

   Todas las imágenes son de mi autoría.