
English
Hi there, friends of the HiveDiy community, how are you today? I hope you're doing great!
It's been a long time since I wove bracelets, as I don't have any yarn, and guess what? I always forget to buy. However, I always end up seeing an opportunity in what is forgotten. I found some leftover mouse tail yarn and didn't hesitate to give it a try, what could possibly come of it? Here we go!
Materials
2.5 meters of fuchsia colored mouse tail thread.
Scissors.
Lighter.
Clipboard.
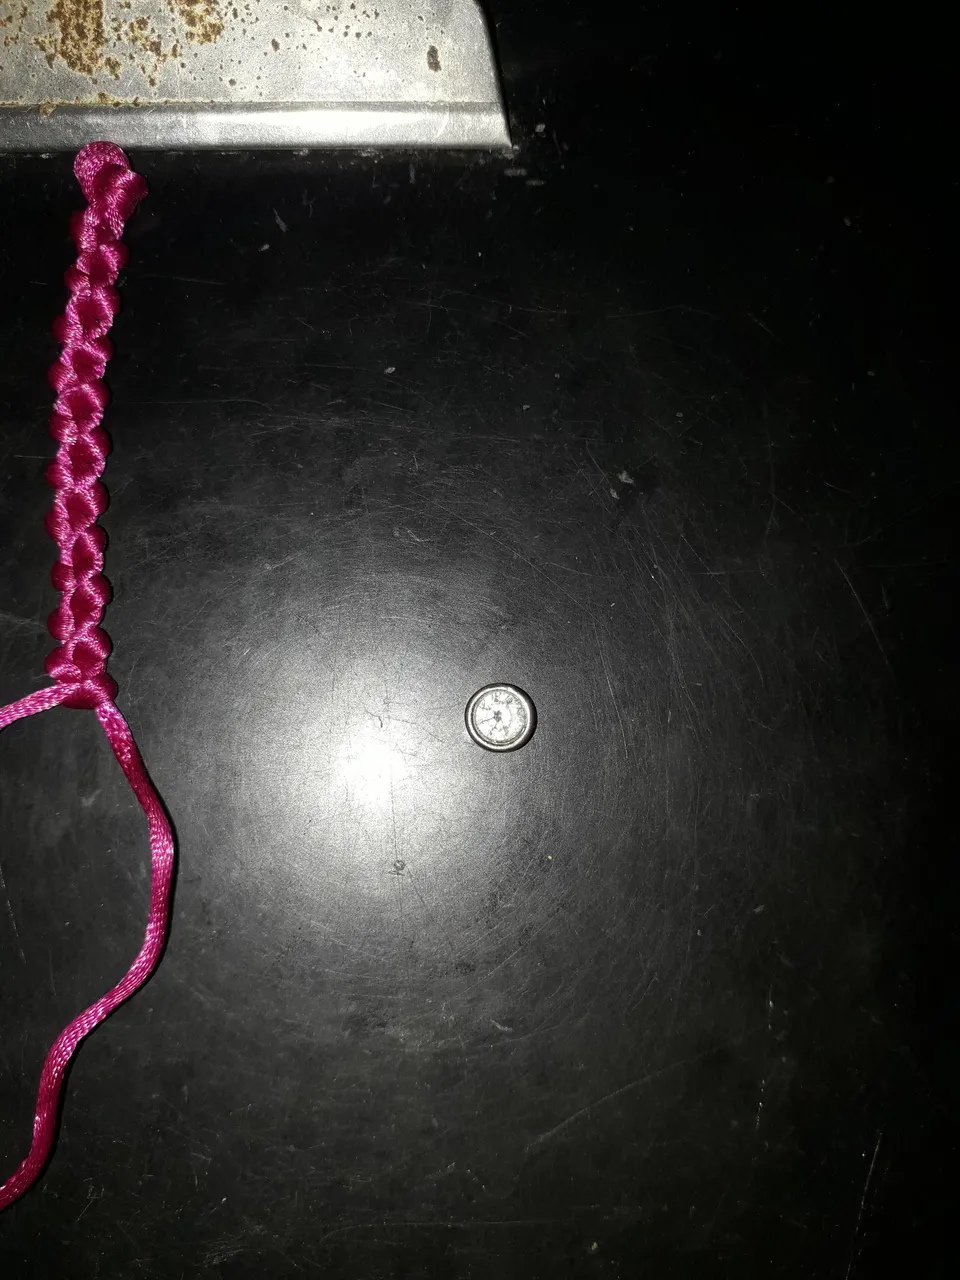
Shiny pendant to decorate.
This was a knitting that I discovered while I was bored and playing at knitting a yarn to kill time. It's nothing very special or amazing, but I still wanted to make a bracelet with this weave because its simplicity is what makes it cute, plus I added a little embellishment to give it a more special touch. And of course, I used a thread of my favorite color: pink.
 |  |
|---|
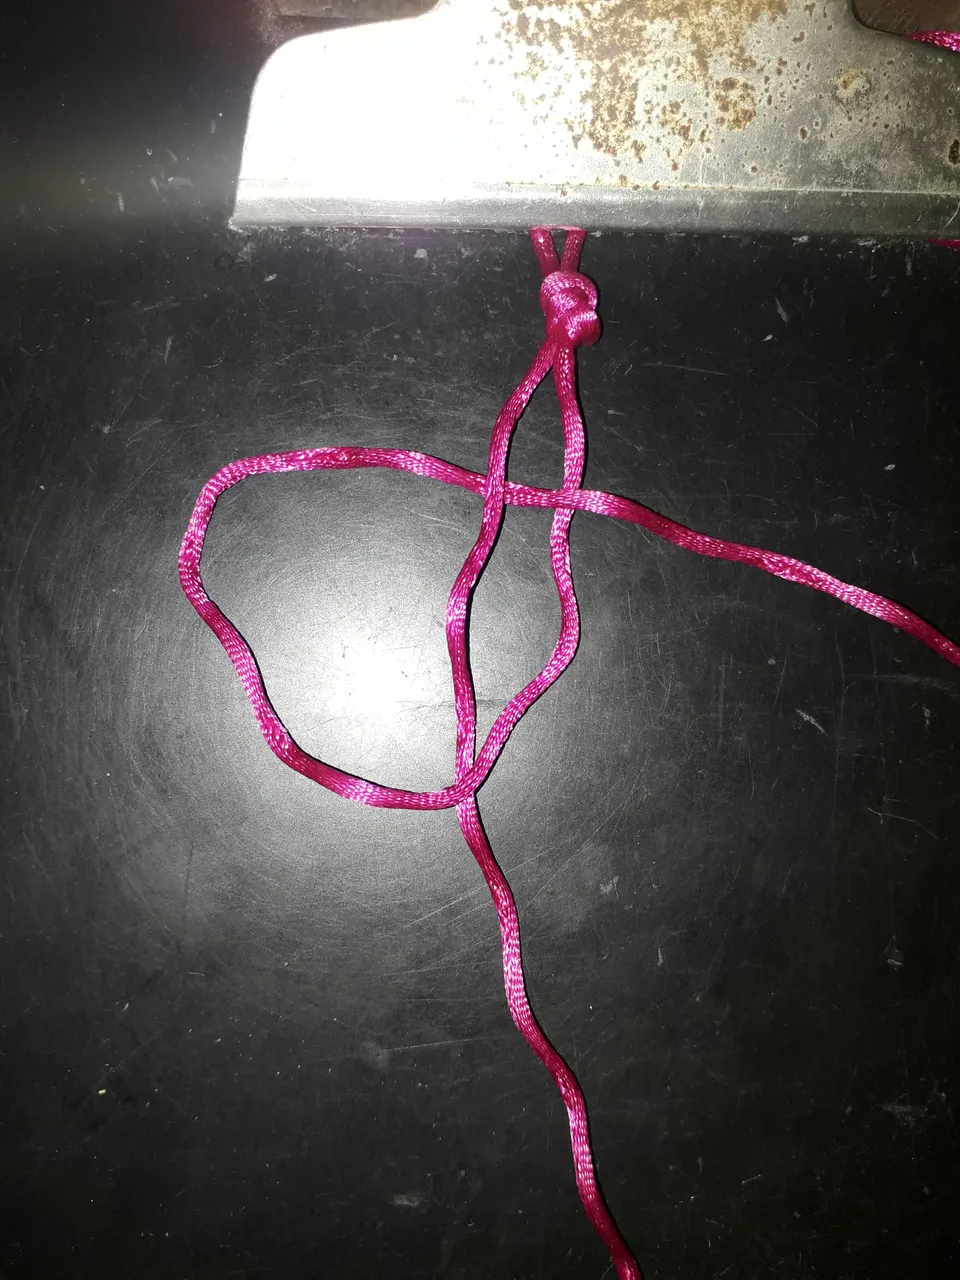
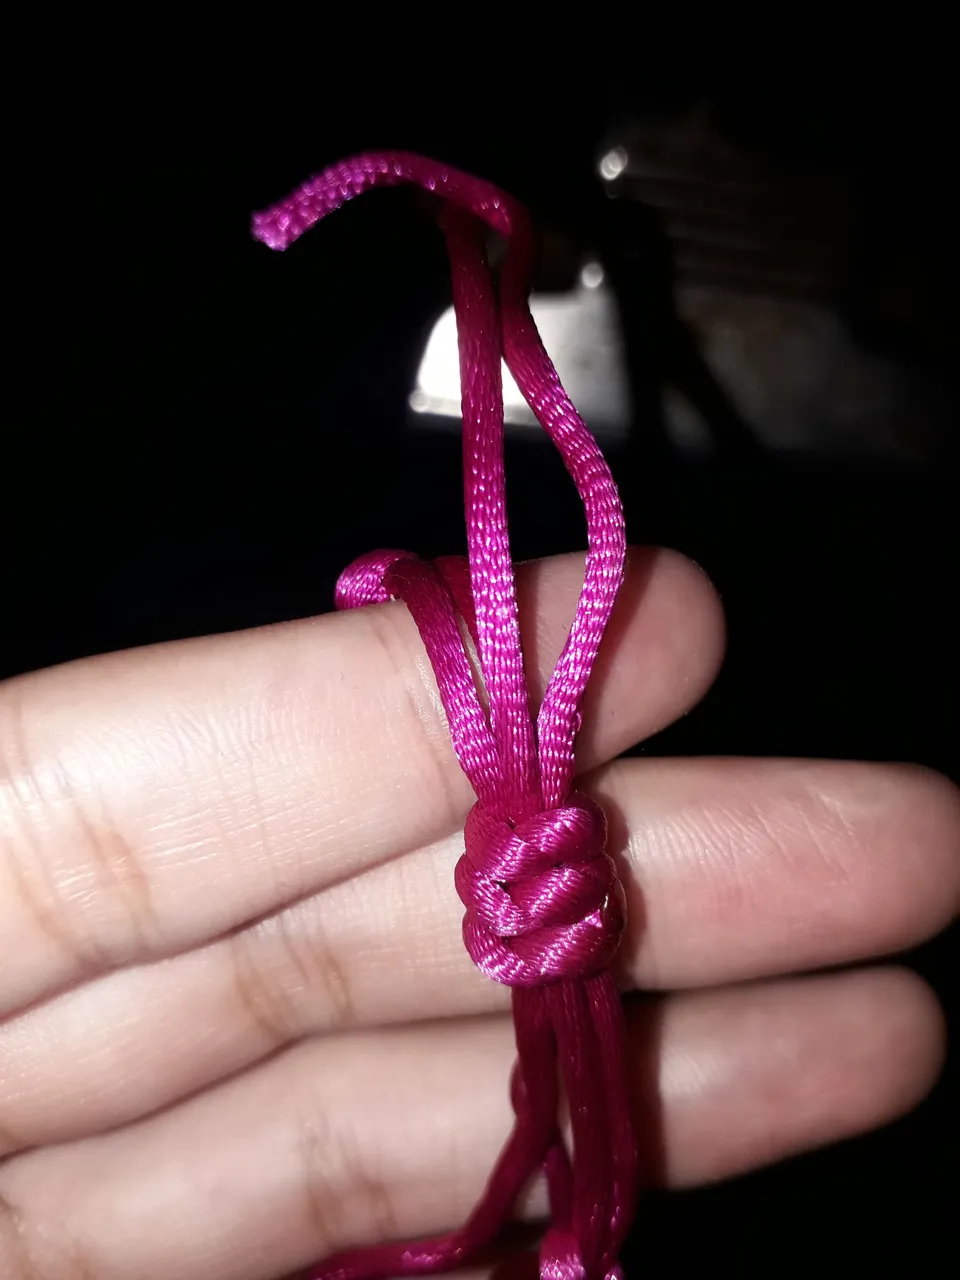
It is very easy to do. To start, we are going to take our 2.5 m long thread and fold it in half. From the end, we measure approx. 10 cm and tie a knot. From that knot we will start weaving our bracelet.
We take our clipboard and step on the thread so that it does not move while we're knitting. Having the thread fixed is important because if it moves too much the knitting will be twisted, as you know.
Now we would have two very long threads left to knit. I'm going to call thread 1 the one on the left and thread 2 the one on the right, to simplify things even more.
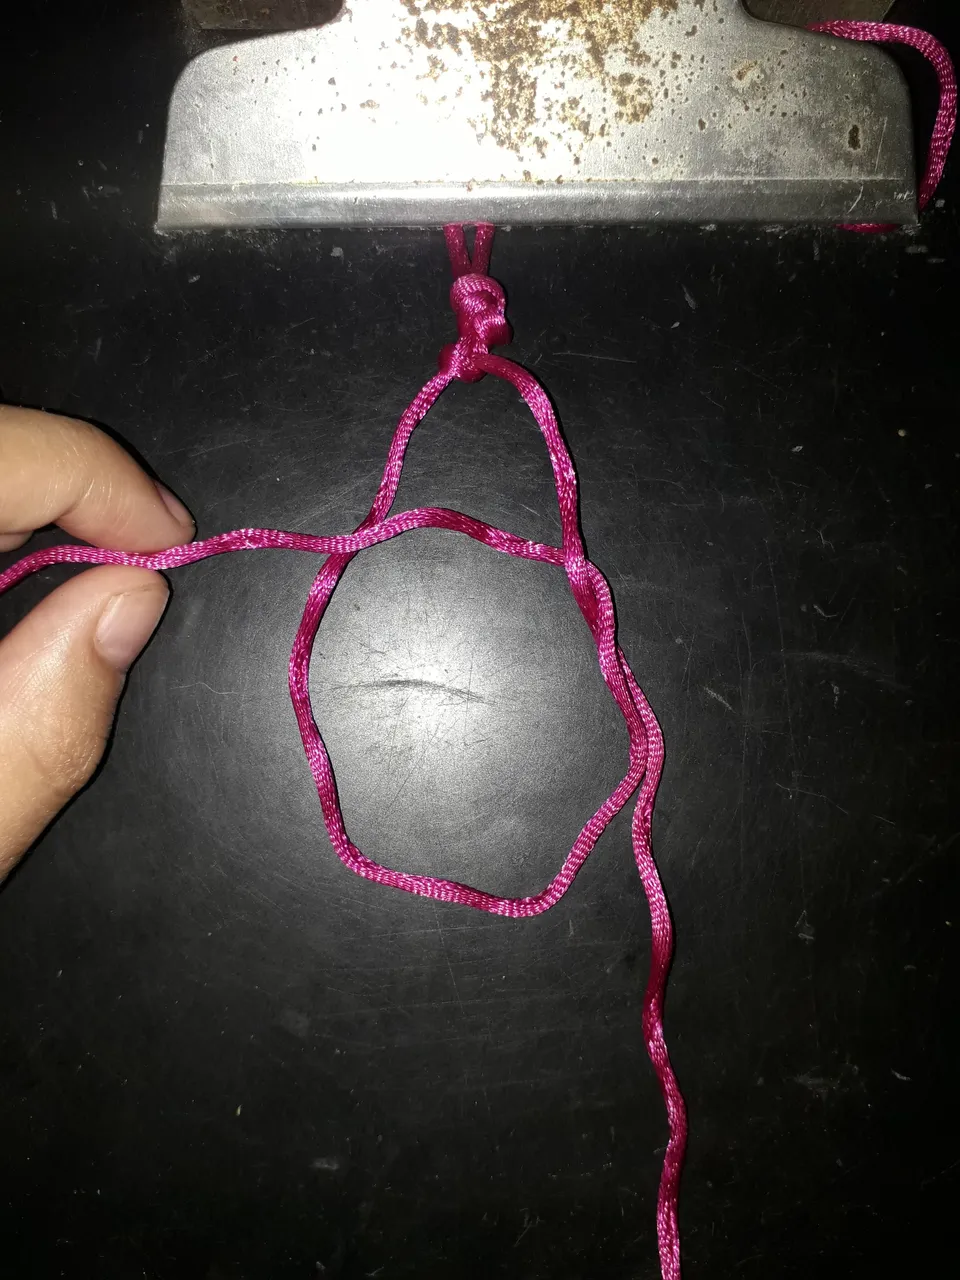
We take thread 2, and we are going to weave it around thread 1, as shown in the picture. We weave and pull.
Then we take thread 1, and we are going to knit it around thread 2.
And then we repeat this process over and over again.
The only “negative” thing about this knitting is that it takes a long time (plus it wastes a lot of yarn).
But here's how we go: we weave and pull one, we weave and pull another. We weave and pull one, we weave and pull another. We weave and pull one, we weave and pull another. Remember to tighten each knot well.
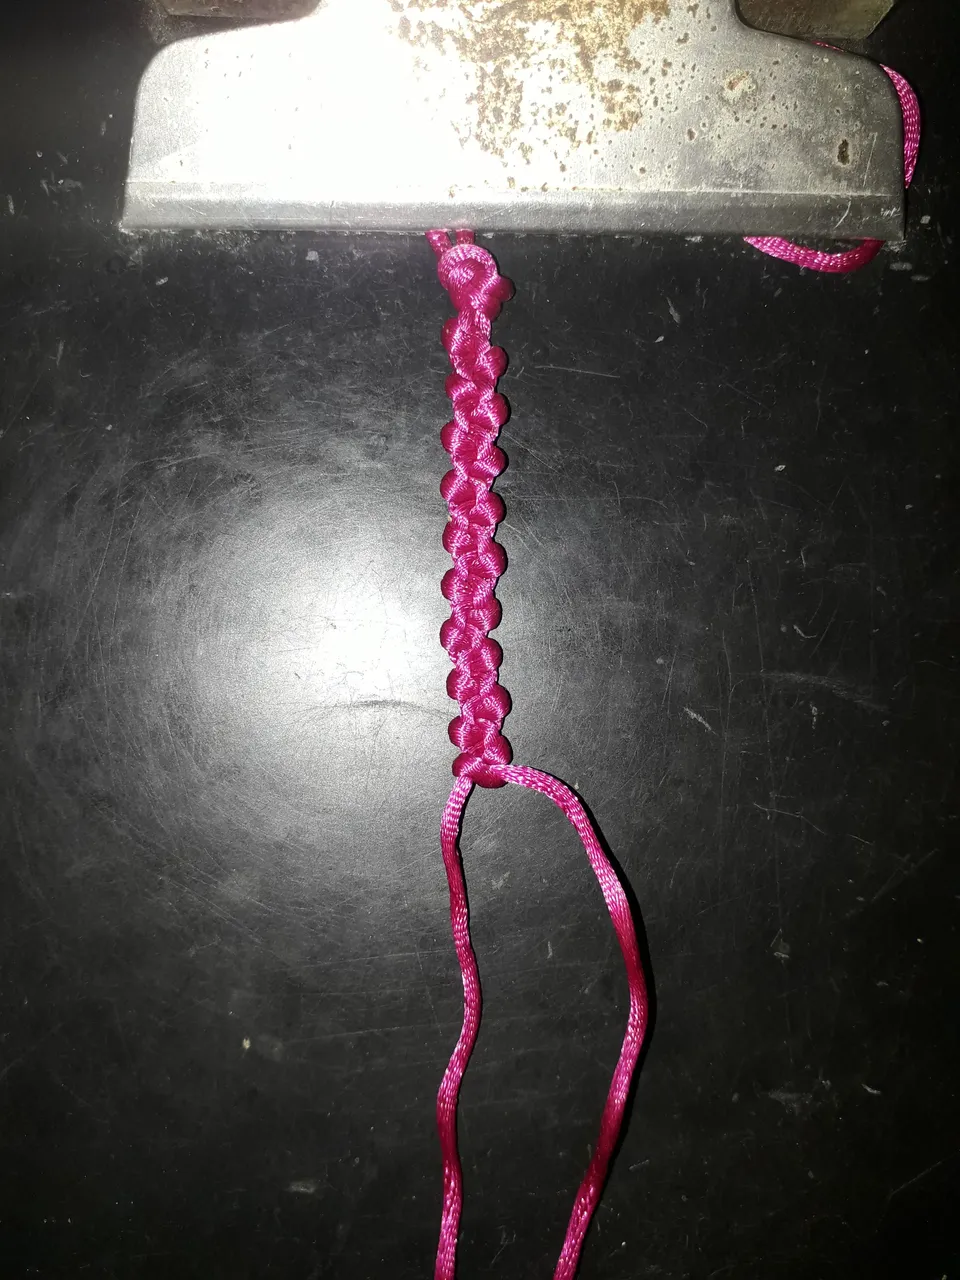
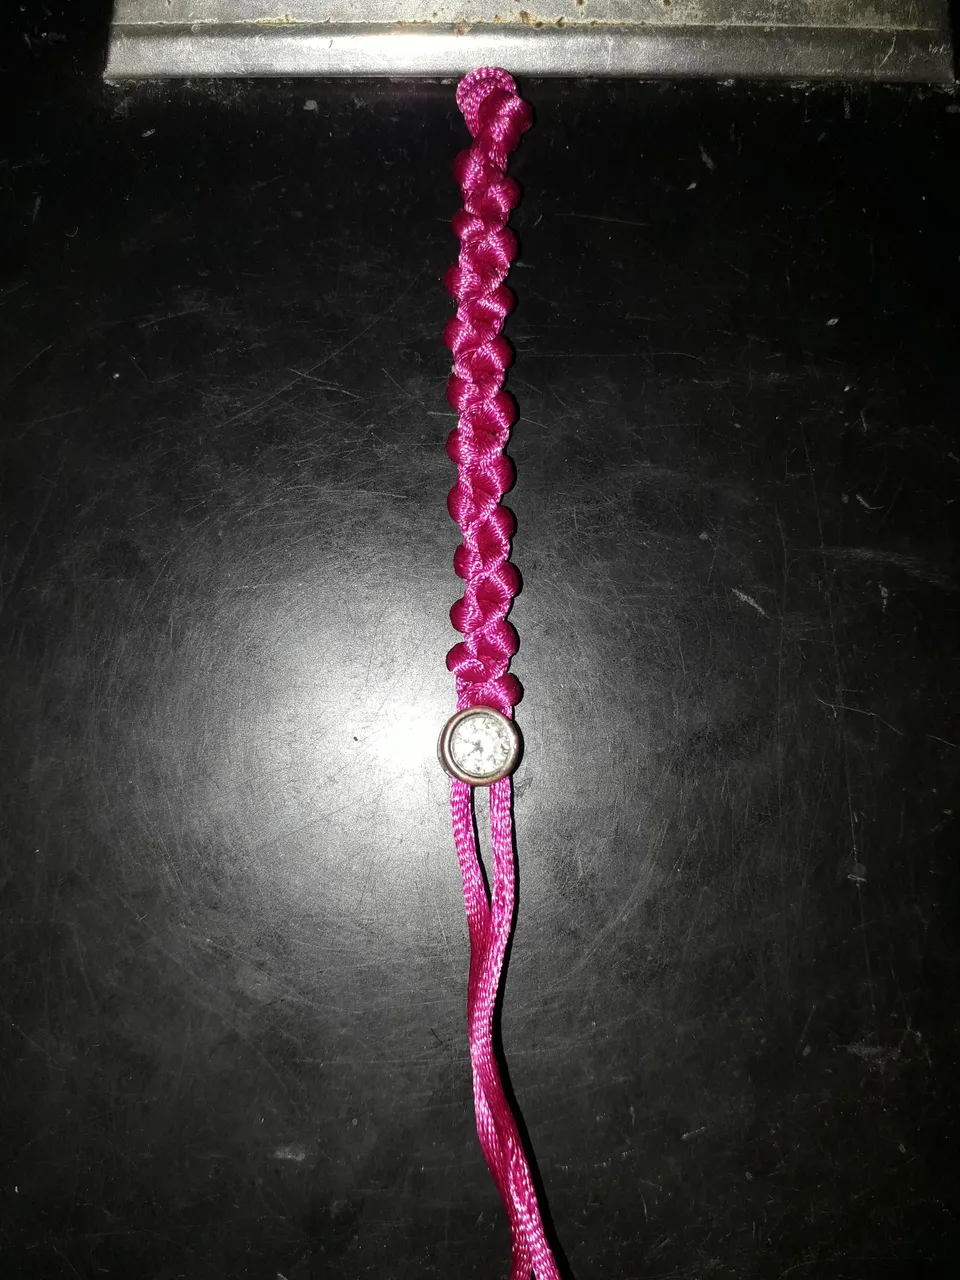
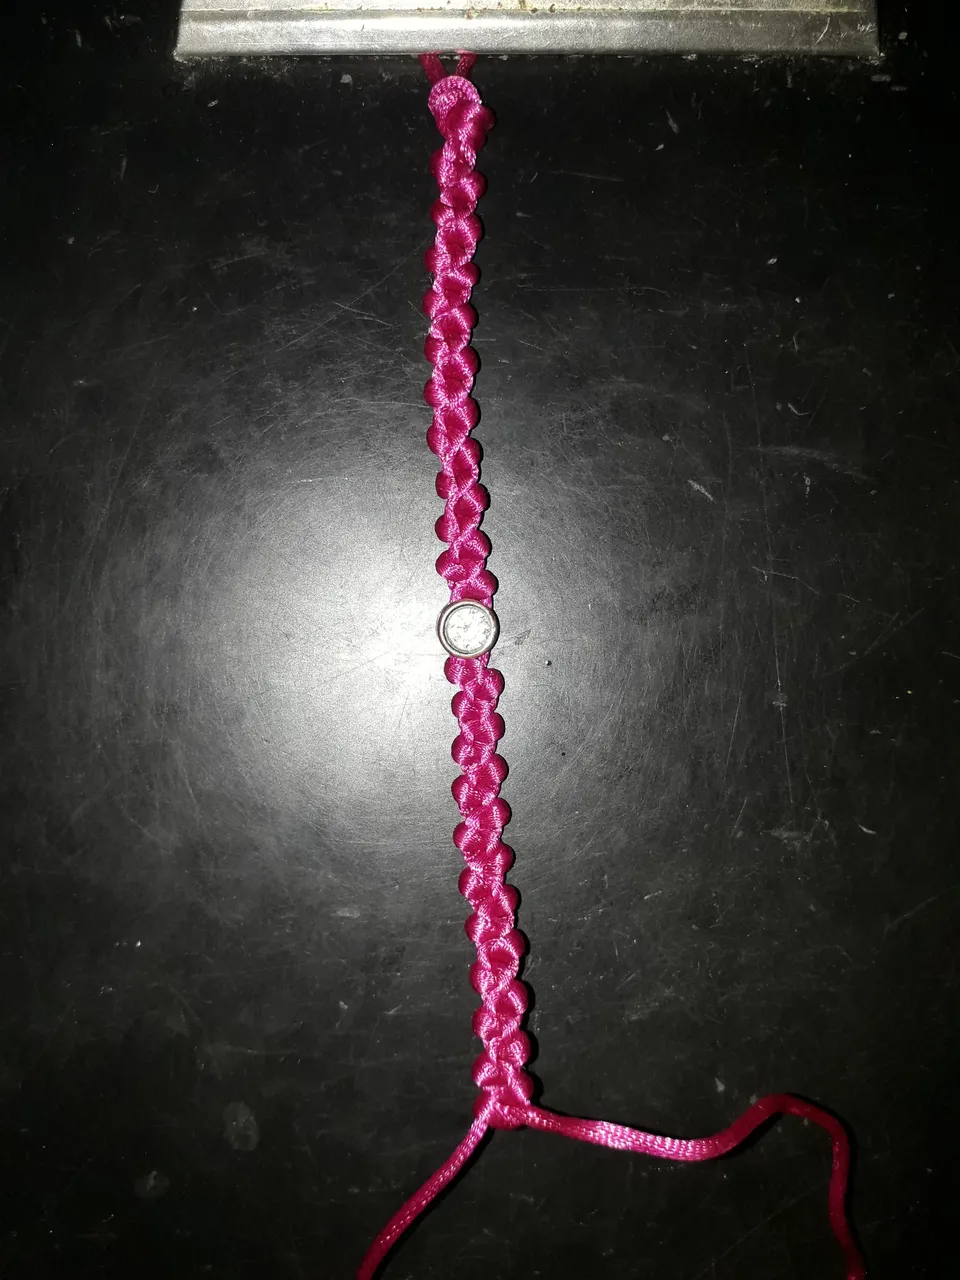
I kept doing this: knitting, knitting, knitting, until I had a length of about 7 cm. This would be the center of the bracelet. So now it was time to put on her little ornament.
 |  |
|---|
I'm like the scientist Frankenstein, my creations are usually forgotten scraps, things that once were, but no longer are.
I mean, all the little things I create are with recycled fabric or leftover material from something else. Furthermore, I don't know, I like that, it's like always seeing a new opportunity.
Well, in this case, I looked for the shiny pendant from a necklace I once had, and I kept the pendant in case it ever came in handy again, and sure enough, it did.
It was quite difficult to insert the thread, as the charm only had two little holes going through the center, and one disadvantage of mouse tail thread is that it is too thick.
I needed a lighter to burn the ends of the thread a little, and once they were melted, I pulled them to stretch them so that they were like a kind of needle… I mean, the tip was pointed, haha. And that's how I was able to get the pendant in, with great difficulty. I mention this in case someone might find it useful with their own creations!
 |  |
|---|
After here, we continue: we weave and pull one, we weave and pull another. We weave and pull one, we weave and pull another. Remember to tighten each knot well.
 |  |
|---|
We extend the fabric for another 7 cm of length approx. and we make a knot to close it. I make the knots by giving the thread a turn inside itself and pulling, do I understand? I guess so, but the important thing is to make a knot to close.
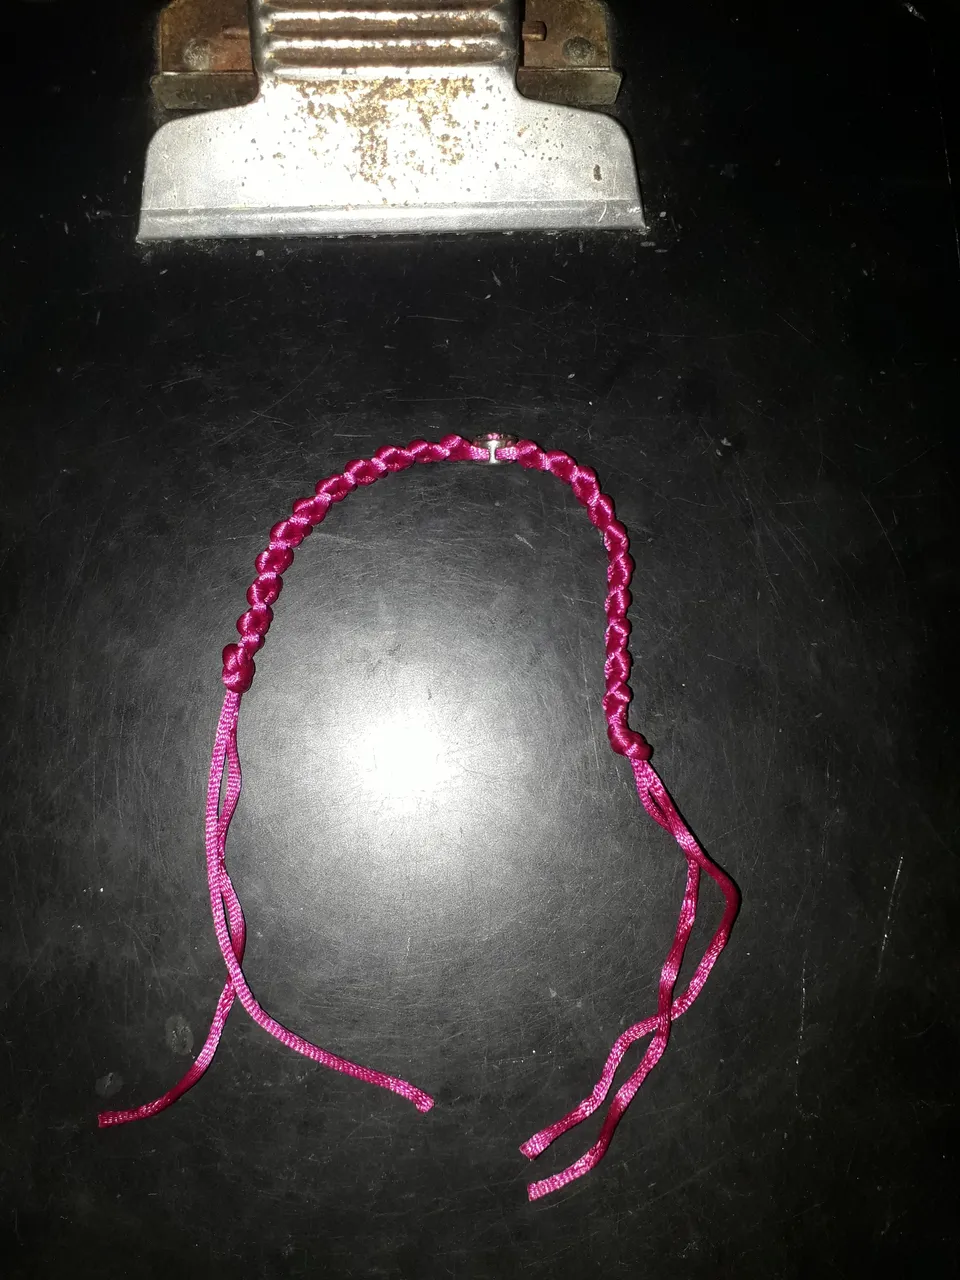
With this we would be ready what would be the weaving of our bracelet, but we lack the closure.
 |  |
|---|
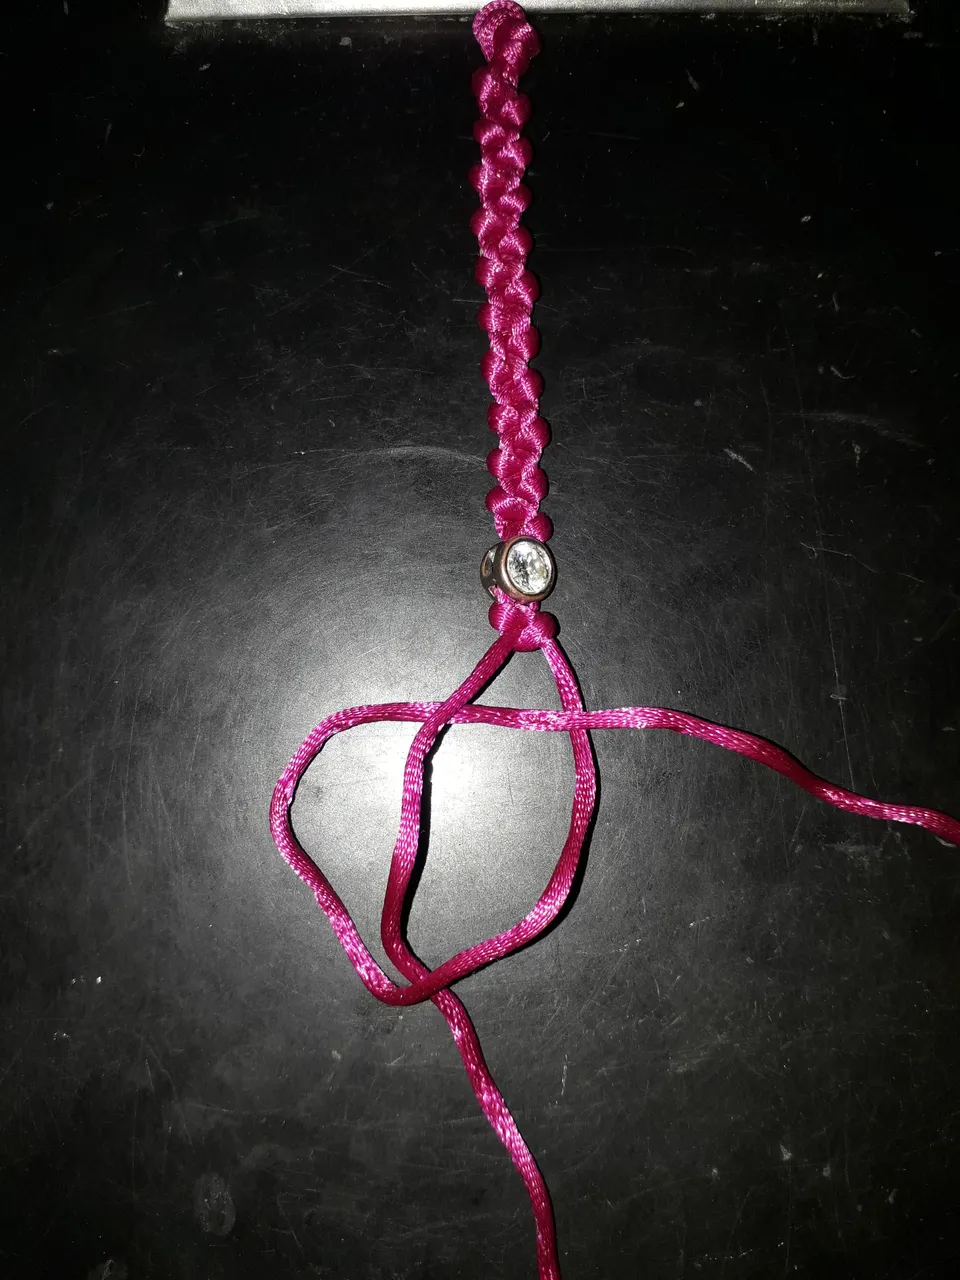
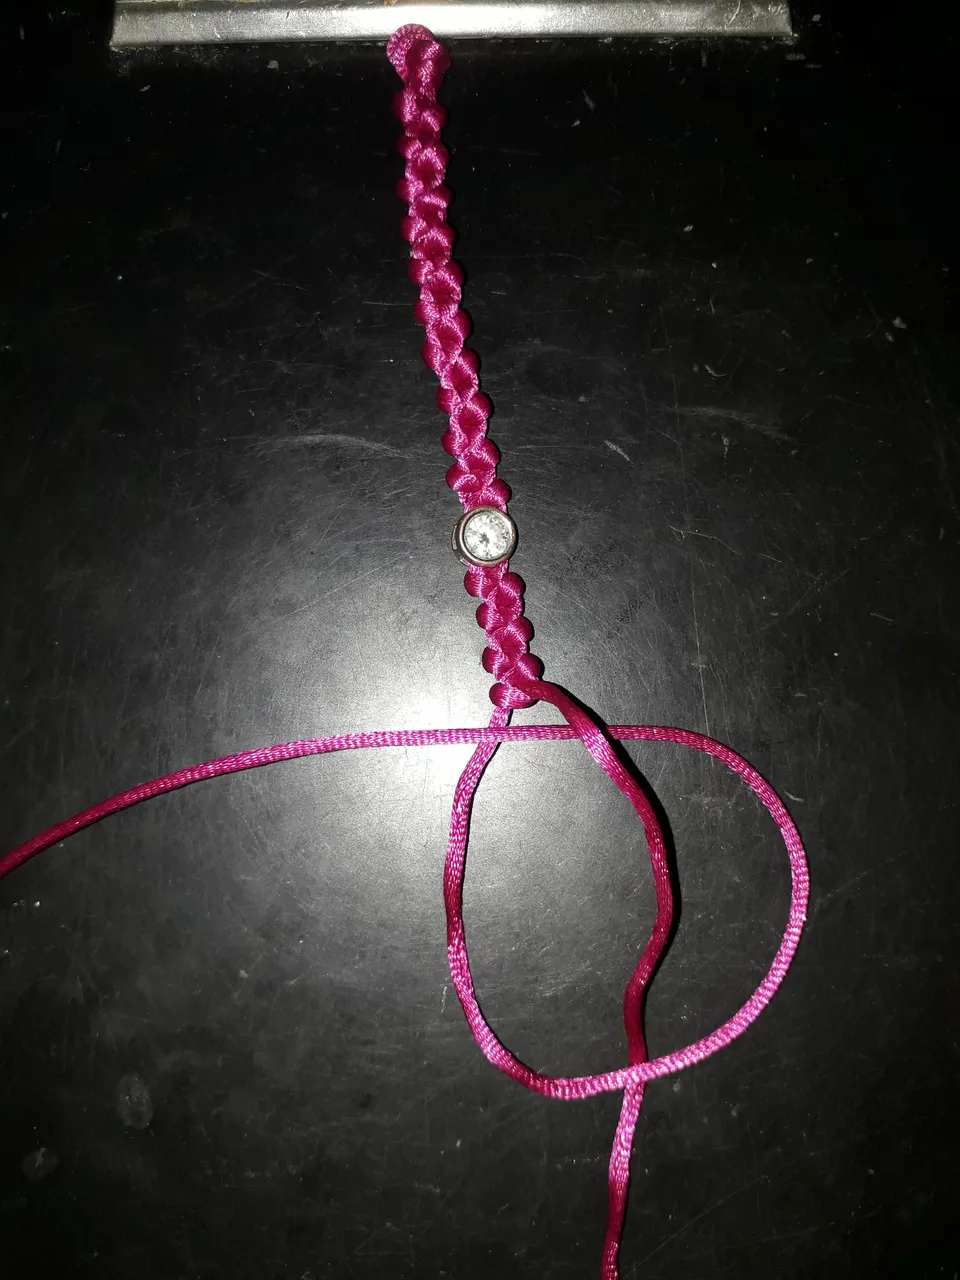
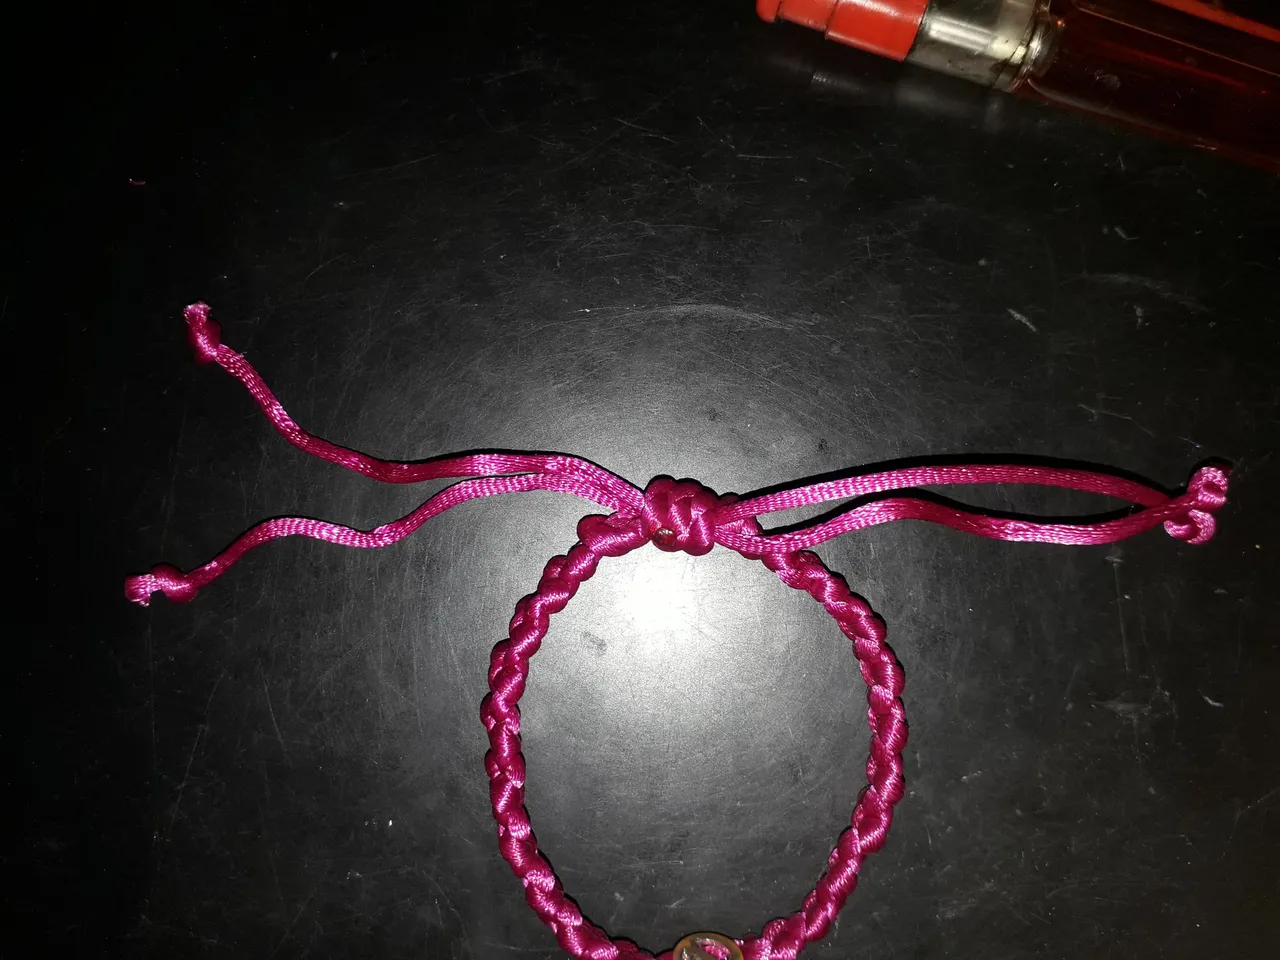
We are going to take the bracelet out of our clipboard, and we are going to put it in this way: we take each end, and we are going to cross it to the opposite side of each one. That is to say, the left end we are going to orient it to the right, and the right end to the left.
Then, with a piece of thread about 10 cm long, we are going to tie it where the ends of the bracelet meet, to hold them both in the same place.
 |  |
|---|
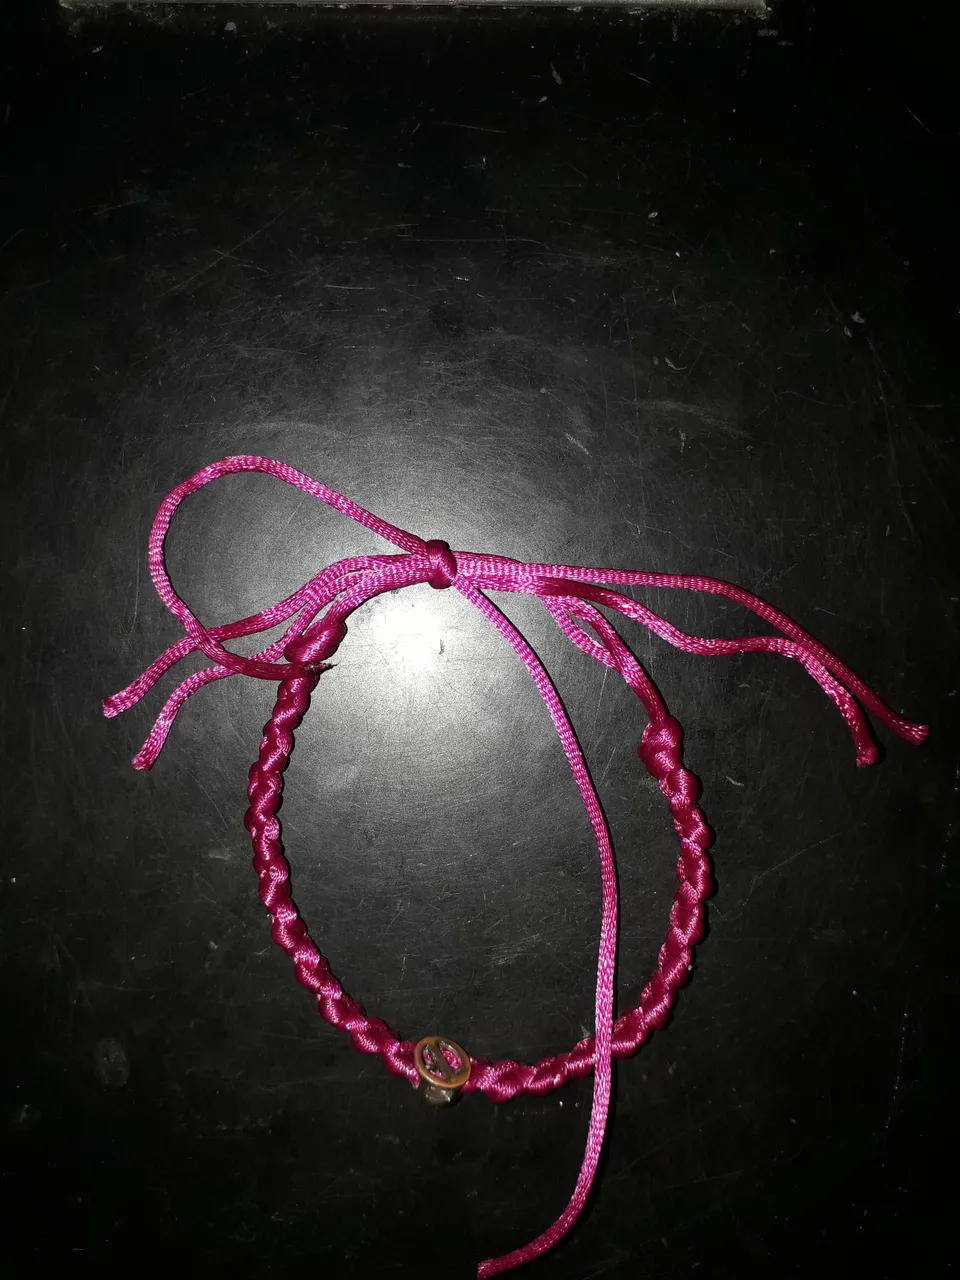
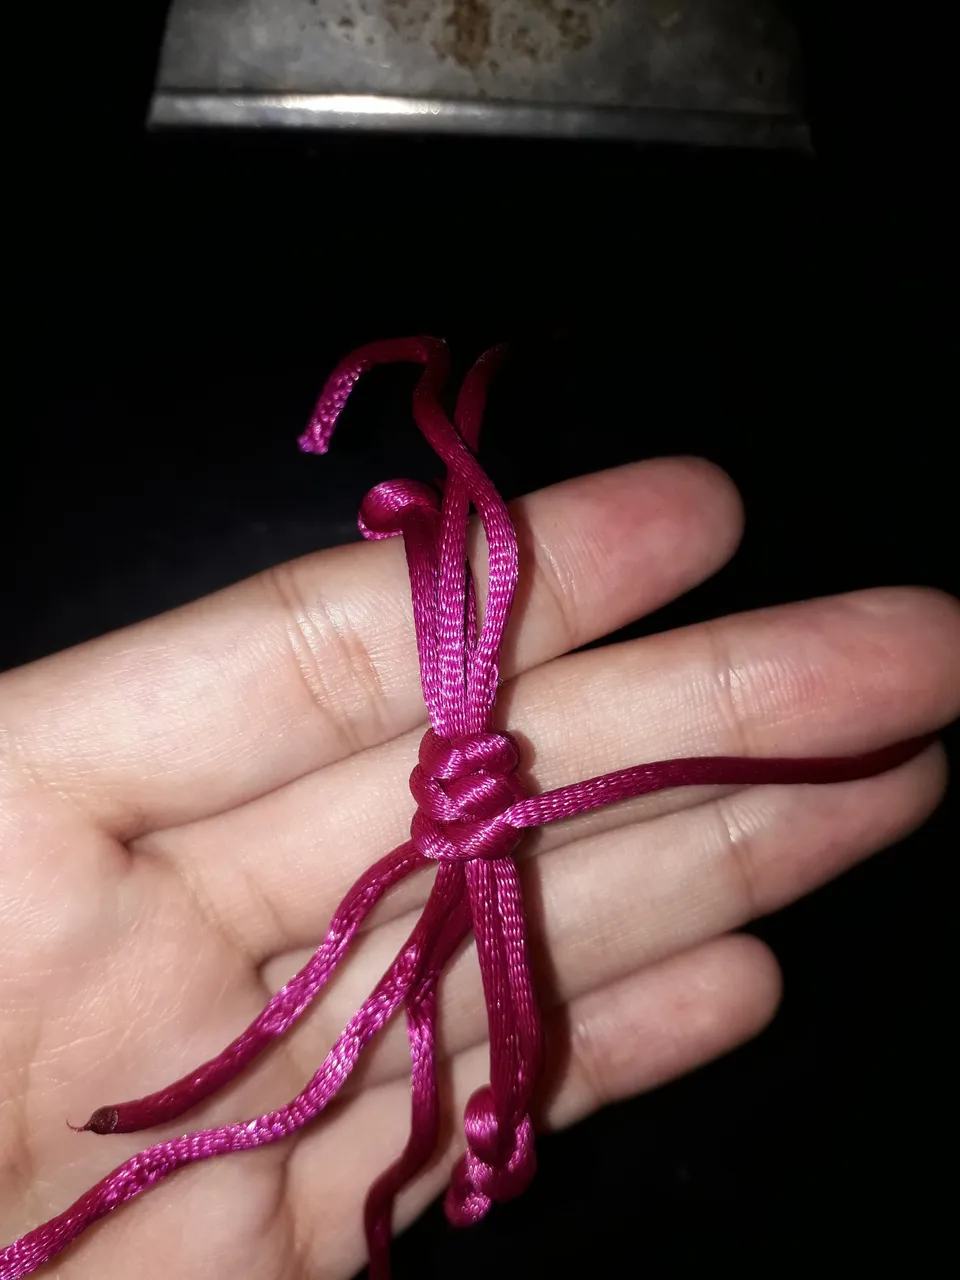
With that thread we tied, we are going to make a smaller weave. I made some simple knots, the important thing is that it is firm so that it does not come loose. You can make any weave you like.
Once the weave is ready, we cut the excess ends, and with a lighter we are going to burn the ends and flatten them so that they are well fixed.
I don't know if I have said it before, but it has happened to me that I buy woven bracelets. They come loose in no time, so I always try to fix the best I can, without leaving anything that looks a little loose.
See those four threads that are loose? Well, we are going to tie a knot at the end of each one. Once the four knots are ready, we are going to take the lighter, and we are going to burn and seal each tip, so that they do not come loose. Well fixed, because if any of these threads come loose, we disarm the bracelet.
And that's it.
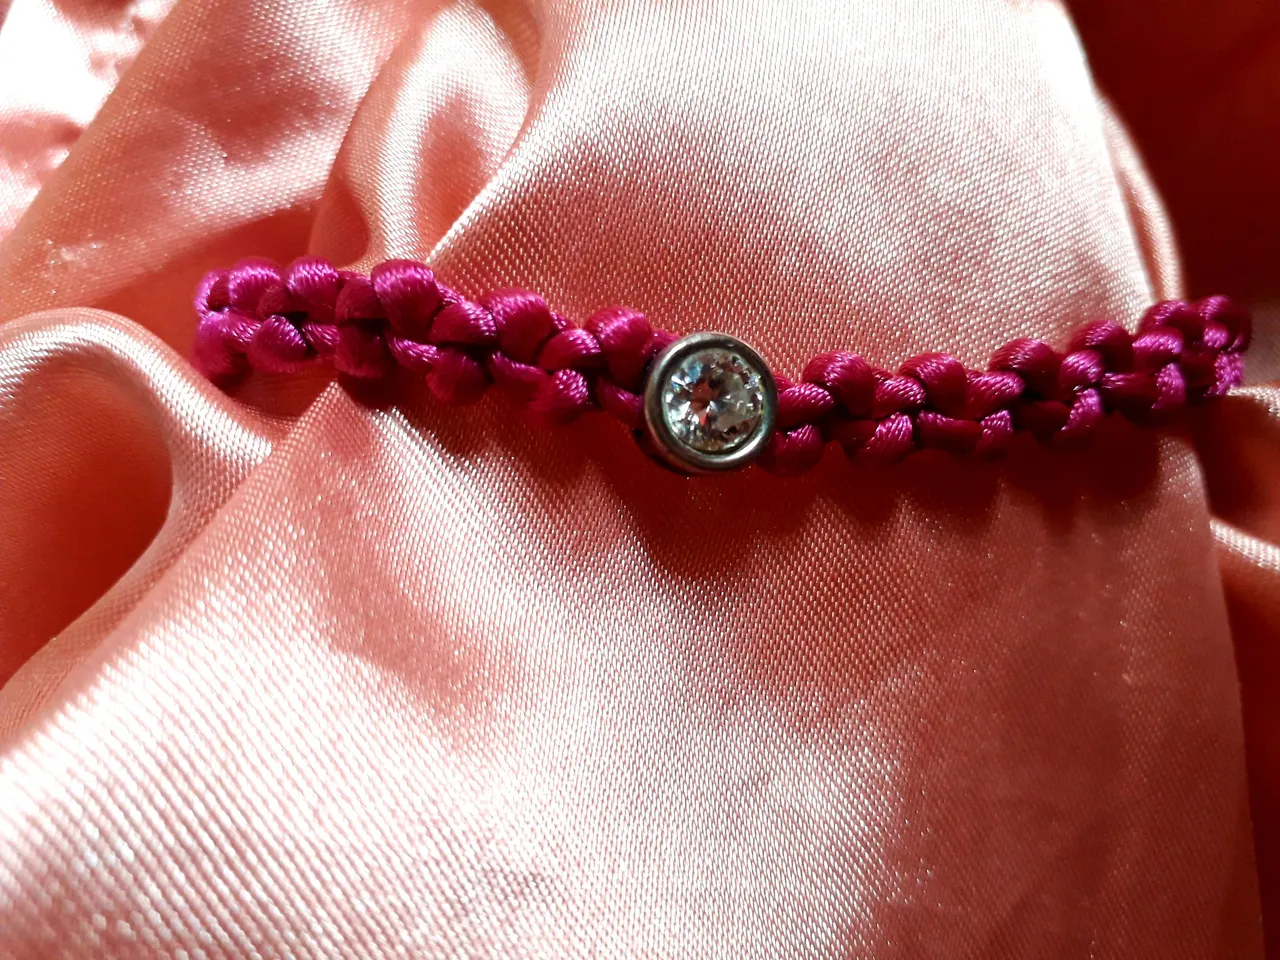
I really like this weaving because it's easy to do, plus I like thin bracelets. I feel that, in spite of being so simple, it's a little showy. See for yourself what this weave looks like up close. I think it's a clear example of sometimes less is more. I thought it would look really cool with a yarn of each color, would you give it a try?
Without anything else to add… Take care, drink water, and don't forget to smile. Love you! See you in the next post, bye!

Español
Holiii, amigos de la comunidad de HiveDiy, ¿cómo se encuentran el día de hoy?, ¡espero que muy bien!
Hacía mucho tiempo que no tejía pulseras, pues no tengo hilo. ¿Y adivinen? Siempre se me olvida comprar. Sin embargo, siempre termino viendo una oportunidad en lo que queda olvidado. Encontré unas sobras de hilo de rabo de ratón y no dudé en intentarlo, ¿qué podría salir de aquí?, ¡vamos allá!
Materiales
2.5 metros de hilo rabo de ratón color fucsia.
Tijera.
Encendedor.
Tabla con gancho.
Dije brillante para adornar.
Este fue un tejido que yo descubrí mientras estaba aburrida y jugaba a tejer un hilo para matar el tiempo. No es nada muy especial o sorprendente, pero igual quise hacer una pulsera con este tejido porque su simpleza es lo que lo hace lindo, además de que le agregué un pequeño adorno para darle un toque más especial. Y claro, usé un hilo de mi color favorito: rosado.
| |
|---|
Es muy fácil de hacer. Para empezar, vamos a tomar nuestro hilo de 2,5 m de largo y lo vamos a doblar por la mitad. Desde el extremo medimos aprox. 10 cm y hacemos un nudo. A partir de ese nudo va a empezar el tejido de nuestra pulsera.
Tomamos nuestra tabla con gancho y pisamos el hilo para que no se nos mueva mientras tejemos. Tener el hilo fijo es importante porque si se mueve mucho va a quedar torcido el tejido, ya lo saben.
Ahora sí, nos quedarían dos hilos muy largos para tejer. Les voy a llamar hilo 1 al de la izquierda e hilo 2 al de la derecha, para simplificar las cosas aún más.
Tomamos el hilo 2 y lo vamos a entrelazar alrededor del hilo 1, tal como se ve en la imagen. Entrelazamos y jalamos.
Luego tomamos el hilo 1 y lo vamos a entrelazar alrededor del hilo 2. Entrelazamos y jalamos.
Y luego repetimos este proceso una y otra vez.
Lo único “negativo” de este tejido es que tarda mucho rato (además de que gasta bastante hilo).
Pero así vamos: entrelazamos y jalamos uno, entrelazamos y jalamos otro. Entrelazamos y jalamos uno, entrelazamos y jalamos otro. Entrelazamos y jalamos uno, entrelazamos y jalamos otro. Recuerden ir apretando bien cada nudo.
Seguí haciendo esto: tejiendo, tejiendo, tejiendo, hasta que tenía una longitud de, aproximadamente, 7 cm. Este sería el centro de la pulsera. Así que ya era momento de ponerle su adornito.
| |
|---|
Yo soy como el científico Frankenstein, mis creaciones suelen ser retazos olvidados, cosas que alguna vez fueron, pero ya no.
Es decir, todas las cositas que creo son con tela reciclada o con material sobrante de alguna otra cosa. No lo sé, me gusta eso, es como ver una oportunidad nueva siempre.
Pues bien, en este caso, busqué el dije brillante de un collar que tuve alguna vez, y que guardé el dije por si alguna vez me servía de nuevo, y vaya que sí.
Fue bastante difícil insertar el hilo, pues el adorno solo tenía dos huequitos que pasaban por el centro, y una desventaja del hilo rabo de ratón es que es demasiado grueso.
Necesité un encendedor para quemar un poco las puntas del hilo, y una vez que estuvieron derretidas, las jalé para estirarlas y que quedaran como una especie de aguja… Es decir, la punta quedó puntiaguda, jaja. Y así fue como pude lograr meter el dije, a duras penas. ¡Menciono esto por si a alguien le pueda servir con sus propias creaciones!
| |
|---|
Después de aquí, seguimos: entrelazamos y jalamos uno, entrelazamos y jalamos otro. Entrelazamos y jalamos uno, entrelazamos y jalamos otro. Recuerden ir apretando bien cada nudo.
| |
|---|
Extendemos el tejido por otros 7 cm de longitud aprox. y hacemos un nudo para cerrar. Los nudos yo los hago dando al hilo una vuelta dentro de sí mismo y jalando, ¿me explico? Supongo que sí, pero lo importante es hacer un nudito para cerrar.
Con esto estaría listo lo que sería el tejido de nuestra pulsera, pero nos falta el cierre.
| |
|---|
Vamos a sacar la pulsera de nuestra tabla con gancho y la vamos a poner de esta forma: tomamos cada extremo y lo vamos a cruzar al lado contrario de cada uno. Es decir, el extremo izquierdo lo vamos a orientar hacia la derecha, y el derecho hacia la izquierda.
Luego, con un pedazo de hilo de aprox. 10 cm de largo, vamos a amarrarlo donde se juntan los extremos de la pulsera, para sostener los dos en un mismo sitio.
| |
|---|
Con ese hilo que amarramos, vamos a hacer un tejido más pequeño. Yo hice unos nudos simples, lo importante es que quede firme para que no se suelte. Ustedes pueden hacer el tejido que gusten.
Una vez listo el tejido, cortamos los extremos sobrantes, y con un encendedor vamos a quemar las puntas y aplastarlas para que se fijen bien.
No sé si lo he dicho antes, pero me ha pasado que compro pulseras tejidas y se sueltan de nada, por eso siempre intento fijar lo mejor que pueda, sin dejar nada que luzca un poquito suelto.
¿Ven esos cuatro hilos que quedaron sueltos? Pues a cada uno le vamos a hacer un nudo en la punta. Una vez listos los cuatro nudos, vamos a tomar el encendedor y vamos a quemar y sellar cada punta, para que no se suelten. Bien fijadas, porque si se suelta alguno de estos hilitos, se nos desarma la pulsera.
Y ya estaría.
Me gusta mucho este tejido porque es fácil de hacer, además de que me gustan las pulseras delgaditas. Siento que, a pesar de ser tan simple, es un poco vistoso. Miren ustedes mismos cómo luce este tejido de cerca. Creo que es un claro ejemplo de que a veces menos es más. He pensado que se vería muy genial con un hilo de cada color, ¿ustedes lo intentarían?
Sin nada más que añadir… Cuídense, tomen agua, y no se olviden de sonreír. ¡Se les quiere! Nos vemos en el próximo post, ¡chau!

Credits | Créditos
- English translation DeepL (sorry for any mistakes, English is my second language)
- Traducción al inglés DeepL (lo siento por cualquier error, el inglés es mi segundo idioma.)
- Cover, dividers, and banners made in Canva
- Portada, separadores y banners hechos en Canva
- Photos used in the post were taken by me, using a Samsung Galaxy J6
- Las fotos usadas en el post fueron tomadas por mí, usando un Samsung Galaxy J6