Happy and blessed Friday night my heart is beautiful of hive today I want to present you a craft activity with recycling materials in this opportunity to build a mini microwave, I hope you like the idea.
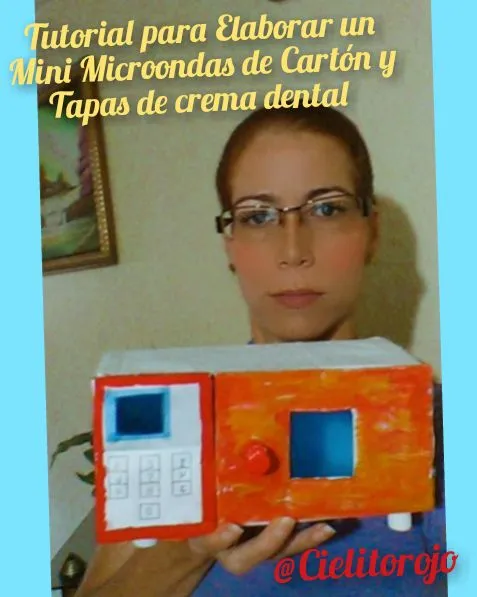
Feliz y bendecido viernes por la noche mi corazón es bello de hive el día de hoy quiero presentarles una actividad de manualidades con materiales de reciclaje en esta oportunidad construir un mini microondas, espero que les guste la idea.
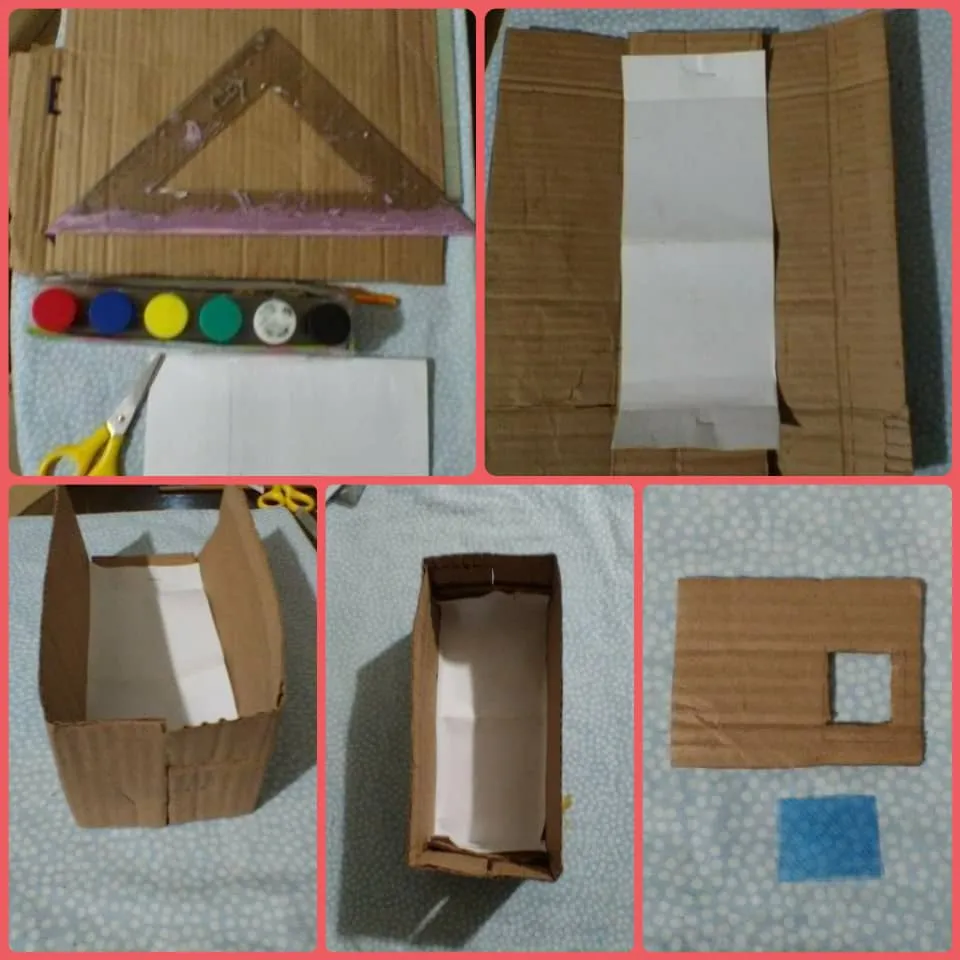
Materials:
Box cardboard, scissors, exacto, ruler, paintbrush, silicone, paste, recycled white sheet, tempera, toothpaste lids and blue plastic folder.
Materiales:
Cartón de caja, tijera, exacto, regla, pincel, silicón, engrudo, hoja blanca reciclada, témperas, tapas de crema dental y carpeta de plásticos azul.
Step by step:
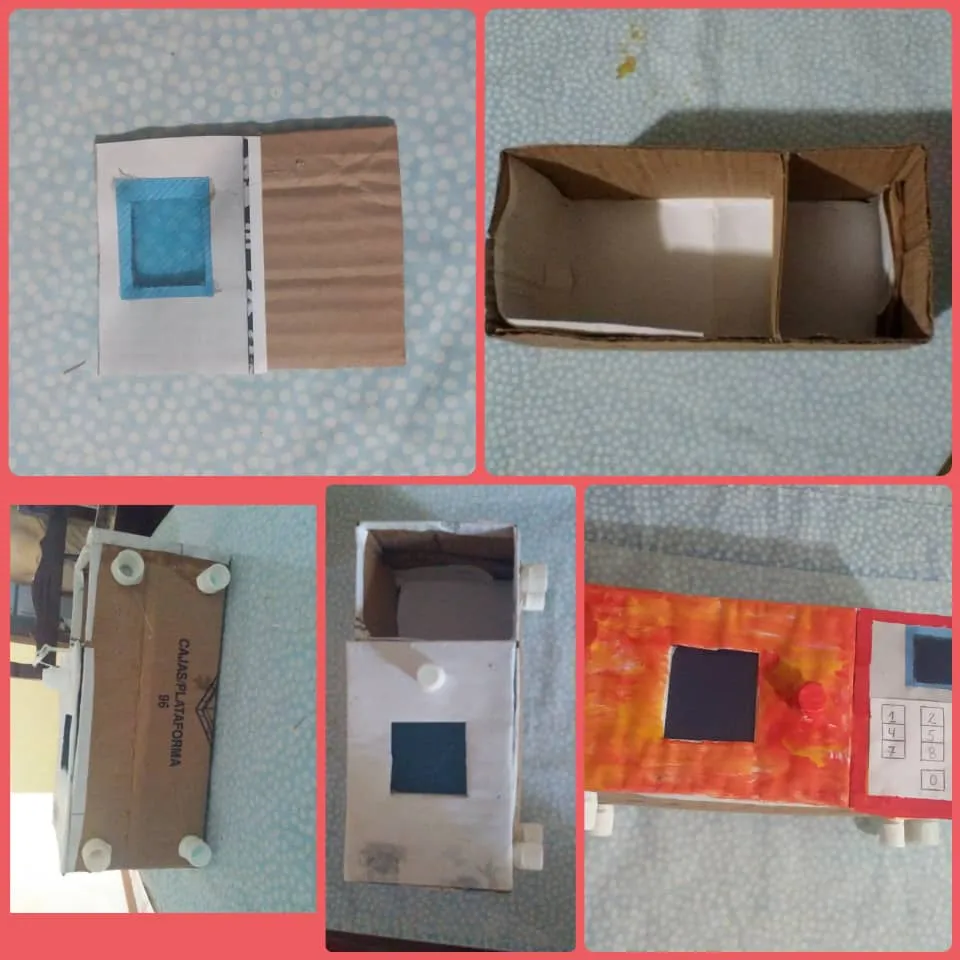
To start with the elaboration of this mini microwave we have a cardboard box of 30 cm which will be divided into three strips of 10 cm each to build the box then we will line them with the white sheets of what will be our microwave, The four stages will be glued at the bottom and they will be the microwave talks. Also to make the microwave lid we will have a rectangle of 20 x 10 cm that we will cut with these measures a 14 cm which we will cut into a square of 4 by 4 in the center of the rectangle to glue there the cut out of the blue folder also we will glue a cap of toothpaste that will allow us to open the microwave and the lid of the microwave. The other one is the remaining part of the rectangle and in the same way we are going to cut a square of 3 x 3 cm. We are also going to paste on the outside a piece of blue folder and with a sheet of paper we are going to draw the numbers of what is going to be our digital and to give it a better appearance we are going to paint it in red colors with yellow shades as shown in the images.

Paso a paso:
Para iniciar con la elaboración de este mini microondas tenemos un cartón de caja de 30 cm qué van a ser dividida en tres franjas de 10 cm cada uno para construir la caja seguidamente las vamos a forrar con las hojas blancas de lo que va a ser nuestro microondas, se pegarán en la parte de abajo las cuatro etapas y van a ser las pláticas en microondas igualmente para elaborar la tapa del microondas vamos a tener un rectángulo de 20 x 10 cm que lo vamos a picar con estas medidas una de 14 cm la cual llevamos a picar un cuadrado de 4 por 4 en el centro del rectángulo para pegarle allí el recorte de la carpeta azul igualmente se le va a pegar una tapita de crema dental que nos va a permitir abrir microondas y la otra lo que resta del rectángulo de igual manera se le va a recortar un cuadrado de 3 x 3 cm también se le va a pegar por la parte de afuera un pedacito de carpeta azul y con una hoja de papel vamos a dibujar los números de lo que va a ser nuestro digital y para darle una mejor apariencia lo vamos a pintar de colores rojo con matices amarillos quedando así como muestran las imágenes
I hope you liked it, I'll see you another time.
Espero que les haya gustado, será hasta otra oportunidad.
The photos are my authorship @cielitorojo
Thank you for reading and supporting me.
Used translator DeepL.
Las fotos son de mis autoria @cielitorojo
Gracias por leerme y su apoyo.
Utilizado traductor DeepL.