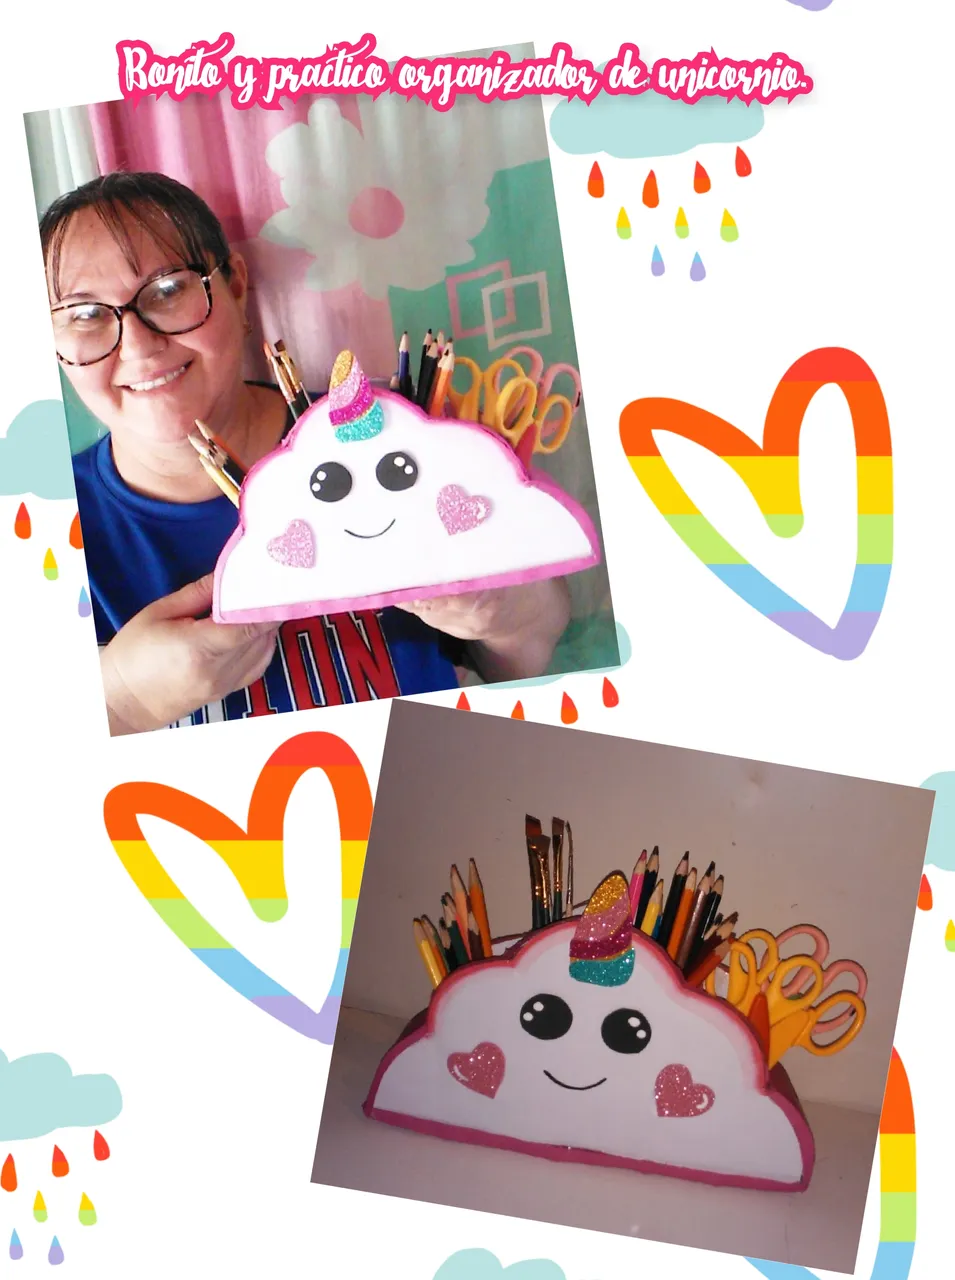
Muy buenas tardes amigos crafteros y artesanos de esta comunidad Hivediy, les mando un fuerte abrazo y espero que se encuentren muy bien, que es lo mas importante. Mi proyecto de hoy, es mostrarle como hacer un bonito, practico y sencillo organizador kwai nube unicornio, es muy sencillo y facil de hacer y tambien es de mucha utilidad, para organizar los colores y lapices de nuestros niños, les voy a compartir el paso a paso y espero les guste.
Good afternoon crafters and artisan friends of this Hivediy community, I send you a big hug and I hope you are very well, which is the most important thing. My project today is to show you how to make a beautiful, practical and simple kwai cloud unicorn organizer, it is very simple and easy to do and it is also very useful, to organize the colors and pencils of our children, I am going to share the step by step and I hope you like it.
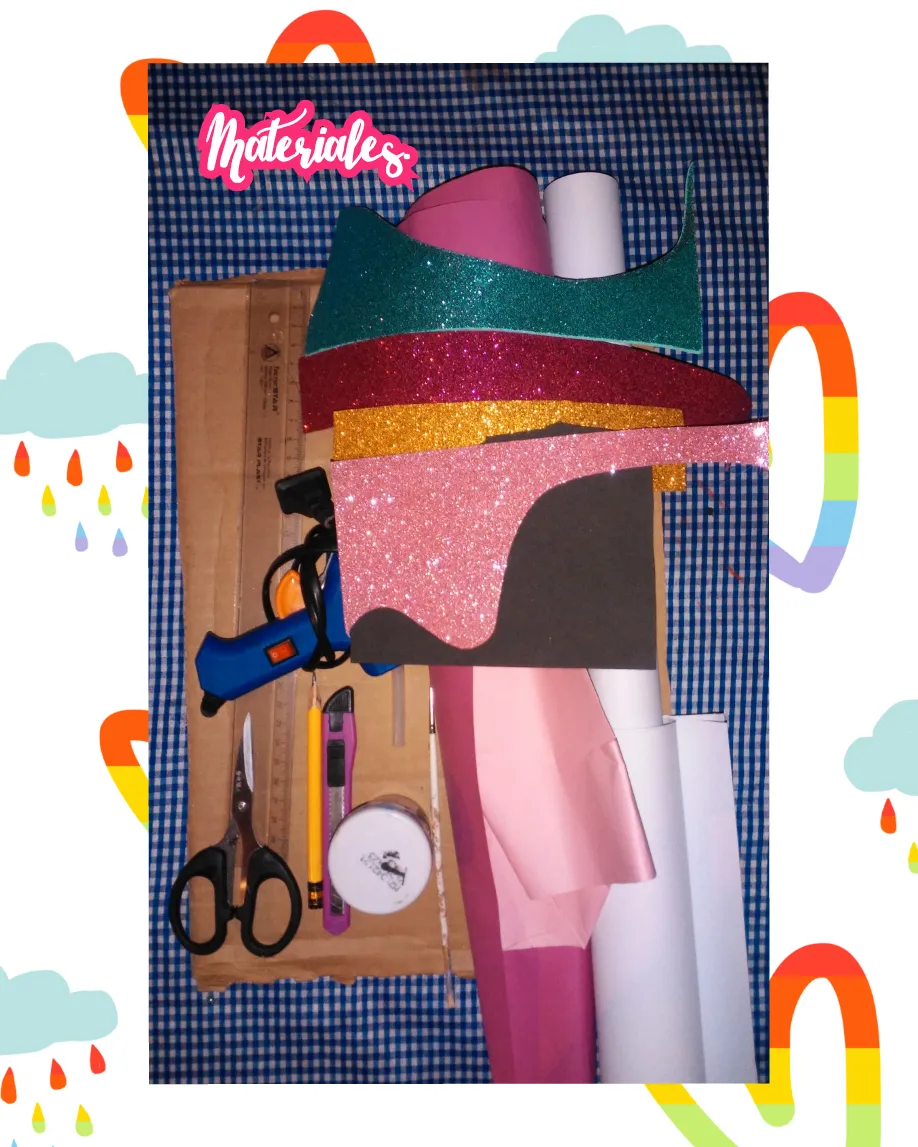
Para hacer este bonito organizador kwai nube unicornio, vamos a necesitar los siguientes materiales y herramientas.
*Carton de uso reciclable.
*Foami diamantado, de varios colores y texturas.
*Cartulinas, de color blanca y fucsia.
*Silicon liquido.
*Lapiz.
*Tijera.
*Cutter.
*Regla.
*Pinturas y pinceles.
*Pistola de Silicon.
To make this cute unicorn cloud kwai organizer, we are going to need the following materials and tools.
*Recyclable use cardboard.
*Diamond foam, in various colors and textures.
*Cardboard, white and fuchsia.
*Liquid silicone.
*Pencil.
- Scissors.
*Cutter.
*Ruler.- Paints and brushes.
*Silicon Gun.
We start with the step by step to make this beautiful and practical unicorn cloud kwai organizer.
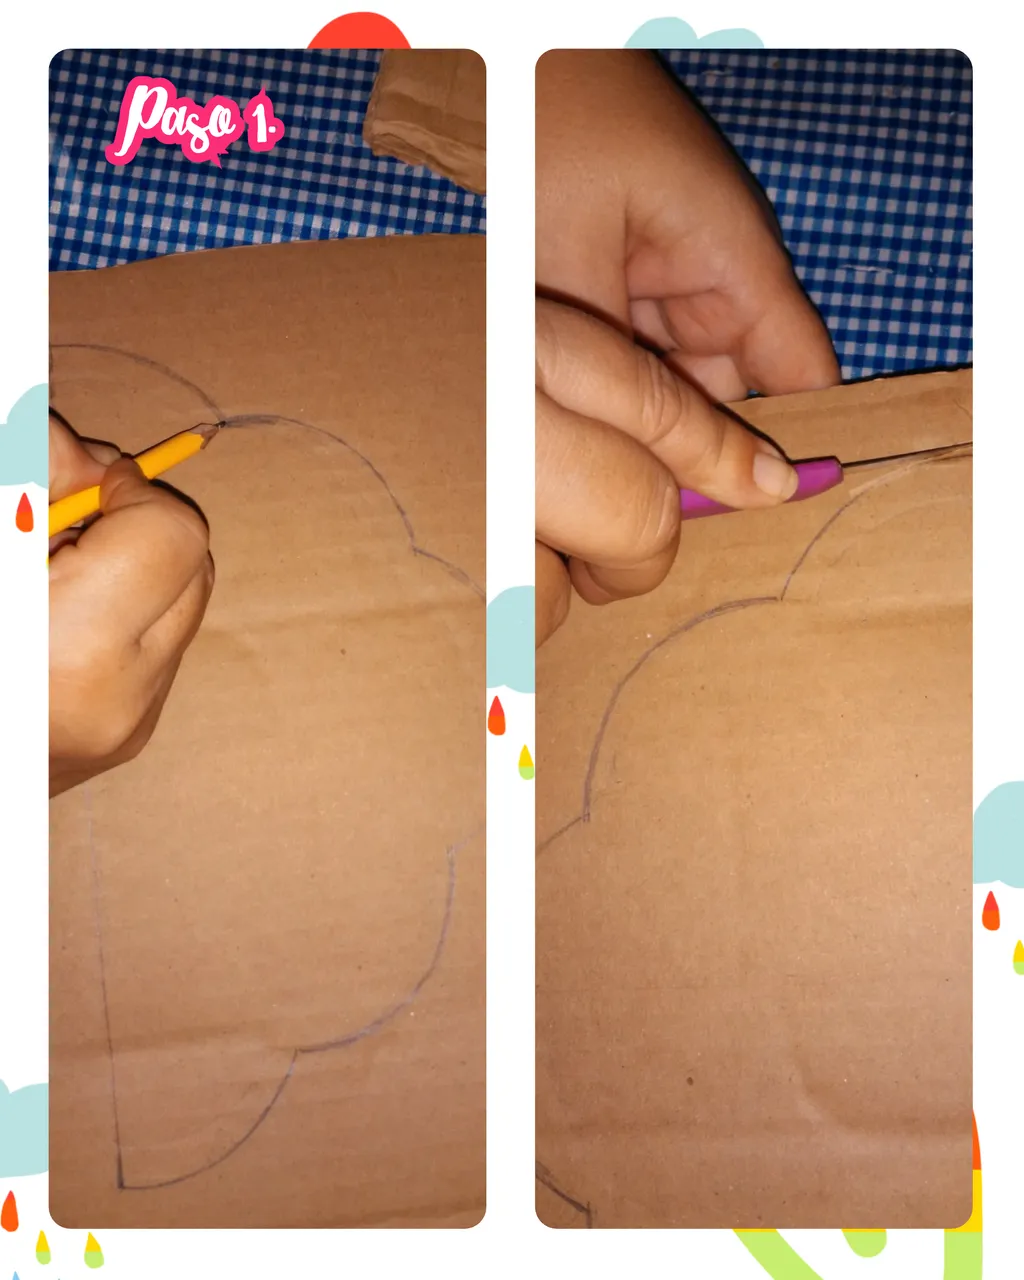
step 1. To begin we take a piece of recyclable cardboard, draw the shape of a cloud, and then with the help of a cutter we cut the piece along the edge, as shown in the images.
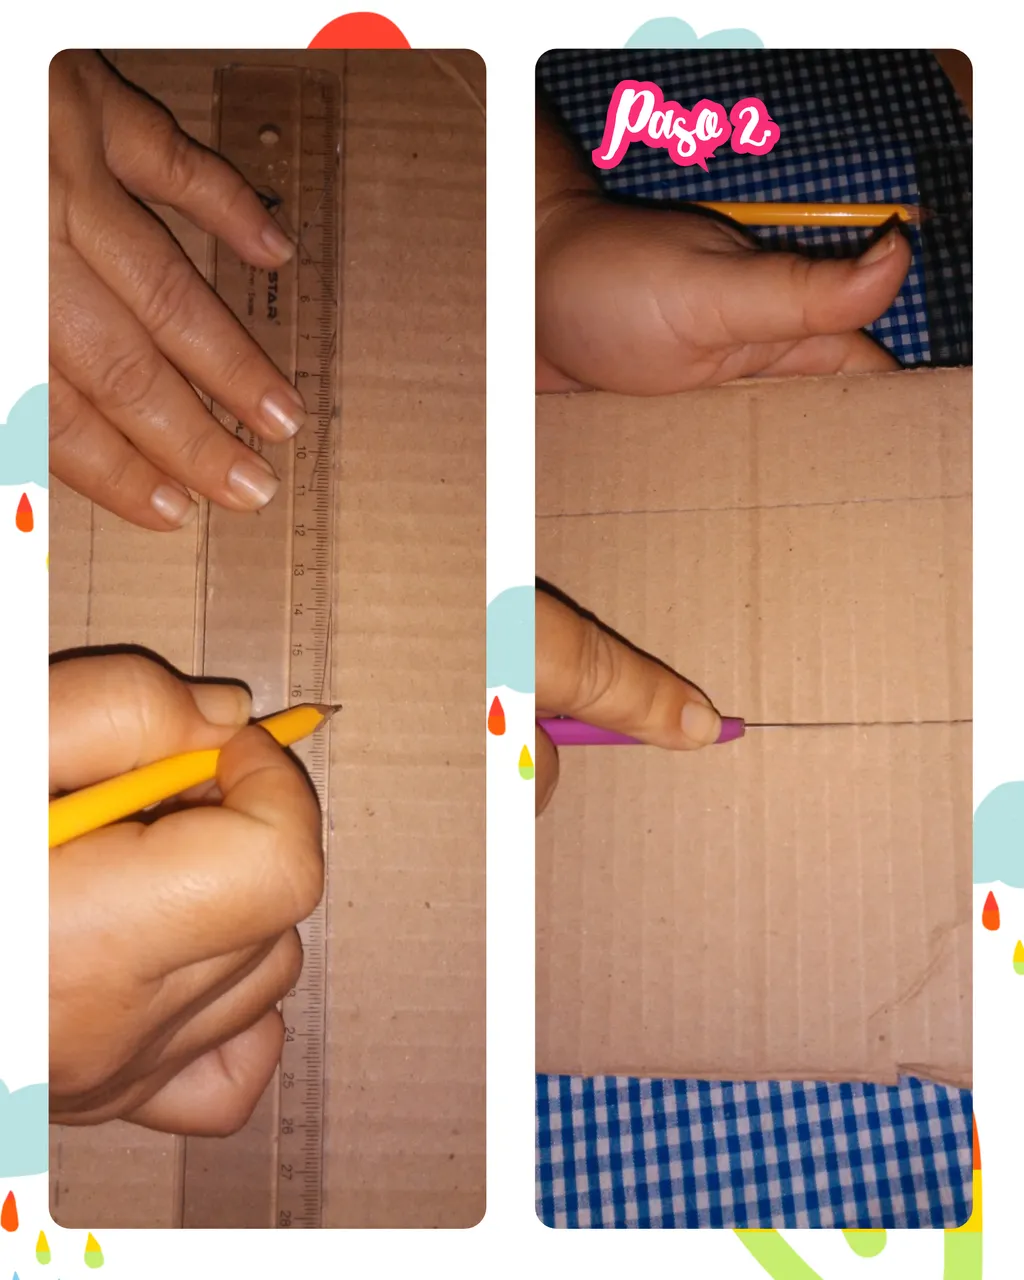
Step 2. To make the base of the cloud, we again take a recyclable cardboard and a ruler, to mark a thick and long strip and then we cut the piece again with the help of a cutter, as in the images.
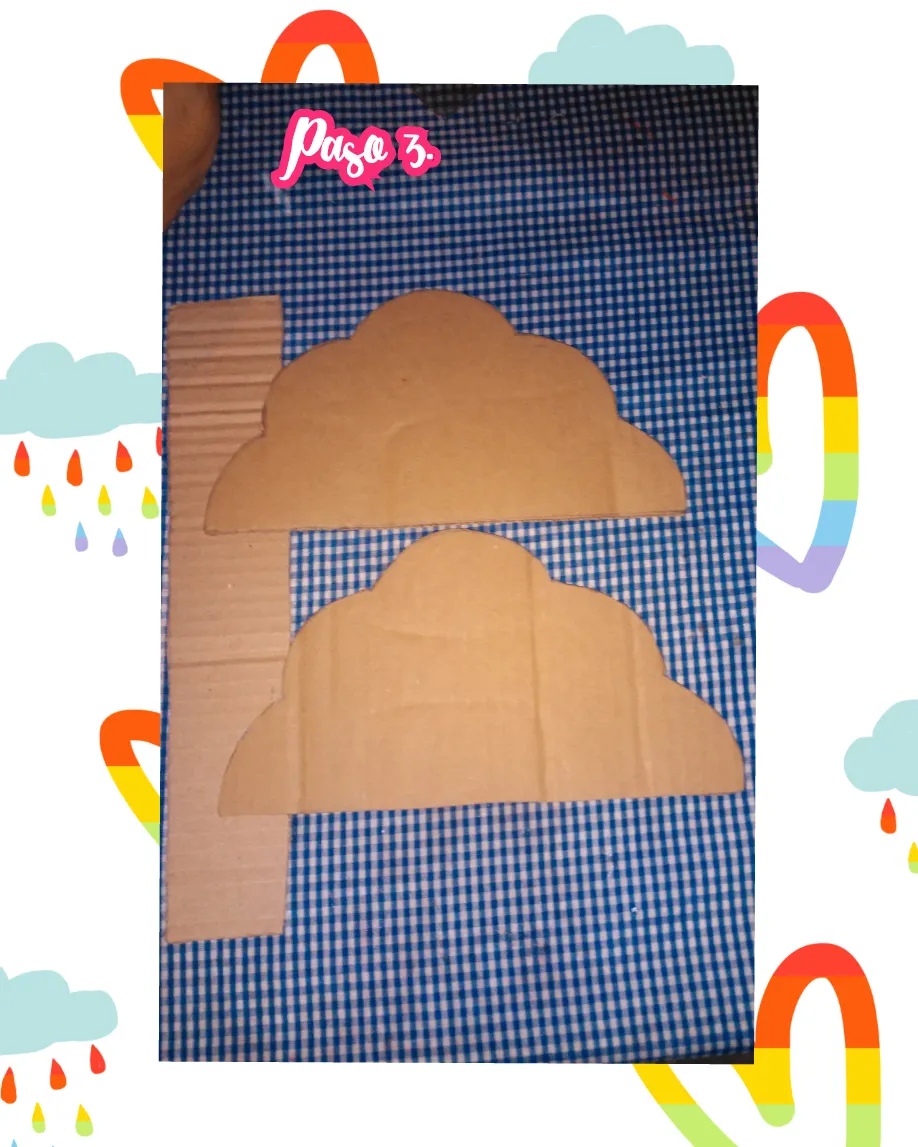
Step 3. In this step we show you all the marked and cut pieces, ready to start lining them and forming the organizer, see image.

Step 4. We take white cardboard and begin to cover each piece of the clouds, with cardboard in front and behind, see the images.
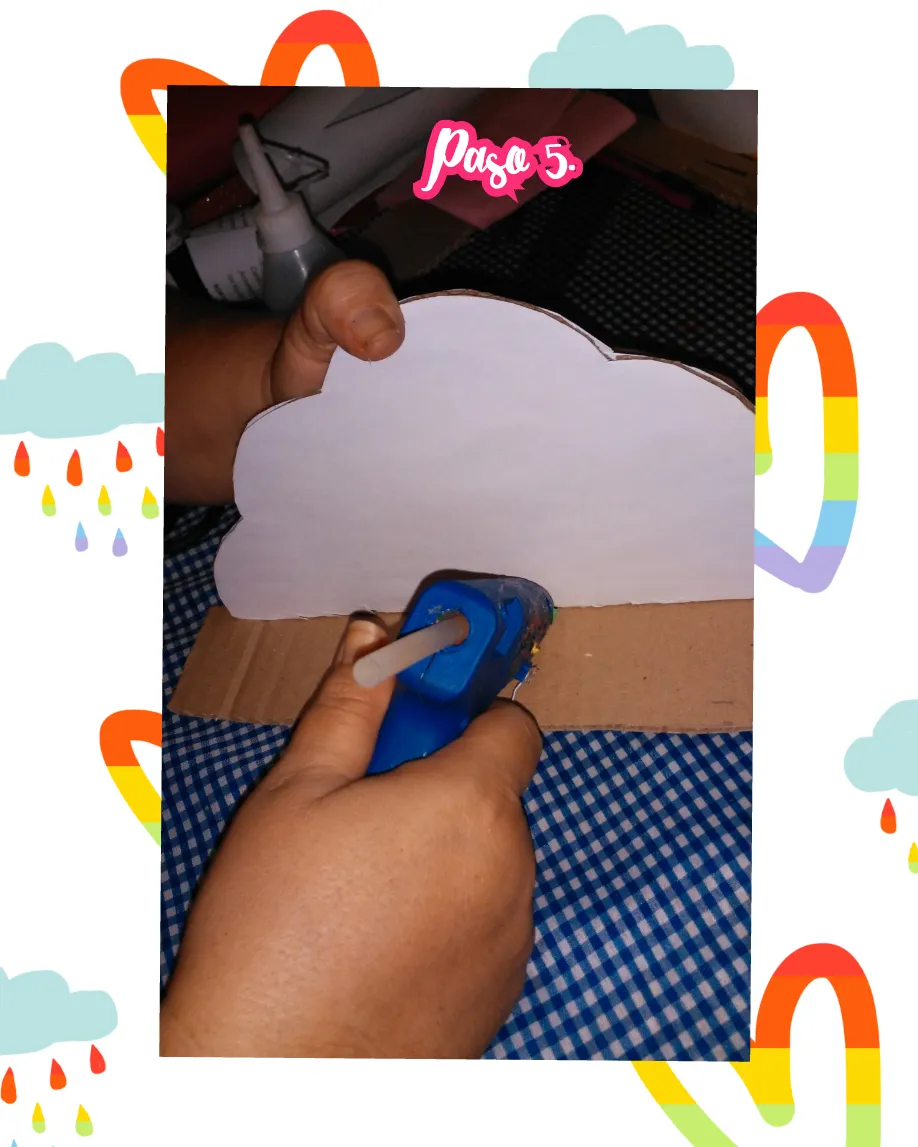
Step 5. We take the glue gun and glue the two pieces of the clouds, on the base that is not yet lined that will serve as the bottom base of the organizer.
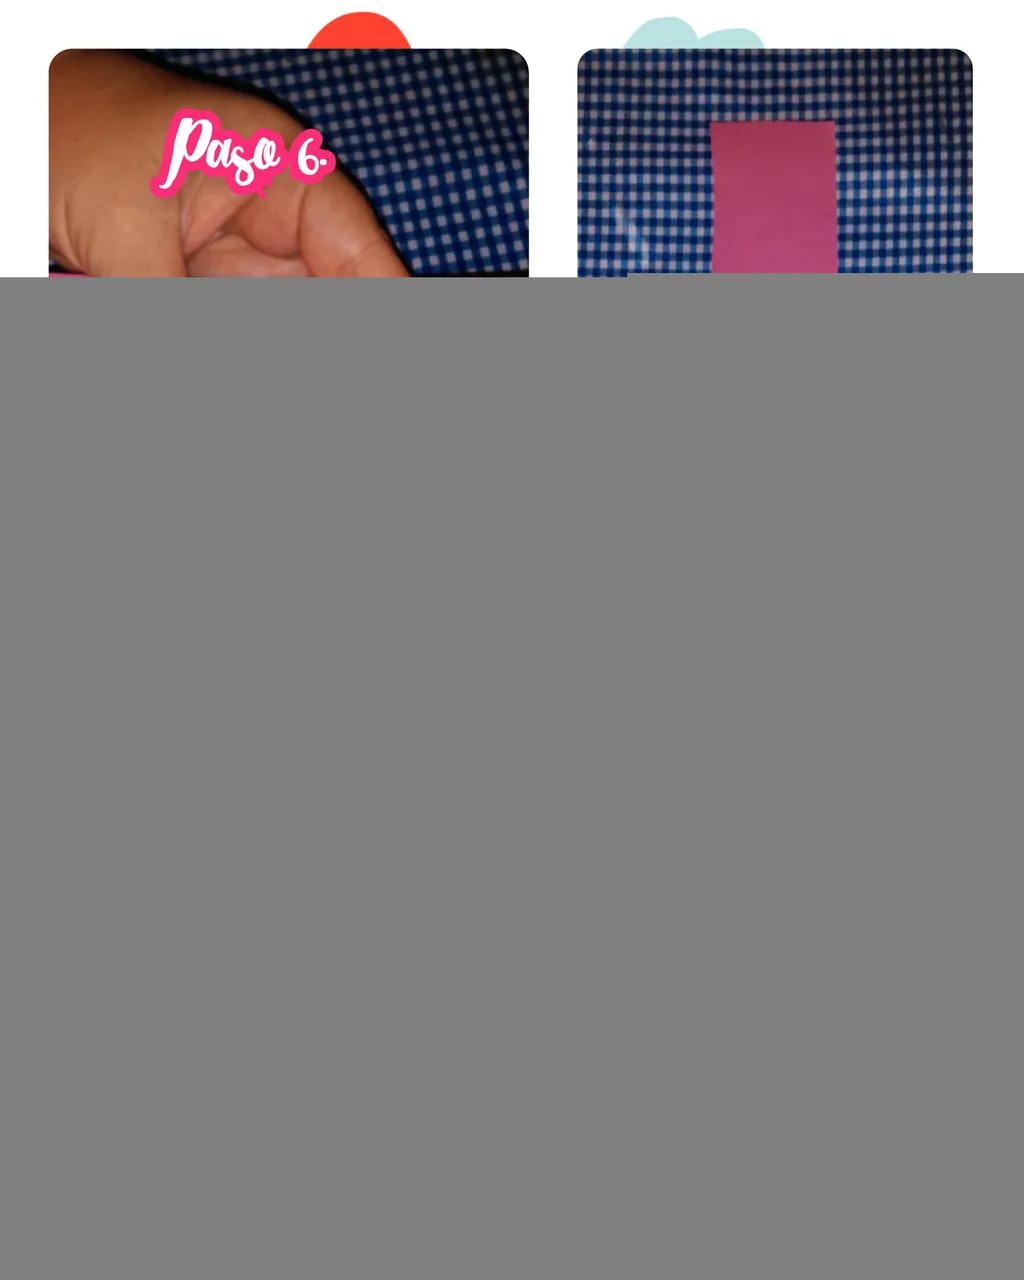
Step 6. We take a piece of cardboard, fuchsia color and we mark a thick and long strip the size of the cardboard that we cut earlier, to cover that piece, as I wrote before it would be the base for the organizer.
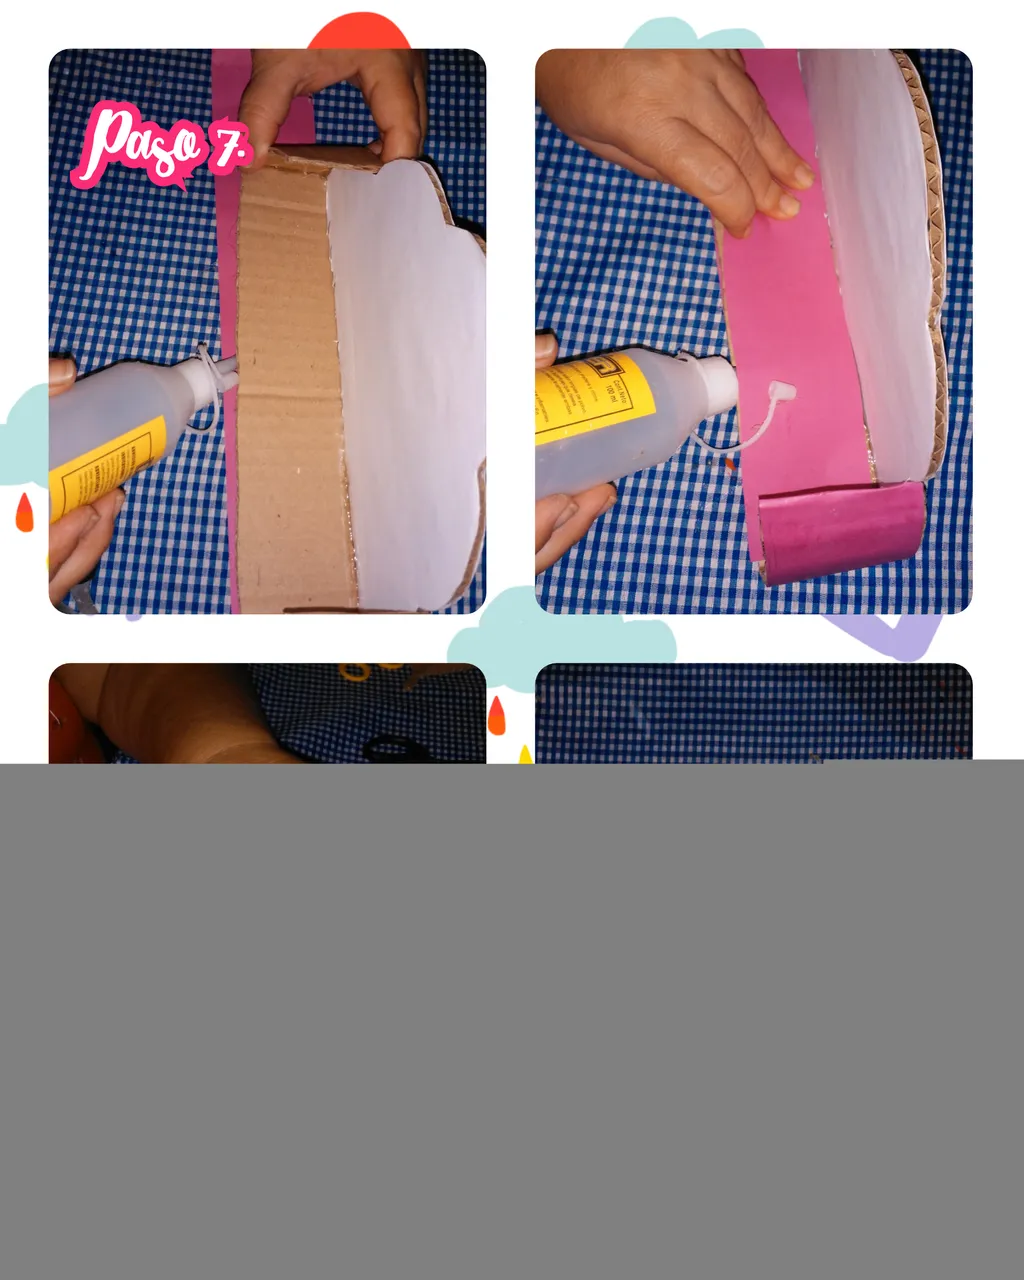
Step 7. We begin to cover the bottom piece with fuchsia cardboard and glue it with liquid silicone, to finish assembling the organizer.
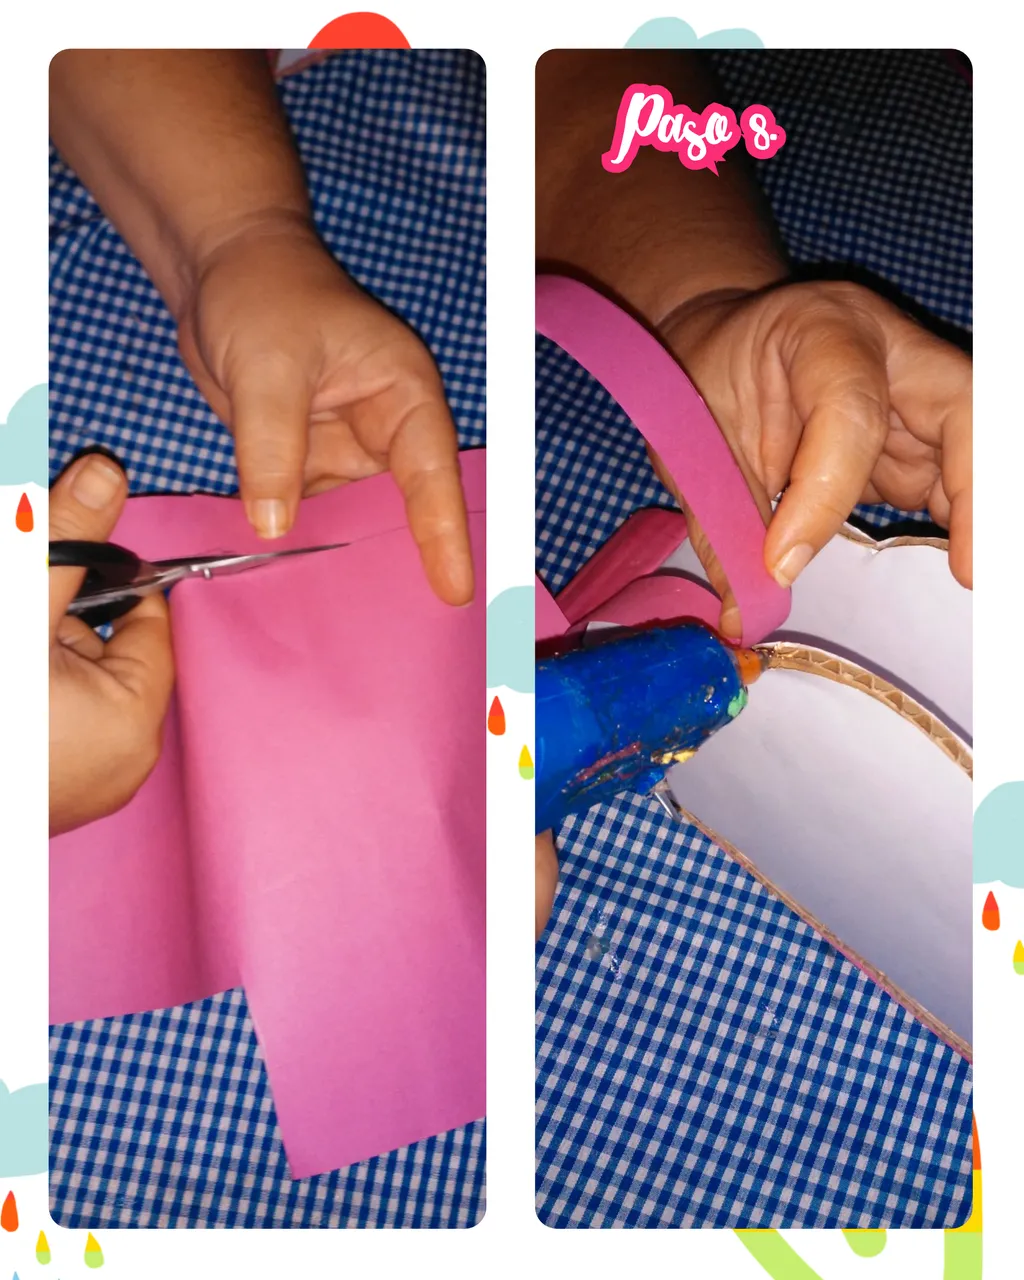
Step 8. In this step that we are going to show you, we have to cut a strip of cardboard, approximately one centimeter wide to stick it to the organizer, to cover the entire edge.
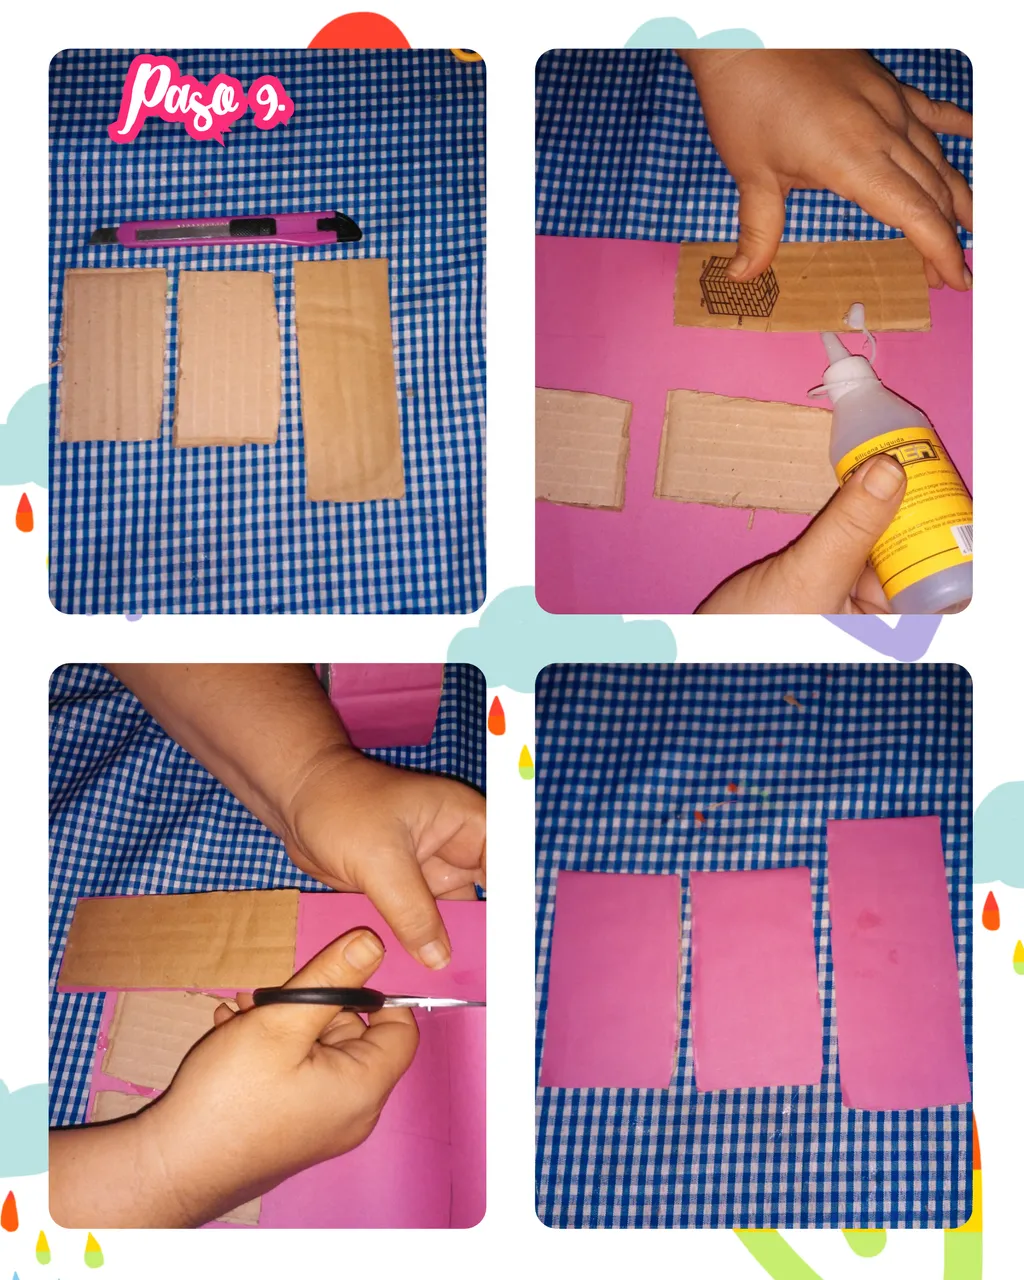
Step 9. We take more recyclable cardboard again, to mark rectangles, cut them out and cover them with cardboard, fuchsia color on both sides, which would serve to make the compartments, which the organizer has inside.
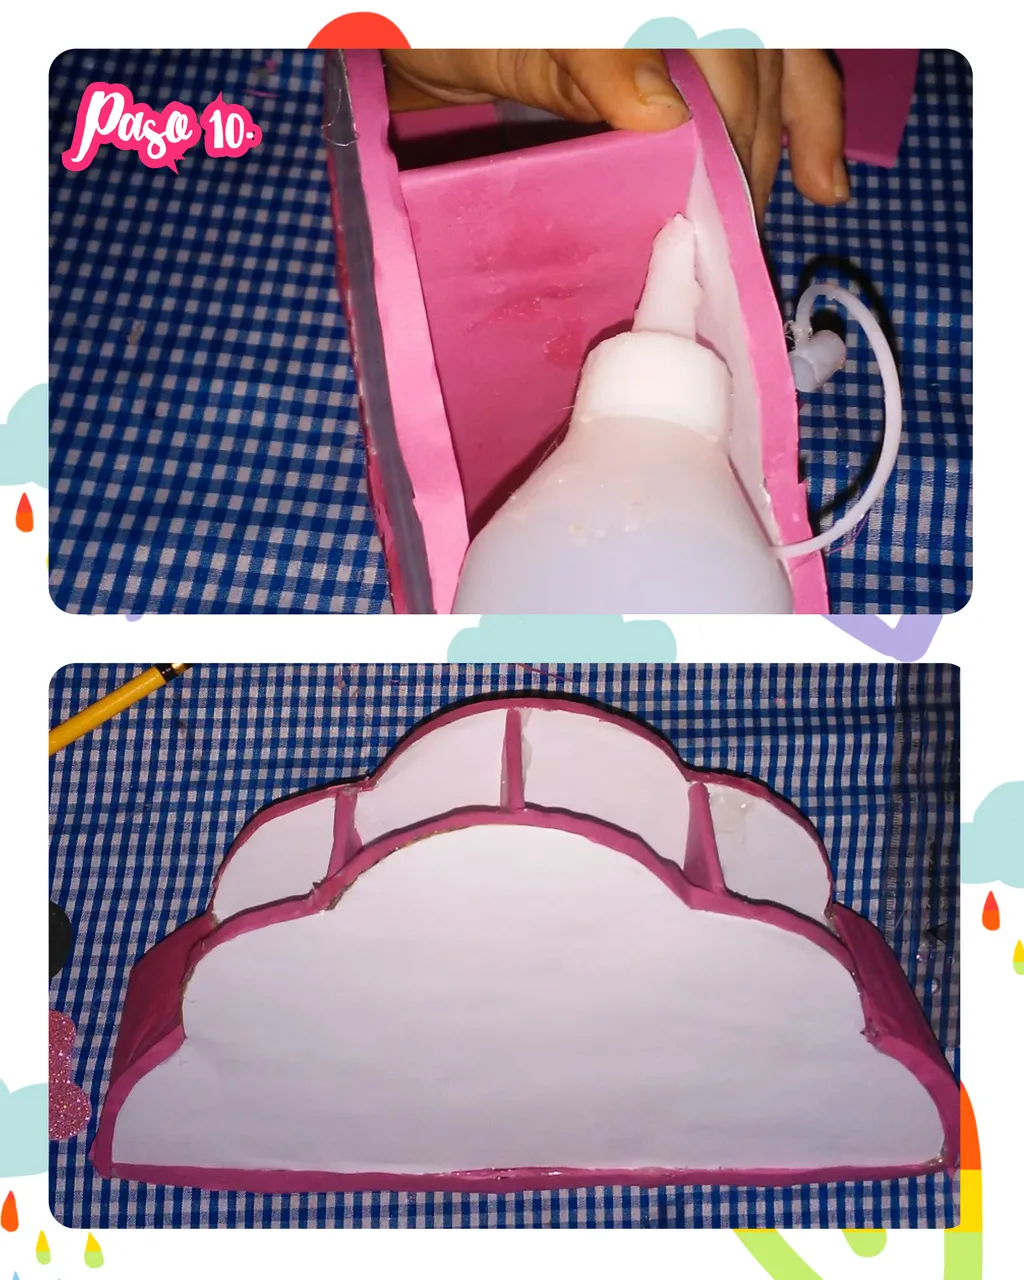
Step 10. We take the liquid silicone and glue the rectangles to make the compartments inside the organizer, as seen in the images.
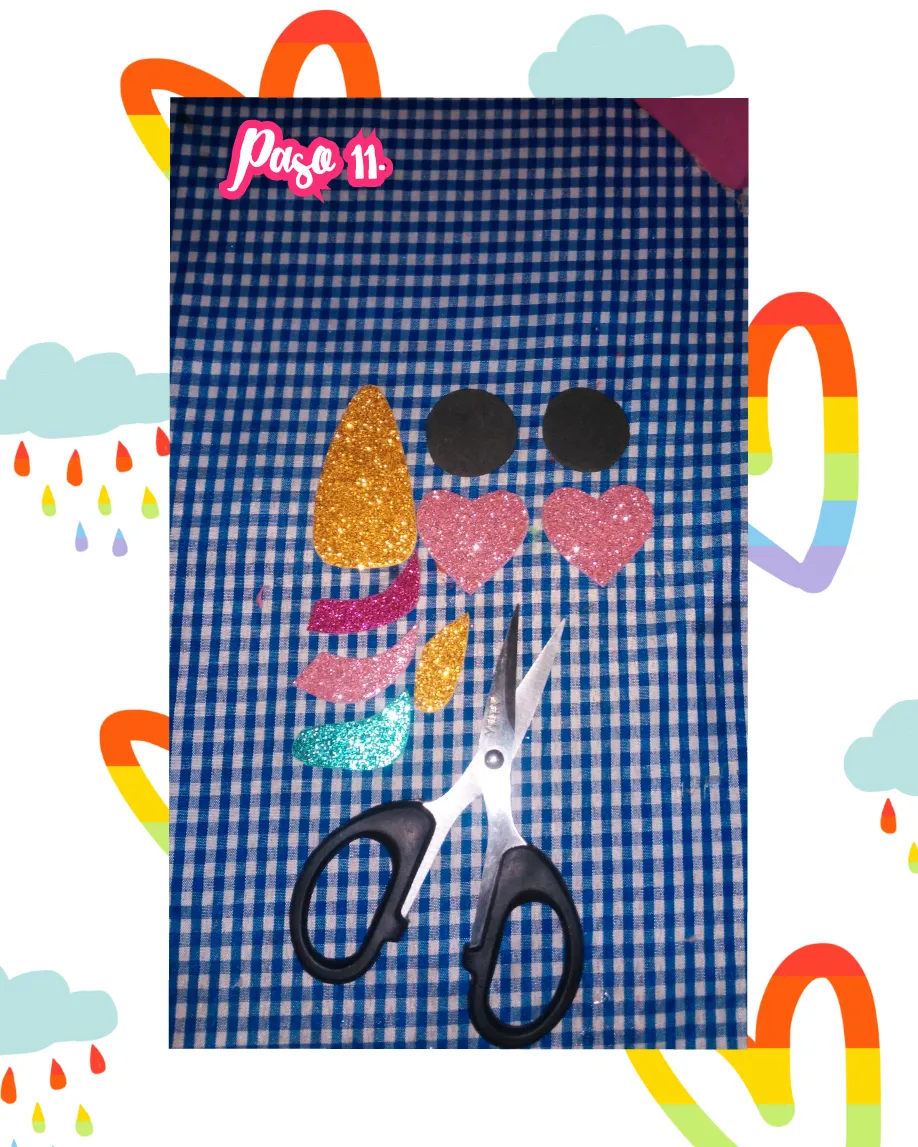
Step 11. With some foamis of various colors, we mark all the pieces in their respective colors, and then with the help of scissors we cut out all the pieces that are going to decorate the organizer.
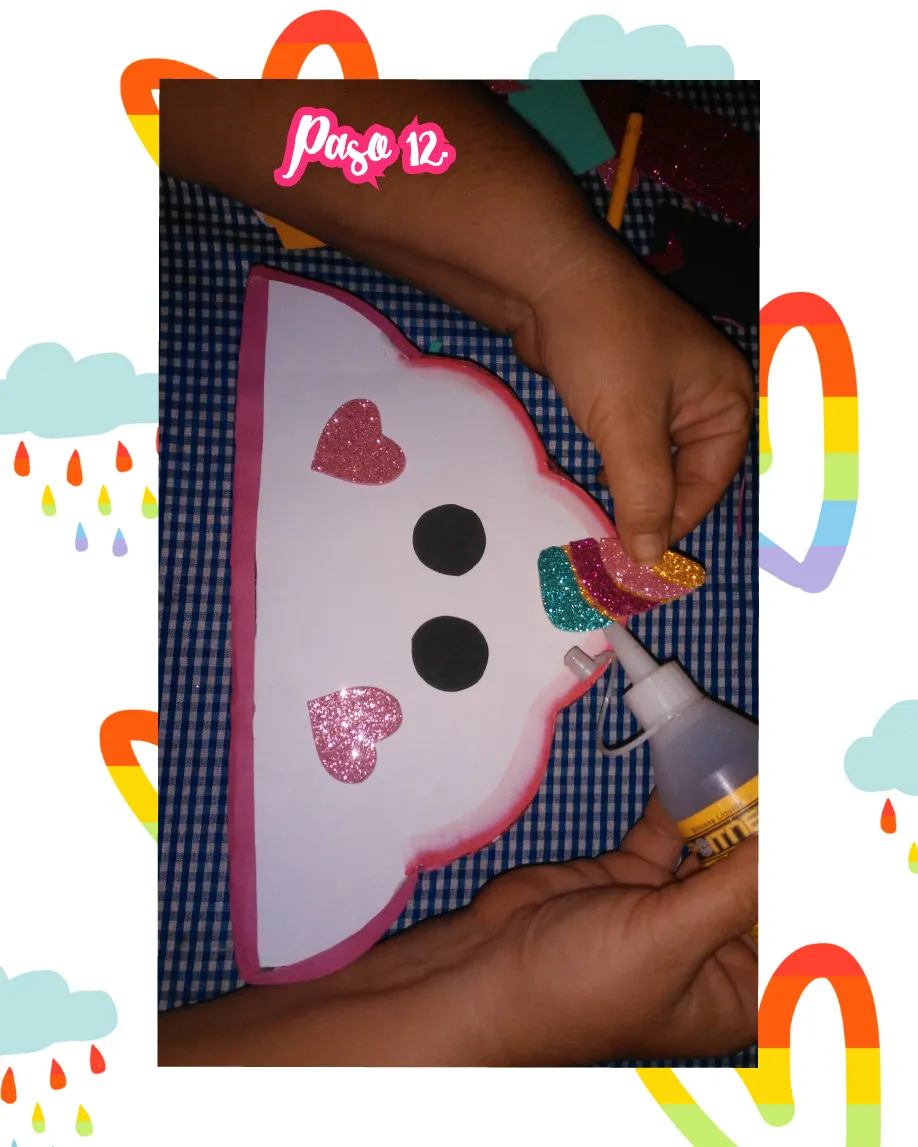
Step 12. We begin to decorate the organizer, gluing with liquid silicone all the pieces that we marked and cut out, as shown in the image.
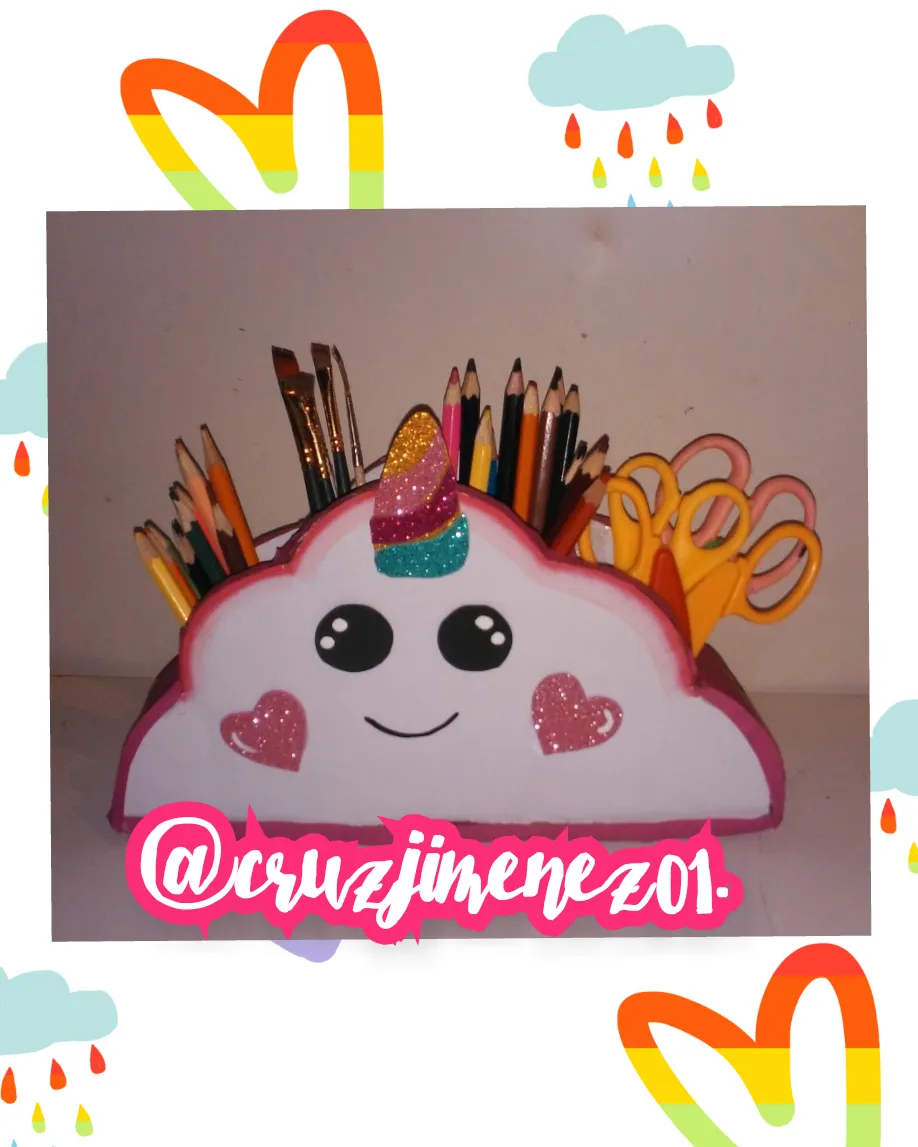
And this has been the result of all the steps, this beautiful and practical kwai unicorn cloud organizer, ideal for organizing our pencils and keeping our desk always tidy, I hope you liked it. Thanks so much for visiting my blog. See you soon with another creative idea. Have a good evening. Blessings. See you later.
Las fotos fueron tomadas con un telefono android LG K9-1823 y editadas con la aplicacion COLLAGE MAKER.
The photos were taken with an LG K9-1823 Android phone and edited with the COLLAGE MAKER app.