Hello everyone...✨
Hello to my dear Hivers and the dear community of artists #HiveDIY, as always very pleased and excited to be here again, showing you my work made with love and especially for you.
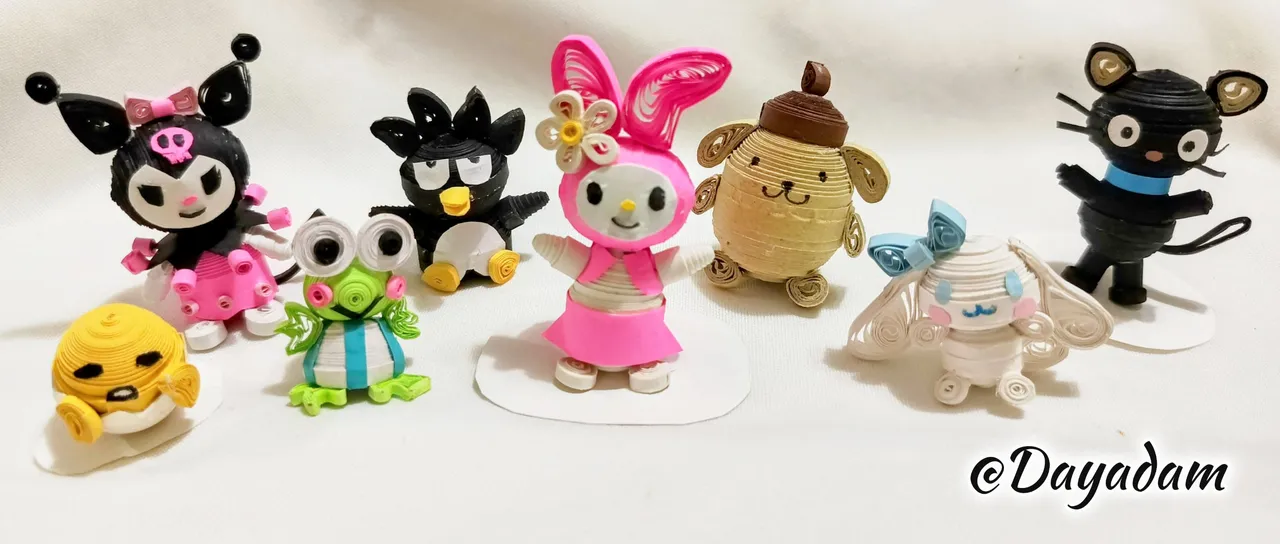
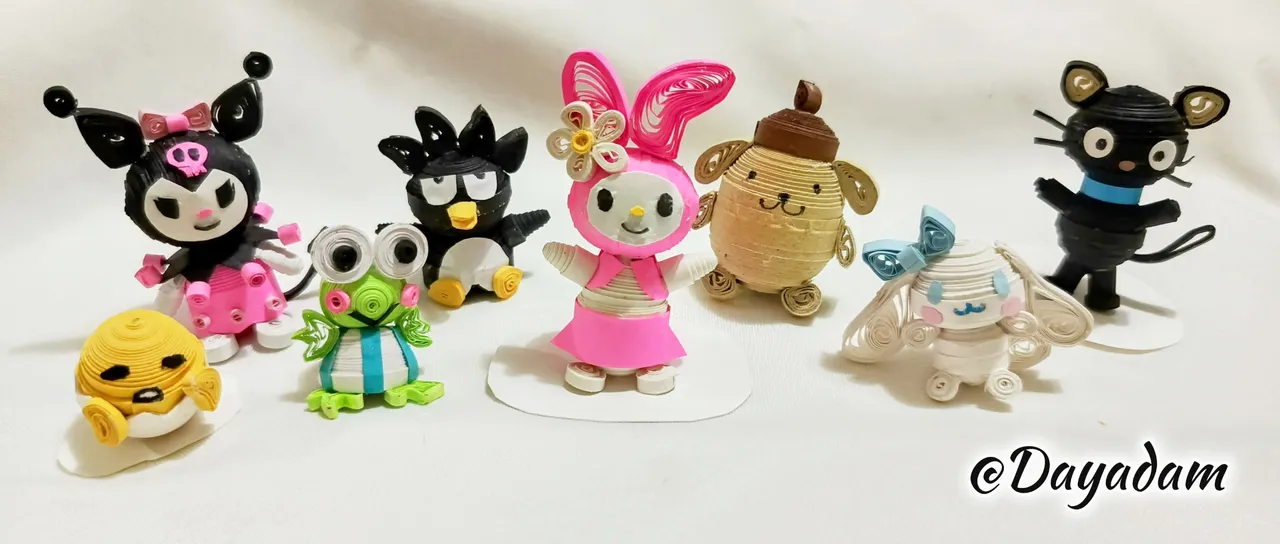
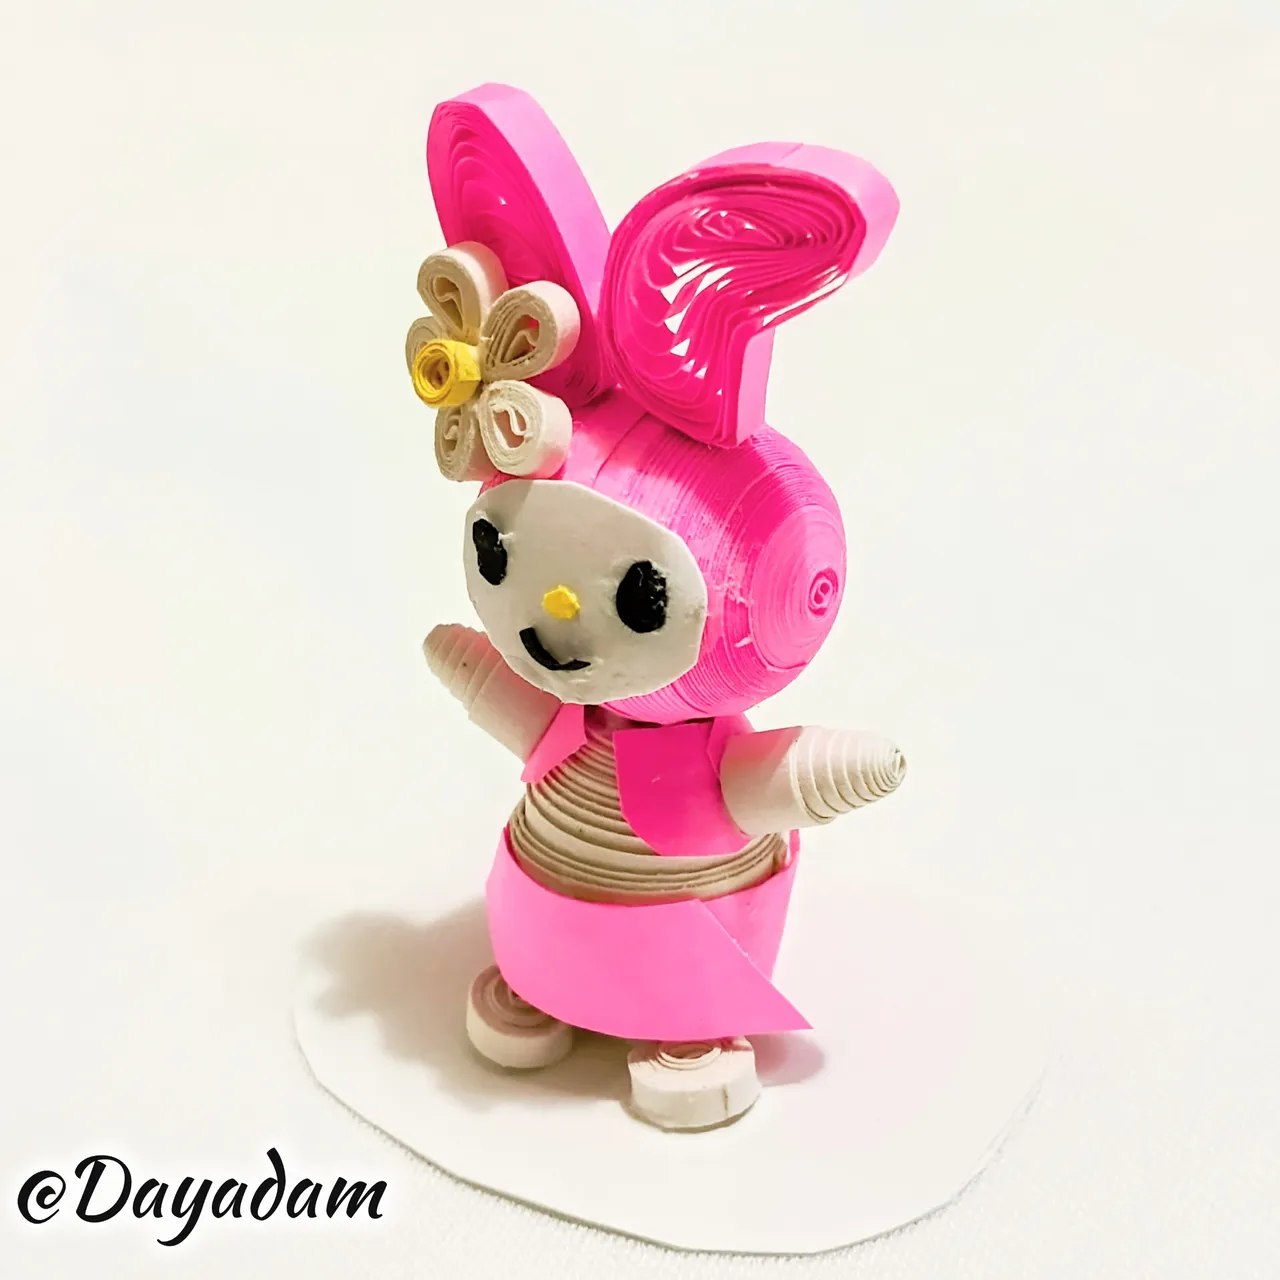
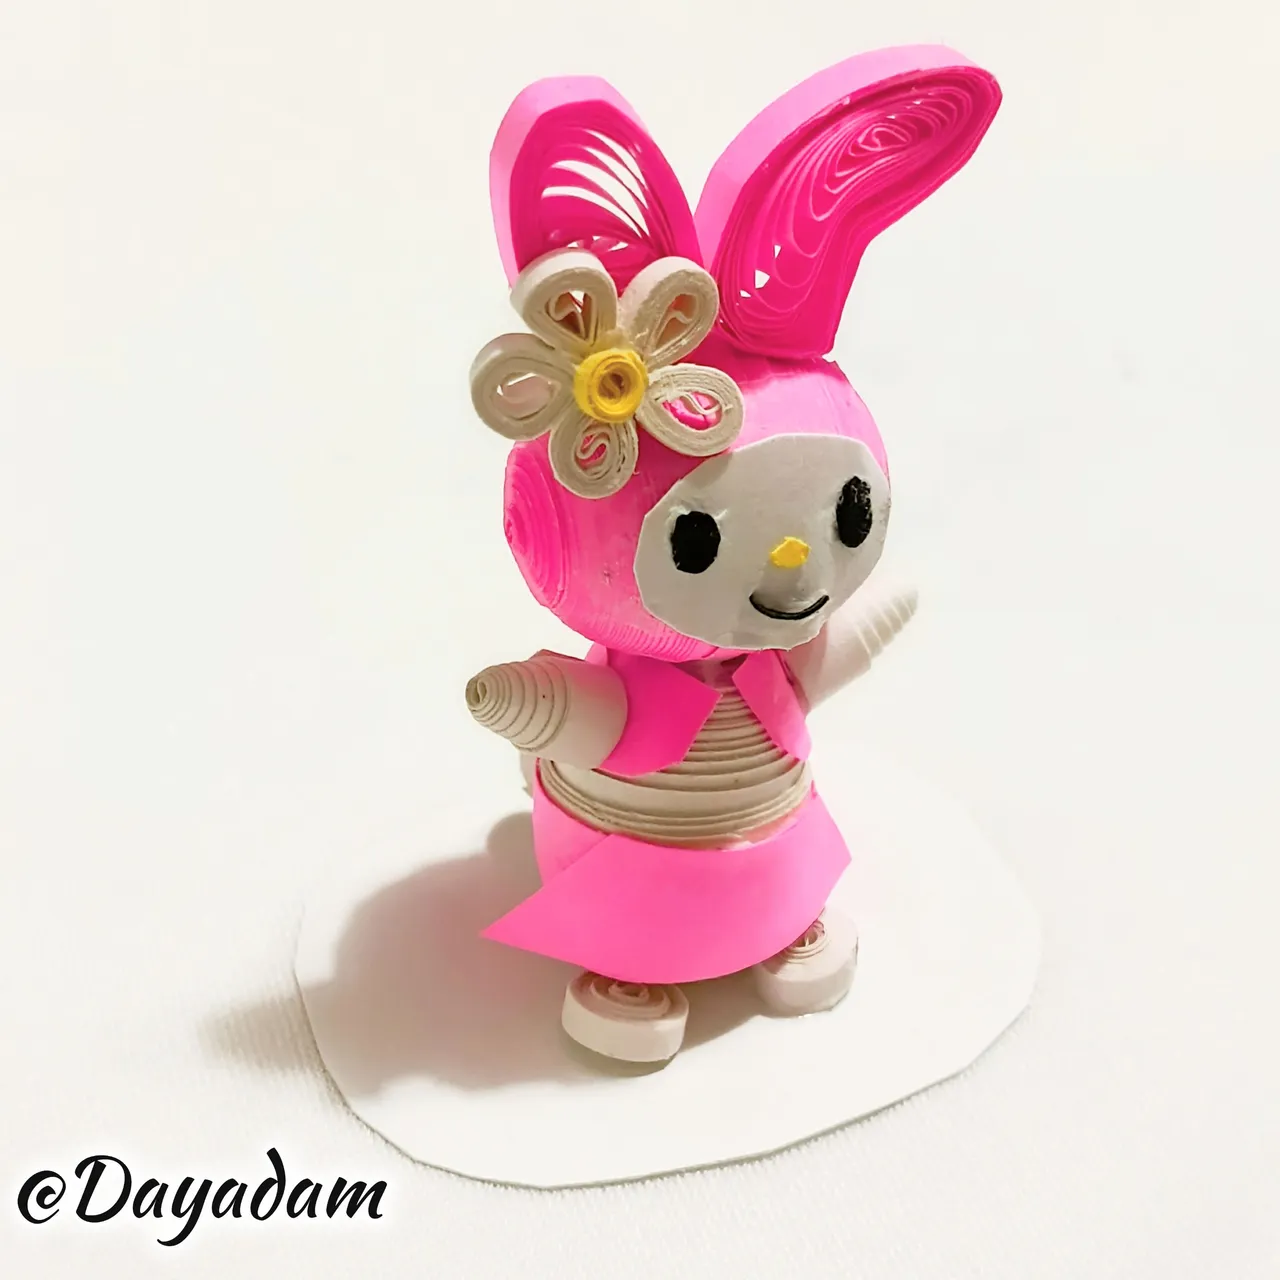
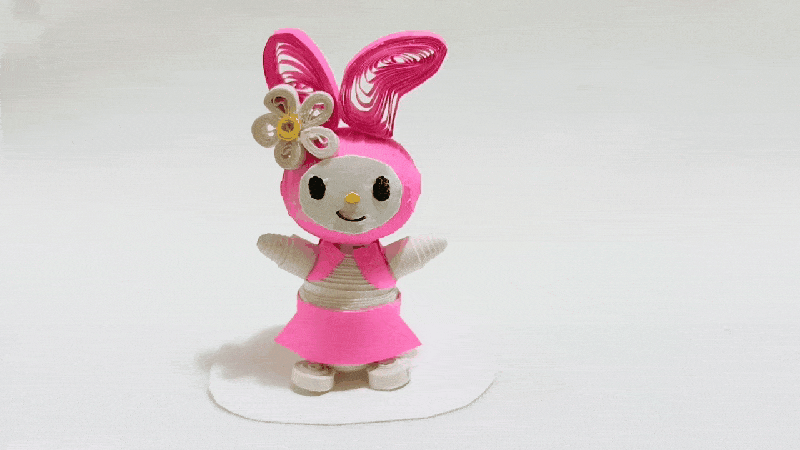
For today I continue with the small collection that I have been making of the characters of SANRIO, to continue with My Melody, as a tender 3D decorative figure made in the quilling technique.
Here are the others that I have been making, so you can appreciate the creative process of each one of them:
Keroppi: @dayadam/keroppi-in-3d-quilling-technique
Pompurin: @dayadam/pompurin-3d-decorative-quilling-technique-engesp-5nh
Cinnamoroll: @dayadam/cinnamoroll-3d-decorative-figure-quilling
Badtz Maru: @dayadam/badtz-maru-3d-decorative-figure
Gudetama: @dayadam/gudetama-3d-decorative-figure-quilling-technique-engesp--9ss
Chococat: @dayadam/-chococat-3d-decorative-figure-quilling-technique-engesp--6jn
Kuromi: @dayadam/kuromi-in-3d-quilling-technique-engesp-a8u
Hoping you like it, I leave you my creative process:
Let's get started:😃

Hola a Todos...✨
Hola a mis queridos Hivers y a la querida comunidad de artistas #HiveDIY, como siempre muy complacida y emocionada de encontrarme por acá nuevamente, mostrándole mi trabajo hecho con mucho amor y especialmente para ustedes.
Para hoy continúo con la pequeña colección que he venido haciendo de los personajes de SANRIO, para continuar lleve a cabo a My Melody, como una tierna figura decorativa en 3D realizada en la técnica de quilling.
Por acá les dejo los demás que he venido haciendo, para que aprecien el proceso de creativo de cada uno de ellos;
Keroppi: @dayadam/keroppi-in-3d-quilling-technique
Pompurin: @dayadam/pompurin-3d-decorative-quilling-technique-engesp-5nh
Cinnamoroll: @dayadam/cinnamoroll-3d-decorative-figure-quilling
Badtz Maru: @dayadam/badtz-maru-3d-decorative-figure
Gudetama: @dayadam/gudetama-3d-decorative-figure-quilling-technique-engesp--9ss
Chococat: @dayadam/-chococat-3d-decorative-figure-quilling-technique-engesp--6jn
Kuromi: @dayadam/kuromi-in-3d-quilling-technique-engesp-a8u
Esperando que sea de su agrado, les dejo mi proceso creativo:
Comencemos:😃
 |
 |

• Cintas de quilling.
• Aguja de quilling.
• Plantilla para moldear círculos.
• Trozos de Cartulinas.
• Pincel.
• Pega blanca extra fuerte (de carpintería).
• Tijera.
- Quilling ribbons.
- Quilling needle.
- Template to mold circles.
- Pieces of cardboard.
- Brush.
- Extra strong white glue (carpentry glue).
- Scissors.

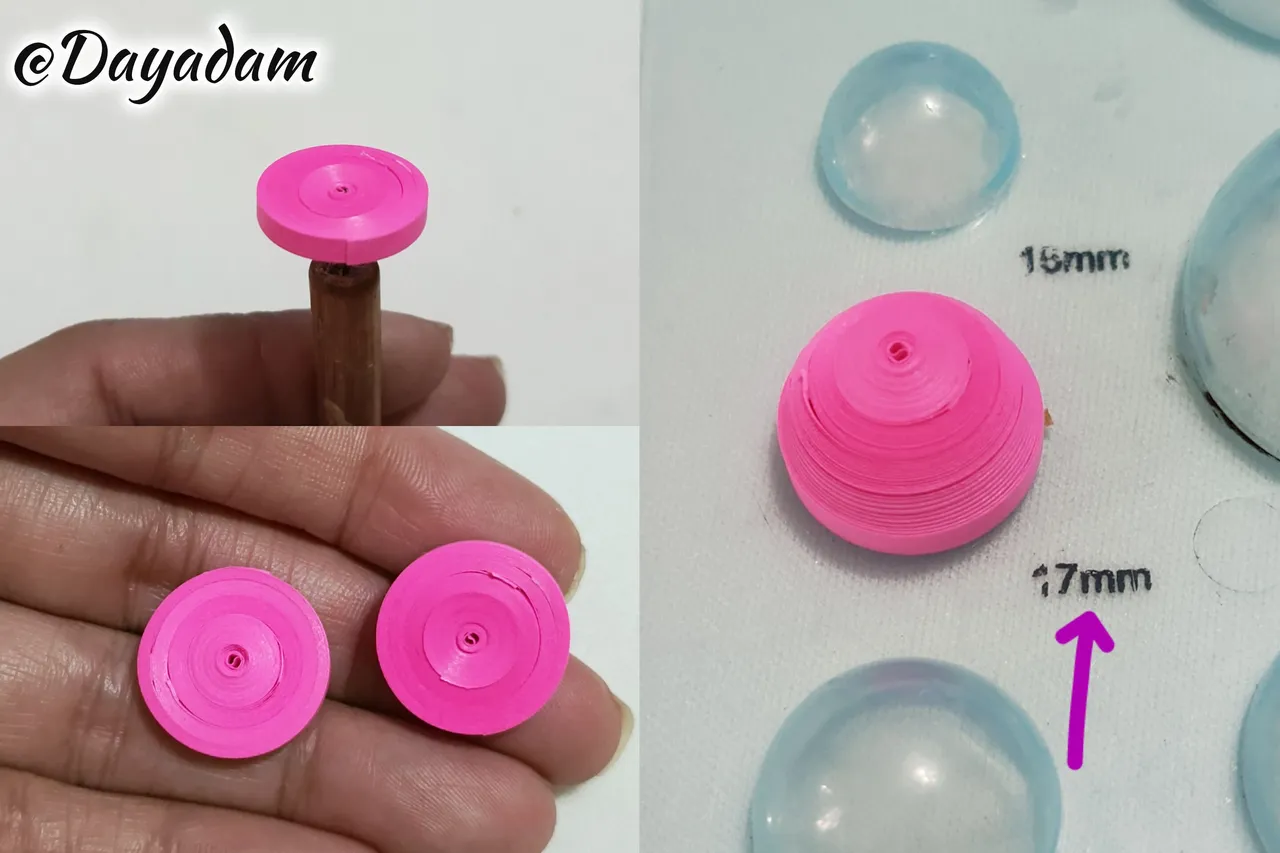
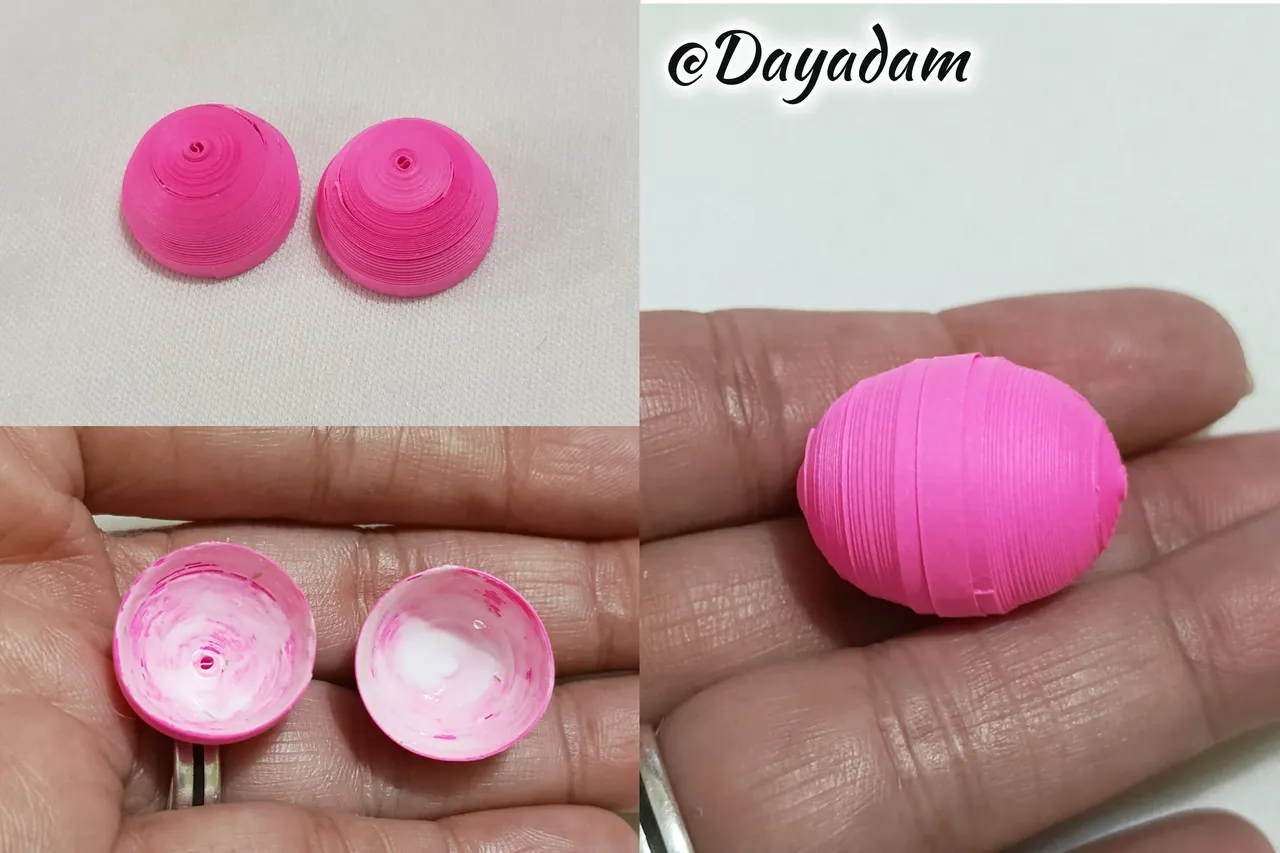
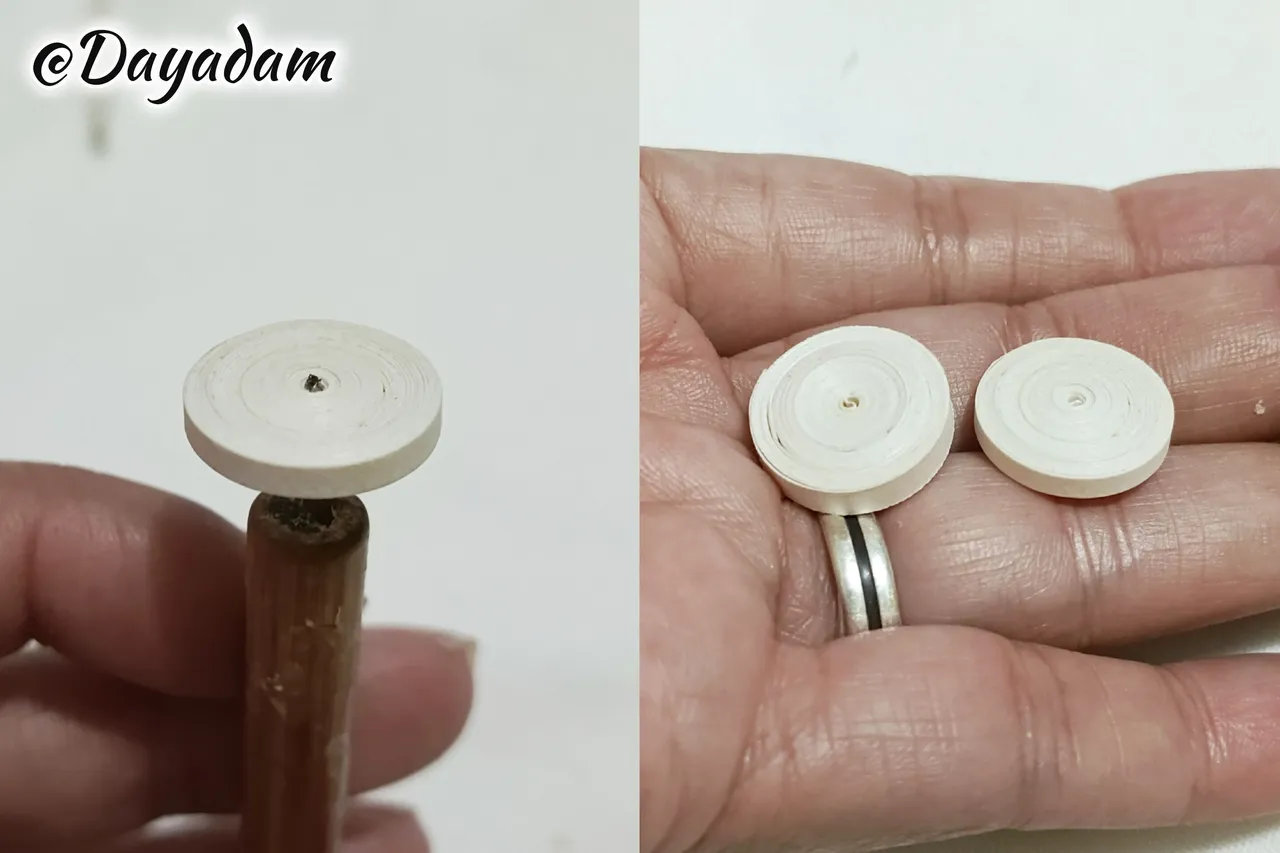
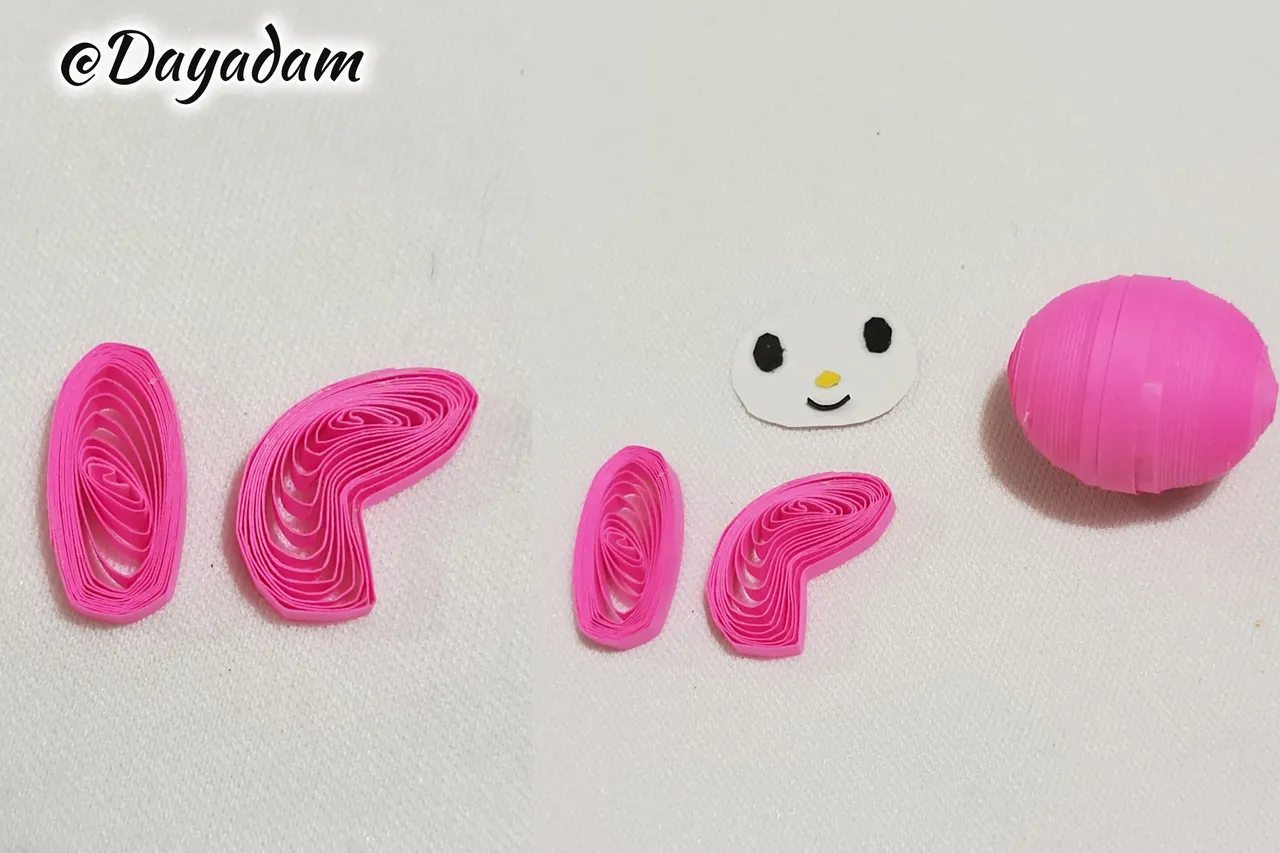
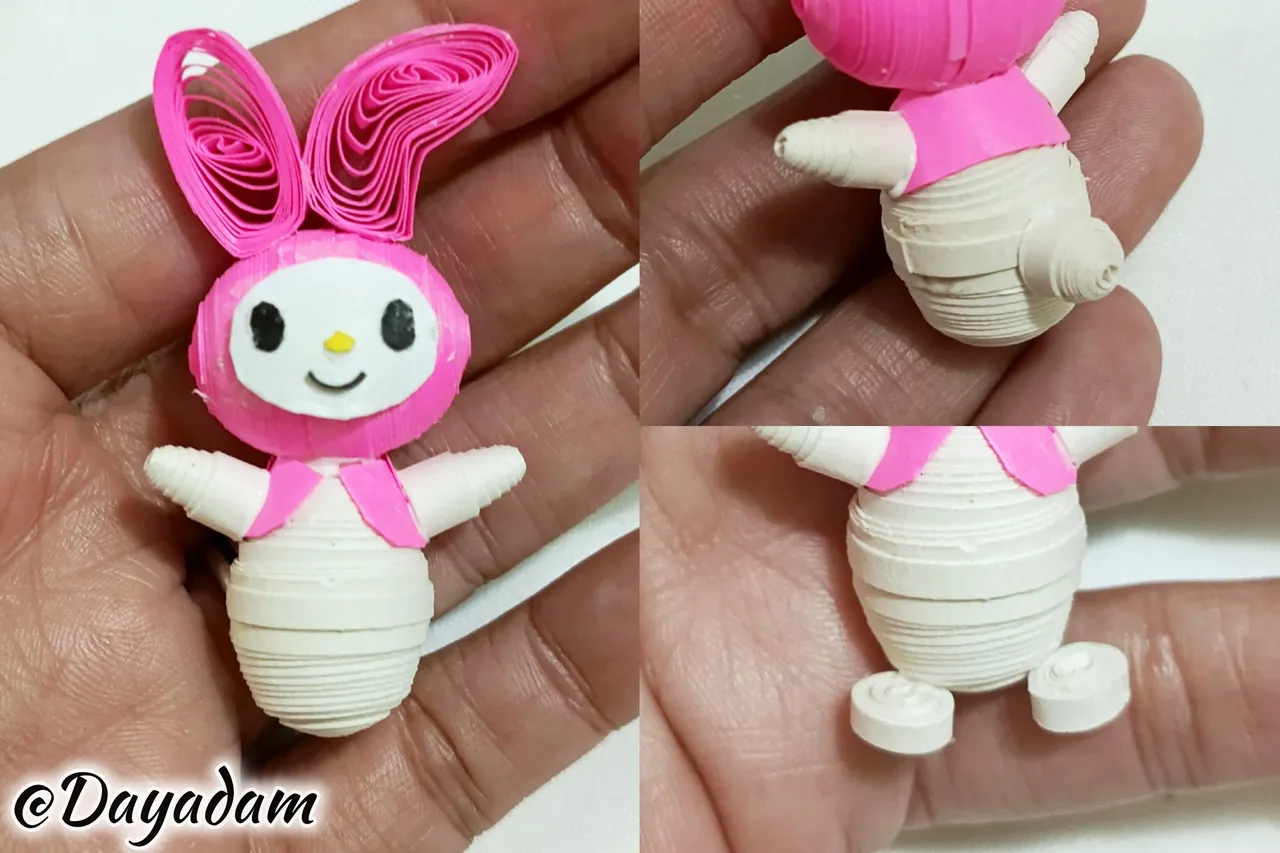
- For the head we start by taking 3 mm wide quilling tape of fuchsia color, with the needle roll all the tape until you reach the end of it, seal with extra strong white glue I took out of the needle, to obtain a closed circle, we will need 2 equal circles.
- We will mold in a template for circles in the measure number 17 mm, we take out of the same we apply extra strong white glue on the inside to prevent them from deforming, then we join both with a ribbon in the middle. In this way we will have the head ready.
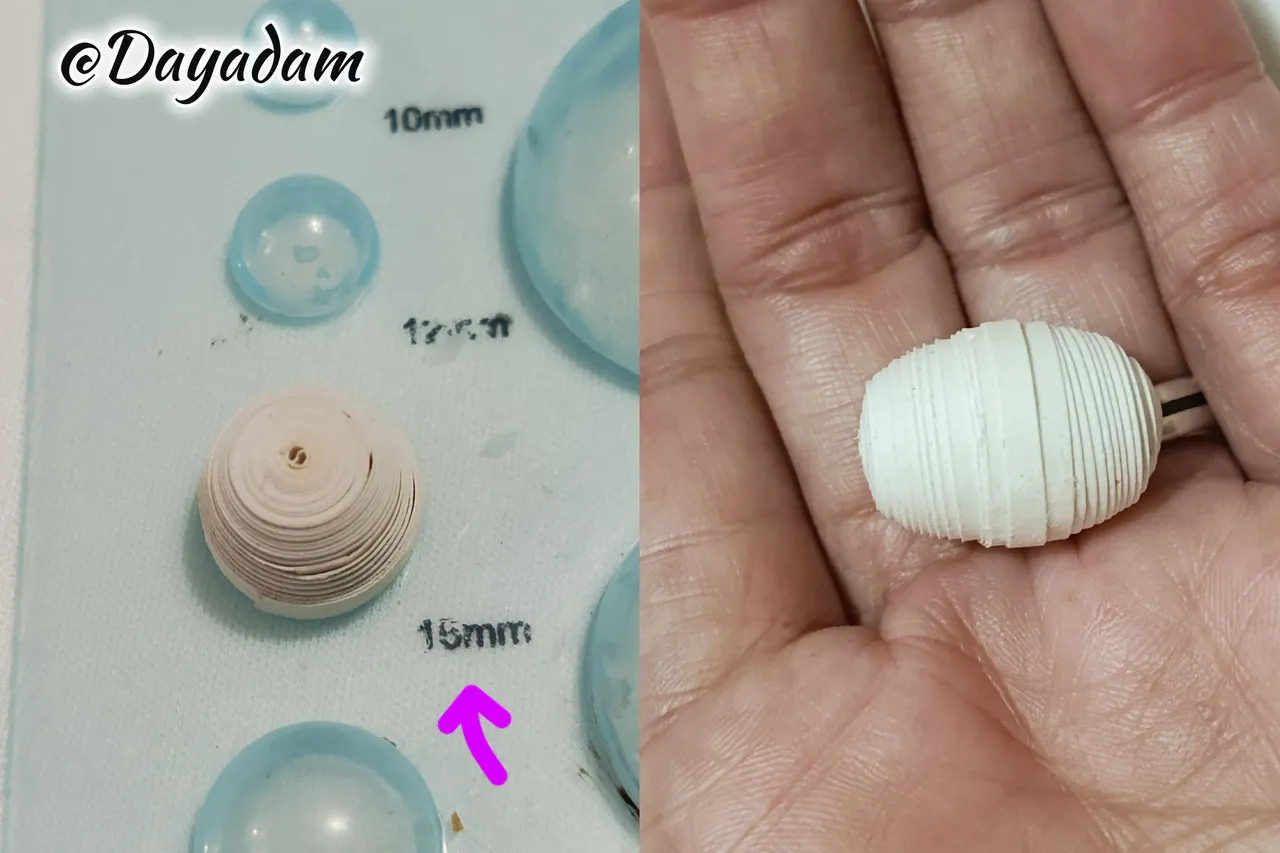
- To make the body under the same parameters above, we will use white tape of 4 mm wide, this we will mold it in the measure number 15 mm to join the two pieces, in this way we will have the body of the character ready.

• Para la cabeza comenzamos tomando cinta para quilling de 3 mm de ancho de color fucsia, con la aguja enrolle toda la cinta hasta llegar al final de la misma, selle con pega blanca extra fuerte saqué de la aguja, para obtener un círculo cerrado, vamos a necesitar 2 círculos iguales.
• Moldearemos en una plantilla para círculos en la medida número 17 mm, sacamos de la misma aplicamos pega blanca extra fuerte por la parte interna para evitar que los mismos se deformen, luego unimos ambos con una cinta en medio. De esta manera tendremos la cabeza lista.
• Para realizar el cuerpo bajo los mismos parámetros anteriores, utilizaremos cinta de color blanco de 4 mm de ancho esta la moldearemos en la medida número 15 mm hasta unir las dos piezas, de esta manera tendremos el cuerpo del personaje listo.
 |  |
 |  |
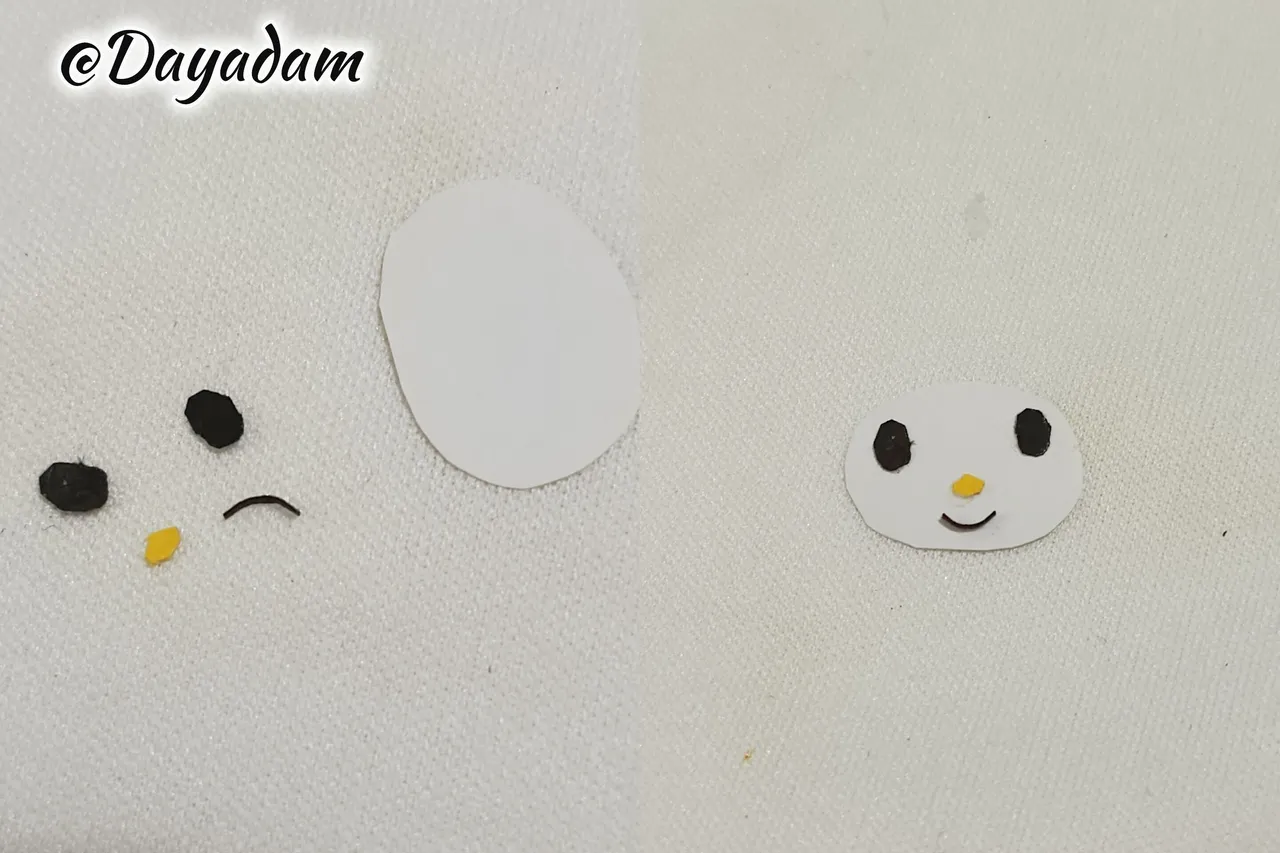
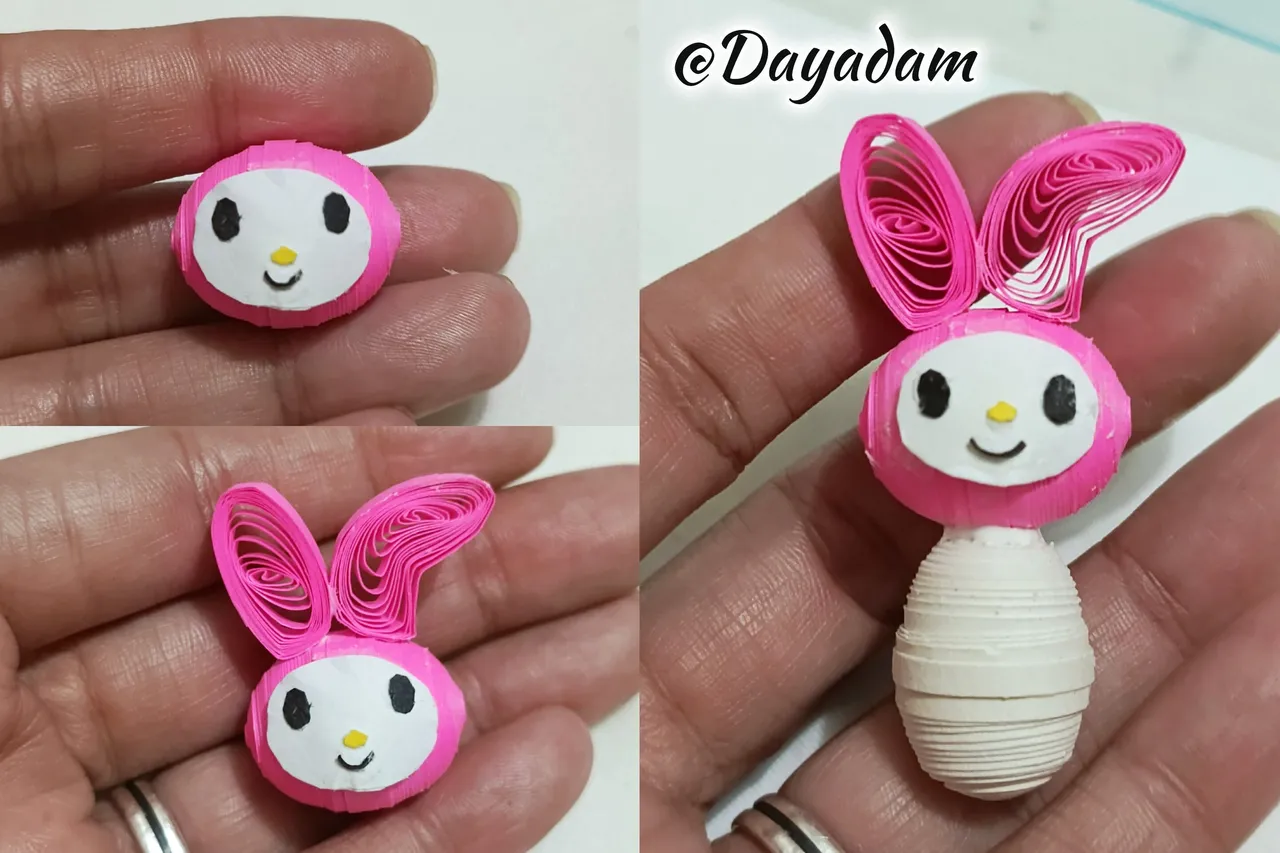
- We will draw the shape of the face from a small piece of white cardboard, the same will be done with the eyes with black cardboard, and the nose with yellow cardboard, we will glue all of them in a harmonic way.
- To make the ears I made 2 open circles of fuchsia color with 3 mm wide ribbons, then we will mold as you can see in the image.
- At this point we will join head, face, ears and body.
- I took 2 small pieces of fuchsia colored ribbon, cut out and glued on the neck of the character.
• Sacaremos la forma de la cara de un pequeño trozo de cartulina blanca, así mismo haremos con los ojos con cartulina negra, y la nariz con cartulina de color amarillo, pegaremos todas de manera armónica.
• Para realizar las orejas realicé 2 círculos abiertos de color fucsia con cintas de 3 mm de ancho, luego moldearemos tal y como pueden ver en la imagen.
• En este punto uniremos cabeza, cara, orejas y el cuerpo.
• Tomé 2 pequeños trozos de cinta color fucsia, recorte y pegué en el cuello del personaje.
 |  |
 | 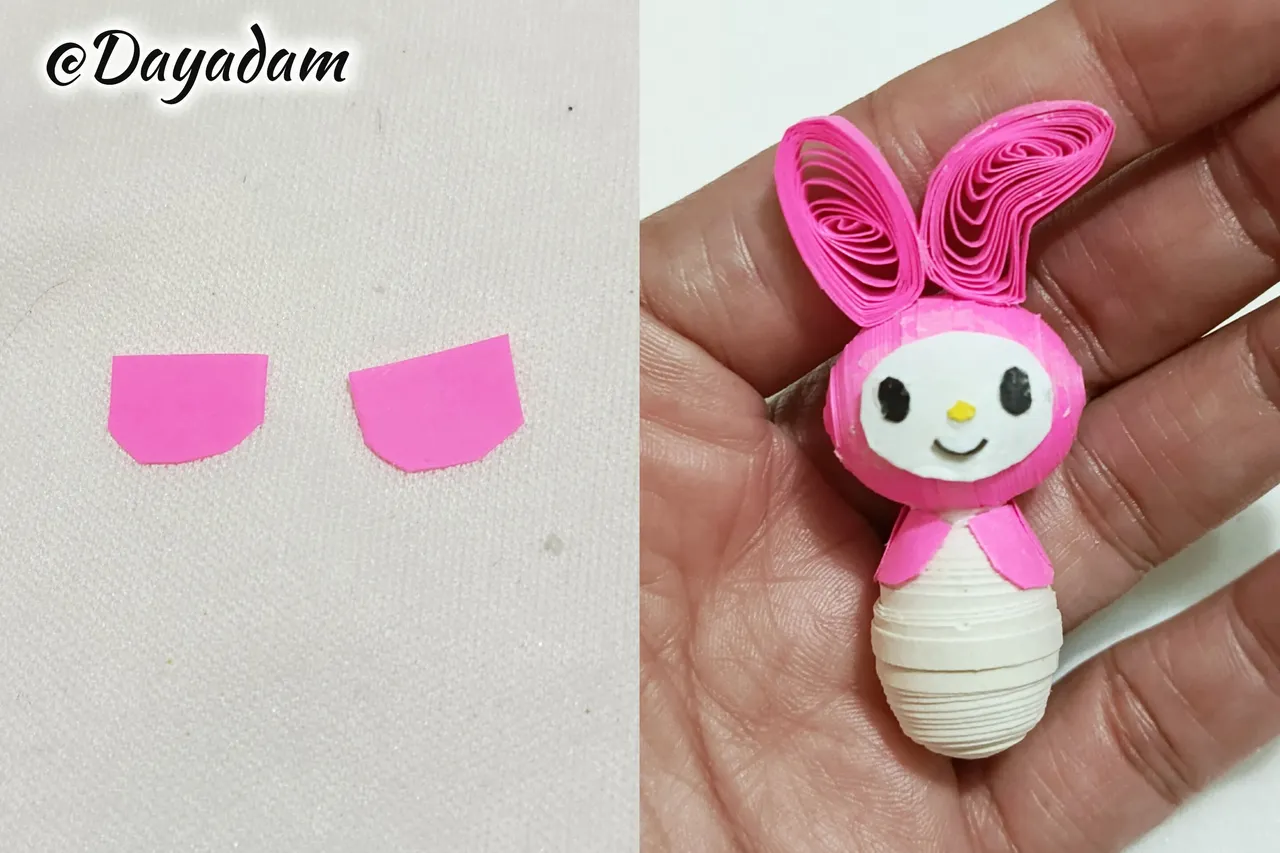 |
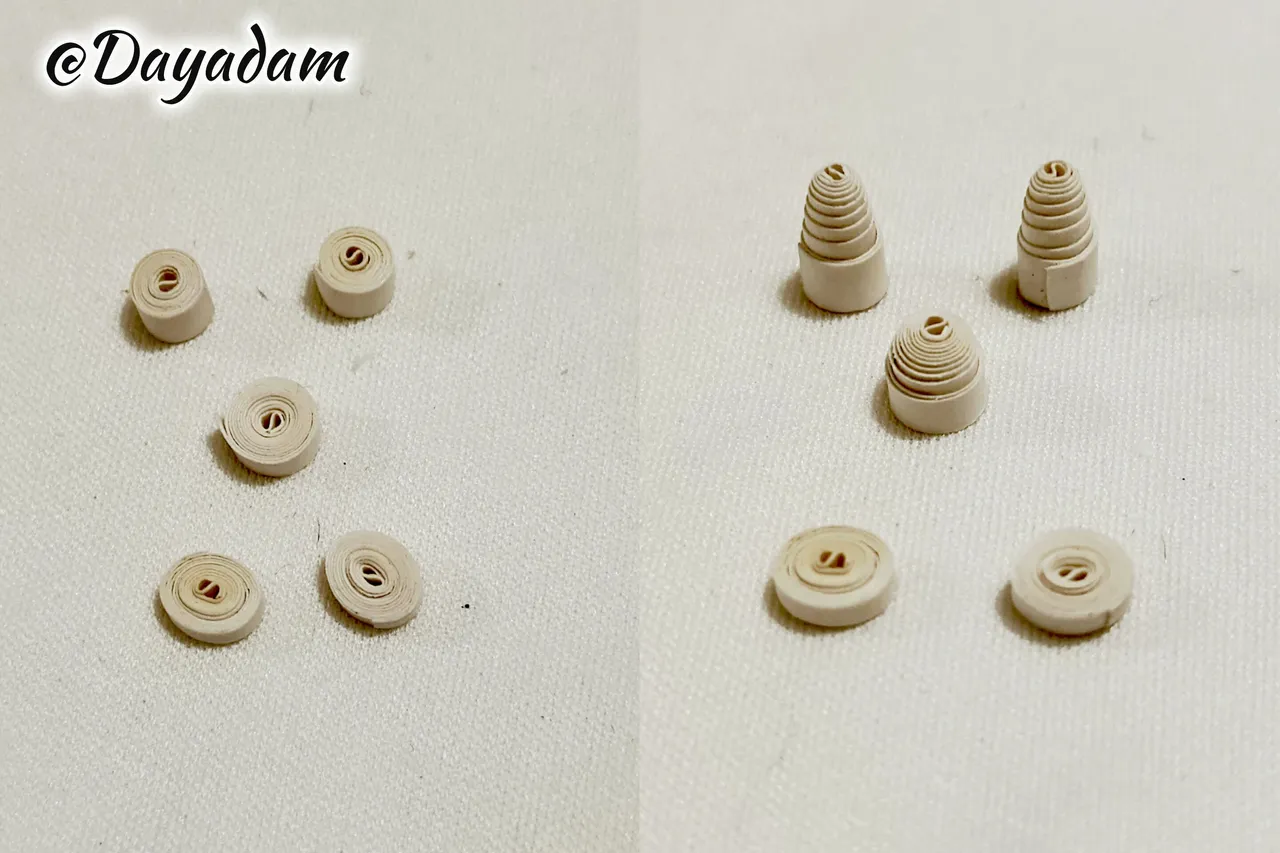
- For the arms I made 2 closed circles with 4 mm wide white ribbon, for the feet and tail I made 3 closed circles with 3 mm wide ribbon.
- The arms I took them out a little bit to give it a cone shape, the tail I took it out in a rounded way. Glue each one in the corresponding place.
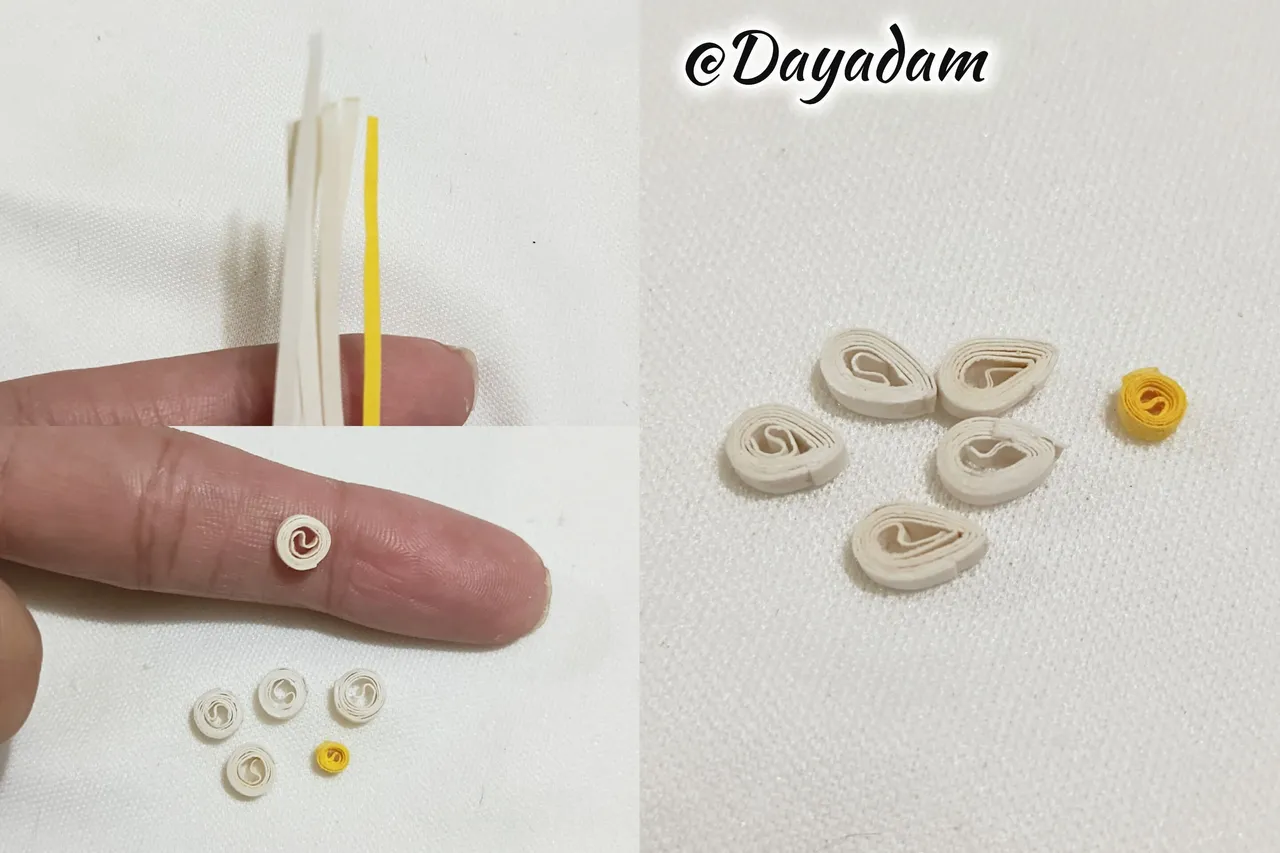
- Additionally I made a small flower by making 5 small circles closed with 1 mm wide white tape, which I molded in the shape of leaves, and a very small yellow circle, I joined all the pieces to form the small flower which I glued on one of the ears of the character.
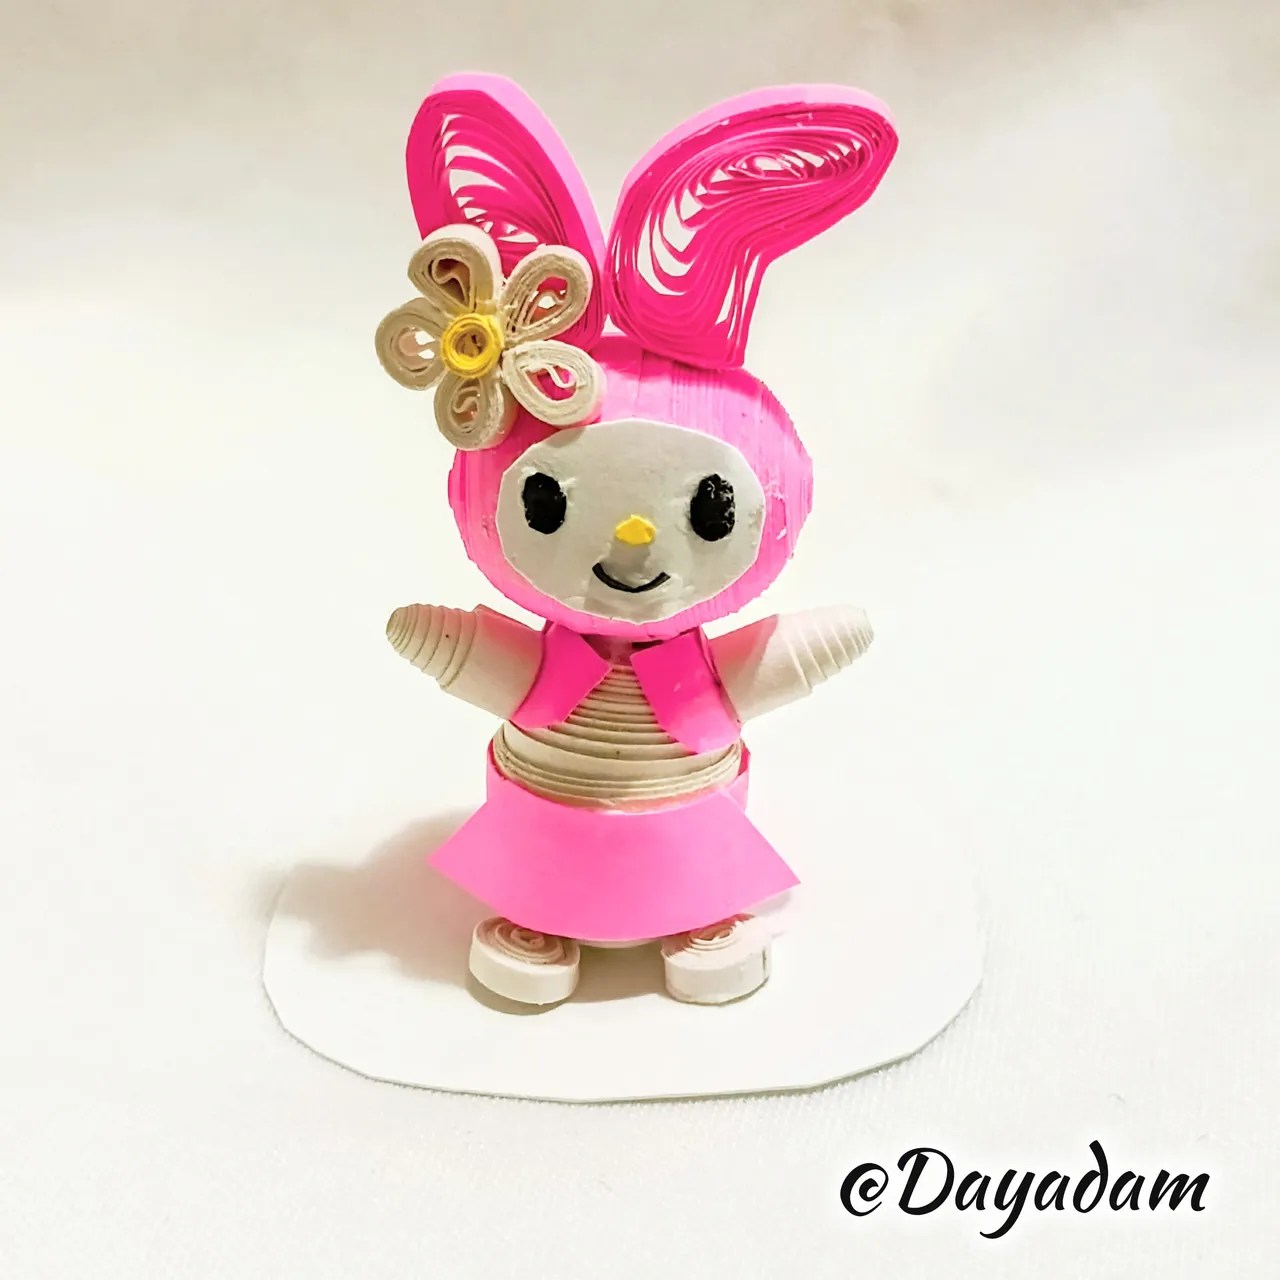
- Finally, I cut a small triangle of fuchsia ribbon, which I glued on the bottom of the body to simulate a skirt.
In this way I finished this small 3D decorative figure of My Melody, using the quilling technique.
• Para los brazos realicé 2 círculos cerrados con cinta blanca de 4 mm de ancho, para los pies y cola realicé 3 círculo cerrados con cinta de 3 mm de ancho.
• Los brazos los saqué un poco hacia afuera para darle forma de cono, la cola la saqué de una manera redondeada. Pegue cada uno en el sitio correspondiente.
• Adicionalmente realicé una pequeña flor elaborando 5 pequeños círculos cerrados con cinta de 1 mm de ancho color blanca, los cuales moldee en forma de hojas, y un círculo muy pequeñito de color amarillo, uni todas las piezas para formar la pequeña florecita la cual pegué en una de las orejas del personaje.
• Para finalizar recorte un pequeño triangulo alargado de cinta de color fucsia, la cual pege en la parte de abajo del cuerpo para simular una falda.
De esta manera finalice esta pequeña figura decorativa en 3D de My Melody, en la técnica de técnica de quilling.
 |  |
 |  |

 |
 |
 |  |
|  |
 |
 |
What did you think, did you like it?
I hope you did, I hope you liked my explanation, procedure and photos, I made them with love for you.
"Let out that muse that inspires you, and let your imagination fly".
Thank you all, see you next time ✨.
¿Que les pareció, les gustó?
Espero que sí, que les haya gustado mi explicación, procedimiento y fotos, los hice con mucho cariño por y para ustedes.
"Deja salir esa musa que te inspira, y deja volar tu imaginación".
Gracias a todos, nos vemos en la próxima✨